

 TL;DR:
To change colors and stylize footage in Premiere Pro, establish foundational exposure and white balance in the Lumetri Color panel before using the Hue vs Hue curves or the Change Color effect to swap specific shades.
● Isolate and shift a single targeted color by applying the Change Color effect with the Match Colors setting on "Using Hue", or by selecting the exact shade using the Eyedropper tool in the Lumetri Hue vs Hue curve.
● Apply your Lumetri adjustments to an Adjustment Layer rather than individual clips to ensure consistent color grading across multiple timeline sequences and to streamline your overall workflow.
● Wondershare Filmora is recommended as a beginner-friendly alternative for users on mid-range PCs who want to avoid Premiere Pro's subscription model, offering simplified sliders and an AI Color Palette tool for automated color coordination.
Ask AI for a summary
 ChatGPT
 Perplexity
 Gemini
 Claude
 Grok
Grok
You'll learn how to change color in Premiere Pro step-by-step, including how to adjust hue and saturation, use color correction tools, and polish your video until it looks professional and cinematic. | You'll learn how to change color in Premiere Pro step-by-step, including how to adjust color in Premiere Pro using the Lumetri panel, and even master how to change text color in Premiere Pro and how to change background color in premiere pro to polish your video until it looks professional and cinematic.
Part 1. Understanding Color Basics Before You Edit
Before you dive into color editing, it's good to understand what actually shapes how your video looks. These basics will help you get smoother results when you start learning how to adjust color in Premiere Pro.
1. Hue (H):
This is what defines the actual color: red, blue, green, or yellow. When you adjust hue in Premiere Pro, you're shifting one color into another. You could make a blue sky look more teal or turn a red shirt into soft pink tones.
2. Saturation (S):
Saturation determines how strong or muted a color appears. If you push it up, your video looks vibrant and full of life. Lowering it can make the scene look calm, faded, or cinematic, depending on your style.
3. Luminance (Brightness):
This one controls how light or dark your colors appear. It's essential when balancing exposure or fixing underexposed shots.
4. White Balance (Color Temperature & Tint):
White balance keeps your whites looking neutral instead of yellow or blue. Adjusting temperature makes your video warmer or cooler, while tint helps correct green or magenta shifts that can throw off the mood.
5. Color Correction vs Color Grading:

This one can be a little confusing since they might sound similar, but they serve different purposes. The main difference is simple:
- color correction fixes technical issues like exposure, temperature, and color balance to make your video look natural.
- Color grading, on the other hand, adds emotion and style, giving your footage that cinematic tone or creative finish that sets the mood.
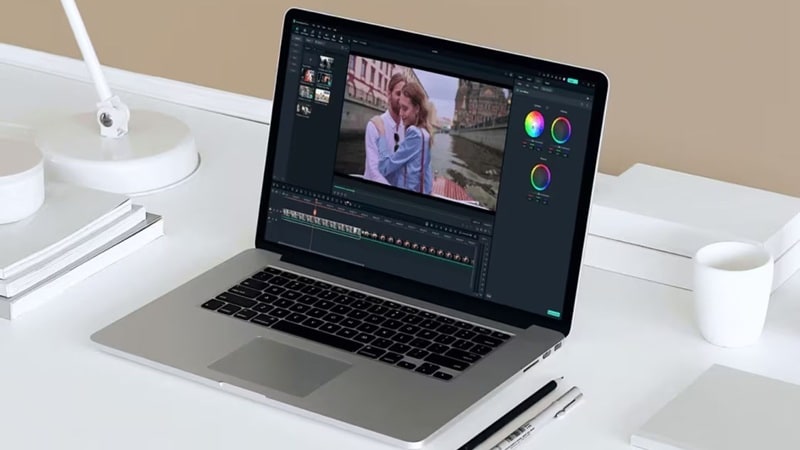
Part 2. Getting Started with Premiere Pro's Lumetri Color Panel
Now that you've got the basics down, it's time to bring those ideas to life. In Premiere Pro, everything starts with the Lumetri Color panel, your main space for adjusting color and shaping the look of your video. You can open it by switching to the Color workspace from the top menu and choosing Window > Workspaces > Color.
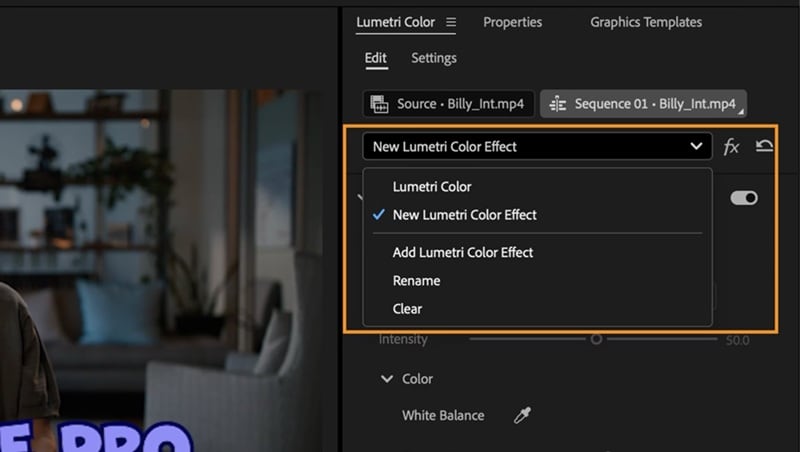
This is where you'll spend most of your time when learning how to edit color in Premiere Pro, and each section focuses on a specific area of your image:
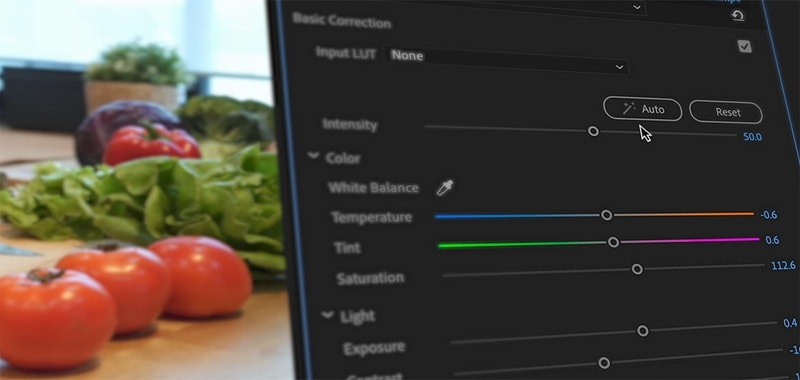
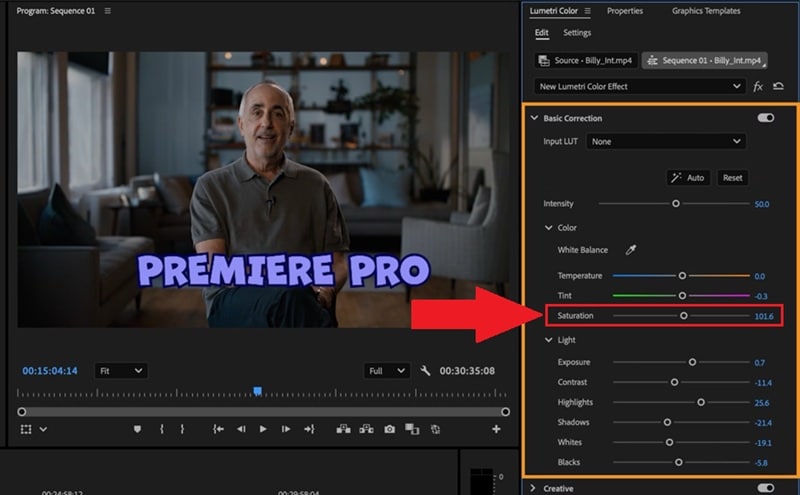
1. Basic Correction: Your Starting Point for Balance
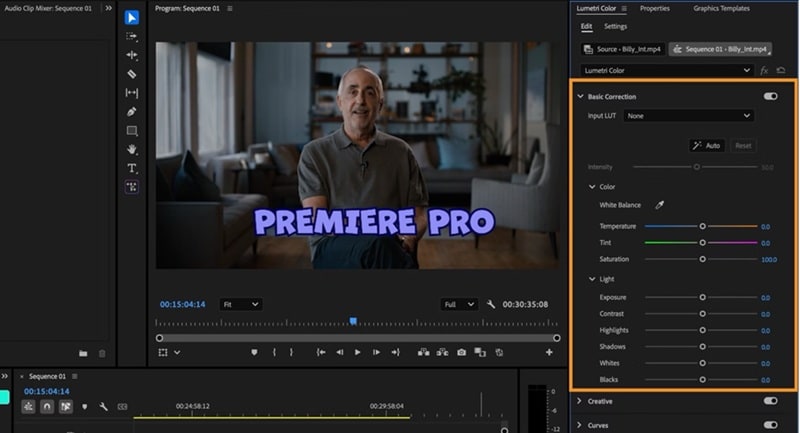
This is where you begin adjusting the overall look of your footage. You can fix exposure, tweak contrast, and correct white balance to make the image look clean and natural.
2. Creative: Give Your Footage Some Style
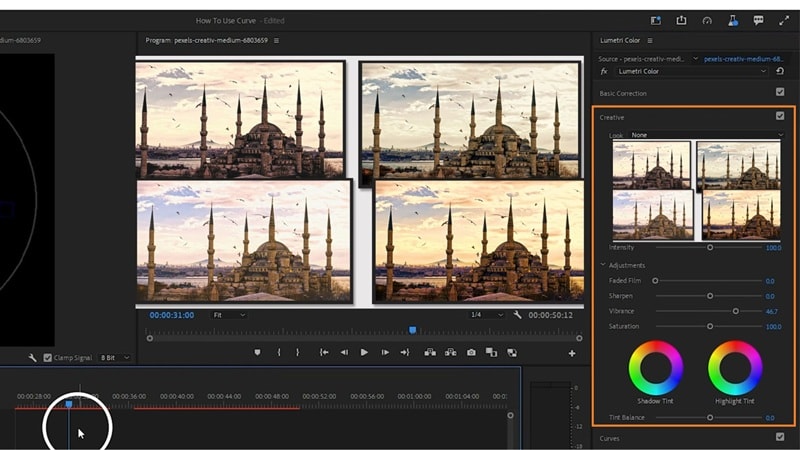
After your clip looks balanced, this section helps you give it personality. You can shape the mood and color tone using built-in presets or tools like faded film, sharpness, vibrance, saturation, and tint.
3. Curves: Fine Control Over Every Tone
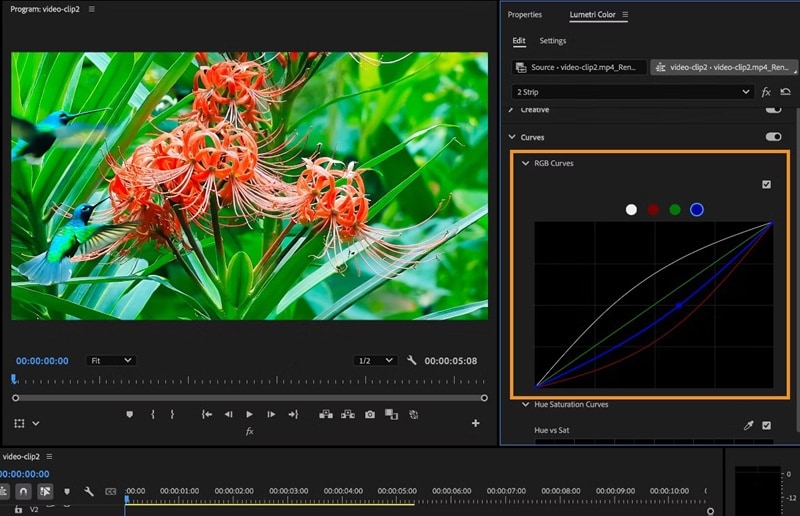
The Curves section lets you shape brightness and color more precisely. You can bring out detail in shadows, soften highlights, or balance color channels to create a smooth, polished result.
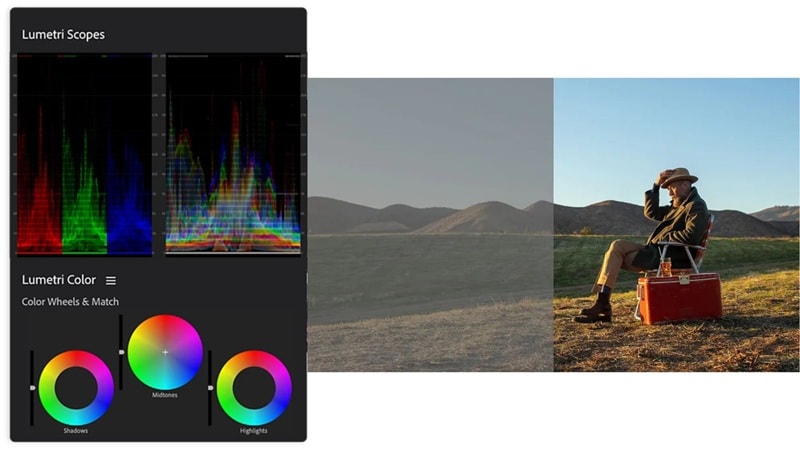
4. Color Wheels & Match: Keeping Every Clip Consistent
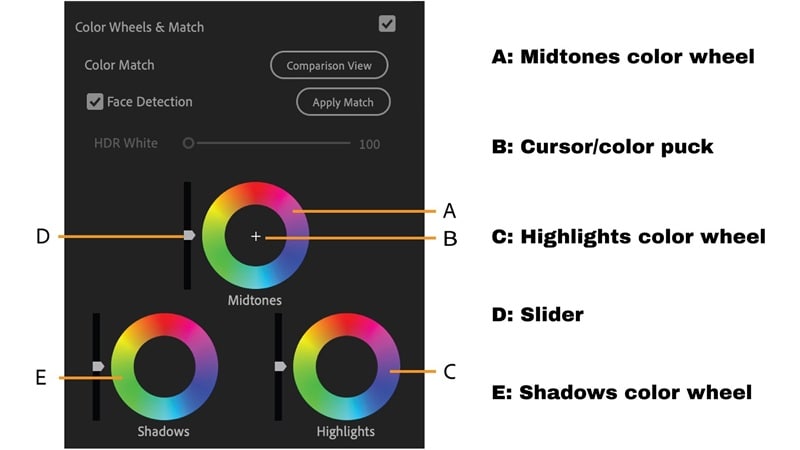
Here you control the shadows, midtones, and highlights separately, making it easy to balance lighting and color across your video. You can also match the color between two different clips to keep everything consistent.
5. HSL Secondary: Focus on Specific Colors
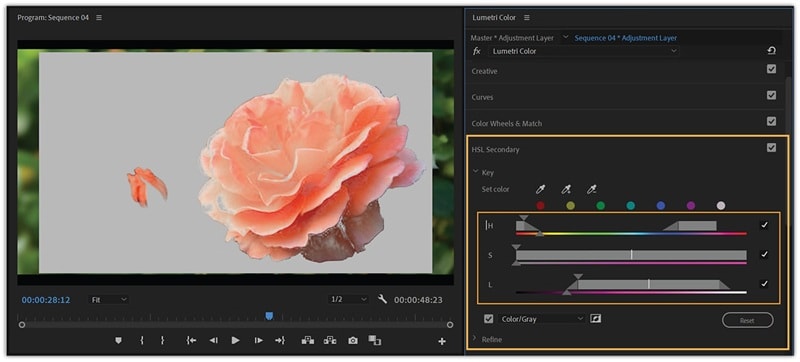
This section helps you isolate and adjust one color without affecting the rest of the image. It's perfect for enhancing a single element, like making a red dress pop or toning down an overly bright sky.
6. Vignette: A Subtle Touch of Focus
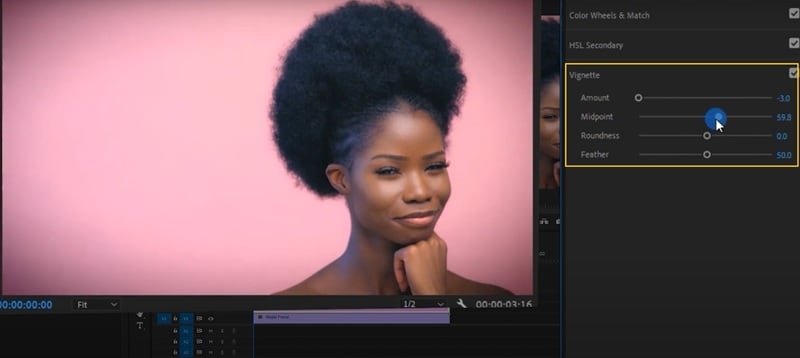
Adding a vignette gives your video that cinematic depth by gently darkening the edges. It draws attention to the center of the frame and helps your subject stand out naturally.
And that's a quick overview of the six Lumetri Color sections you'll use when learning how to adjust color in Premiere Pro. Each one plays a different role in shaping your footage, working together from basic correction to creative grading so you can build your final look step by step.
Part 3. How to Adjust Hue & Saturation in Premiere Pro
Now that you know your way around the Lumetri Color panel, it's time to start adjusting the actual colors in your video. As mentioned earlier, hue controls the color itself, while saturation decides how vivid or muted it looks. Below is a simple guide to help you fine-tune both and bring your video to life.
Basic Saturation / Vibrance Adjustment
There are two ways to learn how to change saturation in Premiere Pro:
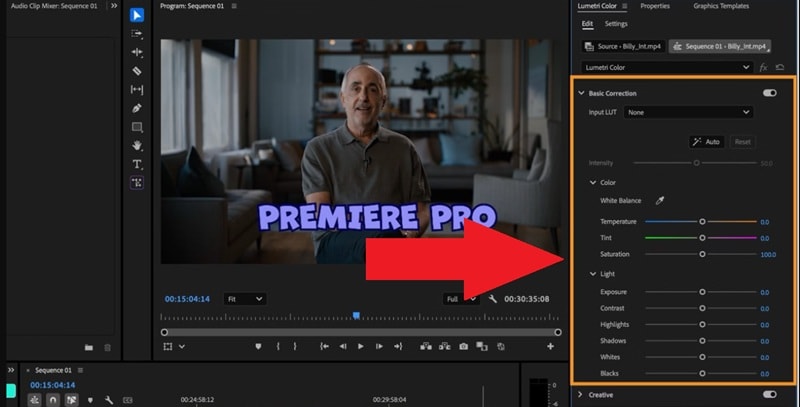
Method 1: Go to the Lumetri Color panel and open up the Basic Correction tab. There, adjust the Saturation slider to make colors richer or softer.
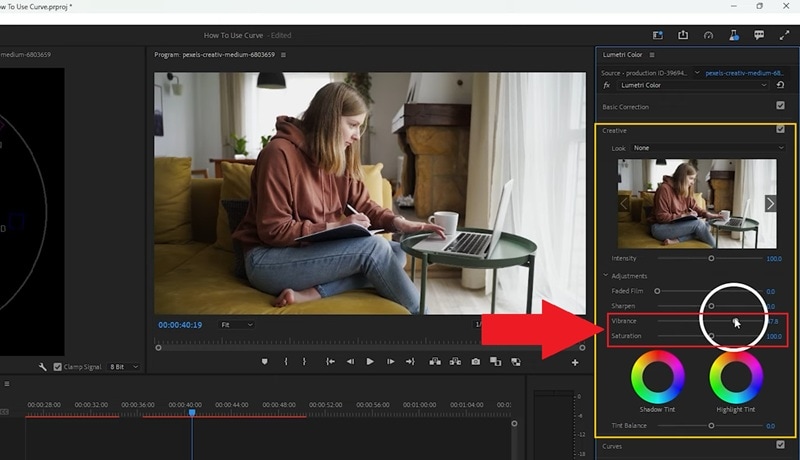
Method 2: Or, you can do it by adjusting vibrance, as guided by tutorial on YouTube. To do that, just open up the Creative tab, and control the Vibrance slider until the colors feel right for your video.
Shift Hues Creatively
Shifting hues can completely transform the feel of your video, whether you want to make a sunset warmer or turn greenery into a softer tone. And if you want to learn how to change hue in Premiere Pro, there are two methods as well:
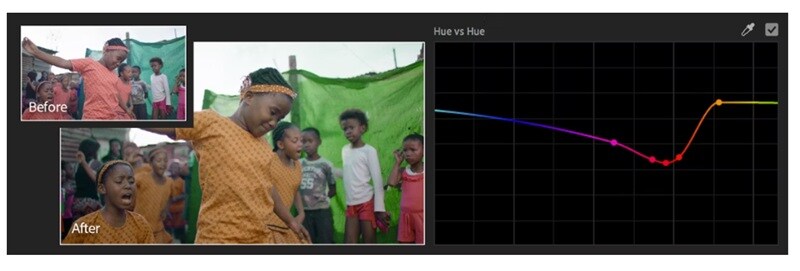
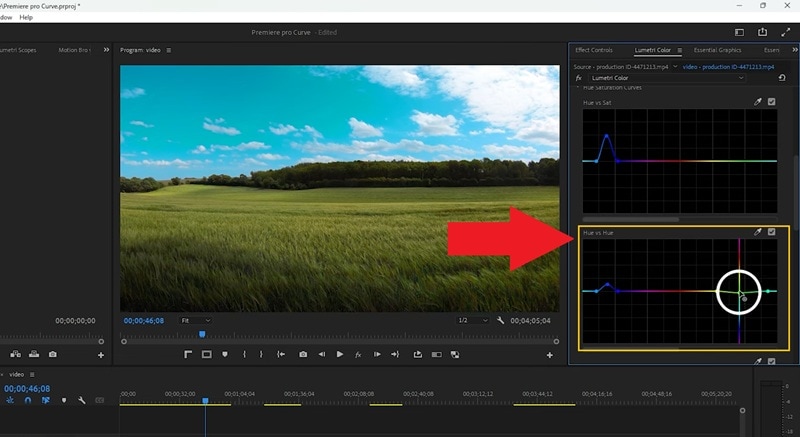
Go to the Curves tab and select Hue vs Hue. Next, select the color you want to change, such as green leaves or a blue sky. Drag the control point up or down to shift that color into a new shade.
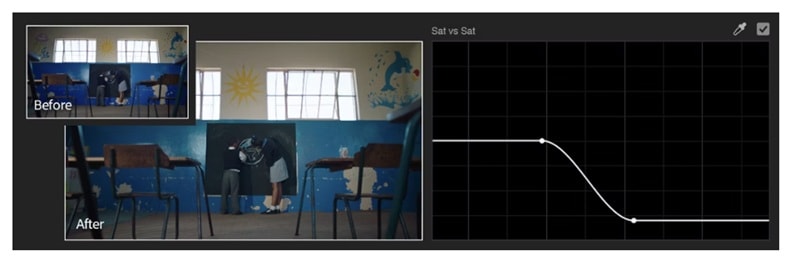
Using HSL Secondary
This method works great when you want to edit only one color without affecting the rest of your image. Pick a color with the eyedropper tool, fine-tune your selection, and adjust the hue or saturation just within that range for clean, precise control.
Part 4. Perfecting Your Color: Correction & Fine Tuning
Now that your hues and saturation are set, it's time to polish everything and make your footage feel balanced from start to finish. Here's how to edit your color in Premiere Pro step-by-step.
1. Start with the Foundation
Head to the Basic Correction tab to set the base tone of your video. Adjust exposure, contrast, highlights, shadows, whites, and blacks until your image feels well-lit and evenly balanced.
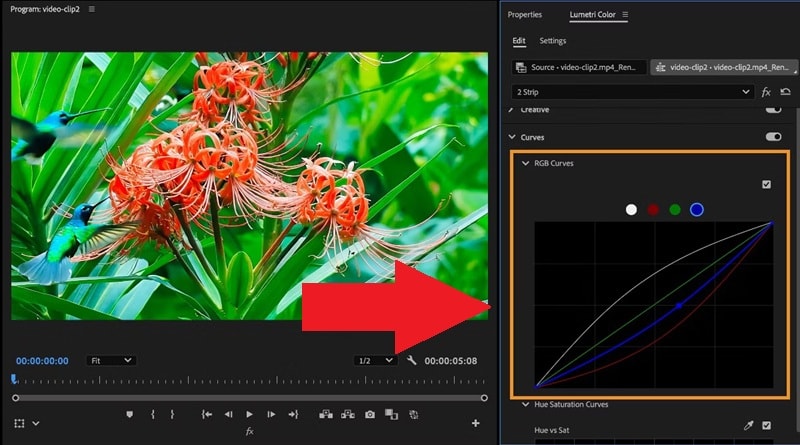
2. Shape the Tone with Curves
Use the RGB Curves under the Curves tab to fine-tune contrast and color channels. This tool gives you precision control, letting you brighten, deepen, or adjust tones without affecting the rest of the image.
3. Add Depth with Color Wheels
In the Color Wheels section, focus on your shadows, midtones, and highlights. It's great for balancing lighting, adding warmth, or giving your video a specific mood that fits the story.
4. Keep Every Shot Consistent
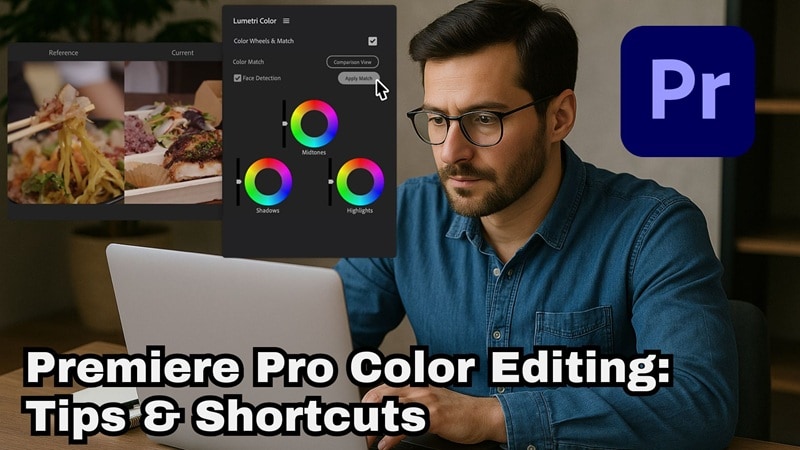
Finally, use the Color Match feature under Color Wheels & Match to make all your clips feel like they belong together. This tutorial from Adobe Made Simple explains it thoroughly. Start by making sure the clip you want to copy the color grade to is right next to the original clip on your timeline.
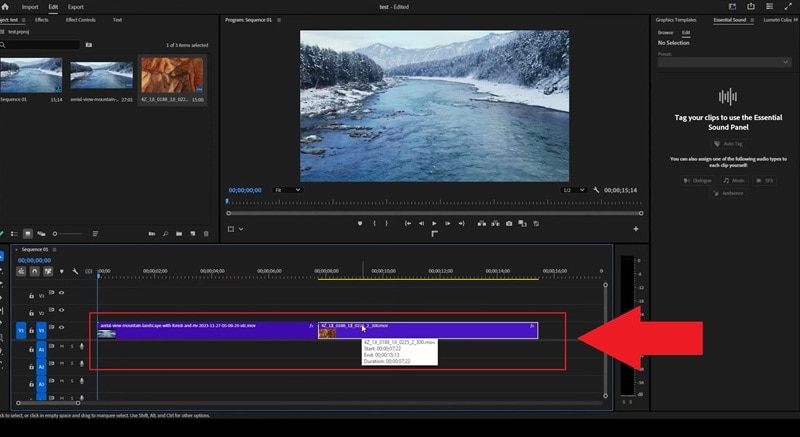
In the Lumetri panel, find and expand the Color Wheels & Match section. Click Comparison View so you can see both clips side by side. Move your timeline playhead over to the second clip. Then, click Apply Match to automatically copy the color grading from the first clip to the second.

Part 5. Changing Specific Colors Like a Pro
Once your overall tones are balanced, you might want to tweak just one color in your video. Maybe you want to make a green hoodie look red or change the color of the sky for a more dramatic scene. And if you want to learn how to change color in Premiere Pro like that, there are two simple methods to do it:
Option 1: Using Change Color Effect
This method is simple and works well when you want to swap one color for another without affecting the rest of your video. Follow this tutorial inspired by Adobe Made Simple to try it out:
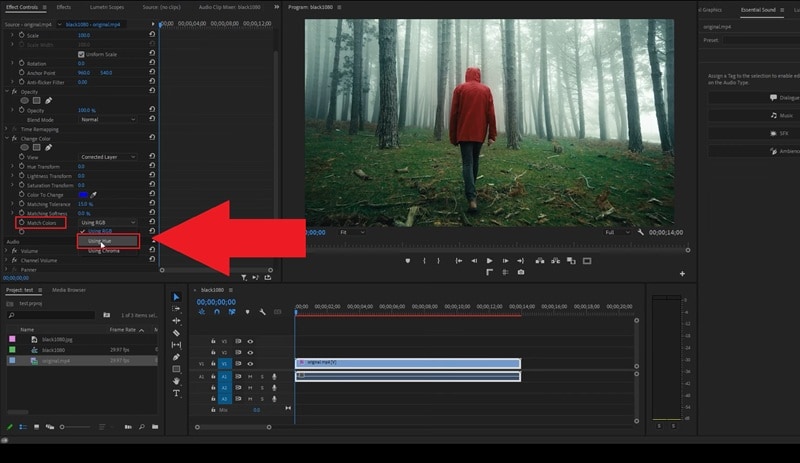
Add your video to the timeline. Go to Effects and search for Change Color. Drag the effect onto your video clip.
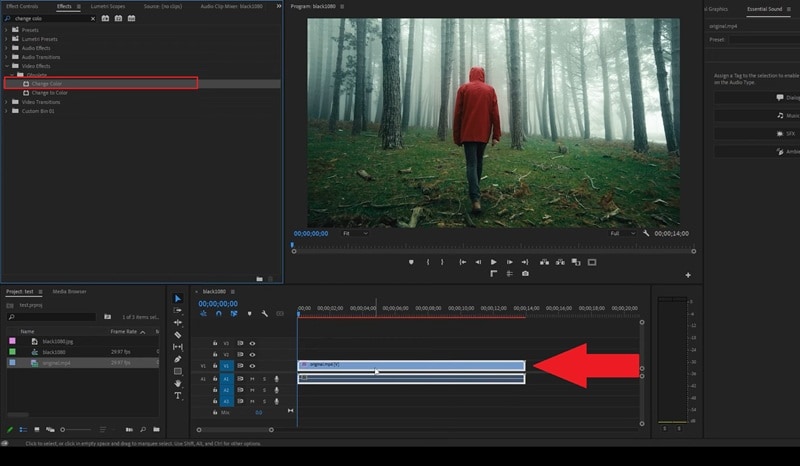
Open the Effect Controls panel and scroll down to the Match Colors section. Change the setting to Using Hue so the effect works properly.
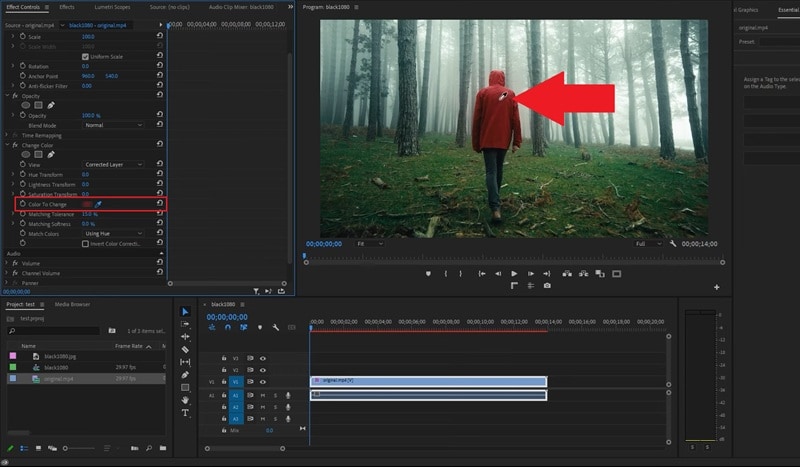
Click the Eyedropper tool and select the color you want to change in your preview screen.
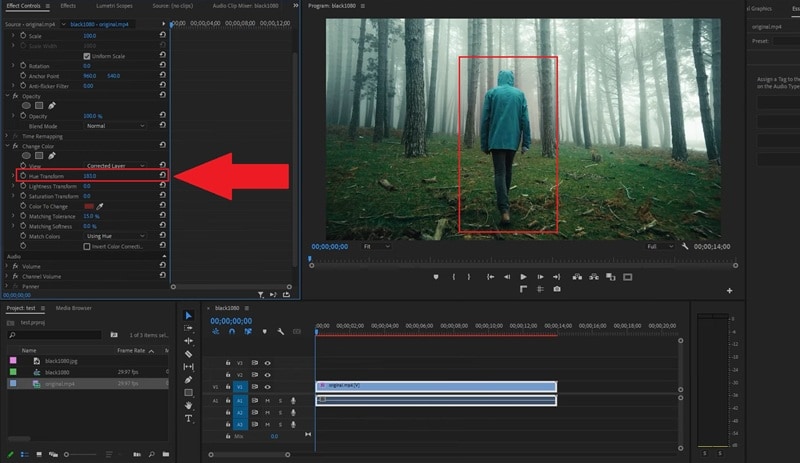
Go back to the Change Color settings and adjust the Hue Transform slider until the selected color changes to your desired shade.
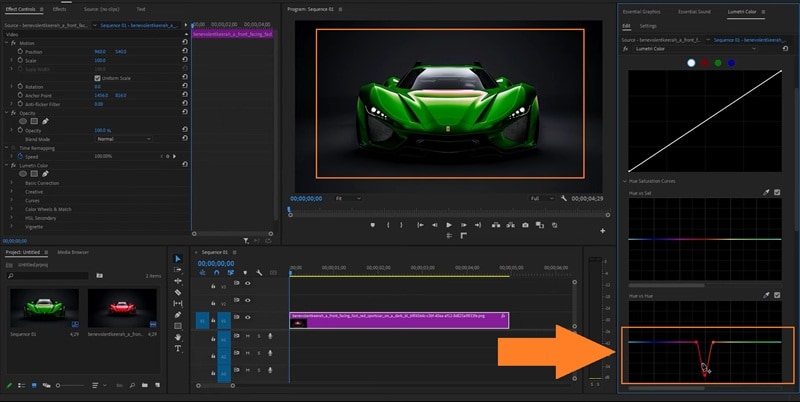
Option 2: Using Hue vs Hue in Lumetri Panel
Another way to change specific color in Premiere Pro is through the Lumetri panel you've been exploring. Here's a quick walkthrough guided by that shows how to do it:
- In Lumetri, go to the Curves section and find Hue vs Hue. Click the Eyedropper tool next to Hue vs Hue, then click on the color in your video that you want to change.
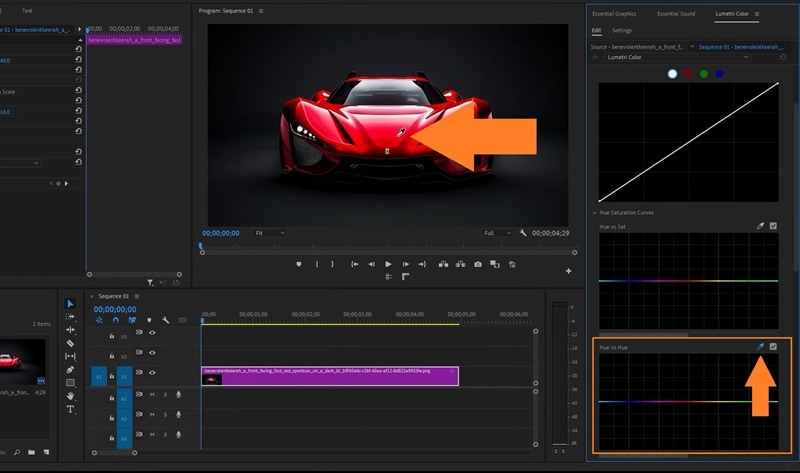
- Three points will appear on the curve. Drag the middle point up or down to shift that specific color into a new hue.
Part 6. Workflow Tips, Shortcuts & Troubleshooting
Alright, so you've now learned how to edit, adjust, and change color in Premiere Pro, but the journey doesn't stop there. Premiere Pro is packed with tools and settings, and there's always something new to discover when working with color.
To keep your workflow smooth and efficient, here are a few simple tips and shortcuts you can follow to stay in control and get consistent results every time:
- Use Adjustment Layers To Save Time: Instead of applying color changes to every single clip, add a new adjustment layer and apply your Lumetri settings there. It keeps your edits consistent and makes it easy to tweak everything at once.
- Keep An Eye On Scopes: Scopes like the waveform and vectorscope help you see what your colors are really doing. They're great for checking exposure, contrast, and saturation so your video looks balanced on any screen.
- Fix Before You Style: Always start with correction before you move to grading. Set your exposure, white balance, and contrast first so your creative color work looks clean and natural.
- Save Your Favorite Looks: Once you create a color style you love, save it as a preset in Lumetri. It's an easy way to keep a consistent look across your future projects.
- Double-Check Your Screen: If your colors look strange after exporting, your monitor or color space settings might be the reason. Calibrate your display and make sure your export settings match your timeline for accurate color results.
Part 7. Meet Filmora: When You Want the Same Results Without the Learning Curve
Premiere Pro offers some of the best color editing tools out there, and once you learn how to change color in Premiere Pro, the results can look stunning. But for someone just starting out, it can still feel a little overwhelming even with all the guides and tips. Not to mention, Premiere Pro is a paid-only tool.
If that problem sounds familiar, Wondershare Filmora is a great alternative. It's an all-in-one video editor that makes color editing simple while still giving you plenty of creative control.

Here's why Filmora is a great option:
Easy-To-Use Controls
Filmora keeps color editing simple. You can fine-tune hue, saturation, brightness, and temperature using clear sliders that respond instantly, making it easy to get the look you want.
Cinematic LUTs And Presets
With one click, you can apply LUTs and presets to give your footage a cinematic or creative style. It's an effortless way to make your videos stand out.
HSL Curves And Color Wheels For Precision
If you want more control, the HSL curves and color wheels let you fine-tune specific tones in your video. You can adjust shadows, midtones, and highlights separately to achieve smooth, detailed color grading.

AI Color Palette For A Unified Look
The AI Color Palette feature lets you extract colors from an image or video and turn them into a coordinated palette. This helps you create a consistent color style throughout your project.
Protect Skin Tones Naturally
Filmora's smart color engine maintains realistic skin tones even when you make strong edits. It keeps faces looking natural while you adjust hue, saturation, or overall color balance.
Smooth And Lightweight Performance
Filmora runs efficiently even on mid-range PCs. You can explore color adjustments, effects, and AI tools without worrying about lag or long rendering times.
Conclusion
Many people want to learn how to control color in Premiere Pro, and this guide walks you through it step-by-step. You've learned how to adjust color in Premiere Pro by exploring each part of the Lumetri panel and understanding how hue, saturation, and tone shape your footage.
In the end, the color tools in Premiere Pro are powerful and professional, but they can feel overwhelming for beginners and require a paid subscription to access. For those who prefer a smoother start, Filmora makes the perfect alternative. It offers an easier way to edit color with clear controls, real-time previews, and smart AI tools that make your videos look polished without the complexity.
