
 100% Security Verified | No Subscription Required | No Malware


 ChatGPT
 Perplexity
 Gemini
 Claude
 Grok
Grok
When editing a video, consistency in every element is a necessity. Like every aspect of the footage, color consistency is of great significance. This can only be achieved when you have a reliable editing tool. Premiere Pro color matching is among the leading editors for making the tones match between two clips or multiple scenes.
The following article explores this platform for color matching on Mac. Also, we will look into a better alternative to Premiere Pro in terms of diversity and user-friendliness.
In this article
-
- Solution 1. Check System and Software Requirements
- Solution 2. Enable GPU Acceleration
- Solution 3. Ensure Correct Lumetri Workflow
- Solution 4. Check for Sequence/Clip Issues
- Solution 5. Clear Cache and Reset Preferences
- Solution 6. Try a New Project or Sequence
- Solution 7. Update or Reinstall Premiere Pro

Part 1. How to Color Match Video Footage with Adobe Premiere Pro on Mac?
We often edit a video with a filter, but it ends up having inconsistencies in the tone. Adobe Premiere Pro understands the frustration and helps by offering its Color Match Premiere Pro feature. All you have to do is select the target and the reference frames, and the AI will automatically apply the tones of the reference scene. This feature is especially useful when you want to match color in Premiere between two clips or several clips with varying lighting conditions. For further details on the topic, follow the guide below:
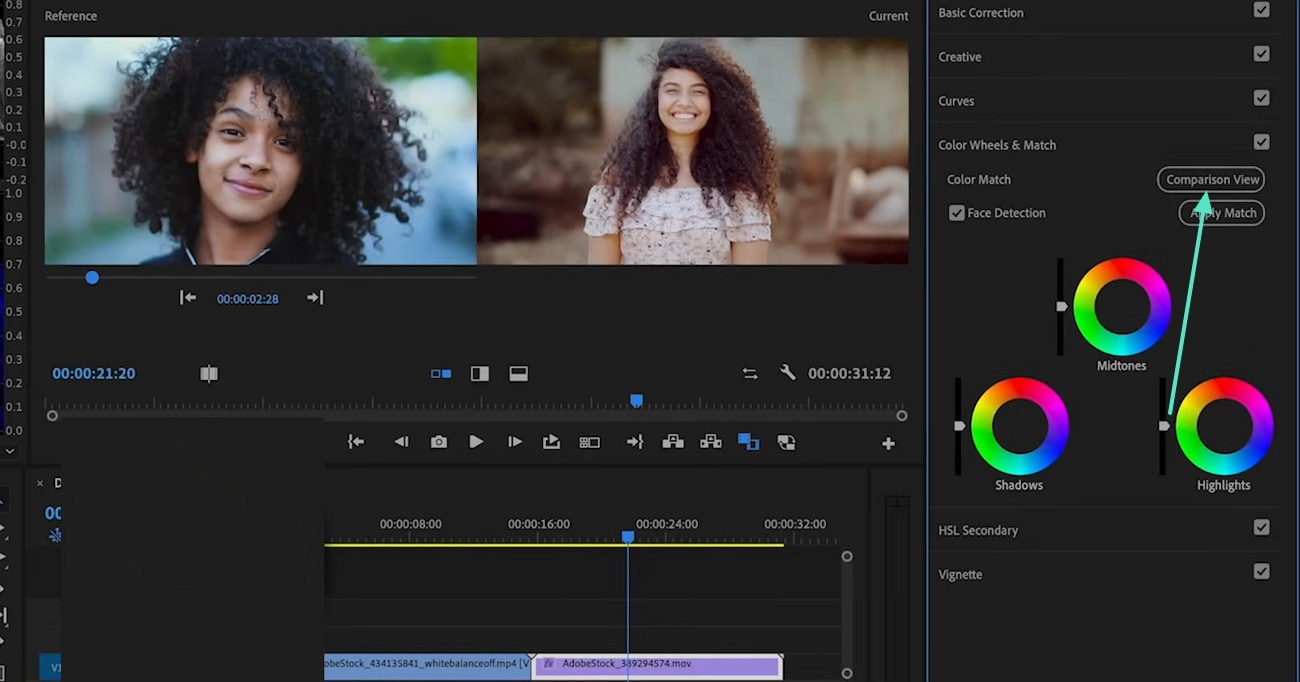
Step 1. In the "Color" workspace, enter the "Color Wheels & Match" section and enable the "Comparison View."
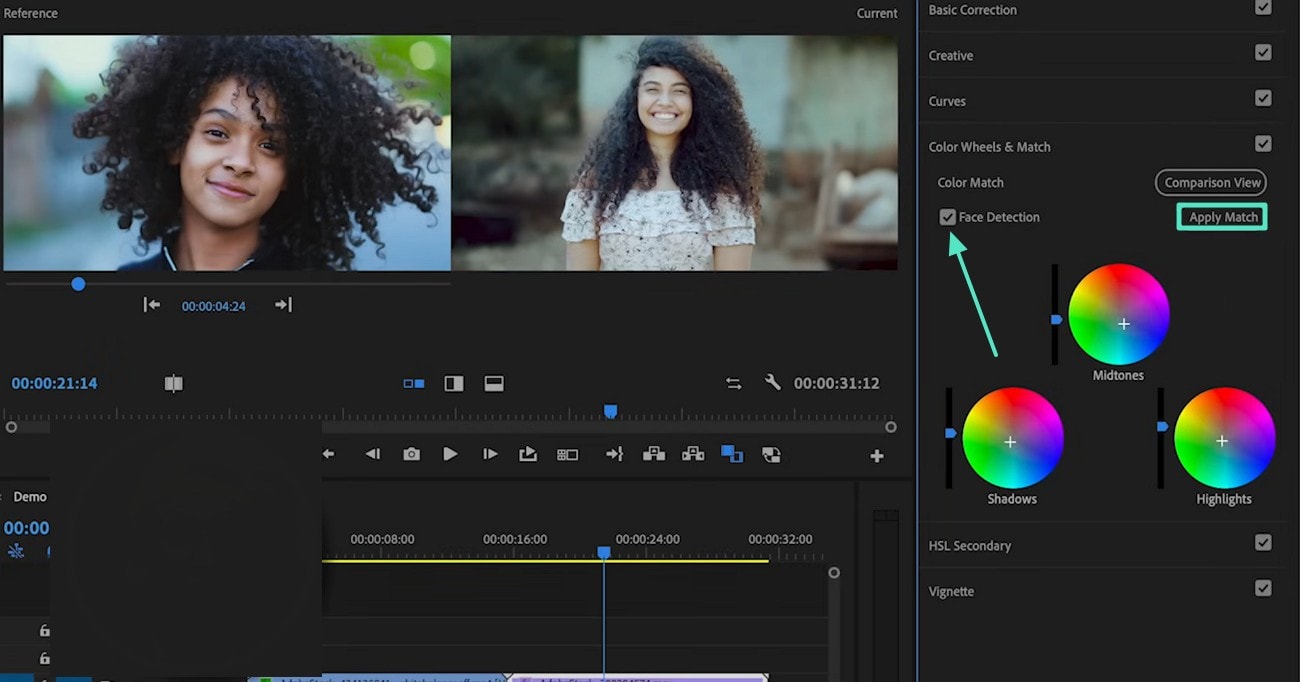
Step 2. When the reference scene window appears, adjust the play head to the frame that you are targeting. For a higher quality match in the videos with faces, enable the "Face Detection" box. Finally, select the "Apply Match" option to make the two frames have the same tones.
Part 2. How to Deal with the "Premiere Pro Color Match Not Working" Issue?
Although the use of this tool is helpful, many users complain that it does not work. The following section looks into the reasons why your Premiere Pro color match not working and how you can fix it:
Solution 1. Check System and Software Requirements
To ensure the tool has the necessary features for Color Match, keep Premiere Pro, your operating system, and GPU drivers up to date. Old or unsupported hardware or software can make GPU-accelerated features fail or run so slowly that they appear broken. Follow the instructions below and learn how to update Premiere Pro on a macOS device:
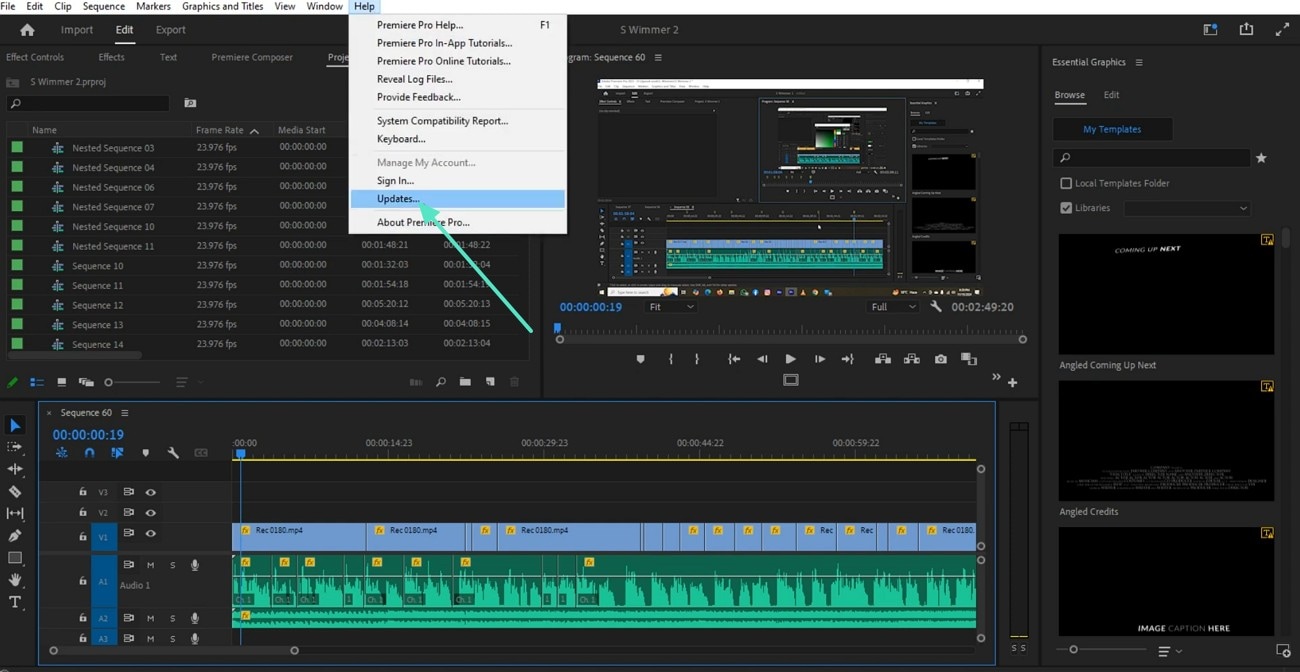
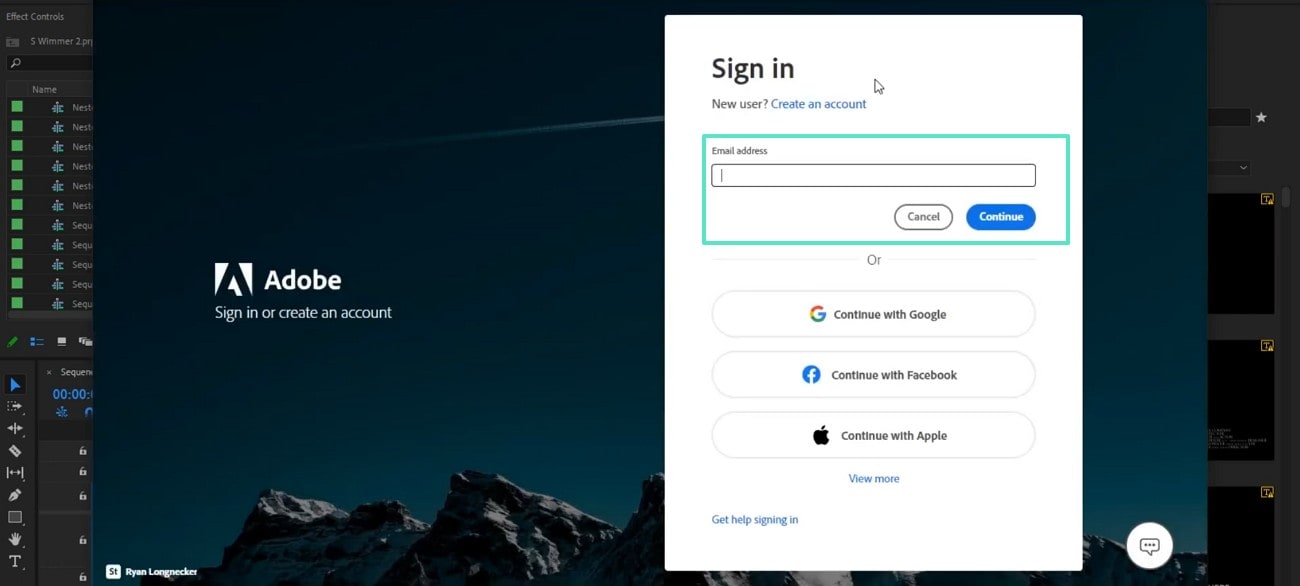
Step 1. From the "Help" tab at the top, select the "Updates" option.
Step 2. Using the next interface, sign in to your Adobe Creative Cloud account and download the updates if the website shows any.
Solution 2. Enable GPU Acceleration
The Premiere Pro match color feature uses GPU processing for the heavy pixel analysis and math behind matching. Without GPU acceleration, it will be extremely slow or may not work at all. When the tool is set to software-only rendering, some Lumetri features are unavailable.
Enabling GPU acceleration also lets the tool use the optimizations that improve both accuracy and stability. Read into the guide below and learn how to enable GPU acceleration on this editor:
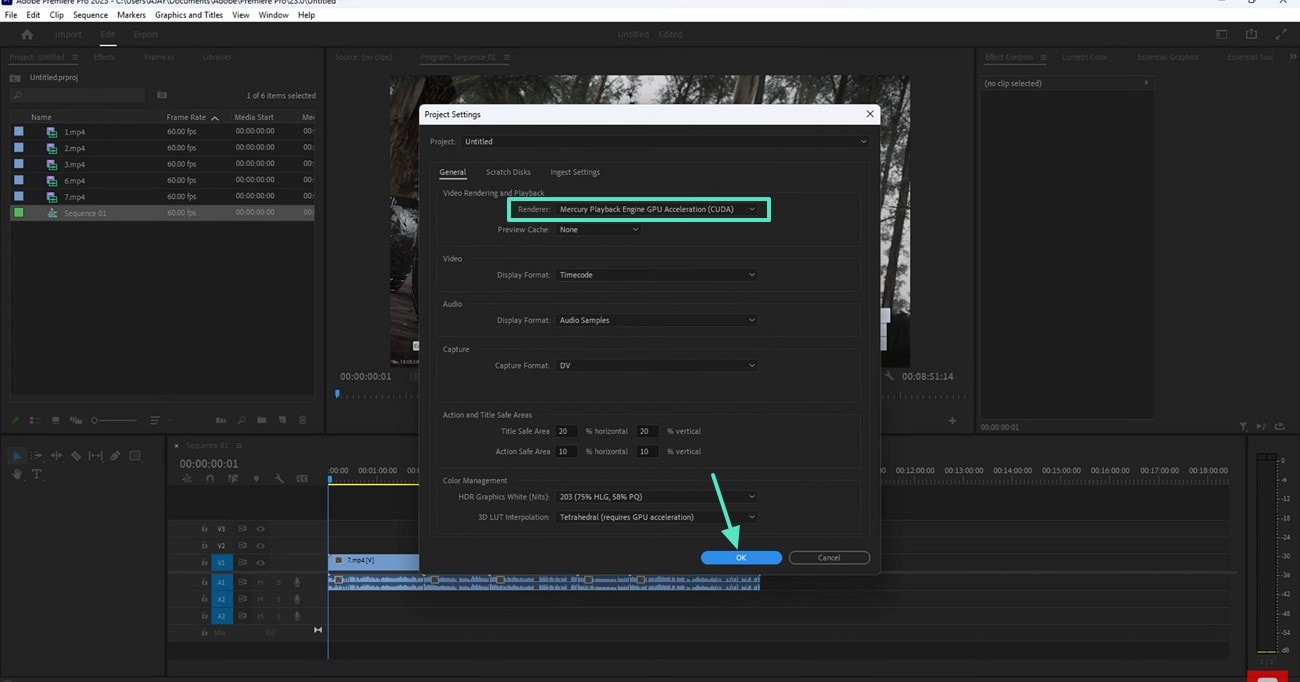
Step 1. From the "File" tab at the top right, enter the "Project Settings" menu to select "General."
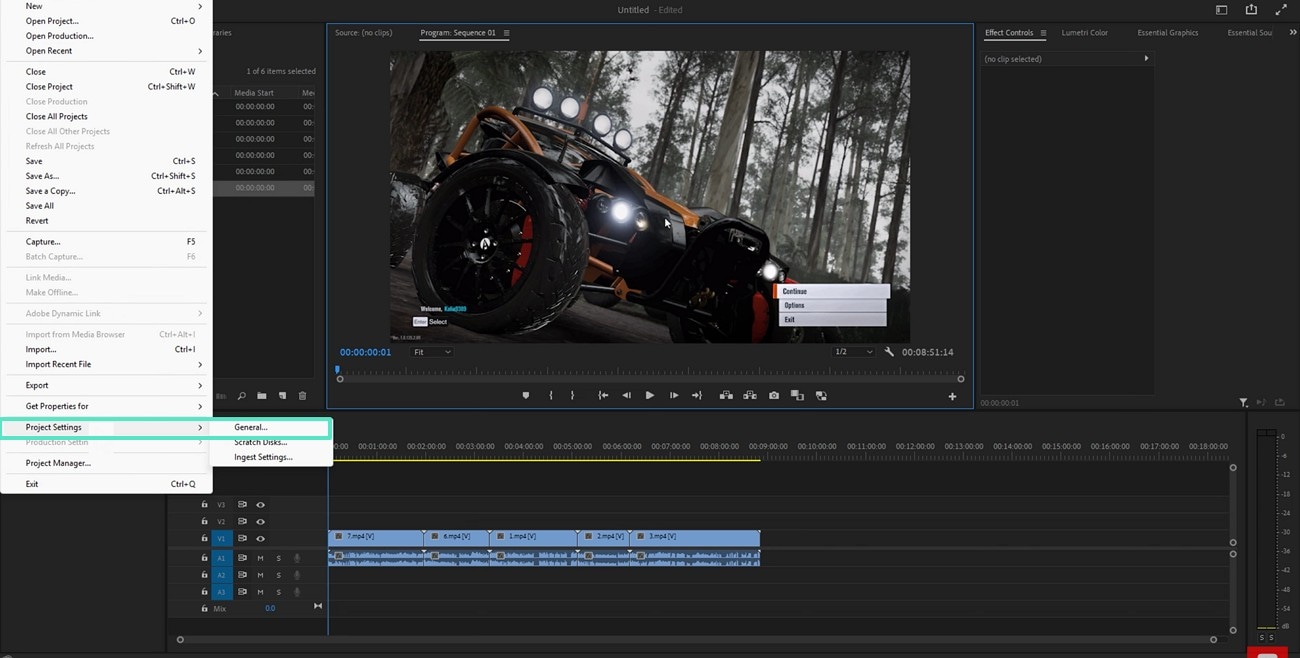
Step 2. Under the "Video Rendering and Playback" section, expand the "Renderer" menu to pick the desired acceleration type. On clicking the "OK" button, the GPU acceleration will be enabled.
Solution 3. Ensure Correct Lumetri Workflow
Many "not working" reports are attempts to use Color Match outside the Lumetri workflow. It is a feature inside the Lumetri Color workspace and only works when the correct panels and comparison and reference frames are active. If you haven't applied Lumetri to the clip or enabled the "Comparison View," the "Apply Match" action in the Premiere Pro match color between clips feature will not do anything.
Solution 4. Check for Sequence/Clip Issues
Project setup can sometimes block Color Match from working. Wrong color space or alpha settings can also confuse the tool and give weak or no results. Disable adjustment layers above the clip and make sure you are selecting the actual clip in the timeline.
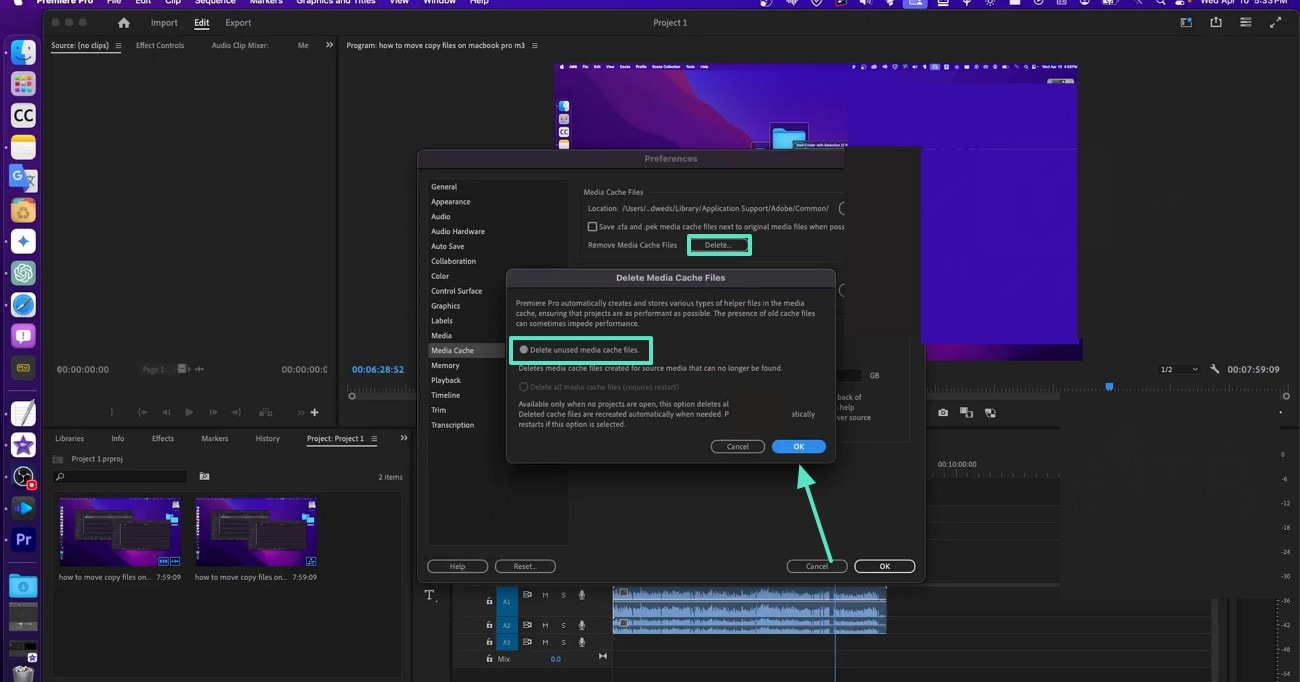
Solution 5. Clear Cache and Reset Preferences
A broken media cache or bad preferences can make buttons vanish or tools act oddly. Clearing the cache makes Premiere rebuild its previews and color data. Resetting preferences restores default settings that usually work well. Follow these guidelines to clear the cache of color match Premiere Pro:
Step 1. In the "Premiere Pro" tab, hover over the "Settings" menu and select the "Media Cache" option to open a window.
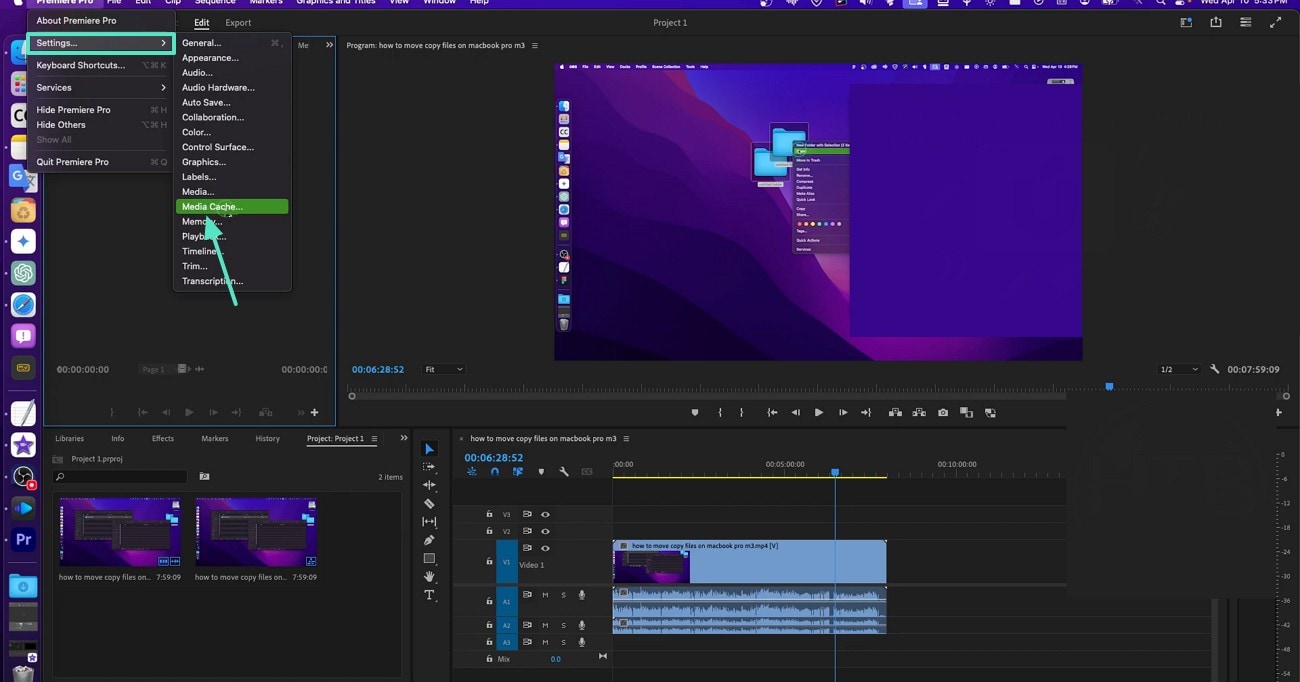
Step 2. In this window, select the "Delete" button under the Media Cache Files section and wait for a new pop-up. Here, check the "Delete Unused Media Cache Files" radio button and click "OK" to clear the cache.
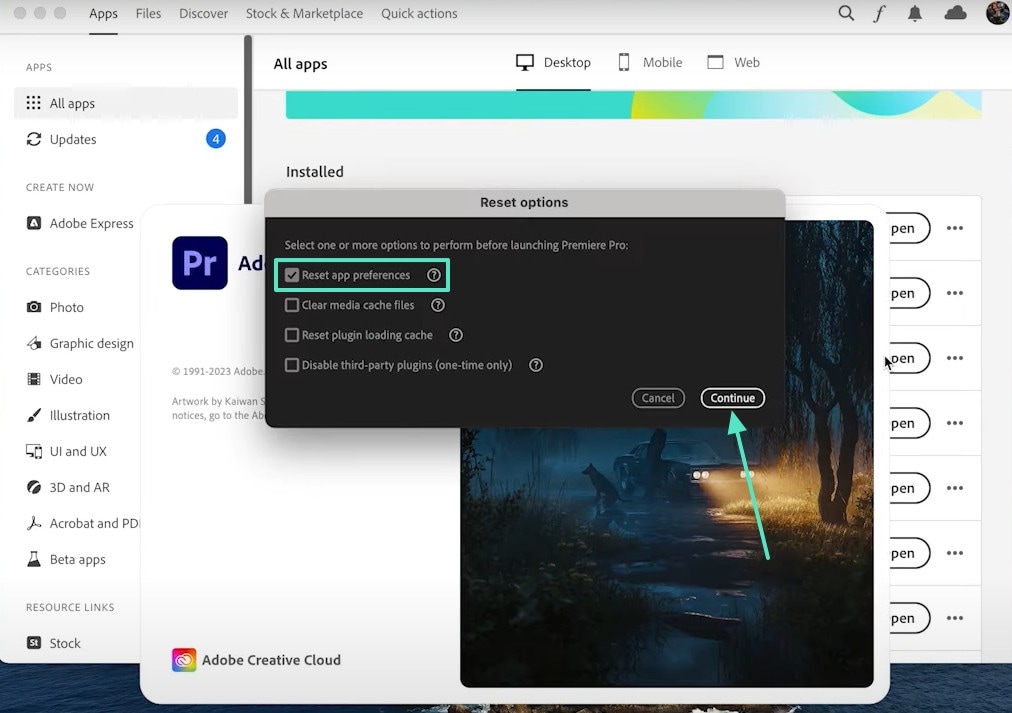
Follow the instructions below and learn how to reset the preferences of Adobe Premiere Pro:
Instructions. As you open Premiere Pro, hold the "OPT" key and check the "Reset App Preferences" box to reset Premiere Pro preferences successfully.
Solution 6. Try a New Project or Sequence
Sometimes a project file gets corrupted and only shows problems in certain cases. Testing Color Match in a new project helps you see if the issue is project-specific. If it works there, the problem is in your original project's settings or files. Moving your assets into a fresh project often clears the corruption and fixes the issue.
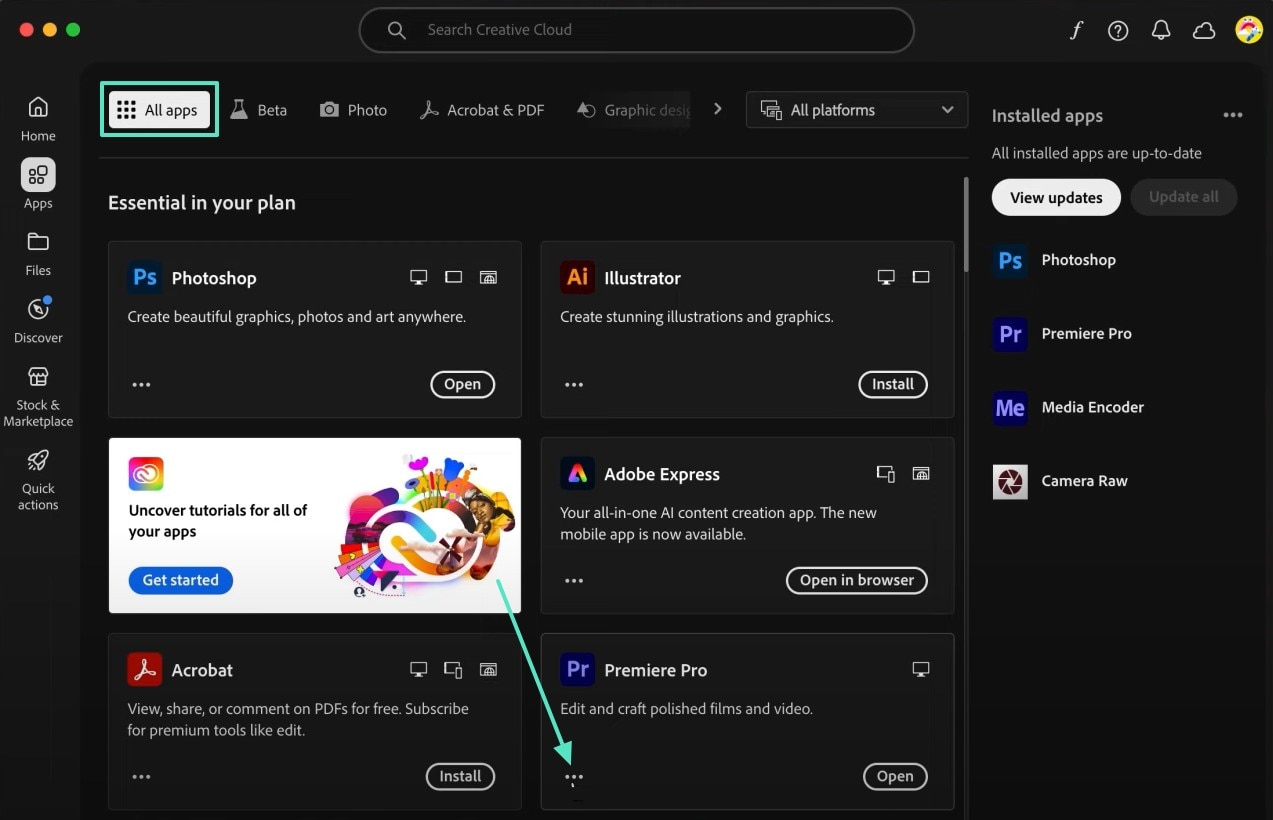
Solution 7. Update or Reinstall Premiere Pro
If the issue still isn't fixed, it may be a bug in your Color Match Premiere Pro version or installation. Updating adds bug fixes, while reinstalling replaces damaged program files. The instructions below feature steps for uninstalling Premiere Pro from your Mac:
Instructions. In the App Store, enter the "All Apps" section and look for Premiere Pro. On finding it, select the "Three Dots" menu and click "Uninstall" to delete the app. Now, search the App Store to reinstall Premiere Pro.
Part 3. Exploring a Better Alternative to Premiere Pro Color Matching: Wondershare Filmora
Premiere Pro is functional for color match, but it may not be accessible to everyone because of its complex interface and workflow. Wondershare Filmora is a better Premiere Pro color match alternative and is user-friendly as well. Besides matching the tones, it allows you to set the strength of the similarity. If your video has faces in it, you can preserve the original shade of the skin during the color match.
Once you have recreated the pigment of a scene, save the color settings as a preset and use them in your future edits. In addition to this automated feature, users can also replicate the color tones manually by entering the advanced color grading options. They can also avail themselves of the built-in LUTs and bring life to their dull, raw footage.
 secure download

Exploring Filmora as a Color Matching Alternative to Premiere Pro
The following guide will help you learn how Filmora helps you color-match with its intuitive interface:
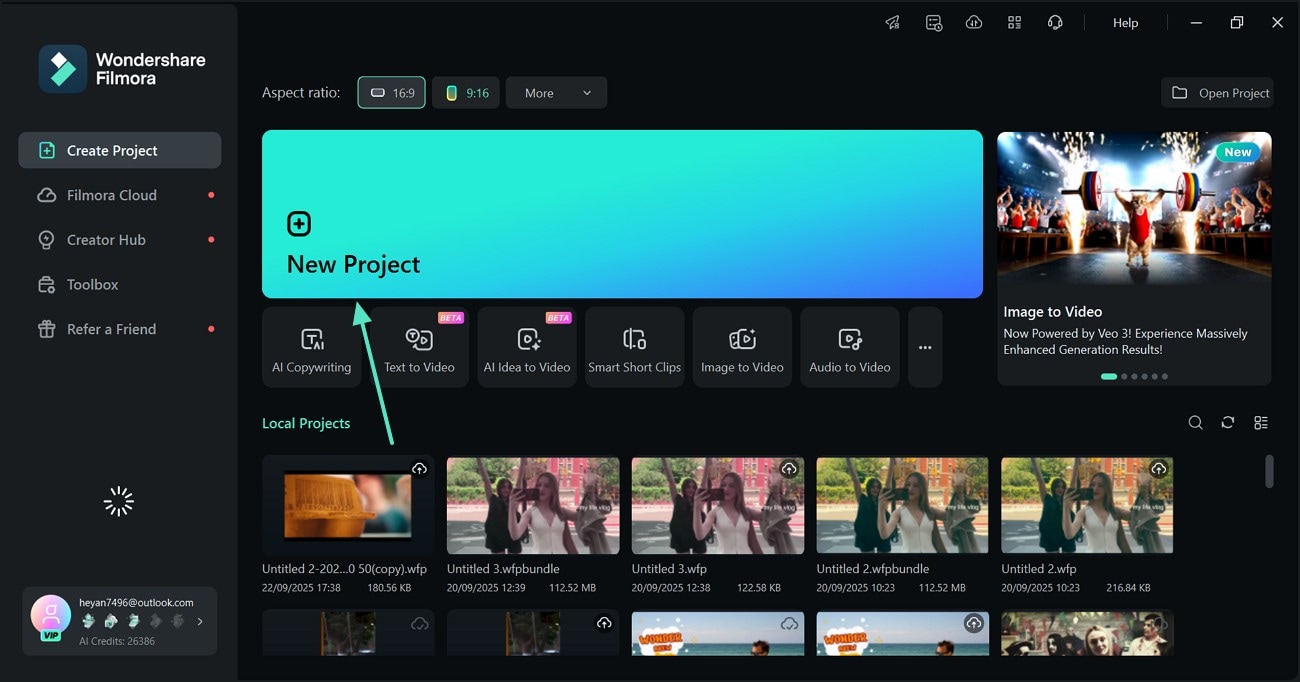
- Step 1. Start with a New Project. First, select the "New Project" button to "Import" a video in the next interface.
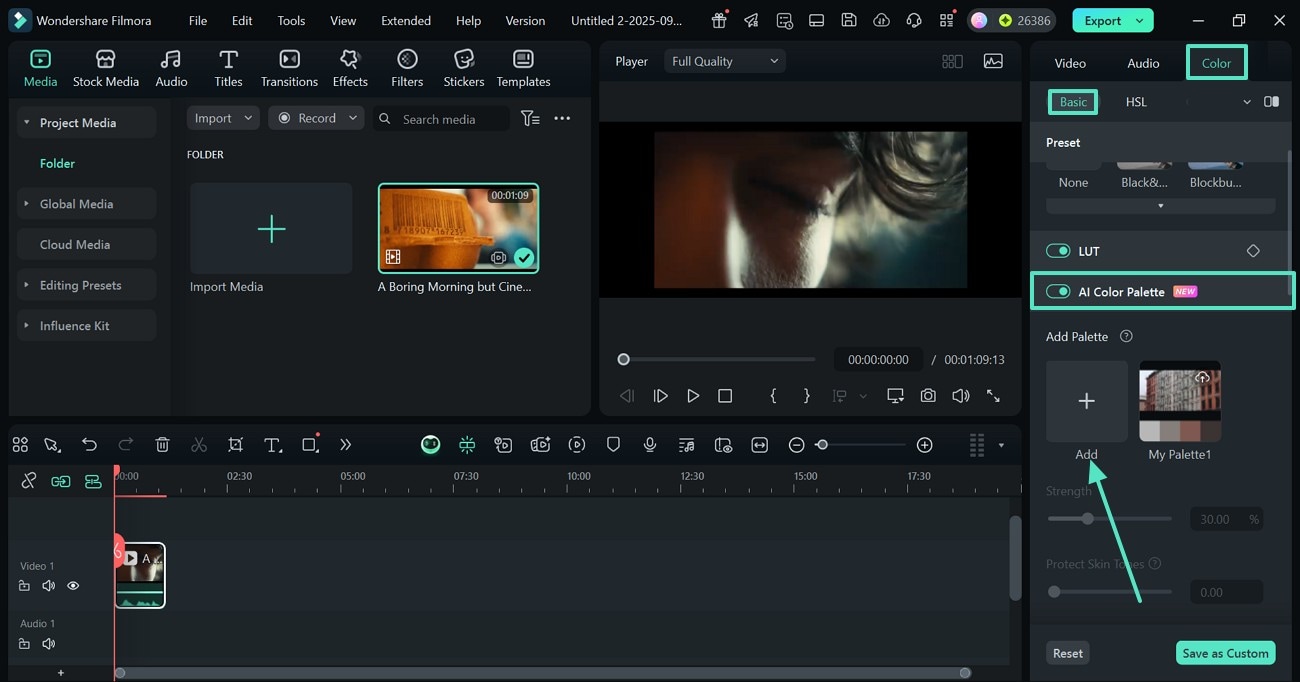
- Step 2. Access and Enable the AI Color Palette. From the right side, enter the "Color" section and explore the "Basic" panel and enable the "AI Color Palette" option. Now, select the "+" button to see the reference and preview windows.
- Step 3. Select the Reference Frame and Continue. From the preview window, select the "Reference" scene. To choose a preview frame, move the video play head from the timeline and stop it at the desired scene. This makes it easy to learn how to color match Premiere Pro even for beginners.
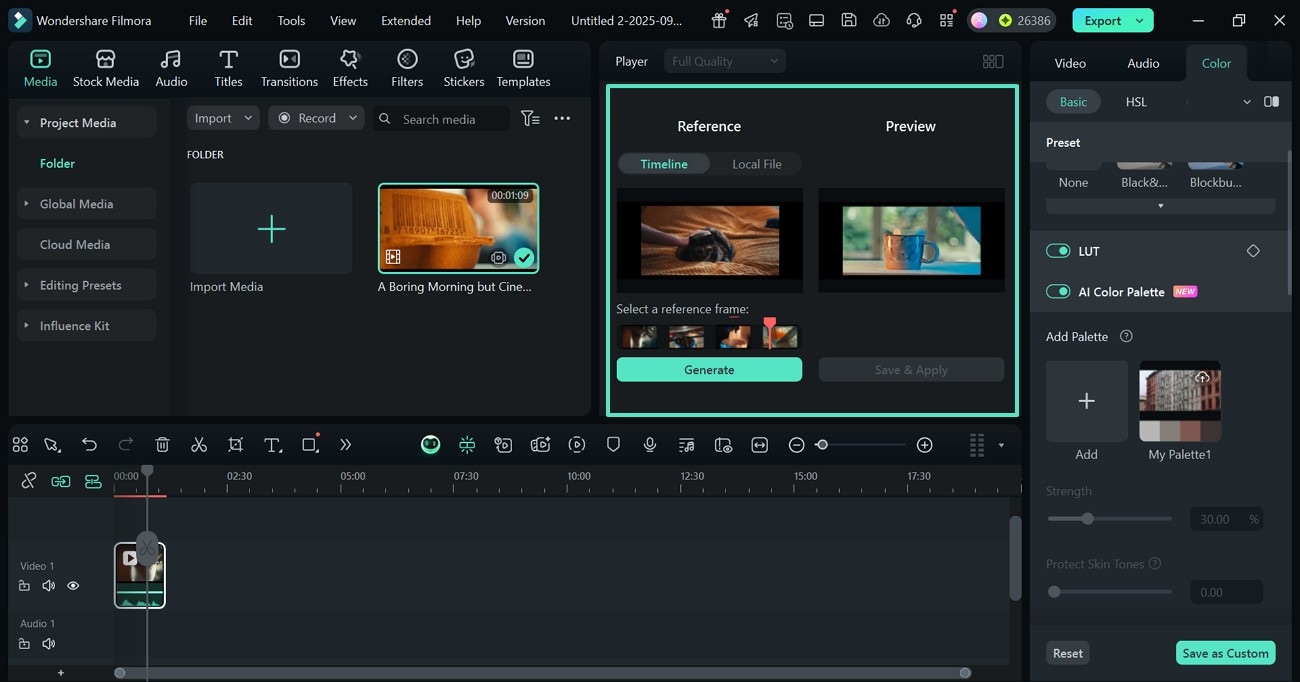
- Step 4. Make More Settings and Export the Project. When the tones have been replicated, select the "Save & Apply" button and adjust the "Strength" of the similarity. If your footage has people, you can also protect the skin tones from the relevant slider. Once done, "Export" the video project to your device using the next window.

secure download
Conclusion
Conclusively, this article was a detailed guide on using Premiere Pro color matching features in videos. We also explored the commonly faced issues during this process and how they can be resolved. Afterward, this article introduced Filmora as a better alternative to Premiere Pro. With its user-friendly interface and diverse color-related features, it serves as a better option for anyone looking to how to match color in Premiere or between multiple clips.
