
 100% Security Verified | No Subscription Required | No Malware


 ChatGPT
 Perplexity
 Gemini
 Claude
 Grok
Grok
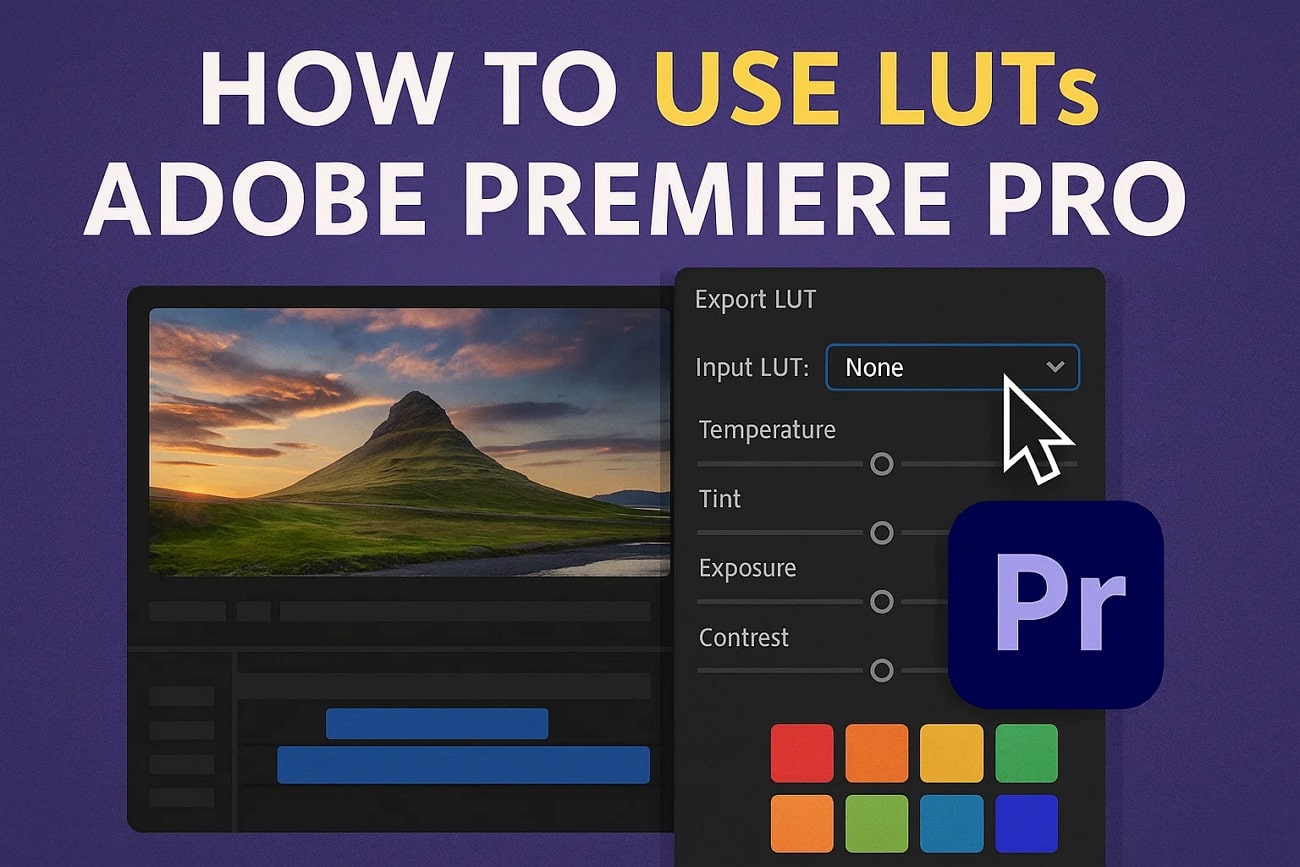
Post-production efforts are nearly as important as the video-making itself. Choosing the right tone for the video helps you create the intended vibe for the film. To create consistent color grading and fine-tune cinematic looks, it is important to use LUTs. Premiere Pro LUTs are famous for their professional-grade presets.
This blog is a breakdown of using this tool's Look-Up Tables and an exploration of the top presets that are compatible with this editor. Furthermore, we will also look for a better alternative for the application of these presets and their customization.
In this article
Part 1. Using Adobe Premiere Pro to Use LUTs
Adobe Premiere Pro is among the leading software for editing films using Look-Up Tables. Users can access the presets by exploring the Color tab. If you don't like the available options of LUTs, you can browse a preset from your device and import it into the system. The outsourced presets are saved in the designated LUTs folder, where the built-in ones also reside.
This platform categorizes the LUTs for Adobe Premiere Pro as Input and Creative LUTs, depending on their application. Read into the following text to learn more about these categories:
- Input LUTs:
Input LUTs are used at the start to fix flat-looking footage shot in LOG or RAW. They turn the footage into a normal color space like Rec.709 so it looks natural. This step makes sure colors and brightness are correct before grading. In Premiere Pro, you apply them in the "Basic Correction" tab of Lumetri Color.
- Creative LUTs:
These presets are used after the footage looks normal to give it a style or mood. They can give a video the vibe intended by the editor. These don't fix footage but add personality to it. Users can find these presets in the Creative tab of Lumetri Color under "Look."
Follow the guide below to learn how to use the cinematic LUTs for Premiere Pro:
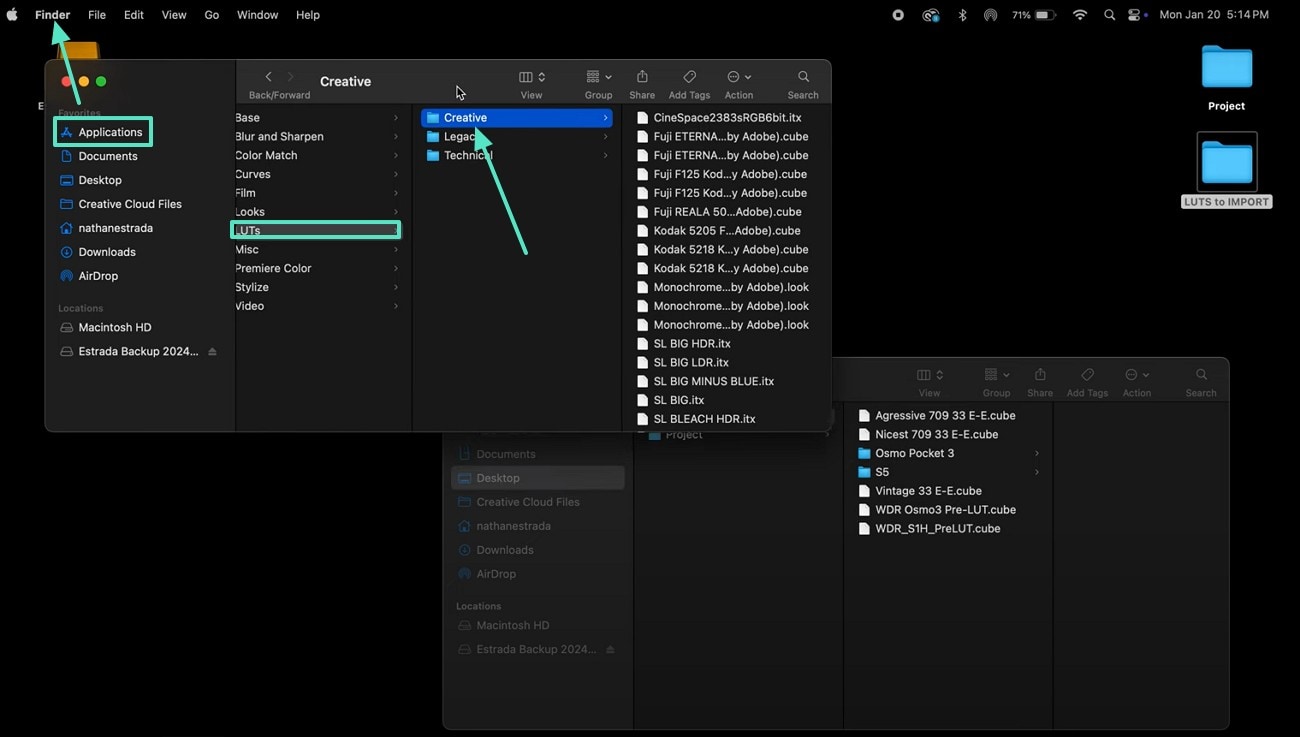
Step 1. First, download the LUTs that you want to outsource, then follow the following navigation and paste the downloaded presets here:
Finder > Applications > Adobe Premiere Pro 2025 > Show Package Contents > Lumetri > LUTs
Step 2. Open Premiere Pro and explore the "Color" tab at the top right of the screen. Enter the "Lumetric Color" section and explore the "Basic Correction" panel. Here, expand the "Input LUT" menu and select a suitable preset from the available options.
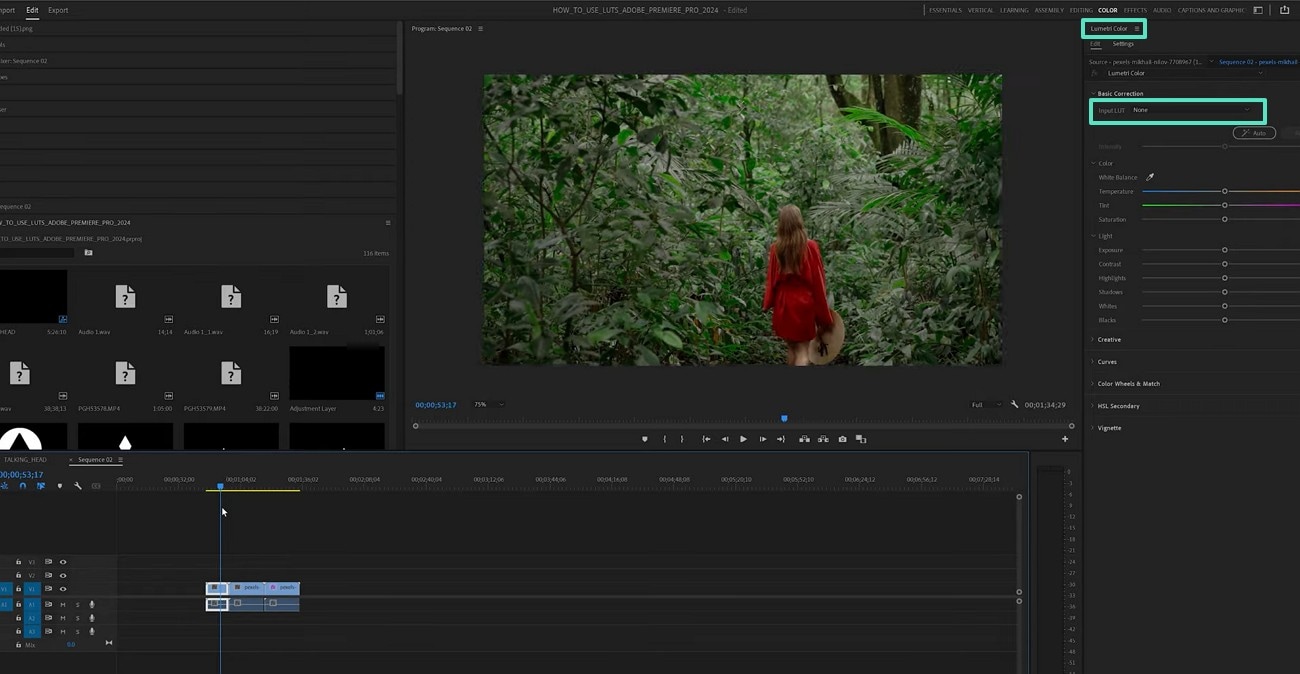
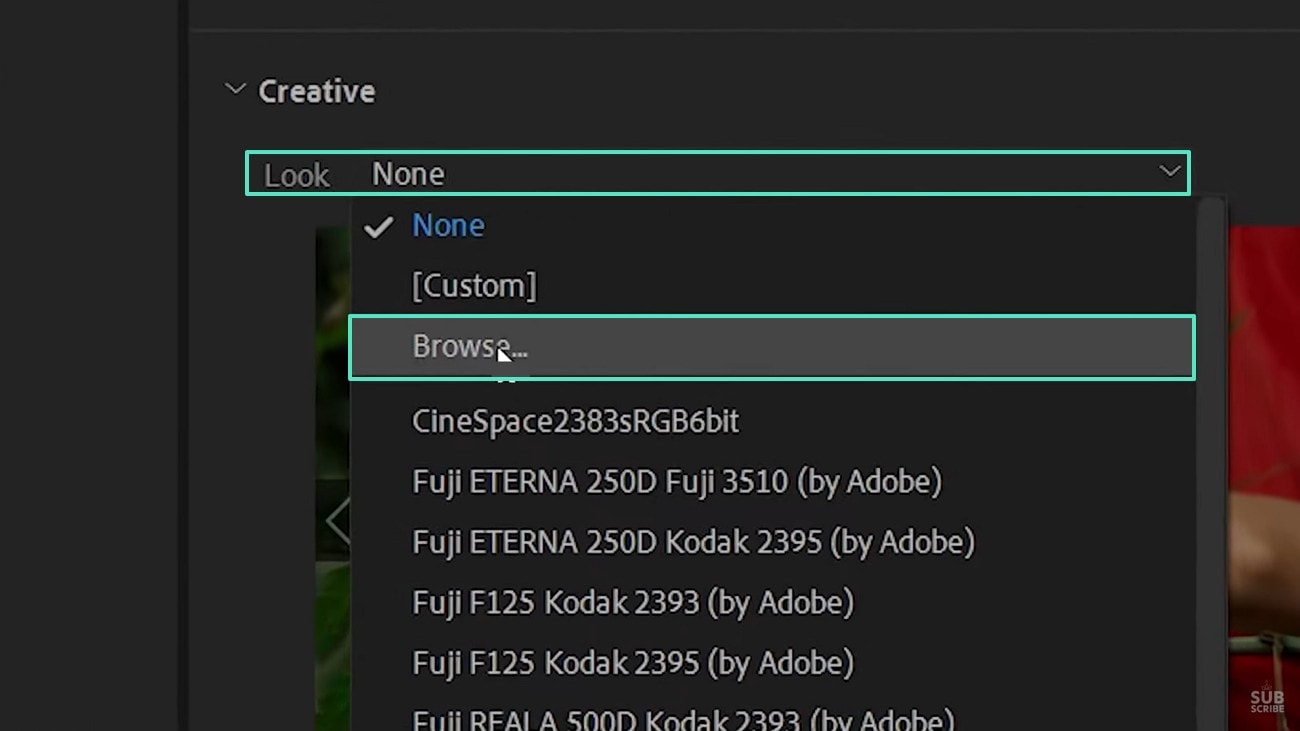
Step 3. If you do not like the built-in options, enter the "Color Wheels & Match" section and expand the "Creative" section. This is another method to access the LUTs feature. Here, explore the "Look" menu and click "Browse" to outsource an LUT from your device. Once the LUT is applied, you can explore the color grading options to enhance the visuals of your videos.
Part 2. Top 10 LUTs of Adobe Premiere Pro
Now that you know a little about the Look-Up Tables, the thought of using them sounds intriguing. Before we jump to the use, we must know about the top Adobe Premiere LUTs that can elevate your visuals. Follow the list below and explore some of the best presets that are compatible with this video editor:
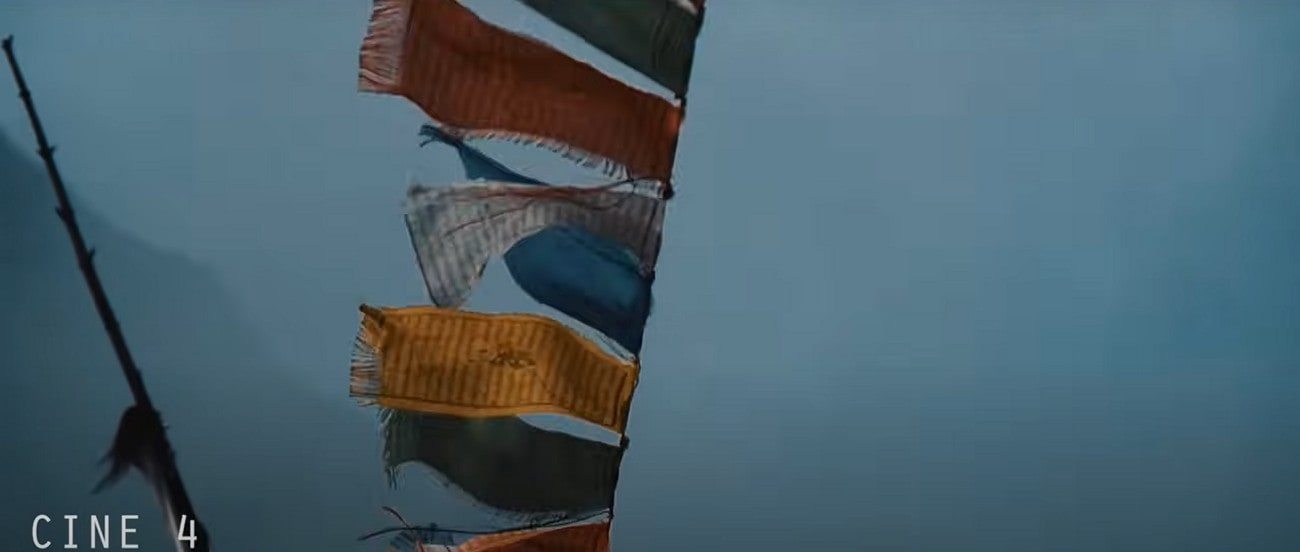
1. Cine 4
With its cool tones and a cinematic vibe, the Cine 4 preset is a perfect fit for your melancholic videos. It is suitable for films that are set in the evening with no sunlight. You can also avail yourself of this LUT in footage recorded indoors or with cool surroundings.
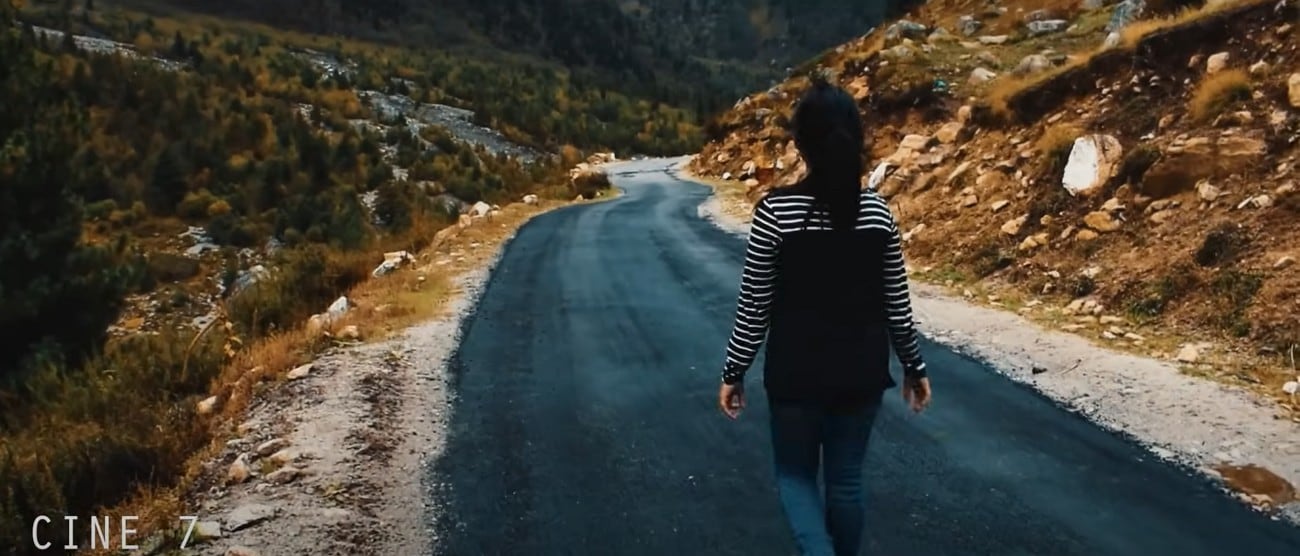
2. Cine 7
When in an outdoor shoot after sundown, use the Cine 7 LUT for Adobe Premiere Pro. This preset can also be of use in videos recorded on a cloudy day. The balance of warm and cool tones in this LUT makes it versatile for a range of use cases.
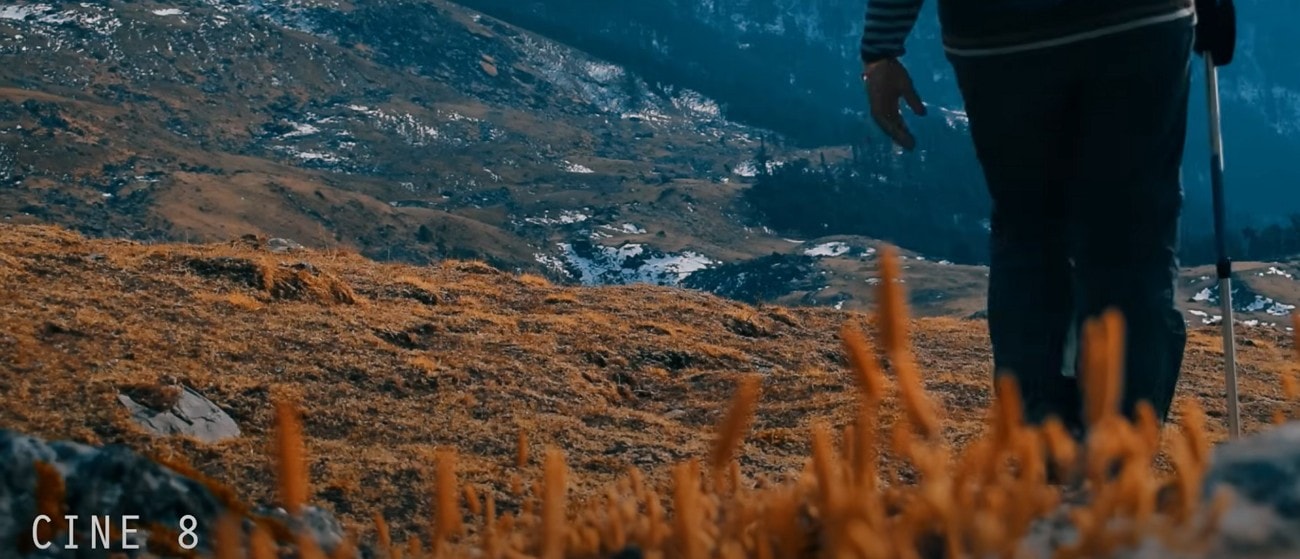
3. Cine 8
Much like the Cine 7 LUT, this one also suits the outdoor videos. Cine 8 has a diverse color that intensifies the tones of the objects, whether cool or warm. It especially looks vibey in a sunlit video that has hints of nature.
4. Thriller LUT
When in a cinematic mood, use the Triller LUT and bring out the inner artist in you. The green tones of this Premiere Pro LUT make it perfect for a film shot in nature. It will enhance the green of the trees and the grass when used in a movie.
5. FUJI 3513
If you like neutral tones in your videos, the FUJI 3515 is the right preset to use. Its balance of color and the moody vibe make it versatile enough to be used in indoor and outdoor films. It is typically suitable for short films that represent the old times.
6. REDLOG FILM TO REC709
Videos shot in broad daylight can be enhanced by the use of this free LUT for Premiere Pro. The mix of green and red tones makes it a fit for sad and dramatic films. Moreover, it can also be used to depict the cold weather in a video shot in the winter.
7. Blue Hour
As the name suggests, the Blue Hour LUT is more on the blue and green tones. It can be used in scenes where you need to enhance the warm tones of a frame. Filmmakers can also benefit from its cool vibes to show a scene with an apocalypse or a sad scene.
8. Waves
You can download free LUTs for Premiere Pro, like this one, and give a green cinematic vibe to your films. It can be a match made in heaven for your films that have elements like water, snow, or smoke. The Waves LUT will be a source of enhancement for your footage with white objects. Video editors can also make use of this preset in a movie set in the countryside.
9. Kodachrome
When in the mood to edit a video with a city travel, use the Kodachrome LUT. Its retro vibes can also make a perfect match for videos that are meant to take you back to the old times. The balance of yellow and orange tones in this preset makes it a diverse option for a range of genres. This preset can also be used as a gothic tone for your horror videos.
10. Hiddenite Dark and Cold
As the name suggests, this cinematic LUT for Premiere Pro is meant for videos that are shot indoors. Filmmakers can benefit from its intense blue tones and utilize it in films that have an artificial source of light. This LUT is a fit for occasions when you need to create a vibe and communicate it to the viewers.
Part 3. Exploring a Better Alternative to Adobe Premiere Pro LUTs
Although downloading free LUTs for Premiere Pro is a viable option, it requires professional editing skills. When looking for a user-friendly option, try Wondershare Filmora on your Windows and Mac devices. With advanced color correction and video-editing utilities, Filmora can replace any video editor. Besides offering you an array of built-in LUTs, this platform enables you to browse and outsource presets from your device.
Once you have applied the LUT, you can easily customize it by applying color grading options. If you like the final product of color grading, save it as a custom preset to use it easily in the future. To top it all, Filmora has a super easy-to-use interface that offers easy navigation from feature to feature. Users can preserve the video quality by exporting their videos in quality as high as 4K.
 secure download

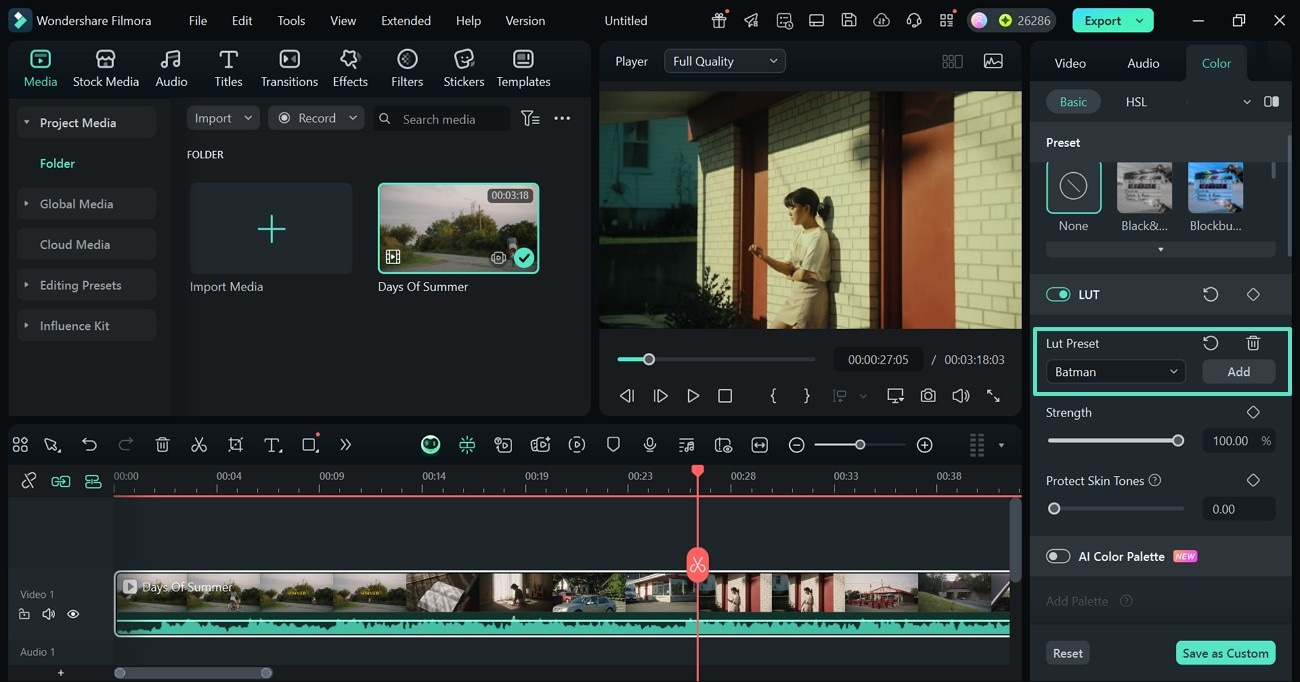
Using Wondershare Filmora to Apply the LUT Presets
Wondershare Filmora allows users to adjust the strength of the LUTs once they are applied. They can also preserve the skin tones in the videos by using the relevant sliders. Follow the guide below for further information on this Adobe Premiere LUTs alternative:
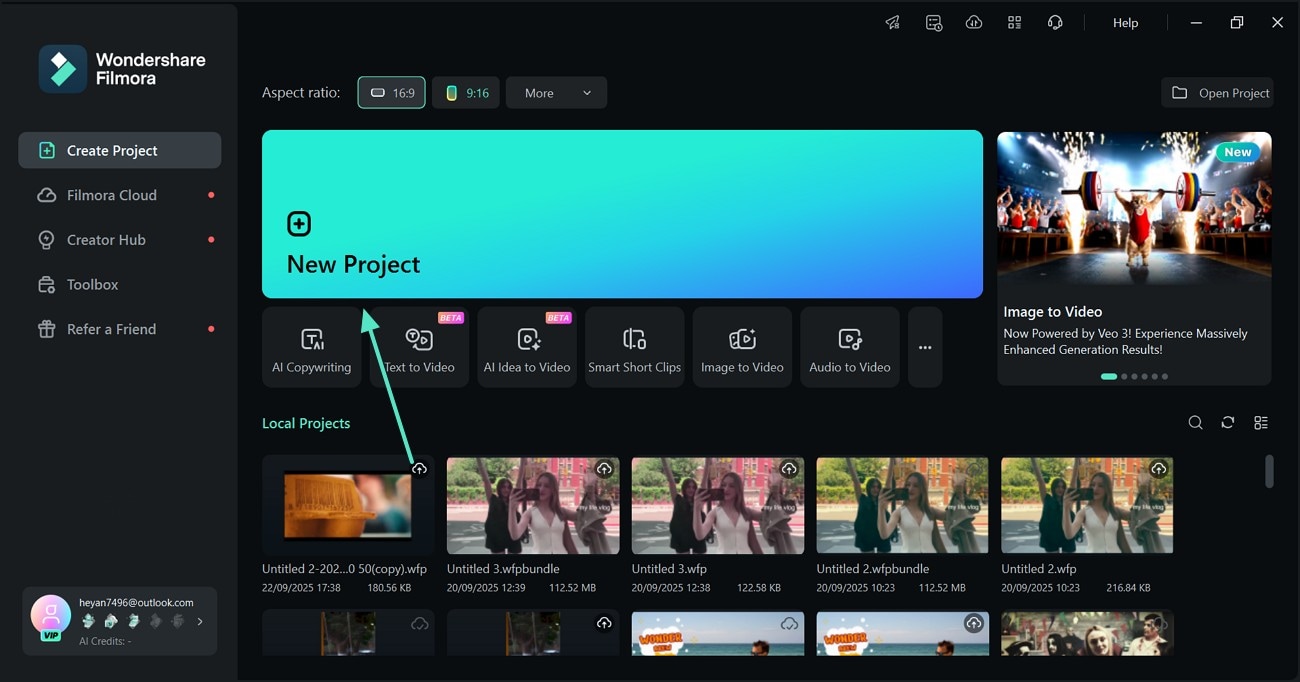
- Step 1. Begin a New Project to Import a Video. Start the process by clicking the "New Project" option and importing a video from the next interface.
- Step 2. Apply a Built-In LUT Preset. After dropping the video to the timeline, enter the "Color" tab from the right side and select "Basic." In this panel, enable the "LUT" toggle and select a suitable preset from the relevant menu. Once applied, customize its intensity by using the designated "Strength" slider. If your film has faces, use the "Protect Skin Tones" option to preserve the original look.
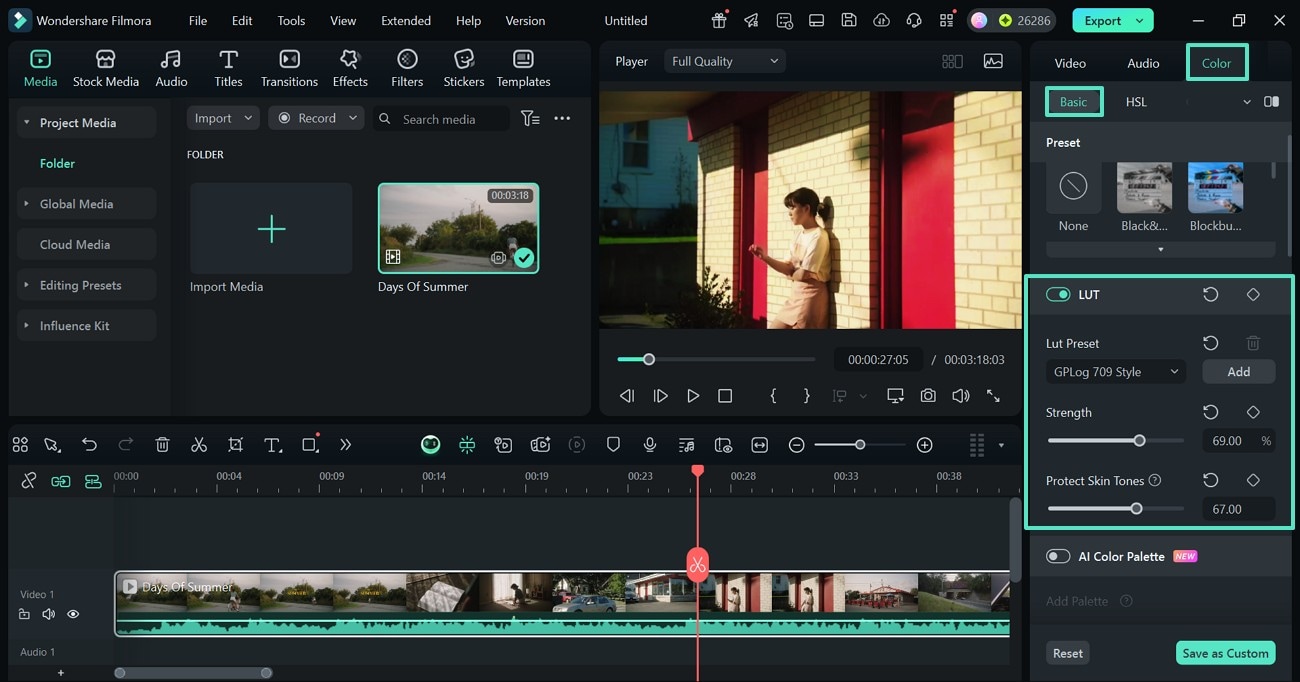
- Step 3. Outsource an LUT. If you do not like the built-in presets, select the "Add" button from the "LUT Preset" section to outsource a resource.
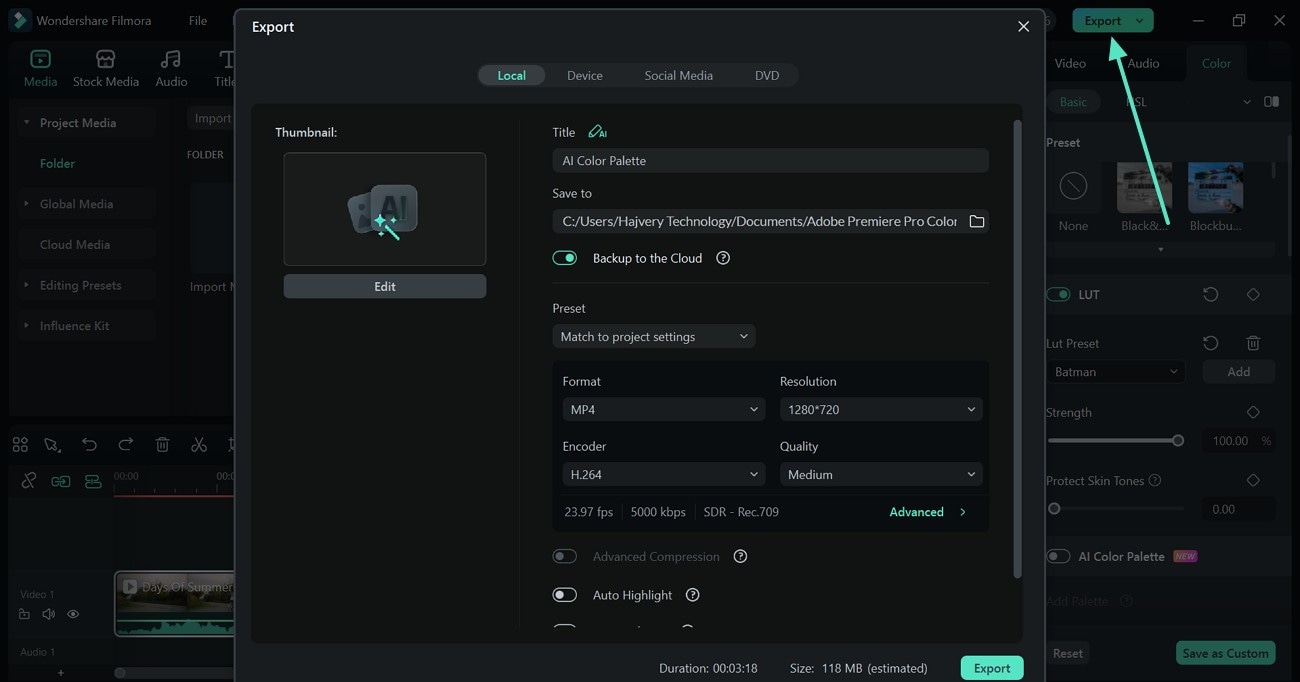
- Step 4. Export the Edited Video. After applying the desired customizations to the preset, select the "Export" button at the top right to save the video to your device.
secure download
Conclusion
In essence, Premiere Pro is the go-to video editor for many filmmakers due to its advanced functionality. They benefit from the Premiere Pro LUTs to enhance the look of their videos with a single click. Filmora was introduced in this article as a better alternative due to its professional-grade LUTs and color grading features. Filmora is a better option, as it offers more vibey LUT presets along with a user-friendly interface.
