
 100% Security Verified | No Subscription Required | No Malware


 ChatGPT
 Perplexity
 Gemini
 Claude
 Grok
Grok
Think of a dull wedding film that makes you feel like you wasted the day. It is natural for a videographer to feel this way until they unbox the Premiere Pro Lumetri Color panel. With this panel, you can make extensive color changes to the video and make it look full of life. With a few adjustments, dull skies turn radiant, and every frame carries cinematic warmth.
This blog is a guide on using this panel to achieve your dream video editing. We will also explore alternative solutions to Premiere Pro that offer improved usability and feature richness.
In this article
Part 1. What is Lumetri Color and How to Use it?
When you open Adobe Premiere Pro, the "Color" tab on the right side has a Lumetri Color panel that enables advanced color grading. This panel enables you to edit your videos using its 6 sub-panels. It is Lumetri Color that lets you add LUTs to the video by using the built-in and outsourced resources. Users can also utilize this space to apply a color match to their videos.
From HSL Wheels to Curves, there are many modes of adjusting video pigments. All in all, the Lumetri Color panel is the home to minimal to extensive color grading in Premiere Pro. To learn how you can use the Premiere Pro Lumetri to make a video edit, follow the guide below:
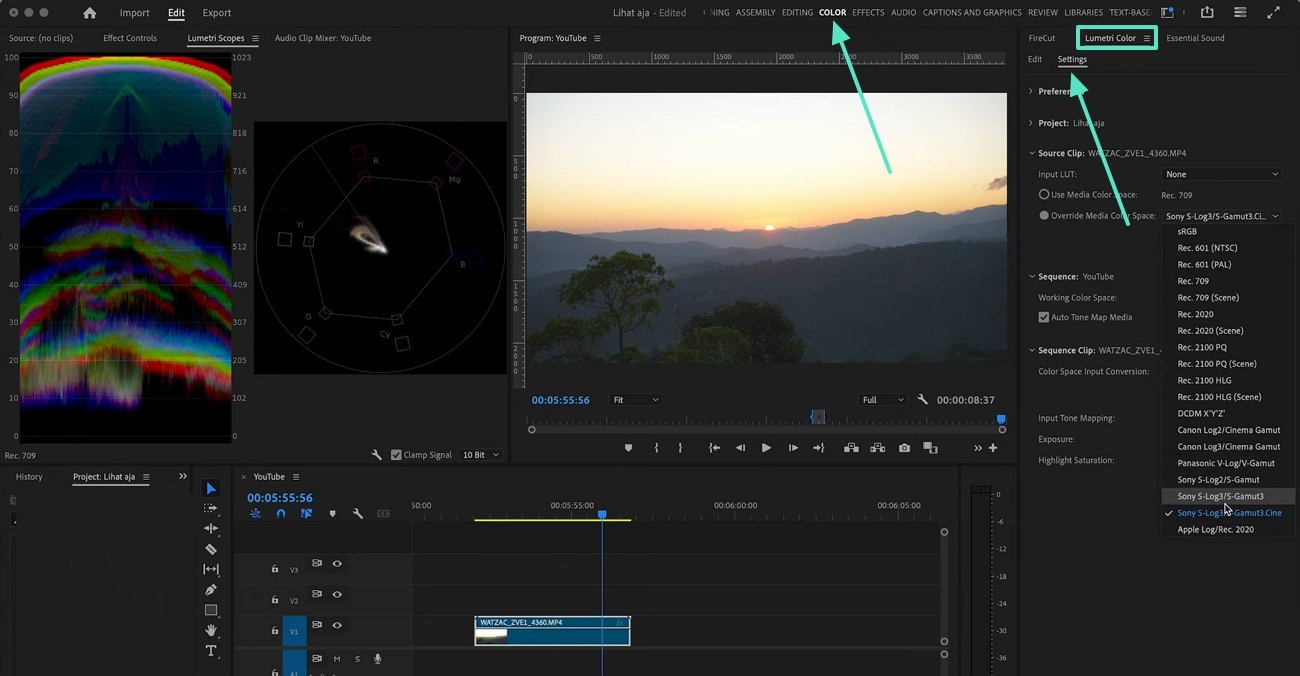
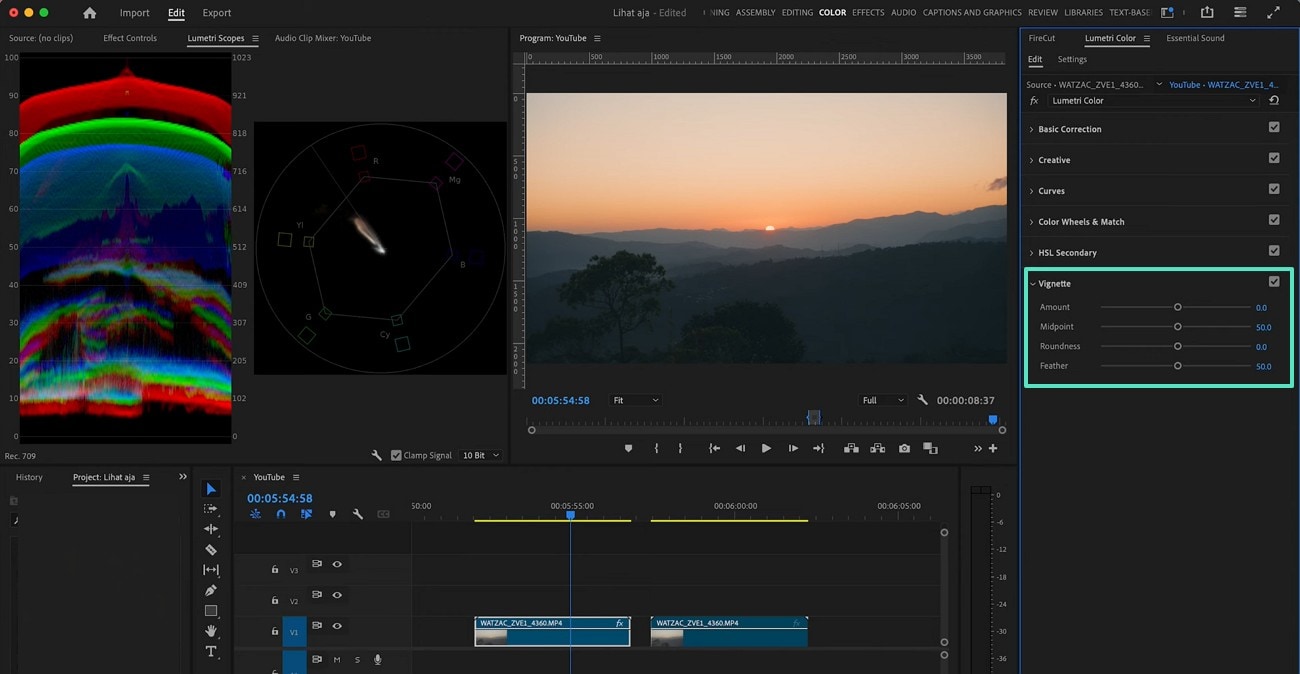
Step 1. Before we jump to the editing, we must first understand the settings of the Lumetri Color panel. To do this, enter the "Color" tab at the top and enter the "Lumetri Color" panel. Now, approach the "Settings" section and explore it. From preferences to the media color space, you can choose any desired setting in this panel. The "Lumetri Scopes" section on the left will provide you with an analysis of the colors in the video in a waveform.
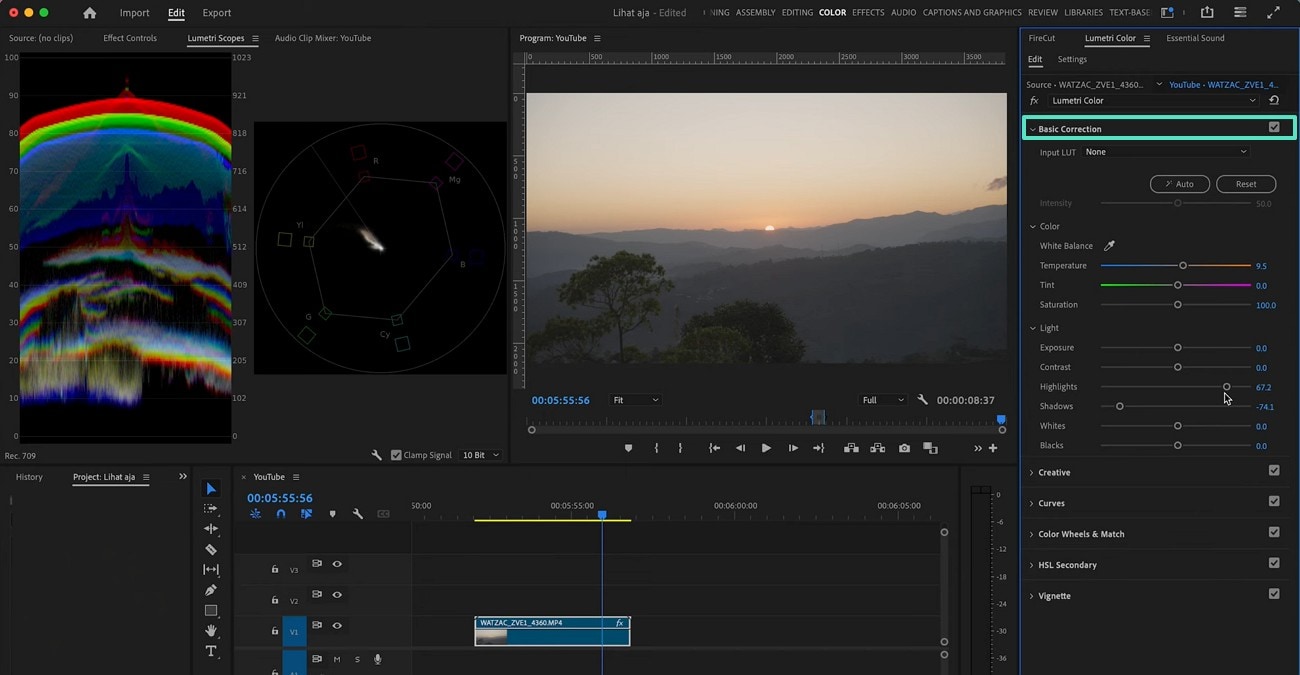
Step 2. Once you have entered the settings, select the Edit tab in the panel and expand the "Basic Correction" menu to make the necessary color edits. This section will enable you to adjust the white balance and the lighting of the video.
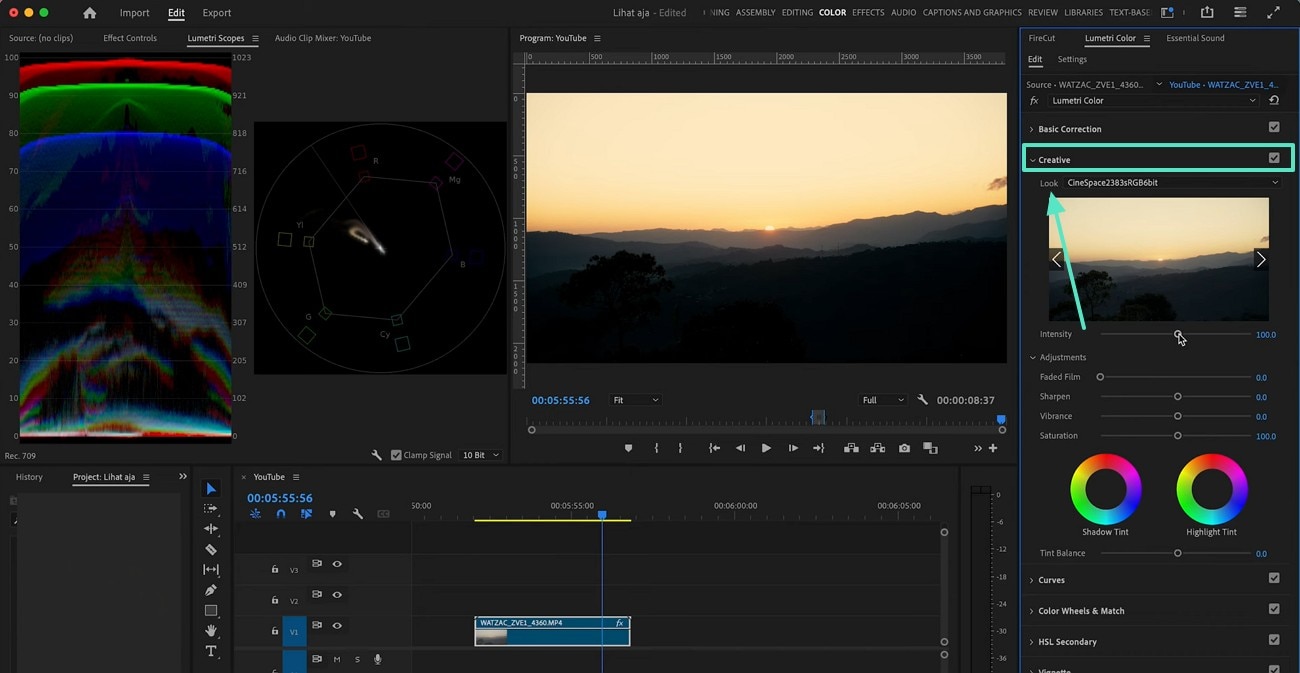
Step 3. Advance to the "Creative" menu and apply a LUT from the "Look" drop-down menu. You can use this menu to outsource a preset from your device. As you scroll down, you will be able to make more color adjustments using the sliders.
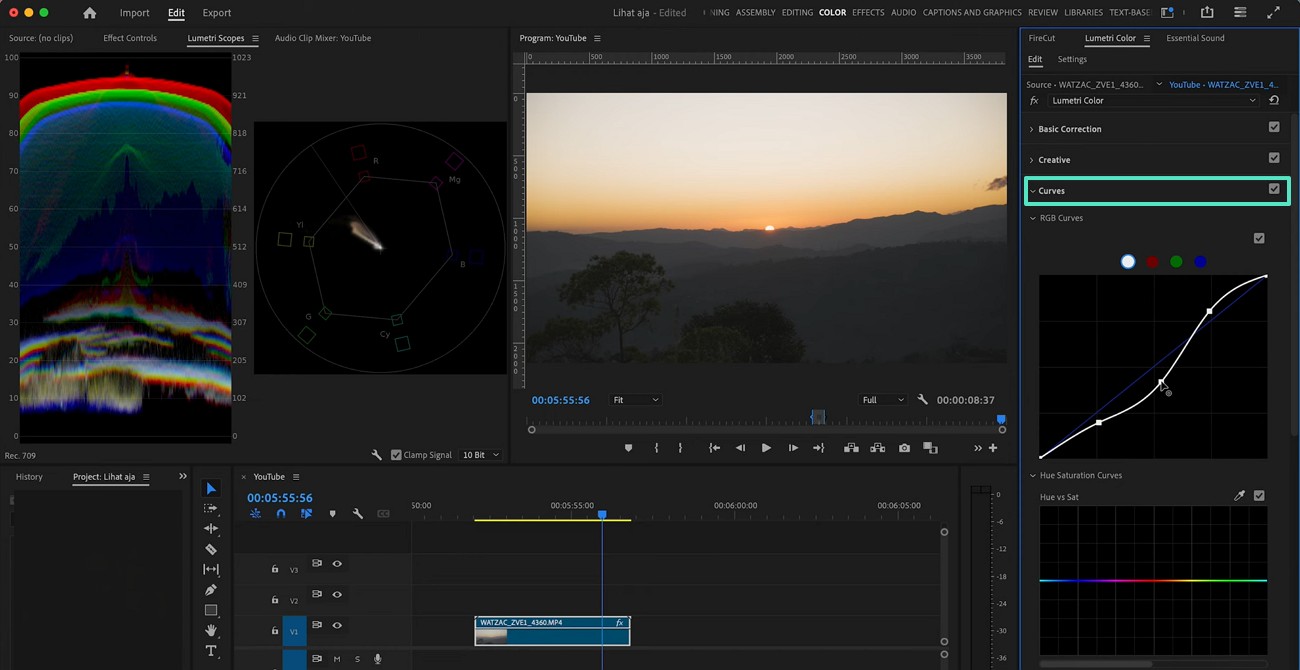
Step 4. Afterward, unfold the "Curves" section and adjust the colors using the designated graphs.
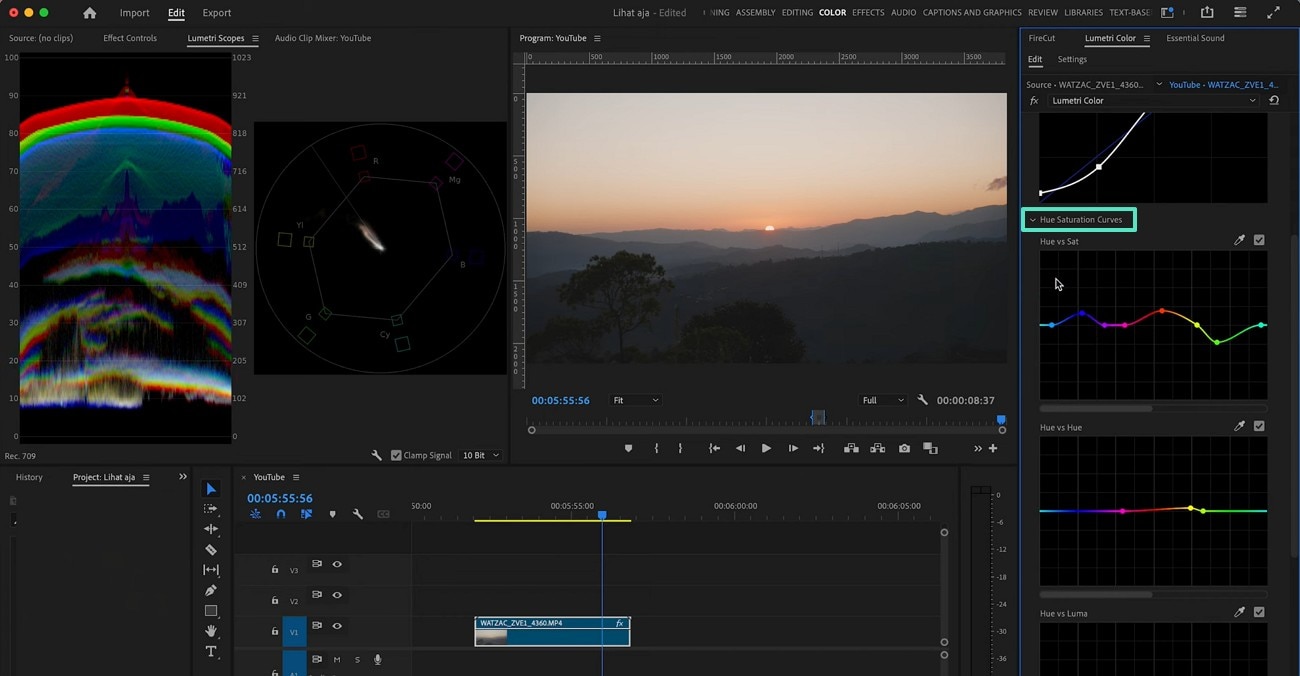
Step 5. From "Hue vs Sat" to "Hue vs Hue," there is a lot you can do to adjust the appearance of your film.
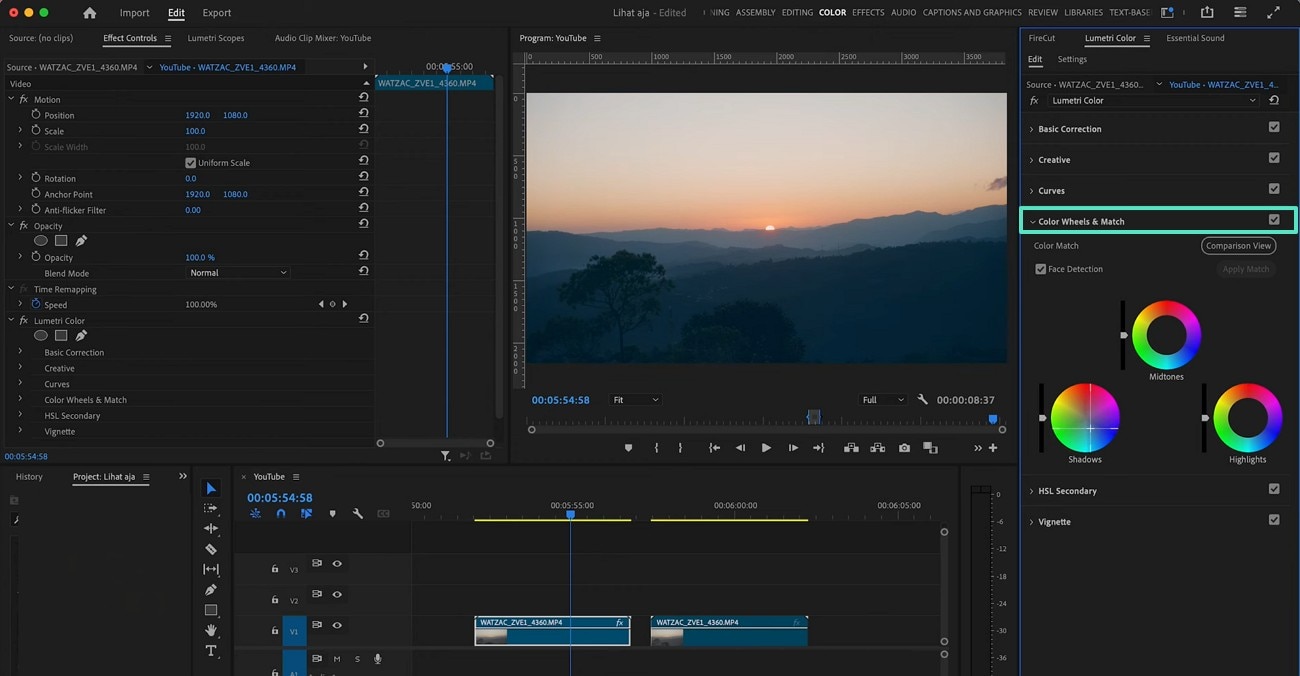
Step 6. Using the "Color Wheels & Match" panel, set the midtones, highlights, and shadows by playing with the wheels.
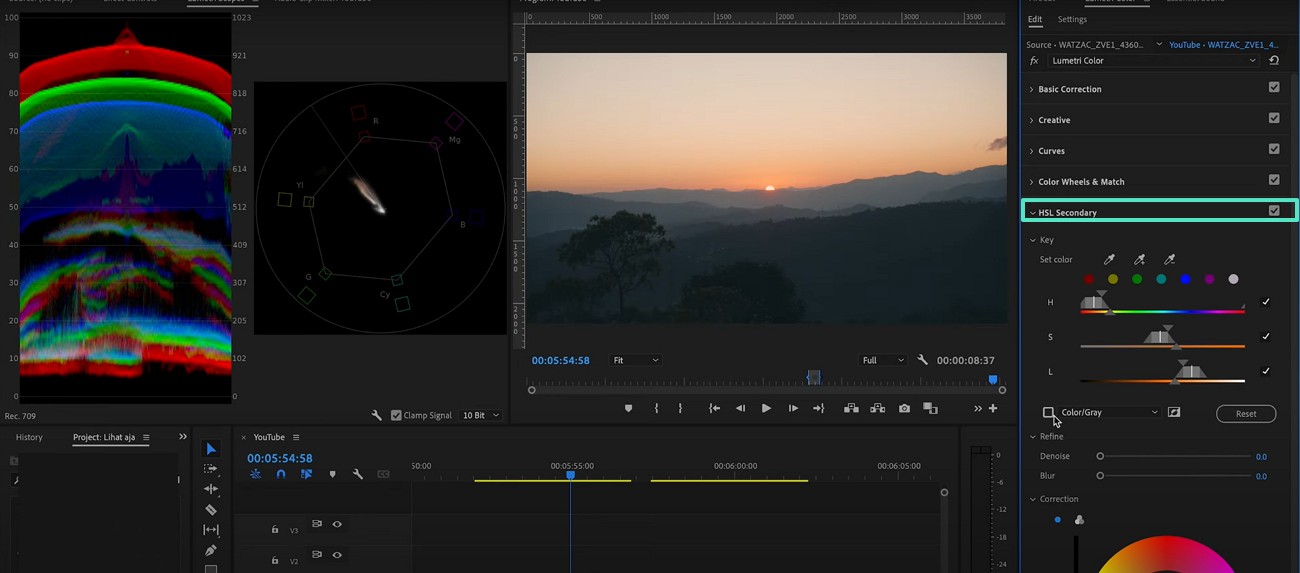
Step 7. By scrolling down, unfold the "HSL Secondary" menu to customize the H, S, and L of the video of 7 color tones. This panel will also enable you to replicate the colors using the color picker.
Step 8. The last menu in the panel is the "Vignette" menu that provides you with 3 settings. You can adjust the "Amount" of darkness and the direction of the vignette.
Part 2. Exploring a Better Alternative to Premiere Pro: Wondershare Filmora
Now that we have been through the working of Lumetri Scopes Premiere Pro, we realize that the color grading process is complex and needs some prior experience. As a better alternative to this tool, we will introduce Filmora. It has a user-friendly interface and is equally diverse in features. Filmora offers a blend of manual and AI functionalities to give you the look of your dreams.
This platform offers a unique option of saving the color grading settings as custom presets for future edits. To ease the workflow, you can benefit from the built-in LUT presets or outsource your favorite resources from third-party providers. As for the automation, users can enable the AI Color Palette to maintain consistency in the tones. Once the tones are replicated, adjust the intensity of similarity to get the desired outcomes.
 secure download

A Complete Walkthrough Guide on Using Wondershare Filmora for Color Grading
From color grading to color correction and more, there is a lot you can do in the Color panel. The following guide provides detailed instructions on using this Premiere Pro Lumetri Color panel alternative:
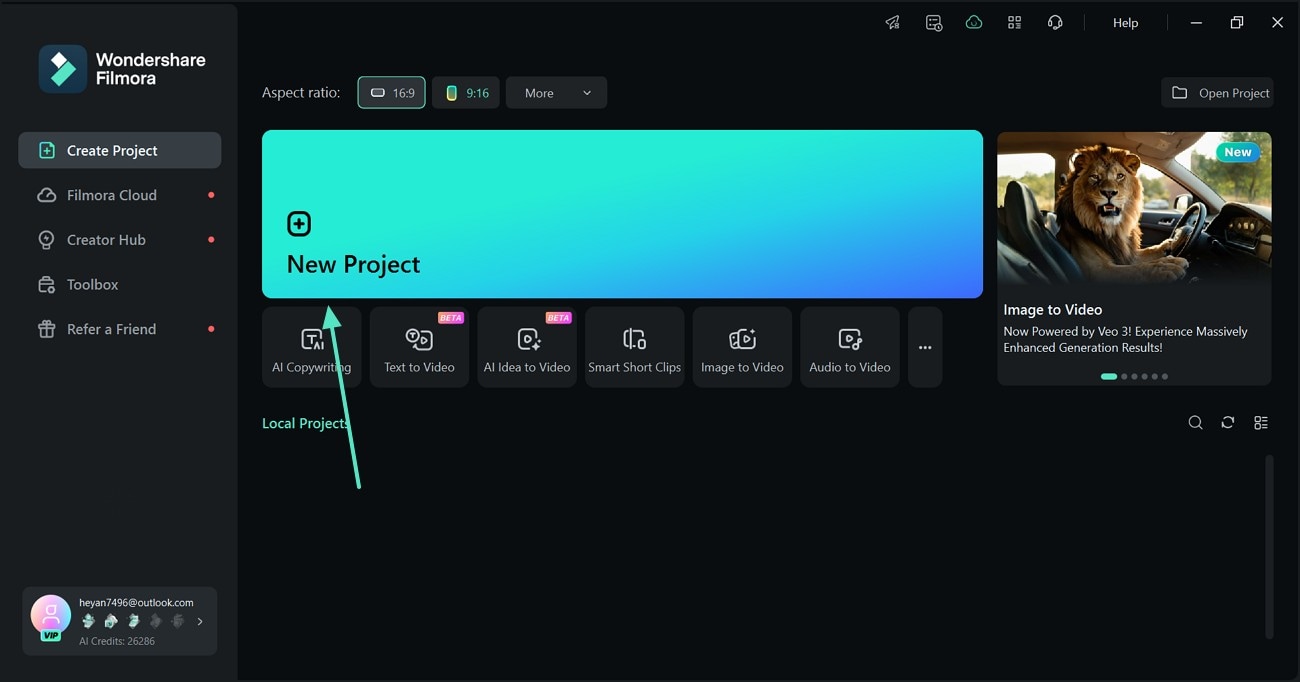
- Step 1. Initiate a New Project to Import a Video. To start your color grading process, select the "New Project" button and import a video.
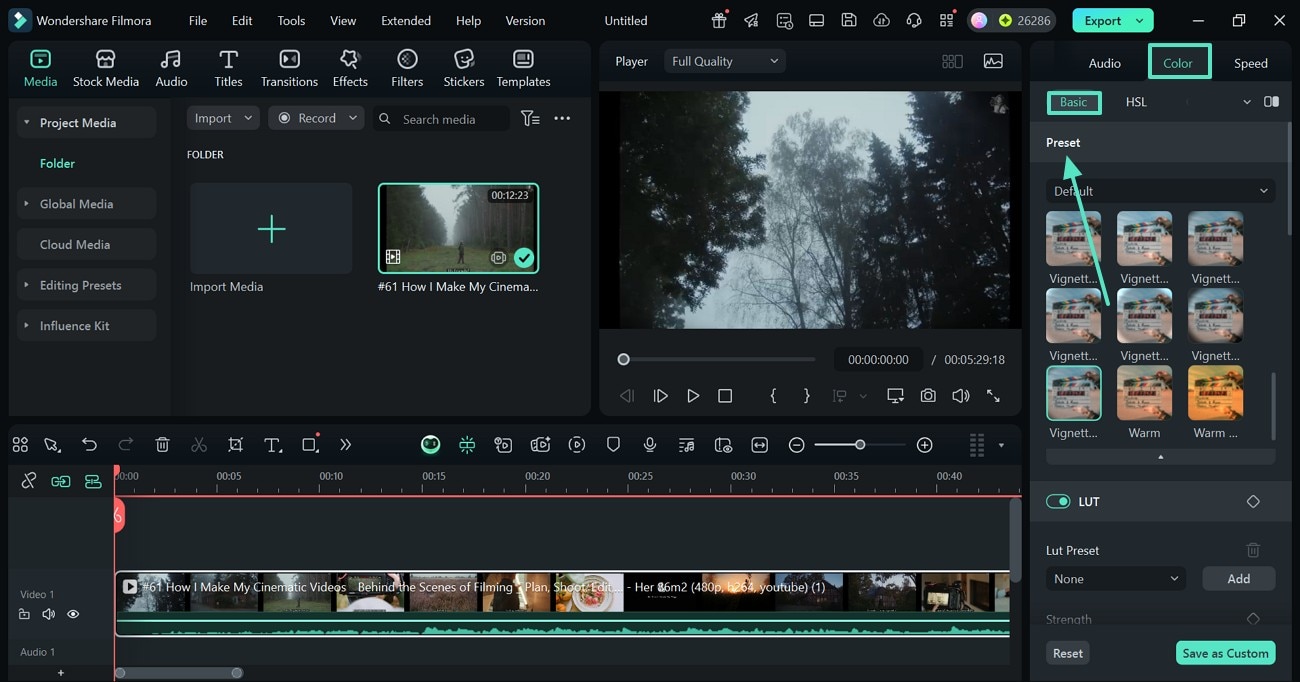
- Step 2. Apply a Preset to the Video. Once the video makes it to the timeline, enter the "Color" panel on the right to unveil the "Basic" section. Here, explore the "Preset" menu to pick a one-click overlay for the film. This technique helps you avoid the manual process by providing easy-to-apply options.
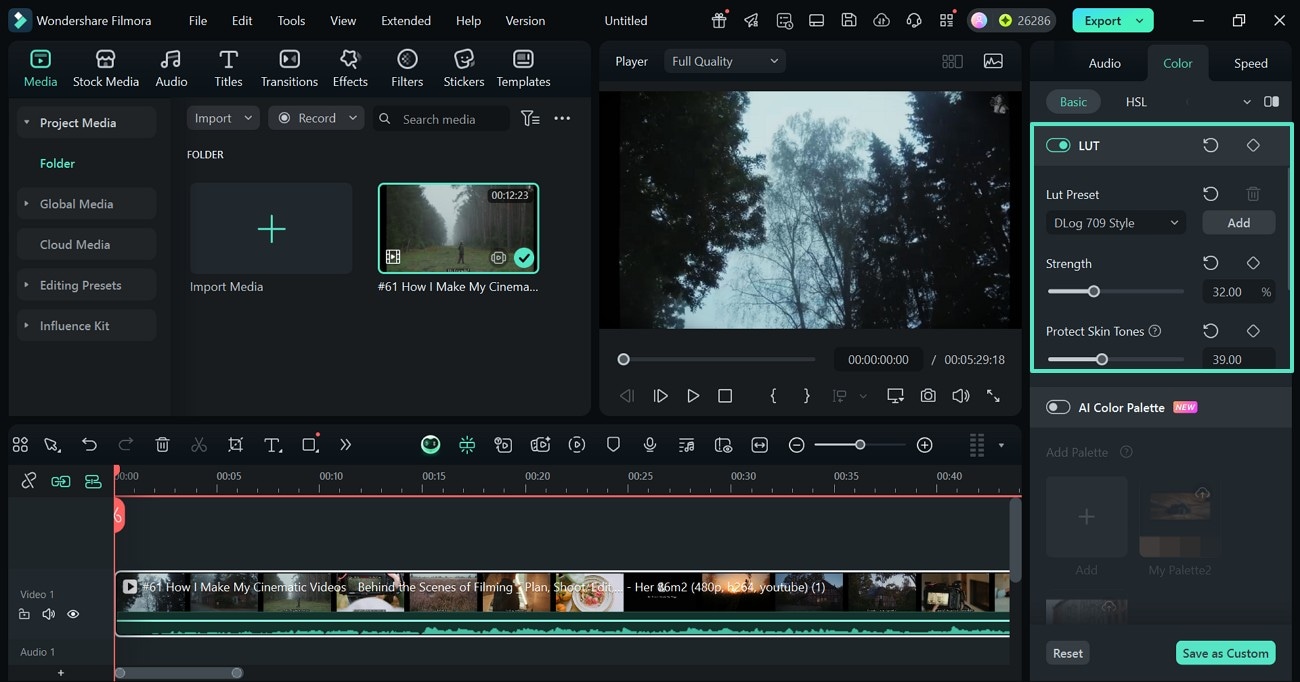
- Step 3. Select a LUT Preset and Customize it. Now, scroll down and enable the "LUT" toggle and select a suitable preset from the designated menu. By clicking the "Add" button, you can browse your device to outsource a preset. Using the 2 sliders, adjust the "Strength" of the preset and preserve the original tones of skin in a video with faces.
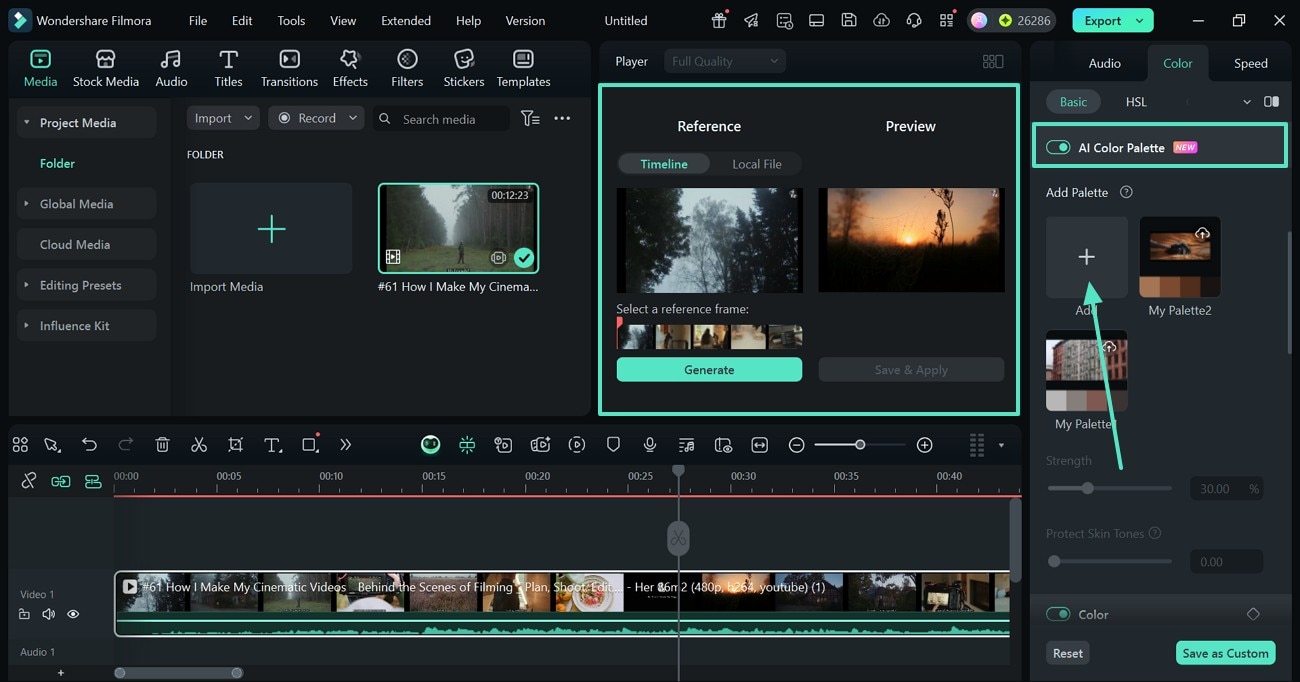
- Step 4. Enable and Use the AI Color Palette. If you like the tones of a frame in the video, turn on the "AI Color Palette" option to replicate that tone for another scene. To do this, select the "+" button to see a comparison window between the reference and the preview scene. Using the slider under the "Reference" section, slide the playhead and select the frame that has the tones you need to copy.
To select the preview scene, simply go to the video track on the timeline and adjust it where you want the tones. Once the scenes are selected, click "Generate" to replicate the tones and press "Save & Apply" to apply the tones to the preview scene.
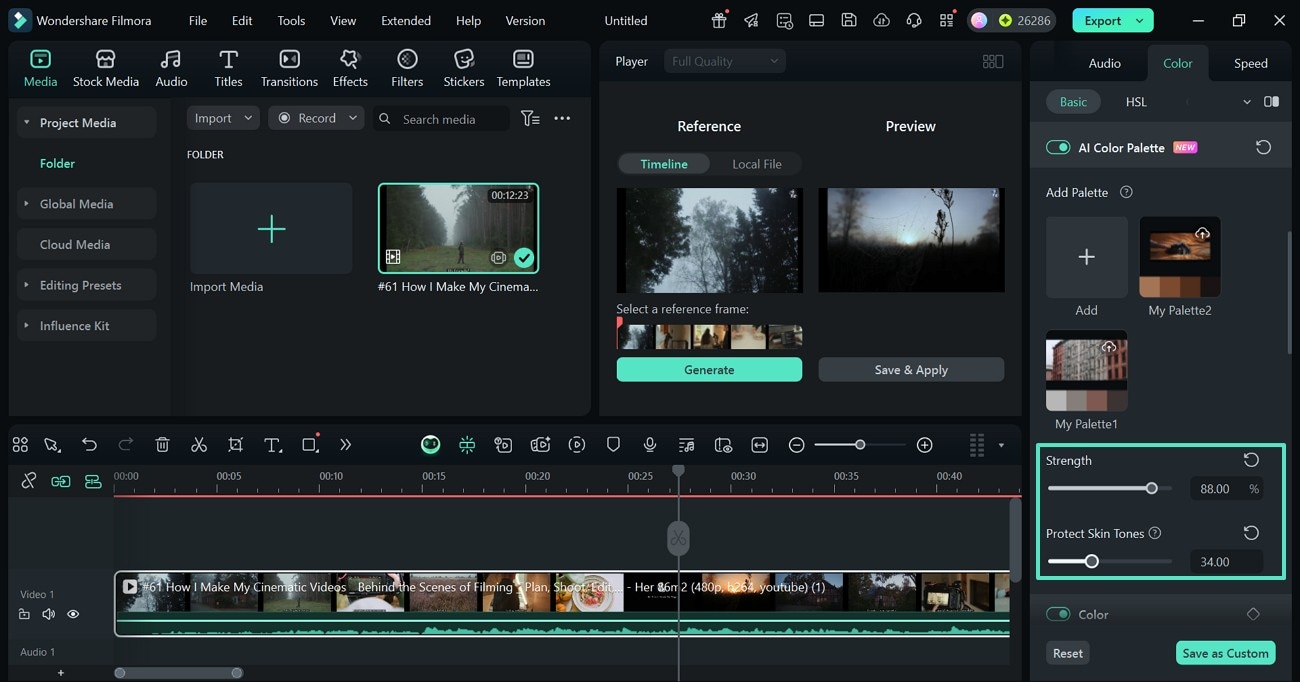
- Step 5. Customize the Tones. Now that the tones are replicated, use the "Strength" slider to adjust the intensity of your colors. If your video has people, drag the "Protect Skin Tones" slider to preserve the natural skin tones.
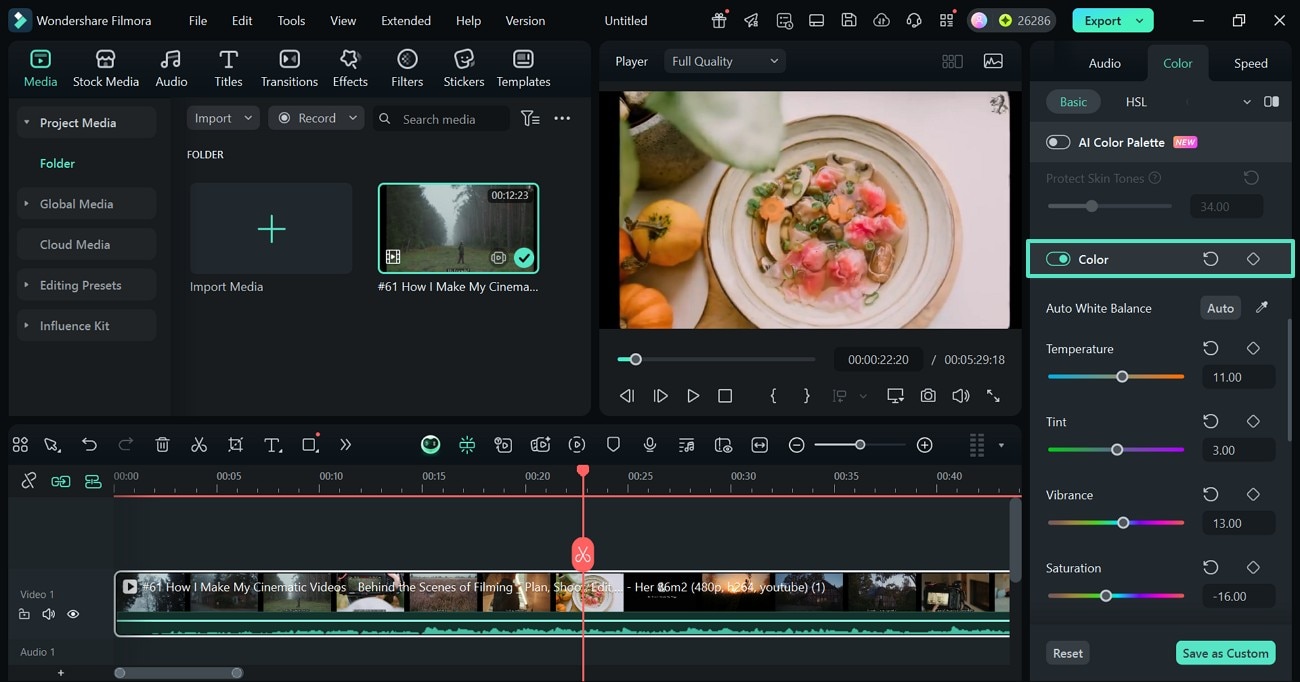
- Step 6. Set the White Balance of the Video. To adjust the white balance of the video, enable the "Color" option and drag the color sliders to get the balance. You can also click "Auto White Balance" to apply a one-click balance to the tones.
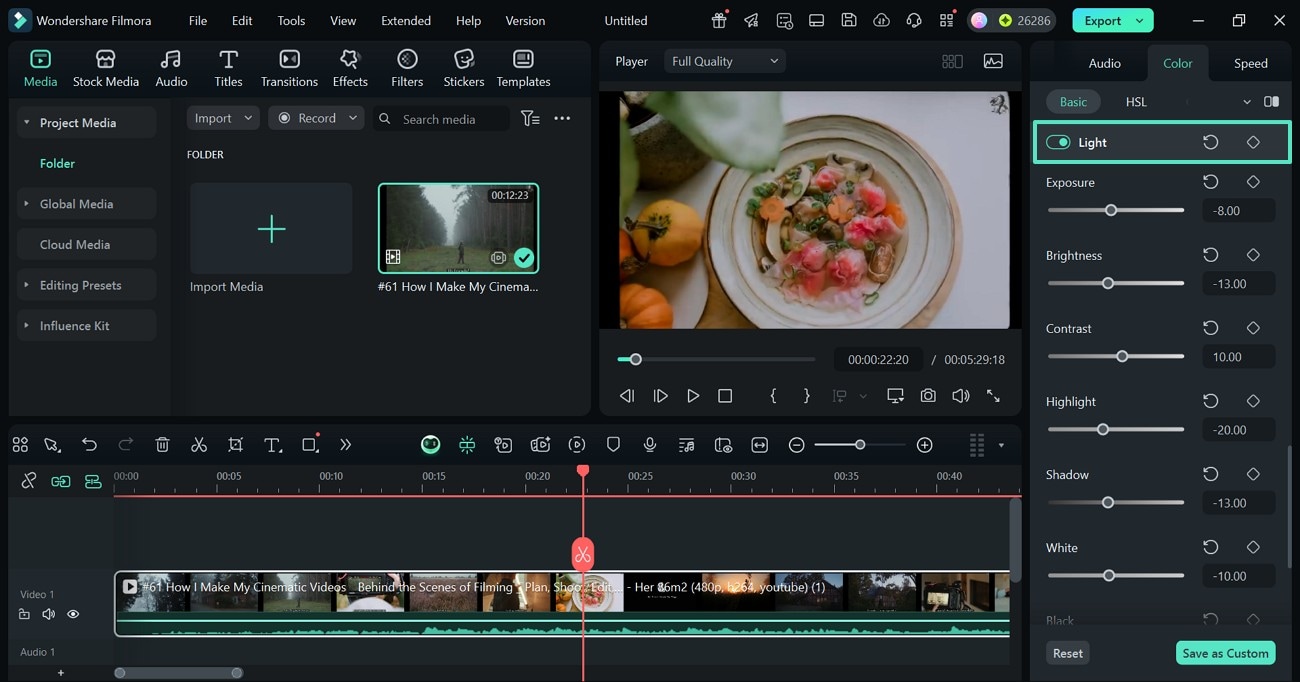
- Step 7. Adjust the Light of the Film. To create a consistent aesthetic, scroll down and enable the "Light" toggle to unveil a new section. Here, use the designated sliders to make changes to the lighting of the footage.
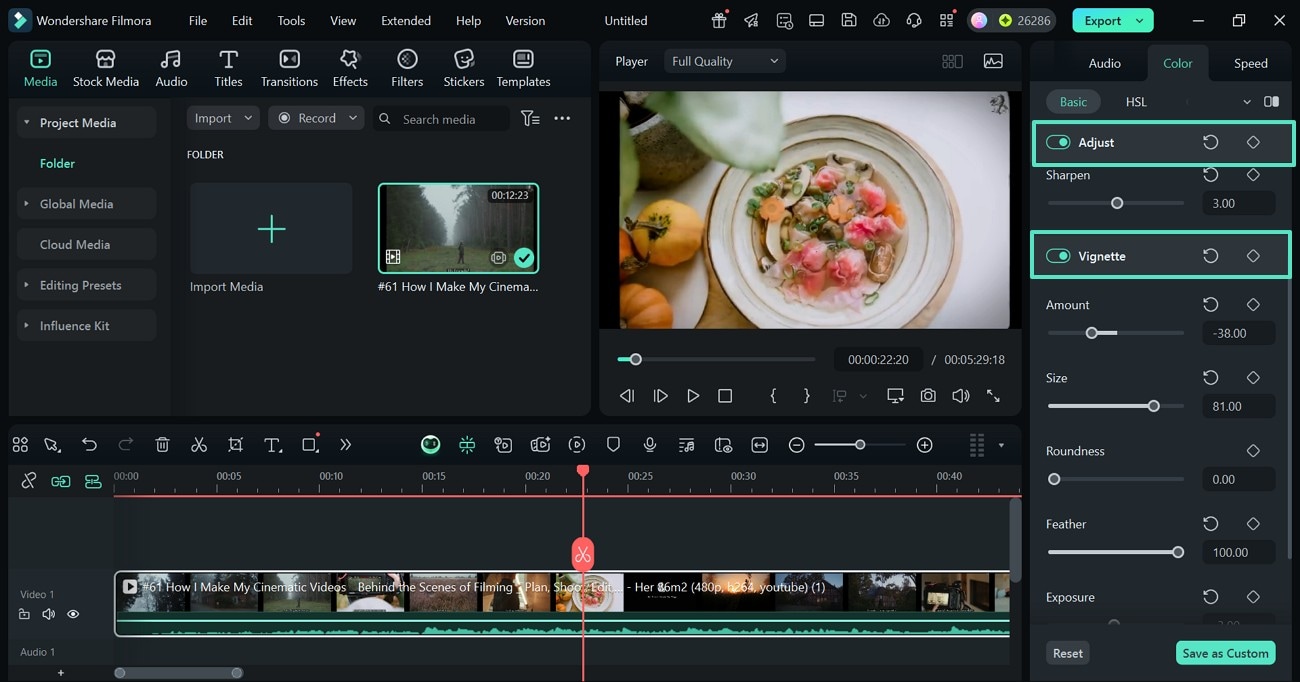
- Step 8. Apply the Sharpness and Vignette Effects. To make advanced changes to the details of the video, enable the "Adjust" option and "Sharpen" the frame using the relevant slider. Now, add black or white round frames to your film by exploring the "Vignette" tabs.
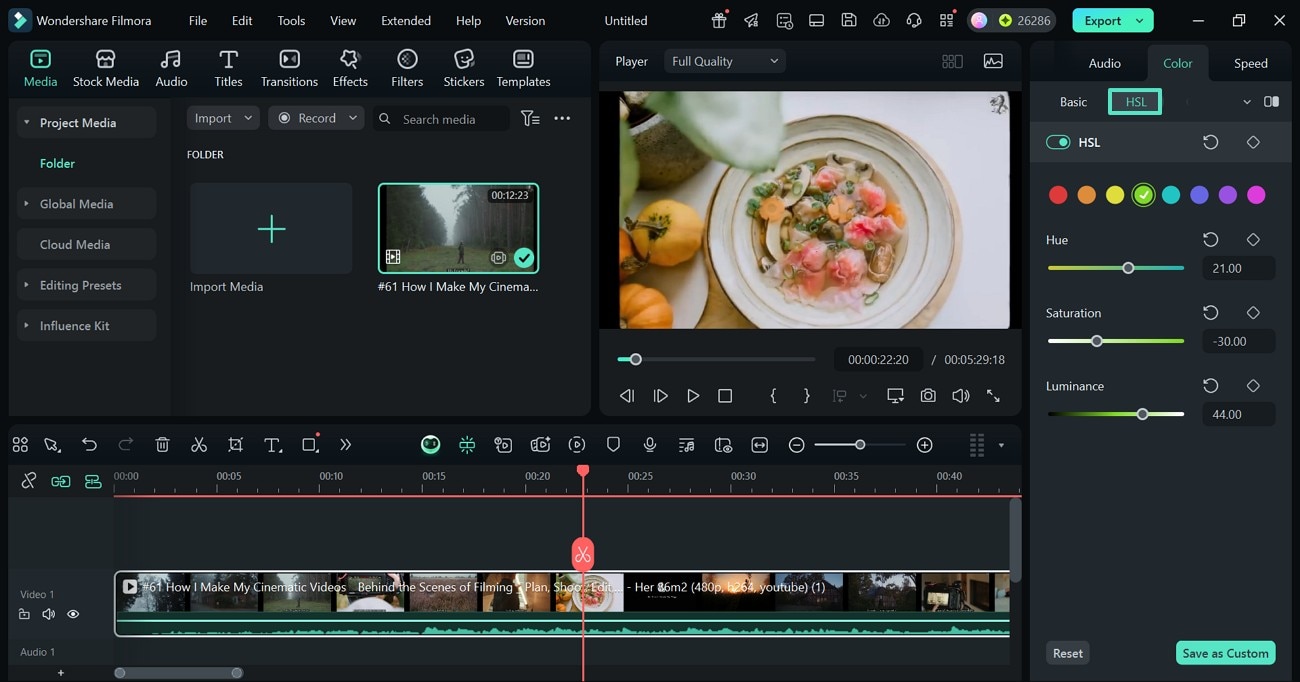
- Step 9. Explore the HSL Tab. For adjusting the hue, saturation, and luminance of the tones, explore the "HSL" tab. Now, enter each color setting to create a custom effect.
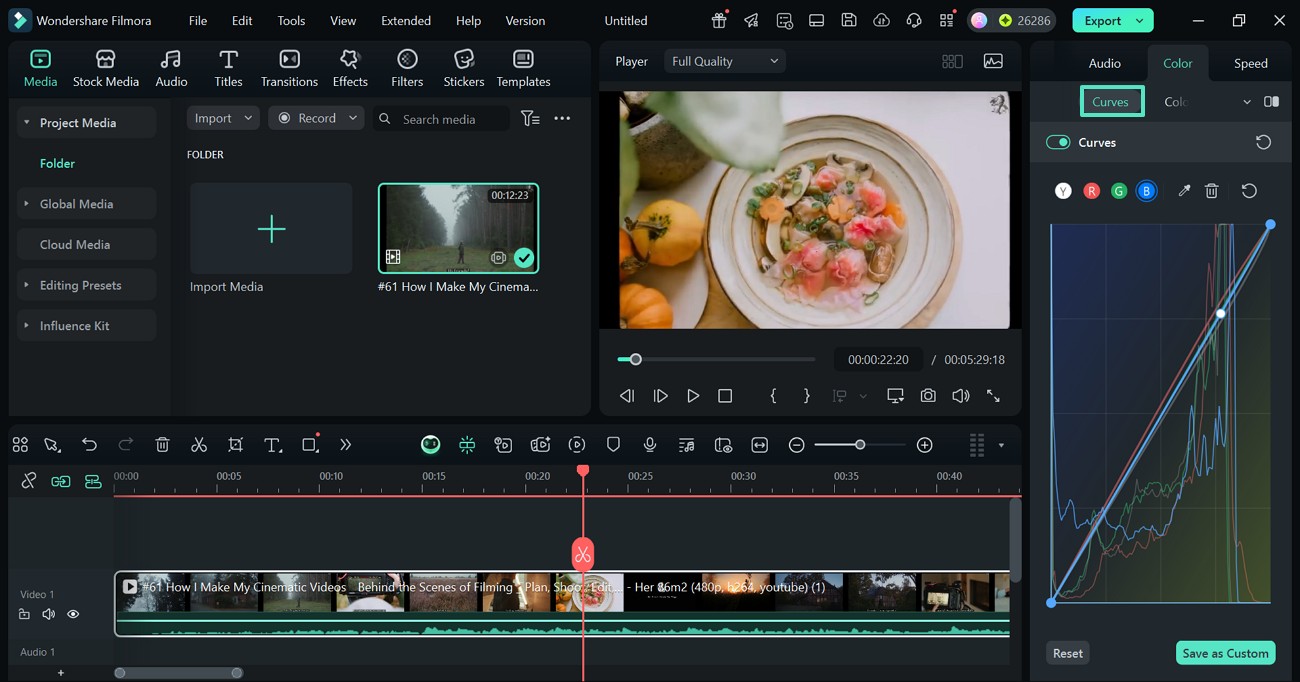
- Step 10. Set the RBYG Tones of the Video. For a subtle, cinematic vibe, enter the "Curves" section and use the graph to make the adjustments. If you want to copy the RBYG aspects of an object in the video, use the color picker to replicate its settings and apply it to the frame.
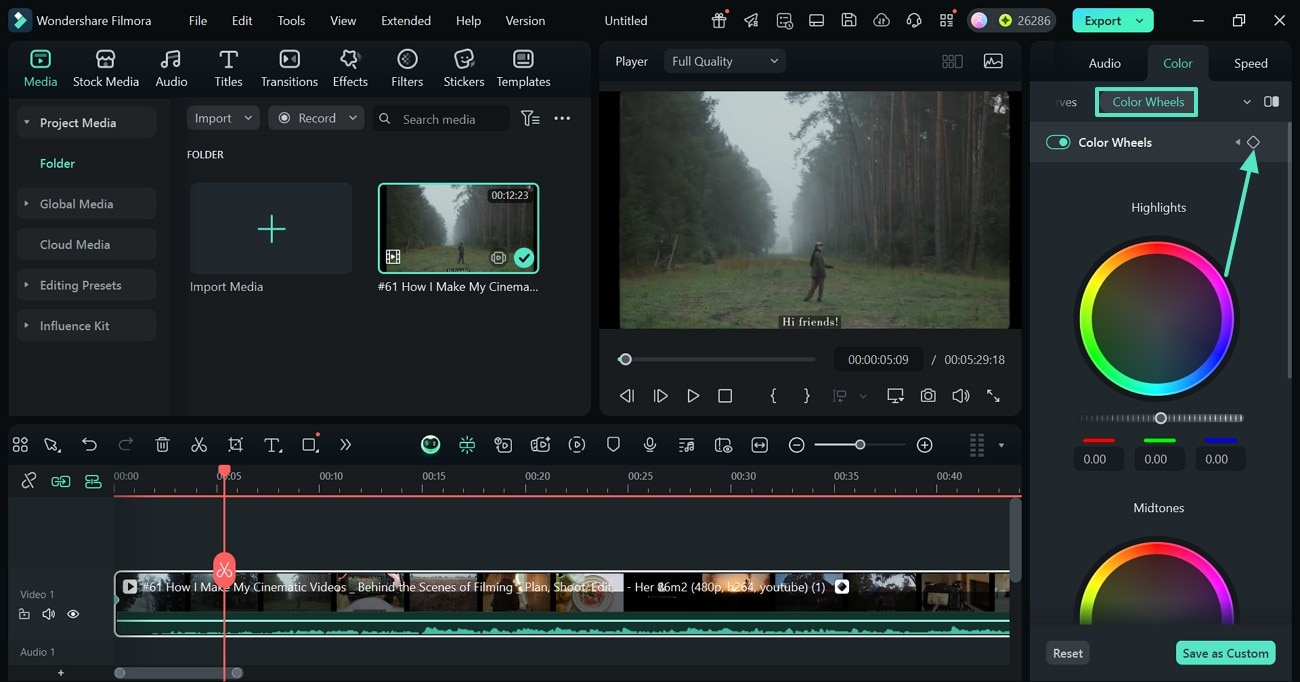
- Step 11. Use the Color Wheels with Keyframing. Lastly, explore the "Color Wheels" section and select the "Keyframing" icon. This selection will enable you to assign a unique color grading to each scene. To create keyframes, select the keyframing icon and move along the video track in the timeline.
Click the icon again at the point where you want the scene to end. Repeat this process for each scene, assigning a new keyframe every time. Once done, you'll be able to adjust and edit the colors from one keyframe to the next throughout the video. Keyframing can be done on "Color Wheels," "HSL," and the entire "Basic" editing panel.
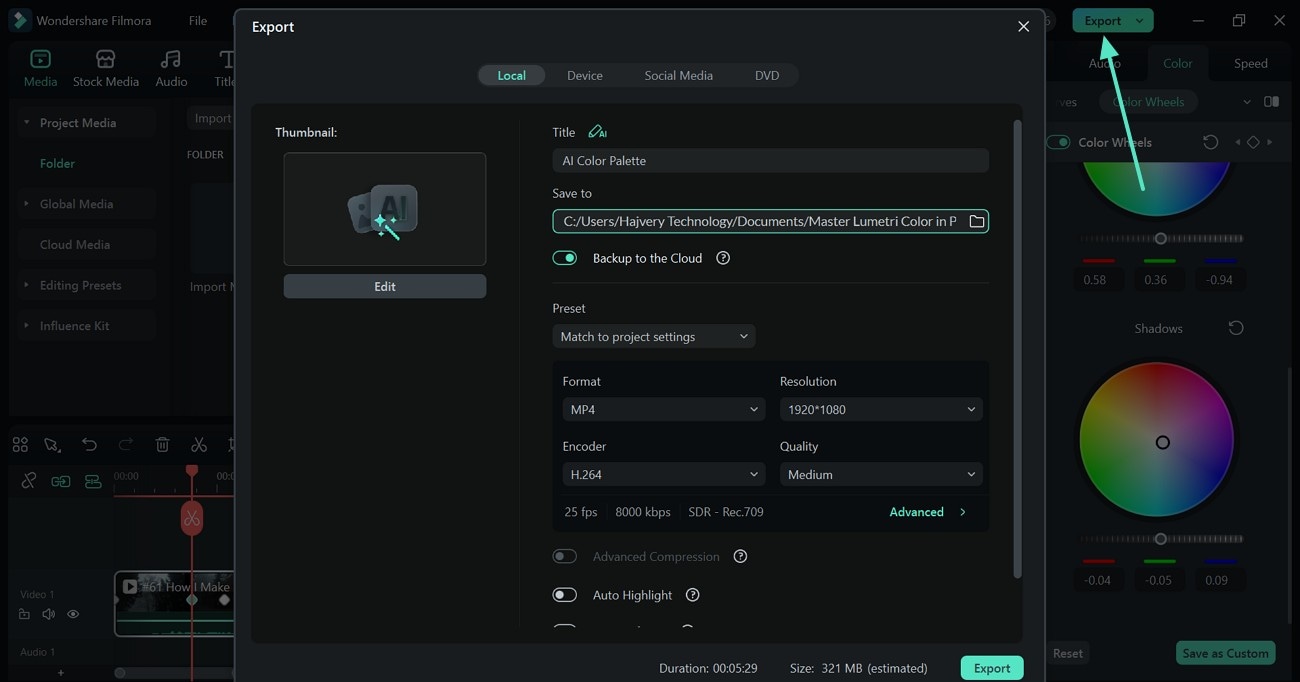
- Step 12. Save the Color-Graded Video to Your PC. Once you are done adjusting the pigments of the video, select the "Export" button at the right to save the video to your device.
secure download
Conclusion
Conclusively, the Premiere Pro Lumetri Color panel is a revolutionary toolkit in the world of video editing. With its extensive color grading options, it enables you to make advanced changes to the vibe of your videos. This article was a detailed guide on using this panel and exploring a better alternative, Filmora. This platform has an easy-to-use interface with extensive color grading features that have cinematic outcomes.
