
 100% Security Verified | No Subscription Required | No Malware


 ChatGPT
 Perplexity
 Gemini
 Claude
 Grok
Grok
With the technological advancements, we can make our films look exactly like we want. The manual and automated color grading options have the ability to give any vibe to your media. To get the best quality of hues, you need to use a reliable editing software, like Premiere Pro. This platform is known for its excellent manual color grading Premiere Pro.
This blog covers the methods of using this tool to adjust the colors of your videos. Besides, we will look into an alternative to Premiere Pro that offers better versatility.
In this article
Part 1. Color Grading and Correction in Adobe Premiere Pro
In Adobe Premiere Pro, the color grading options reside in the "Lumetri Color" workspace. From the contrast to the saturation and light, every aspect can be enhanced using this tool. With its manual sliders and controls, it gives you the authority to play with the media. The section below involves all the methods you can use to enjoy the Adobe Premiere Pro color grading features:
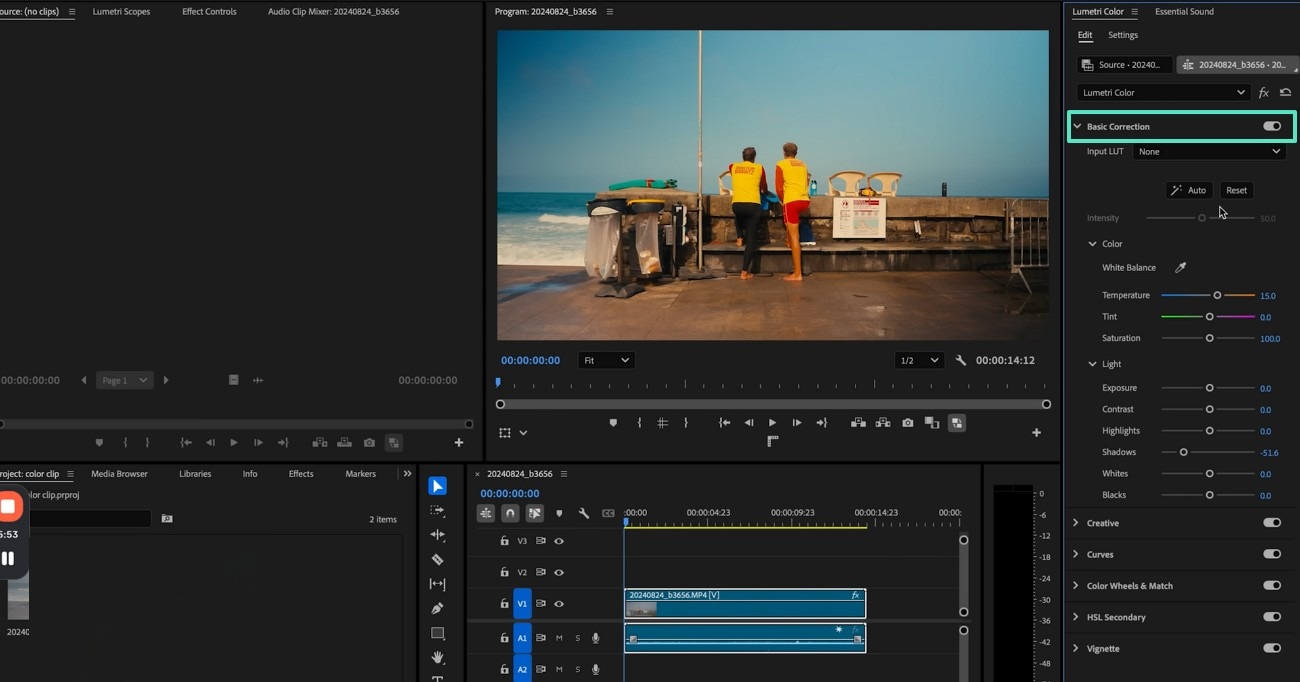
Method 1. Using the Basic Correction Panel
The first technique for enhancing video colors is through the "Basic" correction panel, located on the right panel. Besides executing the process manually, users can apply the one-click Auto Enhancement as well. The basic section also features some great LUT presets for those looking for one-click solutions. If you want to learn how to use this tool for Adobe Premiere color grading, follow the steps below:
- Step 1. To start, select the "Color" tab at the top toolbar to unveil the "Basic Corrections" panel. Explore this section and adjust the colors using the designated sliders and controls.
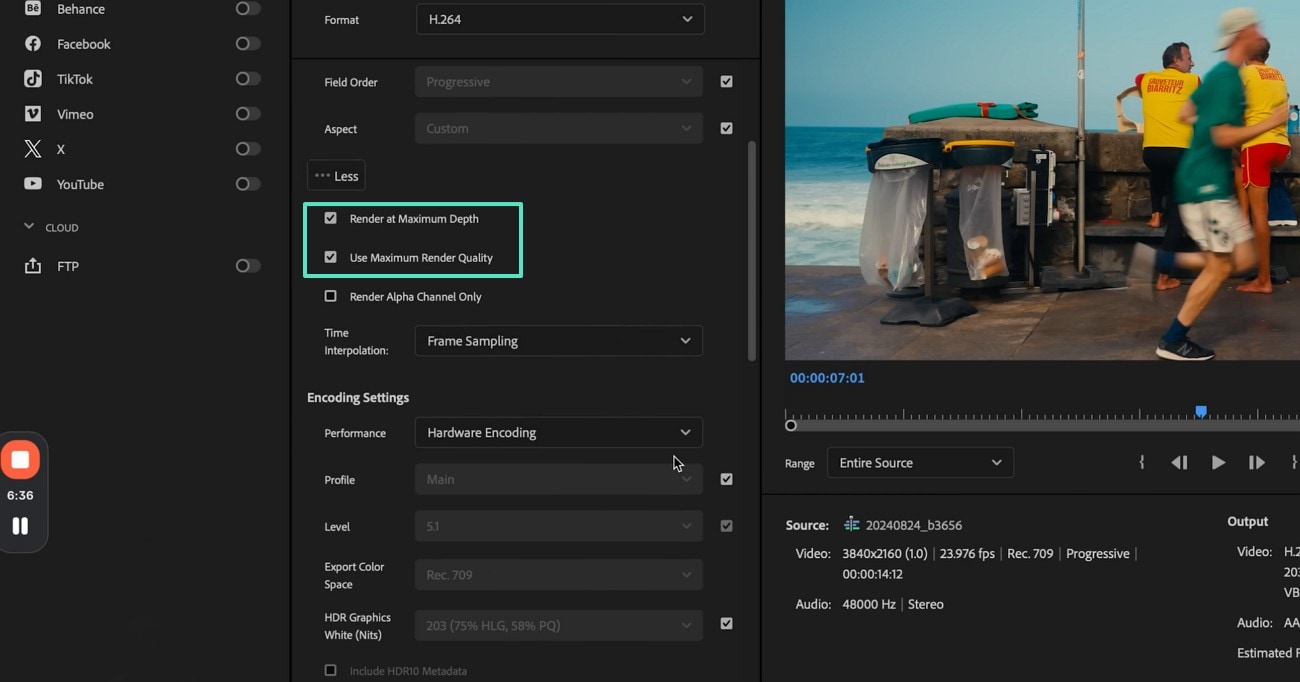
- Step 2. To make the colors look richer, head to the "Export" tab and enter the "Video" menu. Here, select the "Match Source" button and press "More" to unveil more options. Check the "Render at Maximum Depth" and "Use Maximum Render Quality" boxes to continue.
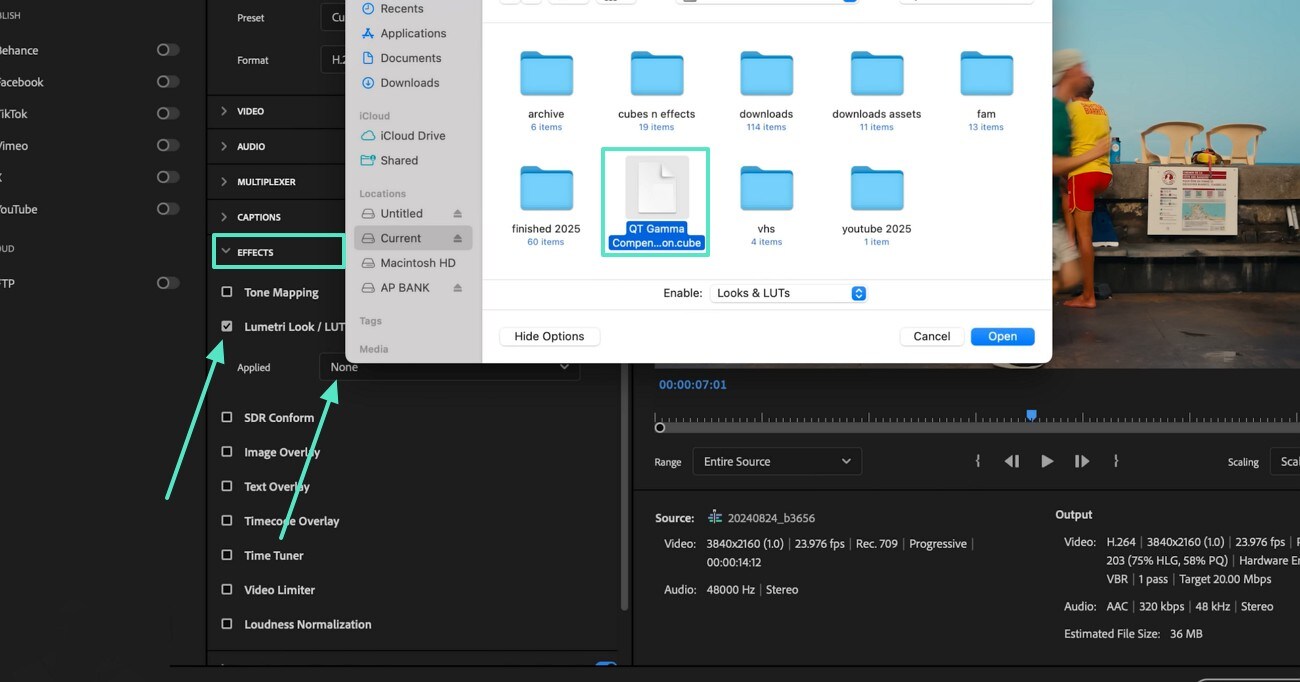
- Step 3. Next, enter the "Effects" menu and check the "Lumetri Look" box to press "Select" from the "Applied" drop-down menu. When your File Explorer window opens, select the "QT Gamma" LUT preset from your device. This preset is available and downloadable on Premiere Pro’s website.
Method 2. Exploring the Lumetri Color Curves
When looking for precision in results, use the curves and make every color grade possible. This feature lets you play around with the red, blue, green, and white of the video to make it look like you want. The following steps cover the guide to using this cinematic color grading Premiere Pro technique:
- Step 1. From the same panel, close the "Basic Corrections" menu and open the "Curves" section. Here, use the grid to make changes to your frame.
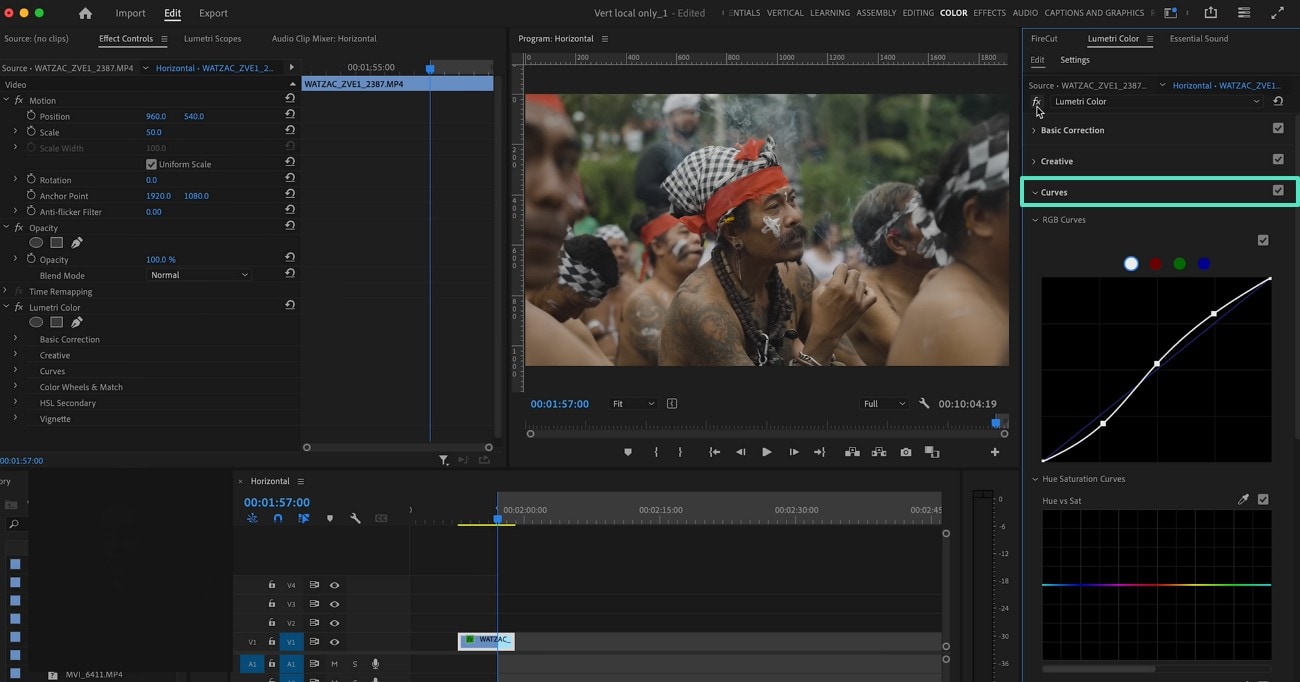
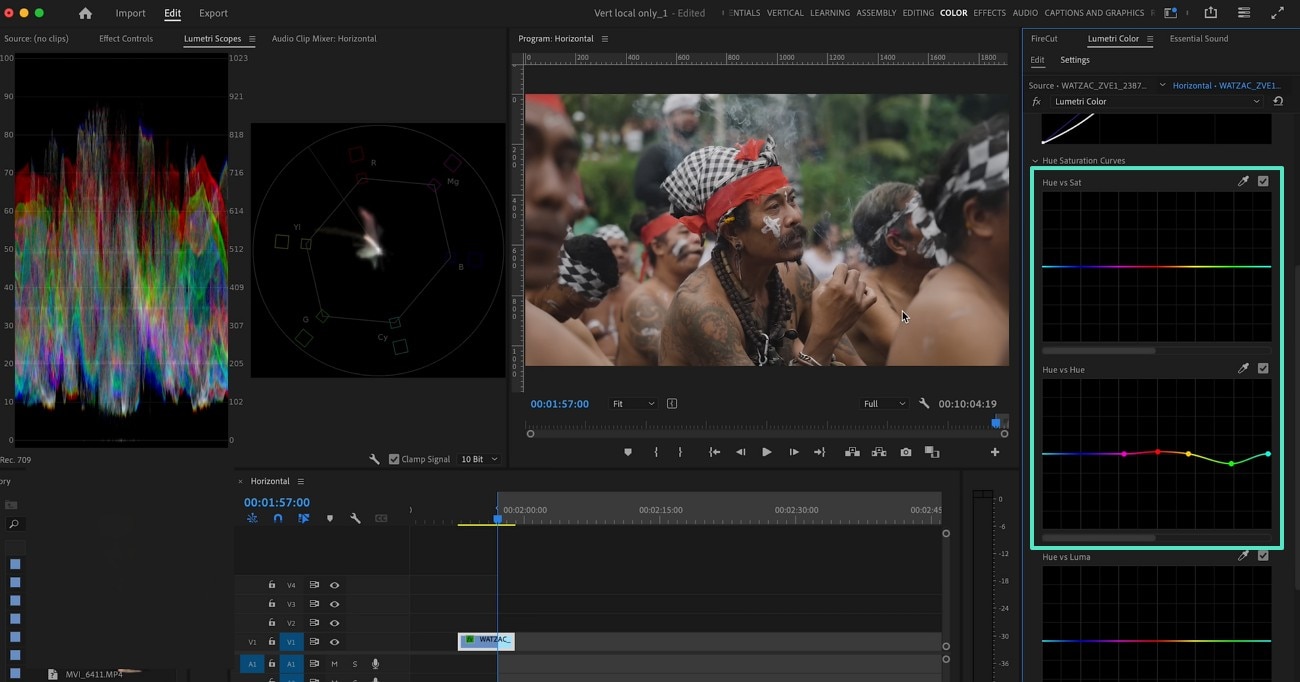
- Step 2. To enhance the tones of the video, scroll down and make more changes using the grid and the dots. From the top left of the interface, you can enter the Lumetric Scopes section and analyze the colors in a professional way.
Method 3. Looking into the HSL Wheels for Advanced Color Grading
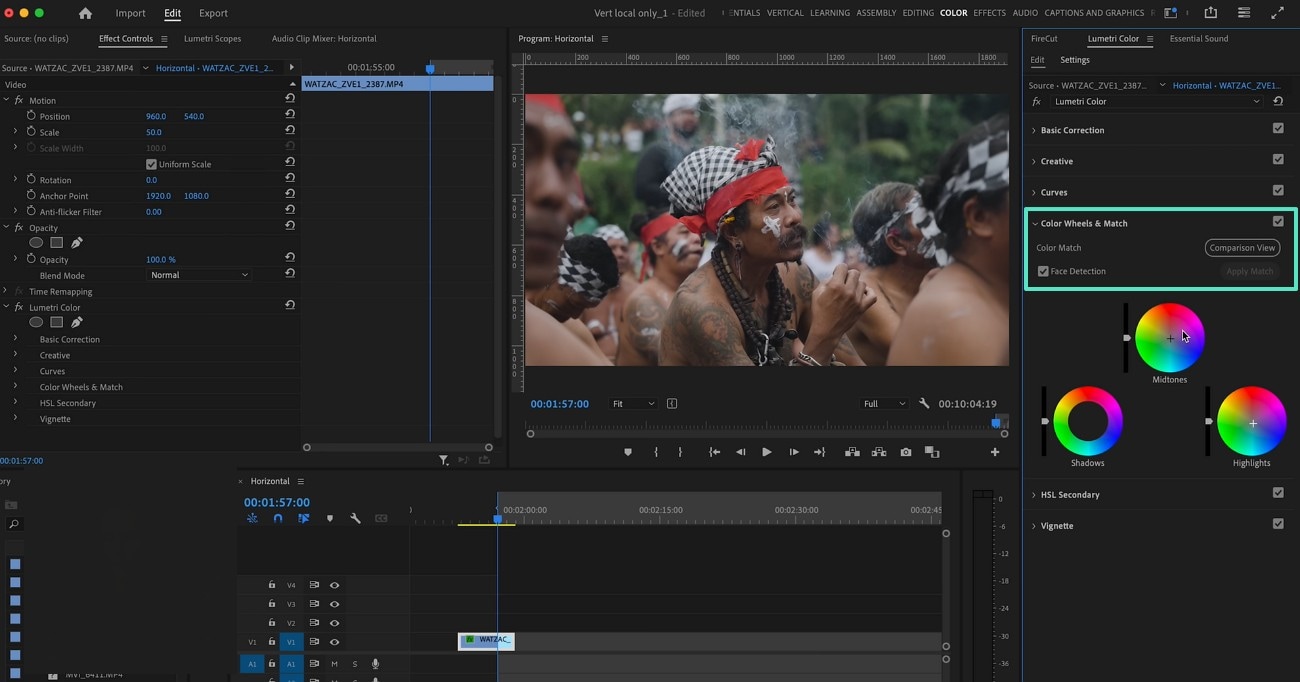
If you want to change the colors of a specific object in the video, using the HSL Wheels is the best approach. From the temperature to the highlights and the saturation, you can tweak everything under one umbrella. The following steps are a detailed guide on using this Premiere Pro cinematic color grading method:
Instructions. As you expand the "Color Wheels & Match" panel, use the Highlights, Shadows, and Midtones wheels to make the desired changes to the objects in your film.
For the complete guide, please visit How to Change Color in Premiere Pro: Hue, Saturation & Color Correction.
Part 2. A Professional Color Grading Alternative: Wondershare Filmora
The above-mentioned tool is usable but requires prior knowledge of the tool. Wondershare Filmora is a versatile video editor that offers extensive color grading that does not need any expertise. Besides opting for the one-click filter presets, users can utilize the HSL options, Curves, and Basic color corrections to enhance dull footage. In addition to manual adjustments, you can make use of the one-click Auto White Balance functionality for quick effects.
If you are looking for color corrections on the go, use the Filmora App [iOS/Android]. With manual adjustment options, it enables you to make visible changes to your films. Besides, users can also utilize the built-in filter presets to make frames shine in a single click. The following section features the use of this color grading Premiere Pro alternative:
 secure download

Using the Desktop Version
The desktop app of Filmora offers 4 methods of enhancing the pigment in your film. The following section will walk you through each method:
Method 1. Applying the AI Color Palette Feature
We always edit a video with the same filter, yet we still experience inconsistencies in colors. This problem can be remedied by using Filmora’s AI Color Palette feature. This utility takes a frame of your film as a reference and generates similar tones for the entire video.
Besides achieving a consistent aesthetic, you can also showcase your video editing skills. The following steps will guide you on using this Adobe Premiere color grading alternative for color correction:
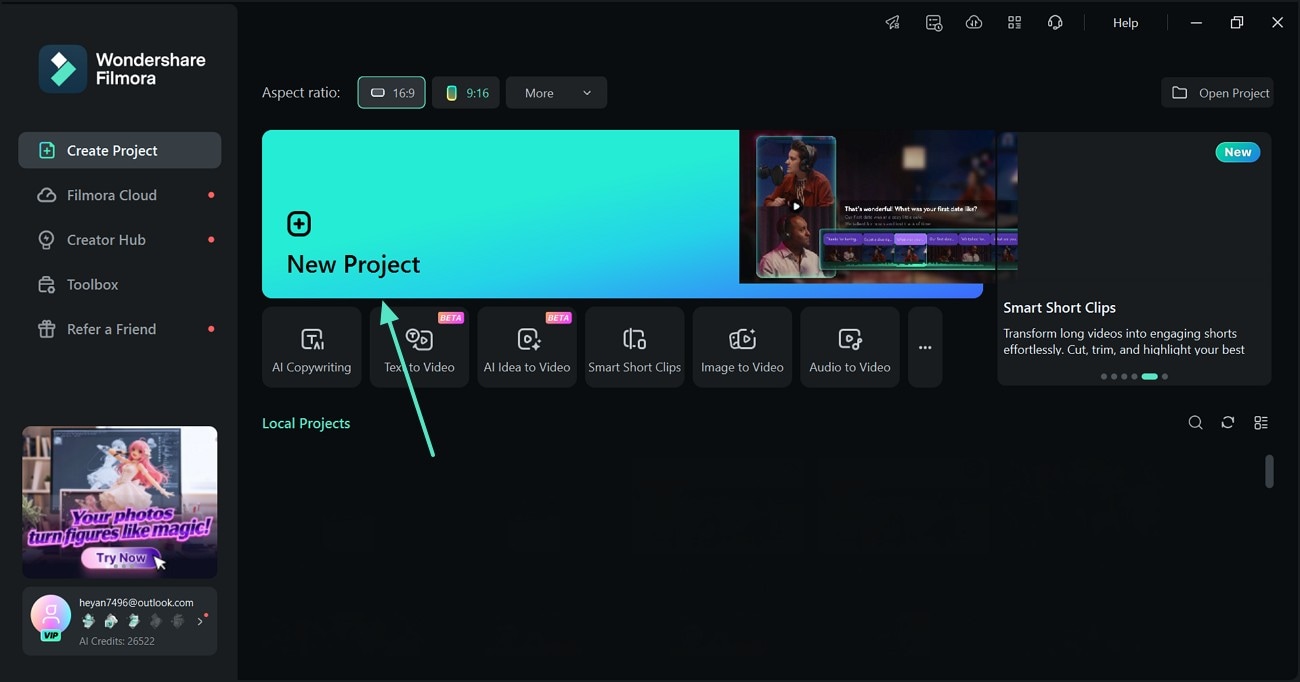
- Step 1. Start with a New Project. To begin, open a "New Project" and import the video that needs color corrections.
- Step 2. Enable the AI Color Palette. Using the right side of the screen, enter the "Color" section and expand the "Basic" panel to enable the "AI Color Palette" toggle. Using the timeline on the preview window, select the frame you want to use as a reference.
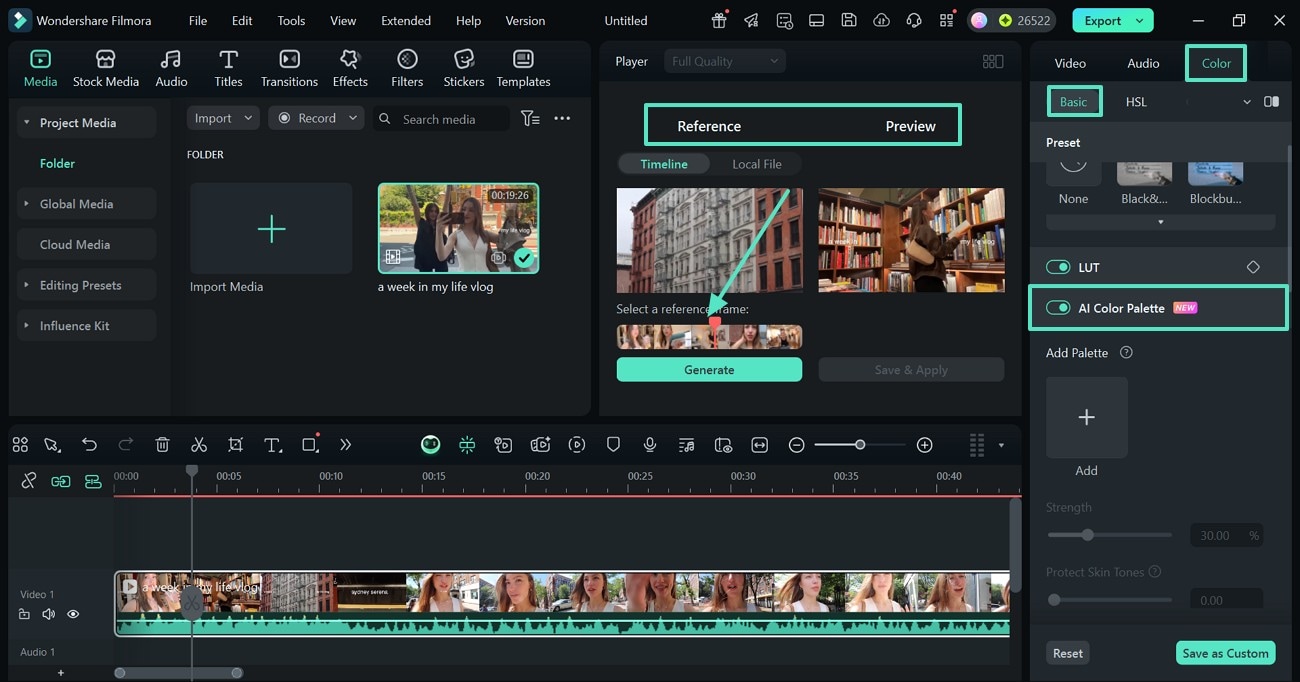
- Step 3. Generate and Apply the Color Tones. When you have selected the desired reference frame, select the "Generate" button and adjust the "Strength" of the colors. Afterward, press the "Save & Apply" button to apply the pigment. If you like this color tone, you can save it as a custom preset to use in the future.

secure download
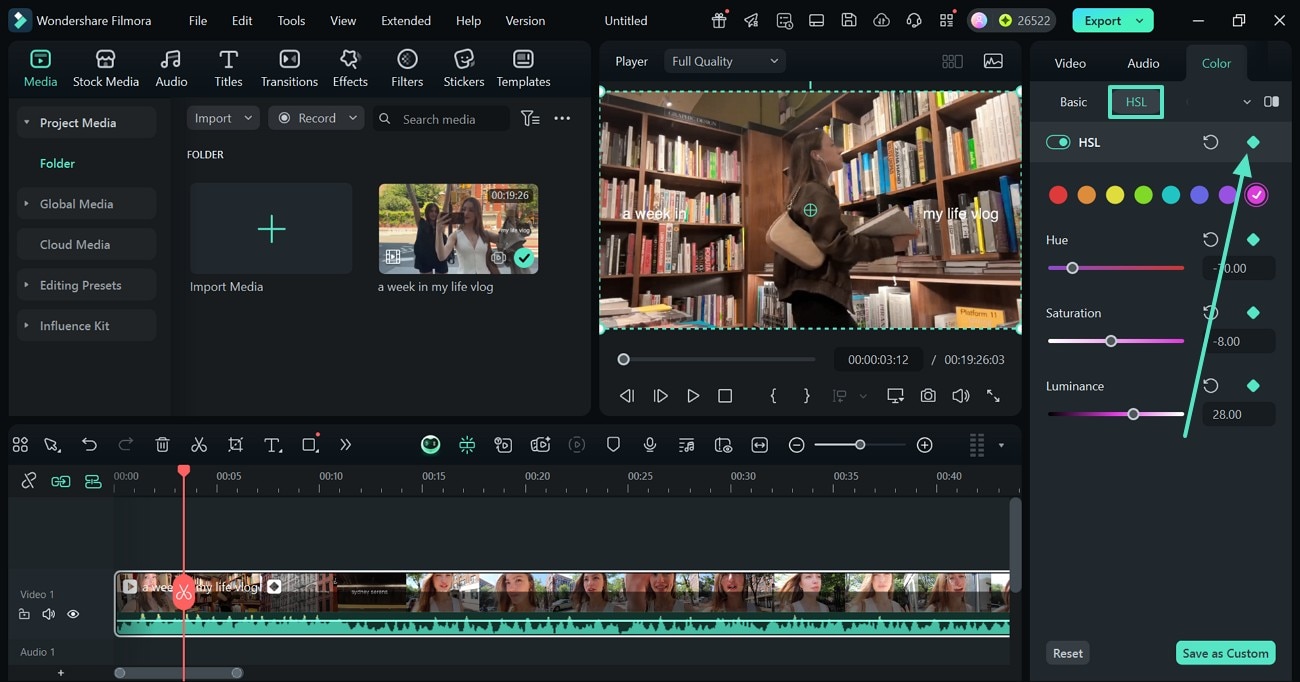
Method 2. Use the HSL Color Correction
When looking for a variety of colors in the video, use the HSL color correction method. Instead of applying a consistent color throughout the footage, this utility will help with its keyframing advantage. Users can assign a specific color tone to each frame, creating diversity throughout. Follow the guide below to master the art of color grading using the HSL colors of this Premiere Pro cinematic color grading alternative:
- Instructions. Using the right panel, enter the "HSL" section and press the "Keyframing" icon. Select the color settings that you need to apply to the clip before the play head. Play the video and select the "Keyframing" icon again to use the desired color tones on the clip between the two keyframing spots. If you like a color tone setting, select the "Save as Custom" button to save this as a preset.
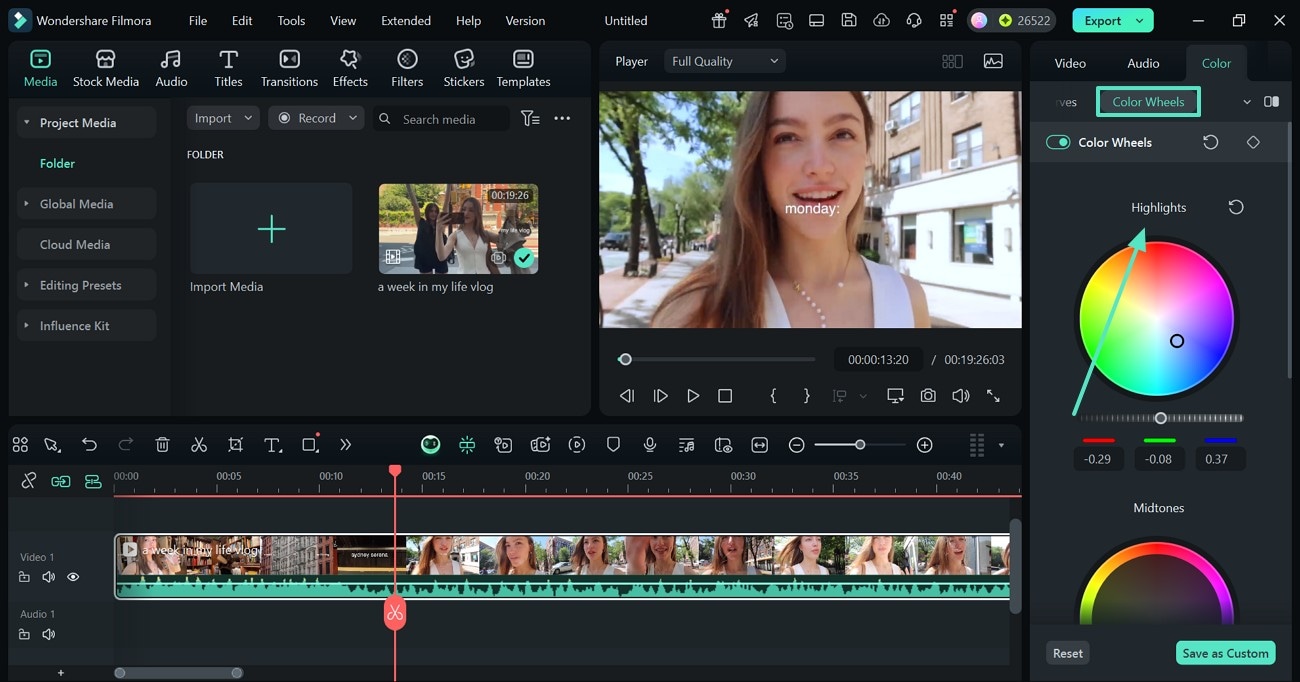
Method 3. Applying Colors Through the Color Wheels
When all the possibilities of color grading results are displayed, the editing becomes easier. With the wheels, users can see all the available colors in the form of a wheel and play within it. Using this technique, you can change the highlights, midtones, and shadows of your footage. Read into the guide below and get the hang of using the Color Wheels in this Premiere cinematic color grading replacement:
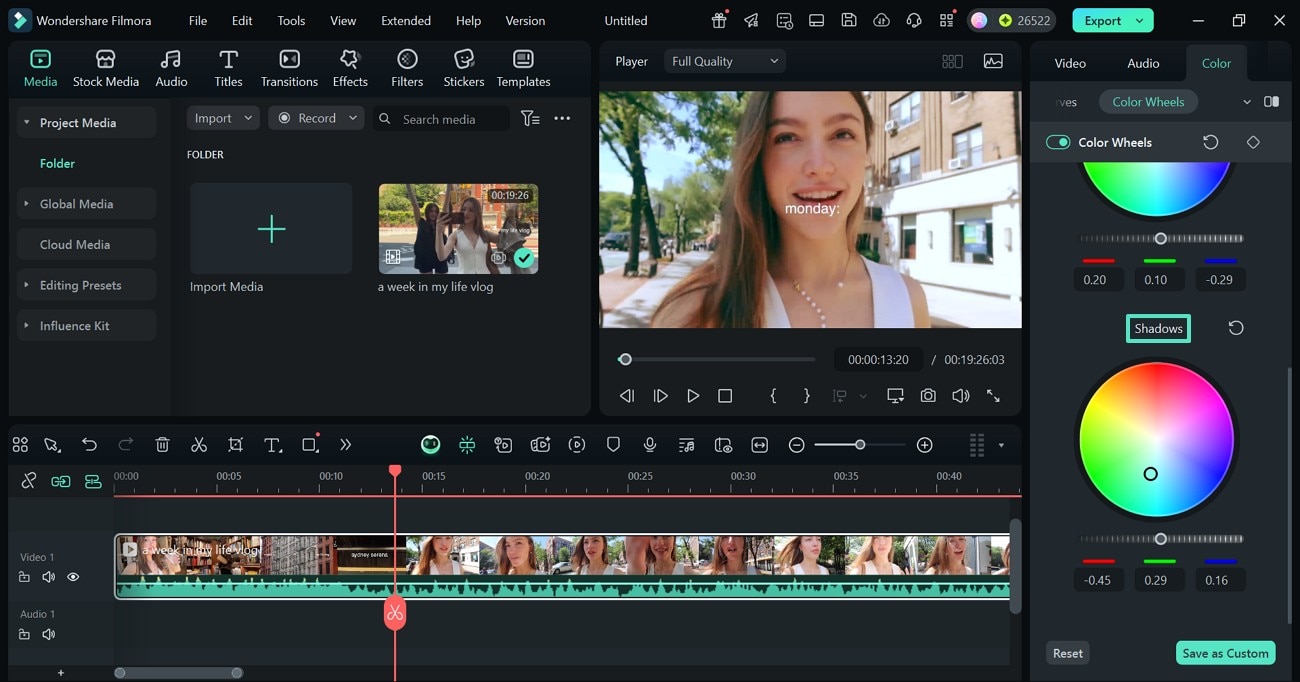
- Step 1. Adjust the Highlights of the Video. From the "Color Wheels" section on the right panel, advance to the "Highlights" wheel and move the cursor until you have found the right color for the footage.
- Step 2. Change the Midtones and the Shadows of the Film. As you scroll down the panel, you will be able to adjust the "Midtones" and the "Shadows" of the video.
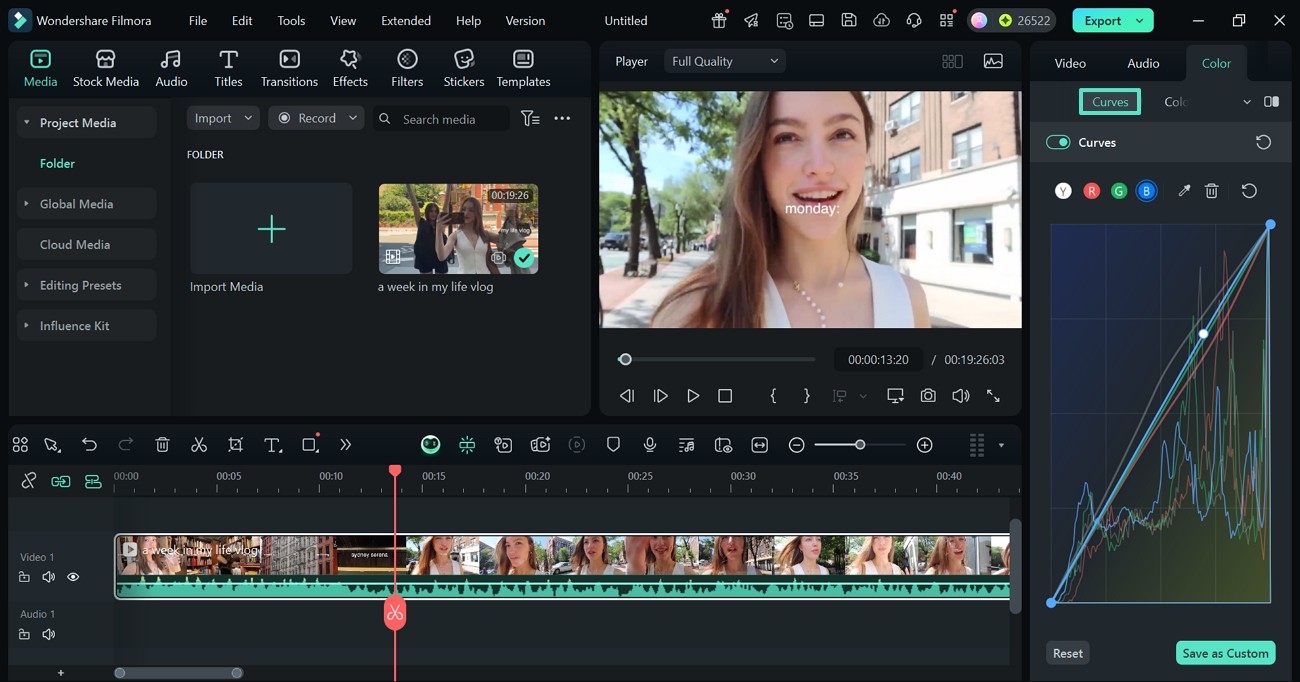
Method 4. Playing with the Color Curves
If you are a professional who is looking for perfection, "Curves" is the right panel to be in. Besides changing the colors using the graph, users can select the color picker to achieve the right color grading. If you like a certain color curve, make it your preset filter by saving it as a custom setting. Follow the steps below and learn how you can use this color grading Premiere Pro alternative for color grading:
- Step 1. Use the Curves for Color Adjustment. From the "Curves" section on the right, enter each color setting and adjust it to your liking.
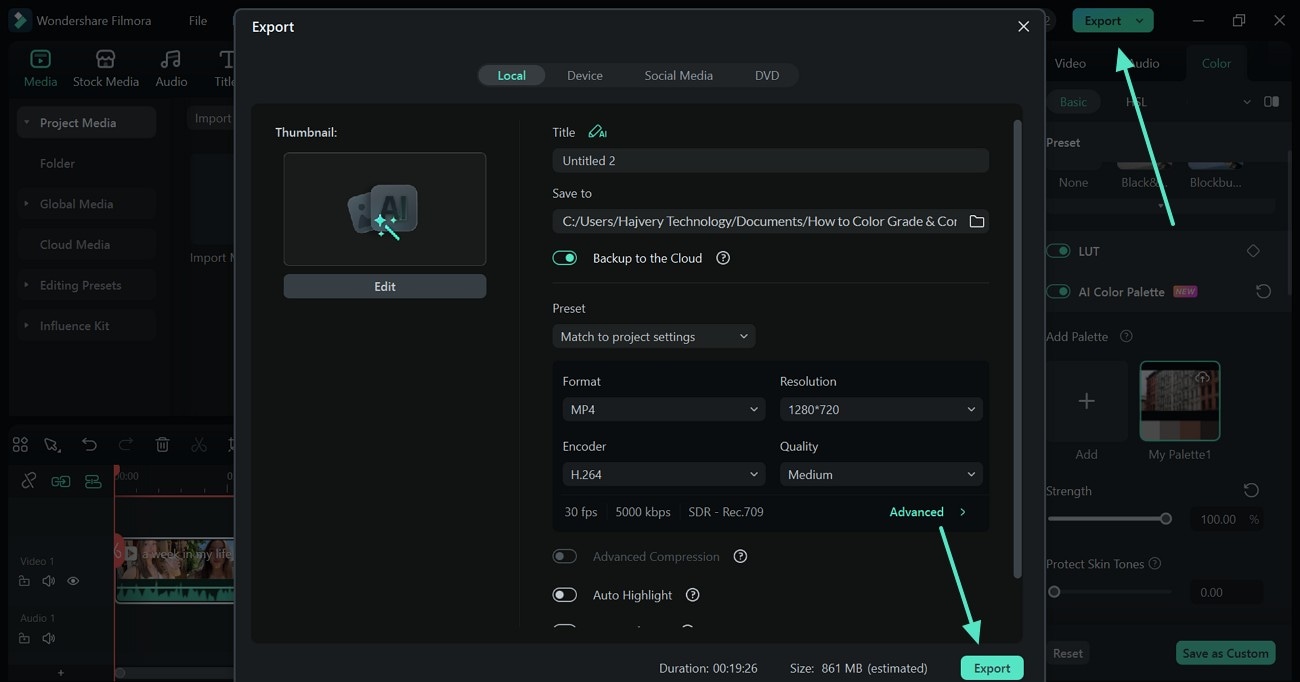
- Step 2. Save the Video to Your PC. When your video achieves your desired colors, hit the "Export" button and enter the next video to save the project.
secure download
Using the Filmora App for Color Grading
This platform offers extensive manual color editing to help you achieve the desired vibe of a film. Follow the steps below to learn how to use this color grading Premiere Pro alternative:
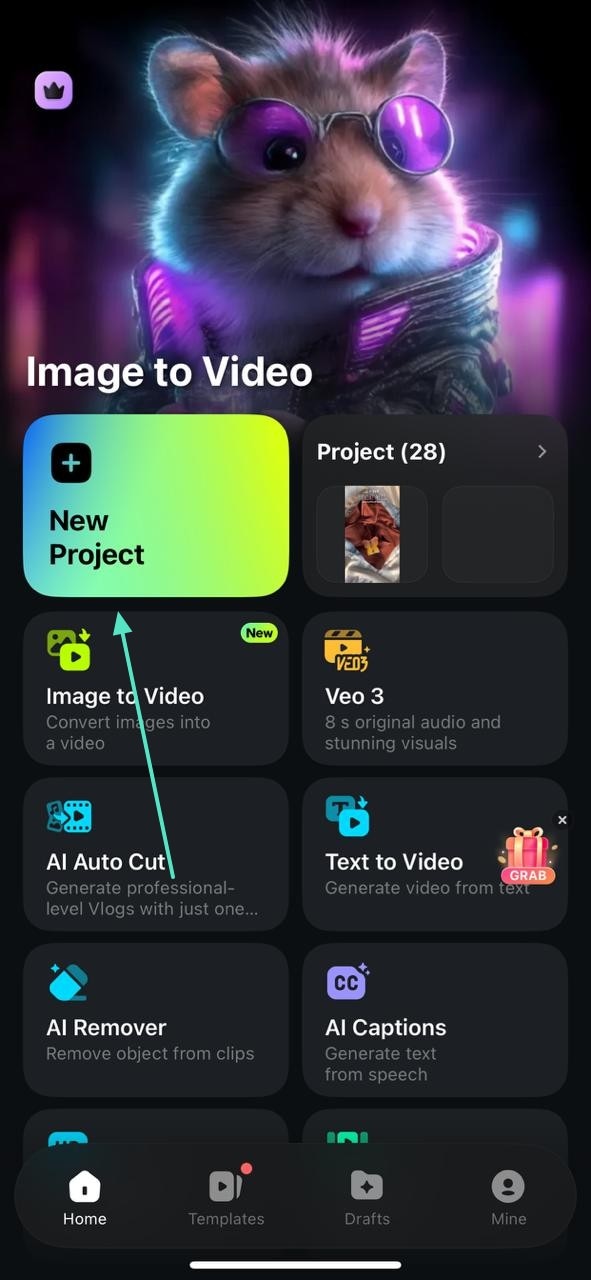
- Step 1. Begin with a New Project. Start the process by selecting the "New Project" tab and importing a video.
- Step 2. Select the Timeline to Start Editing. From the editing interface, select the video timeline and tap the "Adjust" tab to unfold color grading options.
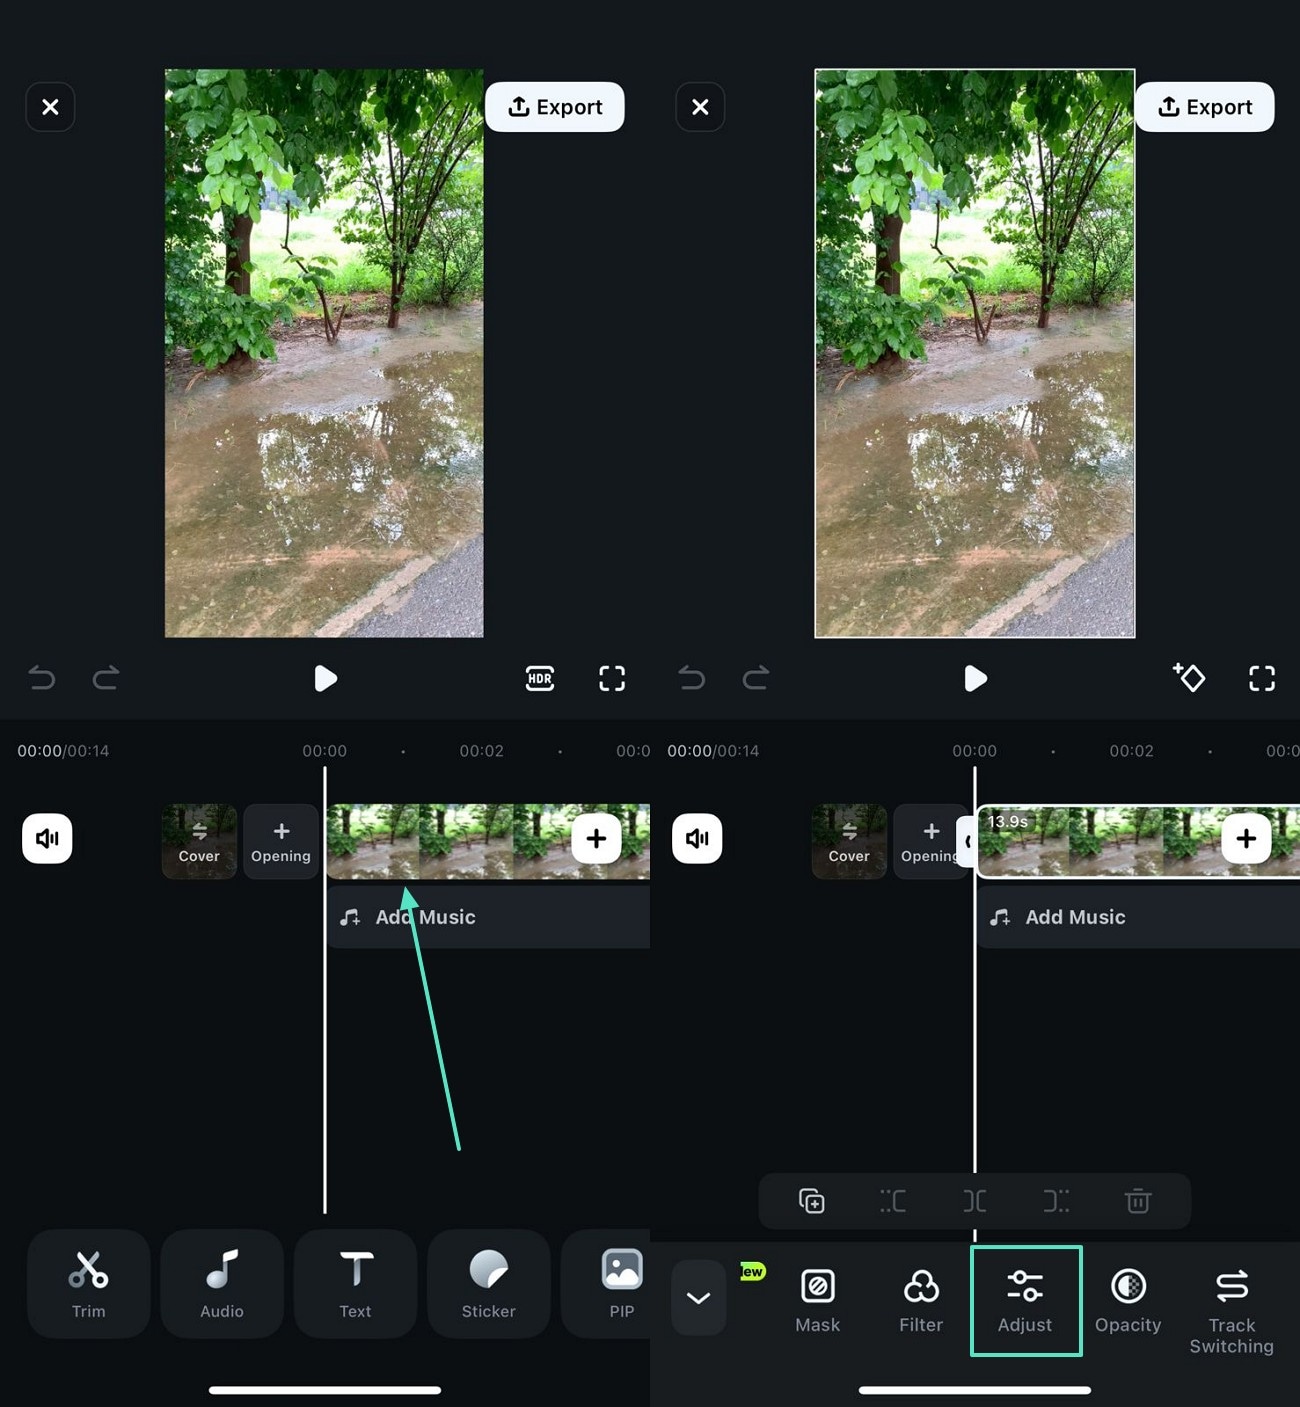
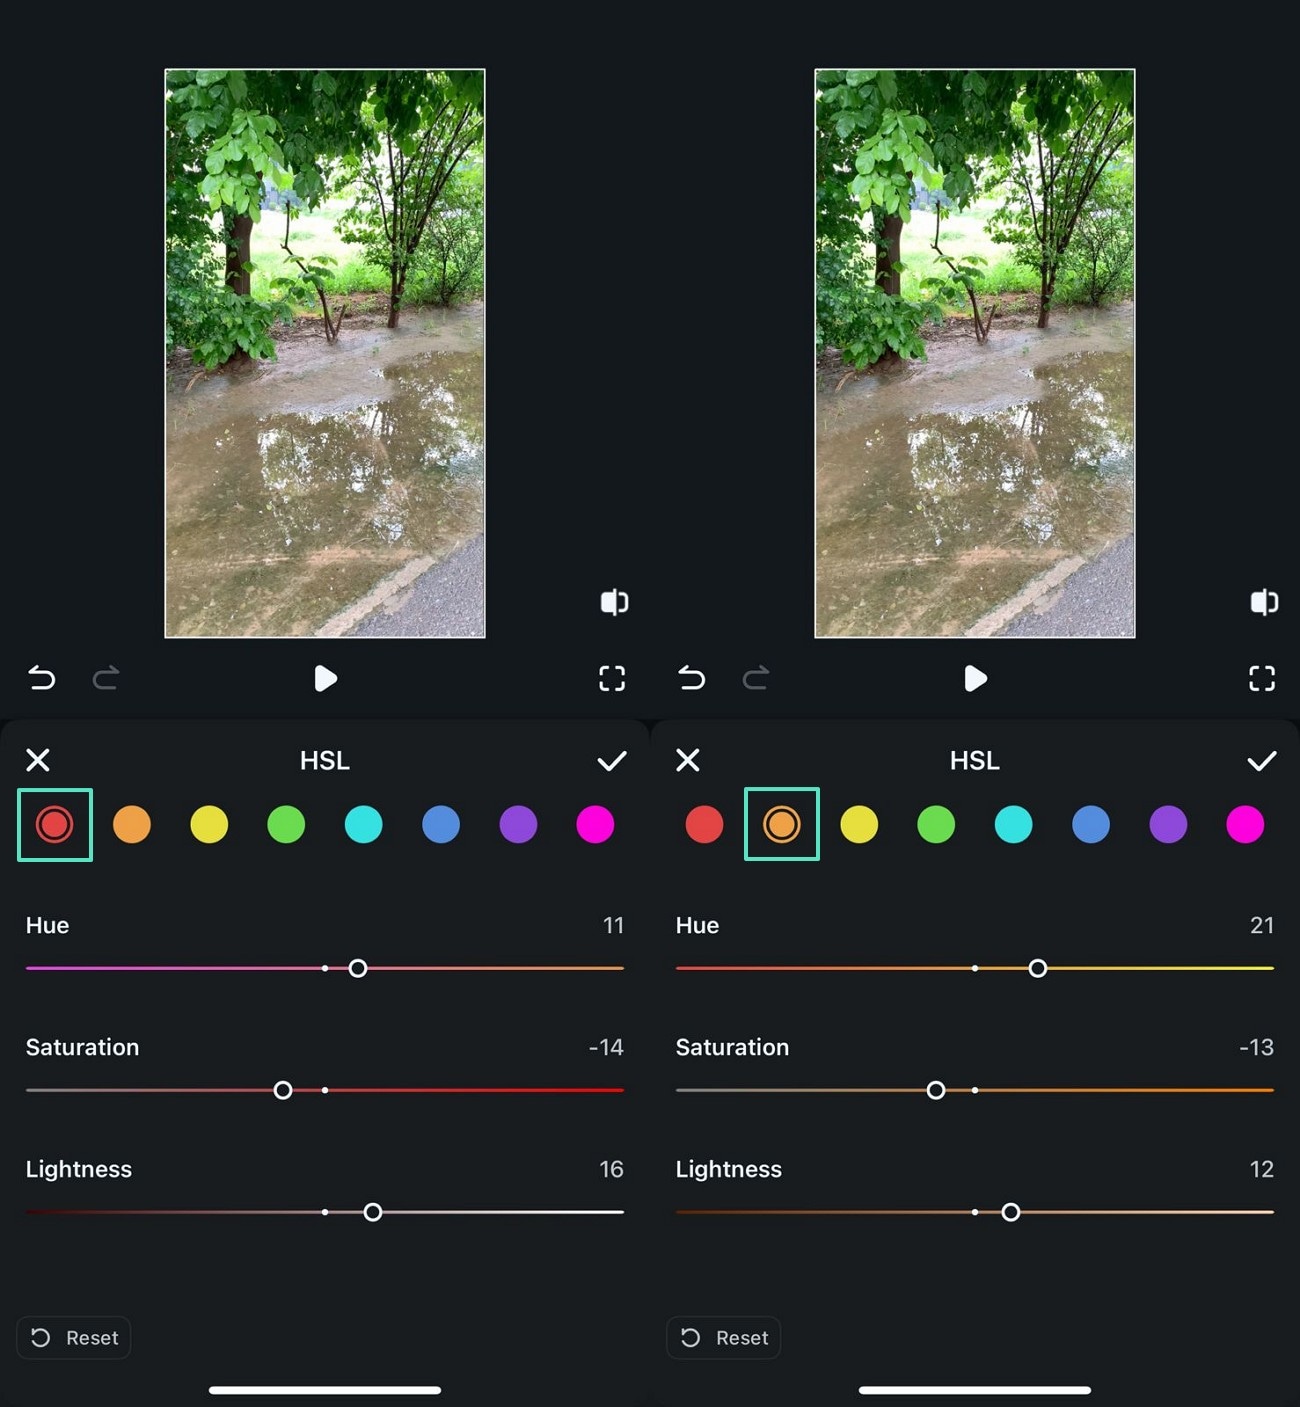
- Step 3. Adjust the HSL Colors. Using the next screen, select the "HSL" tab and play with the sliders to adjust each tone.
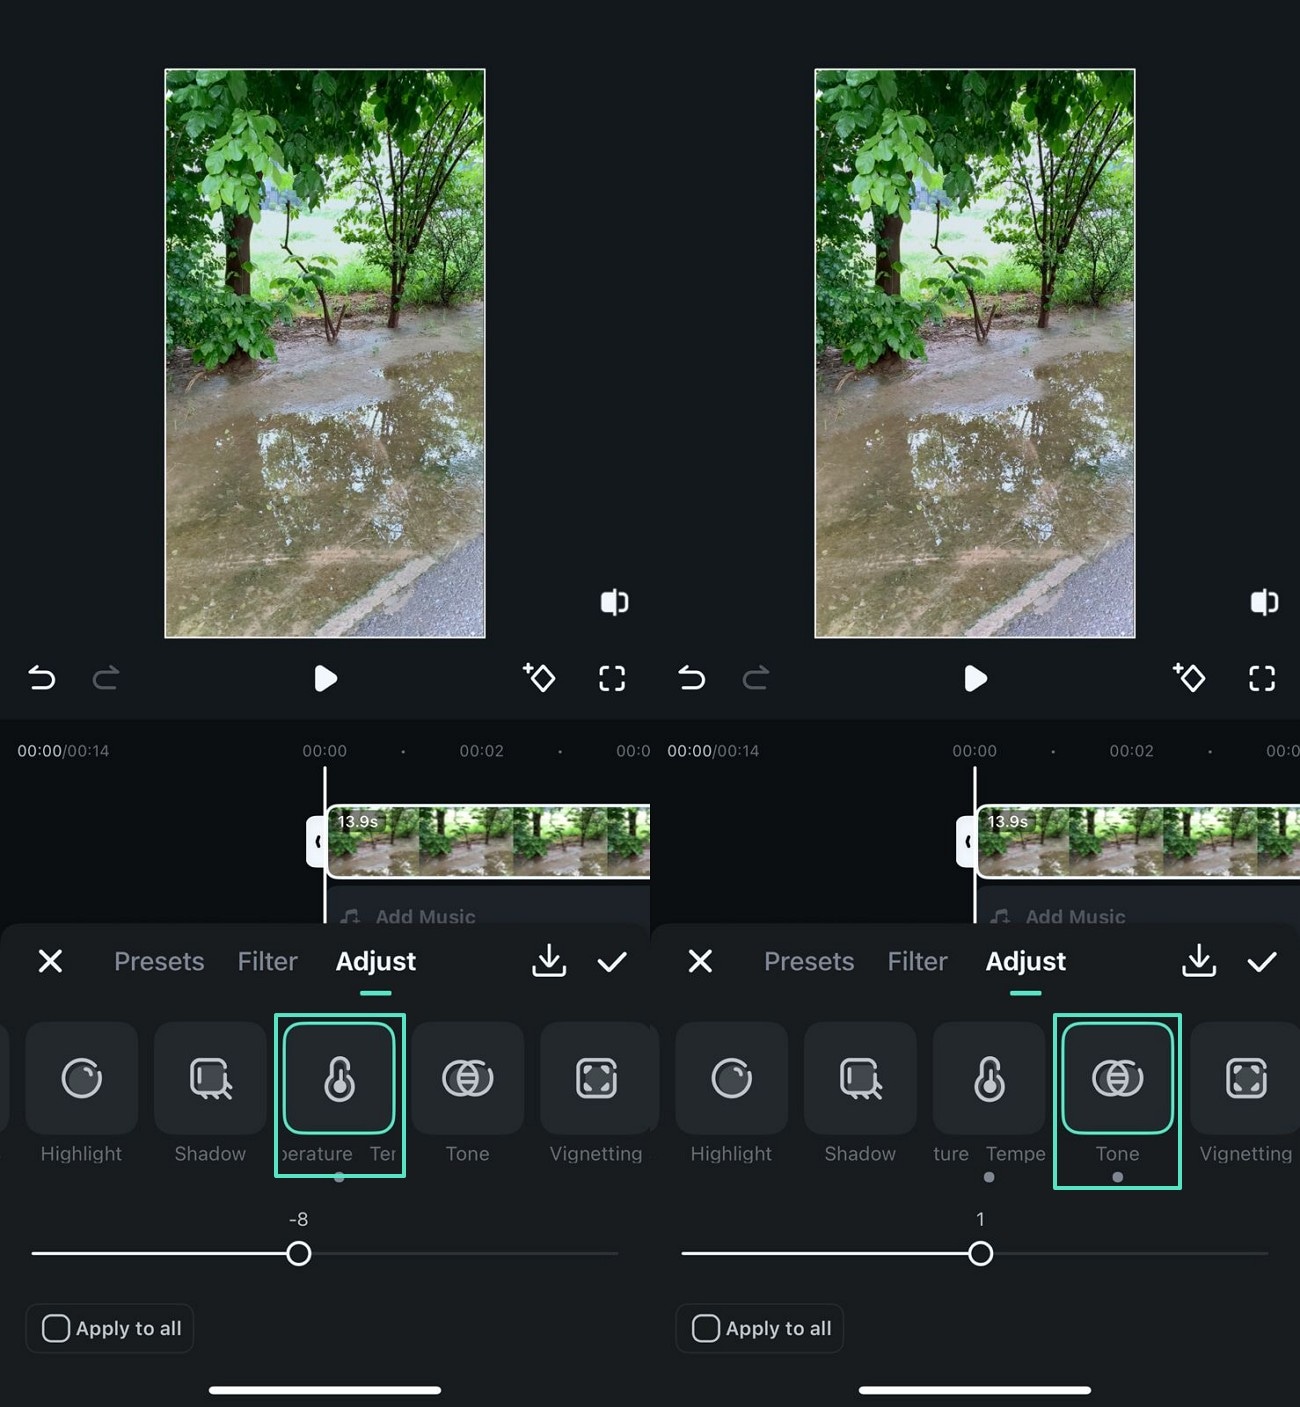
- Step 4. Customize the Tone and the Temperature. After setting the HSL, enter the "Temperature" and "Tone" tabs, and use the respective sliders to get the desired look.
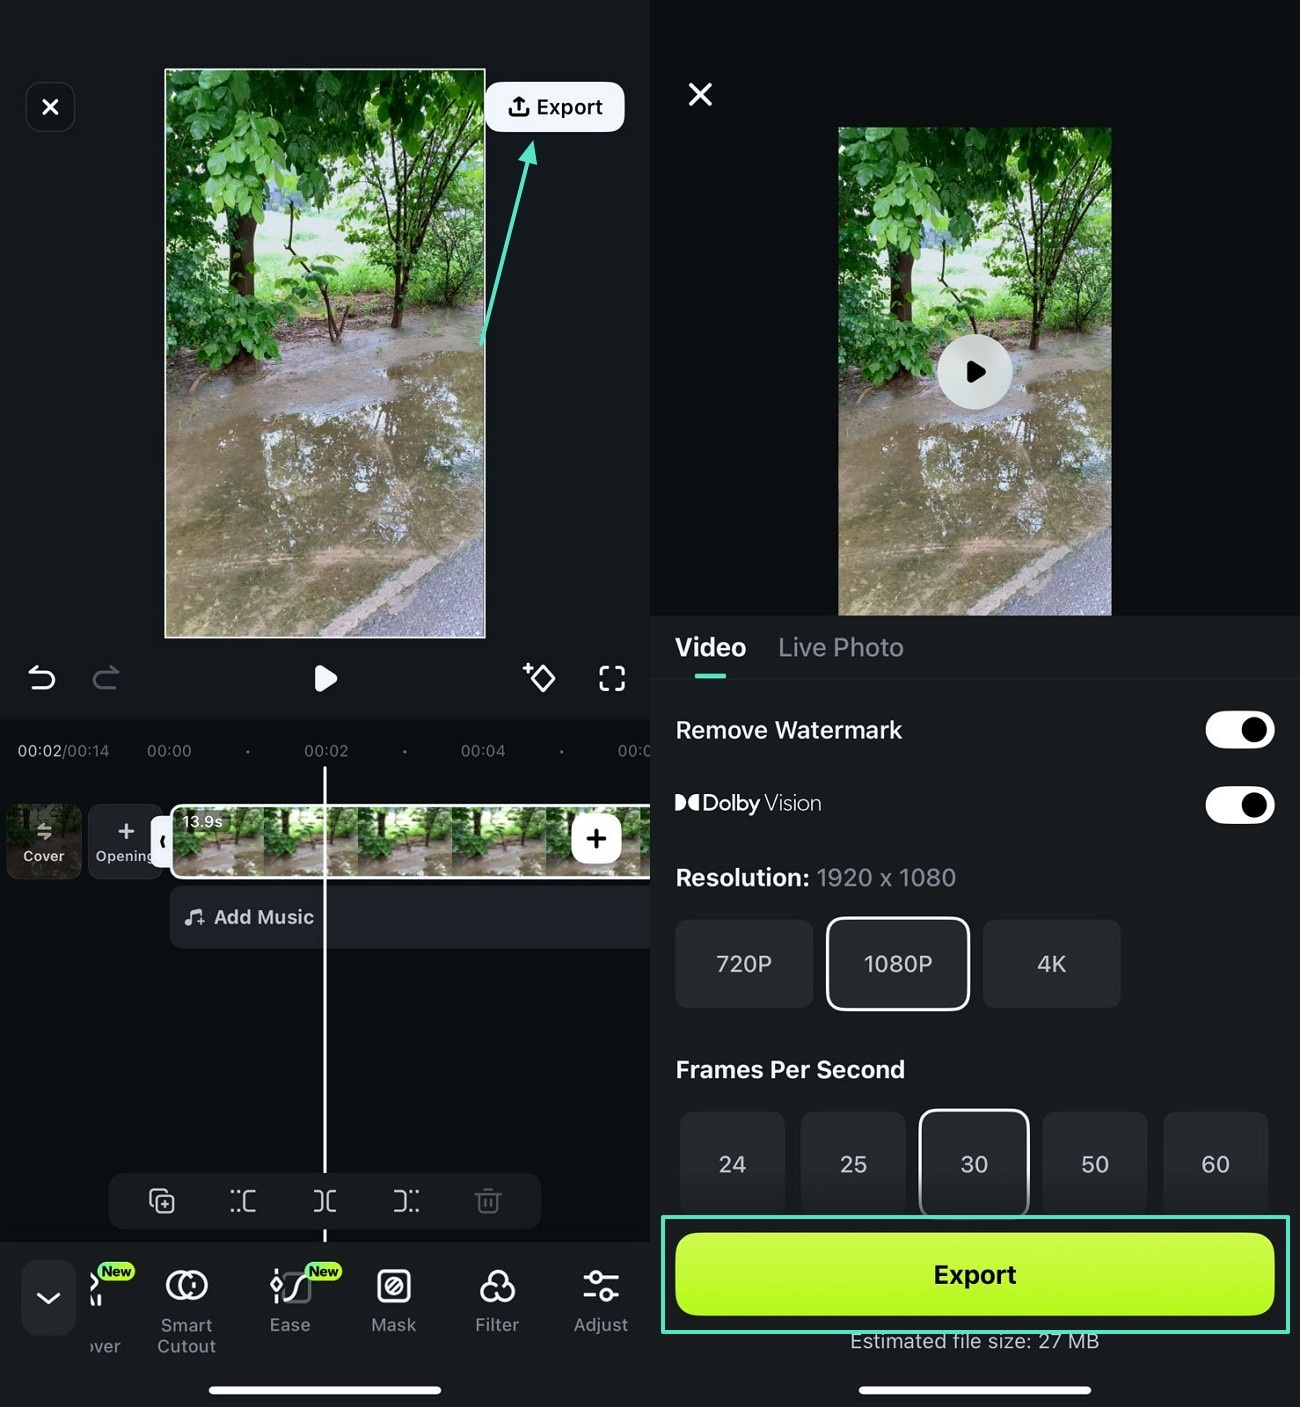
- Step 5. Save the Color-Graded Film. Once the colors of the footage are as needed, select the "Export" button at the top right to save it to your device.
secure download
Conclusion
In essence, color grading Premiere Pro is a reliable way to add a pigmented aesthetic to your films. Although this tool has good functionality for adjusting the hues, it might not be user-friendly for everyone. With more diverse color grading and an intuitive interface, Filmora serves as a better option. It offers 4 methods in the desktop version to give a professional color-graded look to your films.
