
 100% Security Verified | No Subscription Required | No Malware


 ChatGPT
 Perplexity
 Gemini
 Claude
 Grok
Grok
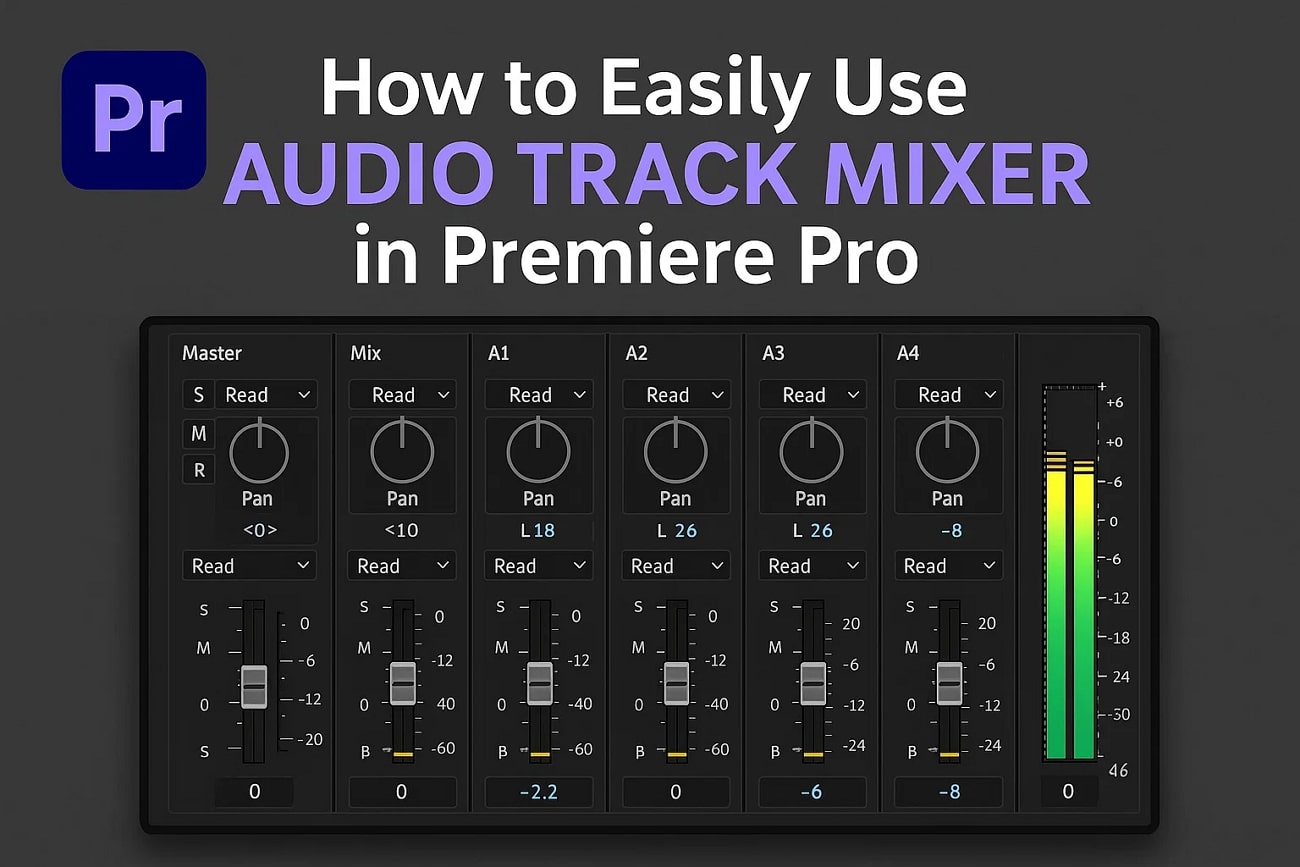
A video has many elements that need to be polished during editing. Audio is among the most prominent elements, as it can grab attention as much as the visuals. Tools like Premiere Pro feature professional-grade audio adjustment tools that enhance the sound quality. With the audio track mixer Premiere Pro, you can adjust and refine audio at the track level to create a balanced and professional sound.
If you are new to the world of video editing, the following article is a must-read. In addition to discussing Premiere Pro's audio mixing, we will explore a better alternative.
In this article
Part 1. How Does the Audio Track Mixer Work?
Audio editing is as essential as editing the visuals, and Premiere Pro understands it. It offers a unique audio track mixer that creates a balance in the sound of the entire film. The tool offers a music console that displays all the features that you need for audio tweaking.
The audio mixer Premiere Pro offers 5 automation modes, allowing you to make real-time, dynamic changes to audio settings while the track plays back. To learn more about this feature of Premiere Pro, go through the following list:
- Offers a range of effects that influence every clip placed on that track.
- Provides the master track that gives you centralized control over the final output.
- Records dynamic adjustments to faders, panning, and effects with automation modes for precise playback.
- Reassigns stereo, mono, or multi-channel audio configurations for accurate track routing and playback.
Part 2. Using Adobe Premiere Pro for Audio Track Mixing
Now that we have an idea about the working of Premiere Pro, let's dive into its step-by-step guide. This platform offers a range of advanced audio editing features to create a balance in the sound. Follow the guide below to learn how to use the audio mixer Premiere Pro:
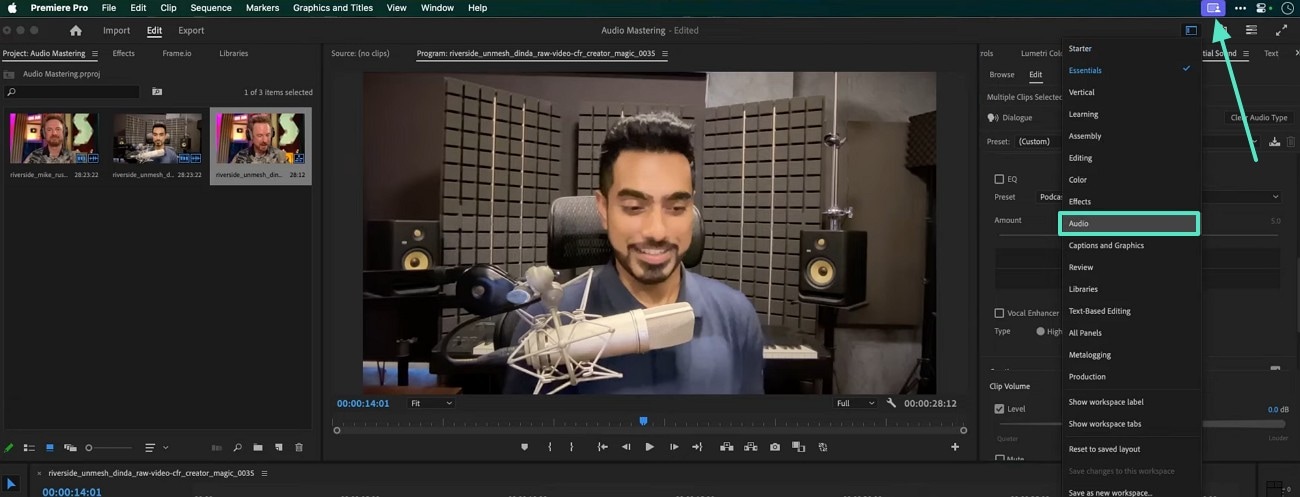
- Step 1. After importing a video, select the icon at the top right and click "Audio" to display the exclusive audio editing interface.
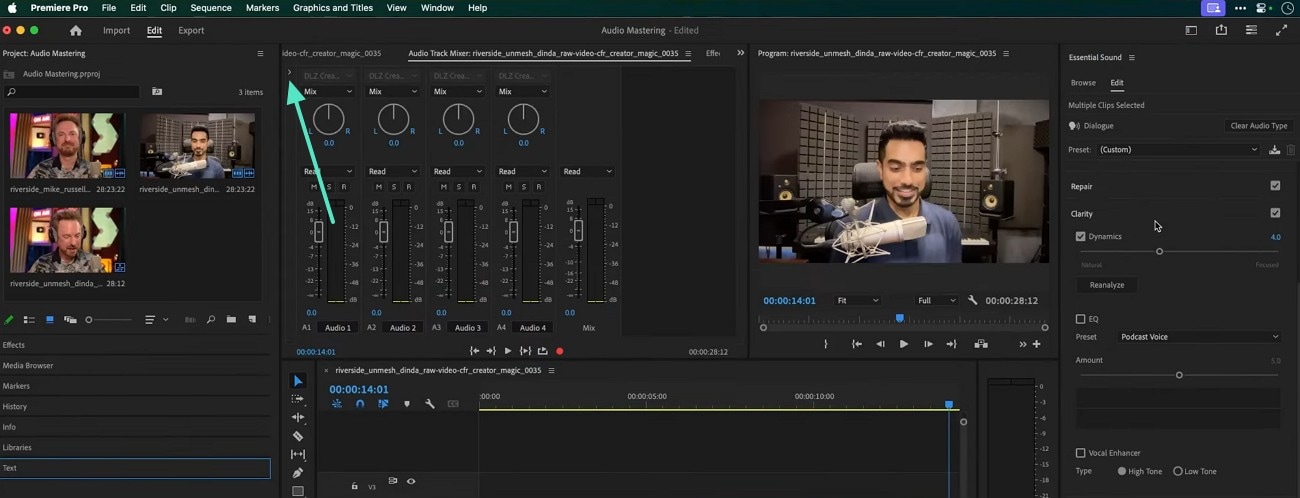
- Step 2. Now, you will see a display of all the audio tracks on the imported video. Using the "Arrow" icon at the top left of the console, find a breakdown of the audio effects.
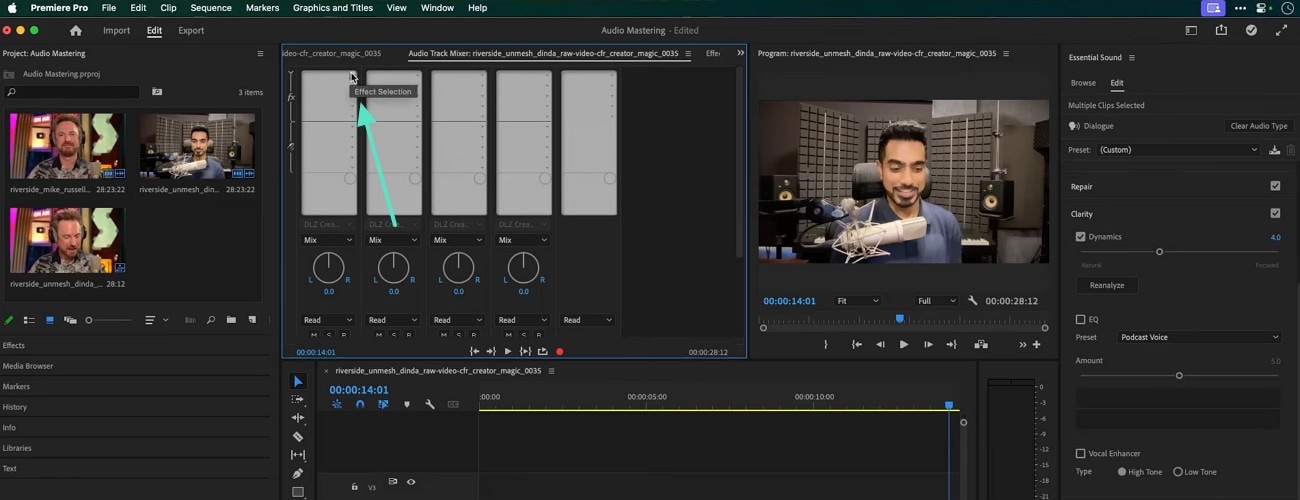
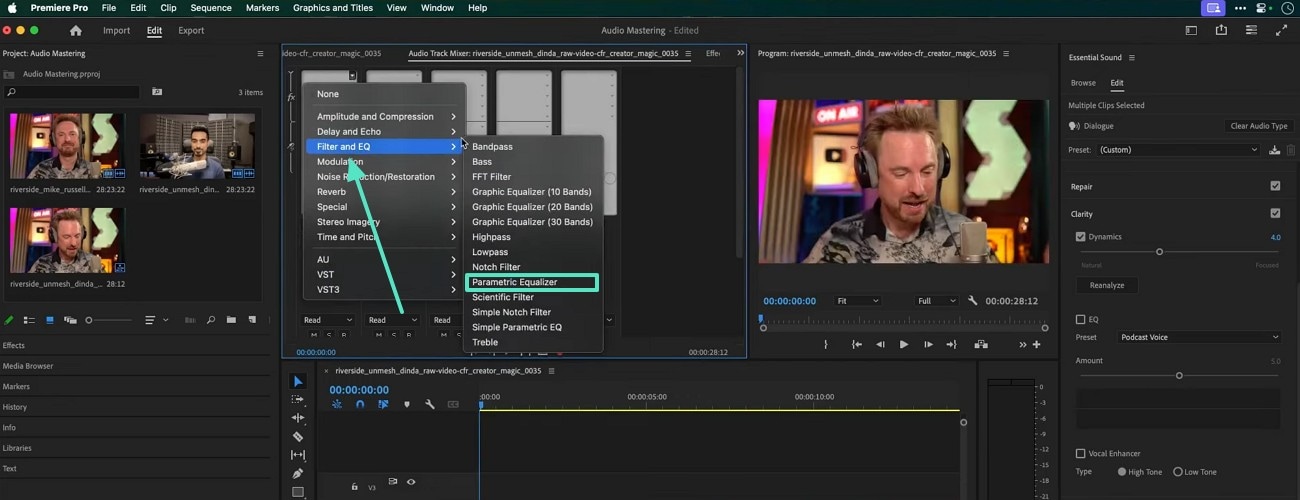
- Step 3. Here, navigate to the desired audio track and click the "Effect Selection" drop-down arrow to head to the following pop-up menu.
- Step 4. In this pop-up menu, hover the mouse over the "Filter and EQ" option and select the "Parametric Equalizer" option.
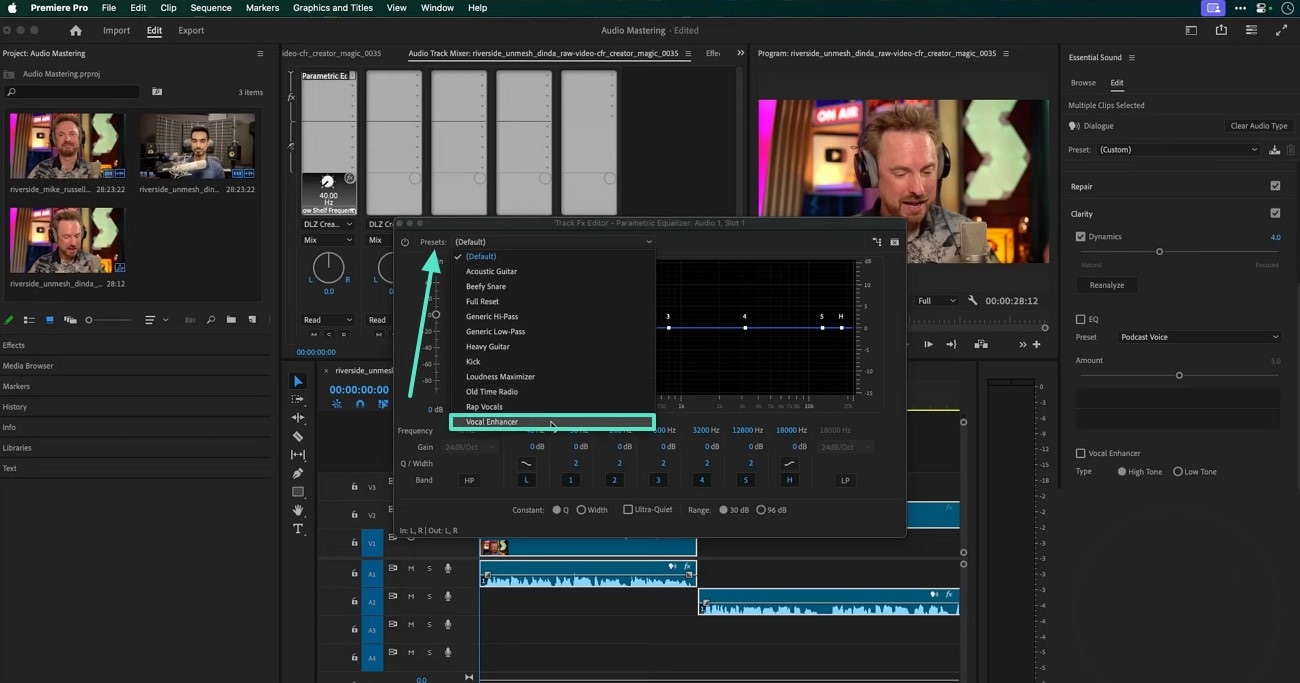
- Step 5. From the next window, open the "Presets" menu and apply the "Vocal Enhancer." Once applied, you can also customize the effect using the graph in this window.
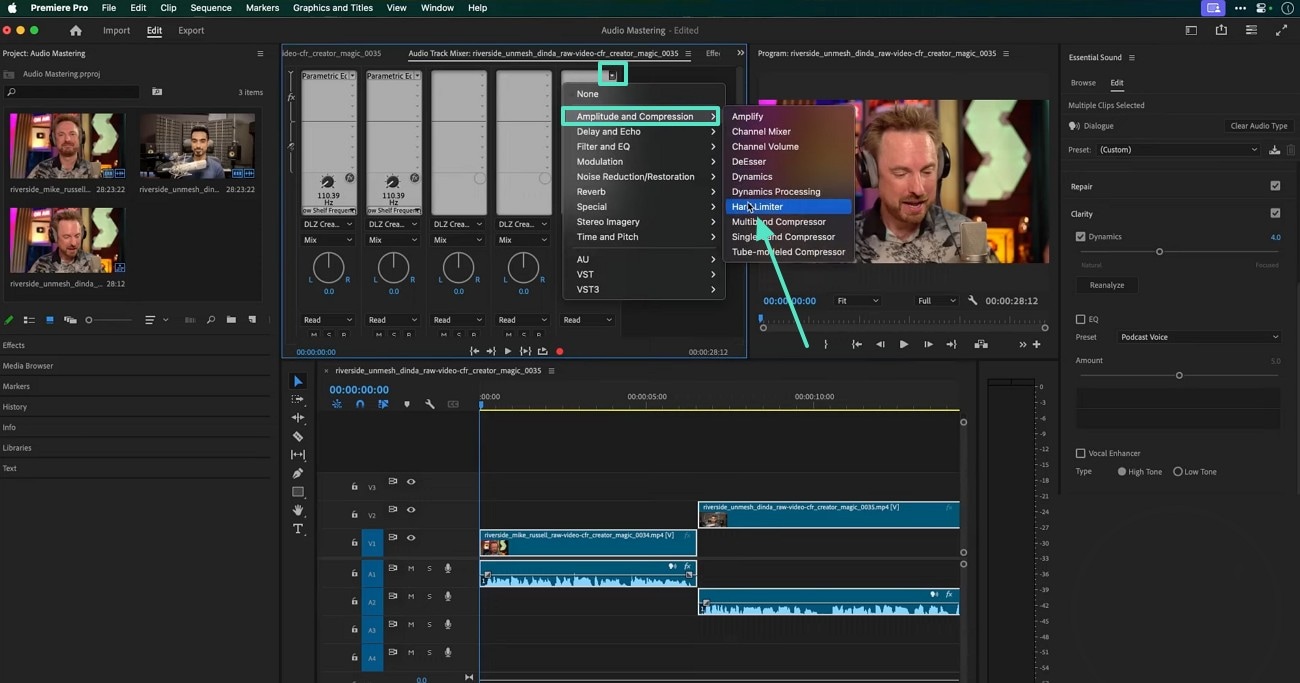
- Step 6. Next, find the desired audio track and select the "Hard Limiter" option from the "Amplitude and Compression" extended menu.
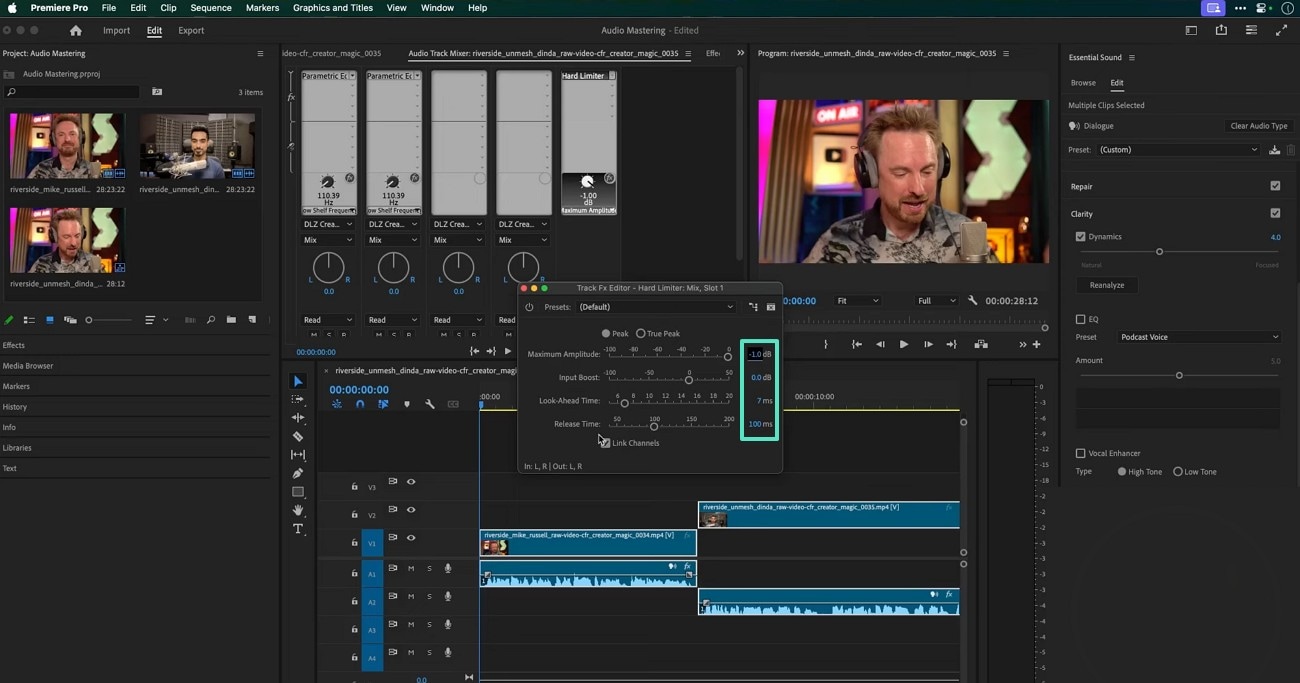
- Step 7. Using the following window, adjust the provided settings of the audio tracks.
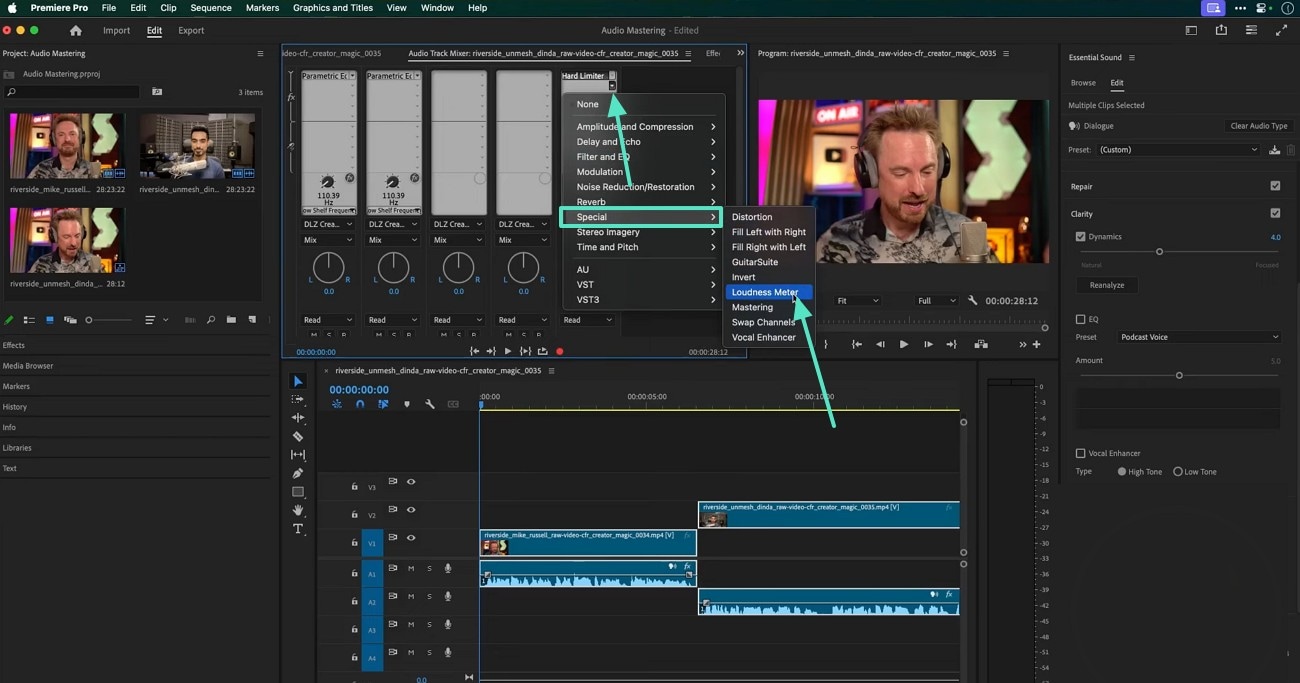
- Step 8. In the Mix Track drop-down arrow on the top right, hover your mouse over "Special" and select the "Loudness Meter" option.
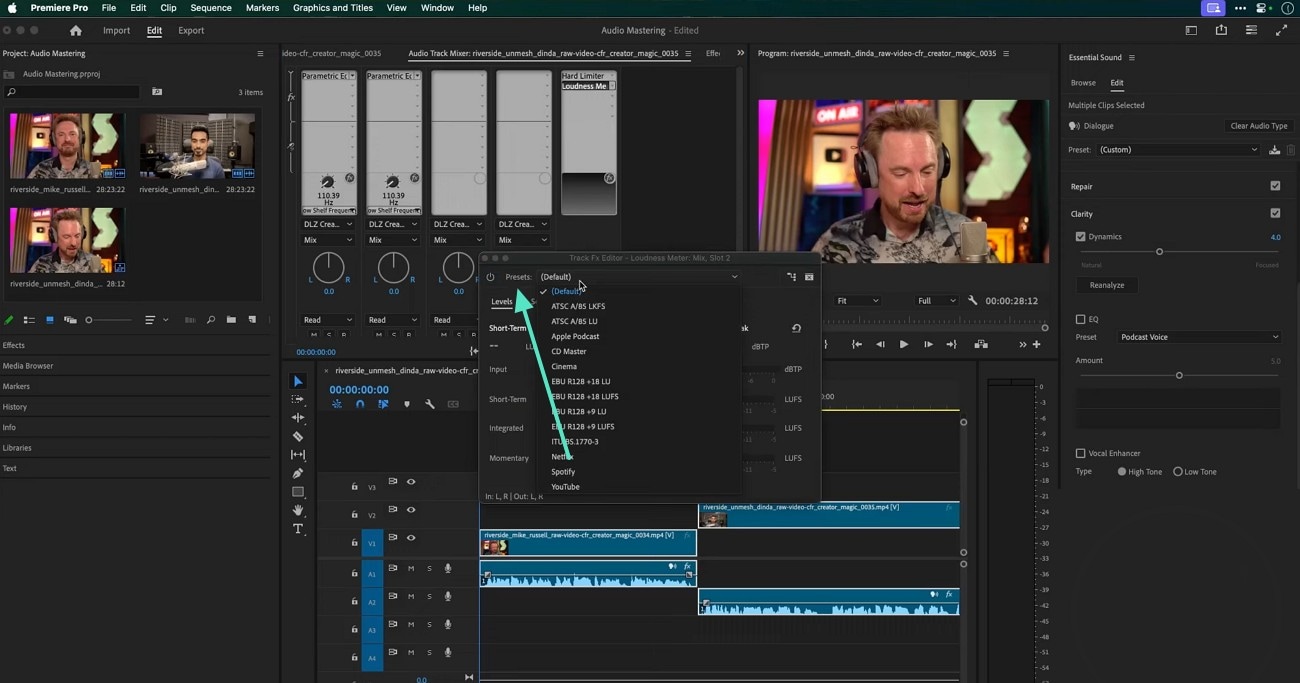
- Step 9. When a new window opens, unveil the "Presets" menu and select the platform where you need to upload the video. Selecting the platform will optimize your sound as per the required settings.
Part 3. Exploring a Better Alternative to Audio Track Mixer in Premiere Pro
After knowing the functionality of Audio Mixer Premiere Pro, it is safe to say that it is not beginner-friendly. Users seeking a user-friendly editor with enhanced AI features can explore the exciting utilities of Filmora. Besides providing easy-to-navigate features, it offers an array of AI-driven utilities that refine audio and video with a single click. From denoising the audio to enhancing the clarity, a lot can be done to refine the sounds.
When editing the sound, you can apply the keyframing to assign a unique audio setting to each keyframe. Music makers working with music videos can explore the Equalizer menu and select an option that goes with the instruments they are using. They can detach the audio from the video and edit without influencing the other tracks. If you want to use this mix audio in Premiere Pro alternative, follow the guide below:
 secure download

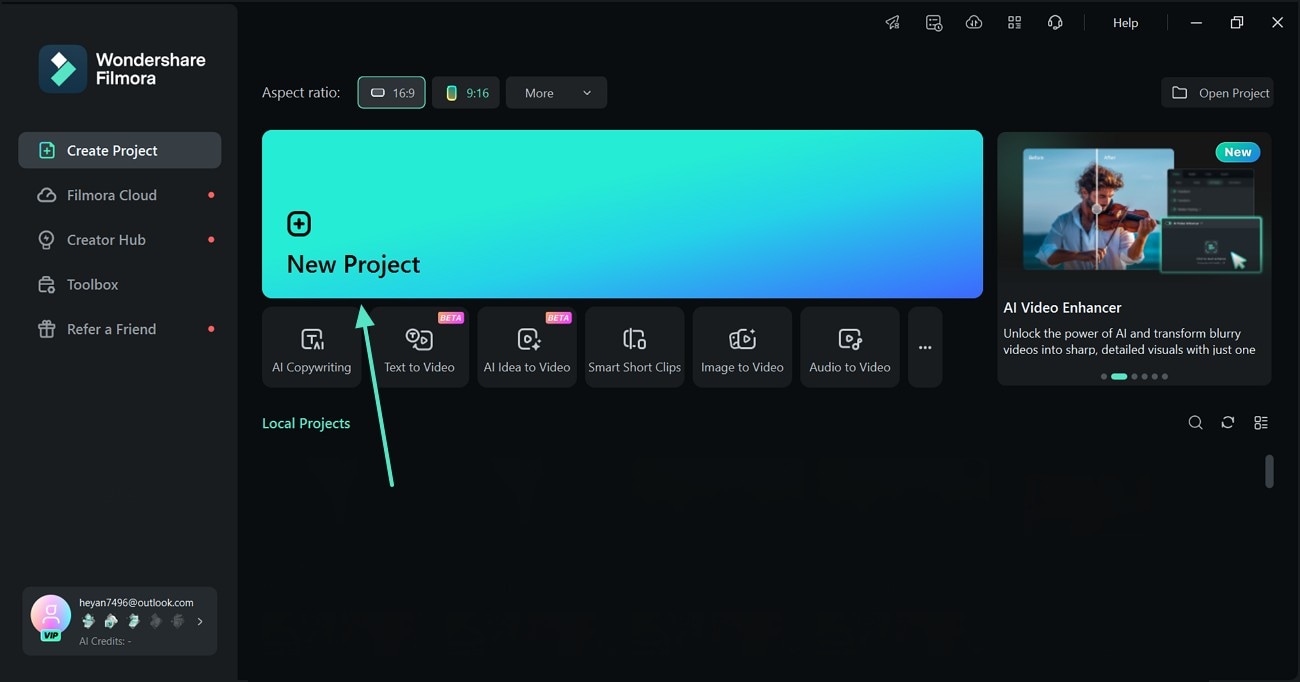
- Step 1. Click the New Project Button. To begin with, select the "New Project' button and import a video in the next interface.
- Step 2. Access the Audio Panel. From the right panel, enter the "Audio" section and explore the "Adjustment" section. In this space, you will be able to enable the "Auto Normalization" option to automatically adjust values to a standard range or level for consistency. You can also use the relevant slider to customize the "Volume."

- Step 3. Pick the Audio Channel. Explore the "Audio Channels" menu and select the desired option to control how sound is routed and perceived in your project.
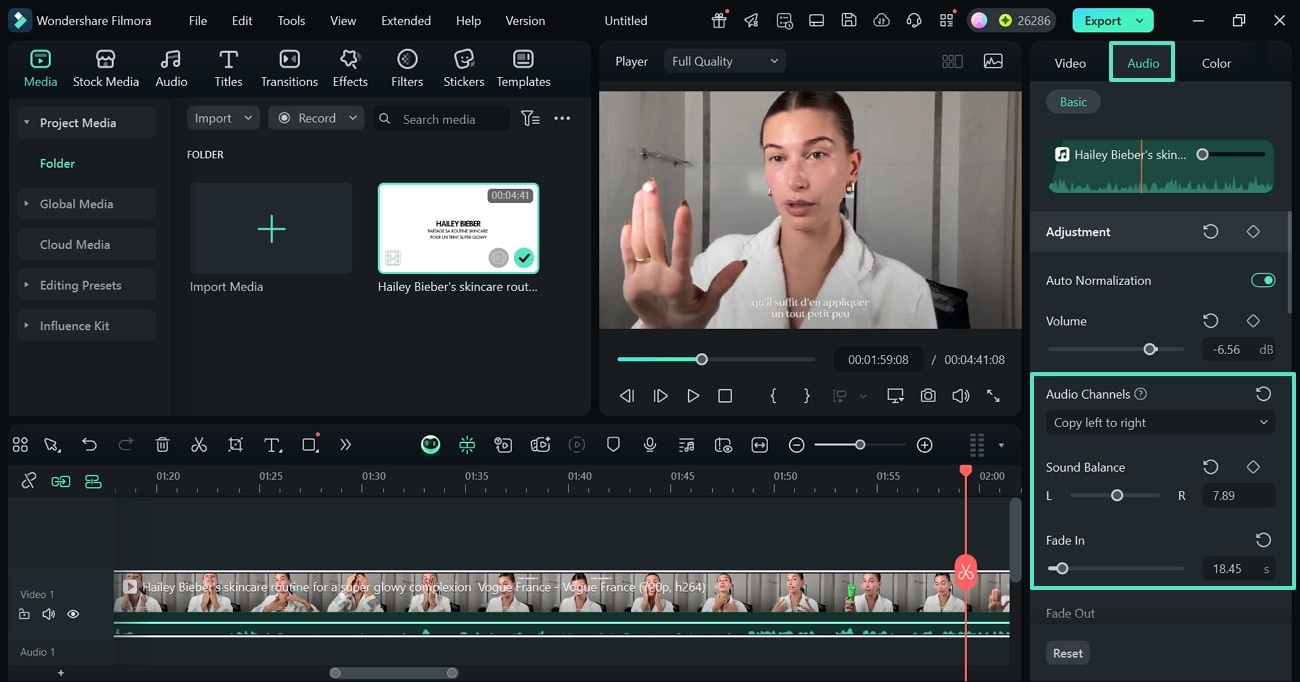
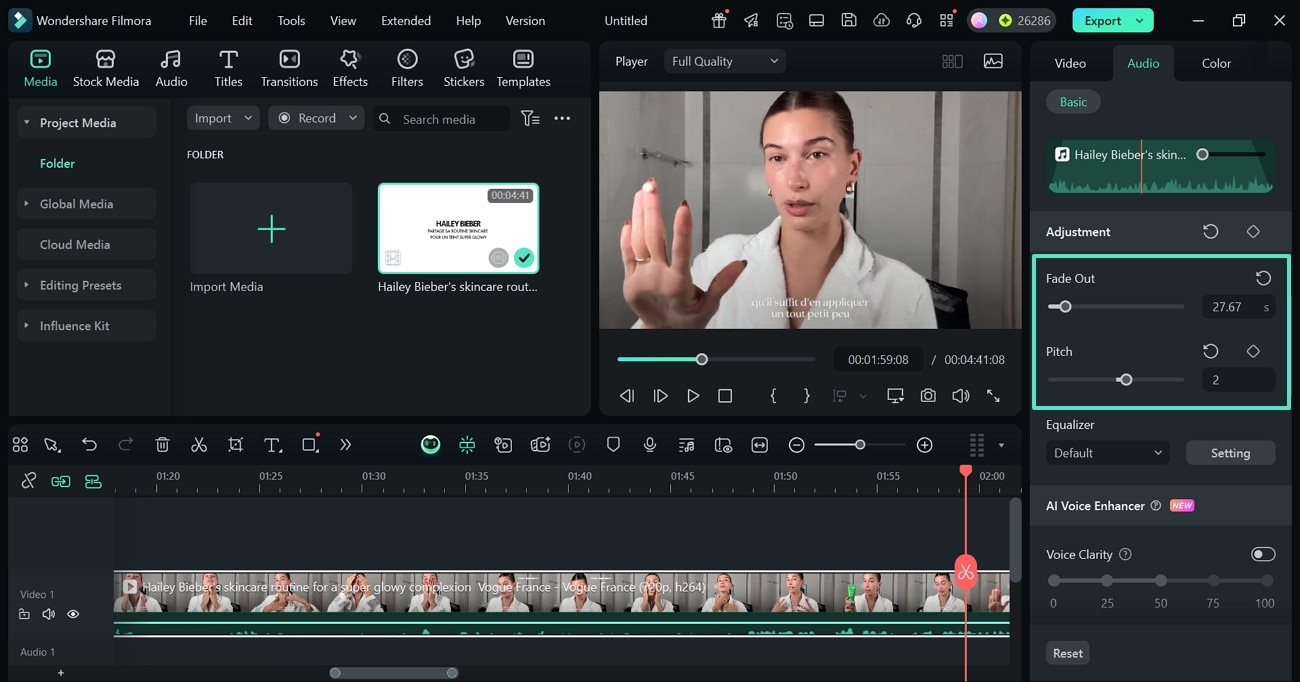
- Step 3. Set a Fade in and Fade out Level. Using the designated slider, adjust the fade-in and fade-out levels to create smooth audio transitions. Next, set the "Pitch" of the voice to match the desired tone or mood.
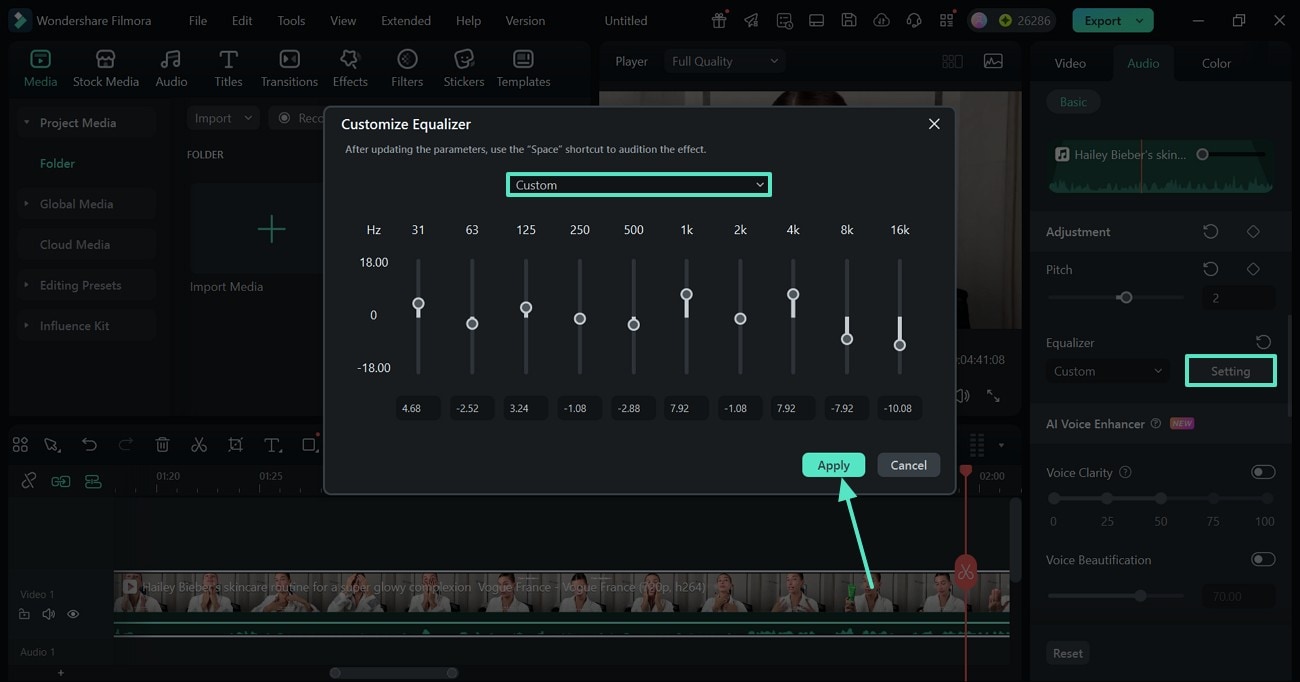
- Step 4. Enter Custom Equalizer Settings in the Next Window. Navigate to the "Equalizer" menu and select the ‘Setting' option. This will open a new window where you can customize the equalizer to fine-tune frequencies for clarity, balance, and overall sound quality.
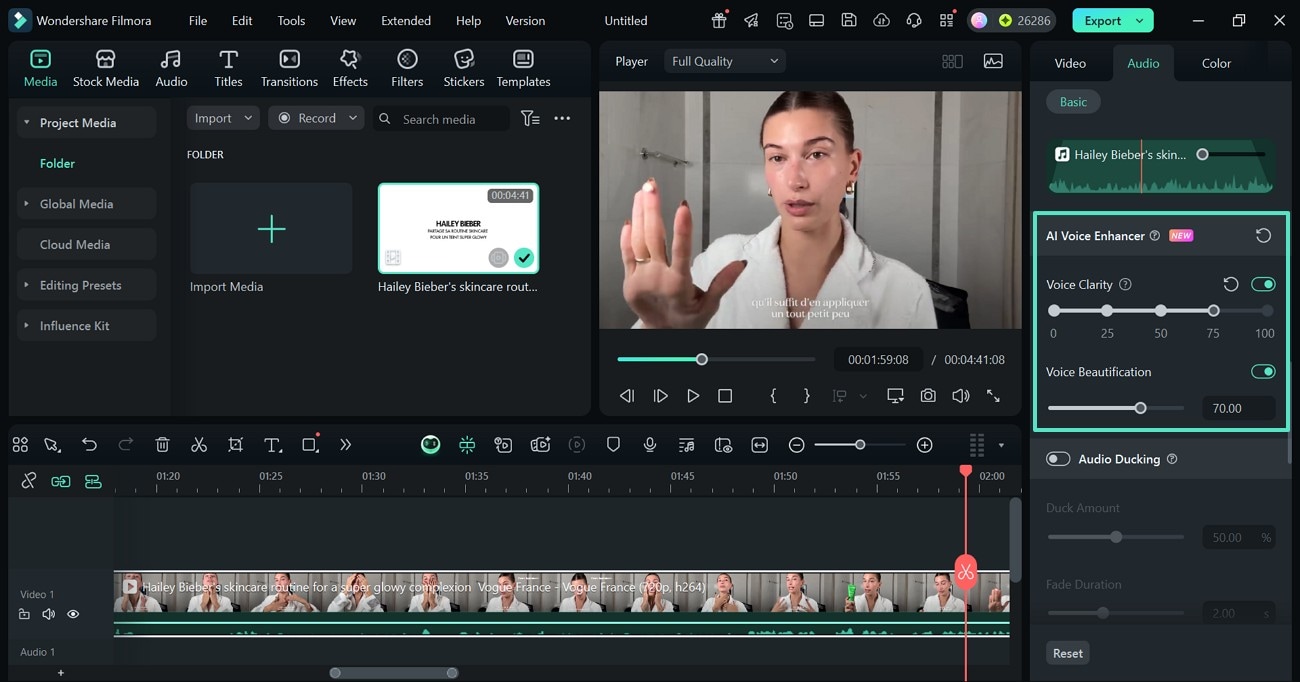
- Step 5. Enhance the Voice Clarity and Beauty. Scroll down the panel and explore the "AI Voice Enhancer" section. Here, turn on the "Voice Clarity" toggle and adjust the clarity level using the dots below. Under this feature resides the "Voice Beautification" option that can be adjusted using its slider.
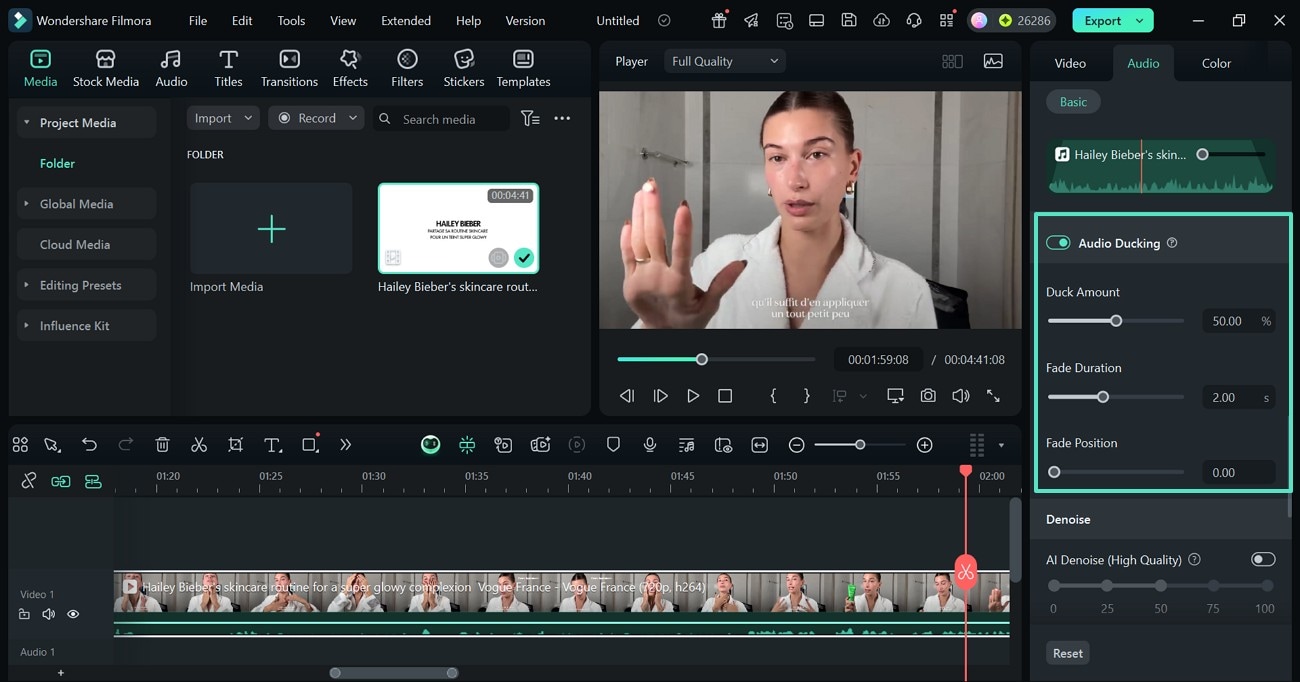
- Step 6. Apply and Adjust Audio Ducking. From the same panel, enable the "Audio Ducking" option and customize the level of its aspects. This will help you balance background music with dialogue or narration for clear, professional sound.
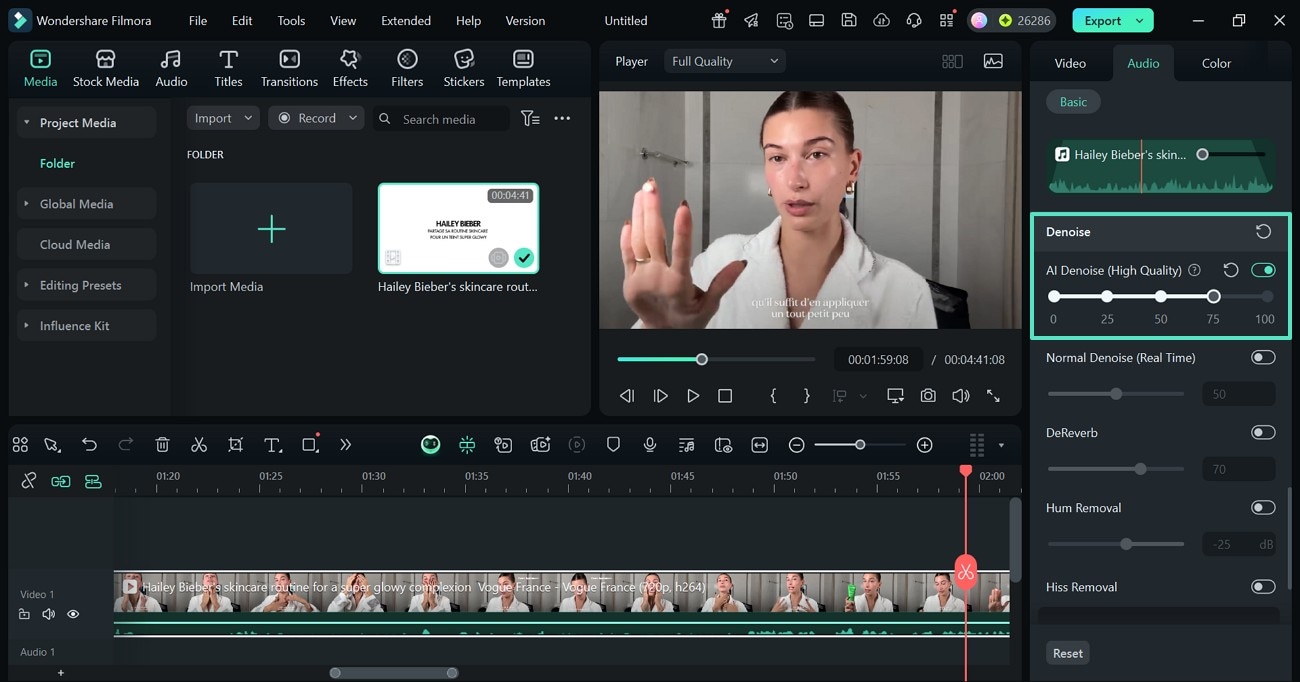
- Step 7. Remove the Unnecessary Background Noise. To polish the audio quality, get rid of the background noise by enabling the "AI Denoise" toggle. You can scroll down and select the type of noise you want to remove.
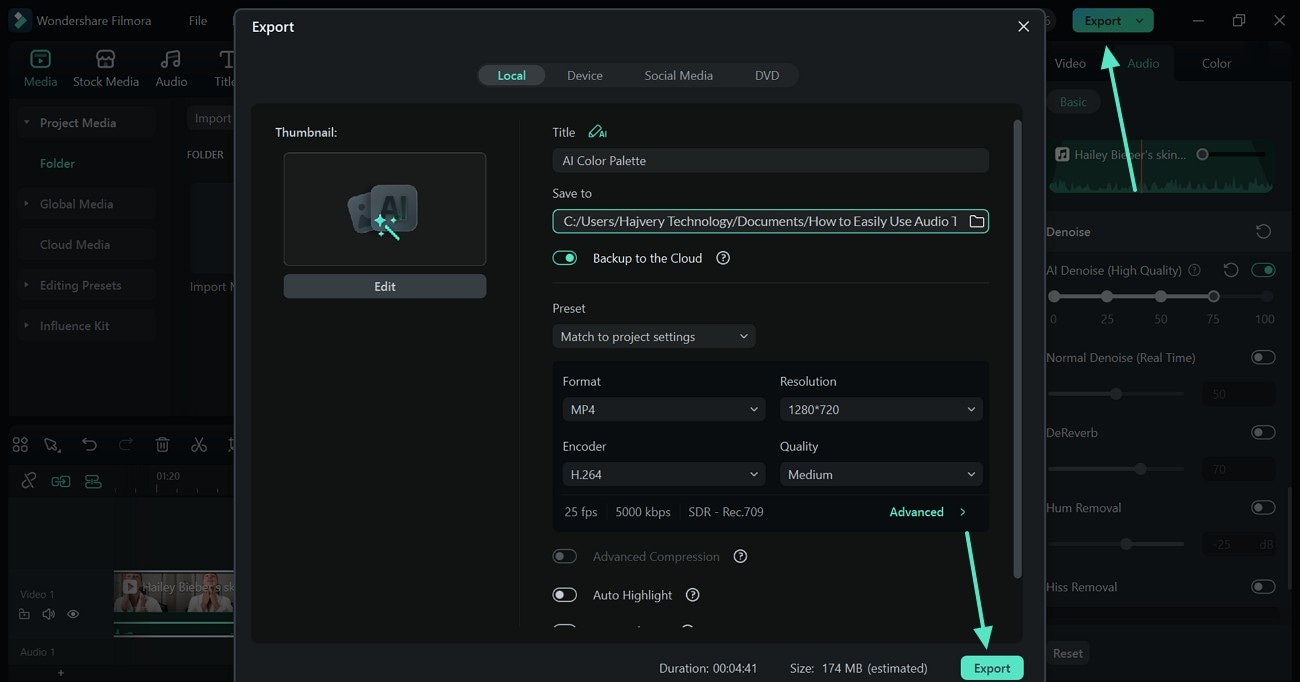
- Step 8. Save the Edited Video to Your PC. Once the sound of the video is as needed, select the "Export" button at the top right to save it to your device using the following window.
secure download
Conclusion
All in all, the audio track mixer Premiere Pro options are game changers in the world of audio editing. It offers a complete virtual console for refining the quality of your sound. Although workable, it is not beginner-friendly and lacks essential AI audio features. To compensate for these limitations, Filmora steps in. It provides users with an intuitive interface and handy one-click AI features that enhance their visuals and audio.
