Discord's always been a fun place to chill with your friends or catch up with communities online. And when it's time for video chat, you must want to represent yourself in the best light possible.
But the problem is, not all of us are comfortable showing our room or sitting in the perfect setup. What if your current background isn't worth showing on camera? You are probably looking for ways to change your Discord video background. This is what we are here for.
We'll present all possible methods to customize your video background on Discord. Blurring it out? Changing it into a custom one? Let's get you set up.

In this article
Part 1. How to Change Discord Background via User Settings
The first method to change your Discord camera background is through the user settings. With this method, you don't have to scramble mid-call looking for ways to perfect your background. It lets you set your background first before joining the voice channel for a video call, so everything is ready once you turn on your camera.
How to Change The Background on Discord
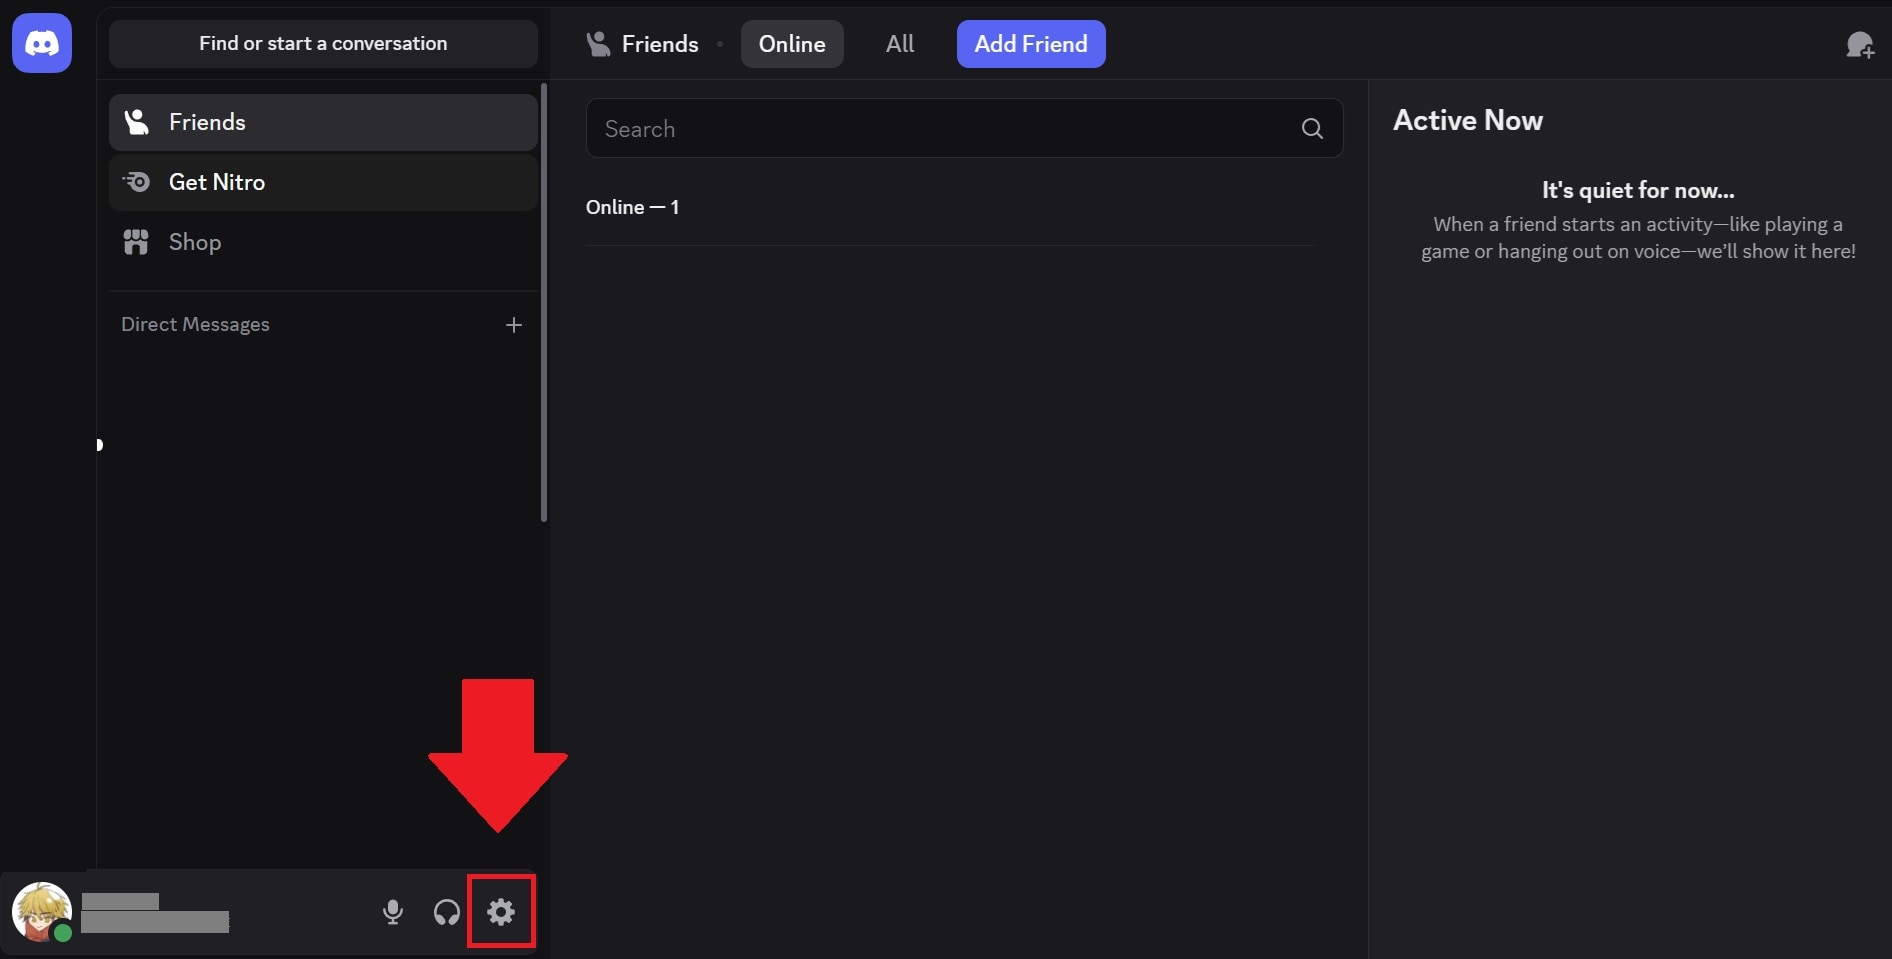
Step 1: Click the cog wheel at the bottom left of your Discord window to open User Settings.
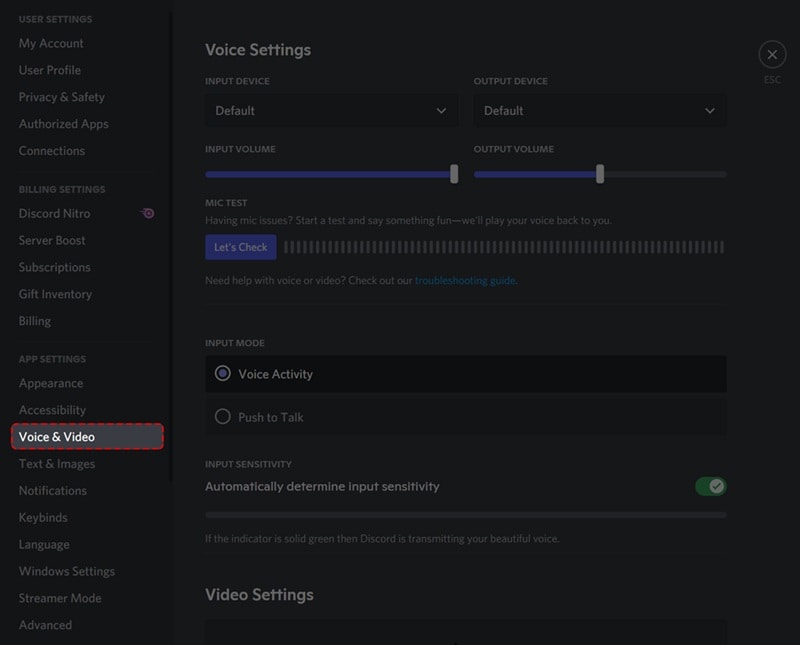
Step 2: In the left-hand menu, go to Voice & Video.
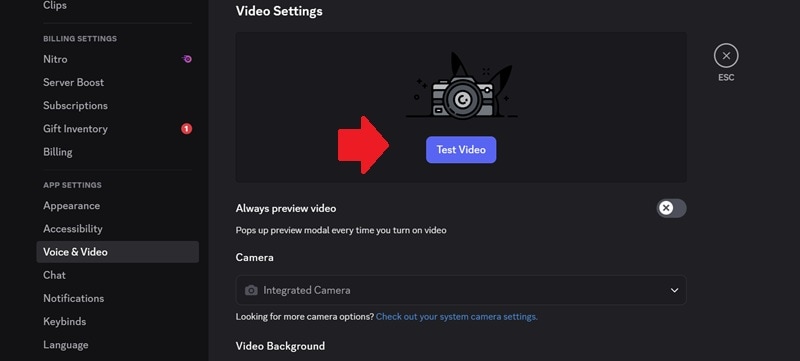
Scroll down to the Video Settings section, and you'll see several options:
- "Always preview video" toggle
- Camera selection drop-down
- Video Background options
Click Test Video to see a preview of how your video looks.
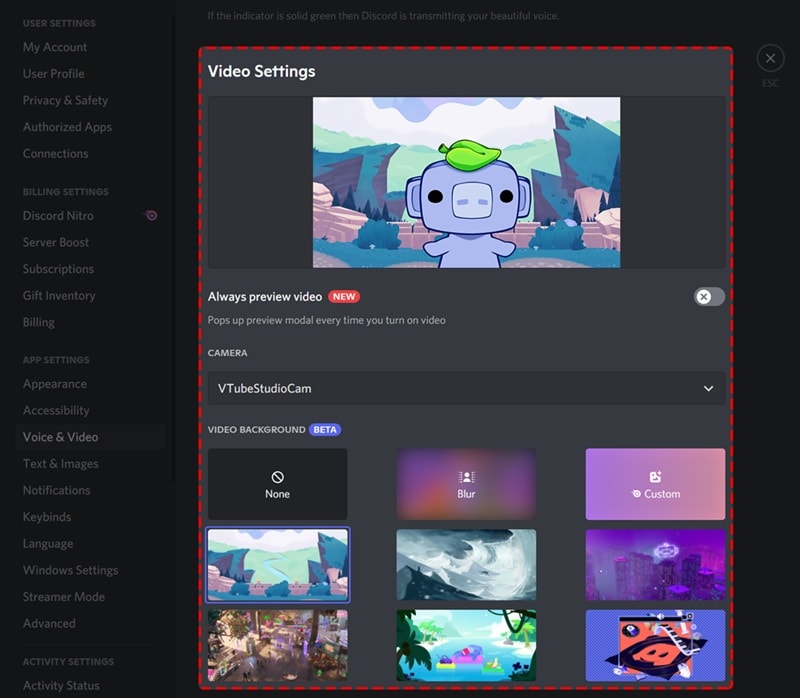
Choose your preferred background. If you are looking for ways on how to blur your Discord background, select "Blur." If not, you can also choose a preset or upload a custom one.
Step 3: Close to Save the Changes
If you are okay with that, you can close the settings. Your chosen background will automatically apply during your next video call.
Part 2. How to Change Background in Discord in a Voice Channel
When you're already in a call (or in a voice channel on Discord), you can still change your Discord background without leaving the chat. This method is useful if you forgot to set it up beforehand or suddenly think of switching it mid-conversation.
How to Change Discord Background During a Call
Step 1: Join a voice channel or make a video call and click the Video button. You'll find it either at the bottom left of your Discord window or right in the center if you're focused on the channel view.
Step 2: Now, to change the Discord call background while you're on it, click the arrow next to the Video button, then select Change Video Background. Make sure you have turned on the camera to see the option.
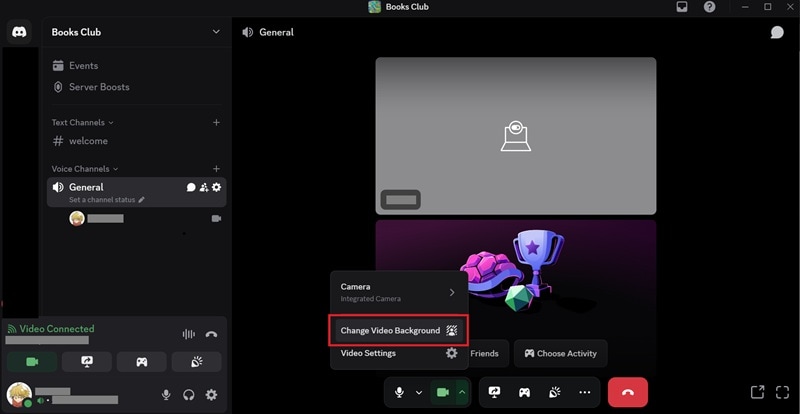
You can then browse and switch the background without interrupting the call.
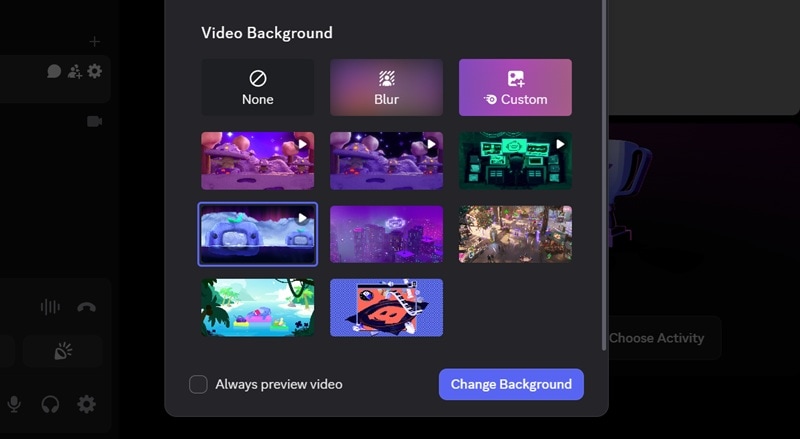
Note: If you've turned on the Preview Video feature in user settings (refer to the previous section), a preview screen will appear. You can see how your camera feed looks with different backgrounds before going live. Pick the one you like, then hit Turn On Camera to apply it.
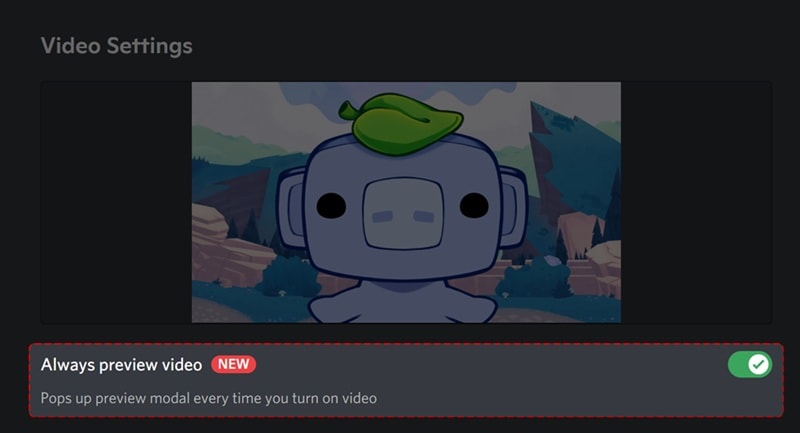
But if you don't have Preview enabled, your camera will start right away using whatever background you used last time.
Part 3. How to Upload a Custom Discord Background
You've seen that Discord gives you a few ways to change your video background. And yes, that includes the option to upload your own custom image, whether you're setting it up in the user settings or switching it during a voice call.
If using a Discord blur background feels a bit plain and the built-in presets don't quite suit your taste, uploading a custom one is the answer. However, note that this feature is only for Discord Nitro users. If you haven't subscribed to Discord Nitro yet, this could be a reason to give it a try.
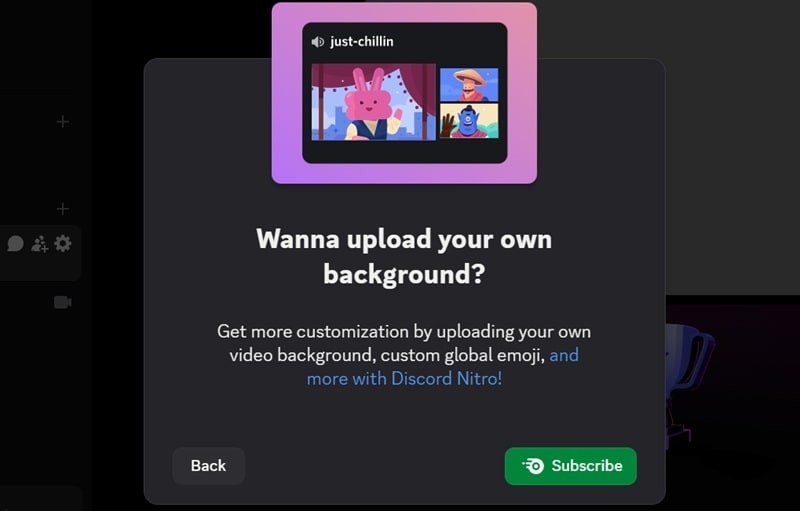
Before we show you how to upload and use a custom Discord background, we'll first walk you through how to create one that's both easy to make and looks great on camera.
Make a Custom Discord Background
Discord lets you upload a custom video background with these specifications:
| Setting | Details |
| File Types | JPG, PNG, GIF, and MP4 |
| Max. Image File Size | 10MB |
| Recommended Resolution | 1920x1080px (HD) |
| Recommended Aspect Ratio | 16:9 |
And as a Discord Nitro user, you can have up to 10 custom backgrounds. To make sure each one fits your taste, you can create them easily by yourself using a beginner-friendly editor like Wondershare Filmora.
Filmora doesn't require any advanced editing skills to get started. Its intuitive interface makes it easy to figure out. Moreover, just because it's simple, it doesn't mean it's limited. You still get all the tools you need to be as creative as you want.
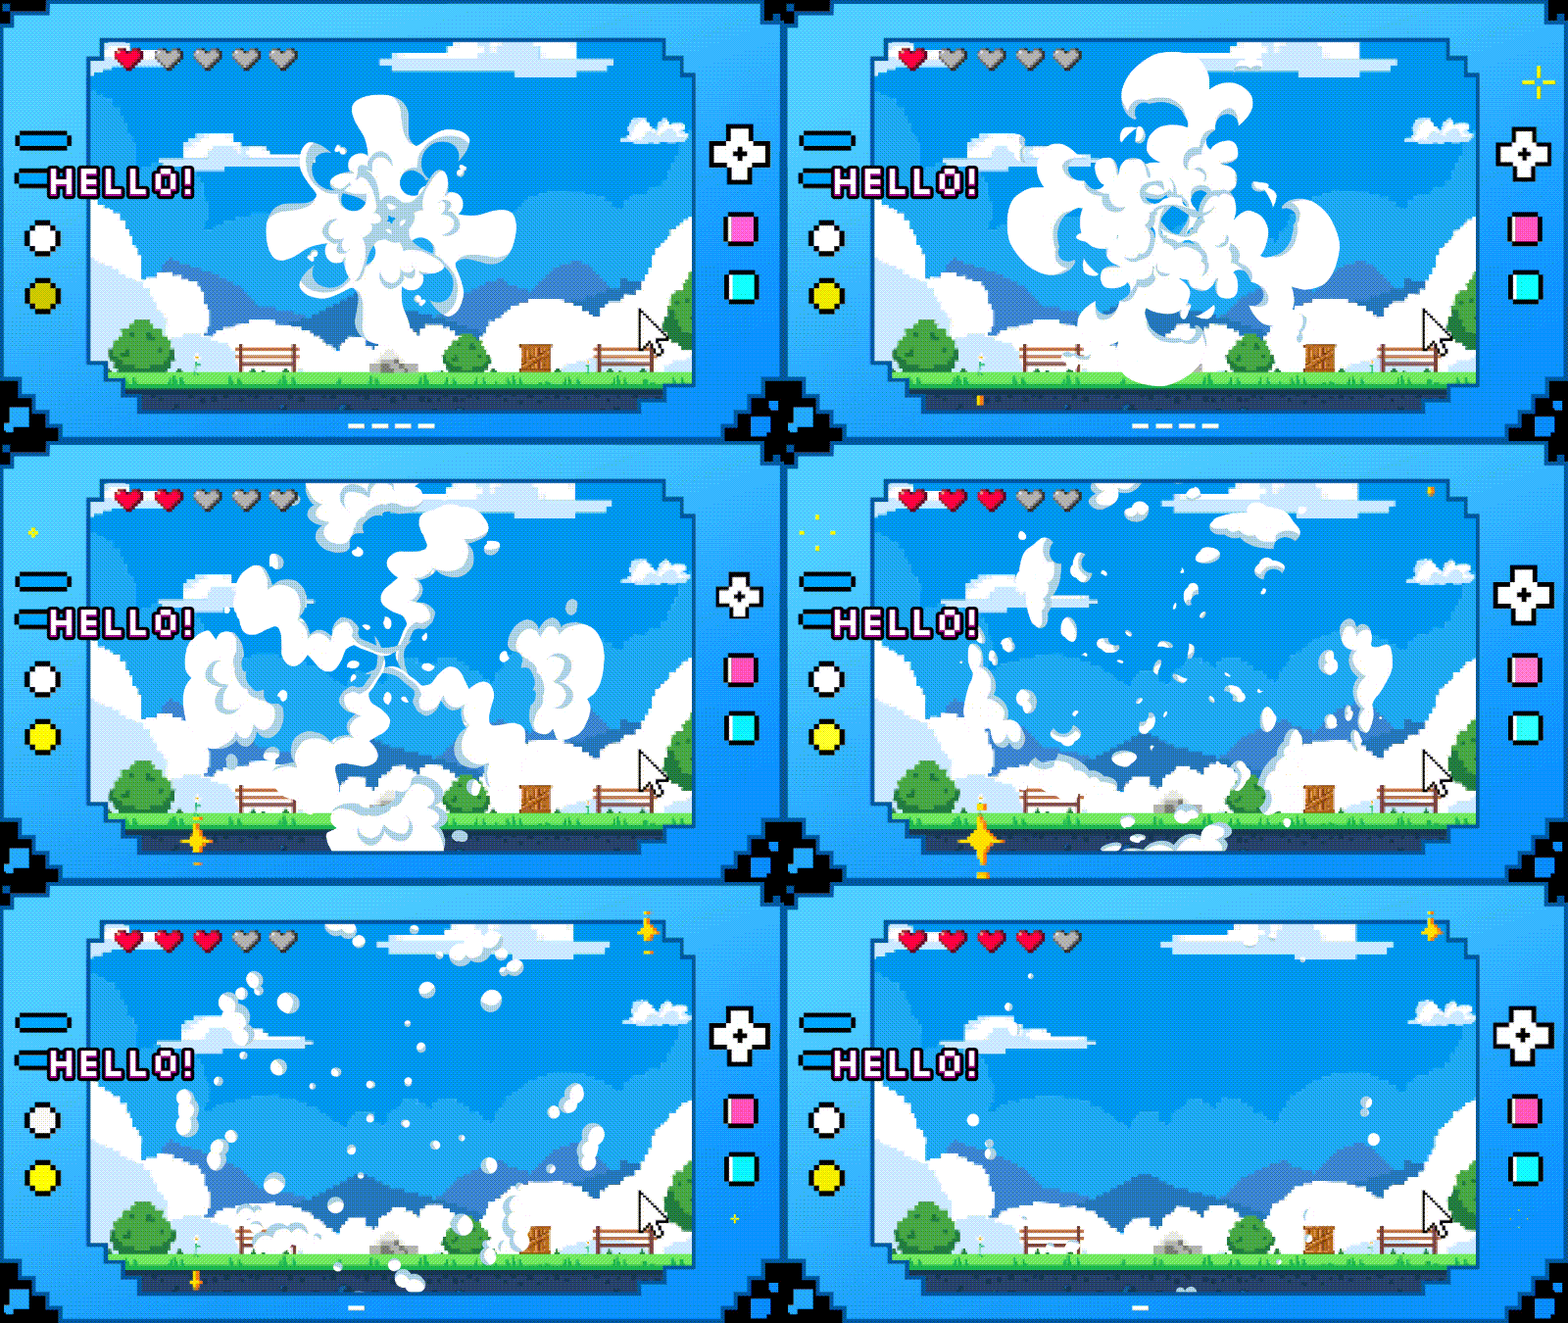
Follow the steps below to start creating a video background for your Discord:
Step 1: Create a New Project and Set the Aspect Ratio
Open Filmora and start a new project. Set the aspect ratio to 16:9, which is the recommended size for Discord backgrounds.

Step 2: Import a Base Video or Image as Your Background
Choose a high-quality image, short video clip, or even a looping GIF as your base background. You can import by clicking the import button under the Media menu. Or, select one from the Stock Media library. Drag it to the timeline.
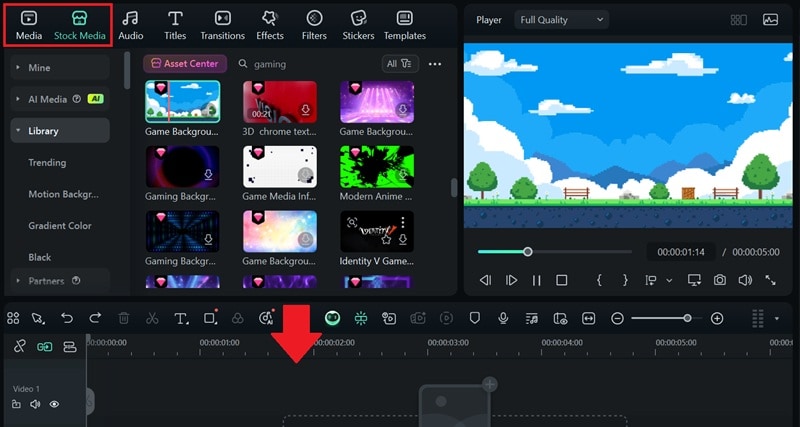
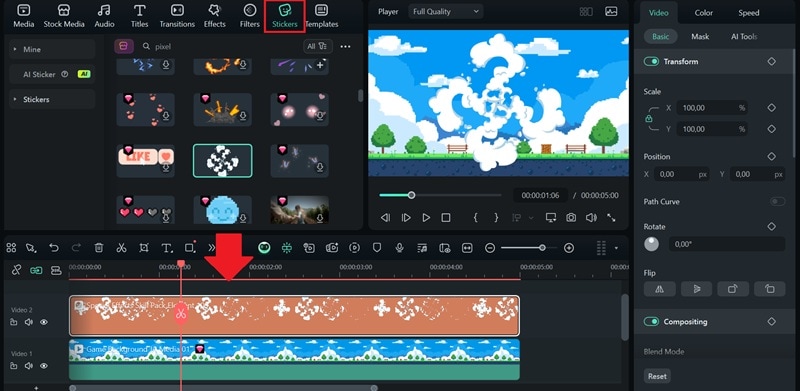
Step 3: Enhance with Stickers and Text
Make it more personal or fun by adding stickers, icons, or text. You can use Filmora's built-in sticker library to find eye-catching elements that fit your vibe.
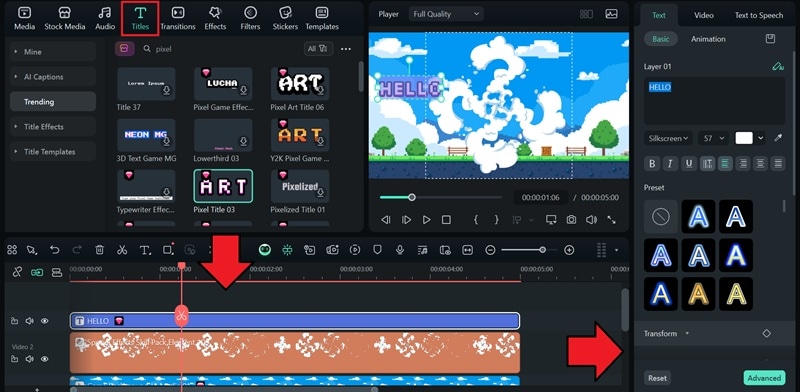
For a text, head to the Titles menu and you'll find various text templates to choose from. Edit and customize the text on the property panel.
Step 4: Add Video Effects for Extra Style
Spice up your background with overlays or animated effects in the Effects menu. Filmora has tons of presets that can make your Discord video background look cool without much effort.
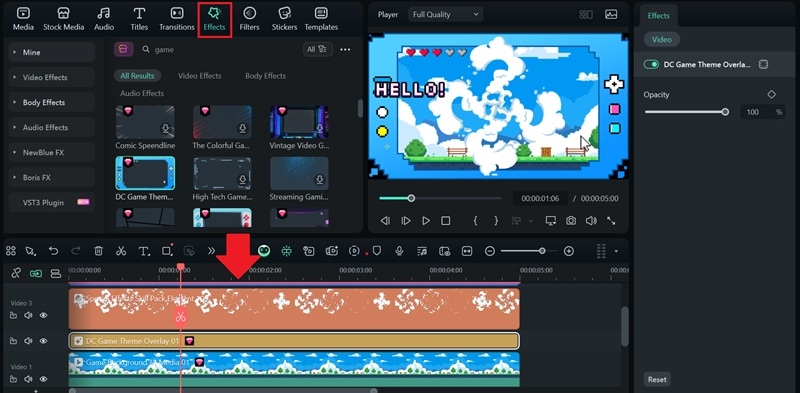
Step 5: Export in the Right Format
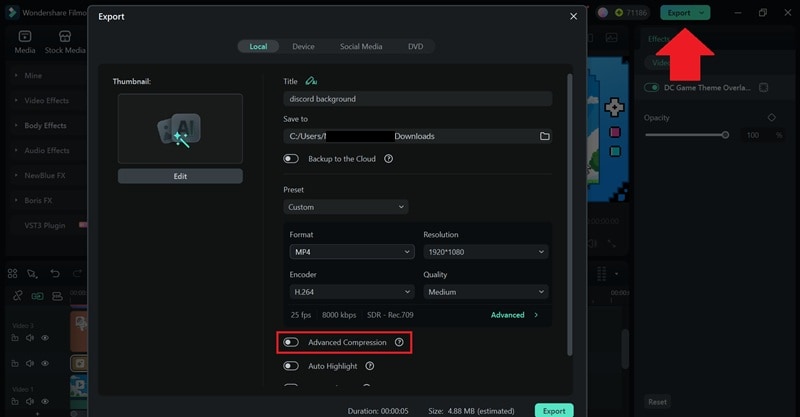
Once you're happy with the result, click Export to save the file in MP4 or GIF format, whichever you want.
💡Tip: If you are exporting in a video format and the file is too large (>10MB), you can enable the "Advanced Compression" tool to reduce the file size without losing too much quality.
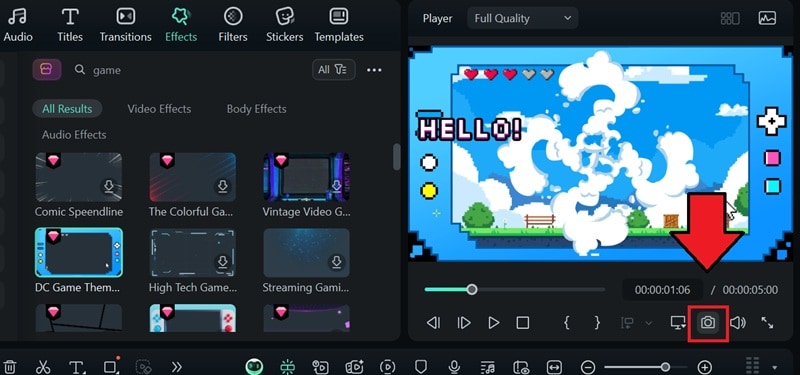
If you want to save it as an image, click the Snapshot button and select whether you want to save it in a PNG or JPG format.
Upload a Custom Discord Background
With your Discord background ready, you can follow the previous steps we have covered. But this time, select "Custom" under the Video background section and follow the prompts to upload your image or video.
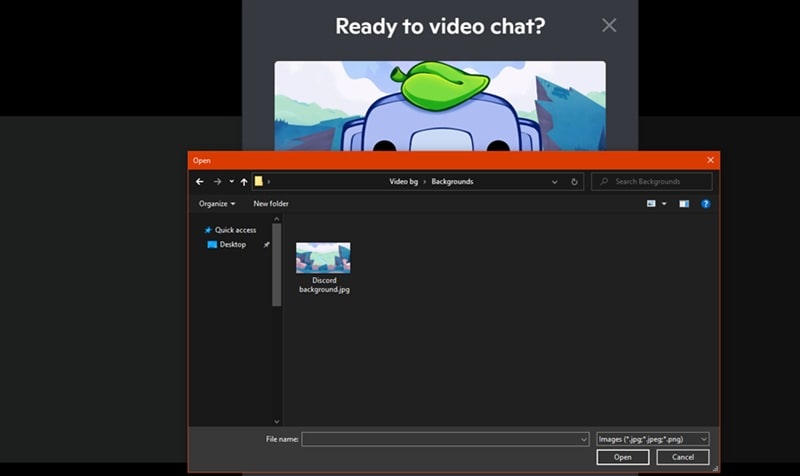
After uploading, it'll appear in your background list and can be used for any future calls in the voice channel.

Part 4. Discord Background Not Working? Here's How to Fix It
Even after following the steps above, is your Discord video background not working? There are a few common reasons this can happen, and every problem has a solution if you know where to look.
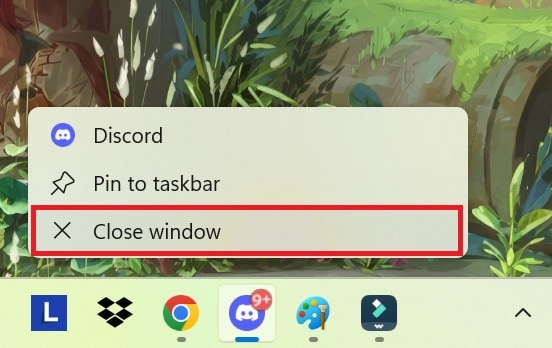
1. Restart Discord or Your Device
Start with the basics. Close and reopen Discord, or restart your entire device. You can also try logging out and back in to refresh your session. There might be bugs or glitches, which a simple restart can usually do the trick.
2. Make Sure to Use the Discord Desktop App
If you have a problem with finding the Discord video background effects, make sure you are using the desktop app. If you're trying this in a browser, the option won't appear. Download the app for Windows or macOS to access full video background features.
3. Restart your internet
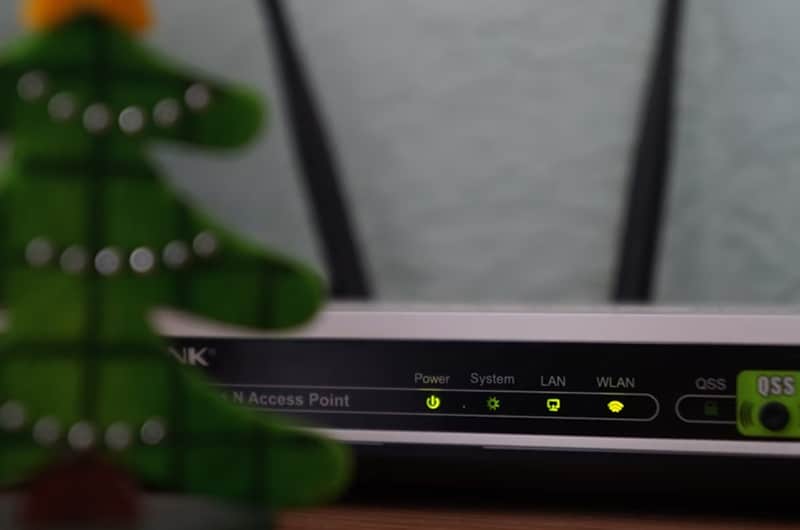
A weak or unstable connection can stop video features from loading properly. Try restarting your Wi-Fi router or switching to a more stable network. Once your internet is back to normal, open Discord again and test the video background feature.
4. Check for Updates and Use the Latest Version
The option to change video call backgrounds was introduced in Discord v1.0.10, released back in 2022. If you're not seeing the feature, it's possible your app hasn't been updated. Make sure you're running the latest version of Discord to access all the current background tools and effects.
Related Templates For You to Try



Conclusion
Changing your Discord video background during a call can help you make a better impression, maintain privacy, and avoid showing anything distracting on camera. You can do it by blurring your video background, selecting one of the presets, or uploading your own custom background you made with Filmora.
Everything you need has been covered in the guide above. Once you're set up, your next video call will look a whole lot better, just how you want it.


 100% Security Verified | No Subscription Required | No Malware


