
 100% Security Verified | No Subscription Required | No Malware

Keeping up with a regular YouTube posting schedule can be tough, especially when life gets busy. Imagine spending hours editing the perfect video, only to realize you won't be home to upload it on time.
Thankfully, there's a way to keep everything on track without stressing over it. With automatic YouTube upload options, you can schedule and auto-upload YouTube videos without lifting a finger.
Automating this process saves time and effort, making it the perfect solution for those who want to stay consistent. So, this guide will break down multiple ways to set up automatic upload to YouTube, step by step, in a simple and easy-to-follow way.
In this article
Part 1. Using Video Editor for Auto Upload Videos to YouTube
One of the easiest and most effective methods of auto-uploading YouTube videos is by using a third-party video editor. So, instead of exporting your video, saving it, and then manually uploading it, you can send it straight to YouTube from the editor itself.
That's right, some video editors come with built-in AI-powered tools that let you automatically upload videos to YouTube without extra steps. Among a few video editors that make it possible, Wondershare Filmora stands out as the best.
 secure download

Here's what makes Filmora the best solution for YouTube auto posts:
- Built-in Social Video Planner: With Filmora, you can schedule and auto-upload your videos directly to YouTube at a set date and time. No need to juggle multiple apps or reminders.
- Track Your Video's Performance: Filmora's Social Video Planner tracks views, likes, shares, and comments right from the dashboard. This gives you a clear picture of your content's reach and engagement.
- Analyze Trends and Improve: Filmora lets you analyze publishing trends over the last 7, 28, or 90 days, so you can spot patterns, make adjustments, and grow your audience with smarter content strategies.
- Smart Short Clips for More Exposure: Filmora makes repurposing video content super easy! With its Smart Short Clips feature, you can quickly turn your long-form videos into bite-sized clips for TikTok, Instagram Reels, and YouTube Shorts.
- AI-Powered Features for Next-Level Videos: Filmora doesn't stop at just editing! It also offers AI Copywriting, AI Translation, AI Captions, and more to help you create engaging content faster.
- Complete Editing Toolkit: Whether you need to trim clips, add effects, or polish your video, Filmora has all the essential tools without any complicated steps.
- Huge Media Library: Filmora gives you access to a massive collection of filters, stickers, effects, and templates to add extra flair to your YouTube content.
As if that weren't enough, Filmora works on both Windows and macOS, so you can use it no matter what device you have. And to top it off, despite all these awesome features, it's still super affordable! With flexible pricing plans and even a free version, you can try it out first before deciding to buy or subscribe.
Those reasons make Filmora hands down the best option for automatically uploading videos to YouTube. Now, let's dive into how you can set it up and start auto-uploading YouTube videos with Filmora. Follow this easy guide to get started!
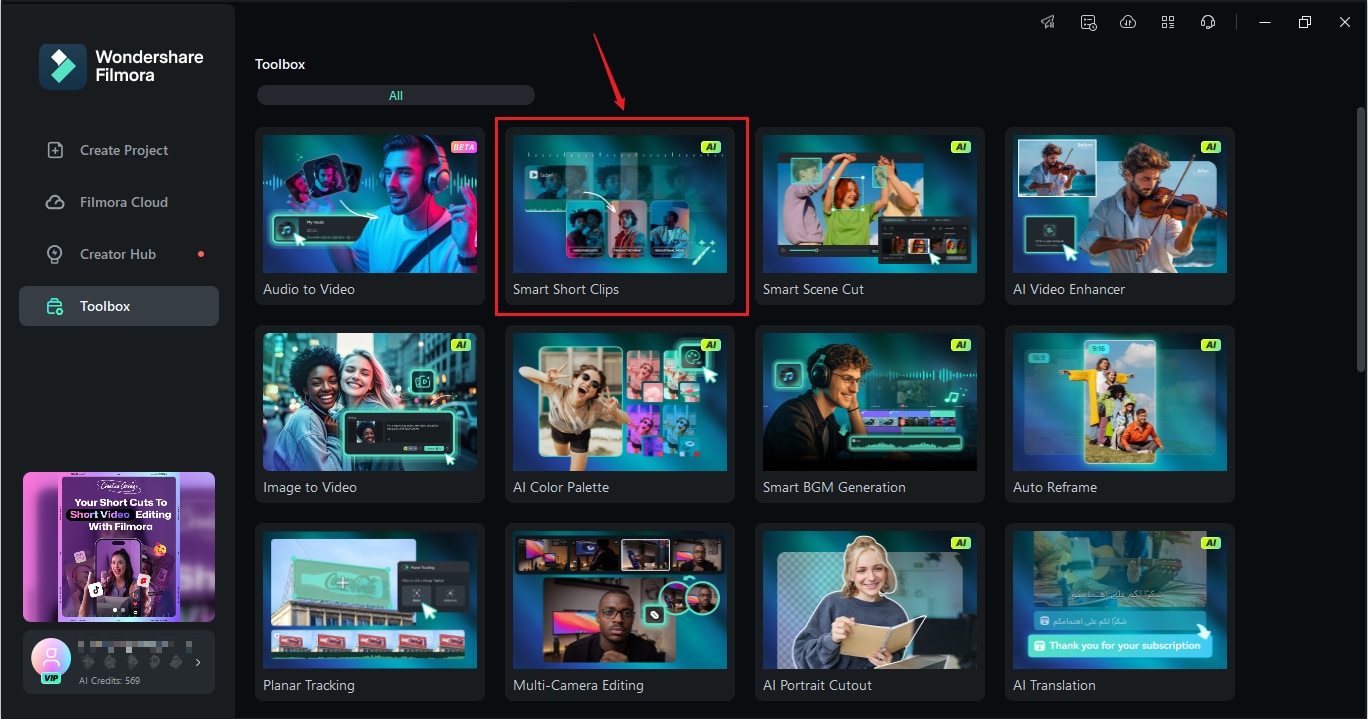
Step 1. Open Filmora and Access the Smart Short Clip Feature
If you haven't already, download and install the latest version of Filmora on your device. Once it's set up, open the program, head over to the "Toolbox" bar, and look for the "Smart Short Clips" feature in the function card.
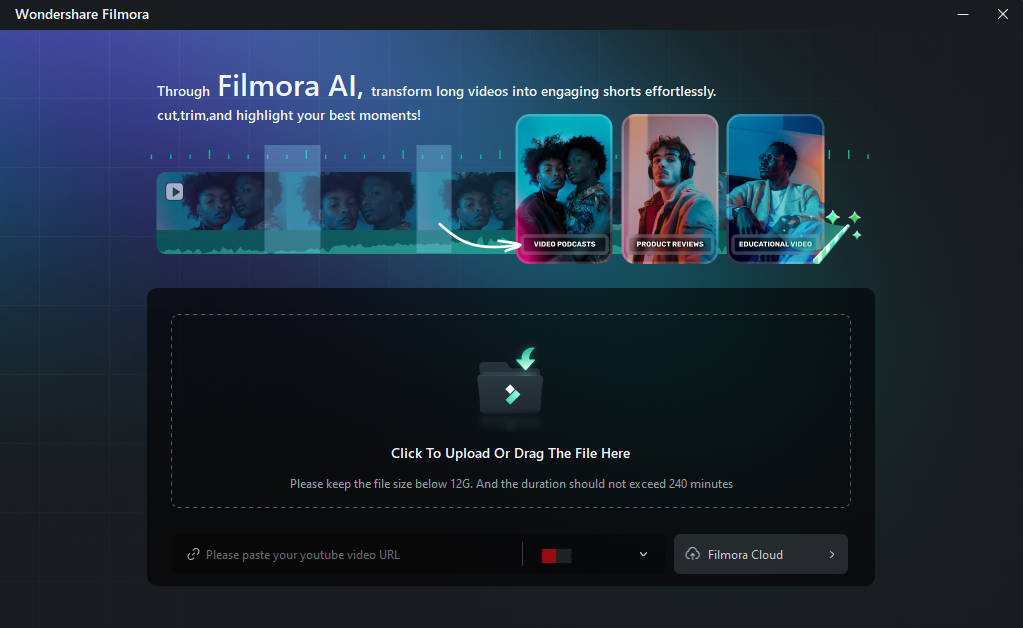
Step 2. Upload Your Video
In the next window, click the Filmora logo to upload a video file, or select a file directly from Filmora Cloud. You can even paste a YouTube video link if you want.
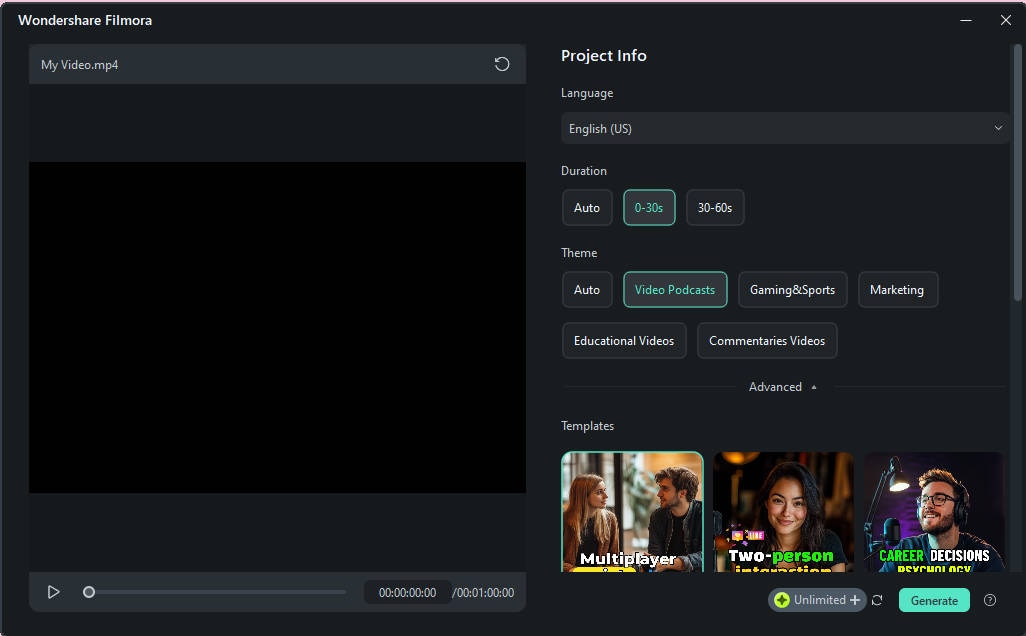
Step 3. Generate a Video and Export It
Next, you need to select the video source language manually. If you want, you can also adjust the duration and themes instead of sticking with the default settings. Scroll down to explore different templates and open the Advanced menu, where you can set the aspect ratio and even enable Smart BGM Generation to automatically add music that matches your content. Once everything looks good, just hit "Generate".
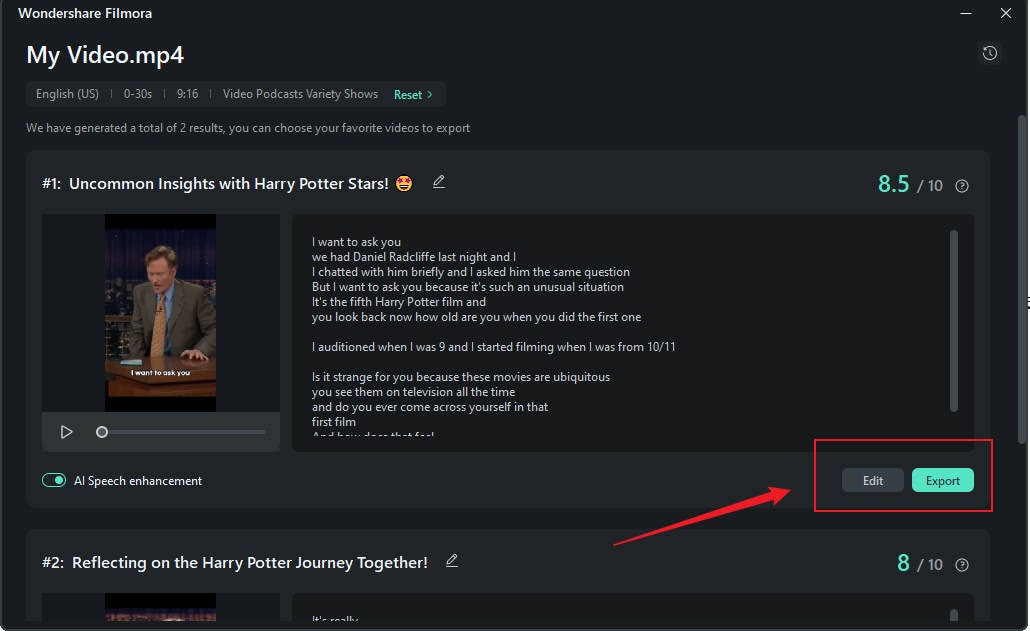
Filmora will generate multiple versions based on your selections and even rate them according to platform rules. Pick your favorite clip. If you want to tweak it further, click "Edit", or if you're happy with it, just hit "Export" to save and share it right away.
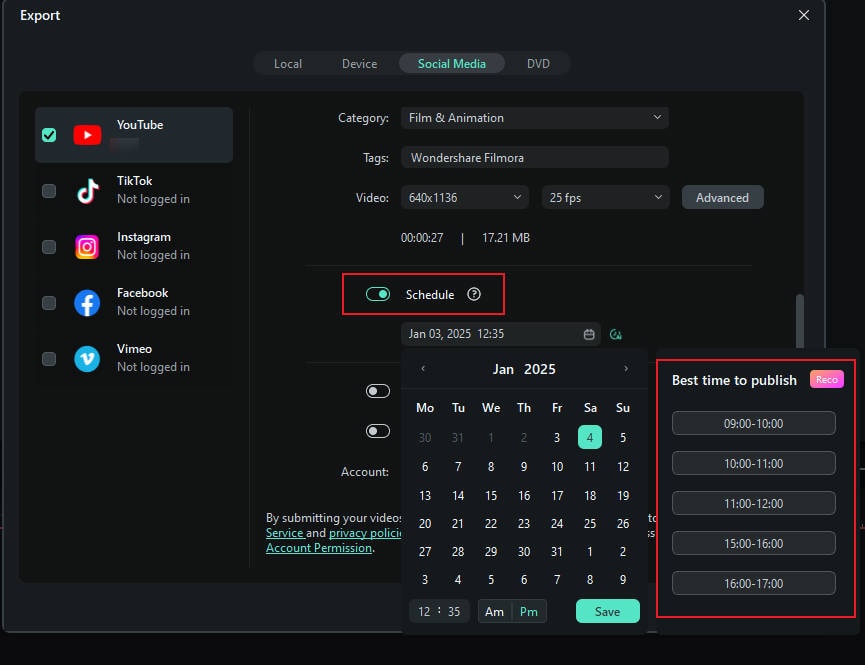
Step 4. Schedule Your Video for Auto-Upload
In the export window, go to "Social Media" and select YouTube as your platform. To schedule your post, enable the Schedule option and set the date and time. You can also customize details like the title, description, category, resolution, and more before uploading.
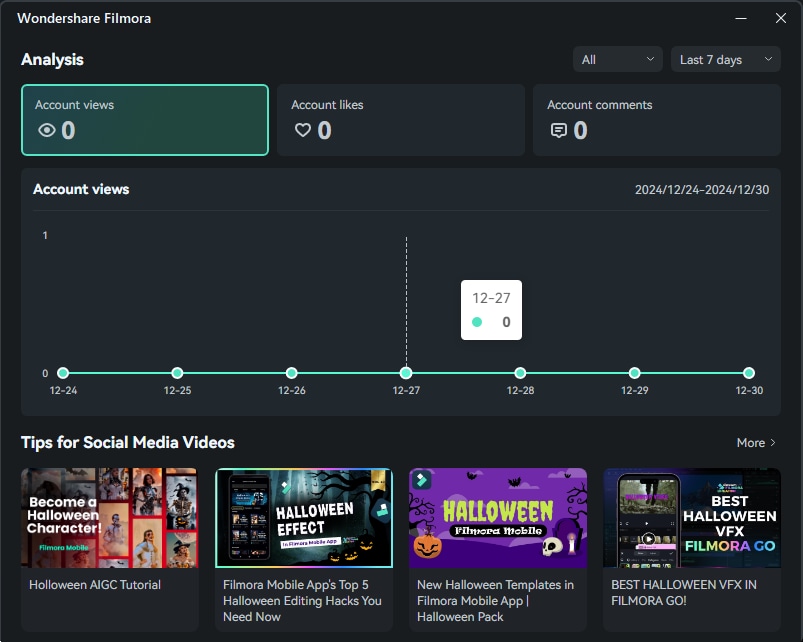
Step 5. Open the Analysis Data
Now that your video is live on YouTube, Filmora's analysis tool lets you track its performance with detailed insights. To check it out, open Filmora and, on the home screen, find the "Publish Tasks" section on the right panel. Click "More" to open the feature and view your video stats instantly.

The tool shows detailed social media stats, including views, likes, and comments from your account. You can switch between 7-day and 30-day analytics, making it easy to track your video's performance all in one place.
Pros and Cons of Using This Method
As you can see, using Filmora to automatically upload videos to YouTube comes with plenty of perks, making it a solid choice for creators who want a smooth and efficient workflow. Here's a quick breakdown of its strengths and weaknesses in using this method for YouTube auto posts:
Part 2. Using YouTube's Built-in Scheduling Feature for Automatic YouTube Upload
As you can see, Filmora makes auto-uploading videos to YouTube super easy, letting you create, edit, and schedule everything in one place. But if you prefer to upload directly through YouTube, there's another way to schedule your videos.
YouTube actually has a built-in scheduling feature inside YouTube Studio, which lets you set a date and time for your video to go live without needing extra software. This is a great option if you already have your video edited and just want to auto-upload your YouTube video and schedule it straight from the platform itself.

To learn how to auto-upload YouTube videos using its built-in feature, you can watch this tutorial video from YouTube's official page titled "How To Upload Videos with YouTube Studio" or follow our simpler guide:
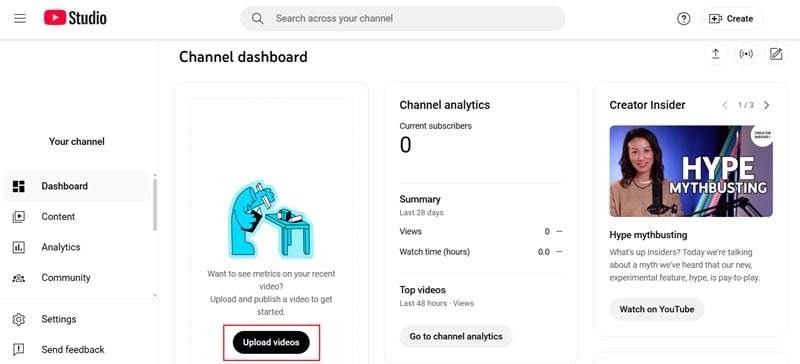
Step 1. Log in to YouTube Studio
Simply log in to your YouTube Studio account, click on your profile icon, and select "Upload Videos".
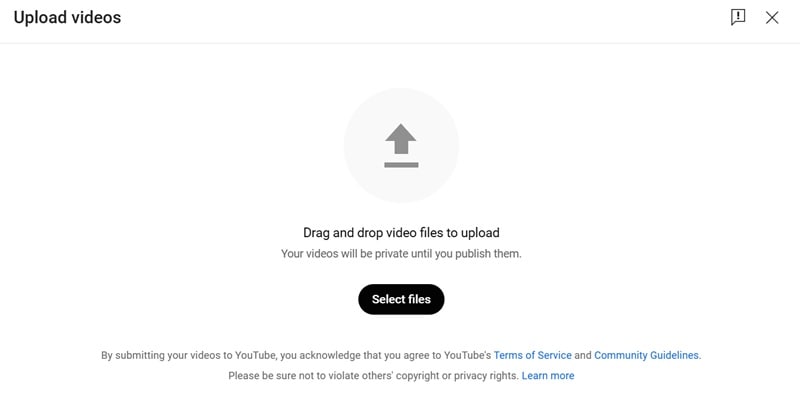
Step 2. Upload your video
Then, simply import the video that you've already edited previously from your device.
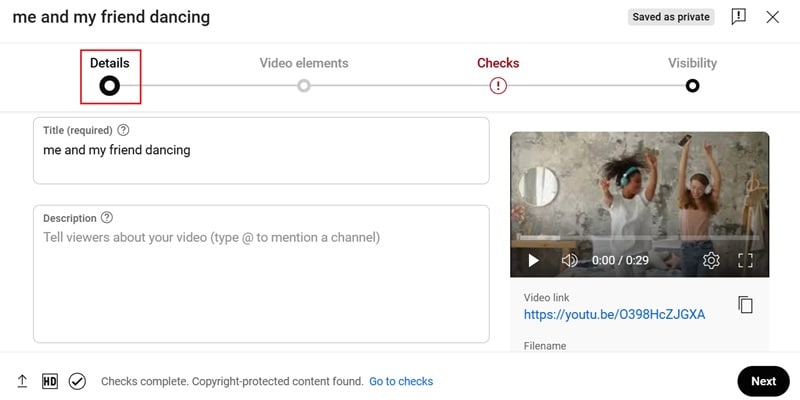
Step 3. Fill out the video details
As your video uploads, a settings panel will pop up. Add details like the title, description, and thumbnail, then move on to setting up other video elements.
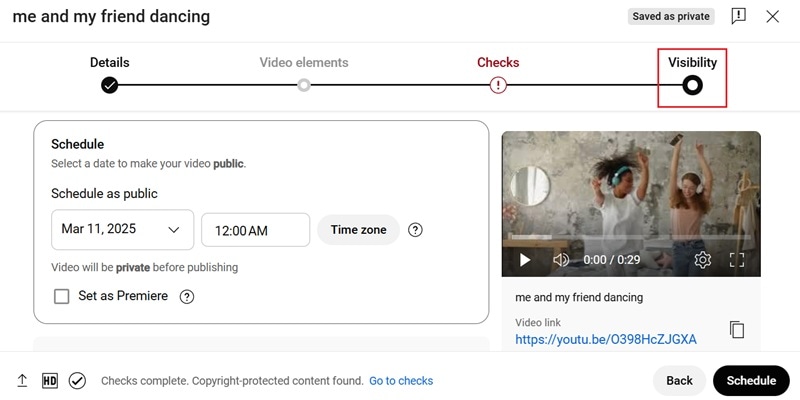
Step 4. Schedule video upload
Next, go to the "Visibility" tab. Set your video to "Public", then choose the date and time you want it to go live on YouTube.
Pros and Cons of Using This Method
YouTube Studio's built-in scheduling feature is another solution to set up automatic YouTube uploads. But like any tool, it has its own pros and cons.
Part 3. Using Zapier for Automatic YouTube Upload
Another great way to auto-upload videos to YouTube is by linking it with cloud storage like Google Drive, Dropbox, or OneDrive. In that case, Zapier is the perfect solution.
Zapier is an automation tool that connects different apps, allowing you to set up a workflow (called a Zap) that automatically uploads videos to YouTube. Once it's set up, your videos will be uploaded straight from your cloud storage without you having to lift a finger.
If you want to learn how to automatically upload videos to YouTube using Zapier, check out this video for a quick overview:
How To AUTOMATE Video Uploads To YouTube Using Zapier
Pros and Cons of Using This Method
Zapier makes auto-uploading videos to YouTube much easier. That said, don't forget to consider its ups and downs.
Part 4. How to Choose the Best Auto-Upload YouTube Video Method for You
By now, you've seen a few different ways to automatically upload videos to YouTube, but not all automation methods work the same way. Some are fully hands-off, while others still require a bit of manual work.
To help you figure out which method is the best fit for you, here are a few key things to consider:
- If You Want a Simple Solution: Use Filmora's Social Video Planner because it lets you edit, schedule, and upload videos all in one app, so there's no need to juggle multiple tools.
- If You Work With Cloud Storage: Try Zapier since it can auto-upload YouTube videos from Google Drive, Dropbox, or OneDrive. It connects your storage to YouTube, making the upload process hands-free.
- If You Edit Videos Frequently: Use Filmora with its auto-upload feature, so you can go straight from editing to scheduling without extra steps.
- If You Want Full Automation: Use Filmora. Its Social Video Planner allows you to schedule videos in advance, track performance, and repurpose content, making your workflow super smooth.
- If You Want Free Tools: YouTube's built-in scheduling tool is free and doesn't require extra software, but you'll still need to upload videos manually before scheduling.
- If You Want AI-powered Recommendations: Filmora stands out among the rest. Filmora AI can analyze trends and suggest the best times to post, helping you get more engagement.
- If You Need High-Quality Video Stories: Filmora is the best option for this. It has a Smart Short Clips feature to turn long videos into short clips for TikTok, Instagram Reels, and YouTube Shorts with just a few clicks.
- If You Prefer Manual Control: Filmora is superior in this aspect. It lets you customize everything, from titles and descriptions to thumbnails and scheduled posts, while still keeping things automated.
Final Thoughts
At the end of the day, the best method for auto-uploading videos to YouTube depends on what works best for you. However, considering all the factors above, Filmora stands out as the top choice. Not only does it let you edit, schedule, and auto-upload videos to YouTube, but it also supports scheduling for Instagram Reels, Facebook, and more—making it the ultimate all-in-one tool for content creators. 🚀🎬
Conclusion
Keeping up with a YouTube posting schedule can be a challenge, but automatic YouTube uploads make it much easier. So, this guide covers three different ways to automatically upload videos to YouTube. From all the options, the best method for auto-uploading YouTube videos is by using Wondershare Filmora.
It has a Social Video Planner, so you can schedule and set the exact time for your uploads. It also tracks your video's performance by providing key social media insights, so you can see how your content is doing.
Plus, Filmora is a full video editing tool, so you can edit and improve your videos before posting them. Whether you're sharing long videos or short clips, Filmora makes the whole process of automatic upload to YouTube quick and simple.
