
 100% Security Verified | No Subscription Required | No Malware


 ChatGPT
 Perplexity
 Gemini
 Claude
 Grok
Grok
Want to record YouTube audio in high quality? Whether you're creating content or saving clips for personal use, a high quality audio recording makes all the difference. You can record audio from a YouTube video on Mac or PC using the right tools. Just remember to avoid copyrighted content—only use copyright-free audio. Let's explore how to record high quality audio the right way.
In this article
Essential Equipment for High-Quality YouTube Audio Recording
Audio recording has evolved dramatically over the past century—from large analog rigs used by bands like The Beatles to compact, digital systems anyone can set up at home today. With modern tools, you only need three essential components to record high-quality YouTube audio:
🎙️ A Good Microphone
You don't need studio gear worth thousands to get professional-sounding results. If you're searching for the best mic for recording YouTube videos, look no further than budget-friendly microphones in the $50–$100 range—they offer excellent clarity for voiceovers, vlogging, tutorials, and more.
Some of the most reliable and YouTube-friendly mic brands include:
- Shure
- Sennheiser
- Audio-Technica
🎛️ A Good Sound Card (Audio Interface)
While many modern computers come with built-in sound cards, a dedicated external audio interface will deliver cleaner, more detailed recordings. These devices are made for one purpose: capturing great audio. Focusrite and Behringer offer solid, affordable options around $50–$100.
💻 Good Recording Software
Your DAW (Digital Audio Workstation) or audio recorder is where the magic happens. Choose one that's:
- Easy to use
- Compatible with your OS
- Offers basic editing tools like cut, EQ, normalize, and export
Some audio recorder also include video editing features, which are perfect for YouTubers working on both sound and visuals in the same workflow.
Now that you know the gear, let's move on to how to actually record YouTube audio.
- Superb video stabilization with low distortion.
- Vast video/audio effects and creative assets.
- Powerful AI for effortless content creation.
- Intuitive, professional yet beginner-friendly.
- Works on Mac, Windows, iOS, and Android.


Best Ways to Record YouTube Audio on Any Device
💻 Record YouTube Audio on Windows & Mac
Wondershare Filmora is the all-in-one solution mentioned above, combining powerful video and audio editing with an intuitive experience that works for both beginners and experienced creators. Alongside its rich editing features and AI tools, Filmora also offers a more streamlined screen recording experience with flexible Area, Full Screen, and Window capture modes, beginner-friendly guidance, smarter screen selection, and quicker recording controls. With everything from recording to editing in one place, Filmora makes it easier to create polished content without a complicated workflow.
The first step is to download and install Filmora by going to the download page. When you download the installation file, open it and follow the prompts to install the software. Open the software and prepare the YouTube video link that features the audio you want to download.
 secure download
Play the video on your screen and use the screen recording feature to capture the video. Here's how it works.
Answer: To record YouTube audio in high quality using Filmora, use the screen recorder to capture system sound and then extract the audio track.
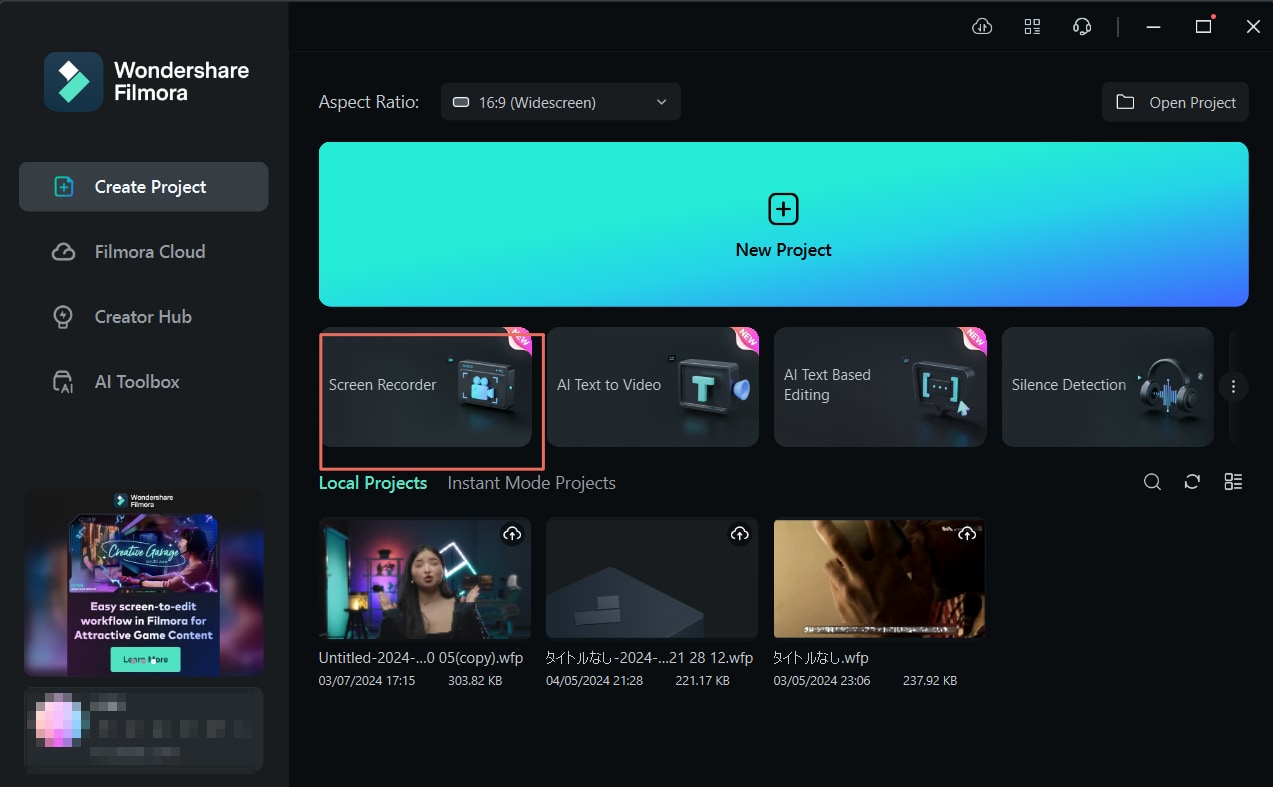
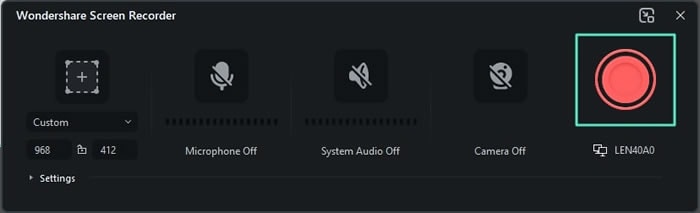
- Launch Filmora and select Screen Recorder from the home screen.
- Enable System Audio and select the recording area of the YouTube video.
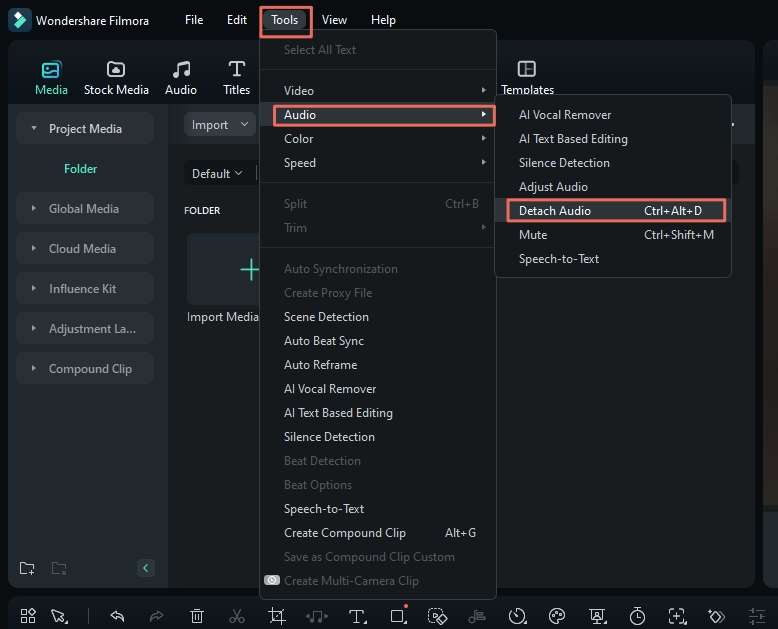
- Capture the content, then right-click the video in the timeline and select Detach Audio.
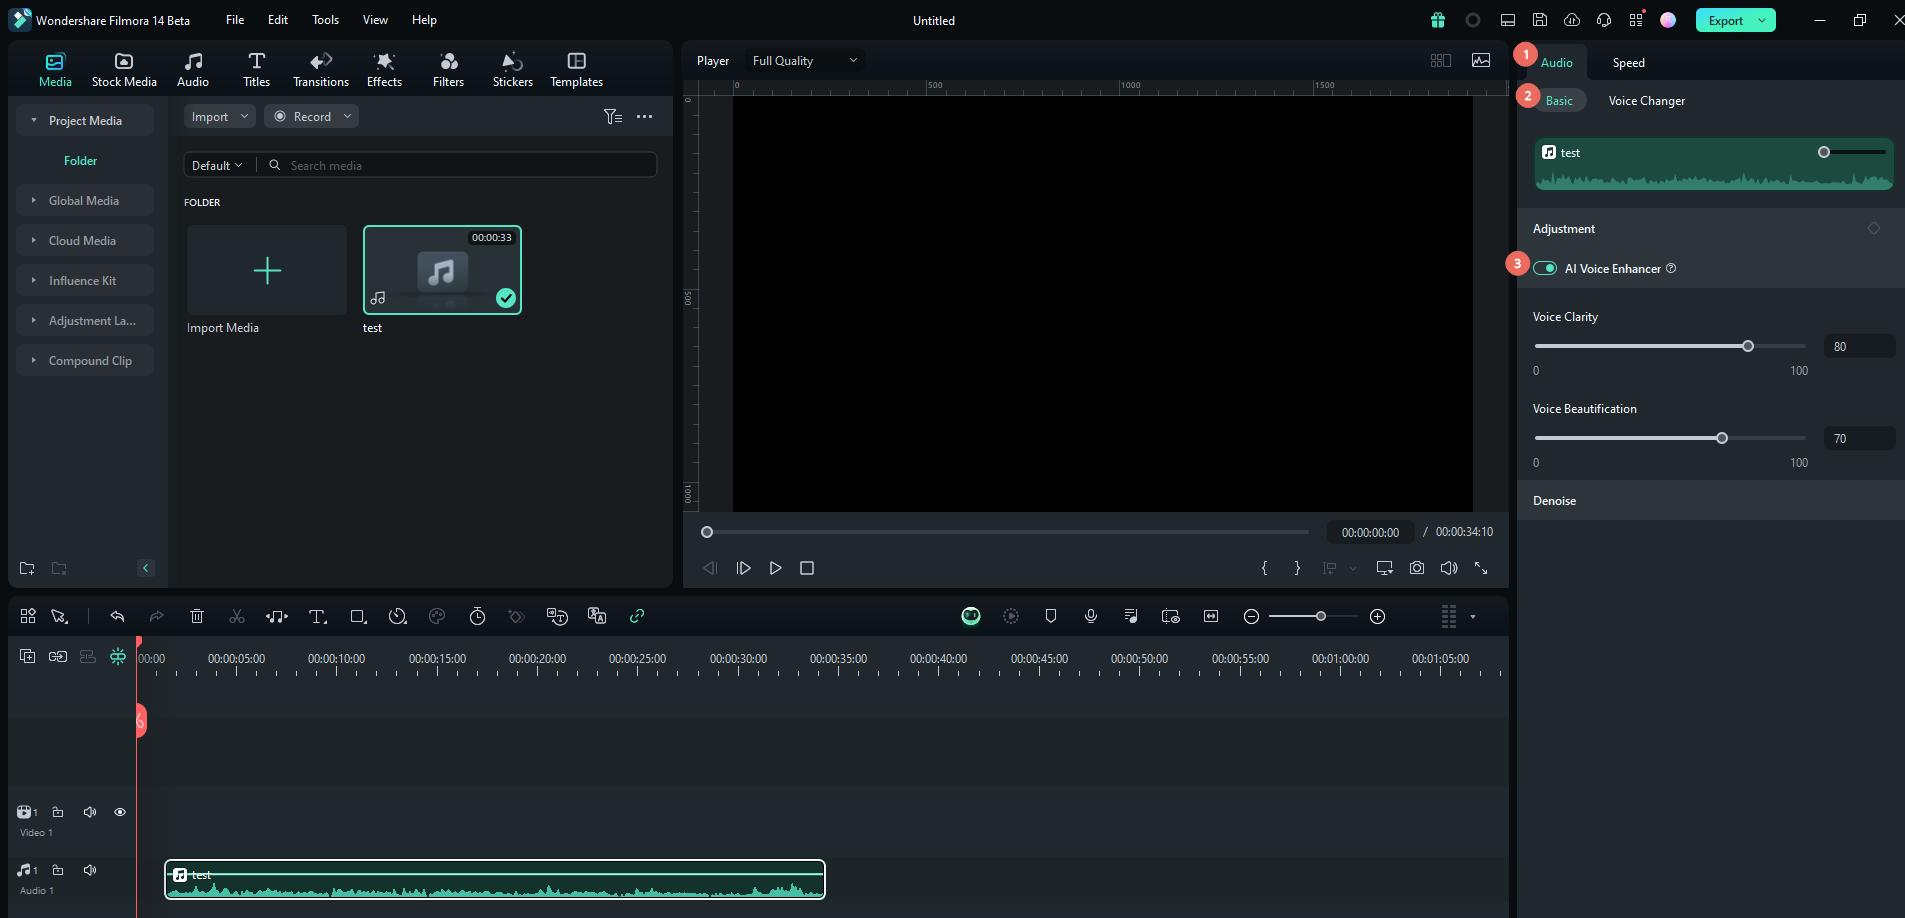
- Use the AI Voice Enhancer to refine clarity and export the final file as an MP3.
Note: This workflow works on Windows 7 or later (64-bit) and macOS 10.14 or later.
Step 1Open the Screen Recorder
From Filmora's welcome screen, click on the Screen Recorder to start recording your screen for your real estate video project.
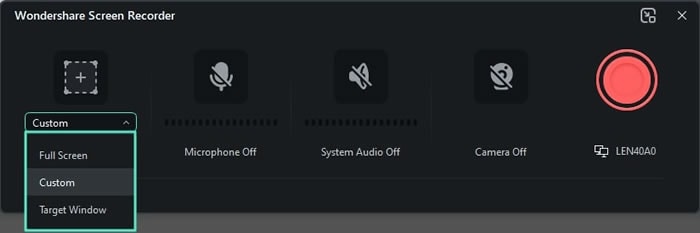
Step 2Select Full Screen
Choose Full Screen from the dropdown menu to capture the entire screen during your YouTube video recording.
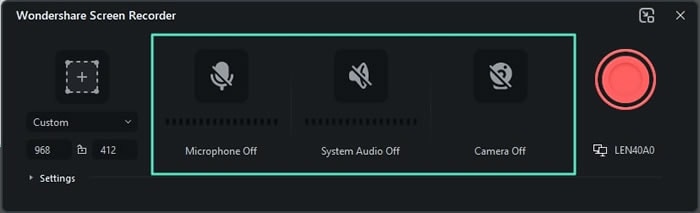
Step 3Enable System Audio
Turn on the System Audio option to capture both video and audio during the screen recording.
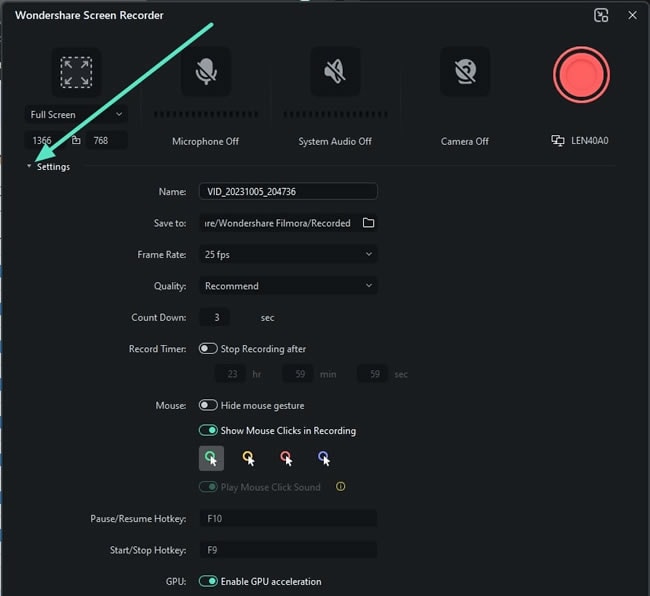
Step 4Adjust Settings
Click on the Settings button in the lower-left corner to explore additional options such as video quality and output settings.
Step 5Start and Stop Recording
Press the Record button to start capturing. Once you're finished, click the same button to stop recording.
Step 6Detach Audio
In the timeline, right-click the video, go to Tools > Audio > Detach Audio to separate the audio track from the video.
Step 7Enhance Audio with AI
Click on the audio track, go to Audio > Basic > AI Voice Enhancer to adjust voice clarity and beautification for better sound quality.
Step 8Export the Audio
Click the Export button, choose MP3 format from the dropdown menu, and click Export again to save the audio file.

That's it. We should mention that Filmora also offers a ton of audio and video editing features that you can explore at your leisure. We should also mention that this method is by far the best method we can recommend, where you get the best quality audio.
Heads up: Our Screen Recording tutorial has been updated for Filmora v15.6, including the new Teleprompter and Marker tools. Learn more: Optimized Screen Recording in Filmora
Two other inferior methods have some merit, and we will talk about them below.
🌐 Record YouTube Audio Online

YTMP3 is an online tool designed to help you quickly extract audio from YouTube videos. It's a simple, fast, and free solution for users who need to extract audio without complex software. However, while YTMP3 is convenient, its audio quality may not be as high as professional editing software like Filmora, which offers superior sound and editing features.
- Paste the YouTube Video URL: Go to YTMP3, paste the URL of the YouTube video from which you want to extract audio into the provided field.
- Click the Convert Button: After pasting the URL, click the Convert button to begin the audio extraction process.
- Download the Audio File: Once the conversion is complete, download the extracted audio file.
📱 Record YouTube Audio on Android & iPhone
Answer: Android users can record YouTube audio using the native system tools:
- Access the Screen Record feature from the Quick Settings panel.
- Toggle Record Audio and set the source to Device Audio.
- Play the YouTube video and stop recording once completed.
Filmora for Mobile supports video and audio editing on Android and iOS.
If you are looking to do this on your mobile device, don't worry. We've got you covered. We will cover how to do this on both Android and iOS devices.
Record YouTube audio on Android
For Android devices, you can use the built-in Screen Recorder feature. Here's how to do it.
- Open Screen Record Feature: Access the Screen Record feature from the Quick Settings panel as shown in the screenshot below.
- Start Recording and Enable Audio: Click the Start button to begin recording. Make sure to toggle the Record Audio option and select Device Audio as the source. Then, play the YouTube video, and when finished, click Stop to end the recording.


When this is done, you can open your Gallery, and you will see your recorded video file. You can then use the Detach Audio feature in Filmora to separate the audio. But, as you can see, it is simply much easier to do everything in Filmora.
Record YouTube audio on your iPhone
For iPhone users, the best method is to simply use the built-in Voice Memos app.
- Open the Voice Memos App: Launch the built-in Voice Memos app on your iPhone to begin the recording process.
- Click Record Button: Tap the Record button in the Voice Memos app to start recording.
- Play YouTube Video: Play the YouTube video you want to record the audio from on your iPhone.
- Tap Stop to Save Recording: Once the video is finished, tap the Stop button in the Voice Memos app to save the recording.

It's a simple process, as is everything on Apple devices.
Part 3: Pro Tips for High-Quality YouTube Voiceover & Audio Recording
Voiceover recordings can make or break your content. Follow these expert-backed techniques:
🛑 1. Silence Everything You Don't Want
Unplug noisy appliances. Listen for hums from fans, buzzing lights, or your pet's collar. Soundproofing your space goes a long way.
📵 2. Put Your Phone in Airplane Mode
Phones can emit interference signals during recording, even if silent. Use airplane mode to prevent signal interruptions.
🧺 3. Minimize Echo
- Avoid bare walls and hard floors.
- Add rugs, cushions, curtains, or even comforters to absorb sound and reduce reflections.
💨 4. Block Wind and Plosives
- Use pop filters, windscreens, or deadcats to prevent wind noise and "P" pops.
- This is crucial for outdoor recording or vocal clarity.
🎙️ 5. Upgrade Your Mic (If Possible)
Even a basic USB condenser mic offers significant improvement over built-ins. Consider recording on a separate device if your camera lacks quality audio input.
🎚️ 6. Adjust Your Levels
Keep your recording levels between -6 dB and -12 dB. This prevents clipping and leaves headroom for unexpected volume peaks.
👏 7. Use a Sound Cue for Syncing
If recording audio separately from video, clap or beep at the start of both. This helps sync audio with video in post-production.
📏 8. Get Close to the Sound Source
The closer your mic is to the sound, the lower you can set input gain, reducing background noise. Don't record from across the room.
🎙️ 9. Consider ADR
If you're in a noisy environment, use Automated Dialogue Replacement (ADR) to re-record clean voice tracks later and sync them with your footage.
🔈 10. Record Ambient Sound or Room Tone
Record 10–30 seconds of background room tone. Use it to smooth transitions, remove gaps, or repair noisy sections during editing.
Bonus: How to Record Clear YouTube Audio Without Using a Microphone
When it comes to YouTube content, audio quality often matters more than video quality. You've likely heard it before: viewers may tolerate blurry visuals or low-resolution footage if the content is engaging—but if your audio is unclear, muffled, or distorted, they'll leave within seconds.
Good news—you can still achieve clear, high-quality YouTube audio without an external microphone. There are free, simple techniques that can drastically improve your sound using the tools you already have.
Here are some practical tips to improve YouTube audio quality without using a mic:
- Use your phone's mic up close (with airplane mode on)
- Repurpose earbud mics
- Try text-to-speech tools (e.g., Murf, LOVO) for narration
- Clean up recordings with EQ, noise reduction, and compression
Conclusion
Out of the three methods mentioned in the article, the first one is by far the best choice for users who want to maximize their effort in recording audio from YouTube videos. Wondershare Filmora has an abundance of features for editing and improving video and audio files. You can immediately try the Demo version and see how you like it.
secure download
Frequently Asked Questions
Is it legal to record audio from YouTube videos?
You should only record copyright-free audio or content for which you have permission. Always check creative commons licenses.
How can I improve the quality of my YouTube audio recordings?
Use a dedicated audio interface and post-processing tools like Filmora's AI Voice Enhancer and Noise Reduction.
