


 100% Security Verified | No Subscription Required | No Malware

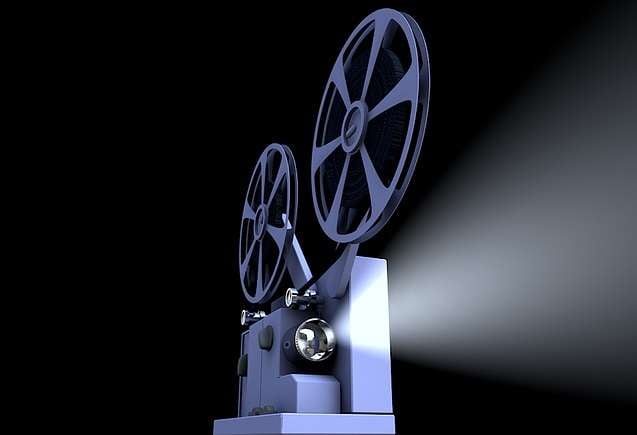
The movie industry is evolving every day with numerous new ideas and creative ways to express your artistic side. Using AI-powered tools to make your dreams come to life is one of the newest additions to the market, which is why you’re reading this guide. If you are looking for the best AI movie editors and generators, you’re in the right place.
We’ll discuss the most powerful options available to help you navigate the journey and create professional movies in just a few minutes. We’ll also present some tips and tricks to help you edit your movies and get the best results.
In this article
What Are Free AI Movie Generators?
Free AI movie generators are advanced and powerful tools that can help you create visual and speech aspects of a movie. You can tell the program what you want your movie to look like and watch the magic happen before your eyes.
People often use such solutions to create shorter movies and present them to their family and friends. However, the future of AI is bright, and we might as well see professional movies in theaters created by these smart solutions.
If you want to create a movie to show your friends and family, you might use AI movie generators and make your dreams come to life.
How Free AI Movie Generators Work
Free AI movie generators have a rather complex structure. Numerous processes happen behind the scenes to deliver high-quality movies. For instance, Natural Language Processing mechanisms are used to resemble human voices or generate new ones according to the program’s speech information.
Moreover, such tools use modeling mechanisms to create your characters and scenes according to your wishes and preferences. All these processes are powered by machine learning, which “learns” patterns and new instances and combines them to deliver your movie.
Best Free AI Movie Generators
Here’s a list of the best free AI movie generators available on the market. You can choose the one that best fits your preferences and needs.
Filmora

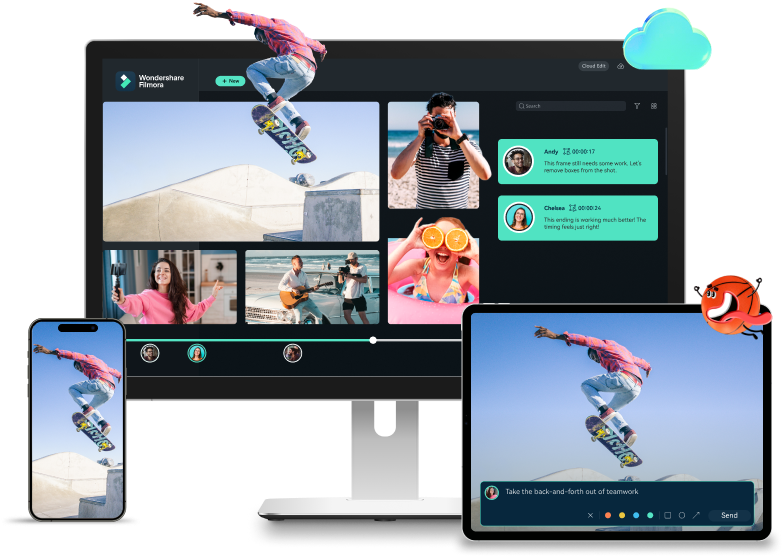
Wondershare Filmora is hands down the most advanced video-making and editing solution on the market. It offers dozens of features that will make the creation process efficient and high-quality. For instance, you can turn your textual prompts into videos in just a few seconds. This makes Filmora the most efficient tool out there.
Key Features
As previously mentioned, Wondershare Filmora provides numerous advanced features, such as the following:
- Numerous transitions – Create custom and smooth transitions between movie scenes to enhance the content quality.
- AI video editing – Access a wide range of smart editing solutions to make your movies professional in no time.
- Voices – Choose between hundreds of AI-generated voices to enhance the movie’s atmosphere and reach the desired results.
Pros and Cons
How to use it?
Wondershare Filmora is simple to use. The first step is to download the tool to your desktop device. Then, you can follow the steps below to learn how to create a movie:
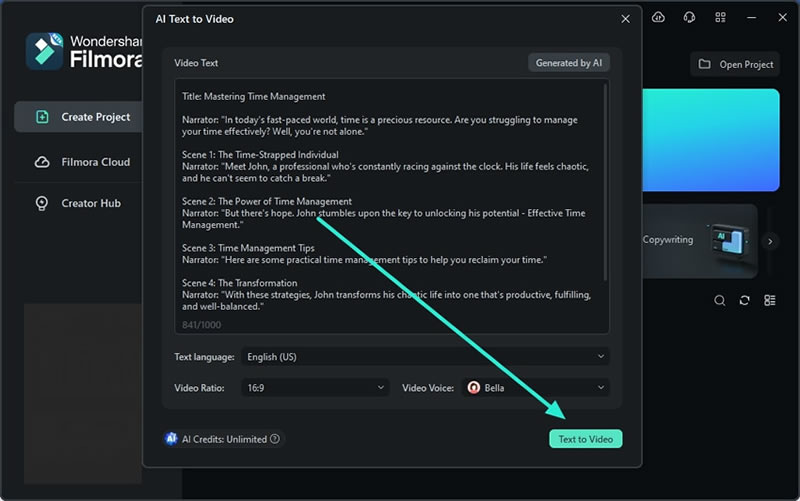
Step 1: Open Wondershare Filmora and click on the AI Text to Video option from the main menu.

Step 2: Input your prompt in the next window, as presented in the image below. Click the Text to Video button to start generating your movie.
Step 3: Preview the video by clicking the play icon under it.
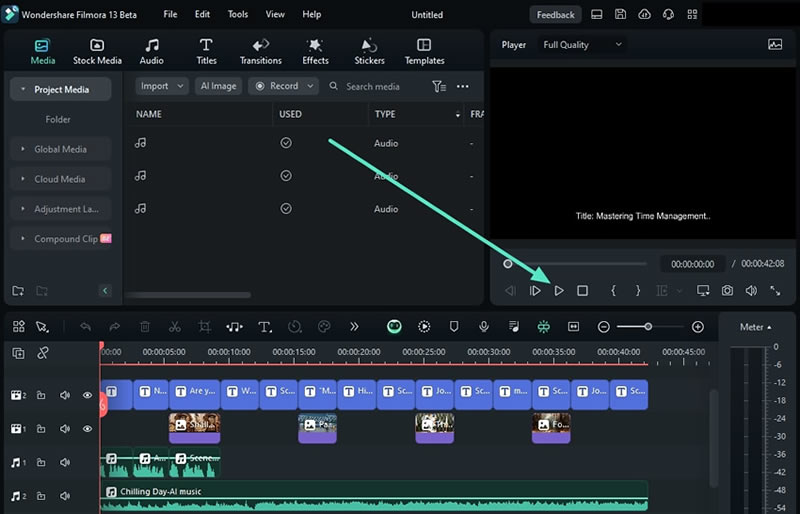
Step 4: Once you complete these steps, click the Export button to save your file.
As you can see, generating a movie from scratch is easy with Wondershare Filmora, and it will only take a few minutes.
invideo AI
invideo AI is a relatively new addition to the AI market. However, it’ll provide you with all the features you need to create your movies from scratch and edit them easily. The best part about this solution is that it’s available in over 50 languages, so you can improve your experience worldwide.
Key Features
Here are some of the best features you’ll find on Invideo:
- Text-based editing – Tell the program what you want to change in your movies and watch the magic happen.
- Voice cloning – You can easily clone your voice and avoid extensive voiceovers for your movies.
- Transitions – The tool has many transitions you can use on your journey.
Pros and Cons
Runway
Runway has a unique approach to creating and editing AI movies. It’s a modern and professional tool recommended for movie professionals. Thus, if you want to start your professional movie-making experience, Runway may be a good starting point.
Key Features
Runway provides several unique AI features, such as the following:
- Clean audio – Remove all background noises from your AI-generated movies.
- Infinite expansion – You can expand your movie in all ways for infinite times.
- Transcript – Transcribe the audio in your movies to create subtitles and captions.
Pros and Cons
Canva
Although Canva is mostly used for educational and professional purposes, you can create your AI movie using a feature that is relatively new to the generation. The best part is that it provides numerous tools you can play with until you reach the desired visual goals.
Key Features
Canva’s generation tool comes with numerous advanced features, such as the following:
- Avatars – You can create custom avatars to narrate the movie.
- Filters – Use an array of filters to enhance the movie’s atmosphere.
- Languages – Transcribe your movies in more than 40 available languages.
Pros and Cons
Synthesia
Although Synthesia was originally designed for business meetings, you can still use it to generate short movies efficiently. One of the things that makes this platform stand out from the crowd is that it supports more than 130 languages, making it among the most inclusive AI movie generators available.
Key Features
Synthesia provides some of the following advanced features you can use on the movie-creation journey:
- Voiceovers – You can turn text into audio and ditch the daunting voiceover experience.
- Collaboration – Ask your family and friends to join your project so you can deliver professional results.
- Integration – Connect Synthesia with other platforms like LMS for the best experience.
Pros and Cons
Kapwing
Kapwing is an entertaining way to create new movies and post them on social media platforms. One of the things that makes this tool stand out is that you can generate videos online without downloading additional elements. That’s why Kapwing may be one of the most lightweight solutions on the list.
Key Features
Below are some of the features you’ll find on Kapwing:
- Text-to-speech – Generate audio materials through text.
- Overlays – You can set up unlimited overlays to make your movies professional.
- Simple editing – The tool comes with basic editing solutions like cropping, trimming, and more.
Pros and Cons
VEED.IO
Veed.io is another modern AI video maker that allows you to create videos according to your preferences. It comes with all the essentials you need to make your movies stand out and reach your target audience. The best part is that it’s an affordable solution if you plan to purchase a subscription.
Key Features
You can see some of Veed’s best features below:
- Stock library – The tool offers over 2 million templates, tracks, and images.
- Avatars – Create custom avatars according to your preferences.
- Collaboration – Share your movies with colleagues and work on the project together.
Pros and Cons
Are There Any AI Movie Editors?
Let’s be real: AI movie generators can make exceptional videos, but the quality and the precision may not be the best in some cases. After all, AI technologies are relatively new, and we shouldn’t expect mind-blowing results just yet.
Thus, you may need an additional movie editor to fine-tune your movies and prepare them for the audience. However, not all editors can handle the tasks, and some may be daunting to work with. Most editors require you to manually edit your recordings, which is why we’re on the hunt for the most efficient one.
Luckily, Wondershare Filmora is just what we need. This time-saving and productive tool has dozens of smart editing features to enhance your experience. For instance, you can use a color match to create visually appealing content or the auto-enhance feature to edit your movies automatically.
Filmora provides more features like beat detection, auto reframe, speed ramping, AI portrait, smart cutout, and more that will help you create professional movies.

AI Film Editing Workflow
Film editing can be challenging, so we’ve prepared a detailed workflow you can follow to get the best results. We’ll present a workflow in Filmora since it’s the most advanced solution out there.
- Inspiration – The first step is to find the topic you want to cover in your movies and create a plan accordingly.
- Video source – Choose the video source you like, such as recording, downloads, text-to-video, image-to-video, or other.
- Import – You should import your project to Wondershare Filmora to start the editing experience.
- Rough cut – First, deal with larger issues to get them out of the way. That can include deleting, cropping, rotating, flipping, zooming, and more.
- Fine cut and advanced editing – In this step, you should use the advanced features of your choice to enhance the content quality. For instance, use compound clips, draw masks, motion tracking, silence detection, video upscaler, and more.
- Customizations – Take care of the final details contributing to the movie’s environment. For example, add subtitles, animations, sound effects, transitions, and more according to your preferences.
- Export – The last step is to export your video. You can save it to your device or share it on popular social media platforms.
As you can see, navigating your Wondershare Filmora experience isn’t difficult, and you’ll easily master the art of the movie-making industry.
Conclusion
Creating AI movies can help you get the desired message across and get professional content. However, not all tools are worth your time, so we’ve researched the market and discovered the best solutions. We’ve presented our selection of the best AI movie generators, which include Wondershare Filmora, Veed.io, Canva, Kapwing, Invideo, Runway, and Synthesia.
Since these solutions may not be able to create videos that perfectly suit your preferences, you can use advanced editing solutions like Wondershare Filmora to make your visions come to life.
