

 100% Security Verified | No Subscription Required | No Malware


 ChatGPT
 Perplexity
 Gemini
 Claude
 Grok
Grok

Want every cut, transition, or visual change in your video to land naturally on the music? Beat markers give you visual reference points on the timeline, making it easier to synchronize clips, effects, animations, and speed changes with the rhythm of a soundtrack.
Instead of listening to a track repeatedly and placing every marker manually, video editors with automatic beat detection can analyze the music and generate beat markers for you. When you're working with a large amount of footage, you can also use AI-assisted media analysis before editing to find promising shots faster, then bring those clips into the timeline and cut them to the beat.
In this article
- What Are Beat Markers?
- Why Use Auto Beat Markers?
- How to Use Beat Markers in Filmora
- How to Find Footage Faster Before Editing to the Beat
- How to Use Beat Markers in Movavi
- How to Use Beat Markers in Premiere Pro With BeatEdit
- Common Pitfalls to Avoid When Using Auto Beat Markers
- FAQs About Beat Markers
What Are Beat Markers?

Beat markers are visual markers that identify rhythmic points in an audio track. Beat detection analyzes the rhythm of music and places markers that editors can use as reference points while working on the timeline.
These markers make it easier to align visual changes with music. For example, you can place a cut, transition, title animation, visual effect, or speed change at a selected beat.
Beat markers are particularly useful for:
- Music videos
- Travel montages
- Sports and action edits
- Product videos
- Short-form social videos
- Event highlight reels
- Photo and video slideshows
You can place markers manually, but automatic beat detection reduces the need to listen through an entire soundtrack and identify every rhythmic point yourself.
Why Use Auto Beat Markers?

Automatic beat detection can simplify several parts of a music-driven editing workflow:
- Faster beat identification: Instead of manually locating rhythmic points throughout a song, beat detection provides visual references automatically.
- Easier timeline editing: Markers give you reference points for positioning cuts, clips, transitions, effects, and animations.
- More consistent pacing: Aligning selected visual changes with the soundtrack can make montages and fast-paced edits feel more intentional.
- More creative control: You don't have to cut on every detected beat. Use the markers as guides and decide which moments deserve a visual change.
Beat detection works best as an editing aid rather than a rule. The rhythm of the video should still follow the story, footage, and mood of the soundtrack.
How to Use Beat Markers in Filmora
Wondershare Filmora provides built-in Beat Detection, so you can analyze music, generate beat markers, and use them directly while editing on the timeline.
Filmora also provides other audio tools for different stages of editing, including AI Audio Denoise, AI Voice Enhancer, Audio Ducking, Silence Detection, and audio synchronization.
Here's how to use beat markers in Filmora:
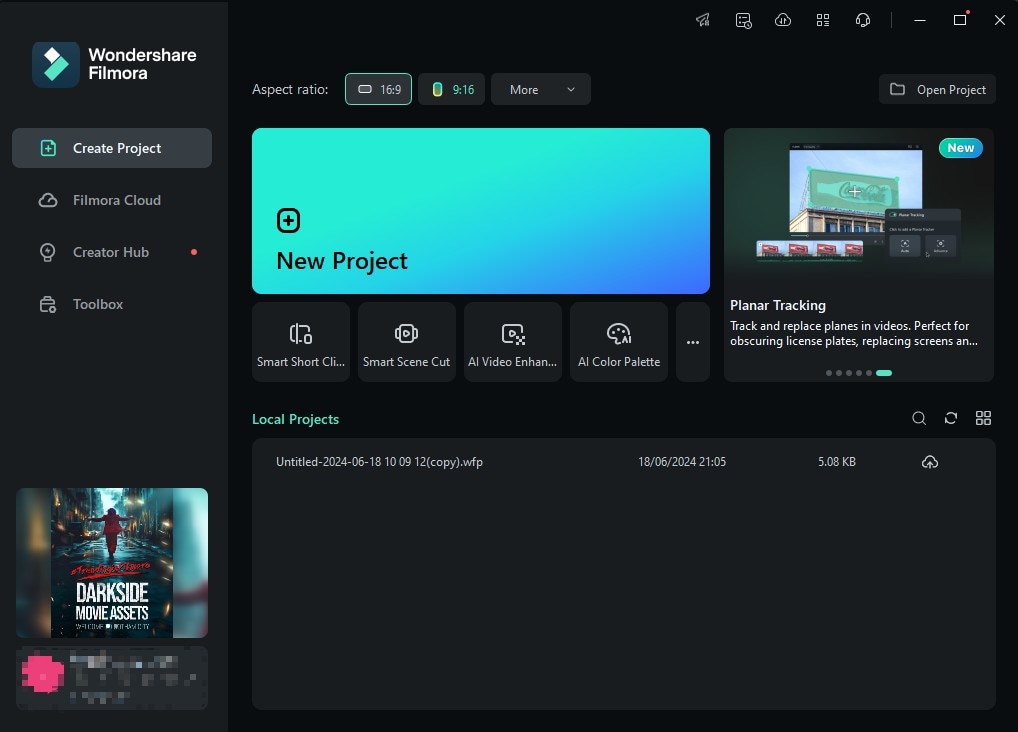
Step 1: Launch Filmora and click Create Project > New Project.


Step 2: Click Import to add a music file from your computer, or choose a track from Filmora's available audio resources.

Step 3: Right-click the imported or built-in audio track in the media library and select Beat Detection.

Step 4: After Filmora analyzes the audio, drag the track onto the timeline to view the generated beat markers. Play the music and review the detected rhythm before you begin cutting.

Step 5: Add your video to the timeline. Place the playhead on a beat marker and use the Scissors button when you want a cut to land on that beat.

Step 6: When creating a montage from multiple clips, position and trim the clips so important visual changes align with selected beat markers.

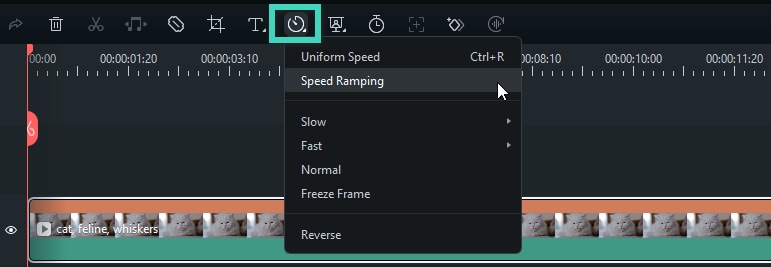
Step 7: You can also use beat markers as reference points for speed changes. Select a clip, open the Speed controls, and choose Speed Ramping.
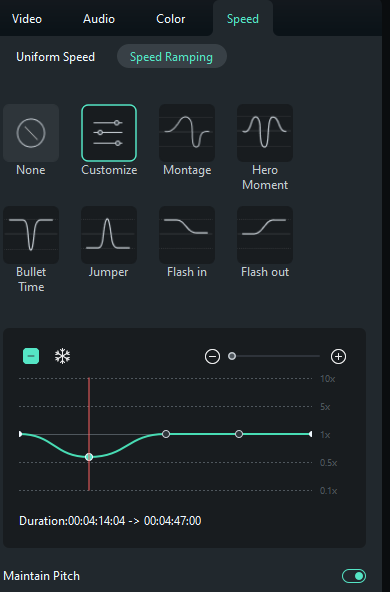
Step 8: Choose a speed ramp preset or select Customize to adjust speed points manually.
Step 9: Beat markers can also guide the timing of animations, titles, transitions, and visual effects. For example, you might place a title animation on one strong beat and a transition on the next major musical accent.
To add a shake effect, go to Effects > Video Effects > Shake and select the effect you want to use.

Step 10: Drag the effect onto the timeline and adjust its position and duration according to the beat markers.

Step 11: Select the effect on the timeline and customize its available properties as needed.

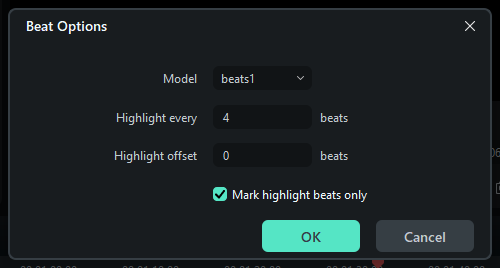
Step 12: If you want to change how Filmora detects the rhythm, right-click the audio track in the library and select Beat Options. Adjust the available beat settings according to the soundtrack and editing style.
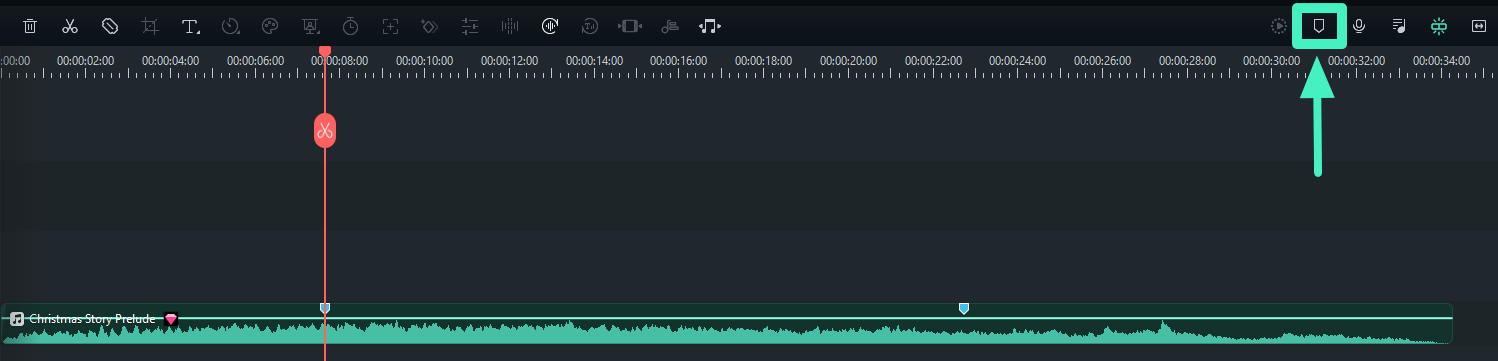
Step 13: You can supplement the automatically detected beats with your own markers. Position the playhead and click the Marker button in the timeline toolbar or press M.
Step 14: Edit or remove markers when necessary. You can also rename supported markers, add comments, or use different marker colors to organize editing cues.

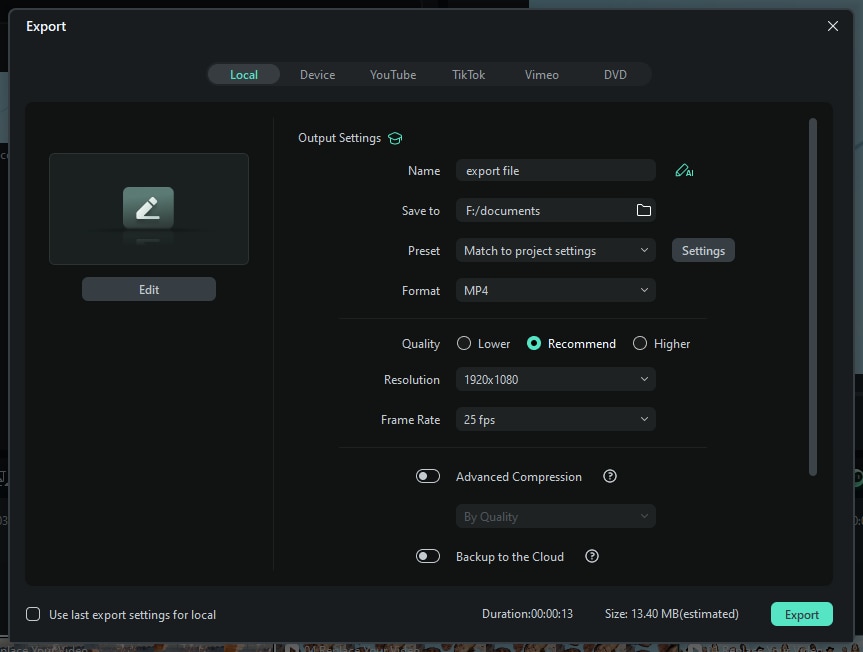
Step 15: Preview the complete edit and make sure the cuts support both the music and the story. When you're satisfied with the result, click Export and choose your preferred output settings.
How to Find Footage Faster Before Editing to the Beat
Beat Detection helps once you're ready to edit on the timeline, but footage-heavy projects have another challenge: finding the right clips before you start cutting them to music.
For example, a travel montage might contain hundreds of phone, camera, drone, and action-camera clips. An event highlight video can contain multiple camera angles, reactions, speeches, and B-roll. Reviewing every file manually can take longer than the beat editing itself.
Filmora's AI Media Analysis is designed for this earlier stage of the workflow. It analyzes videos and images to identify subjects, scenes, locations, actions, and other visual context, then generates structured information such as keywords, descriptions, ratings, and editing suggestions.
Step 1. Import Your Footage
Import the videos and images you may want to use in the montage. You can analyze footage before deciding which clips belong on the final timeline.
Step 2. Run AI Media Analysis
In Project Media, right-click the imported video and select AI Media Analysis. Confirm the selected media and required credits, then click Generate. This is the current workflow documented in Filmora for Windows and Mac.
Step 3. Review the Analysis Results
Open Media Analysis Results to review the information Filmora generated for the footage. The current Guide specifically shows detected Keywords, while Filmora's AI Media Analysis feature also supports broader structured insights such as descriptions, ratings, and editing suggestions.
Step 4. Find the Shots You Want to Use
Use the generated context to narrow down footage before repeatedly opening similar-looking files. AI Media Analysis can help surface potentially useful moments, supporting shots, and B-roll while providing timestamped editing suggestions for faster review.
The final selection remains yours. AI Media Analysis helps prioritize what to review; it does not automatically decide the finished sequence for you.
Step 5. Move Selected Footage to the Timeline and Edit to the Beat
Once you've identified the clips you want, bring them into the timeline and use Beat Detection to shape the montage around the soundtrack.
This creates a practical two-stage workflow:
- AI Media Analysis: Understand, search, and prioritize the footage before editing.
- Beat Detection: Identify rhythmic reference points in the music.
- Timeline Editing: Arrange the selected clips and align important visual changes with the soundtrack.
This combination is especially useful for travel videos, event highlights, sports edits, music-driven montages, and other projects with a large amount of source footage.
How to Use Beat Markers in Movavi
Movavi Video Editor also provides Beat Detection for placing beat markers on an audio track.
Here's the workflow shown in Movavi:
Step 1: Click File Import and select Add Files.

Step 2: Choose the music file and drag it from the Media Bin to the timeline.

Step 3: Go to All Tools > Audio Editing > Beat Detection.

Step 4: Click Detect Audio Beats.

Step 5: Adjust the Beat Detection settings if necessary.

Step 6: Import the videos you want to use.

Step 7: Place the videos on the timeline and align the desired cuts or clip changes with the detected markers.

Step 8: Refine the edit and click Export.

Step 9: Choose the appropriate output settings and finish exporting the video.

How to Use Beat Markers in Premiere Pro With BeatEdit
Premiere Pro users can also use third-party tools designed to automate beat marker creation. One example is BeatEdit for Premiere Pro.
The interface and installation workflow may change as Premiere Pro and BeatEdit are updated, so check the current BeatEdit documentation when installing or configuring the extension.
Here's the workflow demonstrated in this guide:
Step 1: Launch Premiere Pro and create a New Project.

Step 2: Name the project and choose a location.

Step 3: Import the music track and add it to the sequence.

Step 4: Open BeatEdit from its available extension or plugin interface.

Step 5: Select the audio track you want to analyze.

Step 6: Configure the marker settings and generate beat markers.

Step 7: Review the generated markers and make manual adjustments where necessary.

Step 8: Import and prepare the video clips you want to use.

Step 9: Arrange the selected clips according to the desired marker positions and editing workflow.

Step 10: Confirm the sequence settings and apply the automated placement when appropriate.

Step 11: Preview the result and refine the timing manually.

Common Pitfalls to Avoid When Using Auto Beat Markers

Automatic beat markers can speed up music-driven editing, but they should support the edit rather than control every decision. Avoid these common mistakes:
- Cutting on every beat: A fast soundtrack can generate many markers. Using all of them may make the video feel frantic. Reserve cuts for beats that support the pacing and story.
- Ignoring the mood of the music: Rhythm is only one part of a soundtrack. Vocals, melodies, builds, drops, and pauses can also influence where a visual change feels natural.
- Relying entirely on automatic detection: Complex music may not produce perfect markers every time. Preview the soundtrack and add, move, or remove markers when necessary.
- Choosing footage after you start cutting: In footage-heavy projects, repeatedly searching for the next clip can interrupt the editing rhythm. Review and shortlist useful footage first, then build the montage.
- Prioritizing synchronization over storytelling: A perfectly beat-matched cut is not automatically a better cut. The visual sequence should still communicate the intended story or emotion.
FAQs About Beat Markers
Common Questions About Editing Videos to Music
-
What is a beat marker in video editing?
A beat marker is a visual reference point that indicates a rhythmic position in an audio track. Editors can use these markers to time cuts, transitions, effects, animations, and other visual changes to music.
-
Does Filmora automatically detect music beats?
Filmora provides Beat Detection for analyzing an audio track and generating beat markers that can be used as references while editing on the timeline.
-
Do I need to cut my video at every beat marker?
No. Beat markers are editing guides. Using every marker can make a video feel overly busy, especially with fast music. Select the beats that best support the pacing, story, and visual changes.
-
Can I add beat markers manually in Filmora?
Yes. In addition to automatically detected beats, you can place the playhead at a desired point and add a marker manually, including by using the M keyboard shortcut.
-
What is the difference between Beat Detection and AI Media Analysis in Filmora?
Beat Detection analyzes audio rhythm and provides beat markers for timing edits. AI Media Analysis analyzes videos and images to help you understand, review, search, and prioritize source media before editing. They serve different stages of the workflow.
-
Can AI Media Analysis automatically make a beat-synced video?
AI Media Analysis is designed to help understand and prioritize source media rather than automatically create the final beat-synced sequence. Use its insights to find useful footage, then use Beat Detection and timeline editing to control how those clips are synchronized with the soundtrack.
-
When is AI Media Analysis useful for a music montage?
It is particularly useful when you have a large number of source videos or images. Filmora can generate keywords and other contextual information to reduce manual footage review before you choose clips for the beat-synced timeline.
Conclusion
Beat markers make it easier to synchronize cuts, transitions, effects, animations, and speed changes with music, but the strongest edits still depend on selecting the right footage and deciding which beats actually deserve a visual change.
For footage-heavy projects, Filmora can connect these two stages of editing: use AI Media Analysis to understand and prioritize your source media, then use Beat Detection to establish rhythmic reference points and finish the sequence on the timeline. AI Media Analysis can generate contextual information and editing suggestions while leaving the final selection and edit under your control.
