Want to make your videos look more polished? Blurring the background online helps highlight your subject, hide distractions, or obscure sensitive details. With the right tools, you can easily blur any part of your video—whether it’s a face, clutter, or empty edges in reformatted clips.
Many online editors offer customizable blur effects, letting you adjust intensity and style (like Gaussian or motion blur) in just a few clicks. Keep your audience focused on what matters—learn how to blur video backgrounds online for free!
In this article
Part 1. Common Blurring Effects Used to Blur a Video Background
There are several types of video background blurring effects that you can use to enhance your videos. Here are some of the most common ones:
| ✨ Blur Effect | Description |
| 🔹 Gaussian Blur | Common blur type which softens the image by averaging pixel colors, creating a smooth, natural-looking blur. |
| 🌀 Motion Blur | Simulates the effect of motion by blurring objects in the direction of movement, used to create a sense of speed or dynamism in videos. |
| 🛠️ Custom Blur | Manually select the area to blur and adjust the intensity. |
| 🧩 Mosaic Blur | Breaks the image into smaller tiles, creating a pixelated effect. |
| 🔲 Box Blur | Averages pixel colors within a square box, creating a uniform blur effect. |
Part 2. How to Blur the Background of Video Online?
Now that you know how important blurring a video or a part of a video is, let’s now have a look at the best blur background video editor online . Fortunately, there are so many video editing tools for background blur online for free. Most of these tools now feature AI to detect the specific parts of a video and blur it. That said, you can now create professional-looking videos without much hassle and in no time.
Let’s discuss two of the best options for online video background blur.
1.VEED
Veed’s video editing tool features pixelating and blurring options. You don’t really have to mess with the complicated settings, as it features a user-friendly interface. Given that, you can create a perfect blurry background even if you are in a rush and want quick, high-quality results.
Here’s a quick overview of why you should and shouldn’t use this video editing tool:
Key Features
- Easy add blur to video background or pixelate areas. You can blur any area of your video and can adjust the blur level to match your style.
- A wide selection of easy-to-use templates
- Features a user-friendly interface
- Offers one-click tools like split, trim, crop, etc.
- Professional color grading and grade-filters
Limitations
- Watermarked
- Comes with 250MB upload limit
- 10-minute export length
Here’s how you can do the video background blur online using VEED.
Step 1: Open Veed.io in your browser and upload your video by dragging and
dropping the file into the editor.
Step 2: Once uploaded, click the video on the editor and adjust the blur slider that
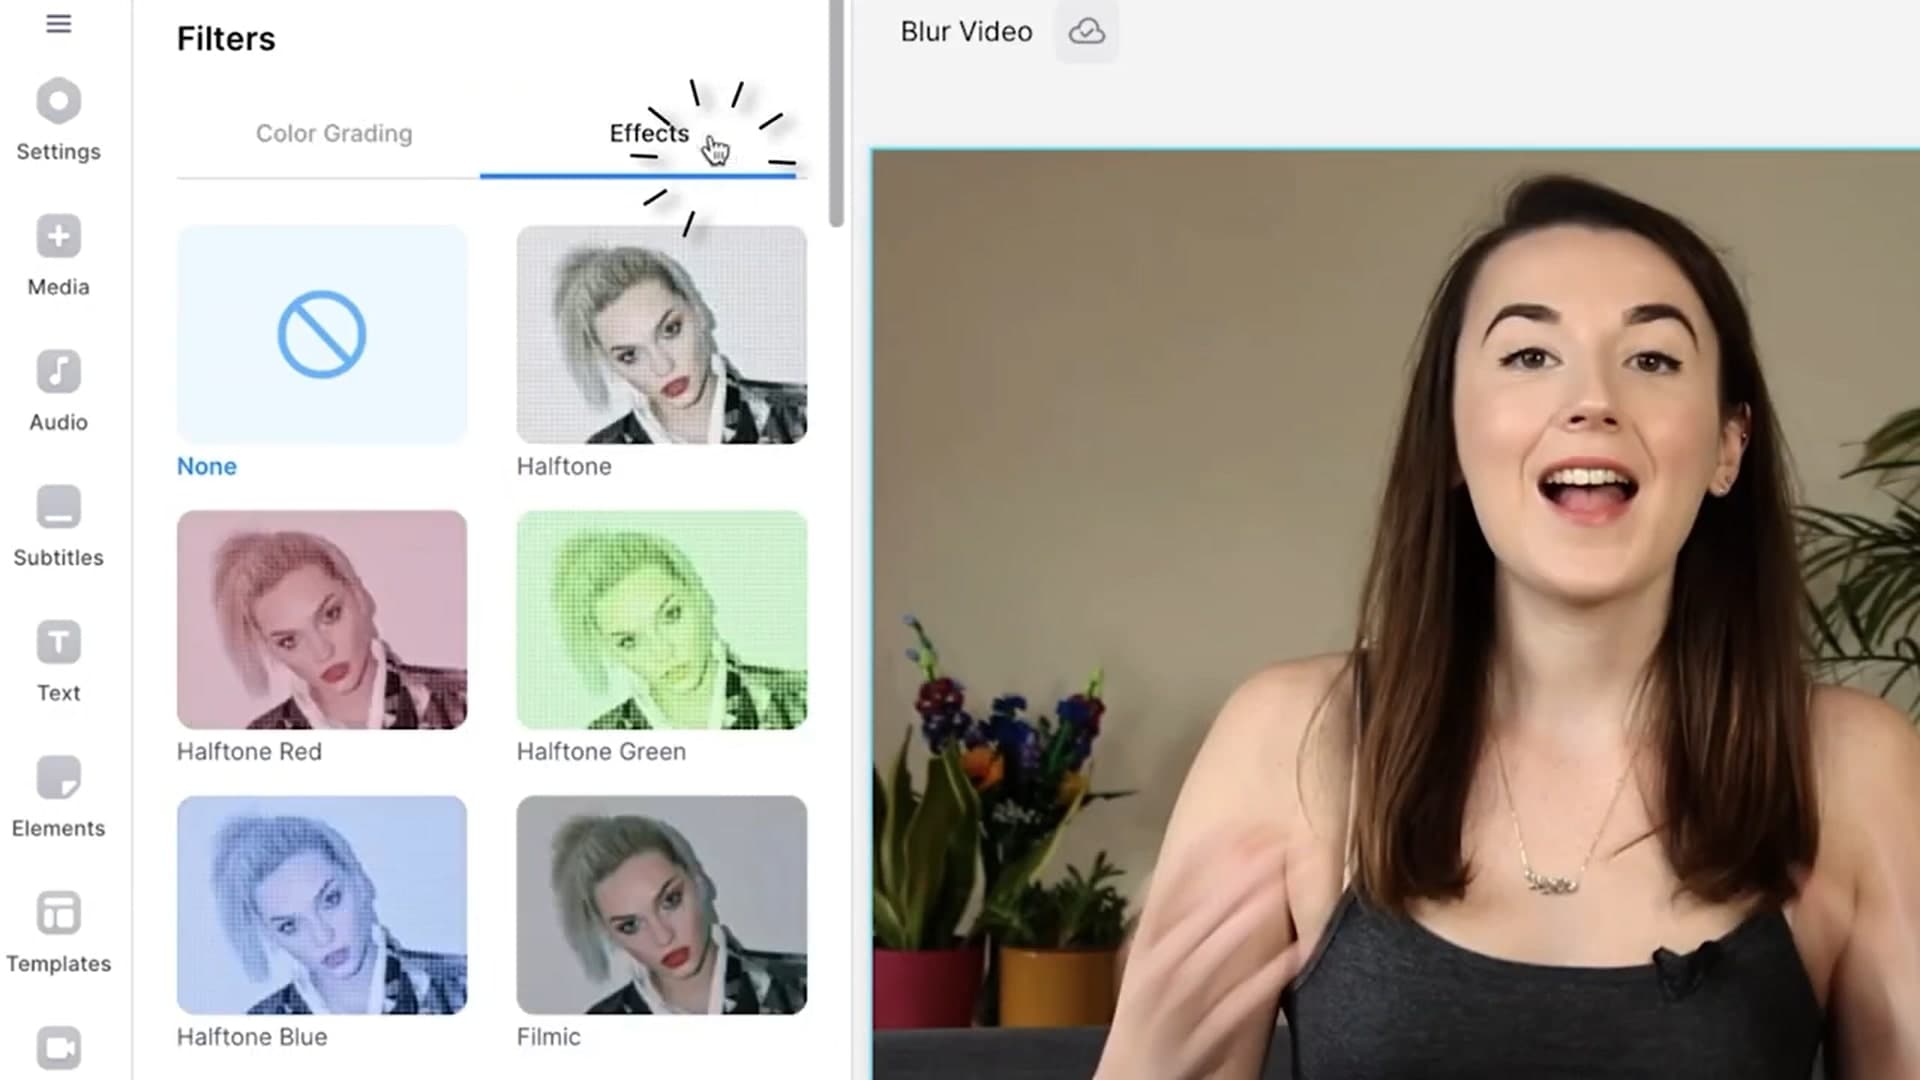
appears on the settings. The other option is to click Filters, then Effects, and choose
either Box Blur or Pixelate and Blur.
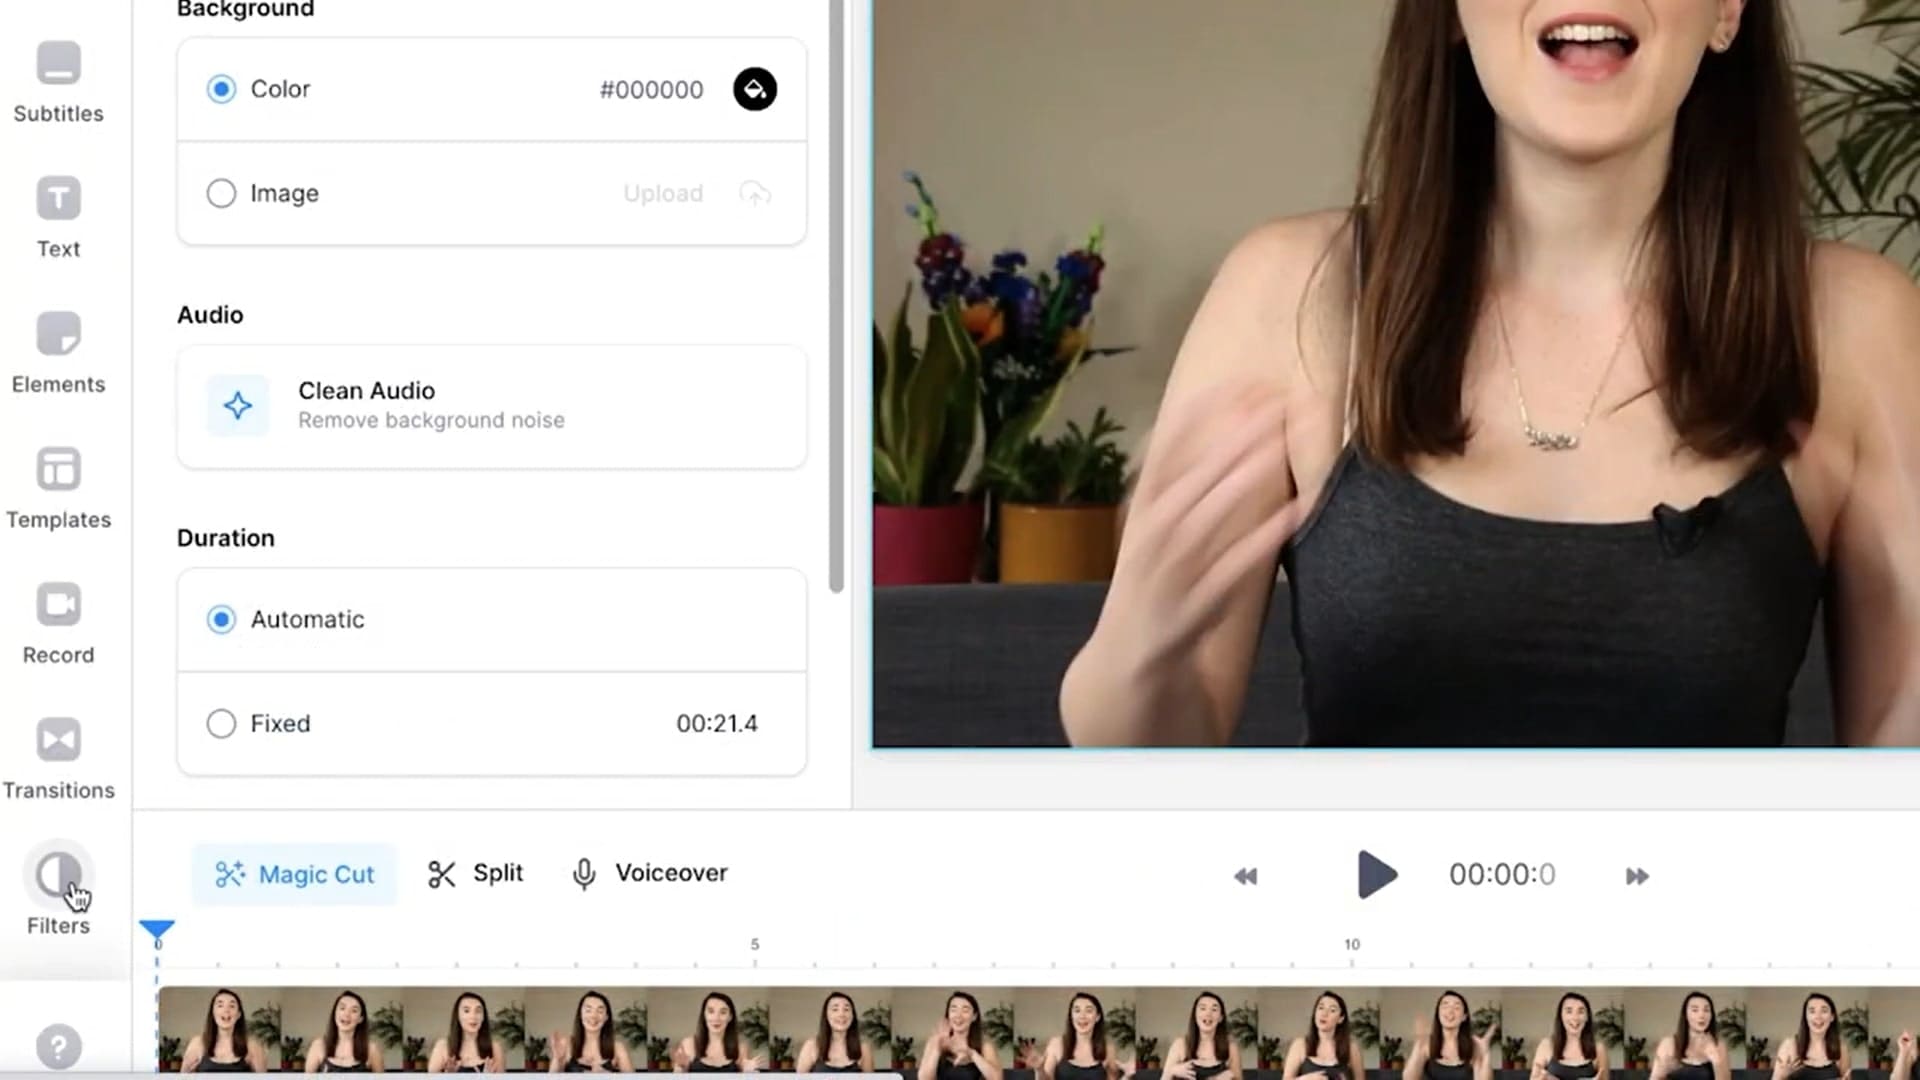
Click on Filters then choose Effects.
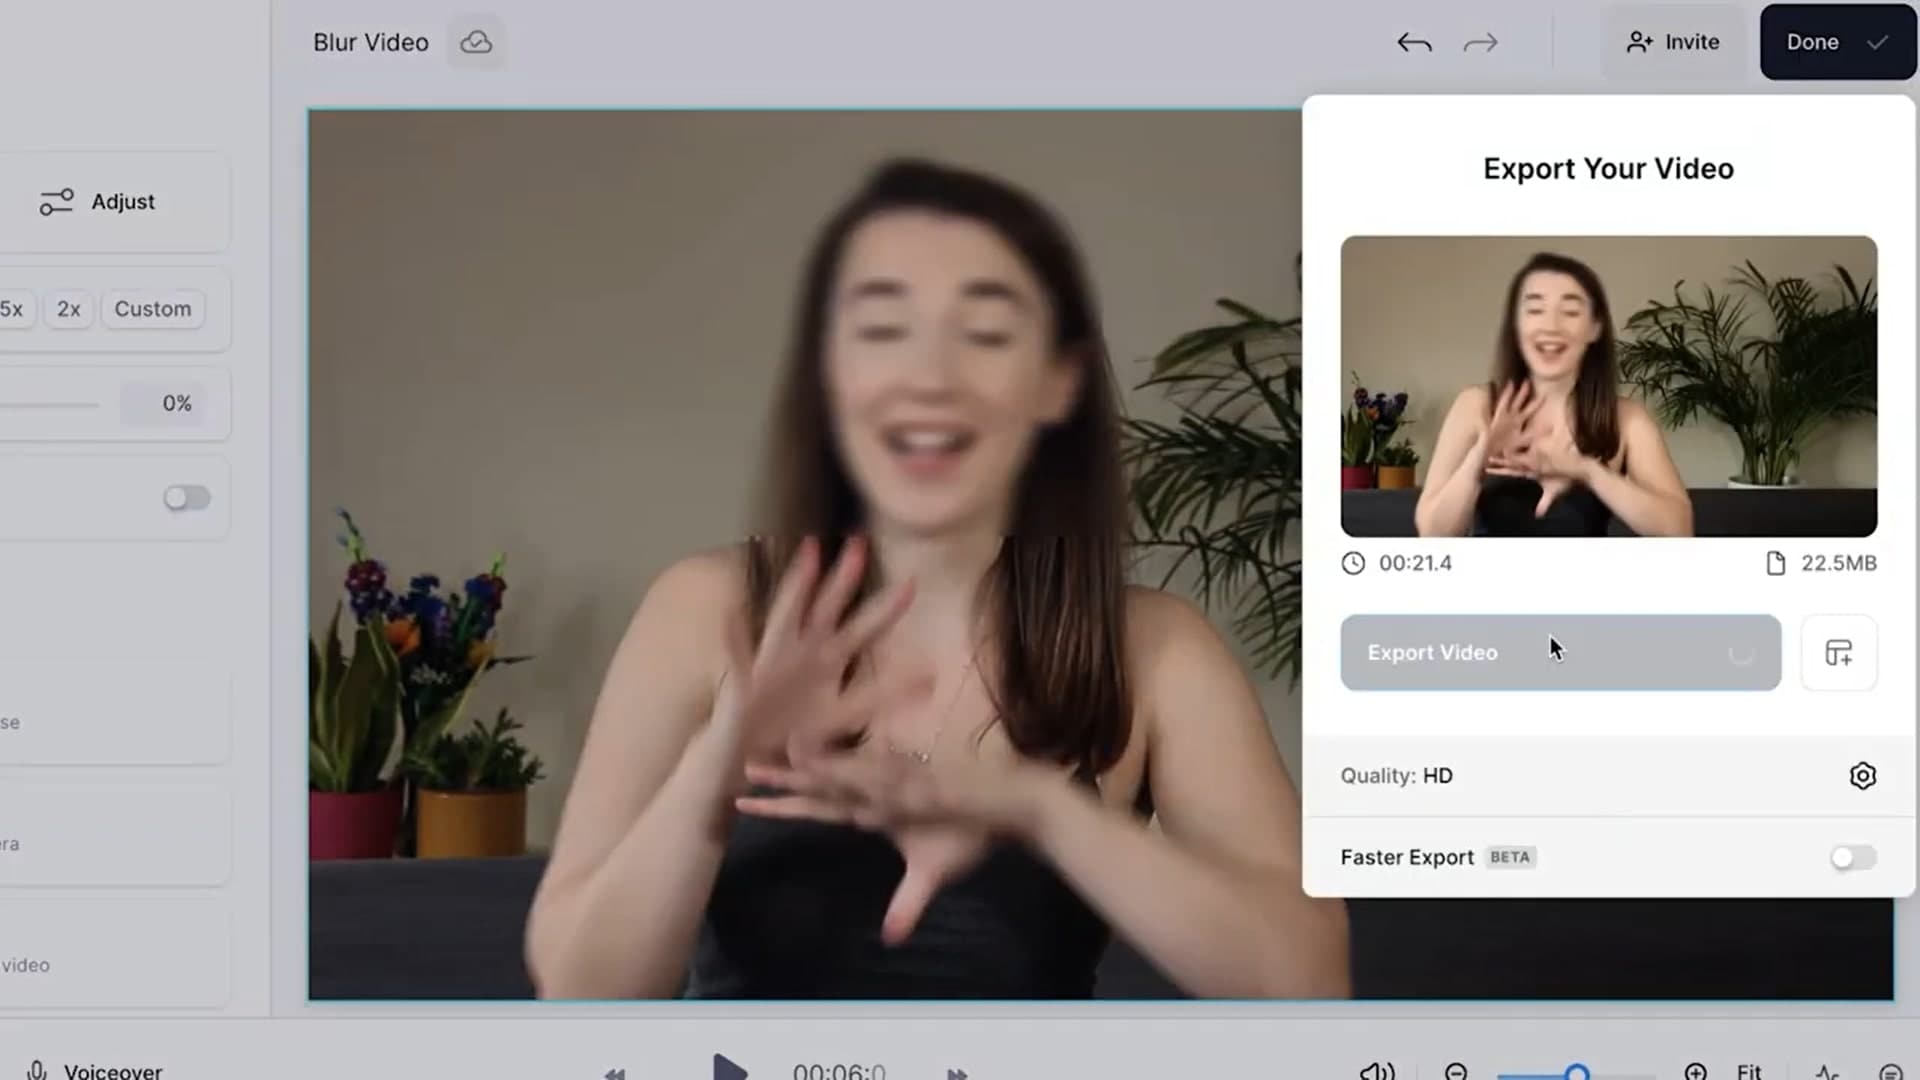
Step 3: Finally, click on Export, Download the video, and use it as you like.
2.Gemoo
Gemoo is another excellent online video-blurring tool that allows you to customize the video quality, so you can blur, delete, and replace your backdrop using video sources. Another thing that makes it stand out is its ability to blur your screen while recording.
Yes, you read that right.
It’s an all-in-one tool that lets you record and edit on the same platform, which makes it super handy for webinars, presentations, or tutorials.
Key Features
- Adjust the intensity with custom background blur
- Record your screen and add blur
- Store videos in the cloud
- Features AI-powered content generation
- No watermark or limitations on recording
Limitations
- No offline access
- Fewer export options
Here’s how you can use it:
Step 1: Upload your video on Gemoo editor and select the video track.
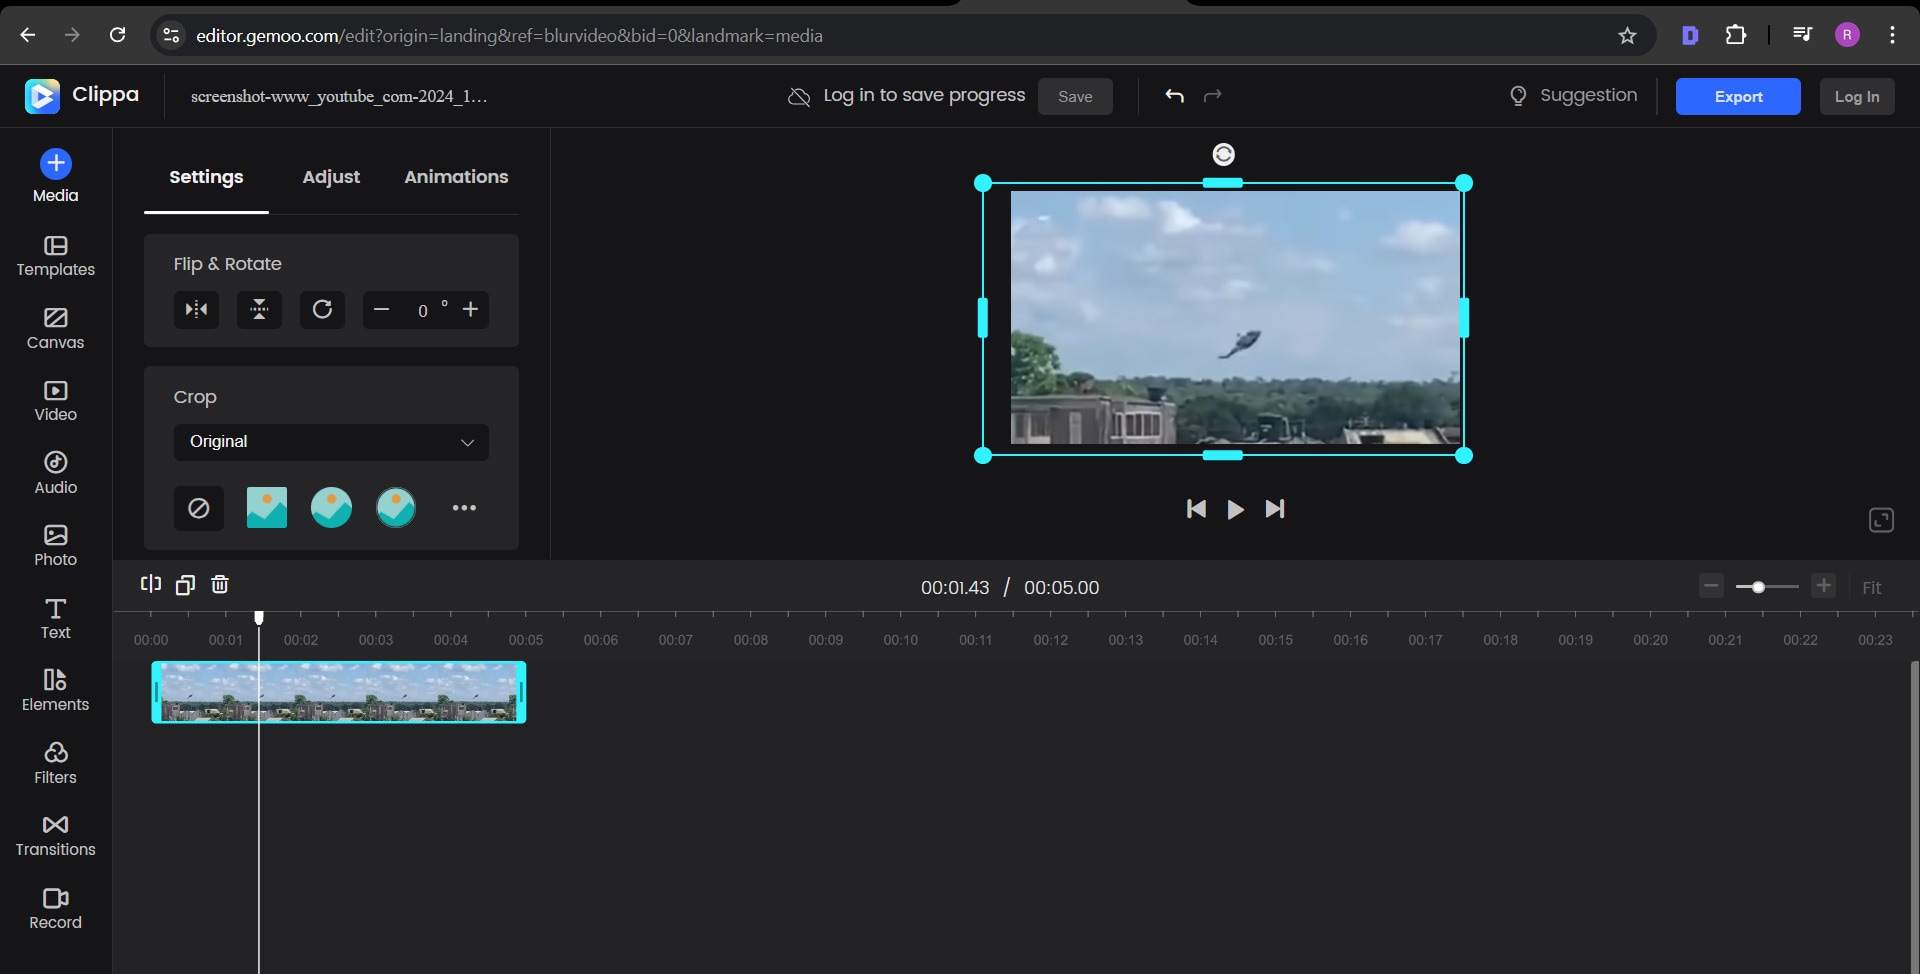
Step 2: Next, select the Adjust button and scroll all the way down to see the Blur slider.
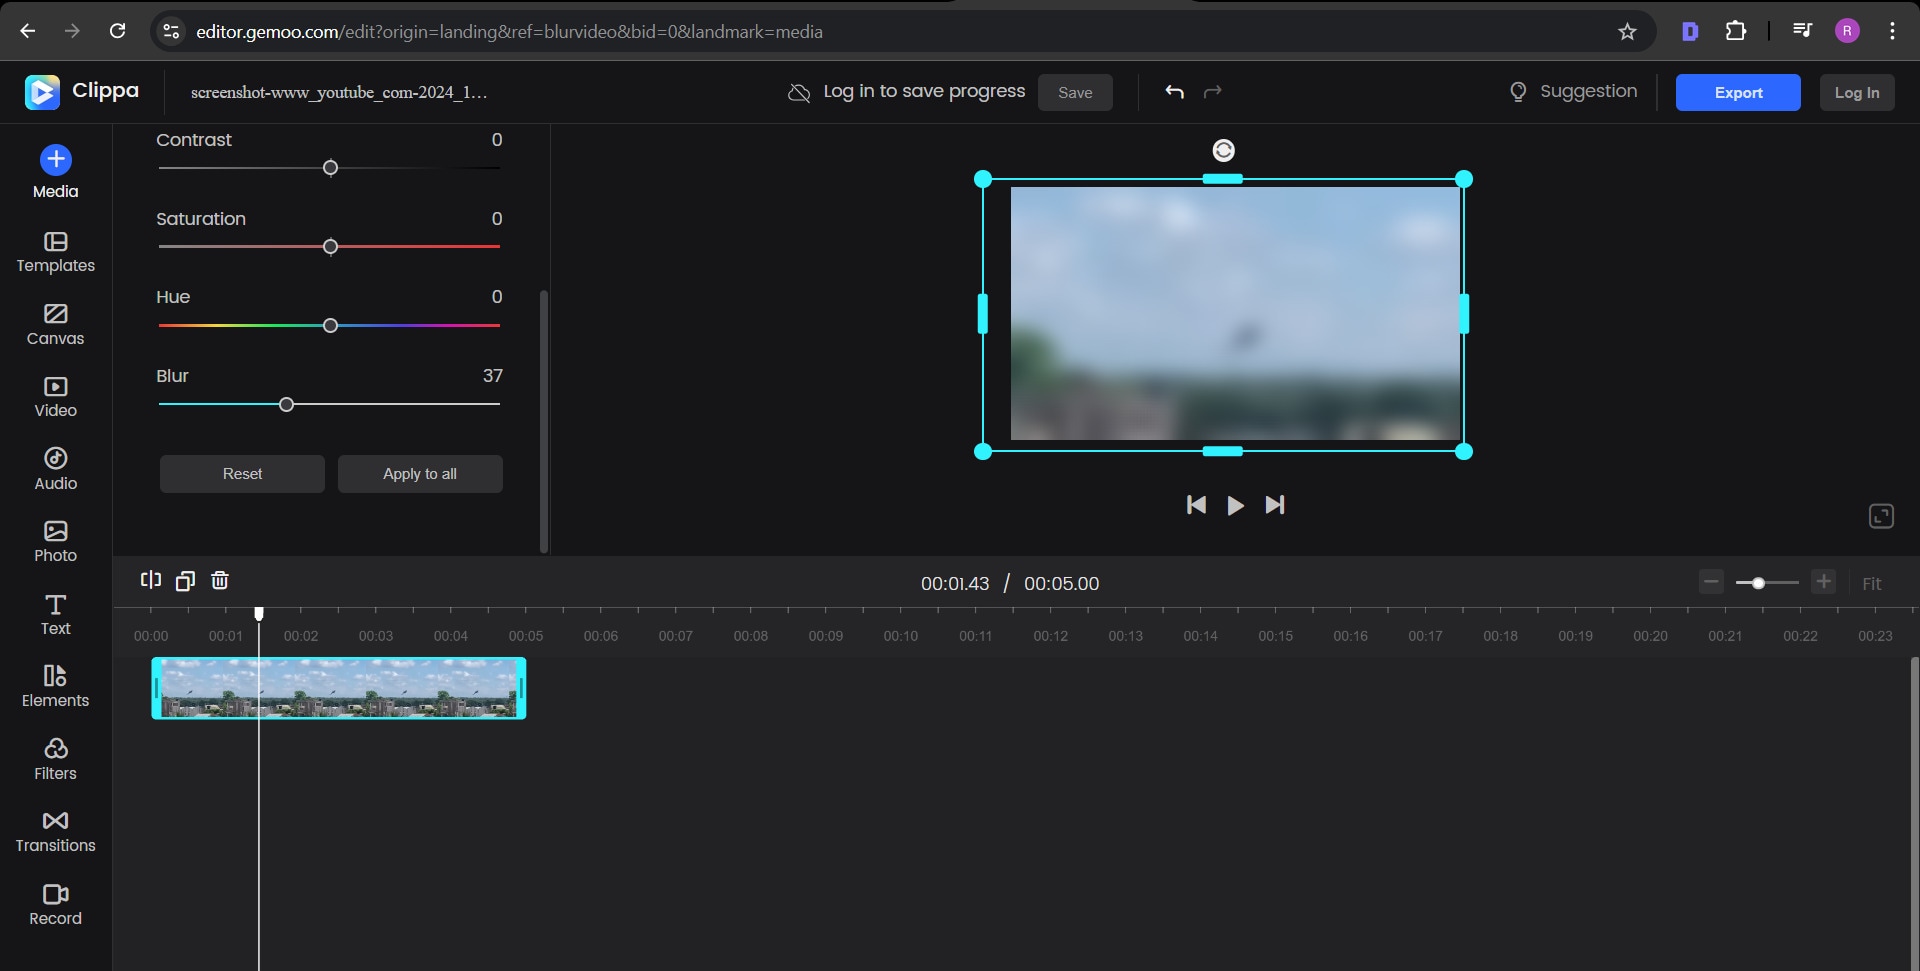
Step 3: Move the slider to increase or decrease the blur intensity according to your needs. And that’s it!
Part 3. Why Blur the Background in Video Using a Desktop Tool?
While online video tools are undoubtedly one of the quickest ways to blur the background of video, they often come with some restrictions and limitations. For instance, the processing time will be slower than usual, or there will be file size restrictions. Other downsides may include:
- Watermarks
- Limited customization
- Quality loss in exports
- Editing lag with large files
- Internet requirements
The best solution to these issue is to get a good desktop tool like Wondershare Filmora. This desktop tool allows you to auto blur your video background, and a variety of other advanced editing options, though with a few restrictions. The company keeps on introducing many advanced features to ensure it matches the professional-level video editing software. Here’s why Filmora is the best option:
| 🌟 Features | Wondershare Filmora | Other Video Editing Tools |
| 🎚️ Blur Control | Multiple blur options | Limited blur options |
| ⚡ Editing Speed | Faster processing speed | Slow speed, especially with large files |
| 🖼️ Export Quality | High resolution | Compression may lower quality |
| 🌐 Internet Requirement | Works offline | Mostly requires stable internet connection |
| ✨ Advanced Effects | Full suite of transitions and filters | Basic editing and limited effects |
More importantly, you can blur the video in different ways by using Filmora to get the desired effects. Keep reading and let's see how.
Different Ways to Blur Video Background Using Filmora
Using Filmora, you can blur video background online in many ways. Let us shed light on the top three of them.
1.AI Face Mosaic
Here’s how you can blur as many faces in a video as you want with the help of the AI Face Mosaic feature on Filmora:
Step 1: Open Filmora
Install Filmora and run it on your device. When it opens, you will see the More option on the screen. Click it to access the Toolbox.
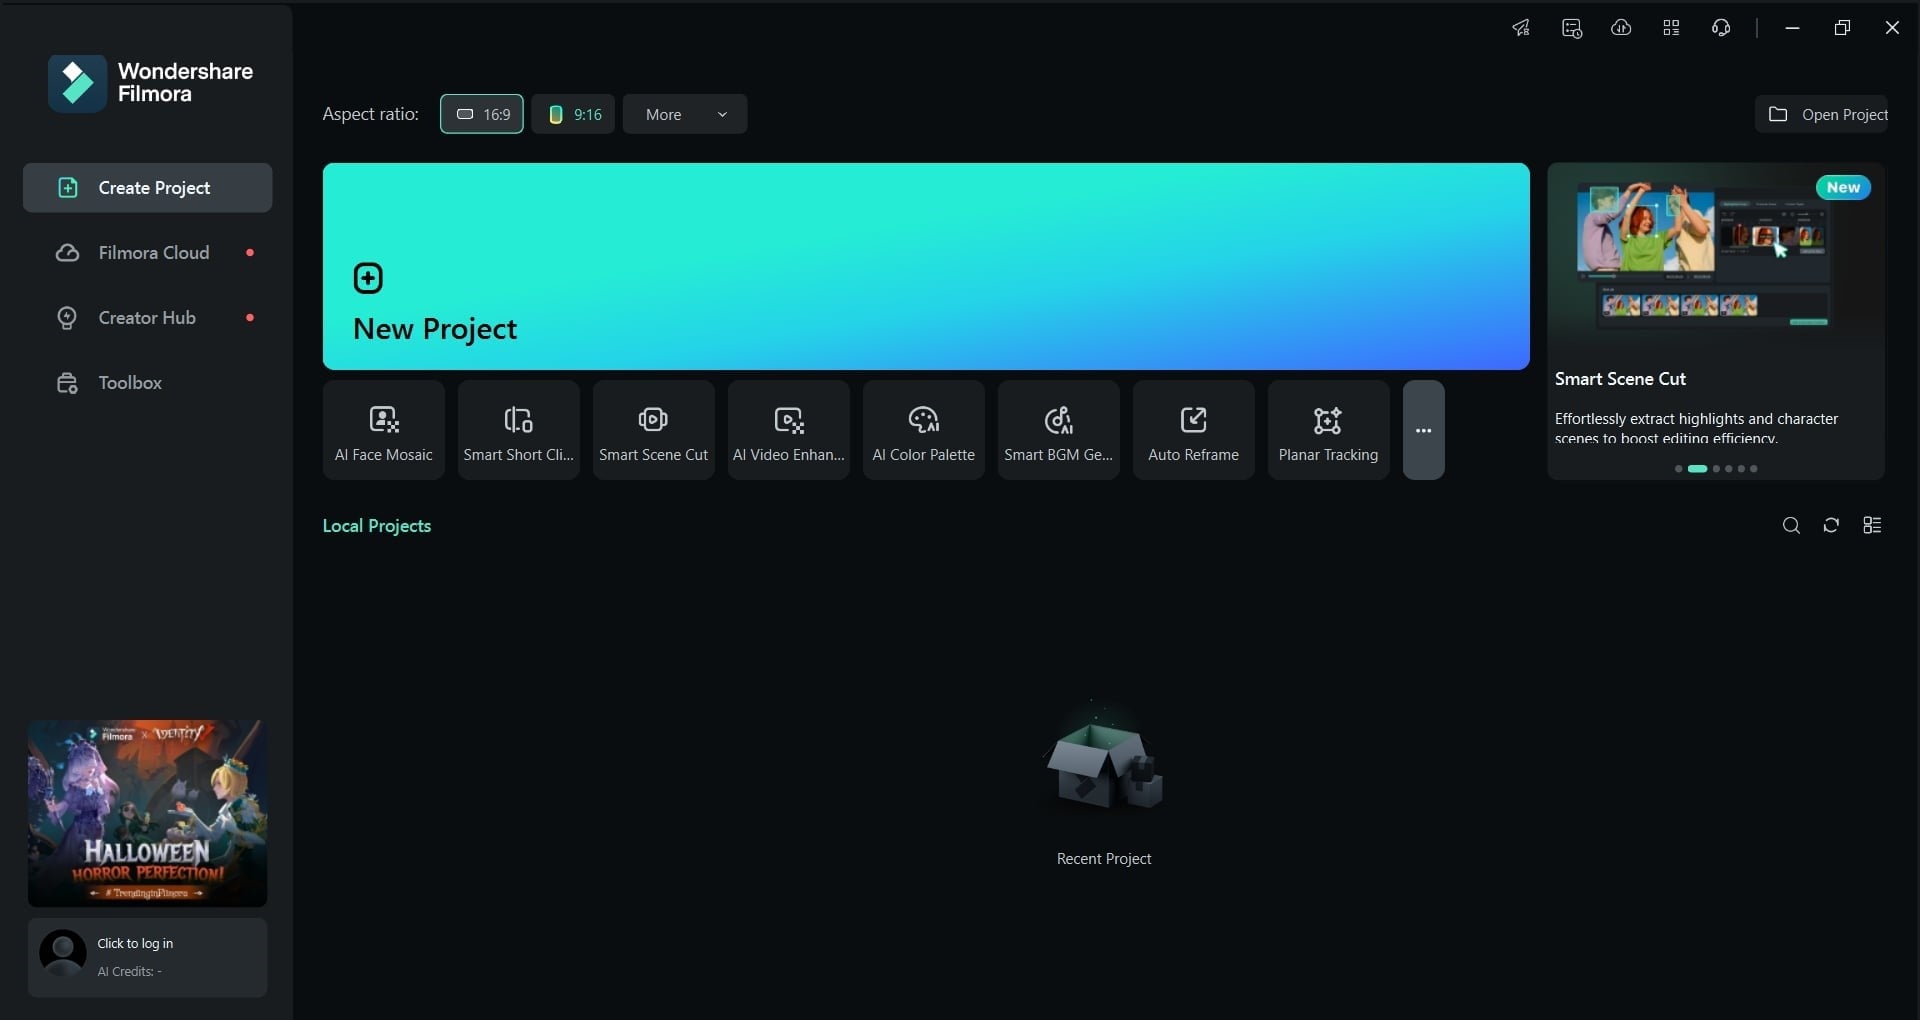
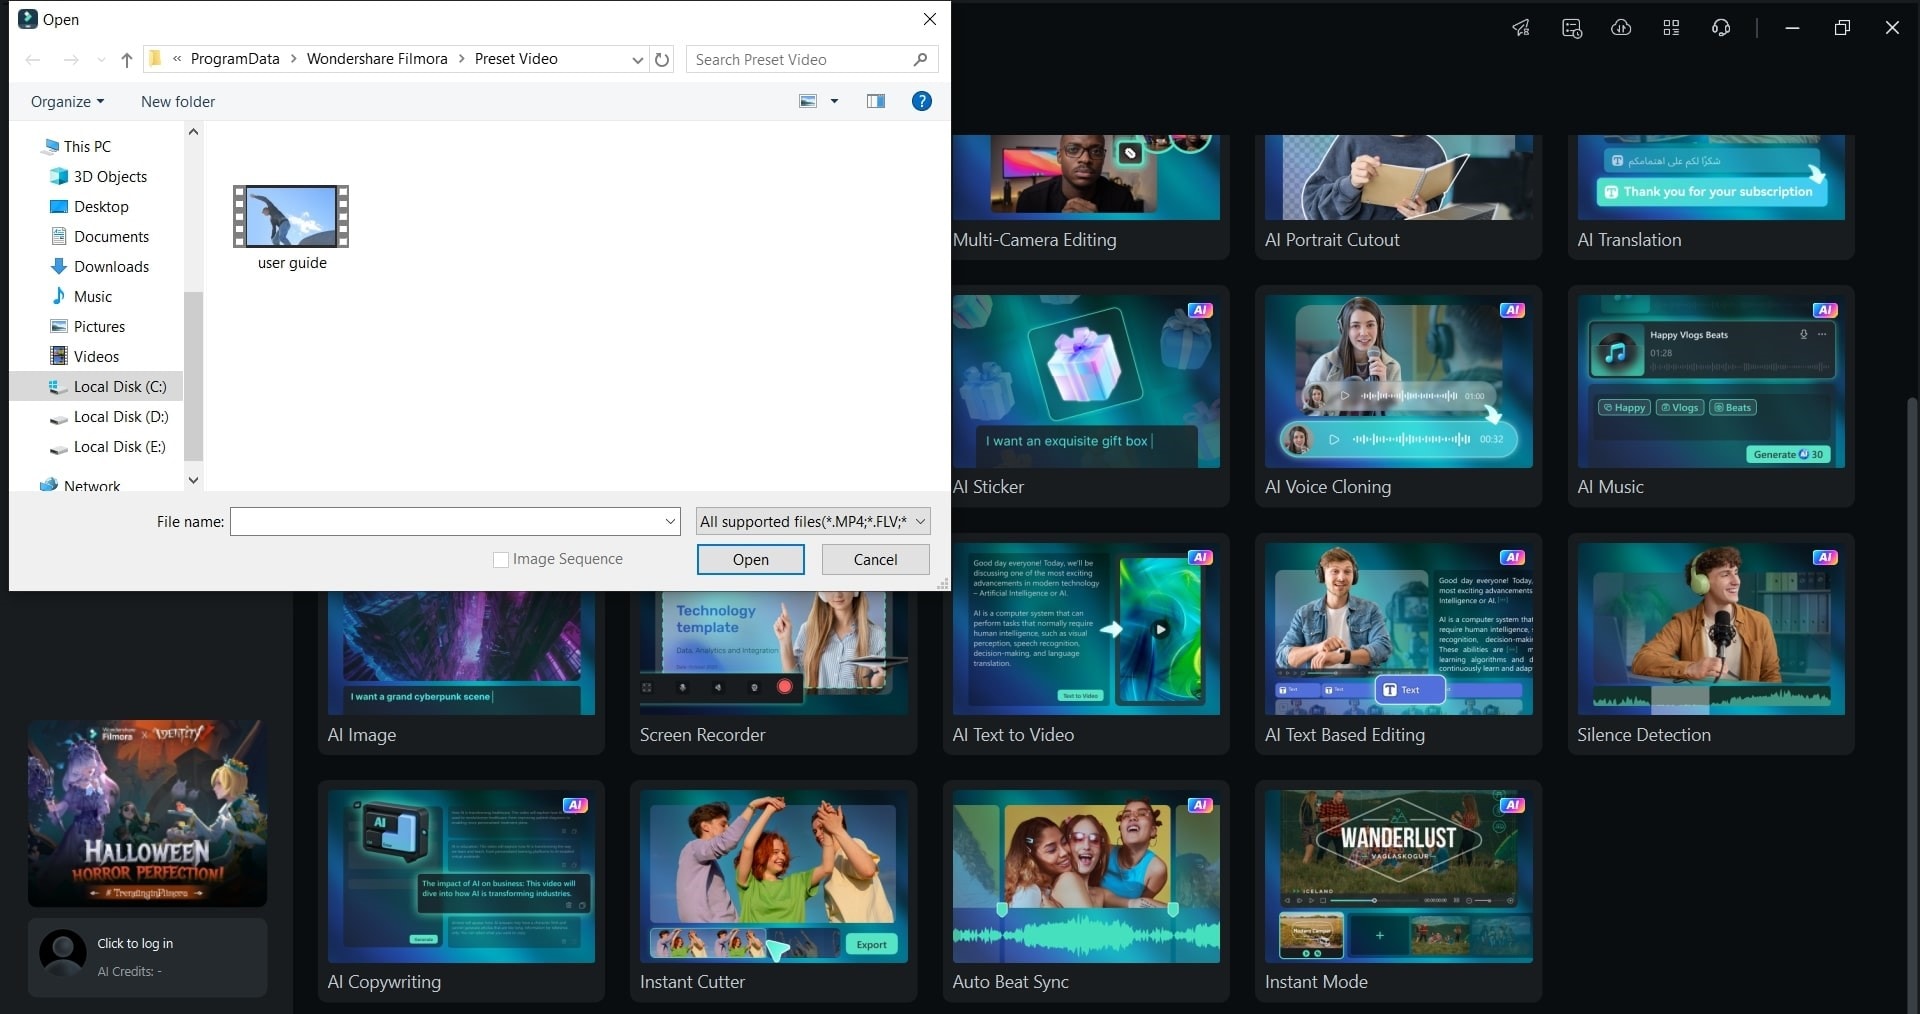
Step 2: Choose the AI Face Mosaic Option
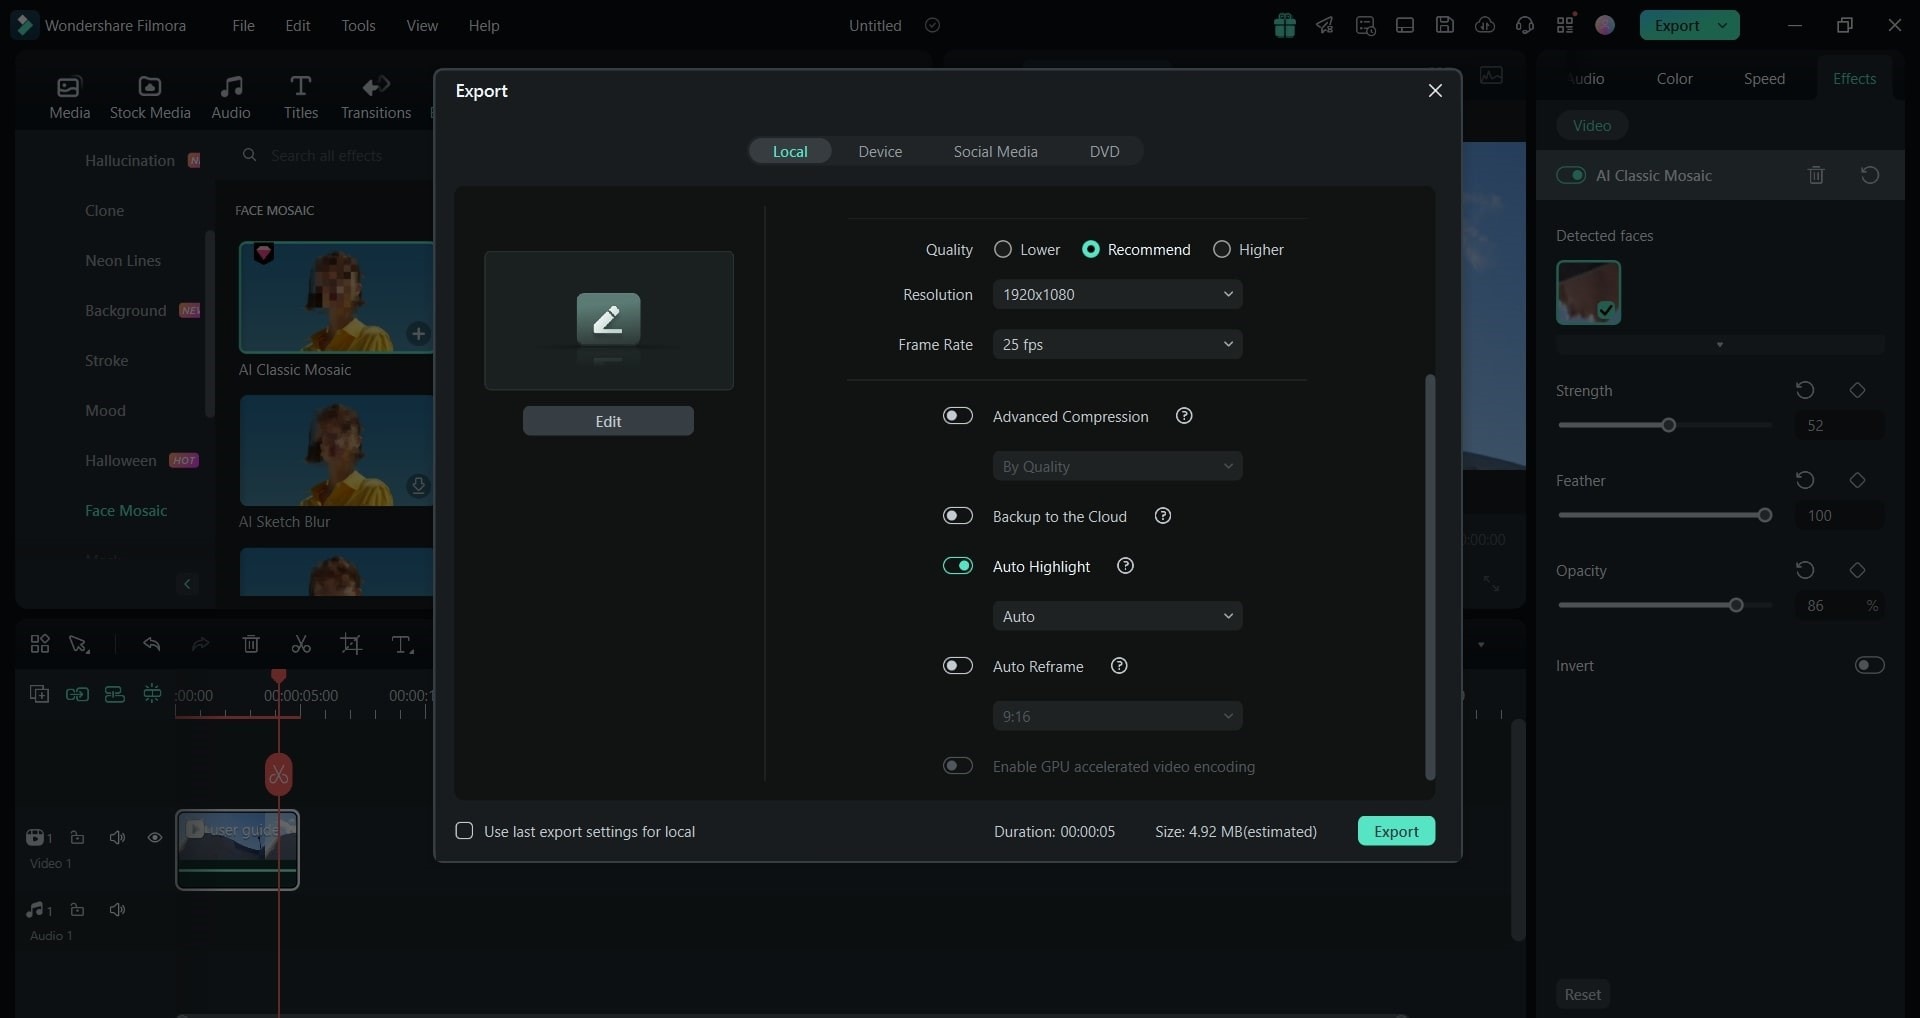
In here, choose the AI Face Mosaic option. After that, you will be directed to choose a video or a photo. Once the video is uploaded, Filmora will automatically analyze the video to detect faces. After the analysis, each face in the video will be automatically mosaicked.
Step 3: Adjust the AI Face Mosaic
Next, you can adjust the Feather, Opacity, and Strength of the mosaic effect. At the same time, you can deselect a part (or a face) to remove the mosaic effect.
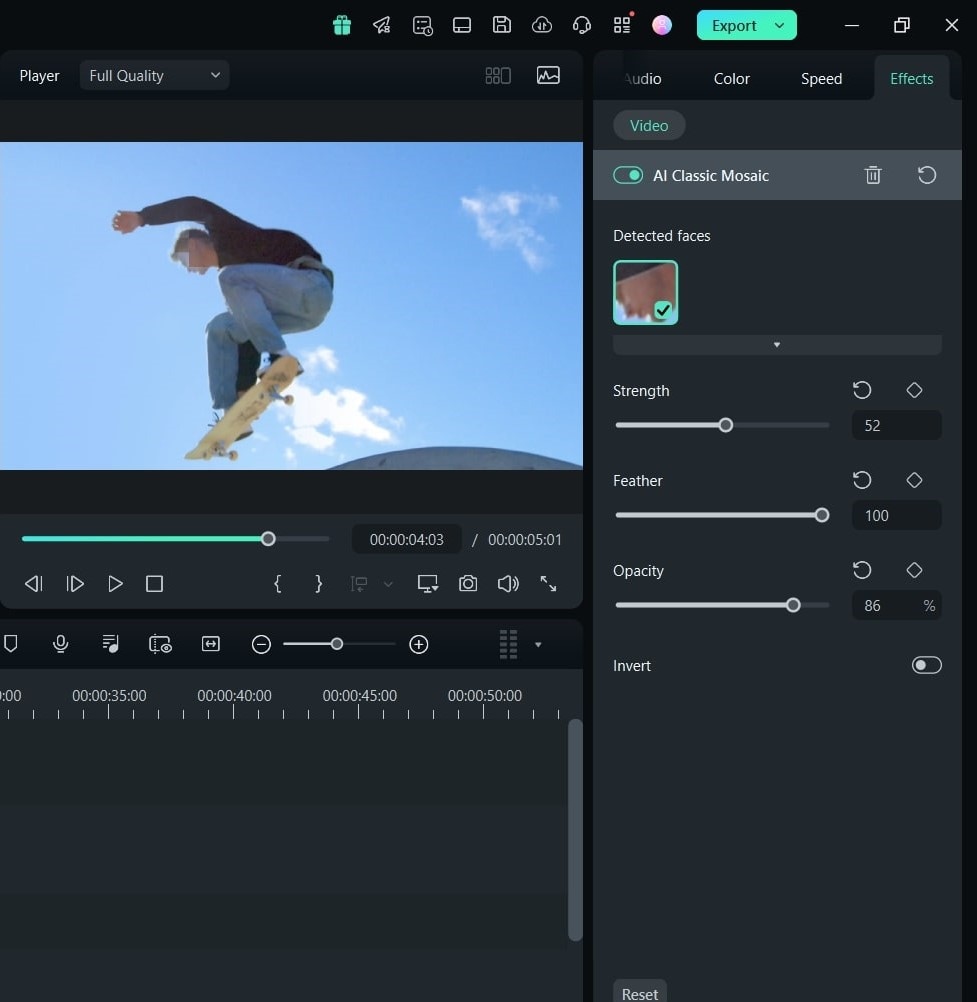
Step 4: Save the Blurred Video
Once you are happy with the results, save and export your blurred video.
2.Blur Effects
Step 1: Import the Video
Launch the Filmora desktop software and import your video into the Media Library. You can either drag and drop the video of your choice or move to the File tab and simply choose Import Media. Once the video is uploaded, drag and drop it into the Timeline.
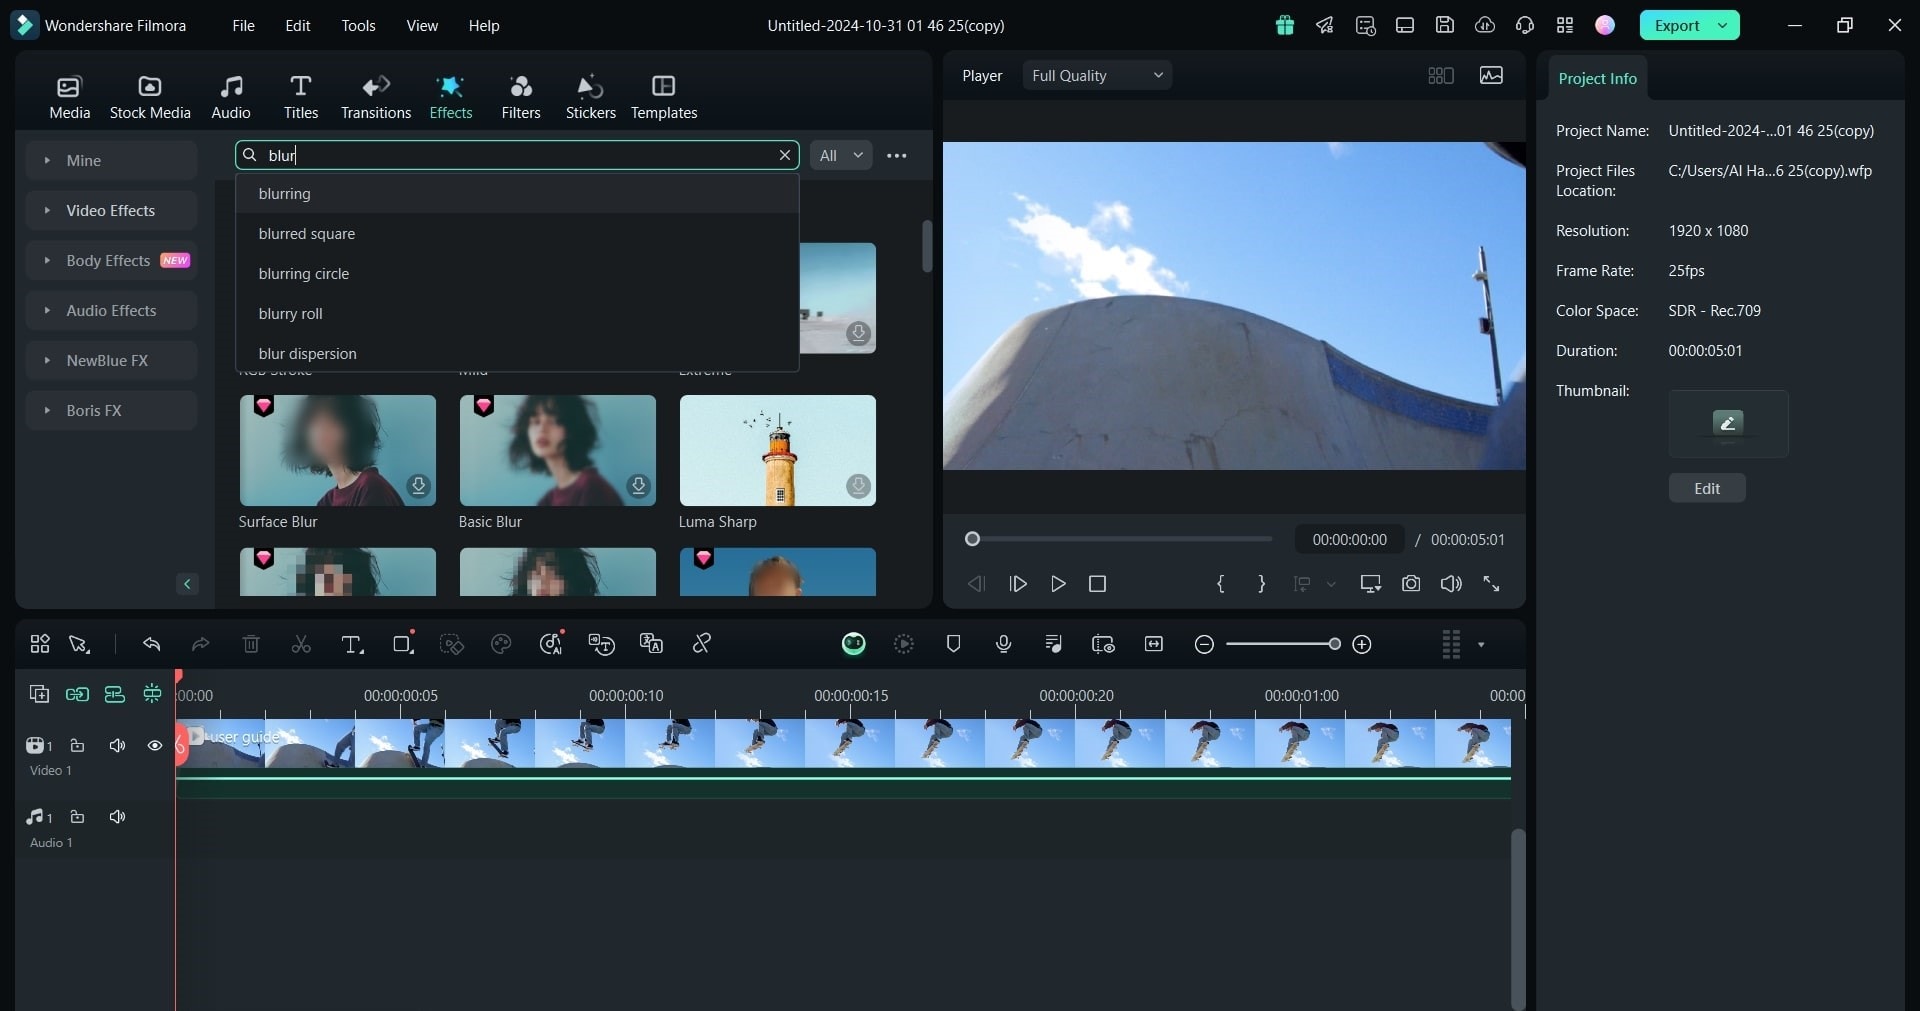
Step 2: Go to Effects and Choose Blur
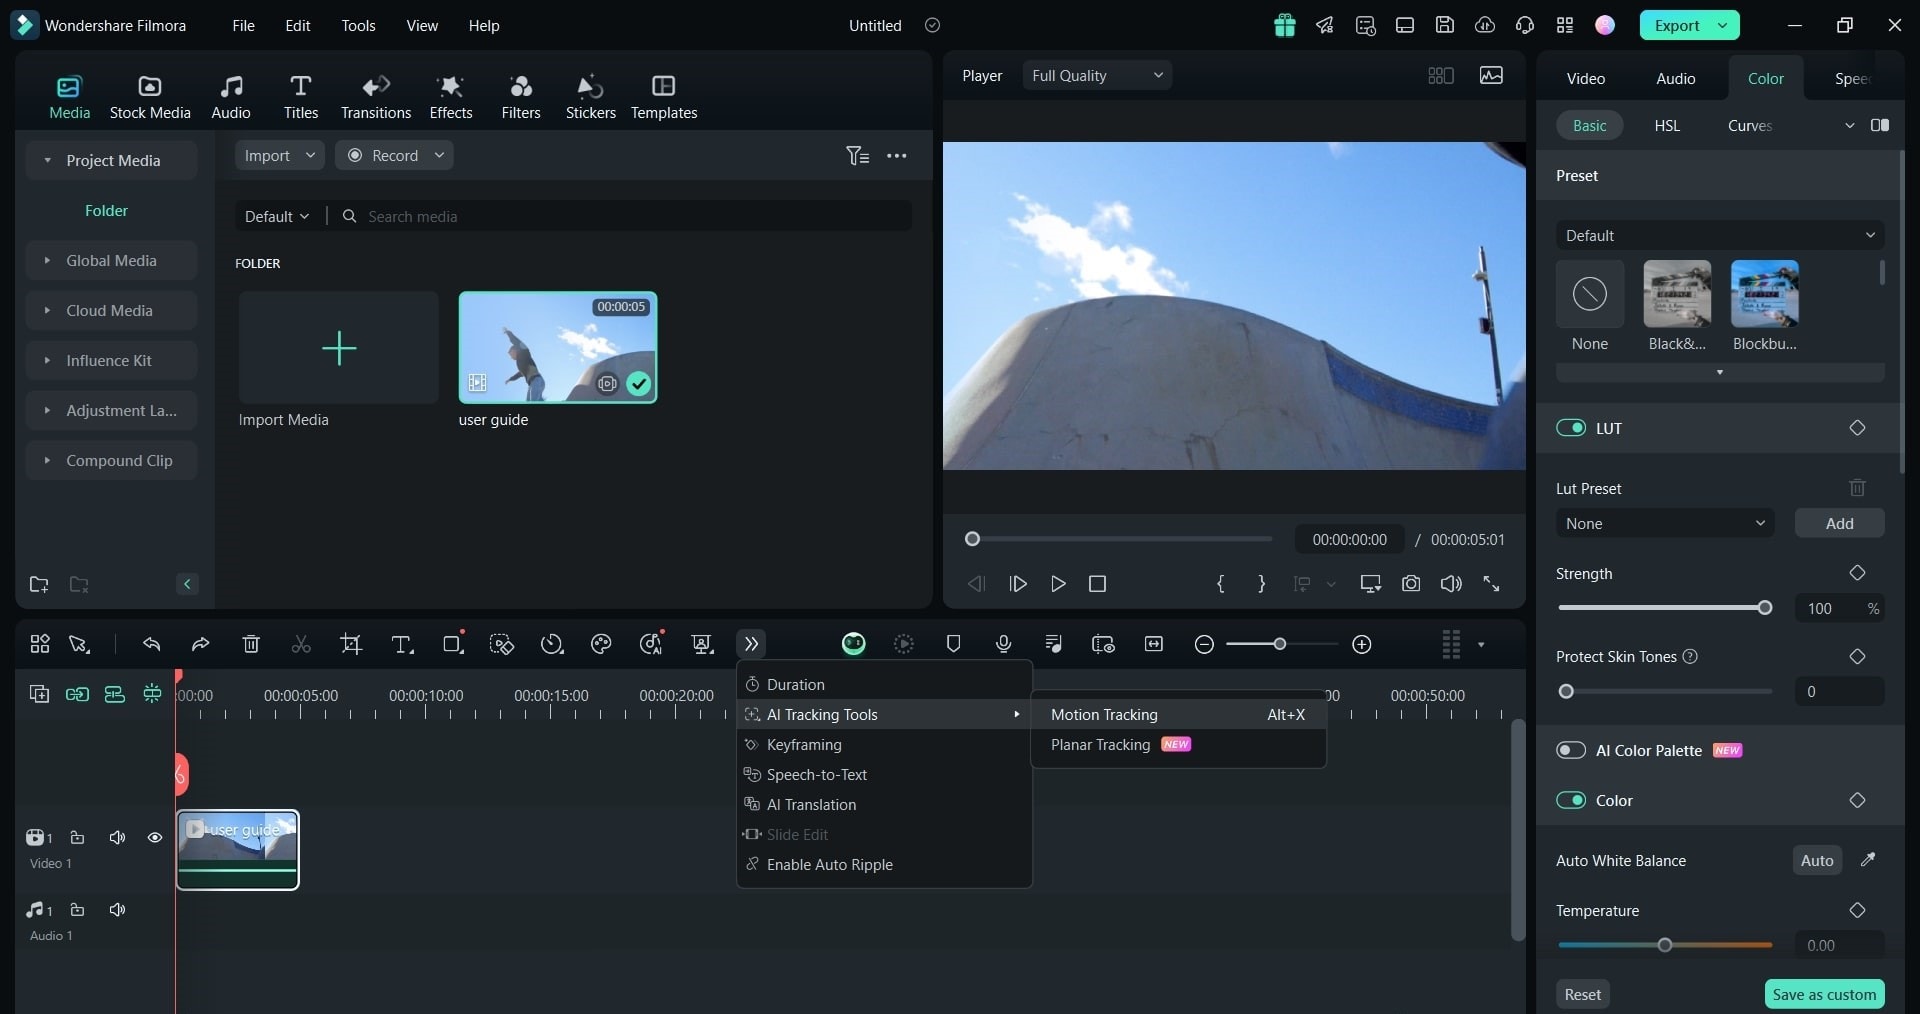
In the top menu, click on Effects and search for the blur effect in the search bar. You will see so many options right there. Select the one you want.
Step 3: Add the Same Video to the Timeline Again
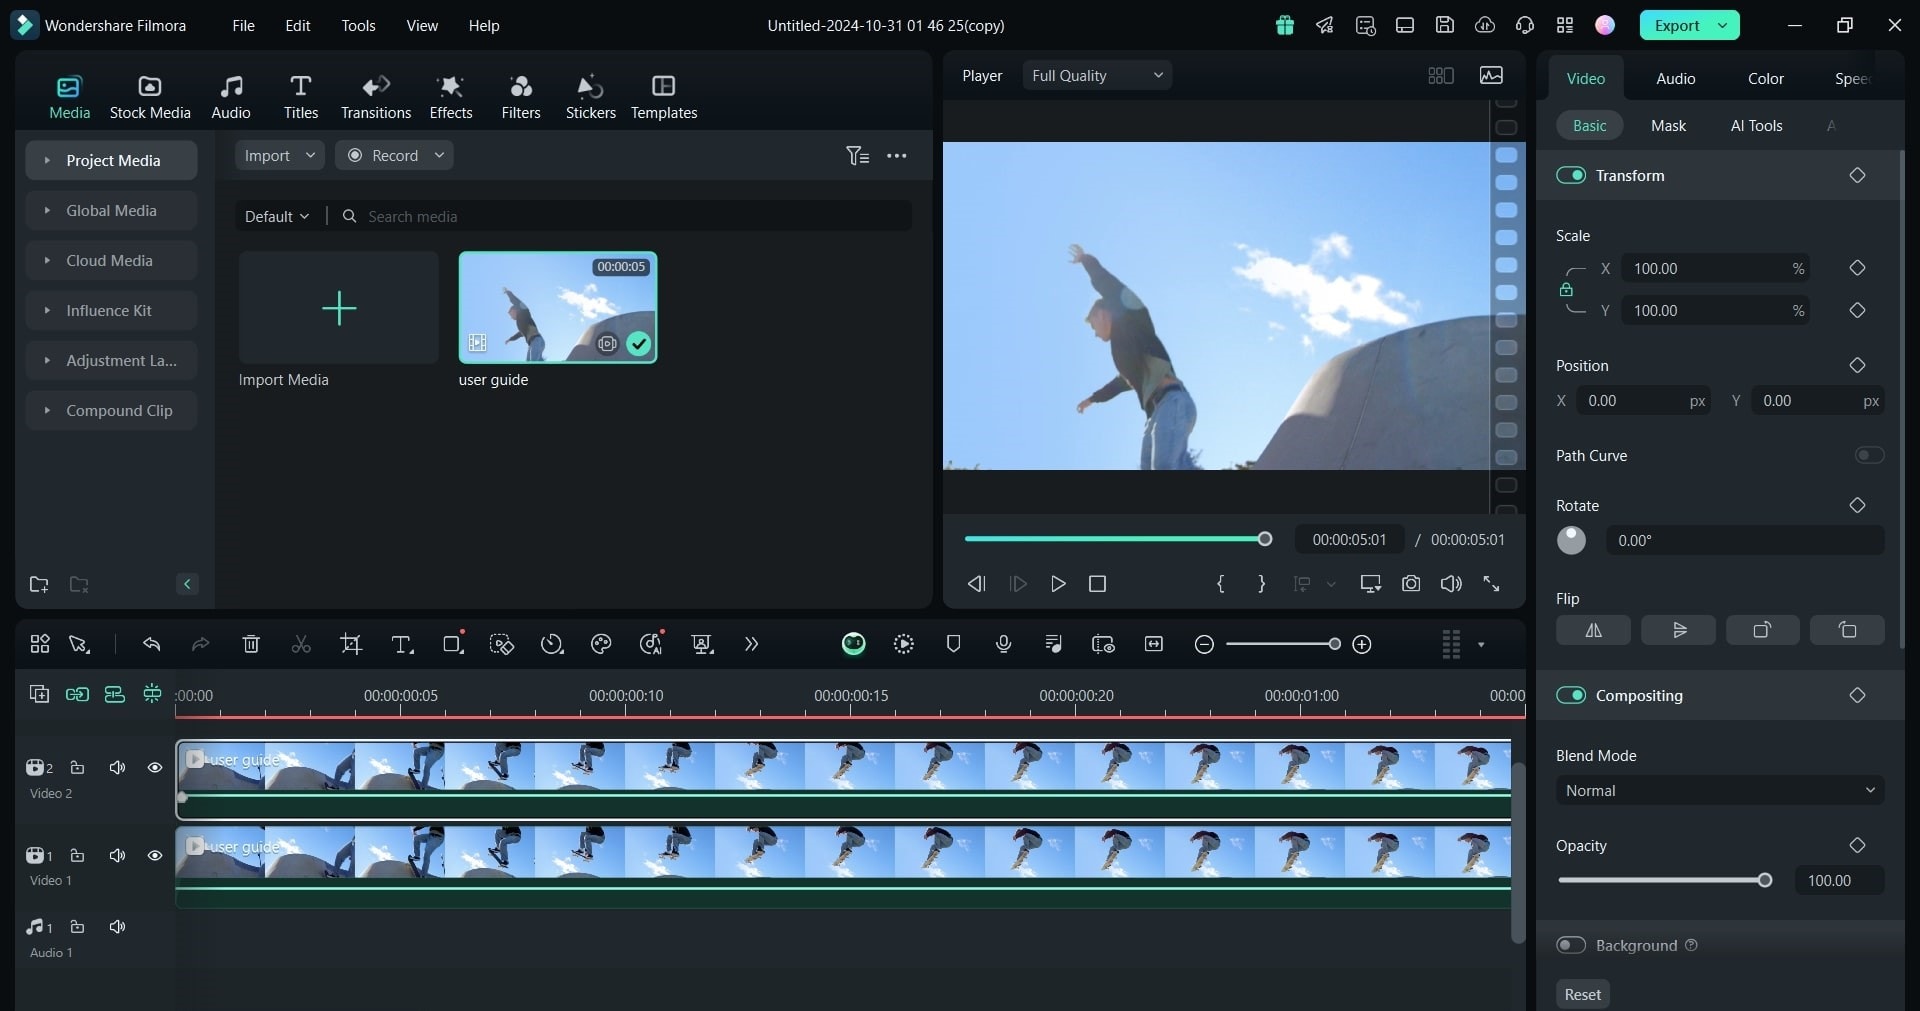
Drag the same video to the timeline to layer it. You can do so by holding the Alt key and the left mouse button and dragging it. This will help with masking and more precise blurring.
Step 5: Choose the Blur Effect
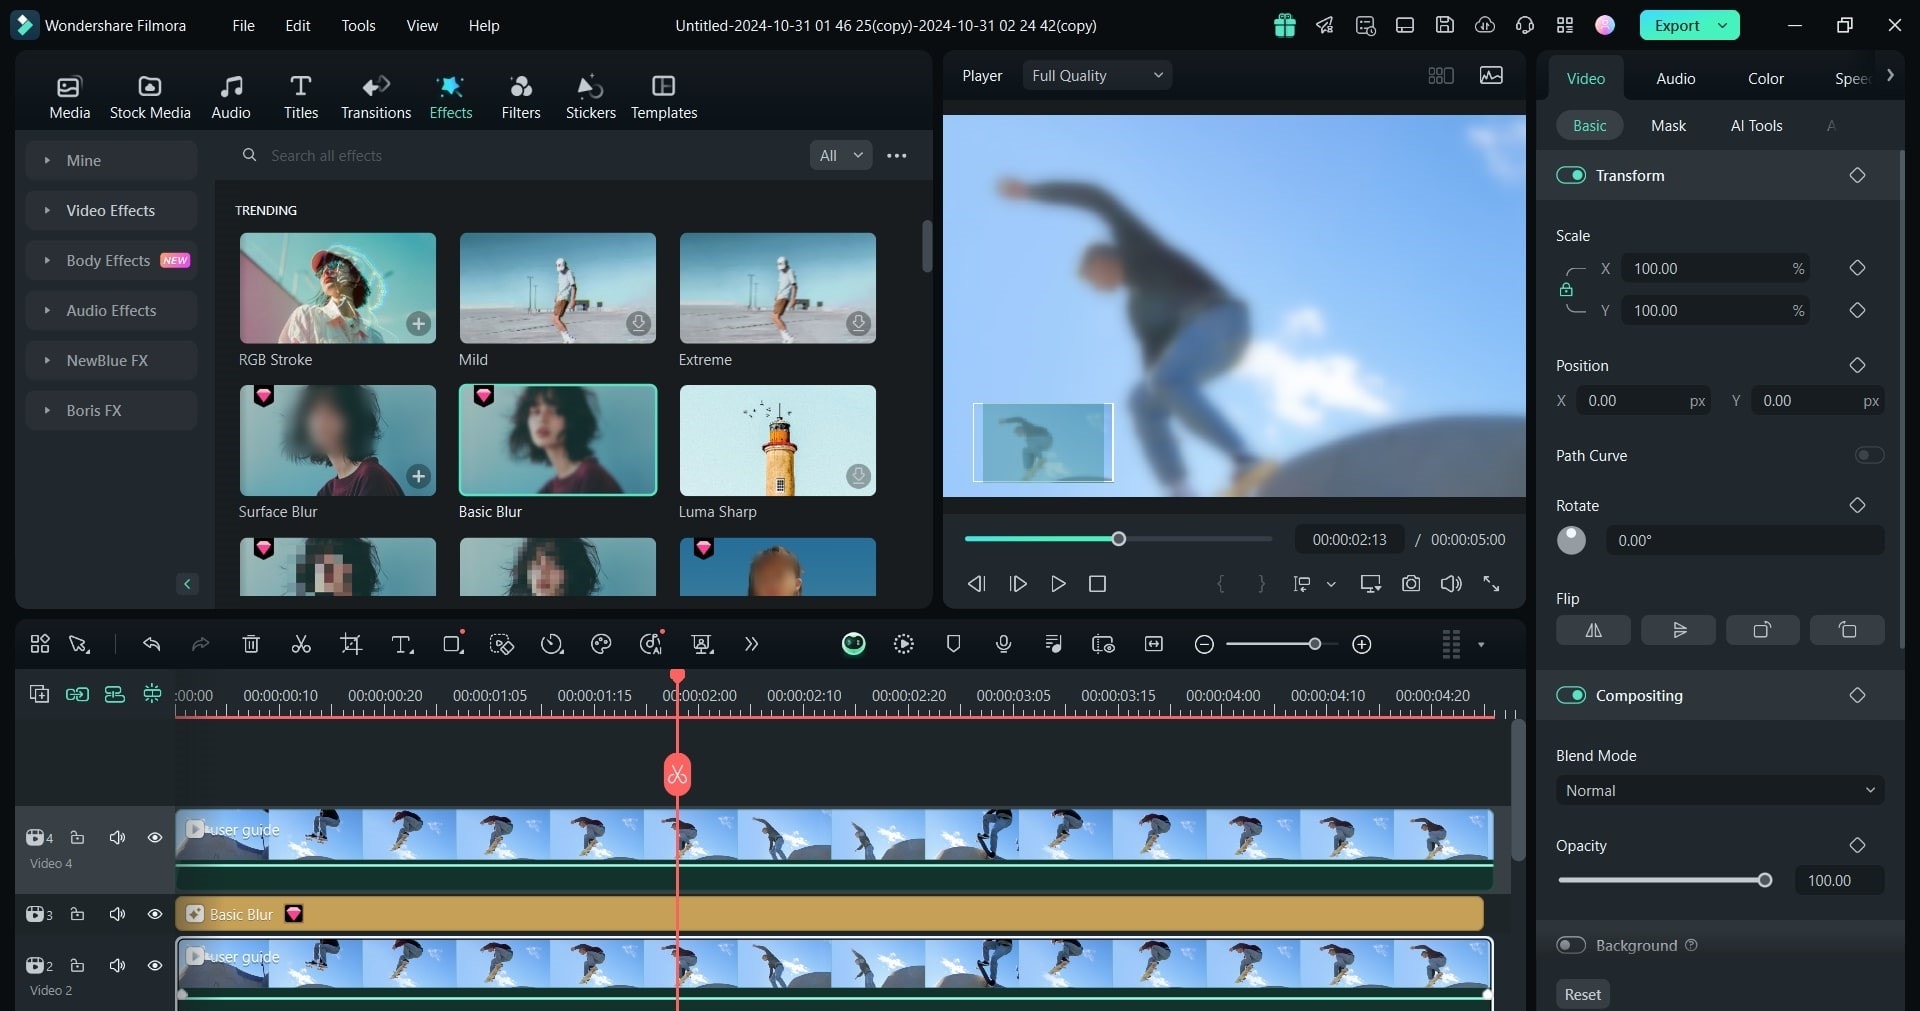
Go to Effects, type in ‘blur,’ and choose the one you want to apply.
Step 6: Adjust the Intensity
Use the intensity slider to control how strong or subtle the blur effect appears
Step 7: Click Save
Once the cutout is complete, click Save to apply the changes.
3.Motion Blur
Want to blur a moving object? Use the Motion Tracking feature in Filmora. Here's how to do it:
Step 1: Import the Video
Launch Filmora and import your video into the Media Library. Then, drag the video to the timeline to begin editing.
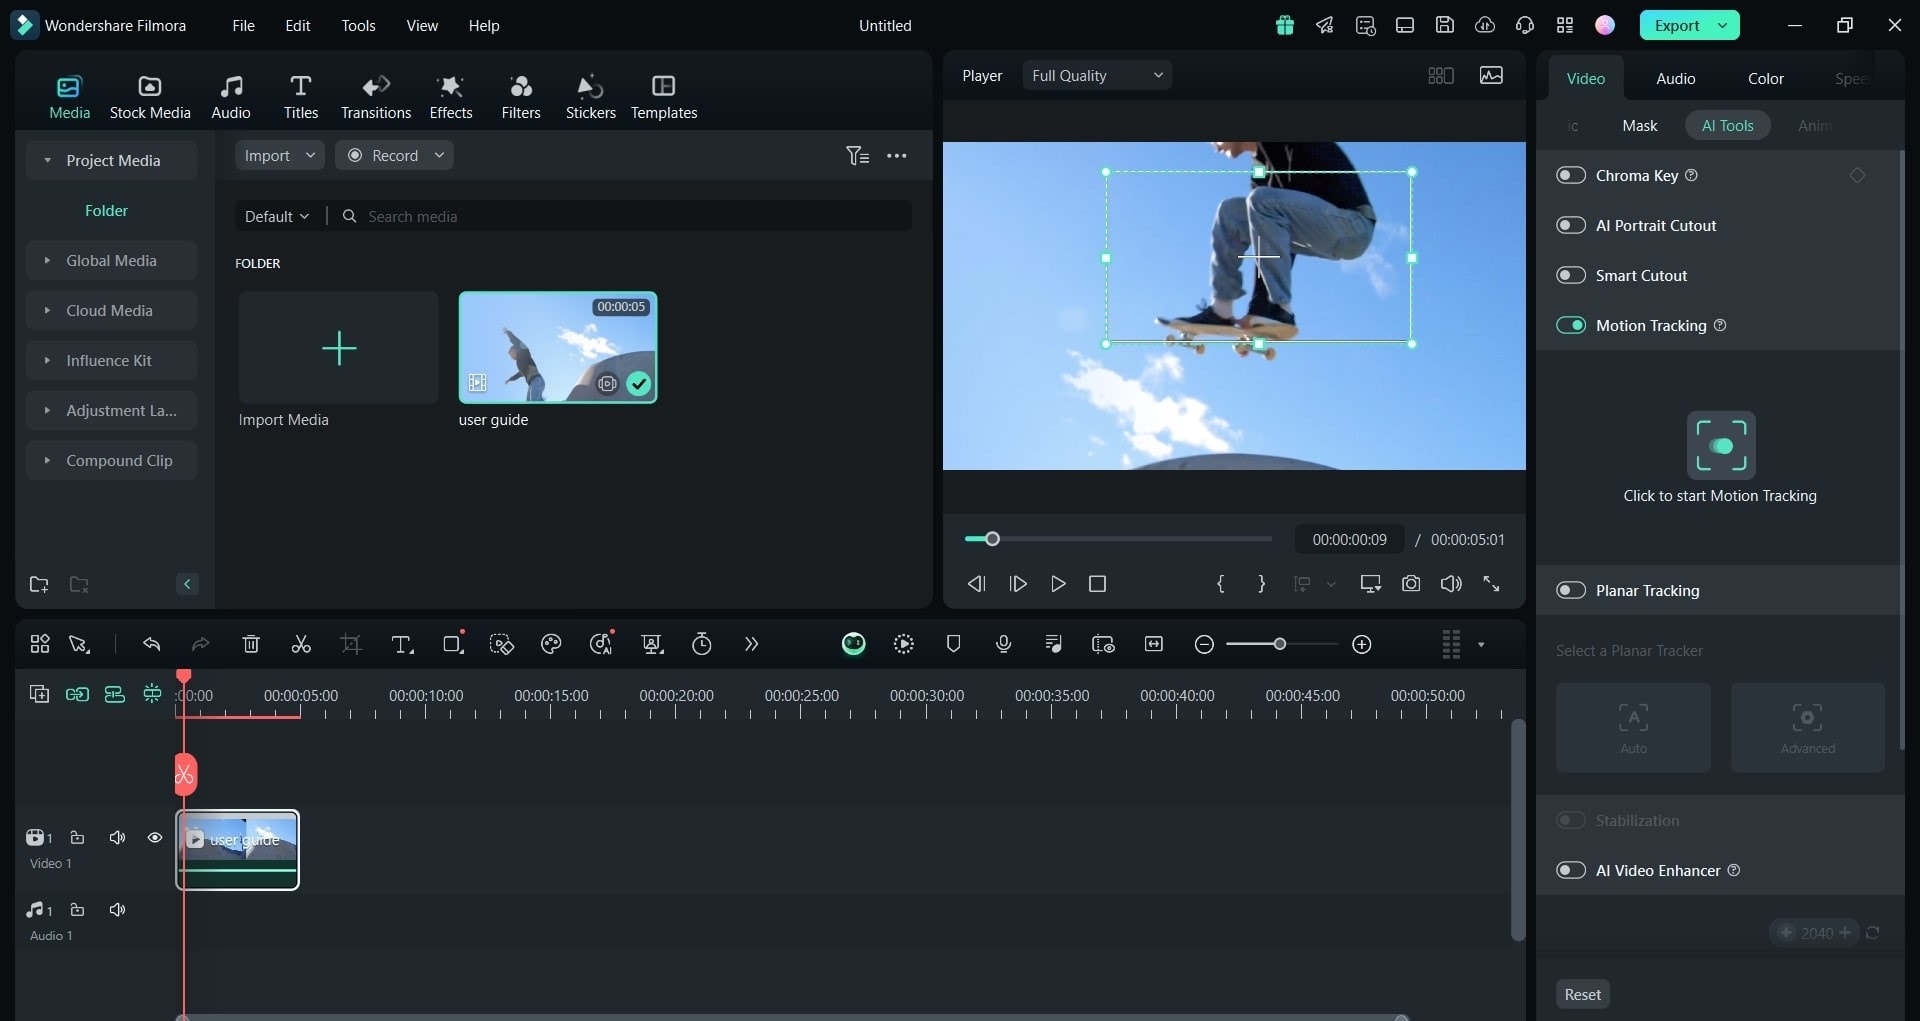
Step 2: Enable Motion Tracking
After adding the video, double-click it in the timeline to open the editing options. Now, check the Motion Tracking box to activate the tracking feature.
Step 3: Set the Tracker Box
Then, a tracker box will appear in the preview window. You need to place the box over the object you want to blur and adjust its size as needed.
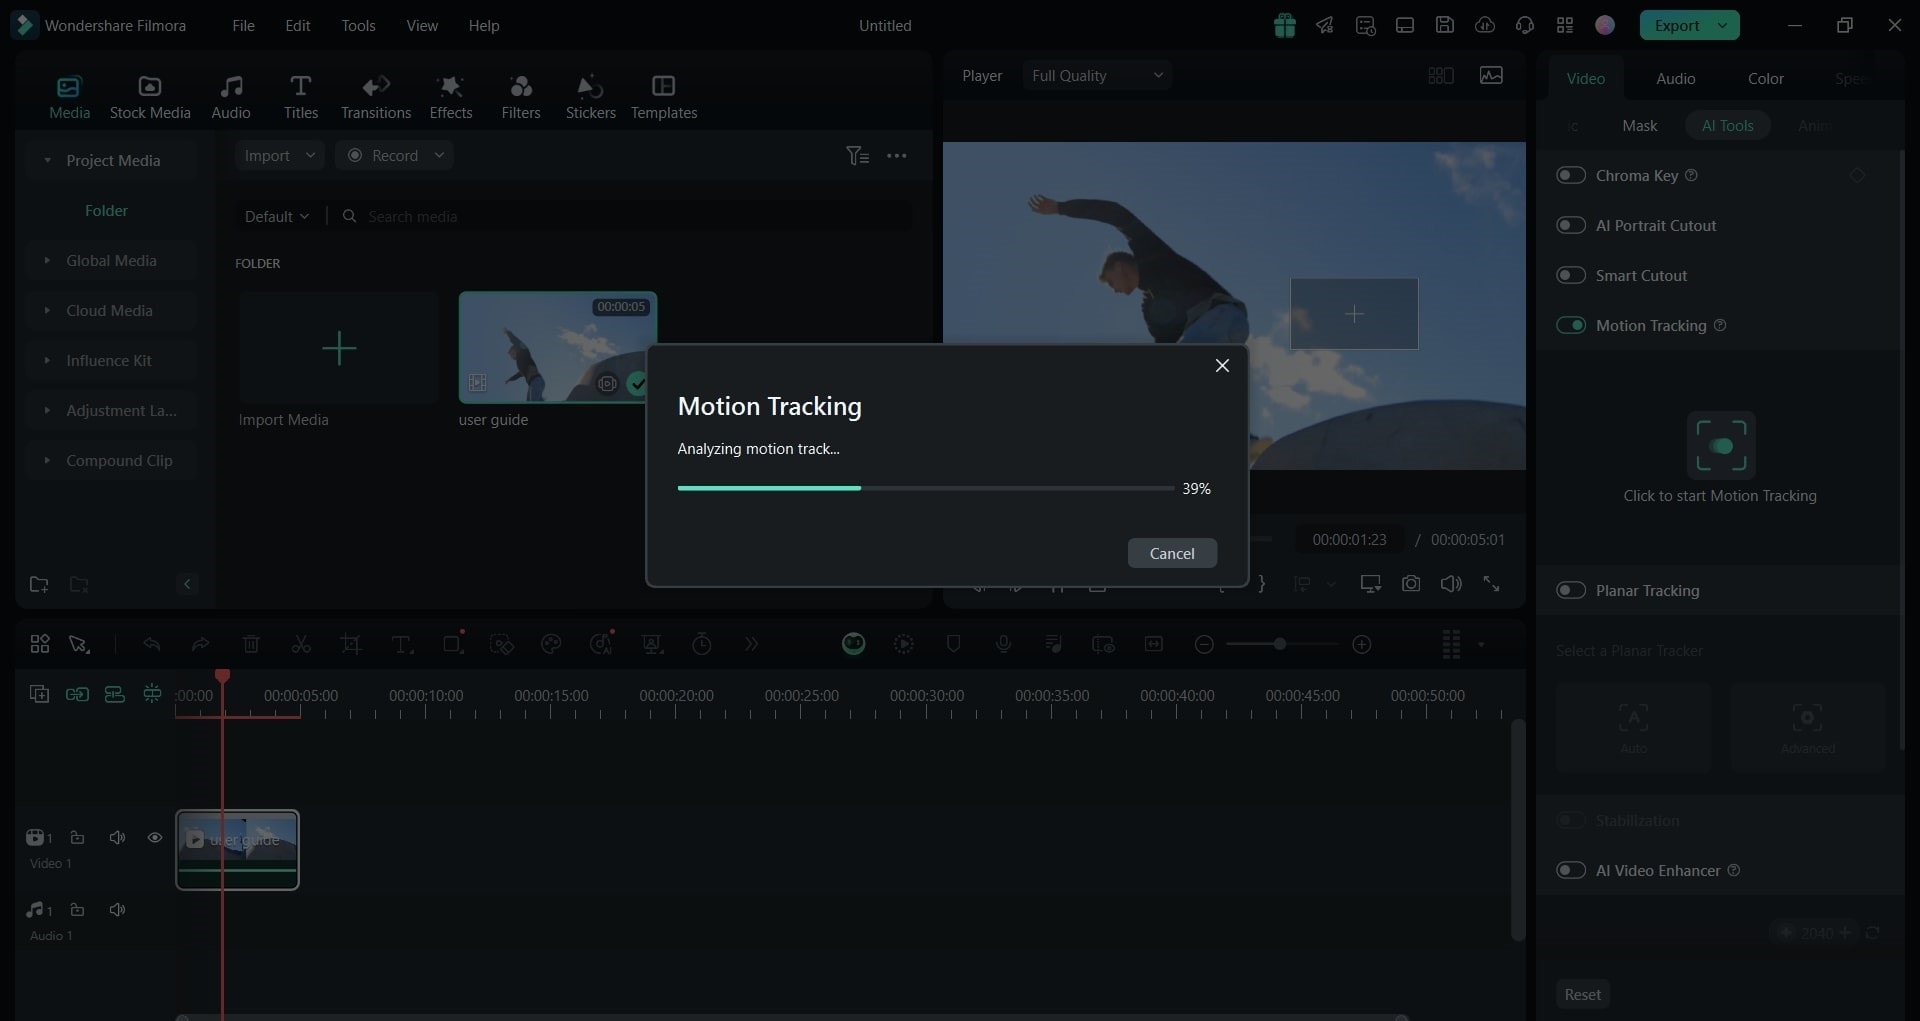
Step 4: Track the Object's Movement
Click Start Tracking to let Filmora follow the object and wait for the process to complete (tracking speed depends on video length).
Step 5: Apply the Blur or Mosaic Effect
Once tracking is complete, select Add Mosaic from the menu and adjust the blur intensity or opacity to make the object unrecognizable.
Step 6: Save and Export the Blurred Video
Before saving, preview the video to ensure the blur follows the object smoothly. Make any final adjustments to the mosaic layer if needed. Finally, save the project by going to File > Save Project.
Part 4. Other Features to Complement Blurred Video Background
While auto-blur video background on Filmora is enough to make your videos look professional, you can take your content to the next level by combining background blur with some other editing tools.
Let’s see what tools you can use to create professional-quality videos on Filmora.
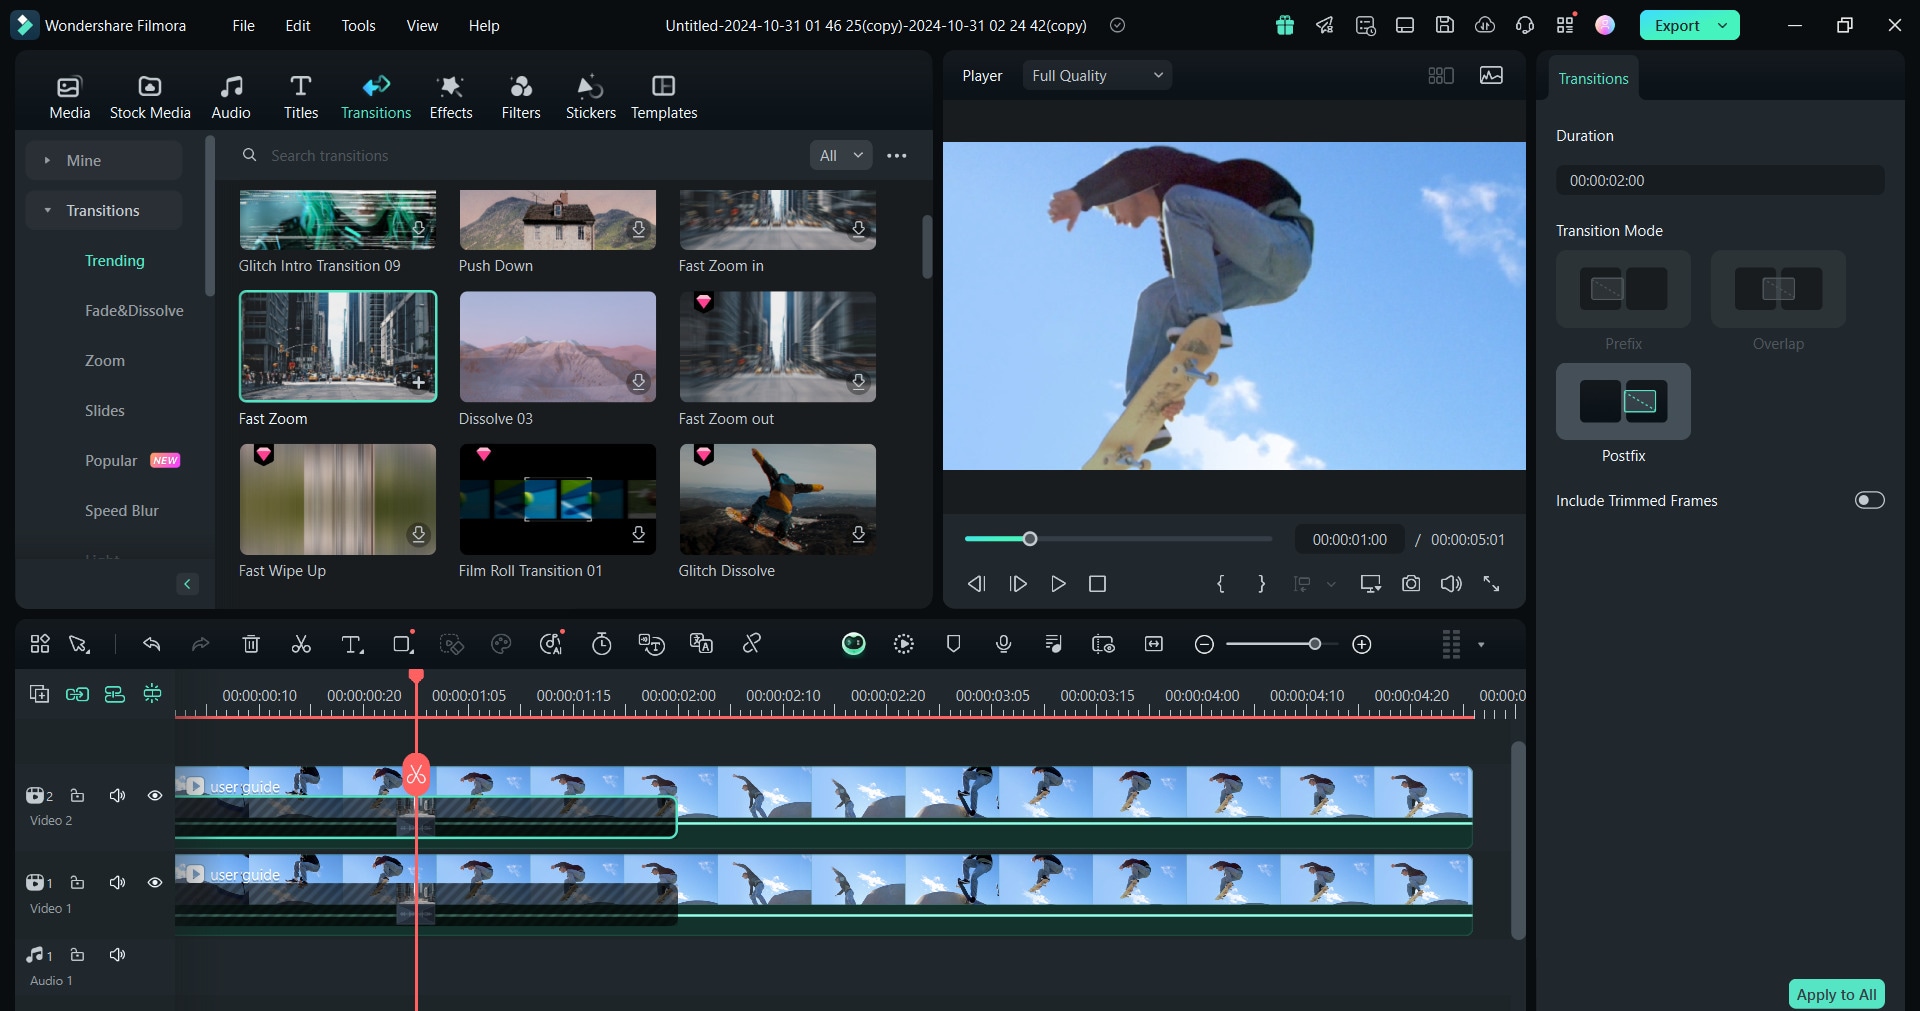
1.Transitions
You can keep the flow of your videos natural and appealing by adding smooth transitions between scenes. For instance, when moving from an introduction to the main content, a fade-in transition along with a blur background can really help avoid those abrupt cuts.
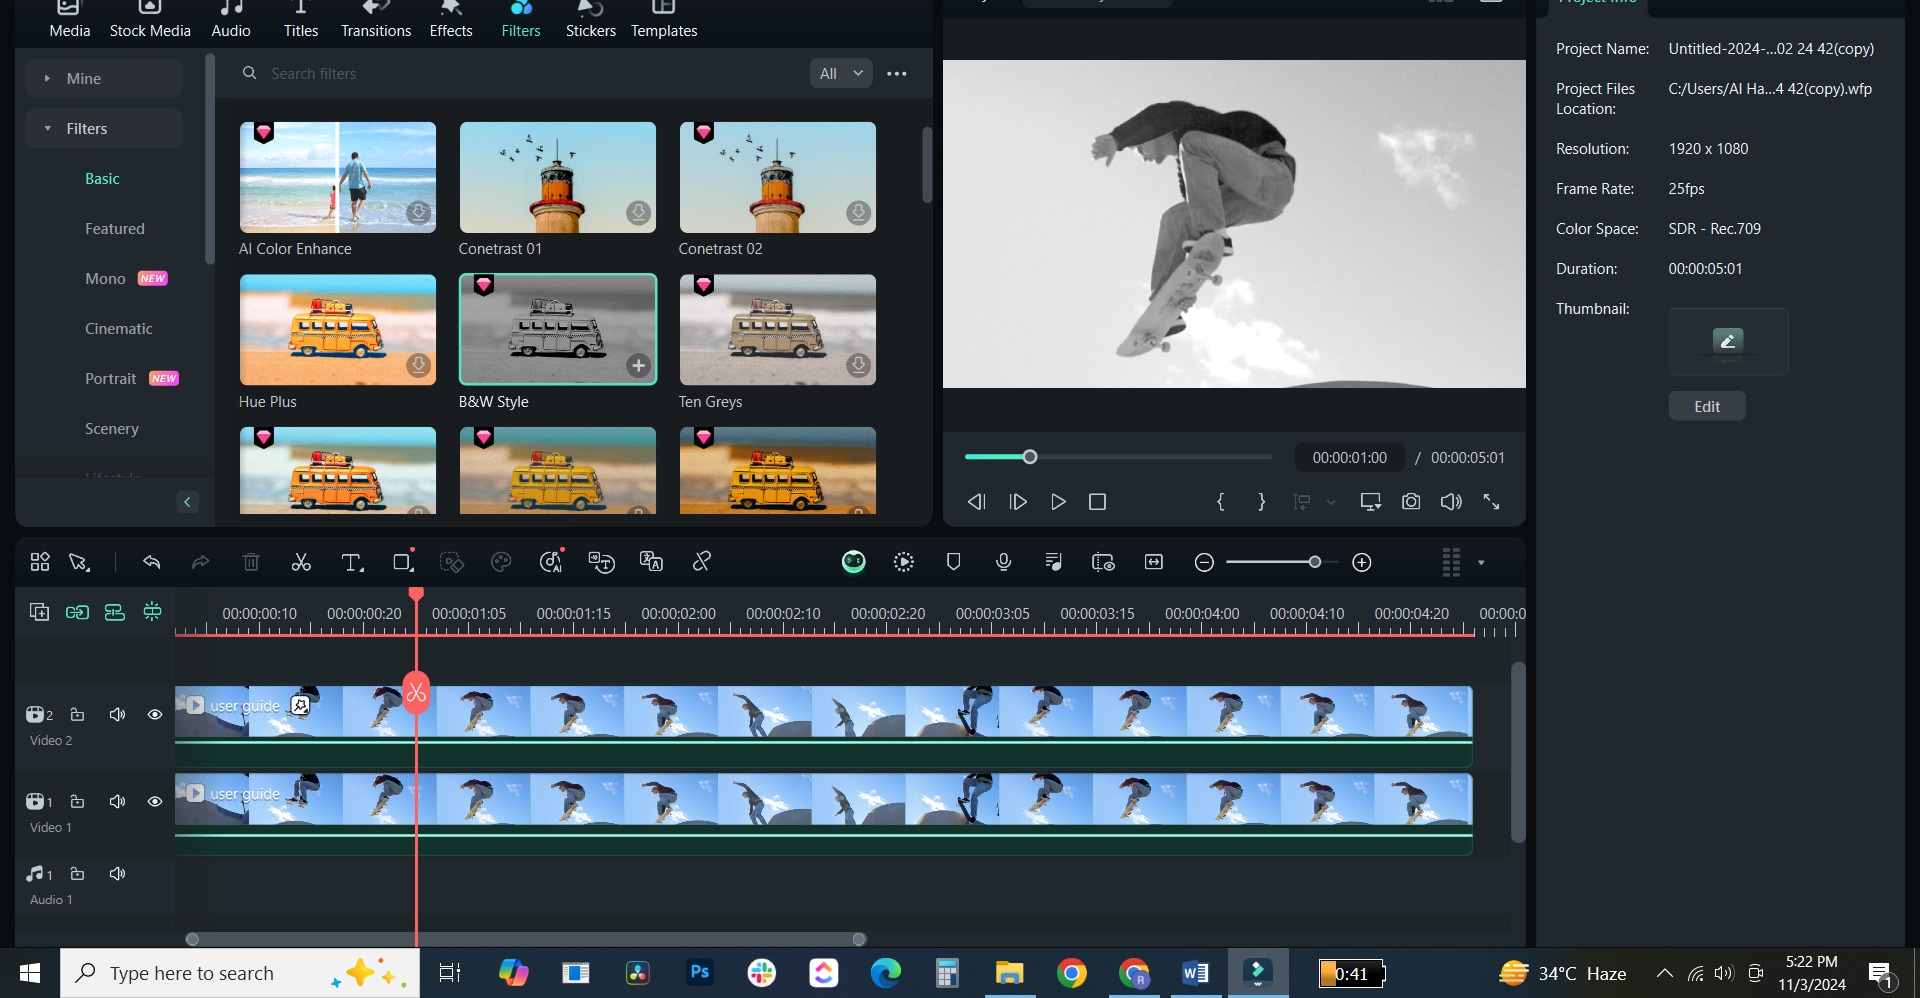
2. Filters
If you want to change the way how your video feels, consider trying different filters and select the one that matches your theme or mood. Along with blurring video background online for free, you can always try a warm filter with a blur effect for instant, cozy vibes that work great for lifestyle content.
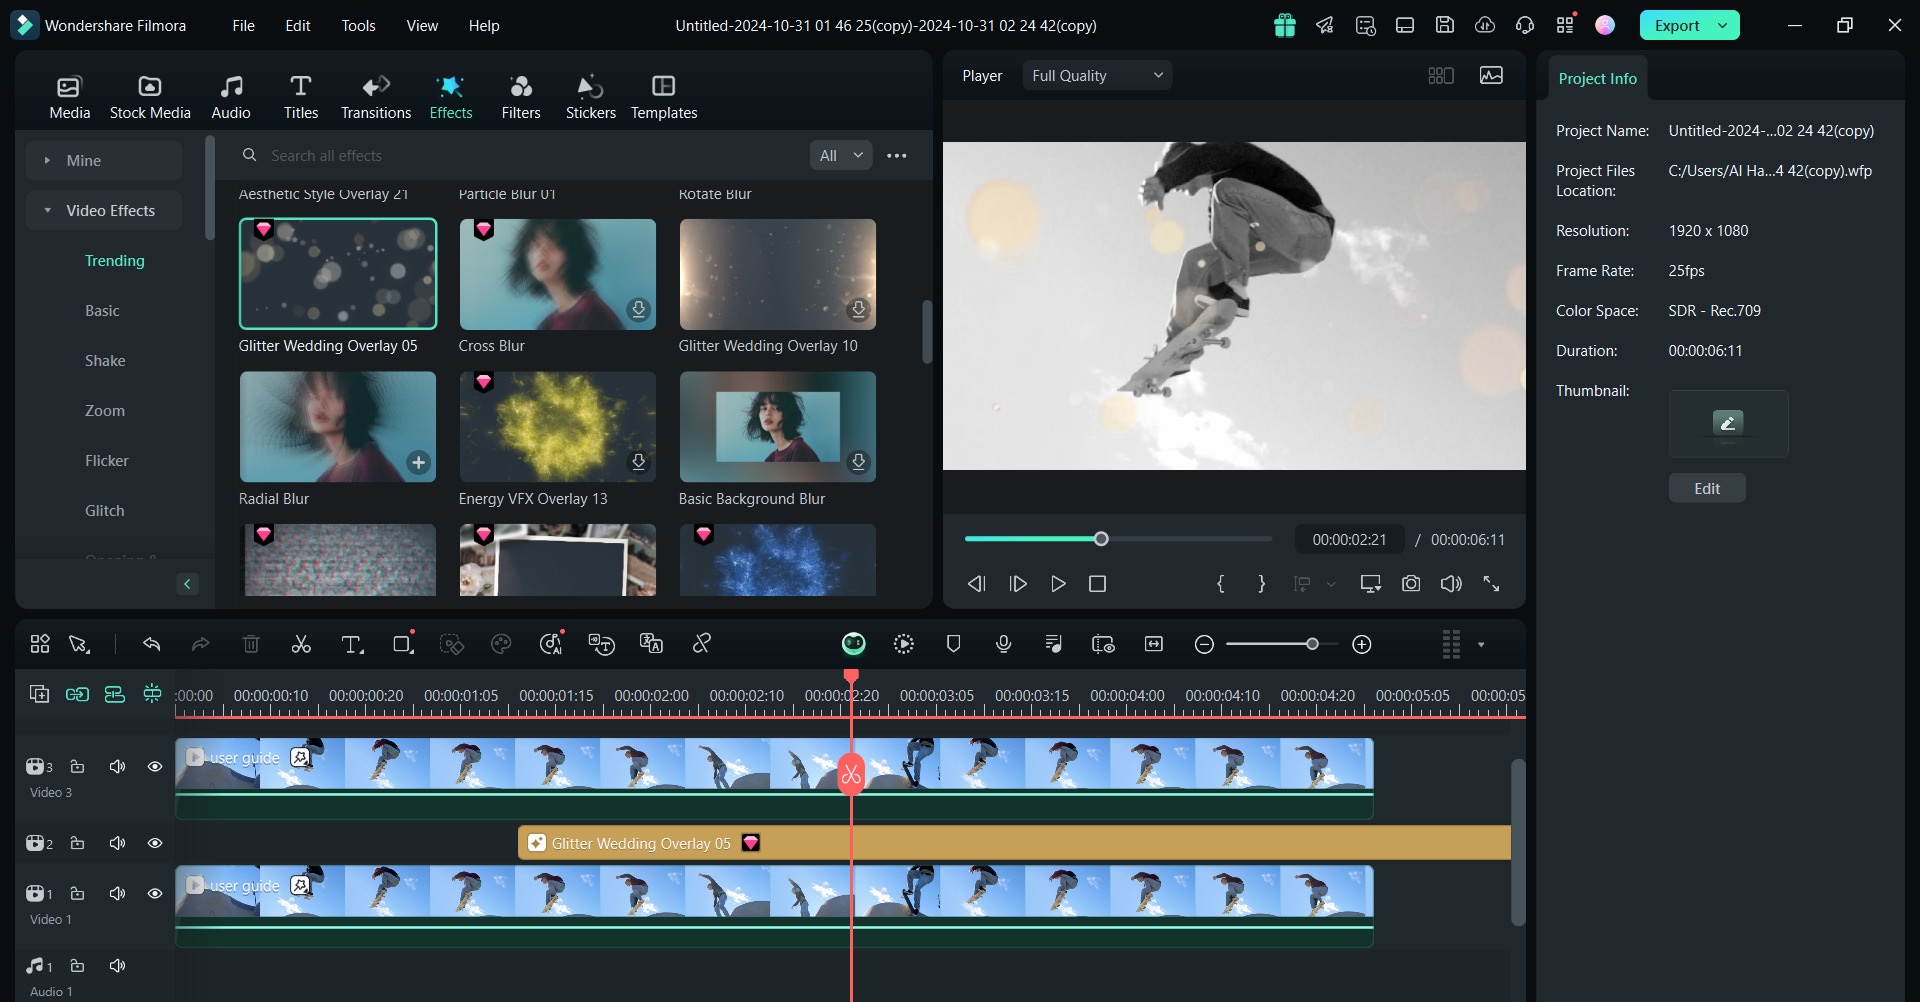
3.Effects
To make the visual content more dynamic, Filmora features various effects, like animated overlays, glitch effects, etc. You can use these effects at different parts of the video to emphasize the subject further and make your videos stand out.
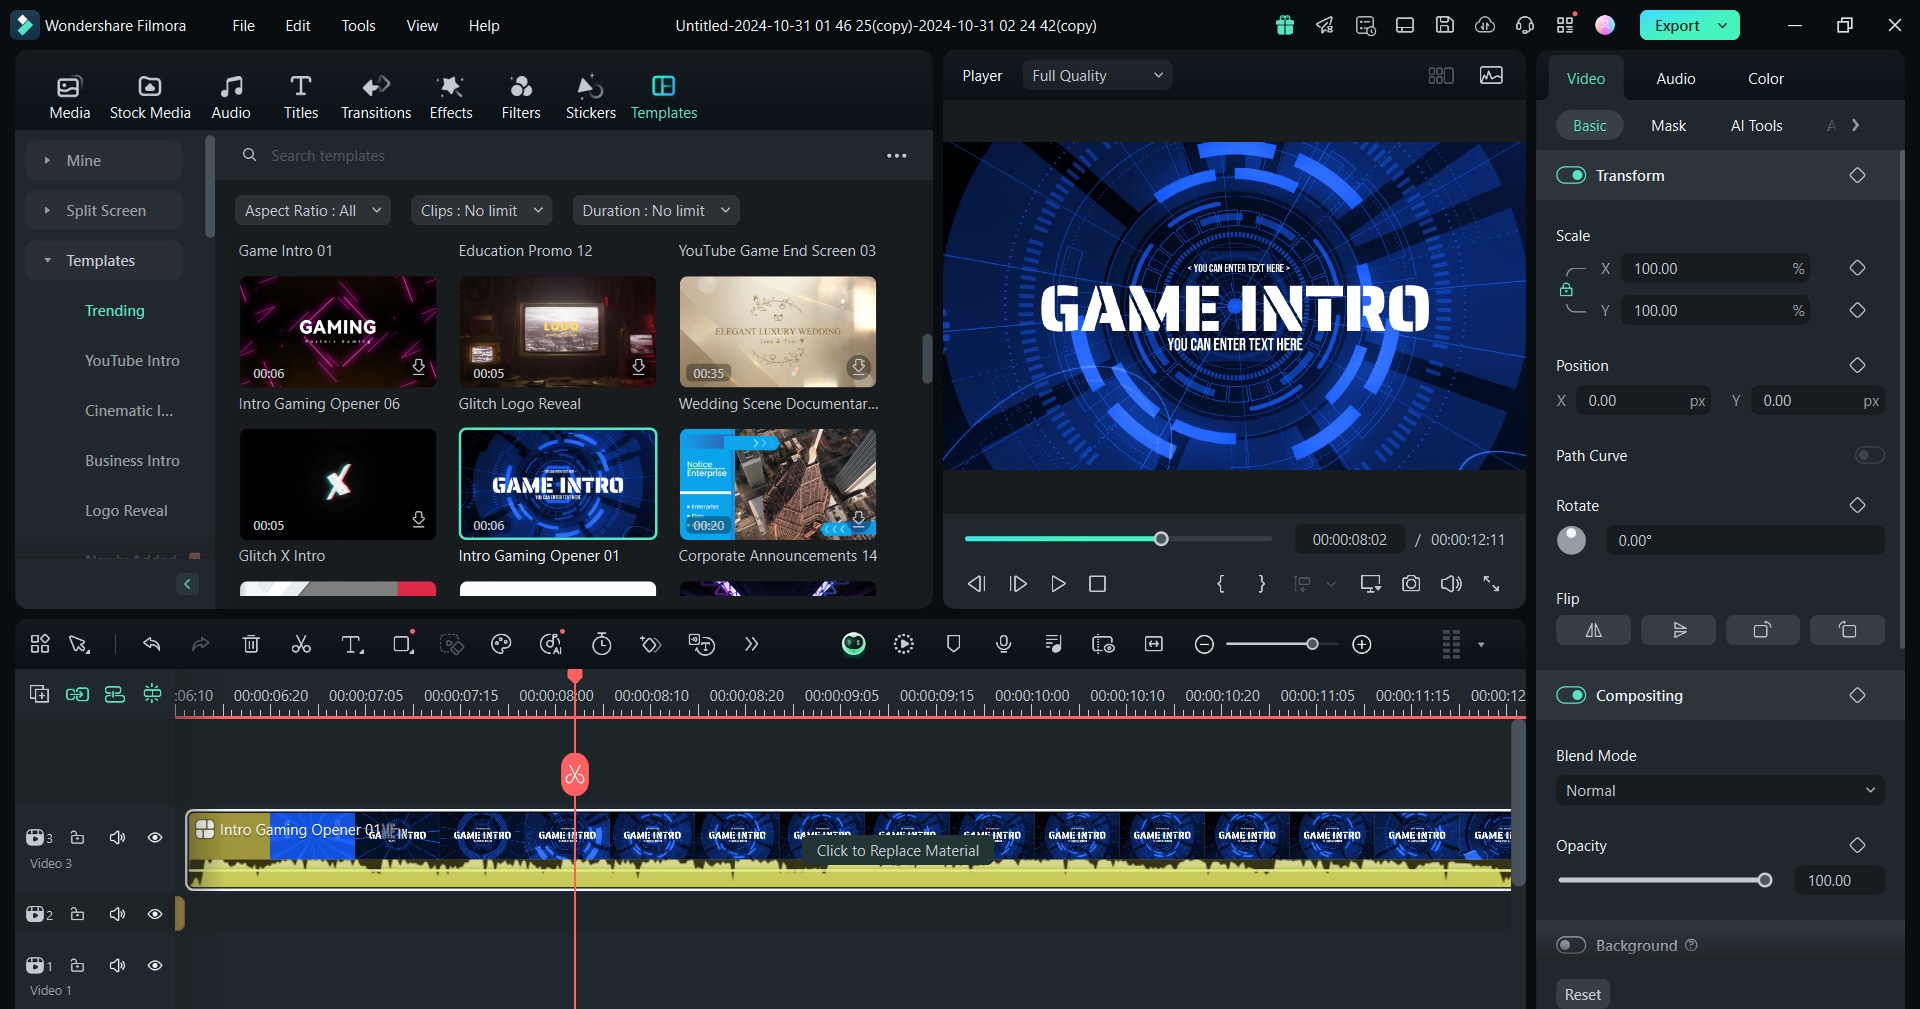
4.Templates
You can save a lot of your time with these pre-designed template. For instance, you can use a YouTube template that already includes transitions, audio, and text elements. You can have a more organized and professional-looking video when using templates along with a blurred background.
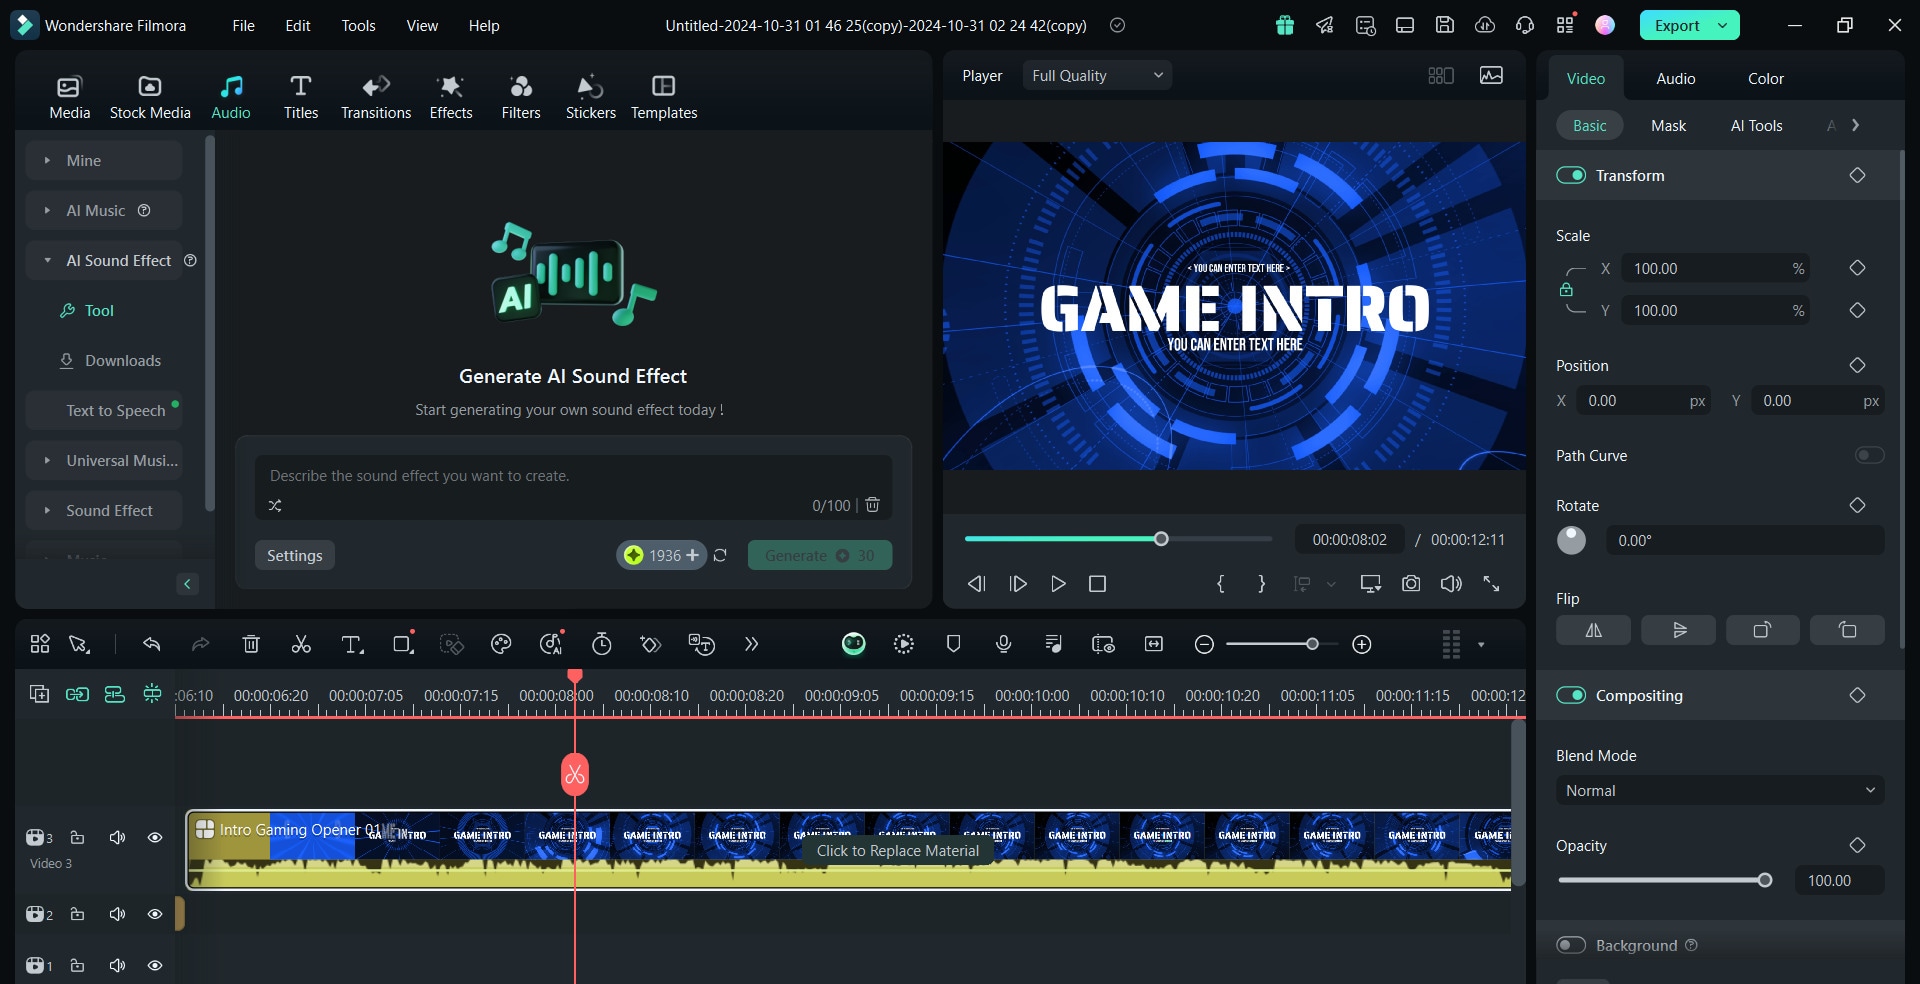
5.Audio
Filmora allows you to add music, sound effects, and voiceovers to the videos. You can have a variety of audio to match with your blur background of video online.
- Vast video/audio effects and creative assets.
- Powerful AI for effortless content creation.
- Intuitive, professional yet beginner-friendly.
- Works on Mac, Windows, iOS, and Android.

Conclusion
With so many amazing video editing tools, it’s now easier than ever to blur a video background or blur a part of the video. While there are many options available to do video background blur online for free, you can try Filmora for a more convenient editing experience due to the AI-featured blurring and various other blurring options.
Start using Filmora today to make the most out of its various video blurring options while retaining your video quality. Explore its other editing tools to create effortlessly professional videos in a matter of a few minutes.


