
Content creation on YouTube has become a legitimate full-time career for many. With so many people jumping into live streaming, you’ve got to find ways to make your broadcasts really stand out. In this case, having multi-cameras set up for your YouTube streams can be one of the ways.
However, it may be tricky at first. Managing multiple cameras during a YouTube livestream involves more than just setting them up and starting the broadcast. You’ll need to learn how to use the cameras, switch between different views, and make sure everything works well together.
This guide will show you how to set up and use multiple cameras to make your YouTube streams more engaging. From picking the right equipment to managing your live broadcast, we’ve got you covered. Let’s dive in and make your next livestream unforgettable!
In this article
Part 1. Why Use Multiple Cameras for YouTube Live Streams?
Using multi camera for YouTube live streaming can significantly improve the quality and engagement of your broadcasts. For example, If you decided to do a product launch live stream, you could use one camera for a close-up of the product, another for the presenter, and a third to show the audience's reactions. This approach provides a comprehensive view of the event and keeps viewers interested in every aspect.
From the example above, it’s clear that using multiple cameras for YouTube live streams offers several benefits, including:
- Better Viewer Experience
With several cameras, you can show your audience different views, like close-ups and wide shots. This makes the livestream more interesting and fun to watch.
- Lively Content
Switching between different camera angles keeps the stream lively and professional. It’s like how movies use multiple cameras to show scenes from different angles.
- Complete Coverage
Multiple cameras make sure you don’t miss anything. For example, at a concert, one camera can show the band, while another shows the crowd, so everyone gets to see everything.
To understand how powerful a multi-camera setup can be, let’s look at some real-life examples where it’s been used to create amazing live streams. Here are some standout examples that highlight the benefits of using multiple cameras:
- Gaming Streams
A popular gamer might use one camera to show their face and reactions, another to capture their gaming setup, and a third to show close-ups of the game screen. This setup keeps viewers engaged by offering various perspectives and making the stream more interactive.
- Travel Live Stream
Travel YouTubers use multiple cameras to capture different scenes from their adventures. One camera might film the beautiful landscapes, another captures the host’s reactions, and another records interactions with locals. This makes the travel experience more immersive for viewers.
- Cooking Live Stream
Chefs use multiple cameras to capture different angles of their cooking. One camera might show the chef's hands as they cook, while another captures their face and the overall kitchen. This setup helps viewers follow along with the recipe more easily.
Part 2. Essential Equipment You’ll Need
After reading the multiple benefits of using multi-cameras for YouTube live streams and a few examples of how you can use it, it's time to move on to the next step: preparing a multi-camera setup for YouTube.
After all, when you set up a multi-camera live stream for YouTube, having the right gear is really important for making your stream look and sound great. There are a few things you need to pay close attention to when it comes to this; how much money you can spend, other people review to see if it works well, and compatibility if it fits together with your streaming setup.
Here’s a guide to the essential gear you'll need and some tips to help you choose the best options for your needs and budget.
1. Cameras
You'll need multiple cameras to capture different angles. Consider cameras with good resolution and reliable performance for live streaming. Popular options include DSLR cameras, mirrorless cameras, and even high-quality webcams.
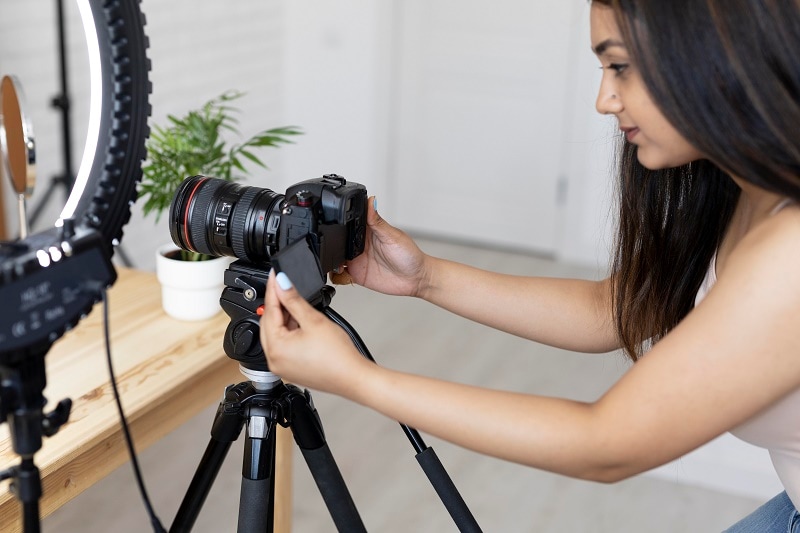
Tip:Choose cameras that have good low-light performance and can connect easily to your video switcher or capture card.
2. Tripods
Tripods come in different sizes and styles, like travel tripods for easy carrying, sturdy professional tripods for heavier cameras, and flexible tripods with bendable legs for tricky surfaces. You can also find tripods with adjustable heads that let you tilt and pan smoothly for better control over your shots.
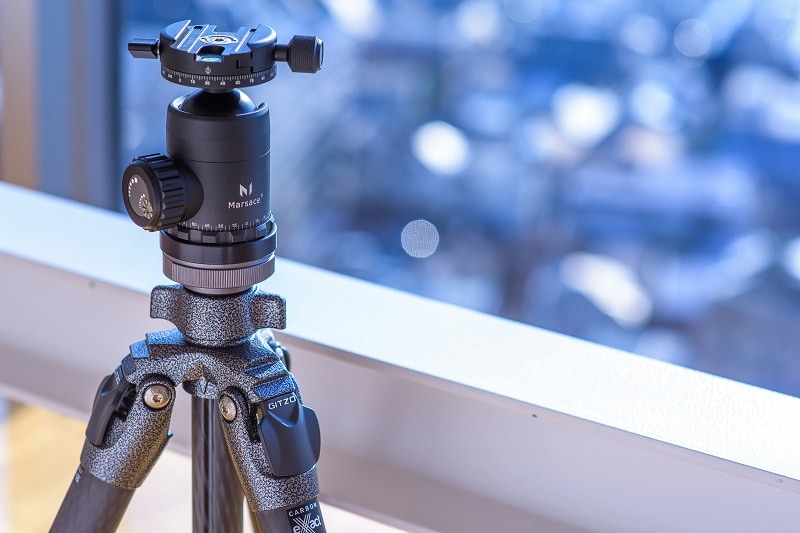
Tip: Choose tripods that can be adjusted and move smoothly so you can easily change camera angles while streaming.
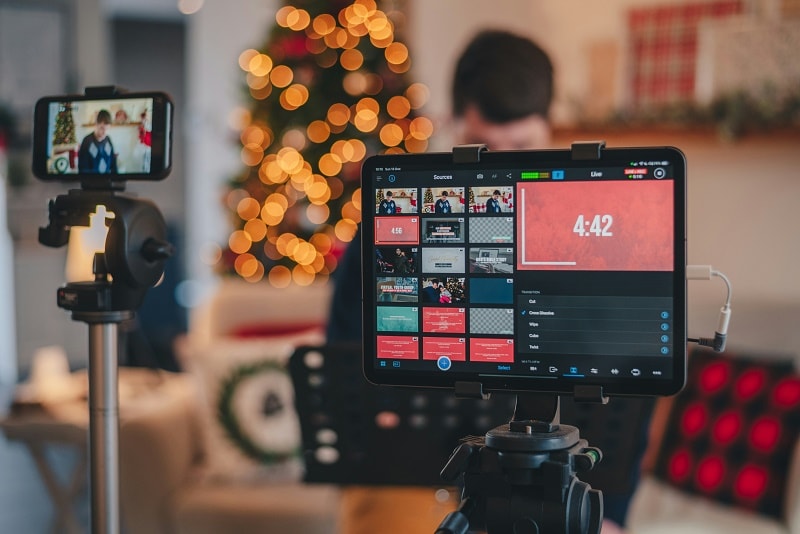
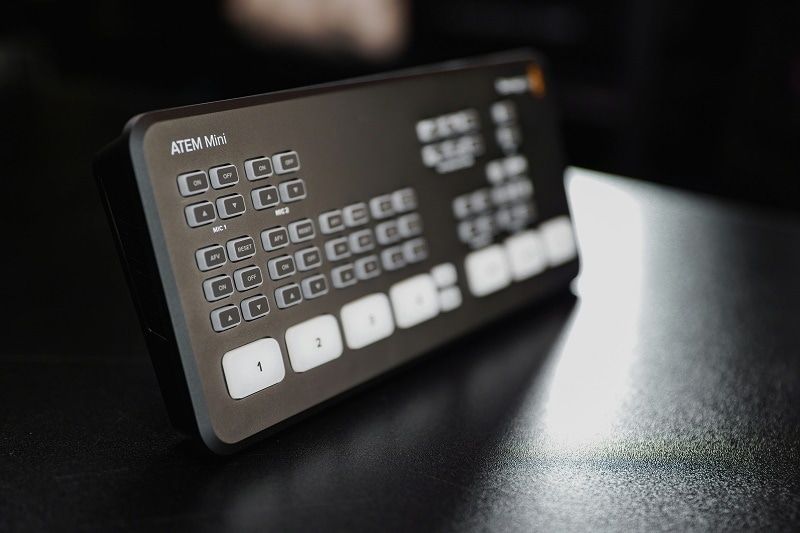
3. Video Switchers
A video switcher lets you quickly switch between different camera views while you’re live. This helps make your broadcast look smooth and professional because you can change angles and views quickly.
4. Capture Cards
Capture cards change the video signal from your cameras into a format your computer can use for live streaming. They’re super important for connecting your cameras to your streaming software. Popular options include Elgato HD60 S and AverMedia Live Gamer, which are both great for getting high-quality video into your stream.
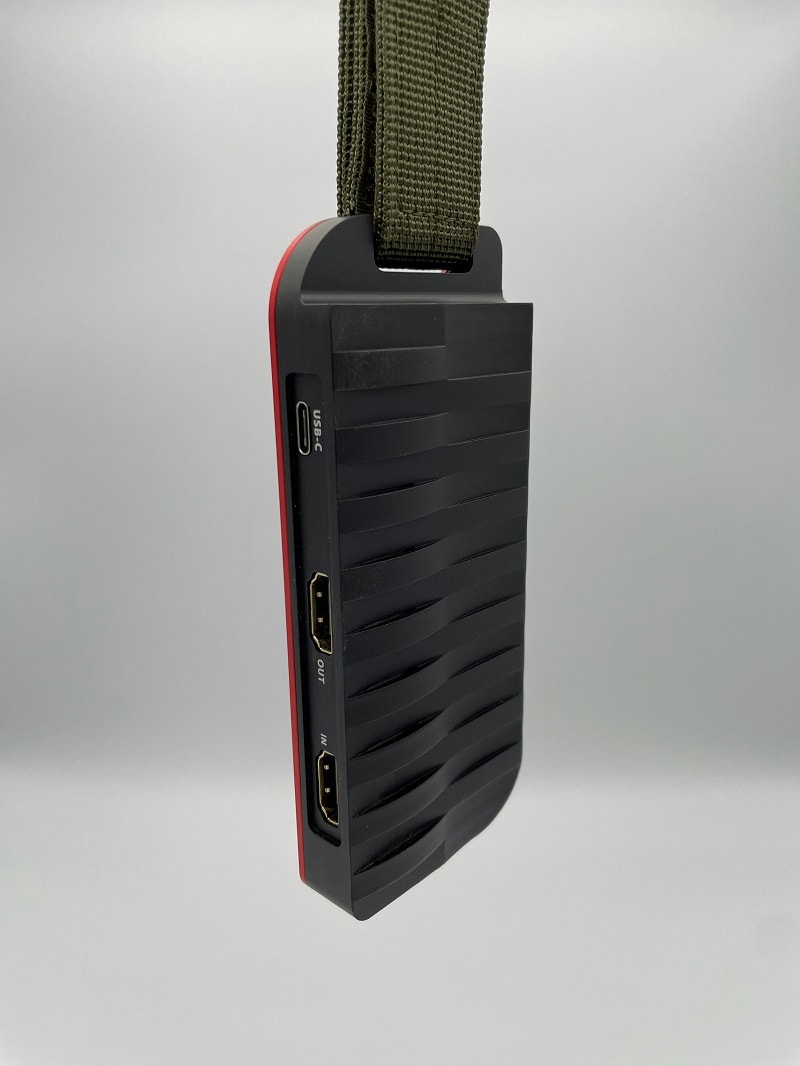
Tip: Make sure your capture card supports the resolution and frame rate you plan to stream in, like 1080p at 60fps. This will help keep your stream looking clear and smooth.
5. Microphones
Good audio is just as important as good video. Use high-quality microphones to capture clear sound. Depending on your setup, you might use lapel mics, shotgun mics, or studio microphones.
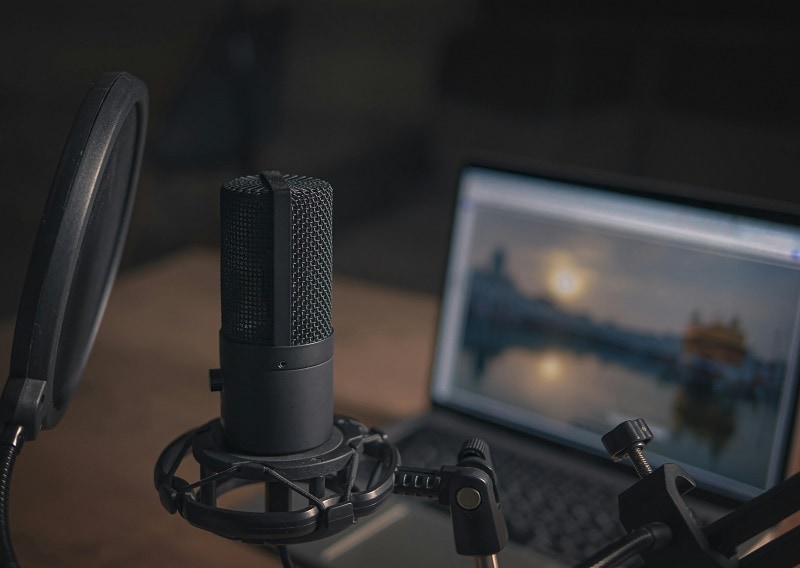
Tip: Test your microphone setup before you start streaming to adjust the volume levels and check for any background noise. This helps make sure the voice is clear and easy to hear.
Part 3. Handling Post-Production for Multi-Camera YouTube Live Streams with Filmora
These days, a lot of live streamers also put their streams or highlight clips on YouTube because not everyone can watch them live. This way, everyone can catch up on what they missed. For editing these videos, especially multi-camera live streams on YouTube, Wondershare Filmora is an excellent choice for post-production.
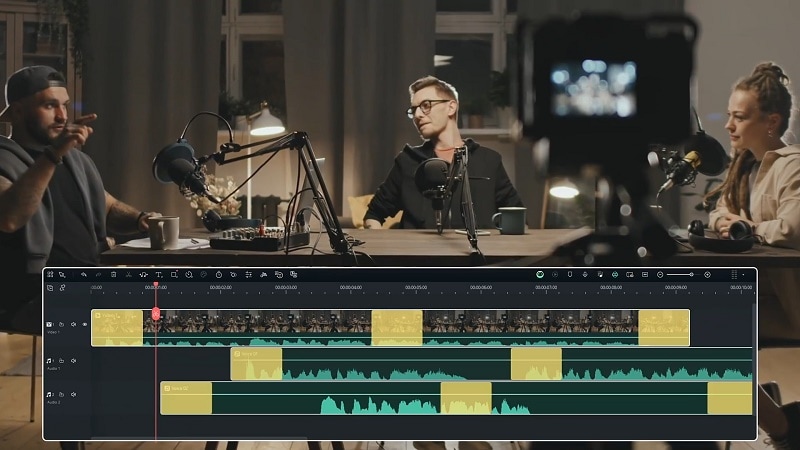
With Filmora V14, editing videos with lots of cameras is really easy. You can use several cameras at the same time and keep everything in sync while you edit. It also has cool audio tools like AI Vocal Remover and AI Audio Denoise to make sure your sound is clear. Plus, you can save your videos in lots of different formats.
Filmora also offers lots of cool post-production features. With the color correction tool, you can apply color presets or manually tweak settings such as exposure, contrast, saturation, and temperature, so everything looks nice and appealing. Audio Ducking is great too—it automatically lowers the volume of background music when dialogue or important audio is present.
- Sync multiple cameras and allow quick angle switches
- Vast video/audio effects and creative assets.
- Powerful AI for effortless content creation.
- Intuitive, professional yet beginner-friendly.
- Works on Mac, Windows, iOS, and Android.


Here’s a simple step-by-step guide on how to use Filmora’s multicam editing features:
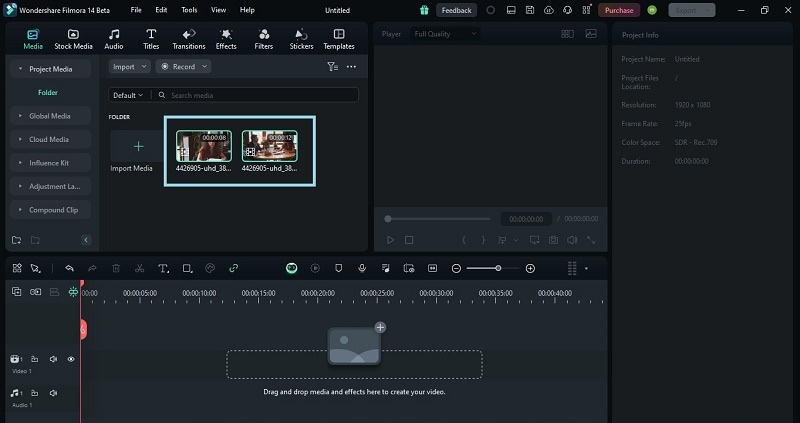
- Step 1. Launch Filmora and import your videos
To get the best multicam editing experience, download the latest version of Filmora, V14. It has all the newest features and upgrades for working with multiple cameras.
Once you’ve installed Filmora on your computer, open it by double-clicking the icon. Start a new project, then add all the video clips from the different cameras that you want to use.
- Step 2. Create a new multicam project
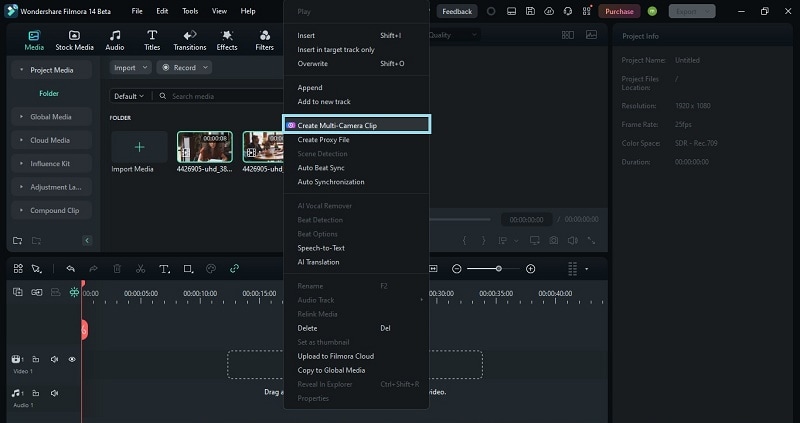
Once you’ve added all the clips you want to use, right-click on them and select “Create Multi-Camera Clip” from the menu that pops up.
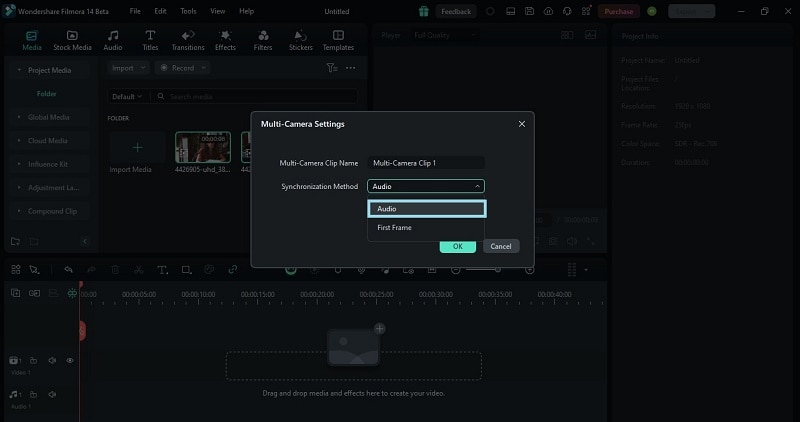
Next, give your multi-camera clip a name and select the “Synchronization Method". You can choose to synchronize the clips based on “Audio” or “First Frame". Since both videos have the same audio, pick “Audio” and click “OK” to create the multi-camera clip.
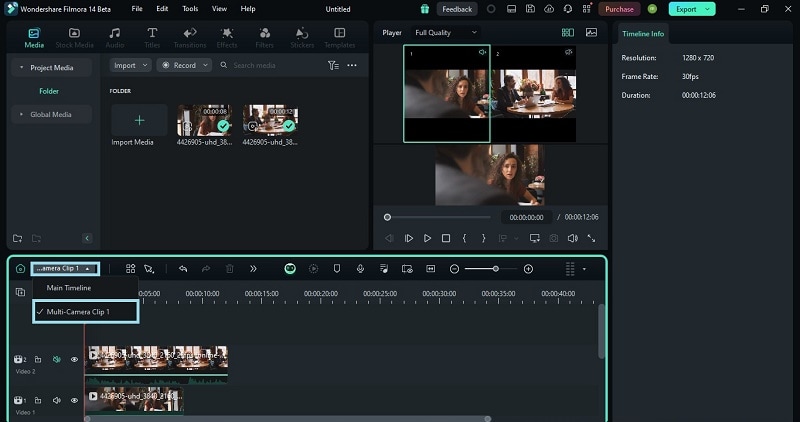
- Step 3. Switch to multi-camera view
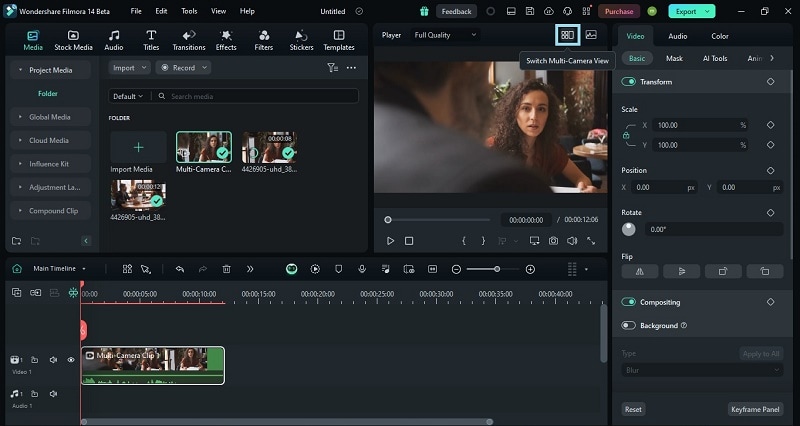
Now that your multi-camera clip is set up, you can start editing your multicam video. To do this, switch to multi-camera view by clicking on the “Switch Multi-Camera View” button at the top of the preview window.
- Step 4. Edit Your Multicam Footage
In this view, you can switch between different camera angles by clicking on them while the video plays. You can also cut between angles in real time. This is called your “Main Timeline”. From here, you can adjust colors, add effects, or make other changes as needed. It will be applied across all multicam clips.
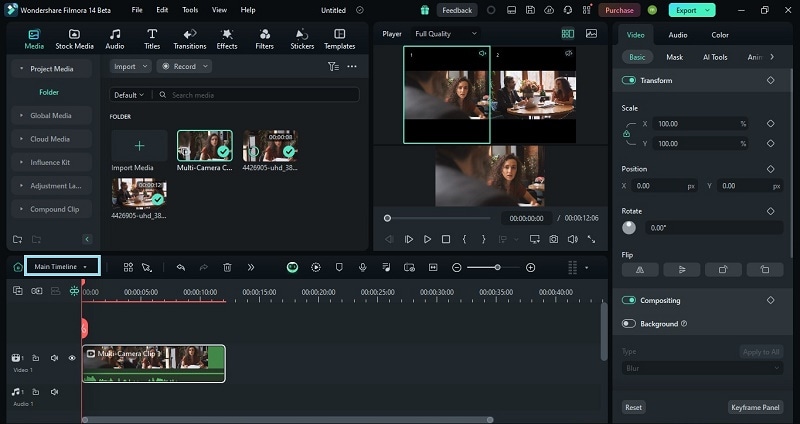
To edit a clip individually, switch from the “Main Timeline” to your multi-camera clip, such as “Multi-Camera Clip 1.”
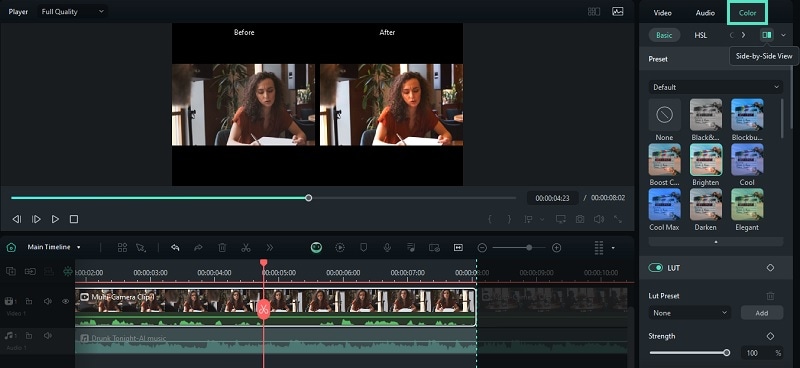
- Step 5. Use color correction tool
To improve the color of your video, use the color correction tool in Filmora. Start by selecting the video clip in your timeline. Next, navigate to the Color tab in the properties panel to apply color presets and adjust the video saturation, vibrancy, contrast, and more.
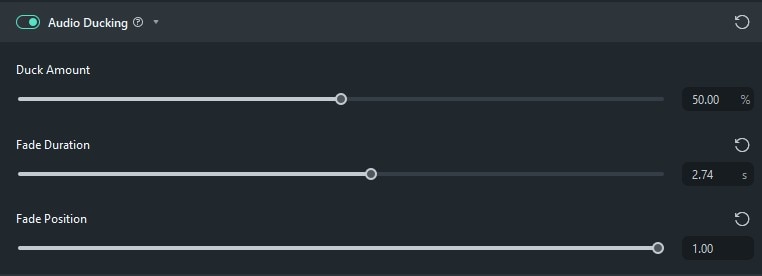
- Step 6. Use audio ducking to individual clip
In case you add background music but don't want it to overpower your main audio, you can use audio ducking to balance the sound levels. To apply it, select the video you want to edit, then go to Tools > Audio > Adjust Audio.
Under the "Audio Ducking" option, you can see that the default value is set to 50%, you can change it according to your needs. You can also adjust the volume of the other clips by moving the slider. Then, click "OK" to activate the feature.
Once you’re done with your edits, click on the “Export” button in the upper right corner of your screen to save your video.
🌟 Related Posts:
- How to Create A Successful Live Stream?
- 10 Most Effective Methods for Live Cricket Streaming
- Best Backgrounds for Live Streaming
- 10 Best Live TV Streaming Services
- The Best Live TV Streaming Services With Local Channels
- The Best Live TV Streaming Services With Local Channels
Conclusion
Using multiple cameras for your YouTube live streamscan make your broadcasts look and sound much better. Whether you're streaming games, cooking, or anything else, having the right gear like cameras, tripods, video switchers, capture cards, and microphones is key to a great stream.
Many streamers also upload their live streams or highlight clips to YouTube so everyone can catch up if they miss the live show. For editing these videos, Wondershare Filmora is a great choice.
With Filmora V14, you can easily handle videos from several cameras at once, keep everything in sync, and use cool tools for your post-production needs.
