


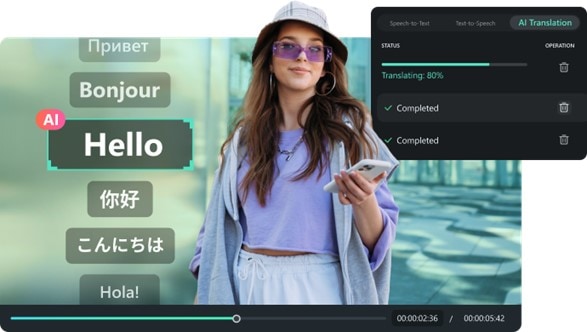
These days, many YouTubers are racking up millions of views just by adding subtitles in multiple languages to their videos. This highlights how important it is to translate your YouTube videos into different languages if you want to connect with a wider audience and grow your reach.
Even though YouTube offers an auto-translate feature, it often struggles with translating idioms and local expressions accurately, leading to a loss of meaning. That’s why reliable video translation is more important than ever.
While YouTube's built-in tools might not be up to the task, Wondershare Filmora offers a powerful alternative. With its AI-driven translation features, Filmora simplifies the process, helping you translate YouTube videos effectively and ensuring your content resonates with audiences around the world.
In this article
Part 1. Wondershare Filmora: Power Your YouTube Video Translations For Secondary Creation
If you’re looking to translate your YouTube videos, you want something that’s accurate, clear, and easy to use. That’s where Wondershare Filmora comes in, offering all the tools you need for smooth, secondary creation. Thanks to its AI-powered translation features, Filmora makes it simple to create multilingual content and helps you reach audiences worldwide with ease.
Main Features
Below are some of the main features of Filmora’s video translator:
- Voice Cloning: Filmora video translator utilizes advanced and cutting-edge cloning technology that's essential in replicating your unique voice into another language and keeping the natural appeal and timbre of your voice.
- Lip Sync: This feature allows you to accurately translate the voice and text of a video. YFilmora will help you translate the video from the original language to the target language, and it will sync the voice and subtitles to match the original content’s timing.
- Subtitle Editor: After your video is translated, Filmora allows you to easily fine-tune the subtitles, edit the style of the text, or even add additional audio tracks.
- Multi-language Support: Another key feature of Filmora is its support for over 20 languages, including Arabic, Spanish, and Hindi, with an accuracy rate of over 95%.
- Audio translation: Do you want to translate audio files? Filmora’s AI translation feature accurately translates text and ensures smooth playback.
Why Choose Filmora to Translate YouTube Videos?
It’s simple to see why Filmora is a great choice for translating your YouTube videos. Along with its key features, the newest Filmora’s AI translation V14 version can even manage multiple voices across different scenes, which is ideal for complex videos. It can also translate and sync audio and video interviews and dialogues.
Even better, Filmora’s AI Translation offers impressive accuracy, with over 90% precision. This is important if you want your content to stay true to the original and maintain its impact, no matter what language it’s in.
Lastly, Filmora offers a full range of editing tools. In addition to its Text-to-Speech feature, you can use Automatic Captions for easy captioning, Speech-to-Text for accurate subtitles, and AI Copilot Editing for smart editing help.
Getting Started with Filmora’s AI Video Translation
Now that you know what makes Filmora’s AI Translation stand out, let’s learn how you can use it to translate your YouTube videos. Fortunately, Filmora is budget-friendly compared to other similar software, with multiple pricing options starting at just $49.99 per year. You can even start with the free version to see if it fits your needs.
Here’s an easy step-by-step guide to translating YouTube videos with Filmora:
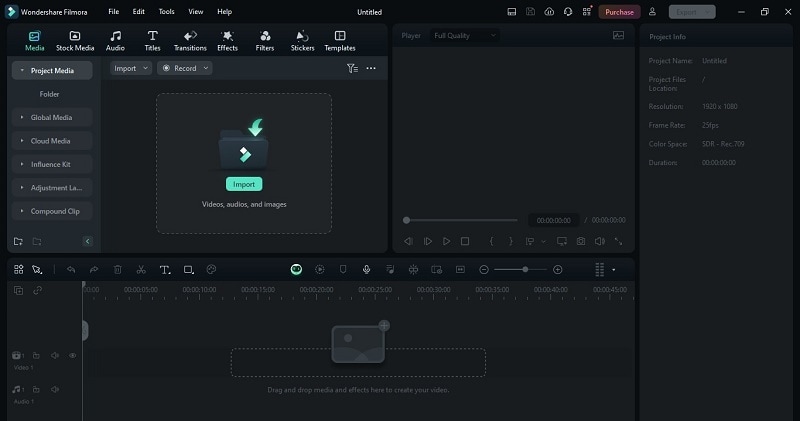
Step1Install Filmora and upload your video
If you haven’t already, download and install the latest version of Wondershare Filmora. Once it’s set up, open the program by double-clicking its icon. Start a new project, import the video that you want to upload to YouTube, and drag it onto the editing timeline.
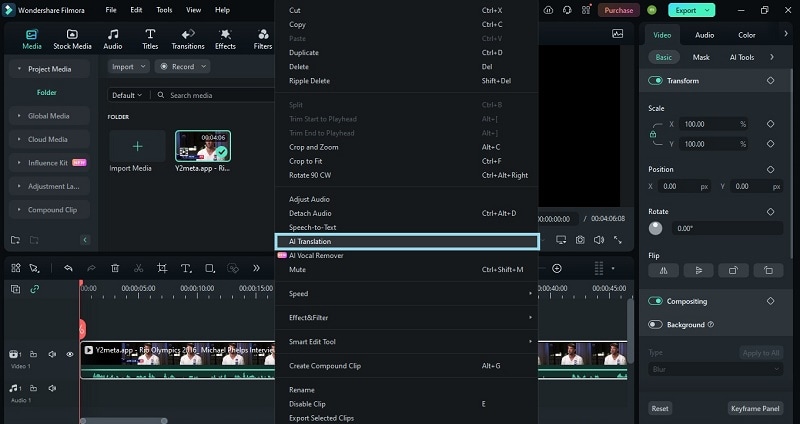
Step2Find the AI Translation feature
Next, find the "AI Translation" feature. To do this, right-click the video in the editing timeline and select "AI Translation" from the menu that appears.
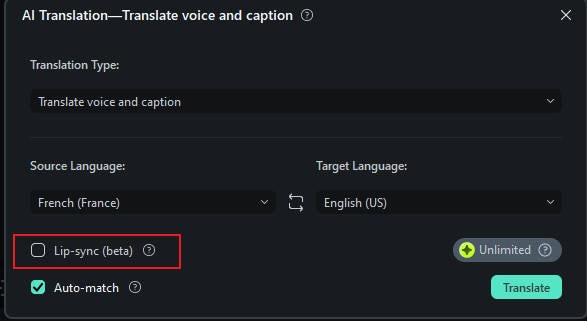
Step3Select translation type
In the dialog box that appears next, click on the "Translation Type" section, open the list, and choose either "Translate voice and text" or "Only translate text" based on your needs. For this instance, select "Translate voice and text".
Step4Set up source and target language
After choosing the translation type, select the "Source Language" and "Target Language" from the list. For instance, if your video is in French and you want to translate it into English, choose "French" as the source language and "English" as the target language.
Next, turn on the "Auto-match" option to sync the transcription with the timeline. Finally, click the "Translate" button to start the translation process.
Step5Check translation progress and export the final results
A pop-up will display the translation progress. Wait until it shows "Completed" to make sure the translation is finished. Once done, close the pop-up and play your media to review the results.
Then, click the "Export" button in the top-right corner to save the media to your device.

Comparing Filmora AI Translation and YouTube’s Built-in Translation
As you can see, the process of translating YouTube videos with Filmora AI Translation is pretty simple, and it’s a reliable choice. But to give you a broader view, let’s compare it with YouTube’s auto-translation feature. We’ll look at key aspects like accuracy, ease of use, and speed. Check out the comparison table below to see how they stack up:
| Feature | YouTube’s Built-in Translations | Filmora’s AI Translations |
| Ease of Use | Automatic and simple to enable | Requires manual setup but offers more control |
| Accuracy | Varies, often prone to errors in complex languages | High accuracy with manual input, depending on the translation |
| Customization | Limited customizations: preset font and style | Extensive customizations, including font, size, color, and position |
| Language Support | Supports a wide range of languages automatically | Support multiple languages but requires manual setup |
| Subtitle Timing | Automatically synced, but may not always be accurate | Precise control over subtitle timing and synchronization |
| Accessibility | Built-in, no need for external software | Requires Filmora software installation |
| Editing Capabilities | Minimal editing capabilities | Full editing capabilities, including advanced text effects and animations |
| Multilingual Options | Can auto-translate into many languages at once | Requires separate translation for each language |
| Cost | Free, included with YouTube | Requires Filmora license or subscription |
| Best Use Case | Quick, low-effort translations for casual and broad use | High-quality, professional translation with detailed customization |
Part 2. How To Use YouTube’s Built-In Auto-Translate Function
If you’re watching a video on YouTube and want to translate it into another language, you can easily use YouTube’s auto-translate feature. This tool is handy for viewers who want to translate YouTube subtitles into different languages or want to understand content that isn’t in their native language.
Here’s how you can make the most of it:
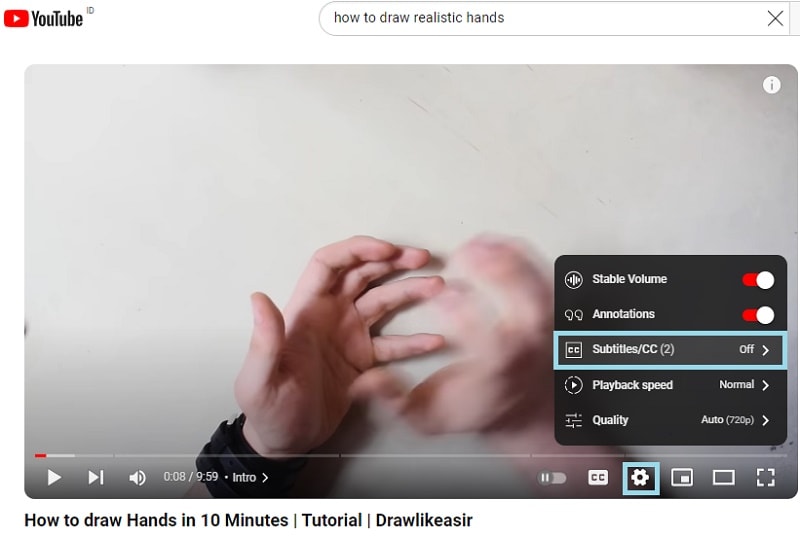
Step 1. Play the video on YouTube and find the settings
Start by playing the video you want to translate on YouTube. Then, click on the "Settings" icon (a gear) at the bottom right of the video player. Choose "Subtitles/CC" from the menu.
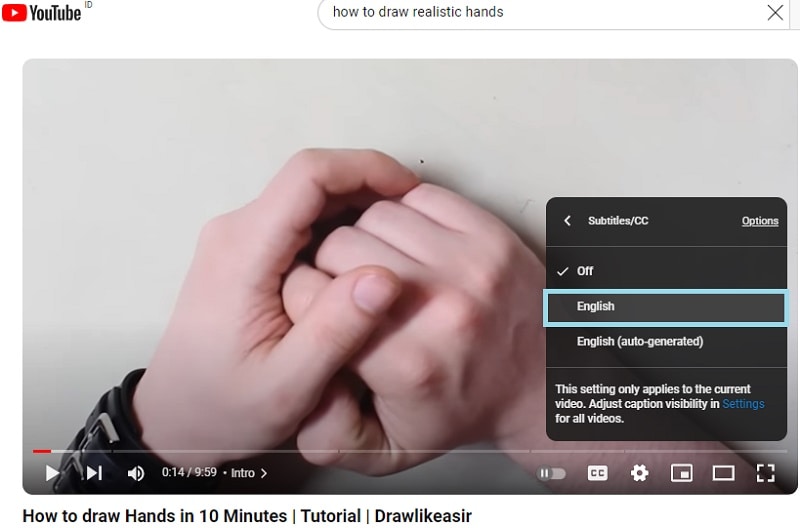
Step 2. Select subtitles
Click on the available subtitles, which in this case is "English". If the channel owner hasn’t provided their own subtitles, you’ll likely only see "[Language] (auto-generated)".
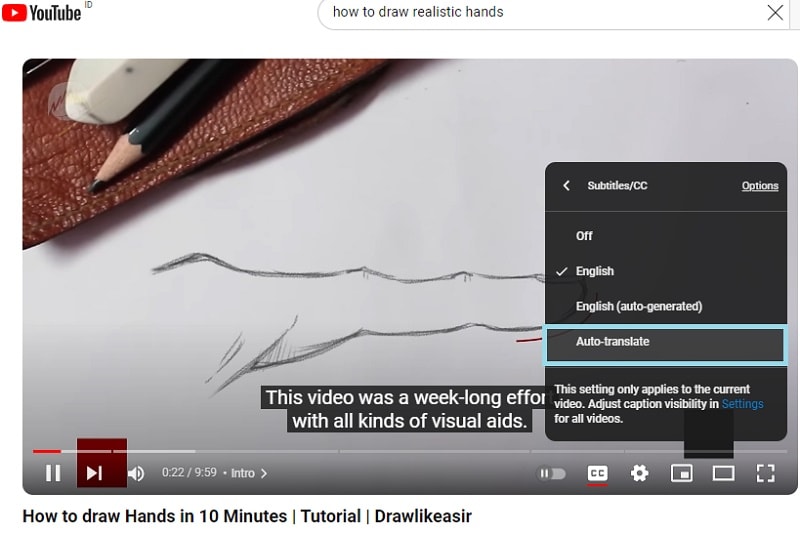
Step 3. Use Auto-translate
Once again, click on the "Settings" icon and select "Subtitles/CC" from the menu. This time, the "Auto-translate" option will appear. Click on that option to open the language selection menu.
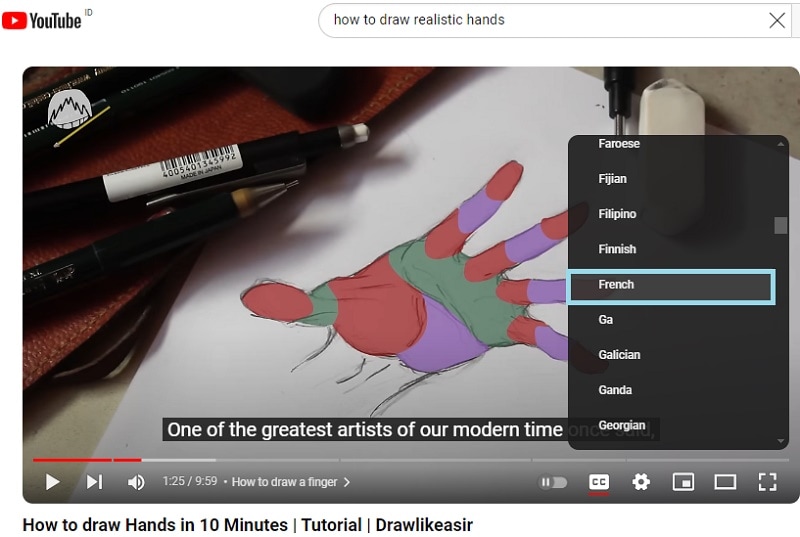
YouTube’s auto-translate feature offers over 120 languages. Scroll through the list to find your desired language. For example, if you’re translating a video into French, select "French" from the list, and the subtitles will instantly change to the new language.
It’s safe to say that the usage of YouTube’s auto-translate feature is fairly simple. If you want to check how your translated videos look, just click on your video and go to the "Settings" icon. Make sure the subtitles are in the chosen language and check that the translations match the video content accurately.
Furthermore, if you want to know how to translate your video titles and descriptions, check out these steps:
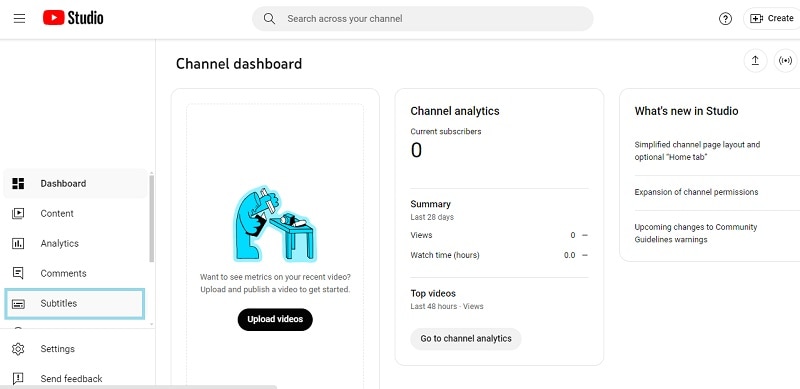
Step 1. Open YouTube Studio and select subtitles
Sign in to your YouTube account and open YouTube Studio. Then, select "Subtitles" from the left menu.
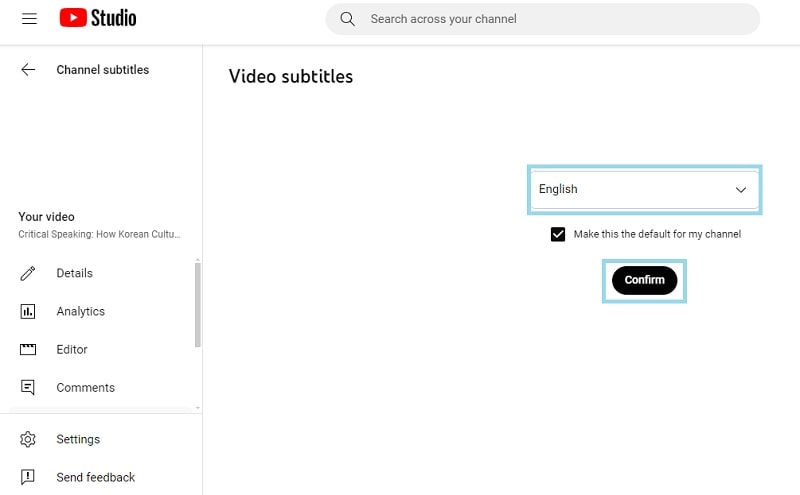
Step 2. Select a video and add language
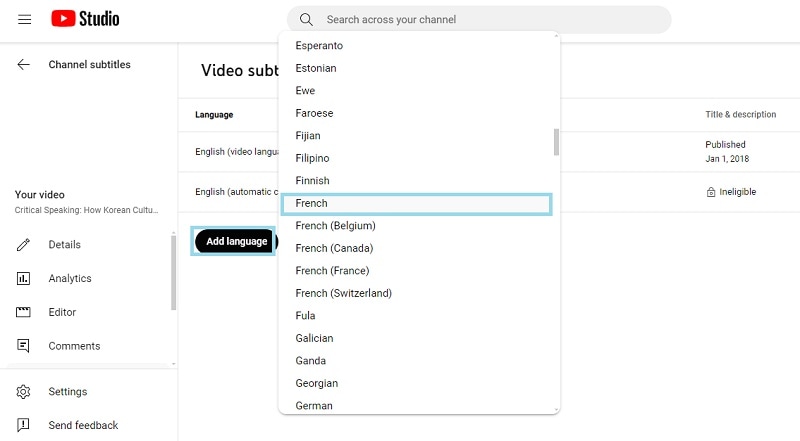
Pick one of your uploaded YouTube videos. If you haven’t selected a language for it yet, you’ll be prompted to choose a language and click "Confirm".
Next, click on "Add Language" and choose the language you want to translate to. In this case, select "French".
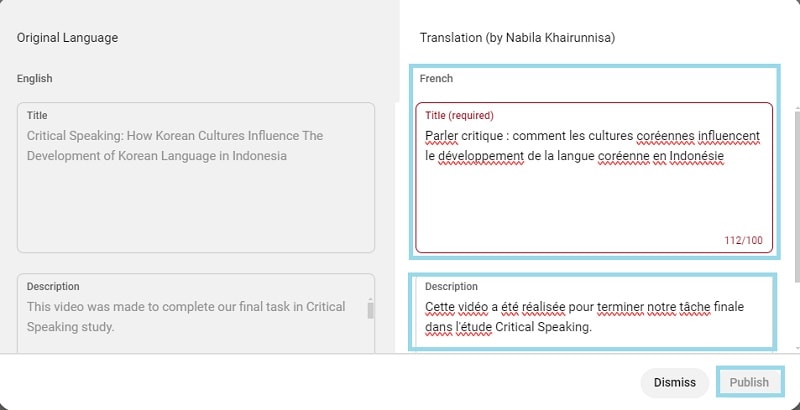
Step 3. Pick titles and descriptions
Under "Title and description" click on the "Add" button. Then, enter the translated title and description. Finally, click "Publish" when you’re finished.
Although YouTube’s auto-translate feature is relatively simple, there are limitations that you can’t ignore. The most crucial problems with this method such as:
- Accuracy Issues
YouTube's auto-translation feature can sometimes get translations wrong, especially with complicated language or idiomatic phrases. This might lead to subtitles that don’t fully convey the intended meaning of your video.
- Limited Customization
The tool offers minimal customization options. Unlike manual translation tools, you can't adjust subtitle timing or formatting, which can be important for ensuring your subtitles match the video perfectly.
Part 3. Resources for Further Learning How to Translate Videos
If you want to learn even further about translating your YouTube videos, you have to learn from various sources. Exploring different resources gives you a broader perspective and new techniques that might not be covered in just one place. Check out this list to expand your knowledge and improve your video translation skills:
1. Tutorial on Video Translation
To get better at translating YouTube videos, check out these YouTube channels and video tutorials that offer helpful tips and skills:
- YouTube Channels: Look for channels that specialize in video editing and translation, such as "Jacky Nguyen" or "Filmora for Creators".
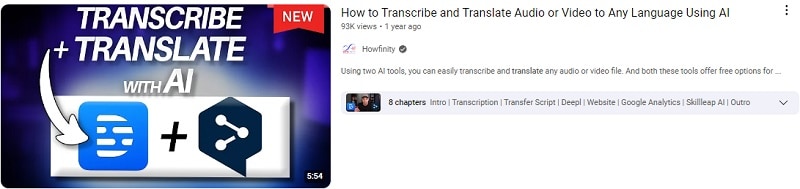
- Video Tutorials: Search for tutorials that cover video translation techniques and best practices, providing step-by-step guidance to improve your skills For example, check out this video by Howfinity.
2. Communities and Forum
Joining industry-specific forums and communities can also be valuable. These spaces allow you to connect with other video creators and translators who share your interests. You can exchange tips, ask questions, and get advice from experienced professionals. Here are a few examples for you to try:
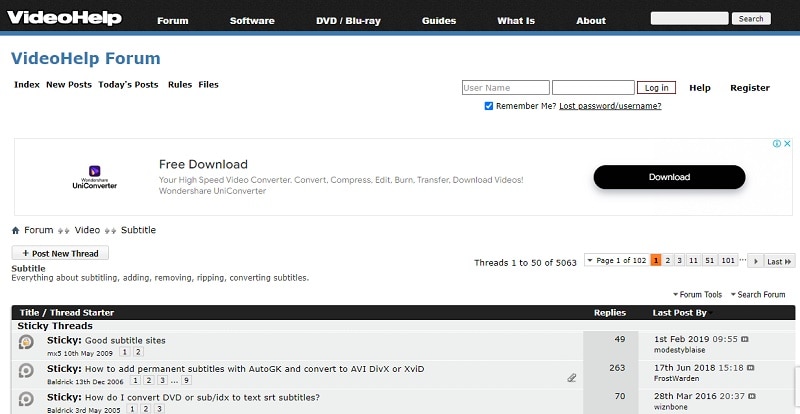
- VideoHelp: A forum dedicated to video editing and subtitling, where you can ask questions and share insights.
- Reddit’s Video Editing Community: A place to discuss video translation and editing with others who have similar interests.
3. Specific Translation Tools
To improve your video translation skills, consider using these specialized tools and plugins:
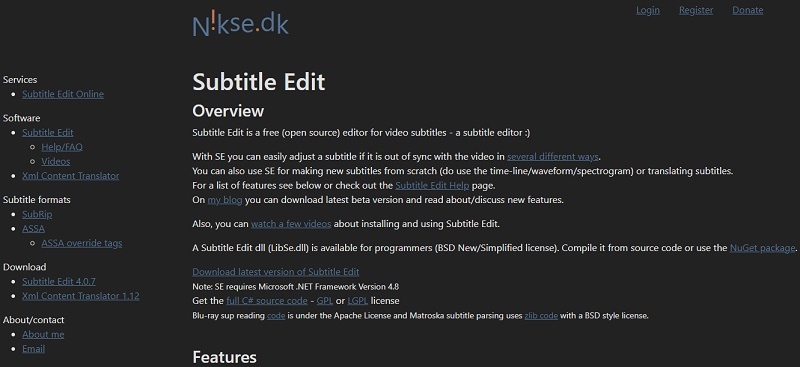
- Subtitle Edit: Subtitle Edit is great for creating and editing subtitles. It helps with syncing subtitles to video, adjusting timings, and translating text.
- Amara: Amara is an online platform that makes subtitling and translating videos easier. It's user-friendly and allows for collaboration on subtitle projects, making it perfect for reaching a broader audience.
- Aegisub: Aegisub is a free, cross-platform subtitle editor with advanced features. It offers powerful tools for timing, formatting, and translating subtitles, which helps you handle more complex subtitle tasks and ensure high-quality translations.
Conclusion
While YouTube's auto-translate feature is convenient and supports over 100 languages, its limitations like accuracy issues and limited customization cannot be ignored. Thankfully, Wondershare Filmora can be the perfect alternative for you.
Filmora's AI Translation feature delivers high accuracy and smoothly handles multiple voices. You can easily edit translations to correct errors or add decorative elements. Combined with tools like Text-To-Speech, Automatic Captions, and Speech-to-Text, translating your YouTube videos becomes simple and effective.
Download Filmora today to access these powerful tools and translate your content into different languages. With Filmora, video translation is easy and efficient, helping you connect with a global audience.
