
 100% Security Verified | No Subscription Required | No Malware

Working with audio can be tricky. Sometimes, it might unintentionally keep flipping between being too loud and too soft. If not solved properly, your audience might think there's something wrong with your audio, which can distract them from the content you've worked so hard to create.
Before letting that happen, you can easily normalize your audio with DaVinci Resolve. But if DaVinci Resolve seems too complex or if you're looking for a quicker fix, we will also cover easier alternatives.
In this article
Two Ways to Normalize Audio in DaVinci Resolve
Normalizing audio is not the same as optimizing audio. Audio normalization is all about making sure your audio doesn't have any spots that are too quiet or too loud. This process helps eliminate distortion and enhance the overall listening experience by standardizing the volume to a consistent level.
In short, normalizing audio in Davinci Resolve is particularly useful when you:
- Have several clips with varying audio levels so you can create a uniform sound across all segments.
- Want to avoid sudden spikes or dips in volume that might distract listeners
- Need to prepare audio for professional output, like podcasts or videos
- Combine multiple recordings from different sources
- Create a balanced audio experience for various playback devices
- Ensure your audio meets platform-specific standards (e.g., YouTube or Netflix)
In DaVinci Resolve, you have the option to normalize audio loudness or peak levels. This feature adjusts the source levels to conform to the first threshold that is exceeded. There are a couple of ways to do this, so you can pick the one that works best for you.
Method 1: Normalize Audio in DaVinci Resolve with Keyframes
First, you can normalize audio levels in DaVinci Resolve with keyframes if you want to manually adjust the volume at specific points in the timeline. Follow the steps below.
01of 03Launch DaVinci Resolve and Locate Your Audio Clip
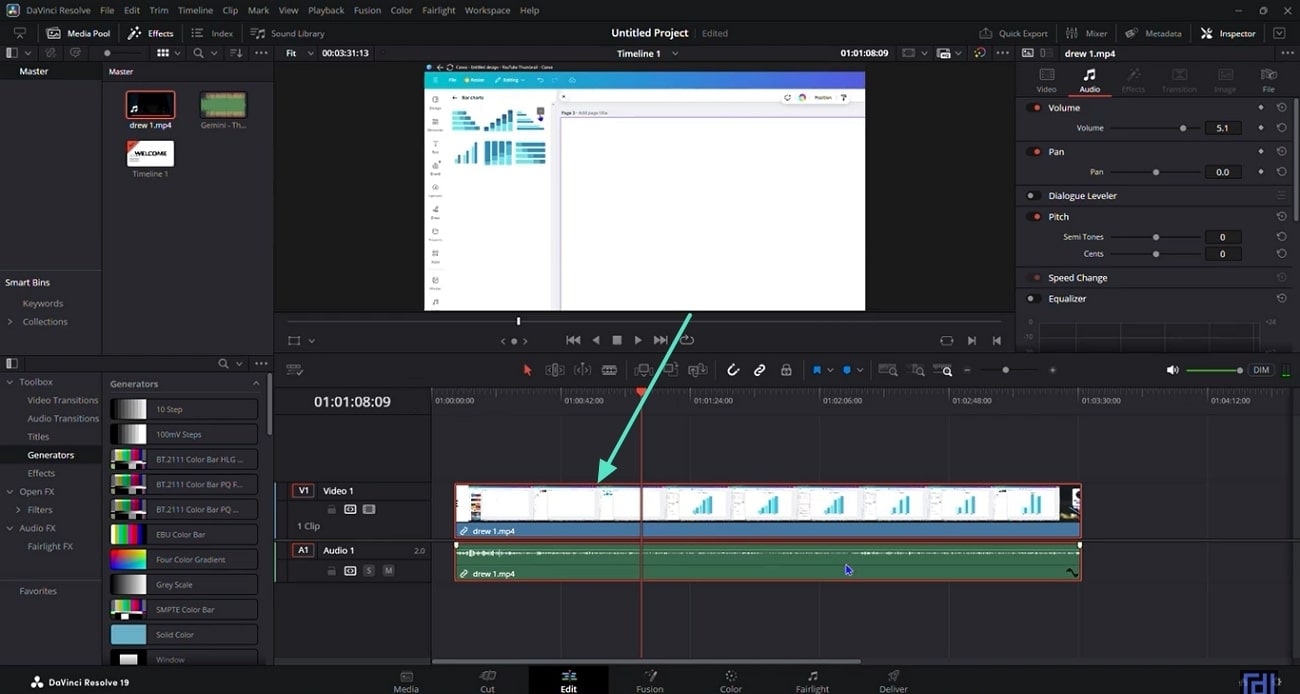
Open DaVinci Resolve and navigate to the Edit tab. Select the audio clip you want to work with in your timeline. You can zoom in on the audio track to see the volume track better.
02of 03Add Keyframes
Identify areas with peaks that are too high or too low. Click on the white line in those areas to create keyframes. Each click will mark a point where you can adjust the audio level.
03of 03Adjust Keyframes
Drag the keyframes up to increase the volume or down to reduce it. This helps you balance the audio for consistent normalization throughout the clip.
Method 2: Normalize Audio in DaVinci Resolve without Keyframes
If you prefer a quick and simple method to adjust audio levels, you can normalize audio in DaVinci Resolve without using keyframes. This approach works well when the audio has consistent volume levels and doesn't require precise adjustments. Follow these steps:
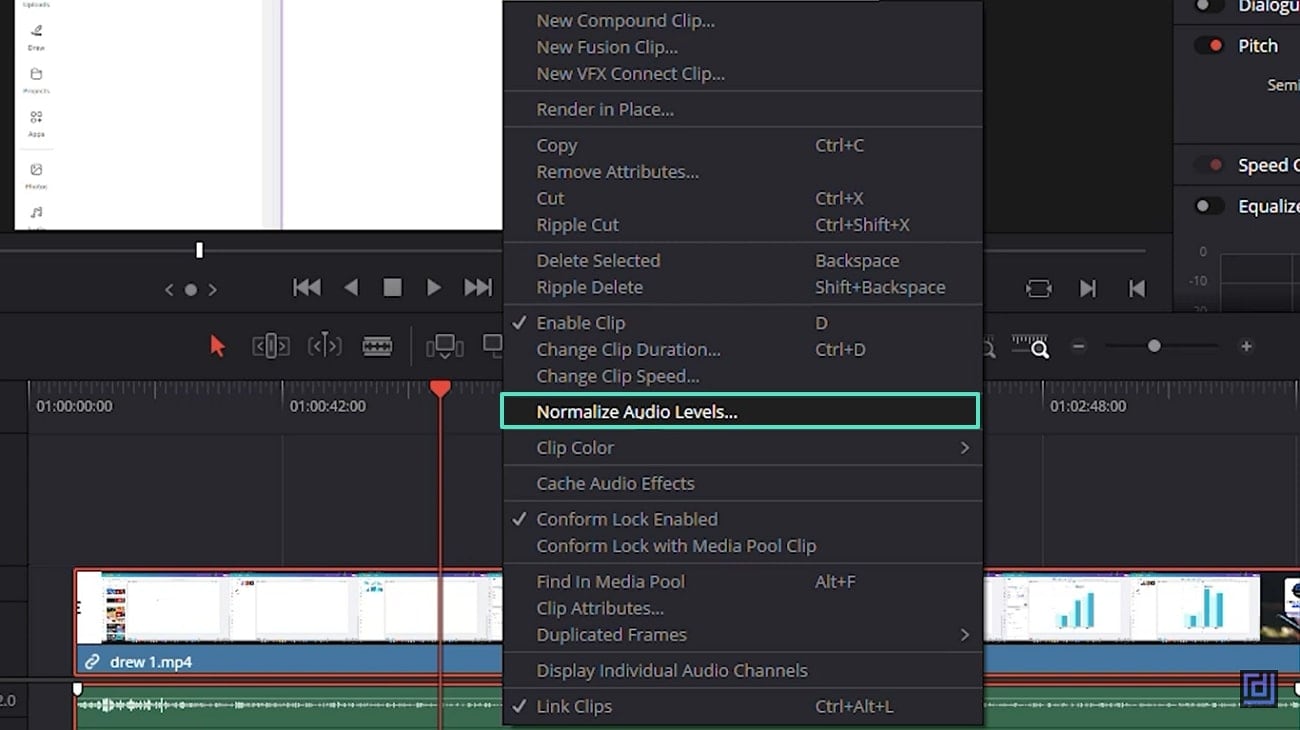
01of 03Access the Normalize Audio Option
Right-click on the selected audio clip to open the context menu. From the menu, choose Normalize Audio Levels to access the normalization settings.
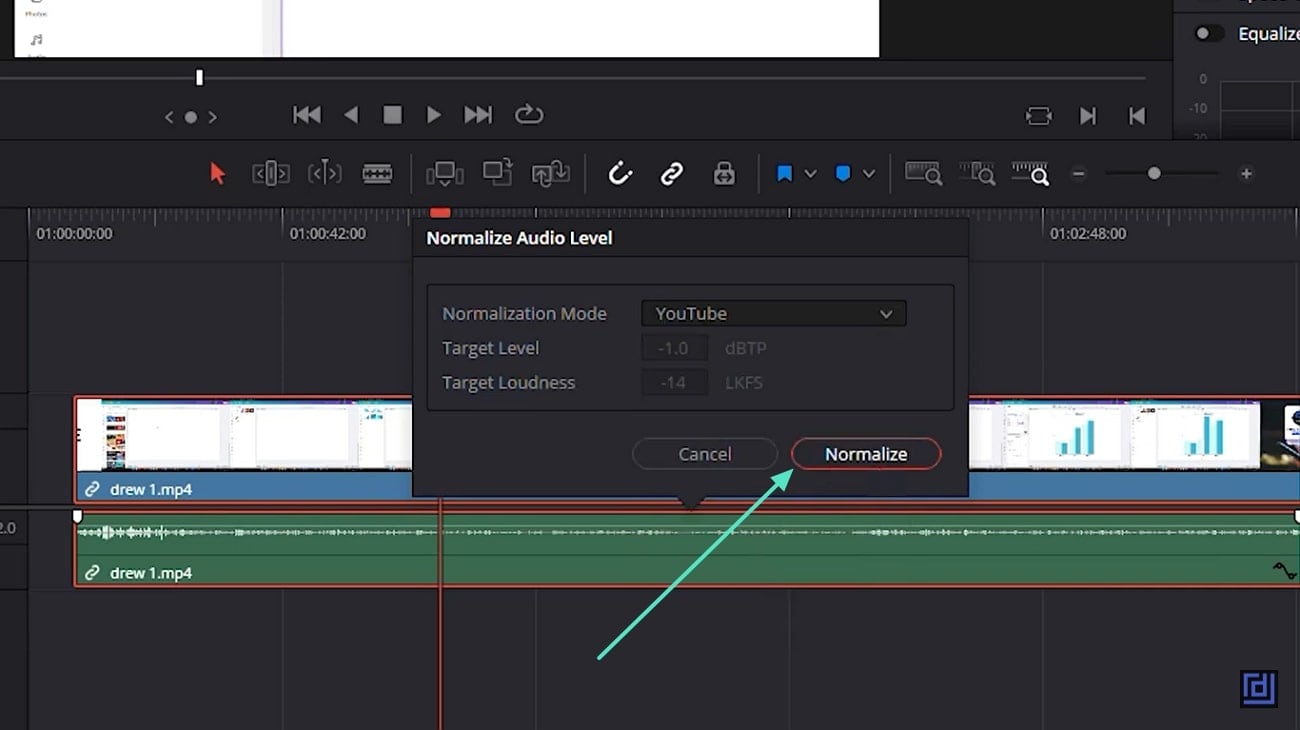
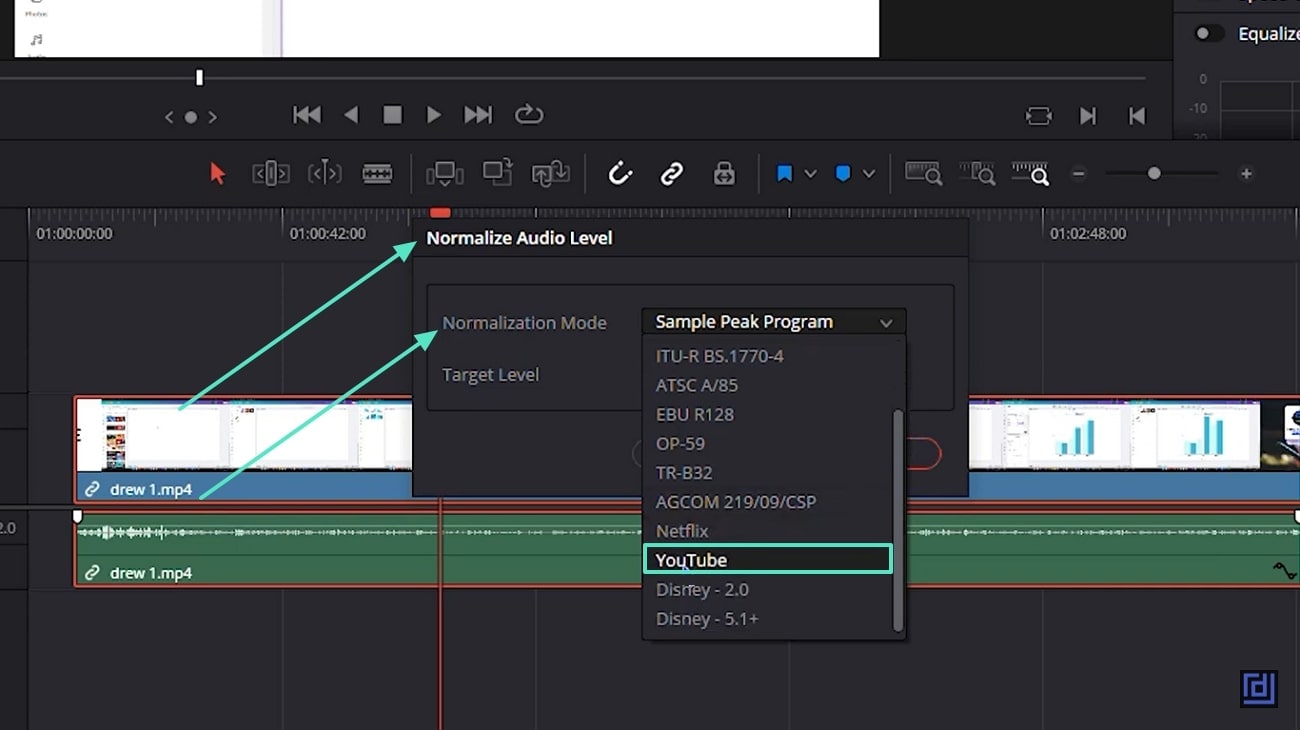
02of 03Set the Normalization Level
In the normalization window, select Sample Peak as the normalization mode. Set the target level from -9 to -16 dBFS for most online platforms like YouTube.
For streaming platforms like Netflix, use a target level of -16 dBFS in Sample Peak mode. For TV and radio broadcasting, aim for -23 dBFS in True Peak mode. Refer to the Recommended Audio Levels below for more details.
03of 03Apply the Normalization
Click Normalize to apply the adjustments to the entire audio clip. The volume levels will now be consistent across the track.
Recommended Audio Levels
For Streaming Services
- YouTube and Netflix Videos:-16 dBFS
For Dialogue
- General vocal/dialogue range: -15 dB to -10 dB
- Strong, booming voice: -10 dB
- Soft or calm voice: -15 dB
- Average speaking voice: -12 dB
- Whispering: -20 dB
- Yelling or shouting: -3 dB
For Music and Sound Effects
- Background music: -20 dB
- Explosions or loud effects: -3 dB
- Music for videos (e.g., music videos): -10 dB to -5 dB
DaVinci Resolve Audio Normalization Not Working
Did you encounter some issues when trying to use DaVinci Resolve's audio normalization function? Perhaps the waveform is not updating, the function is disappearing, or the settings are not being applied correctly.
Don't worry though—these problems are usually easy to fix. Below are some common DaVinci Resolve audio normalization issues and how to resolve them.
The Normalization Window Disappears When You Try to Use It
- Check for Stereo Clips:Ensure that the clips you're working with are stereo, as the normalization feature might not work correctly with other types of audio.
- Adjust Windows Display Scaling: Disable the "Override high DPI scaling" setting or reduce the display scaling on Windows to 100%. This issue can occur due to high DPI settings affecting DaVinci Resolve's interface.
- Use a Second Monitor: If using a second monitor, make sure the display scaling on that monitor is also set to 100%, as scaling discrepancies between monitors can cause UI glitches.
DaVinci Resolve "Normalize Audio" Function Not Affecting the Audio
- Manually Adjust the Audio Level: You can work around the issue by manually adjusting the audio levels by dragging the level line on the timeline. Refer to Part 1 for a tutorial.
- Use "True Peak" Normalization Mode:Switch to the "True Peak" option in the normalization settings and retry the process—this often solves the problem.
- Normalize Clips Individually:If you're working with multiple clips, try normalizing them one at a time instead of grouping them. Some users have found that this resolves the issue.
Normalization Works on Timeline, But Not for Individual Clips
To fix this, enable the "Render timeline effects" option in the Video tab on the Deliver page. This ensures that any audio normalization or gain changes applied to the timeline are included in the exported clips.
Easier Solution to Normalize Audio (Without DaVinci Resolve)
If you've tried normalizing audio in DaVinci Resolve but find it confusing and frustrating, you might want to check out Wondershare Filmora, which is an easier alternative to DaVinci Resolve.
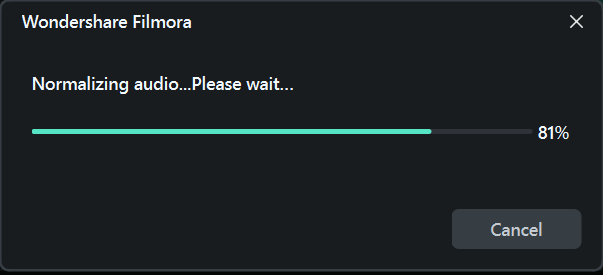
Filmora also features an Audio Normalization tool that automatically analyzes and adjusts the volume of selected clips. This adjustment aligns the volume to the standard loudness level commonly used in European audio programming, which is 23.0 LUFS with a deviation range of ±1 LU.


To provide a clearer comparison, here's a table detailing the differences between Filmora and DaVinci Resolve, especially for audio editing and normalization capabilities.
| Feature | DaVinci Resolve | Filmora |
| Ease of Use | Complex interface, steep learning curve | Simple, intuitive interface, easy for beginners |
| Level of Control | Advanced control with detailed settings and customization | Basic control, easy adjustments for quick results |
| Supported Audio Formats | .wav, .aiff, .mp3, .aac/m4a, .flac | .mp3, .m4a, .wav, .wma, .ogg, .flac, .aif, .aiff |
| Automation | Manual adjustments with more detailed automation options | Automatic audio normalization with a one-click solution |
| Interface | Dedicated audio editing interface in Firelights | User-friendly interface with straightforward navigation |
| Target Users | Professional editors and advanced users who are familiar with Black Magic software | Beginners, hobbyists, and casual to intermediate editors |
How to normalize audio using Filmora
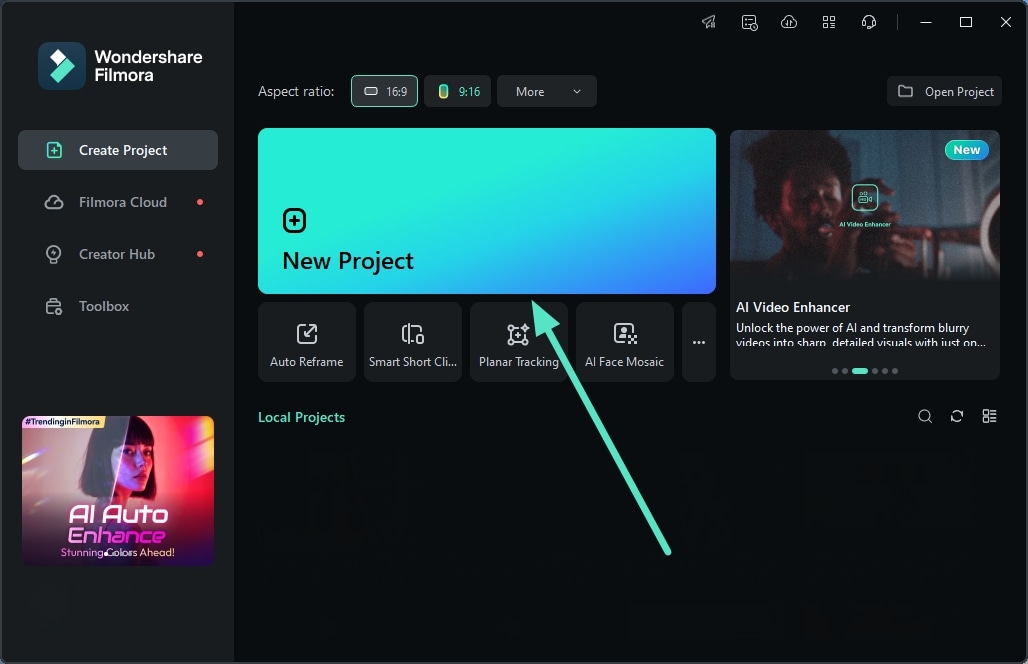
01of 03Import Your Media File
Start by importing your video or audio file into Filmora. Click Import under the Media button or drag the file into the timeline to begin editing.

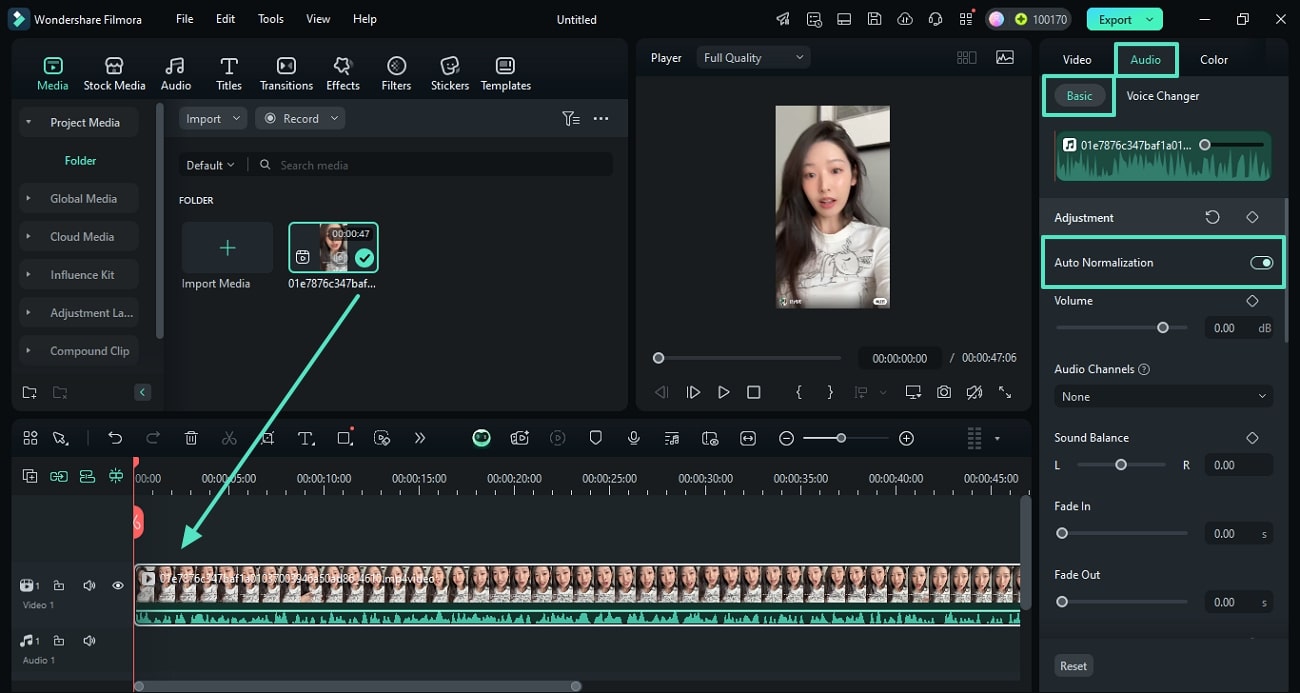
02of 03Access the Audio Editing Panel
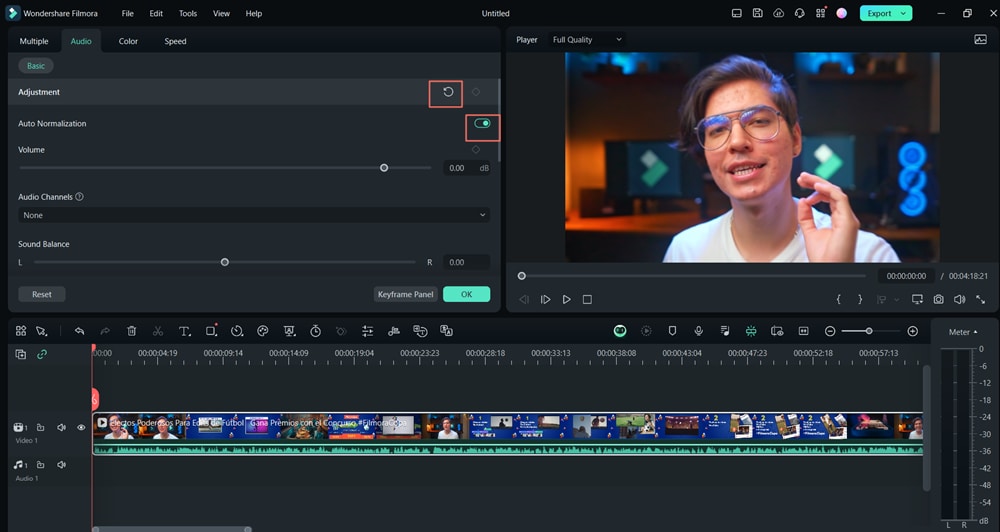
To open the audio adjustment options, select the video or audio clip, and then navigate to the Audio > Basic tab on the property panel. Enable Auto Normalization.
Alternatively, you can select the clip, go to Tools > Audio, and then click on Adjust Audio to open the audio editing panel.

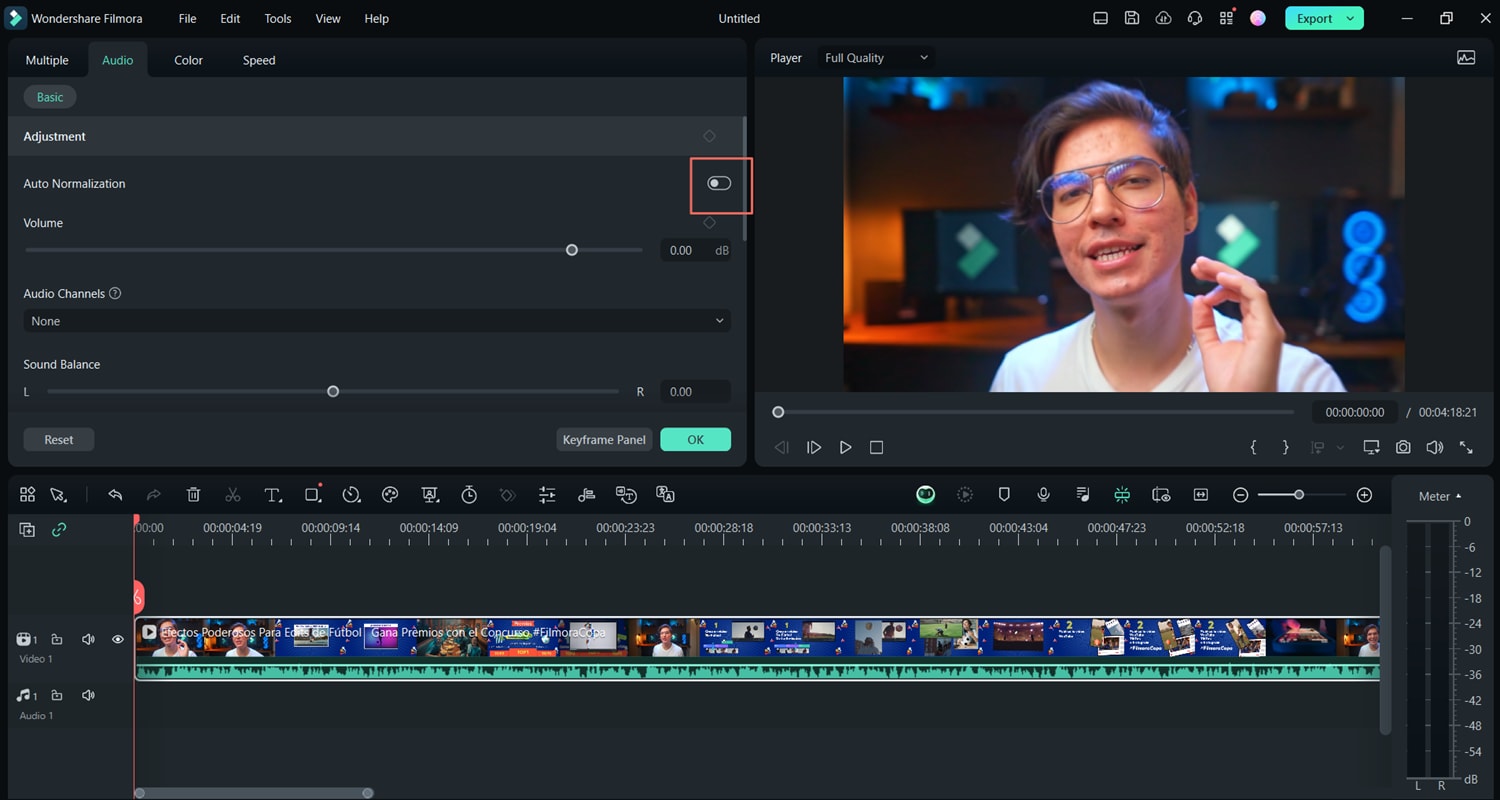
03of 03Enable Auto Normalization
In the audio editing panel, locate the Auto Normalization option. Click the button to activate it. Filmora will automatically analyze the clip and adjust the volume to ensure consistent loudness throughout.
Reset Auto Normalization
If you're not satisfied with the result, simply click the Auto Normalization button again to reset it. You can also click the Recheck icon to reevaluate and adjust the volume if needed.
Conclusion
By implementing the steps on how to use DaVinci Resolve to normalize audio levels, you're well on your way to ensuring your audio consistently hits the mark. You can either use keyframing for precise control or opt for the simpler automatic normalization to quickly even out your tracks across the entire project.
If you want a simpler solution to normalize audio besides DaVinci Resolve, you can also try Filmora. In Filmora, you only need to enable the Audio Normalization tool, and Filmora will automatically analyze and adjust the audio levels in your clips to ensure they meet standard loudness levels.
