Key Steps of This Video Tutorial To Follow
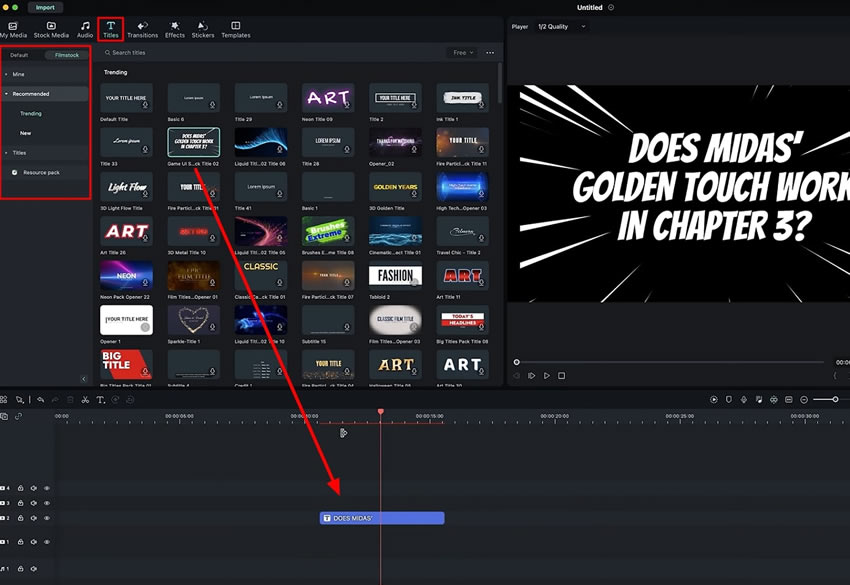
You can see multiple title options in the "Titles" tab of the Filmora. The left menu of the "Titles" tab provides many categories to choose from. To start the process, select any moving title of your choice and bring it to the timeline.

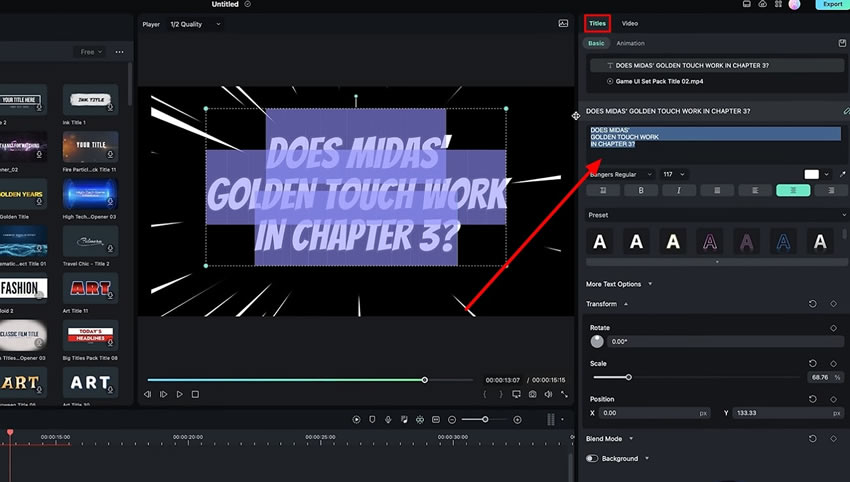
Here, you can customize this title, double-click the title, and head toward the right panel. From the right corner of the screen, choose the "Titles" tab. Under the "Titles" tab, go to the "Basic" section and type the text you want to keep as the title of your video into the text box. You can easily change its size, style, "Rotation," and "Scale" from there.

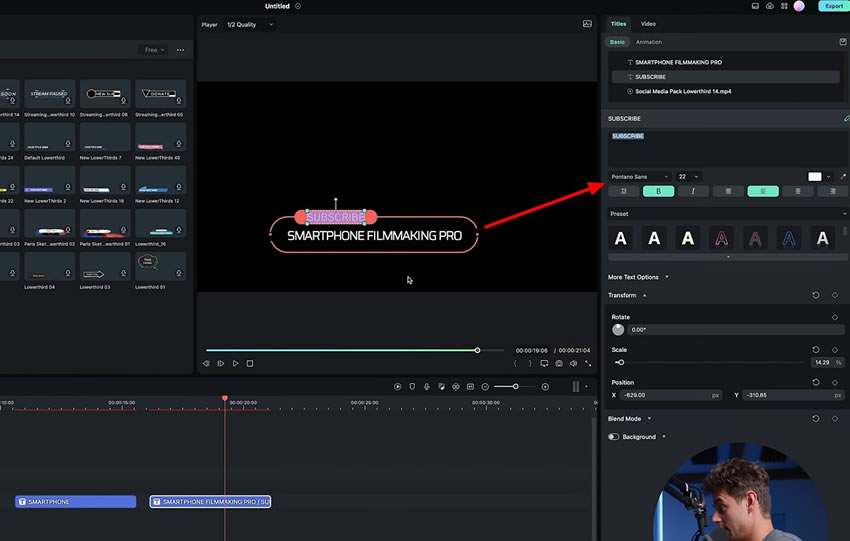
What if you want to choose the title for your interview videos? Look for the "Lower Third" option from the left menu. Select this option, and you will see multiple templates are present. Select any template of your choice and bring it to the timeline.
Similarly, you can customize this title according to your video's demand. Double-click the title on the timeline to open the settings. From the "Titles" tab on the right panel, enter the "Basic" section, and here you will be able to enter the text and adjust the "Scale" and "Rotation."

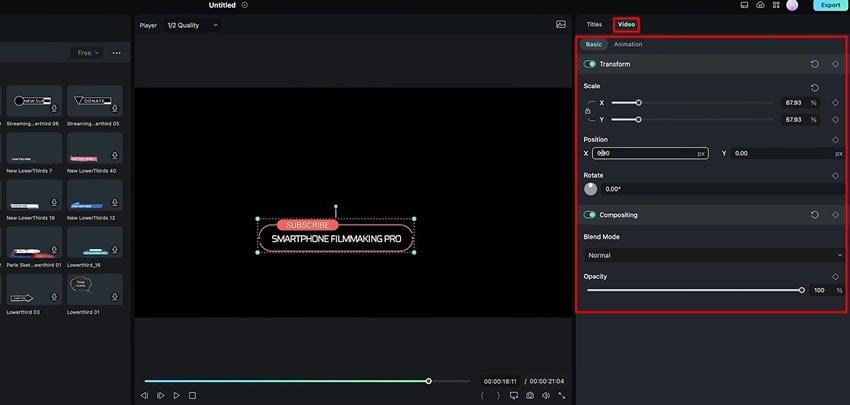
If you want to change the overall scale and position of the animation, navigate to the "Video" tab from the same menu. Here you can conveniently adjust the "Scale" of the animation on the "X" and "Y" axis. Similarly, change the entire "Position" by changing the "X" and "Y" values. Playback to see the final results of the animation.

Adding animation at the beginning of the videos, especially in the titles, makes them more attractive. Here we have learned to add animated titles to the videos. This guide explains the step-by-step process of adding and customizing animated titles for specific videos using Filmora. Filmora also provides multiple in-built options to make the task more convenient.
Julian's Other Filmora Master Lessons


