Key Steps of This Video Tutorial To Follow
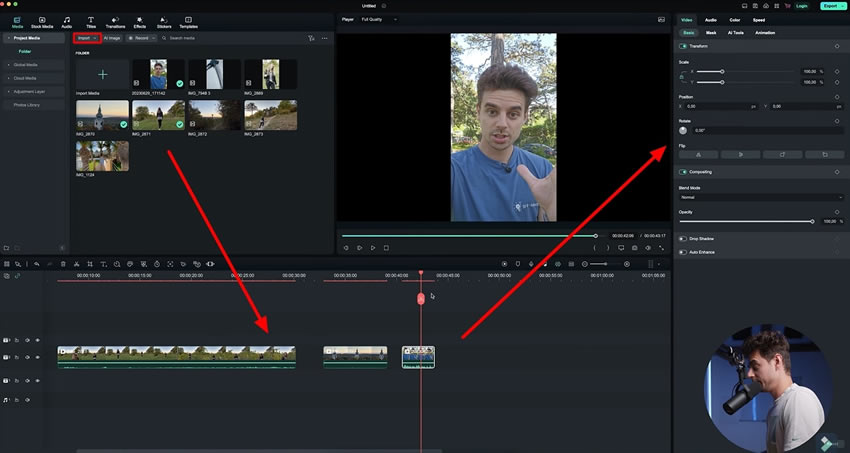
Open a new project of Filmora and import your videos into the media panel. Select the video on which you want to try the AI feature and drag it toward the timeline. Double-click the selected video and head toward the settings panel of Filmora.
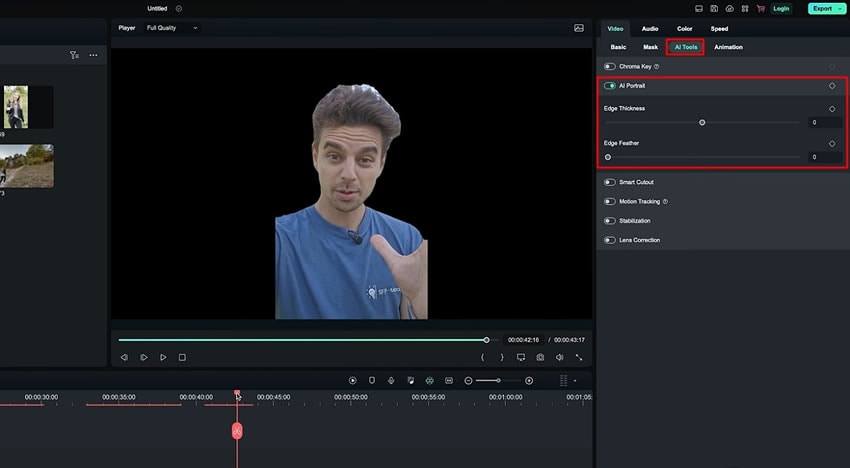
As you navigate into the video settings, you'll see the "AI Tools" section in the options. Choose "AI Tools" and select "AI Portrait" from the dropdown list. If you enable this button, the background will disappear. You can adjust the sharpness of the subject by adjusting the “Edge Thickness” and “Edge Feather.”
Furthermore, you can also adjust the background of your video by layering the background behind this video. Select the background video from the media panel and drag and drop it on the lower track of your footage. Now, double-click the video and adjust the “Scale” and “Position” of your footage on the background from the settings window.
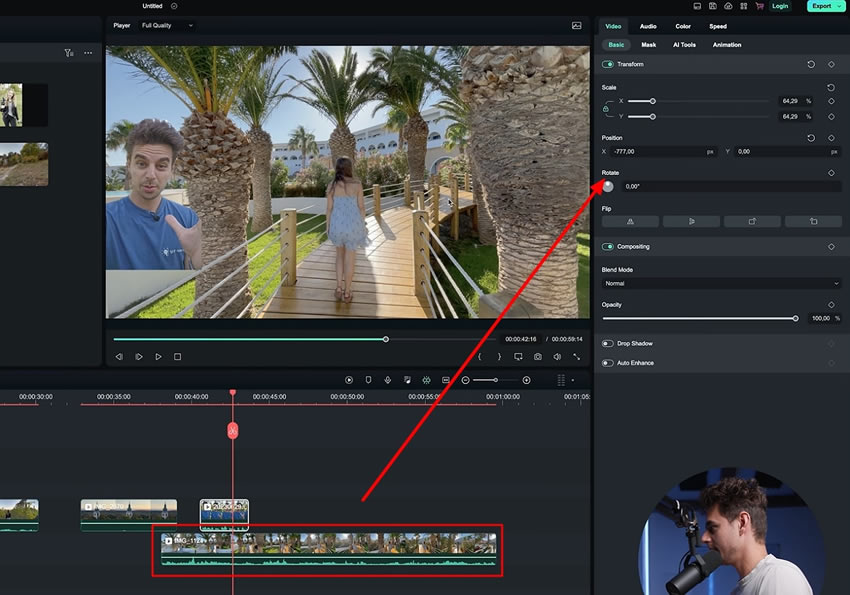
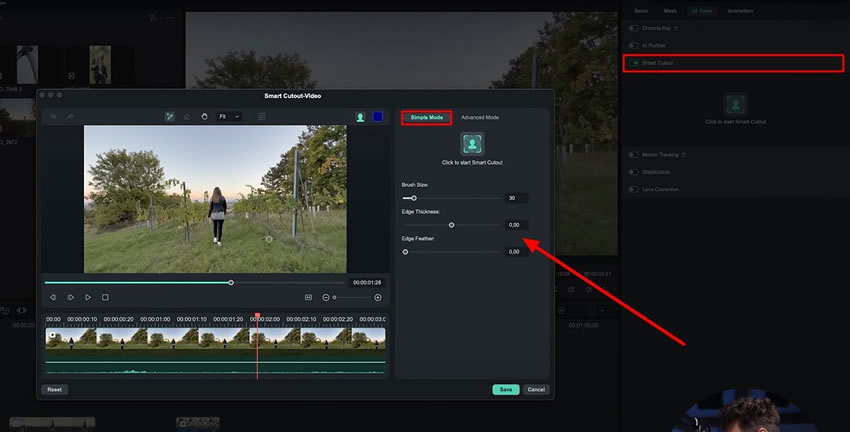
You can cut anything from a video and paste it on any other video using this AI tool. Select the imported video from the timeline and go to the “AI Tools” as explained earlier. As you navigate into the respective tab, look for the “Smart Cutout” option and hit the “Click to Start Smart Cutout” button. A new window will appear on the screen where you can manually adjust the settings by moving the available sliders.
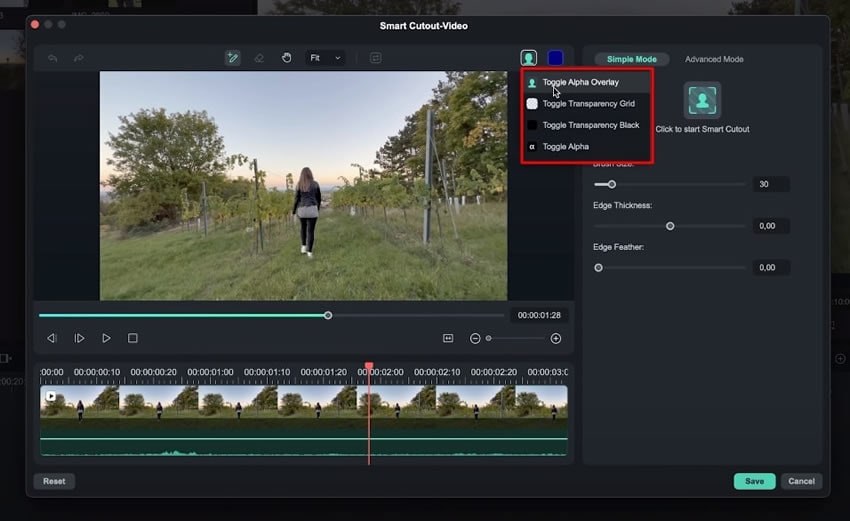
With Filmora, you can draw the mask around the object. To do so, go to the buttons on the top right corner of the preview panel of the newly opened window. Select the "Toggle Transparency Grid" from the dropdown list and draw the mask around the object. Adjust the settings as per requirements, then zoom in and zoom out to see the details.
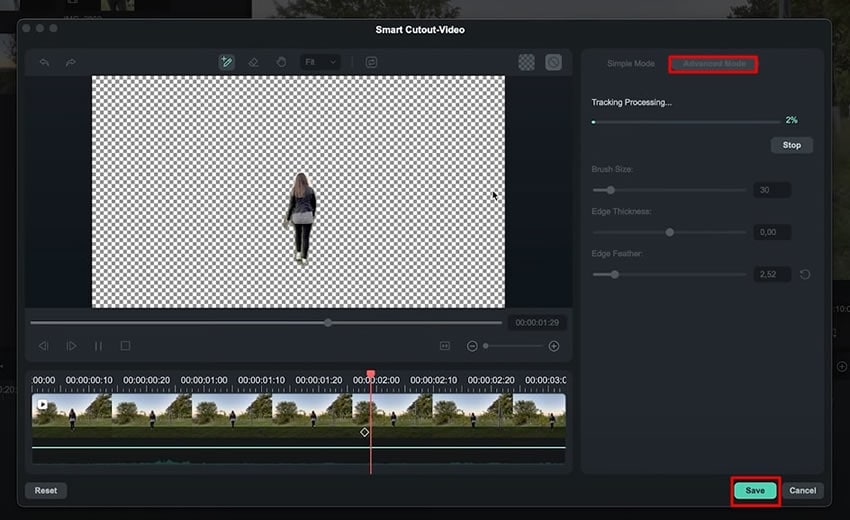
If you have a moving object, lead into the “Advanced Mode” section of the Smart Cutout tool and hit the play icon to track all the frames. Wait until the tracking is complete, after which you’ll get the video of the object without the background. Now hit the “Save” button from the bottom right corner. You can put any background for the video by dragging it to the timeline.
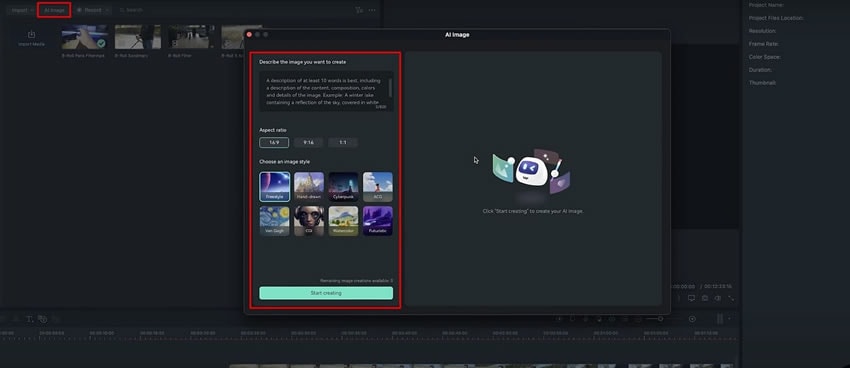
Filmora also offers a few more AI features. To enjoy them, go to the "My Media" menu, and you'll see the "AI Image" option on the media panel. On selecting it, a new window opens on the screen showing the AI Image functions.
From this window, you can write the description of the image you want to create in the given space. It also provides you the option of setting the image’s “Aspect Ratio” and “Image Style.” Hit the "Start Creating" button, and you'll get the desired image.
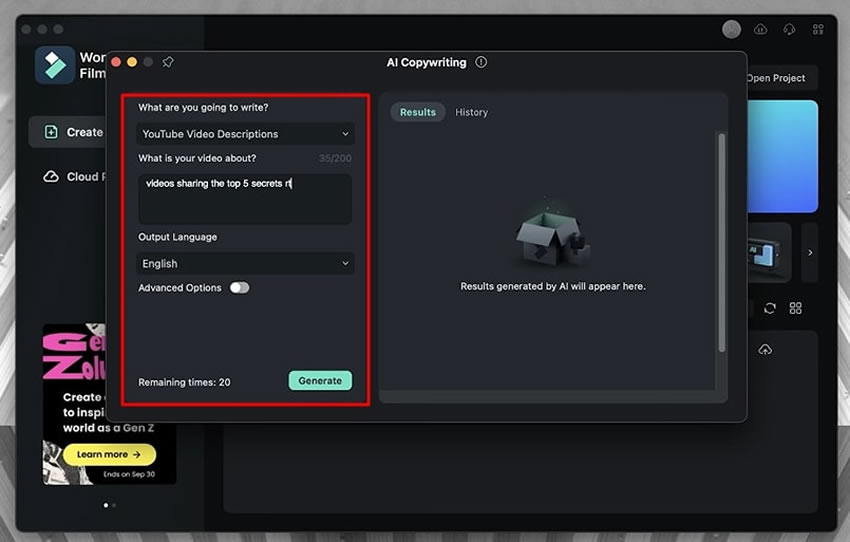
Filmora has an AI copywriting tool which is available on the main interface below the “New Project” option. As you select the option, a new window displaying different copywriting options appears. You can choose whatever you want to write about your video. Choose the language of your content and the number of expected results, and generate explicit video scripting content ideas.
Besides video editing, Filmora’s AI tools have also made the job easier for you in many ways. As a content creator, you can conveniently do tricky and complicated tasks with just a single click. This article has provided an overview of the functionality of AI features of Filmora that you can use to make video editing simpler.
Julian's Other Filmora Master Lessons

