Guide On Working with LUTS in Filmora

In this video guide, you will find different ways to change the tone of your video in Wondershare Filmora. Get to know how you can manage your entire video using LUTs in Filmora.
Key Steps of This Video Tutorial To Follow
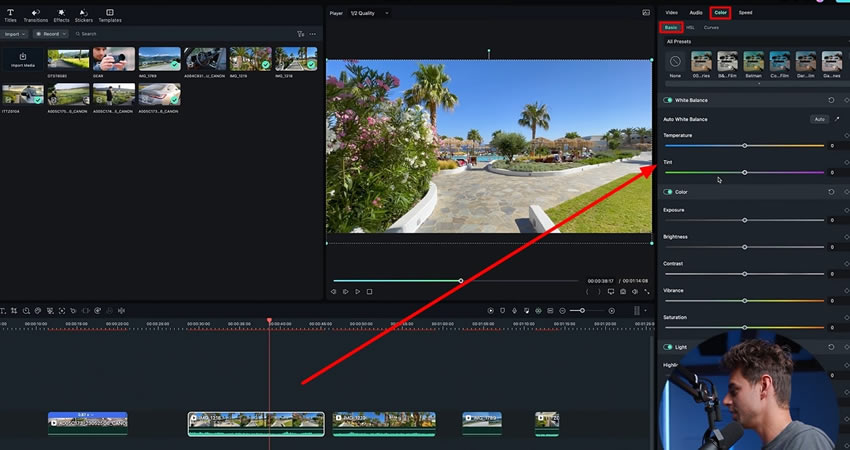
To begin with adding a cinematic look to your videos, you will first need to import the required video clips into the Filmora library. Once you successfully import the clips, you can drag and drop them in the timeline to start your editing process. Here, tap on the clip you want to adjust at the start. By tapping on it, you will get access to the respective settings.
You will see different options like "Video," "Audio," and "Color" across the window that opens. Following these, click on the "Color" panel to see different editing options. From these options, you can control different features like "Brightness," "Temperature," "Saturation," and many more things in your video.
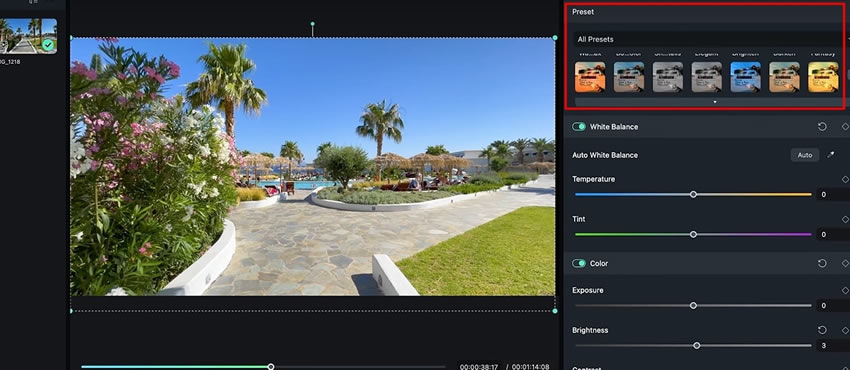
Here you can also see a "Preset" option under which you can see a bunch of presets. These presets can be applied to your video to give a unique look. In the film world, these presets are called "LUT," which means "Look Up Tables." These are drag-and-drop color gradient filters that can help you improve your clip in a quick way.
Once you click on one of these preloaded LUT, you will see a color change in the clip. You can try different LUTs and select the desired one according to your video.
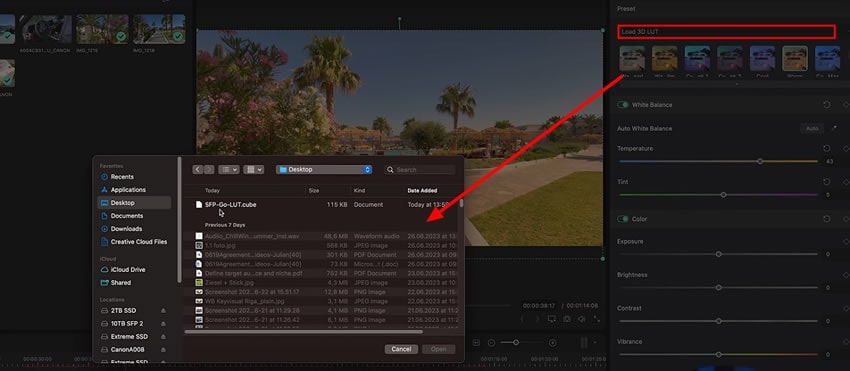
Moreover, you can also add your own custom LUTS in the Filmora. For this, click "All Presets" and scroll down to "Load 3D LUT" to import your custom-made LUT in Filmora. Here we are adding our own custom LUT to the video. You can apply yours and see the before and after mode to observe the difference.
Following this, you need to remember that LUTs are just a base option for your color grade. You can easily adjust them by playing with other settings like "Color," "Saturation," and so on to add cinematic effects to your video.
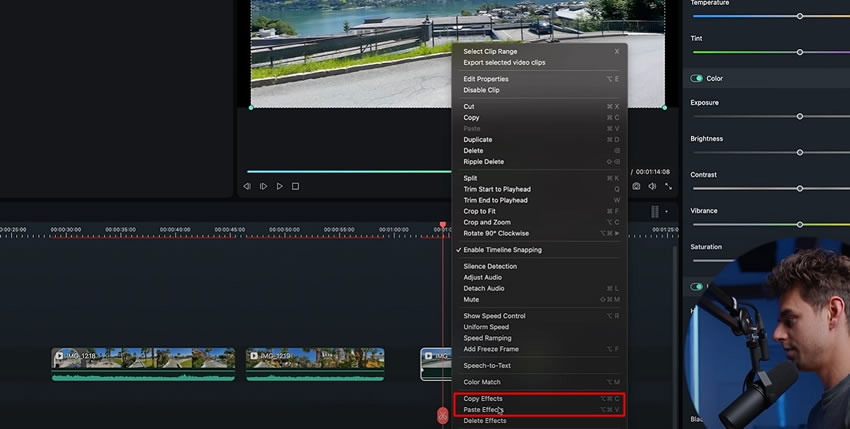
You can also see another unique feature that can help you to apply the effect of one clip on others in a quick way. For this, you can right-click on the clip in your timeline to copy its effect. Right-click on the other clip and paste the same effect on it as well. Using this way, you can save time and effort.
Adding cinematic effects in videos is very helpful for an artist and content creator to make his content look more presentable. Using these presets, you can make your content more engaging to attract more audience towards your content. With the help of Wondershare Filmora, you can save a lot of time and make customized effects using 3D LUTs.
Julian's Other Filmora Master Lessons