Key Steps of This Video Tutorial To Follow
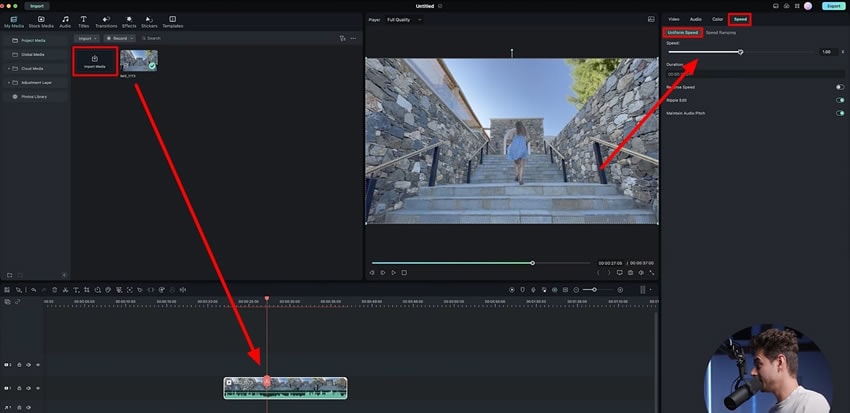
Start the process of adding effects to the video by importing the video into Filmora. Drag the video clip on the timeline and select “Project Settings” from the pop-up window. Select the video and head toward the panel displaying its settings.
Select the "Speed" tab and enter the "Uniform Speed" section. Under the "Uniform Speed," you can adjust the overall "Speed" of the video by moving the slider. By moving the slider toward the left, you can easily add a magical slow-motion effect to your videos.

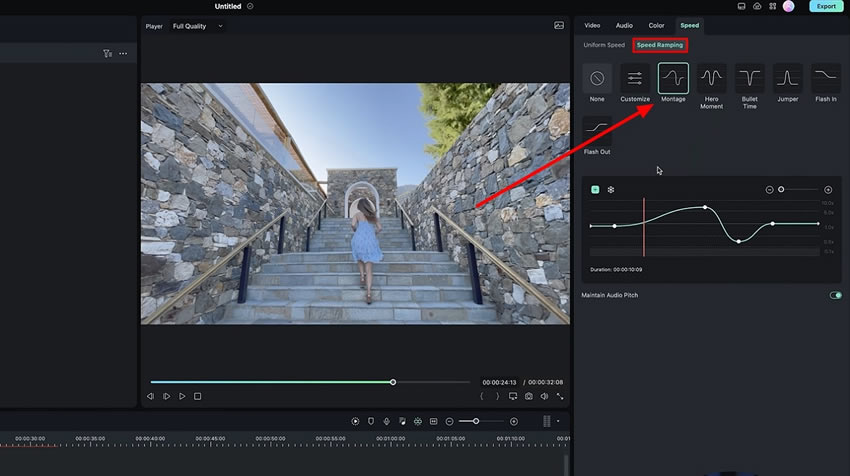
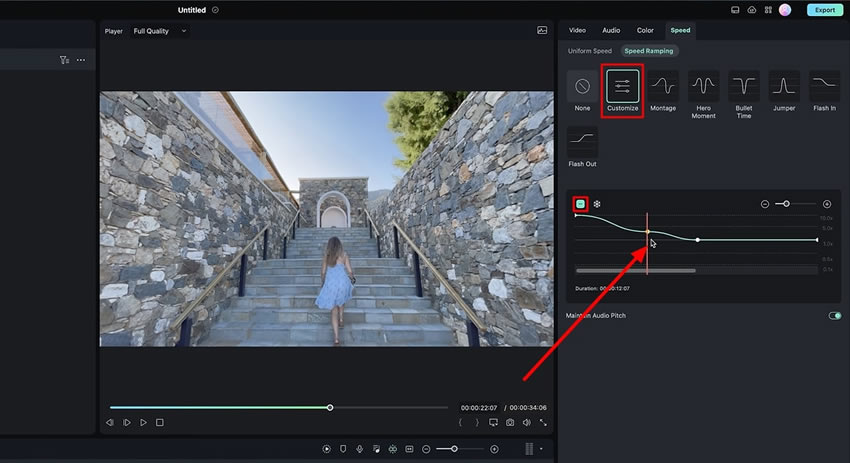
You might not be satisfied with this setting and want to manually adjust the speed of the different parts of the video. For this, you can go to the “Speed Ramping” section from the same panel. As you enter the settings, you’ll be provided with multiple options. You can select the preset speed option or “Customize” the speed of your video.

To customize the video's speed, you can add keyframes at the desired points of the baseline of the video. Adjust the speed of different video portions by moving the keyframes upwards and downwards. If you move the keyframe upward, the speed of the video will be increased. Similarly, decrease the speed at any other part of the clip by dragging the keyframe down.

Adding cooler effects to the videos makes them attractive to watch. Content creators often find it challenging to edit as this is the final step in creation and requires lots of attention to the details. In this guide, you've learned how you can adjust the overall speed of the videos with speed ramping to make them more fascinating.
Julian's Other Filmora Master Lessons


