Key Steps of This Video Tutorial To Follow
To start the process, import your videos into Filmora. The videos must be of the same settings captured by different cameras from different angles. Select the videos and place them on the timeline on other tracks. Select the videos one by one and right-click to access the dropdown list. Choose "Detach Audio" from the list. Here, you'll get two audio and two videos on the timeline on different tracks.
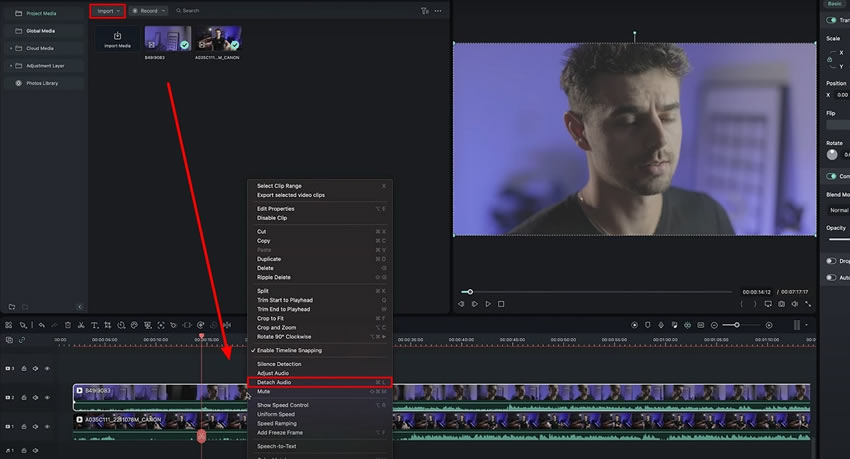
Continuing with the multicam video editing, you will notice by observing the audio clips that they do not synchronize. To do so, select both audio clips at once and make right-click. Choose "Auto Synchronization" from the dropdown list. In seconds, you'll be provided with audio clips arranged exactly at similar beats.
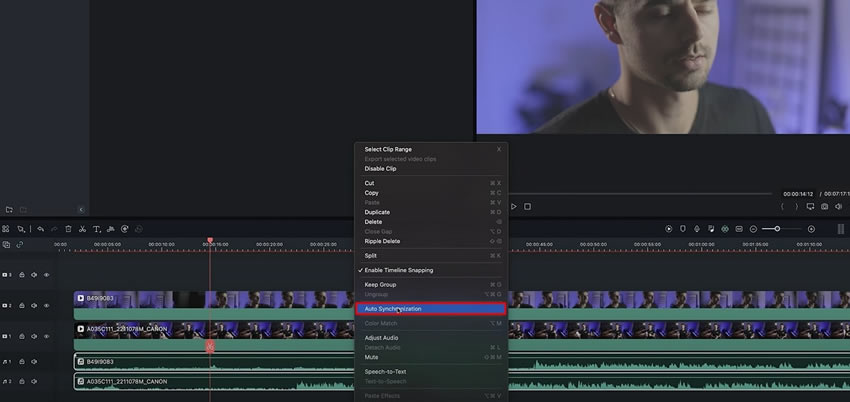
Find the exact matching numbers on the corresponding video and audio files and align them accordingly. You can remove the unwanted parts of the video and audio files to make them start from the same point. Now, you can also keep the desired audio file, which is more apparent, and delete the other one.
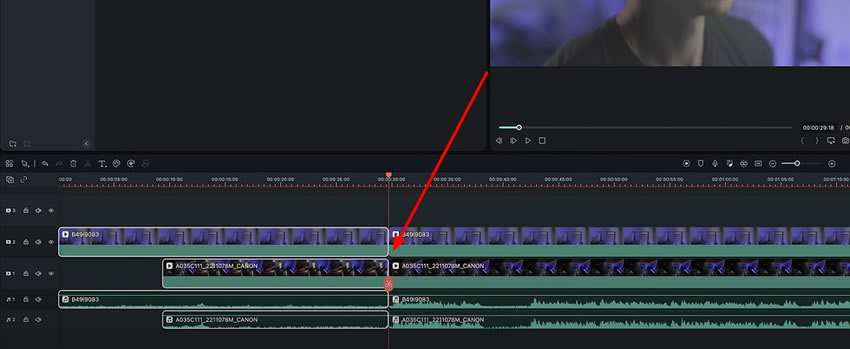
To edit the video clips, you only need to cut both videos at the same time frame. You can divide them into as many parts as you want. It is also recommended not to delete any part of the videos as you might need them later for editing your videos.
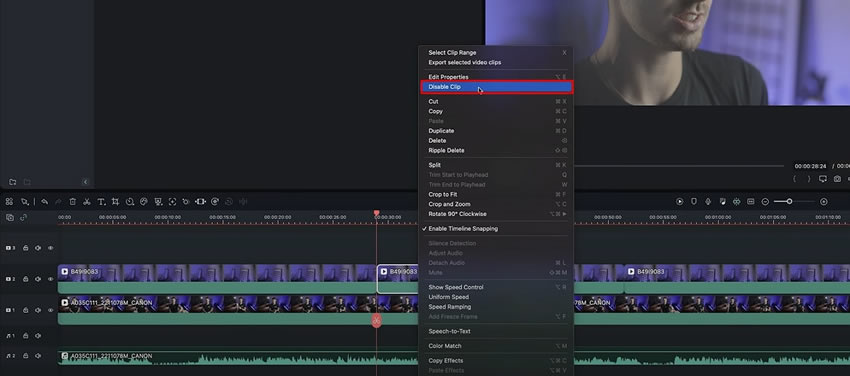
Select the video clip of the angle you don't want to show in your final video. Right-click on that clip and select the "Disable Clip" option from the dropdown list. Similarly, if you follow the same technique, you can enable and disable the desired clips from the video.
Videos that have been captured from different angles might seem difficult to edit. The reality is the opposite if you have Wondershare Filmora. In this guide, elementary steps are explained to edit multicam videos. As we know that creativity is the key to success for content creators; with Filmora, you can easily surprise your audience by creating magical content.
Julian's Other Filmora Master Lessons

