Key Steps of This Video Tutorial To Follow
Start the “New Project” from the main interface and enter into the editing interface of Filmora. Import your recorded video into the media panel from your system. Select this imported video and drag it onto the timeline track. Moving forward, to add the VFX go to the “Stickers” menu, where you'll get multiple options to choose from. Scroll down until you find the desired VFX from the list.
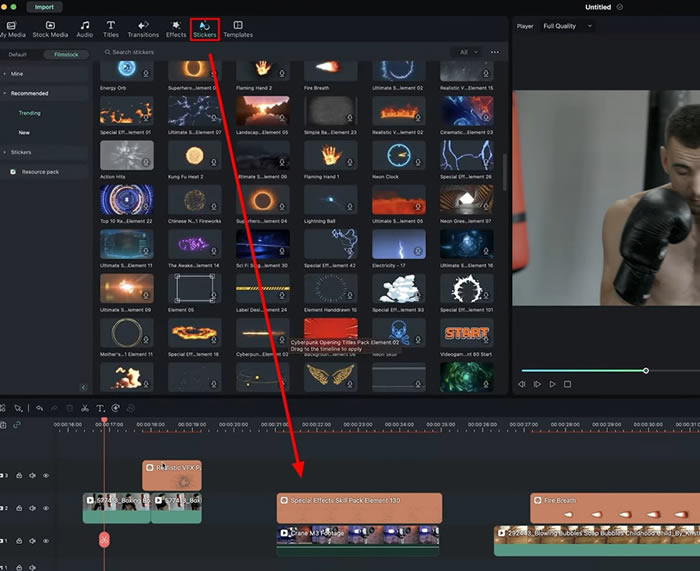
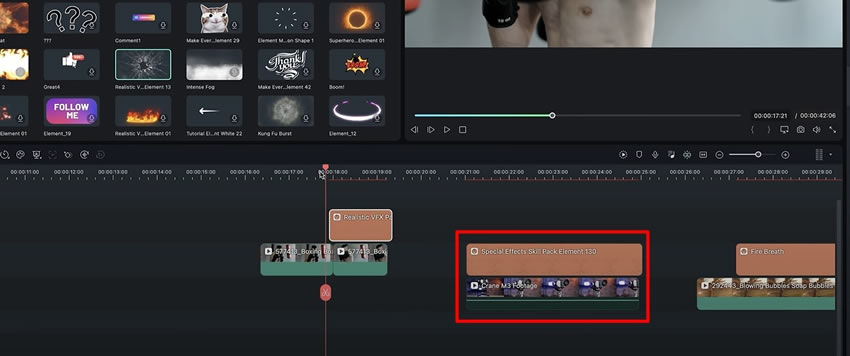
After finalizing the VFX, select and drop it on the timeline above your video. Place this VFX right above the video at the exact point where you want to apply this effect. Playback to check if the effect is applied correctly.
If you want to relocate the VFX in the video, you can simply select it or the upper layer from the preview panel. Following this, change its position by dragging it on the place of this effect right at the position or object in the video, and the effect is ready.
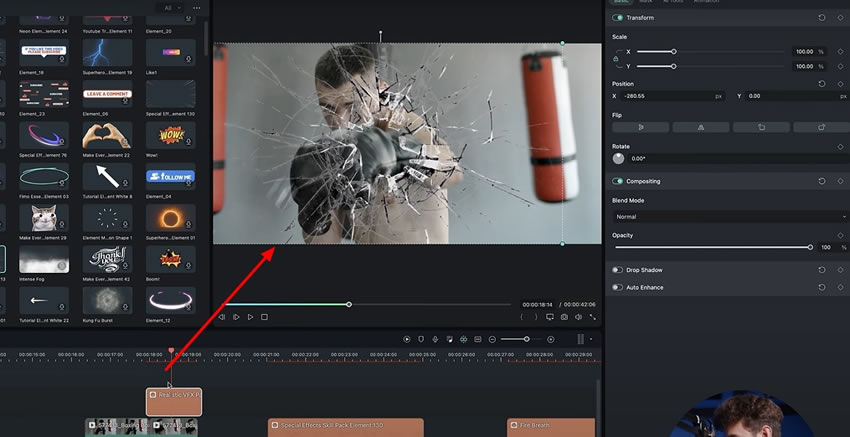
You can also add the moving effects on the moving objects in the video as well. Double-click the effect and go to the right panel to adjust its "Position" over the moving object. From the "Video" tab, go to "Basic” and change the “Position” of your effect from “X” and “Y.”
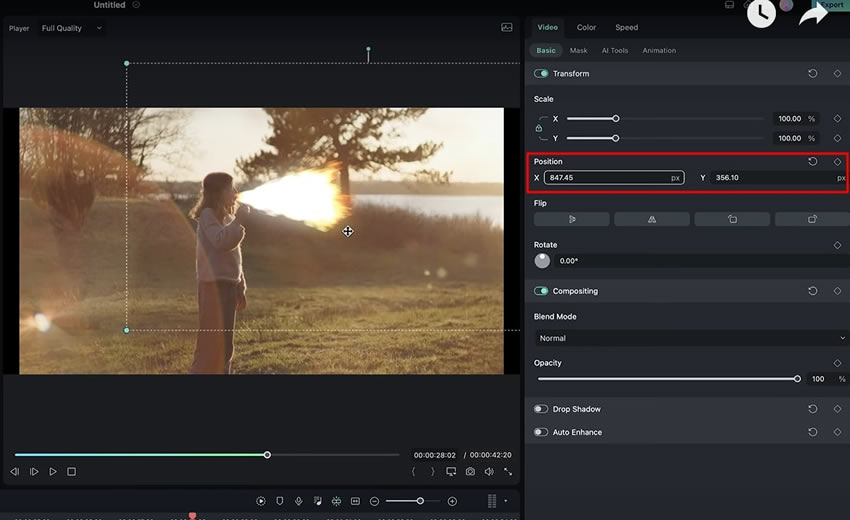
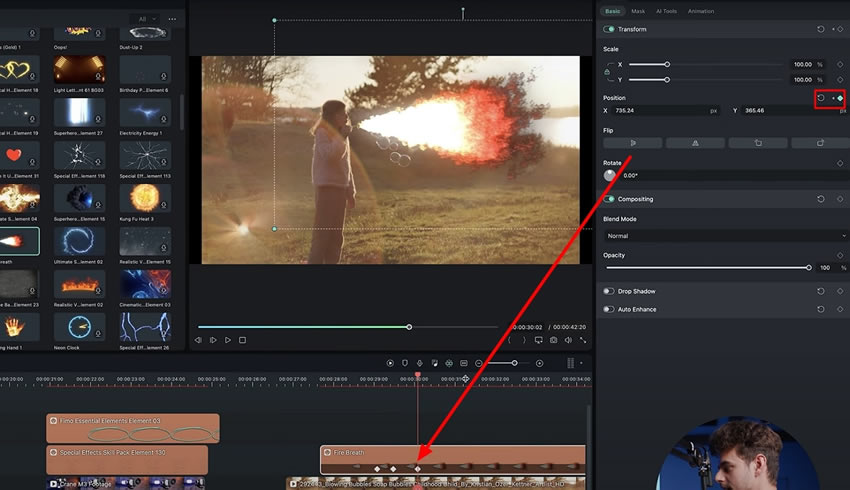
To make this applied effect move along the object in the video, you can add a keyframe to this effect. Hit the keyframe icon in front of the "Position" and add multiple keyframes on the clip. Playback to check the final results and create easy VFX using Wondershare Filmora.
In this guide, we have learned about the VFX features that Filmora offer and learned the functionality of these features. Filmora cannot only track the moving objects but can also add stickers on these objects in the video. Enjoy these features of Filmora and spice up your videos by adding magical VFX effects.
Julian's Other Filmora Master Lessons

