


 100% Security Verified | No Subscription Required | No Malware


 ChatGPT
 Perplexity
 Gemini
 Claude
 Grok
Grok
While undoubtedly a valuable skill, being a quick typer can only get you so far. Whether you’re taking notes for your online class or creating a script for your social media video, there are multiple situations in which voice typing is much more efficient.
That’s where Microsoft Word’s speech-to-text tool can be incredibly beneficial, allowing users to keep up with the demanding workflows of today’s fast-paced digital world.
In today’s guide, we’ll review Word’s voice-to-text requirements, show you how to speak and type in Word, look into the feature’s pros and cons, and present a powerful voice typing alternative you might like even more, so let’s dive in.
In this article
Things You Need to Use Word’s Voice-To-Text
Like with most voice typing tools, using Microsoft Word’s speech-to-text feature also requires having a few items in place, including the following:
- Microphone – The first and the most obvious thing you need to convert speech to text in Word is a microphone. While mobile devices already have built-in microphones, you might need to invest in an external USB or 3.5mm jack microphone if you use Word on a desktop PC.
- Quiet Environment – Word’s voice-to-text feature is undeniably excellent, but it’s not perfect in loud rooms or environments with too much background noise. To increase the tool’s efficiency and accuracy, you must be in a quiet place to speak and type in Word.
- High-Quality Internet – Compared to the program’s word processing, which doesn’t need much regarding internet speed and stability, Word’s speech-to-text feature requires a stable internet connection as it uses cloud-based processing to convert your voice into text.
- Microsoft 365 Subscription – A premium account or a subscription is the last requirement you’ll need to meet. Namely, the speech-to-text or dictation feature is only available to Microsoft 365 subscribers, so you’ll need a paid account to convert speech to text in Word.
Once you have these essential tools taken care of, you’re ready to move on to the section on using Word’s speech-to-text tool.
How to Use Speech-To-Text in Microsoft Word
As voice typing is supposed to be quicker and easier than regular typing, Microsoft has made its Dictate tool in Word easily accessible and incredibly straightforward. Here’s how you can use it:
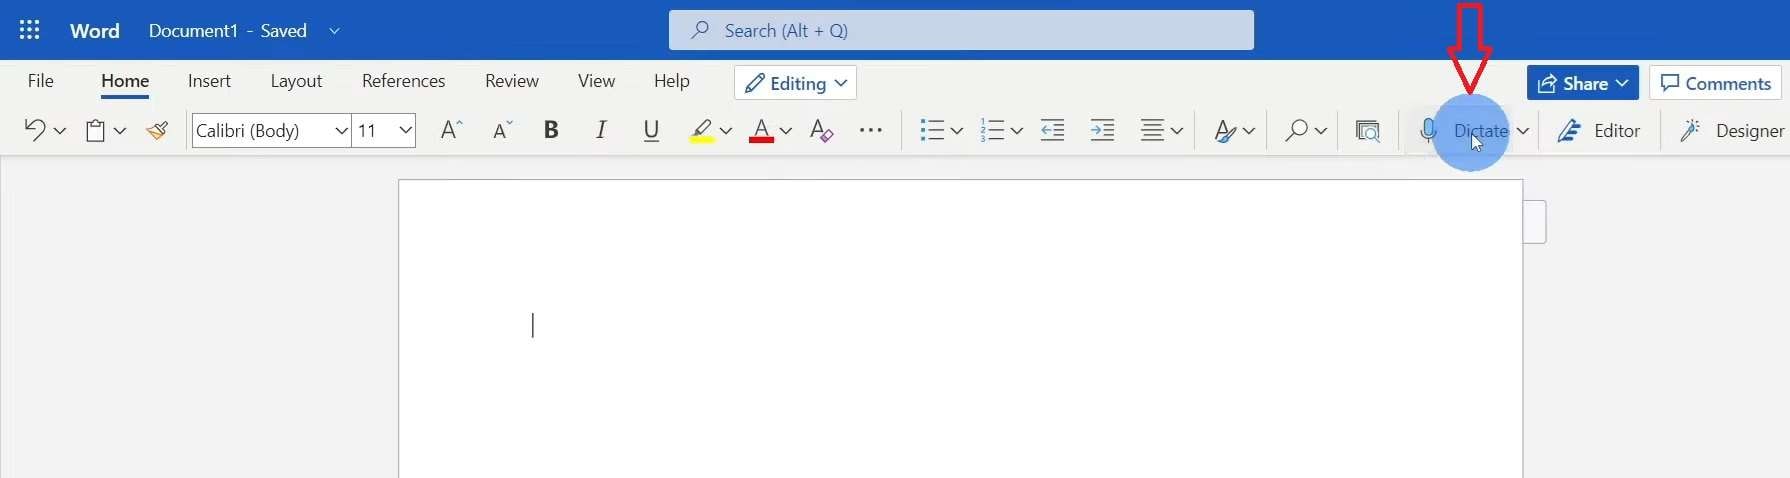
Step 1: Head to Microsoft 365’s website and create a new Document or launch a desktop version of Word on your PC.
Step 2: Access the Dictate tool in the ribbon or hit your keyboard’s Alt + (tilde) keys.
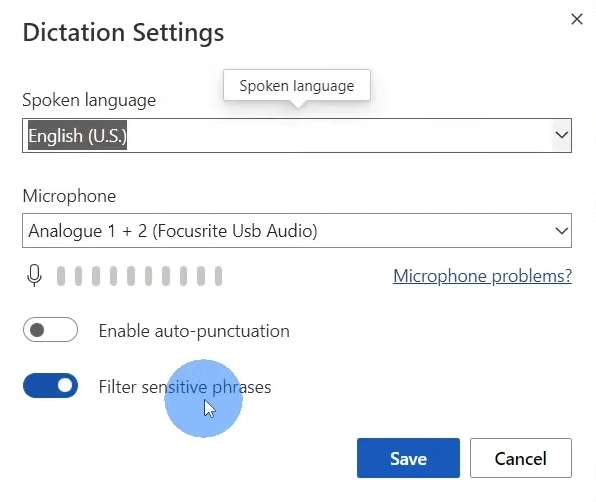
Step 3: A tiny new menu will pop up at the bottom of the screen, and you can tap the Settings button to change the language or the microphone and adjust other voice dictation settings.
Step 4: Once you’re ready to stop converting text to speech in Word, tap the Stop Dictation button in the menu bar at the bottom of the screen.

You can also click the third Help button to learn more about using different aspects of Word’s voice-to-text tool, such as punctuation, lists, new lines, paragraphs, etc.
Benefits of Using Word’s Voice-To-Text Tool
Speaking your thoughts out loud instead of writing them down is bound to be advantageous in multiple situations, and through it, Word’s voice-to-text tool brings the following benefits:
- Hands-Free Typing – Whether you’re eating, holding your physical notes, or doing any other type of multitasking that prevents you from using your hands to type, Word’s voice-to-text tool becomes handy for typing in such situations.
- Higher Accessibility – Word’s voice-to-text feature also makes it effortless for individuals with physical disabilities and other limitations to create even the most elaborate documents while barely lifting a finger.
- Elevated Productivity – Sometimes, our brains work faster than our fingers, and we lose track of our thoughts while typing. However, with Word’s speech-to-text feature, you can type as fast as you can speak, increasing your productivity and efficiency in the long run, regardless of whether you’re a fast thinker or a slow typist.
- Enhanced Workflow – School essays, work reports, and other lengthy documents can take too long to type out, but that’s not the case with Word’s voice-to-text tool. With this handy feature, you can significantly reduce the time spent on typing, greatly improving your overall workflow.
Ultimately, it’s clear that Microsoft Word’s speech-to-text tool undeniably has multiple uses and advantages, making it an indispensable voice typing tool for numerous reasons.
Disadvantages of Microsoft Word’s Speech-To-Text Feature
While the benefits are not only present but many, Word’s speech-to-text tool also has a few disadvantages that you should be aware of. These disadvantages include the following:
- Unintuitive Punctuation Dictation – While you can say phrases like “full stop” or “new line,” Word’s voice-to-text punctuation isn’t the most reliable or precise. As a result, controlling punctuation is intuitive, and correcting it can take a long time.
- Inaccurate Dictation in Noisy Environments – Word’s speech-to-text tool is known to have severe issues with transcription the moment the room you’re in becomes a bit louder. This disadvantage significantly limits its usability, especially when you’re not at home.
- It’s a Paid Service – As speech-to-text in Word is a premium feature, the app’s Dictation tool is only available to paid users with an active Microsoft 365 subscription, making it inaccessible to the free version users.
It’s worth noting that, although not a problem for 99% of users in 2024, Word’s voice-to-text feature requires an active internet connection and can’t be used in offline mode.
An Alternative to Microsoft Speech-to-text: Filmora
While speaking and typing in Word undeniably has its use cases, Word’s voice-to-text feature isn’t the best choice for all users with speech-to-text conversion needs. Namely, its inaccurate transcription in noisier rooms and its unintuitive punctuation control severely limit Word’s voice-to-text usability.
Those looking for more advanced voice-to-text options and users who need scripts for their video content will have a much better time using Filmora, a powerful video editing tool with an AI-powered speech-to-text feature that can easily outperform Word’s voice-to-text tool.
Despite being effortless, Filmora’s speech-to-text tool also provides an incredibly accurate transcription, even in noisy environments, as it’s AI-powered. It’s aimed at content creators, podcasters, journalists, vloggers, teachers, and business professionals who need direct video and audio file transcription.
Moreover, the tool supports 27 languages and direct translation, making it vastly more powerful than Word’s voice-to-text feature.
How to Use Filmora’s Speech-To-Text Tool
Although Word’s voice-to-text feature is remarkably easy to use, Filmora’s speech-to-text tool takes this straightforwardness to another level. As a result, the process of voice typing in Filmora looks like this:
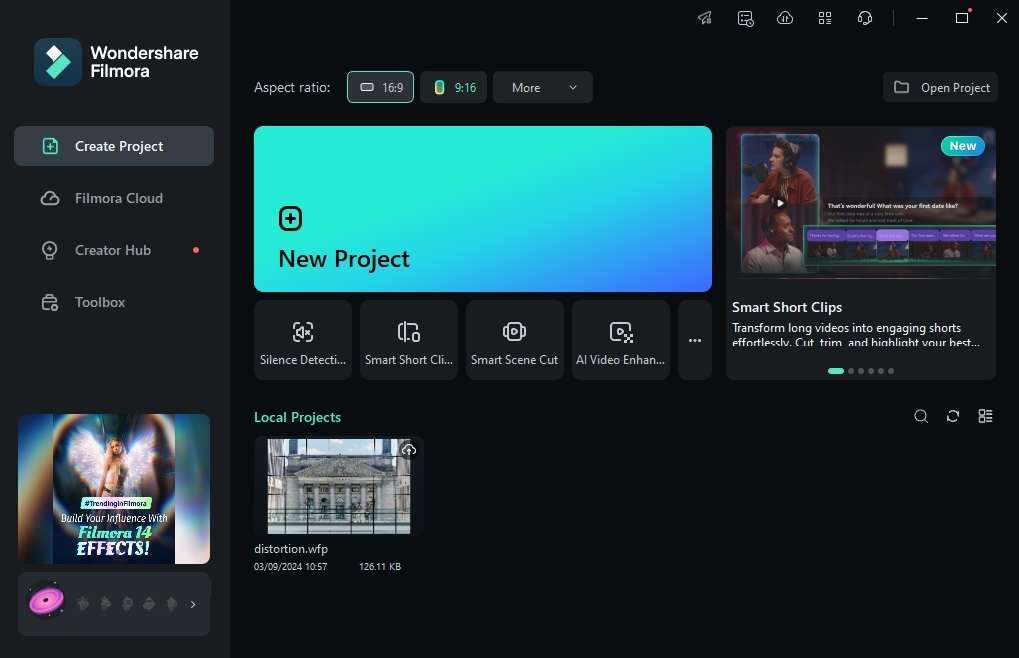
Step 1: Launch Filmora on your computer and hit the New Project button on the startup screen.
Step 2: Tap Import to add audio or video files to transcribe directly.

Step 3: Drag and drop the media files from the Import section into the Timeline at the bottom of the screen.
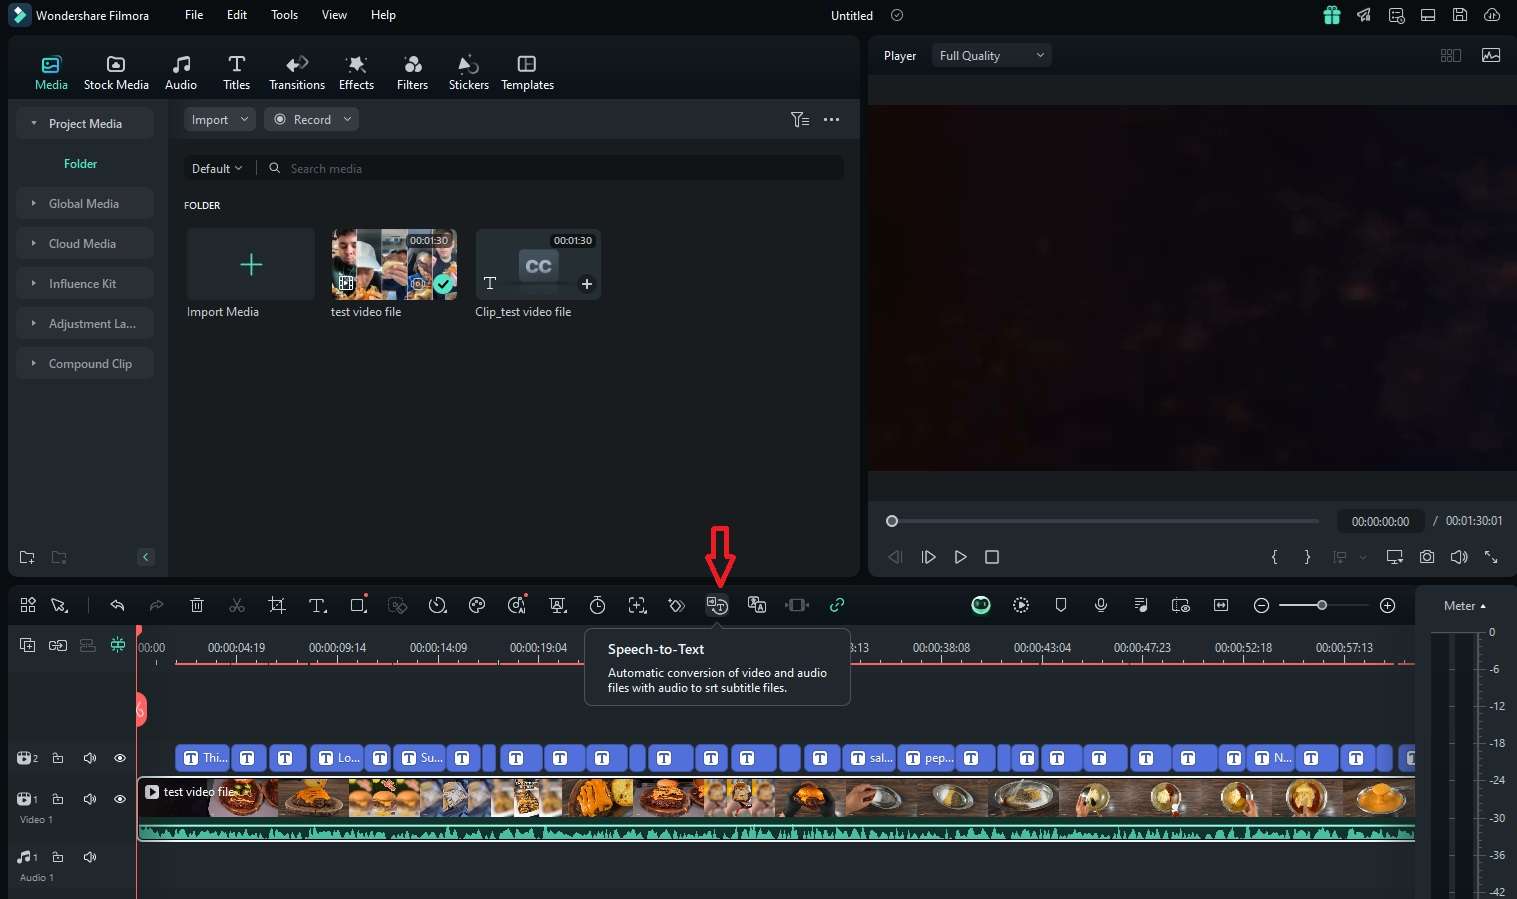
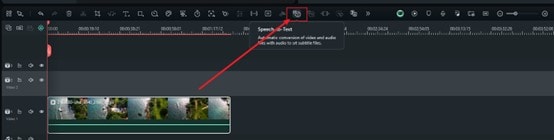
Step 4: Click the Speech to Text button right above the Timeline. Alternatively, navigate to Tools > Speech to Text at the top of the screen.
Step 5: Change the language, choose whether to translate the transcription and to which language, and adjust other speech-to-text parameters before you hit Generate.
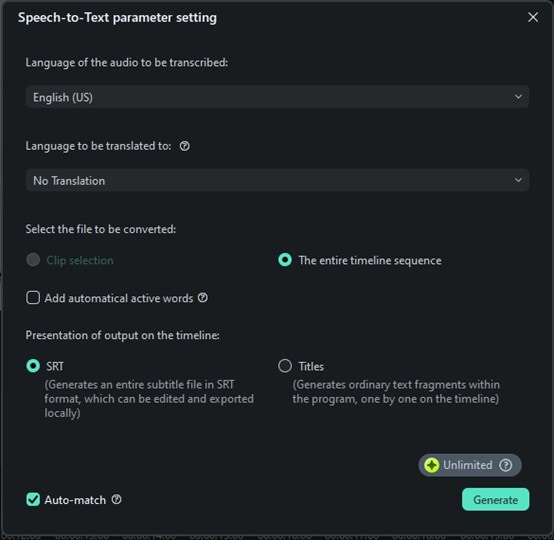
What’s excellent about Filmora’s speech-to-text feature is that you can choose between creating an SRT file, which lets you save transcriptions locally, or adding textual elements directly to the Timeline.
Conclusion
Converting speech to text in Word, or any other word processor, represents a seamless and much more efficient way to create elaborate text documents than manually typing them out.
It can be remarkably beneficial for students taking notes, teachers creating tutorials or presentations, content creators making YouTube videos and clips for other social media, and numerous other groups of users.
However, Microsoft Word’s speech-to-text tool isn’t without limitations. It has an unintuitive punctuation control and is known to struggle in loud environments.
As a result, many users who need advanced voice-to-text features or use speech-to-text conversions for video/audio editing prefer Filmora, a powerful editing tool whose speech-to-text feature easily outperforms Word’s voice-to-text tool.
Its speech-to-text tool is as easy to use as Word’s Dictate tool but also supports 27 languages and direct translation while being drastically more accurate thanks to AI.
