


 100% Security Verified | No Subscription Required | No Malware

Refrain yourself from using a microphone to record audio coming from your PC! It will only make the recording sound muffled and lack the clarity you need. Instead, there are straightforward methods to record audio output on Windows with much better results, such as using built-in tools on your computer or specialized recording software.
To help you get started, we will explore these methods and provide step-by-step instructions to ensure you achieve high-quality audio recordings when recording audio from an application. We won’t make it more complicated than it needs to be; our goal is to simplify the process so that anyone can implement and quickly capture crisp, clear audio directly from your computer's output.
In this article
Part 1. Using StereoMix to Record Audio Output
The first way to record your favorite songs and music from a computer is by using Stereo Mix, a feature available through certain sound drivers. If your sound driver supports this function, you can use it to capture all audio output from your computer, including system sounds, microphone input, and game audio.
To record audio on a Windows PC using Stereo Mix, follow these steps:
Step 1: Open the Control Panel, then navigate to Hardware and Sound > Sound.
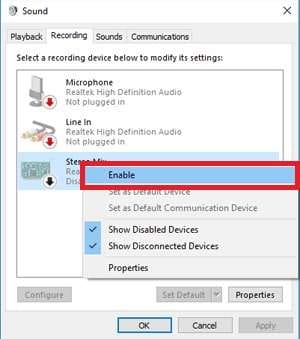
Step 2: In the Sound window, select the Recording tab. You should see the Stereo Mix option listed.
Step 3: Right-click on Stereo Mix and select Enable. Click OK to save the changes. After that, you can start recording and capture the audio.
Part 2. Record Audio Output Using Wondershare Filmora
If you don’t have the sound drivers that support the Stereo Mix settings, you can use third-party software like Wondershare Filmora to record audio output from your Windows computer. Wondershare Filmora is a versatile video editing software that also includes audio recording features.
This software is best if you want an easy-to-use tool with advanced features. With its intuitive interface, even beginners can quickly get the hang of recording and editing audio. Additionally, Filmora offers a range of advanced features such as multi-track editing, noise reduction, and various audio effects.

More of Filmora features:
- Voice Changing Effects: Add effects like echo, old radio, diving sound, and more.
- Denoise Options: Improve audio clarity with AI speech enhancement, dereverb, hum removal, hiss removal, and wind removal.
- Sound Balancing: Ensure consistent audio levels throughout your project.
- Fade In and Fade Out Effects: Create smooth transitions at the beginning and end of clips.
- Pitch Modification: Adjust the pitch of your audio to suit your project's needs.
- Audio Ducking: Automatically lower background music when dialogue or voiceover is present.
- Stock Media Library: Access a vast collection of music, sound effects, image backgrounds, and more to enhance your project.
Compatibility: Windows and Mac
Here’s how to record audio output using Wondershare Filmora:
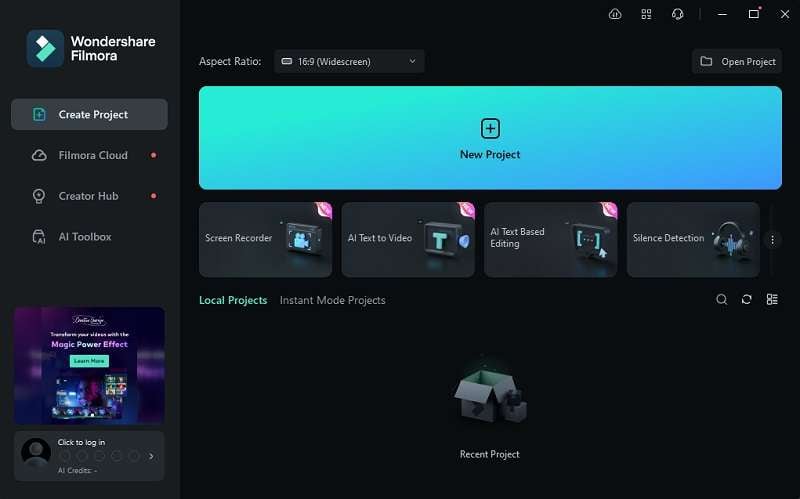
Step 1: Launch Wondershare Filmora and create a New Project.
After installing Wondershare Filmora, you can open the software and click “New Project.”
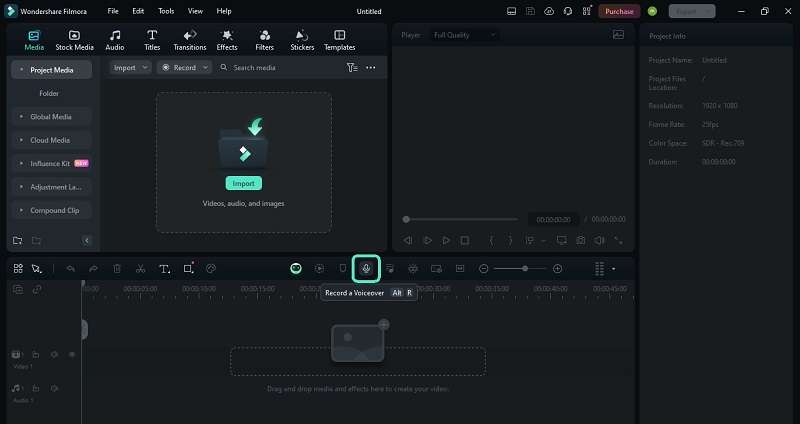
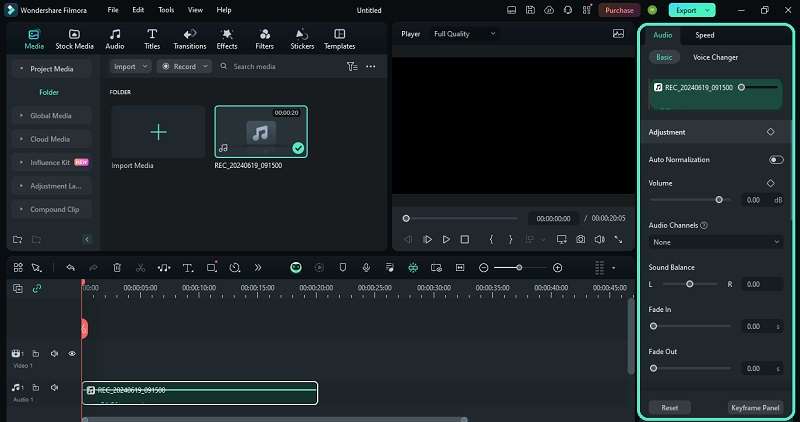
Step 2: Start the audio recording.
On Filmora’s editing interface, click the microphone button to start recording audio. You can also press ALT + R on your keyboard to start recording.
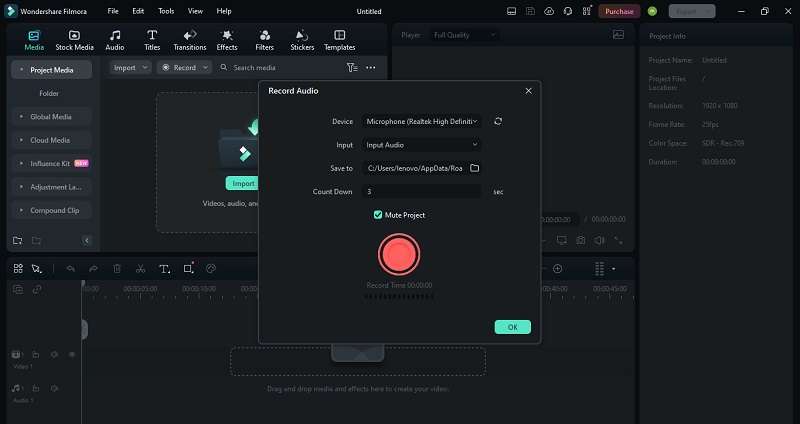
After clicking the recording button, a pop-up screen will appear as below. Select the recording device and input audio to make sure high-quality recording. You can also customize the countdown and specify the location for saving the recording file. To start the audio recording, click the red button.
Step 4: Stop the audio recording.
To stop the recording, you can click the red button again or press the spacebar on your keyboard.
Step 5: Edit the voiceover audio recording.
After you are done, you can edit the audio as needed. You can trim, split, adjust the audio level, change the voice, and apply various audio effects like denoise, wind removal, DeReverb, hum removal, hiss removal, and more.
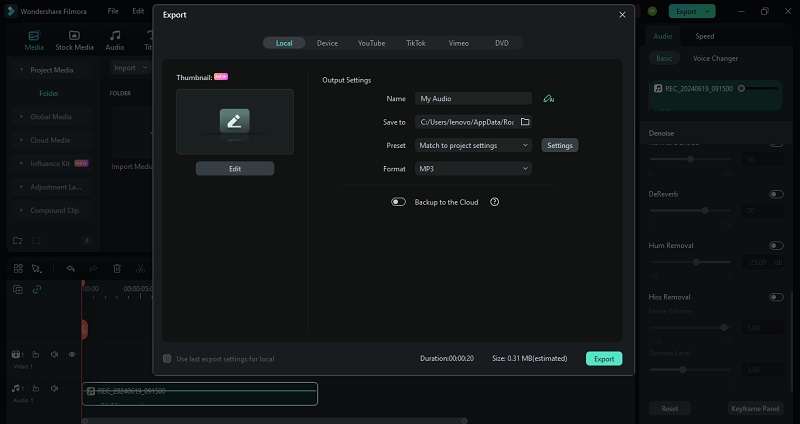
Step 6: Export the video.
To save and export the final video, click "Export." Then, rename the file and choose an audio file format, such as MP3, for saving.
Part 3. Record Audio Output Using Audacity
For those preferring a no-cost option to record computer audio professionally, Audacity is also highly recommended. Renowned as one of the most widely used audio capture software, Audacity excels in capturing system audio, recording multiple tracks simultaneously, applying filters to recordings, and offering extensive editing capabilities.

You can record, edit, and export audio files to various audio formats like MP3, WAV, AIFF, and more. However, achieving high-quality music files may require familiarity with its advanced settings and you may need to install plugins if necessary.
Compatibility: Windows, Mac, and Linux.
Here’s how to record audio output from a computer using Audacity:
Step 1: Download and install Audacity on your computer, then launch the application.
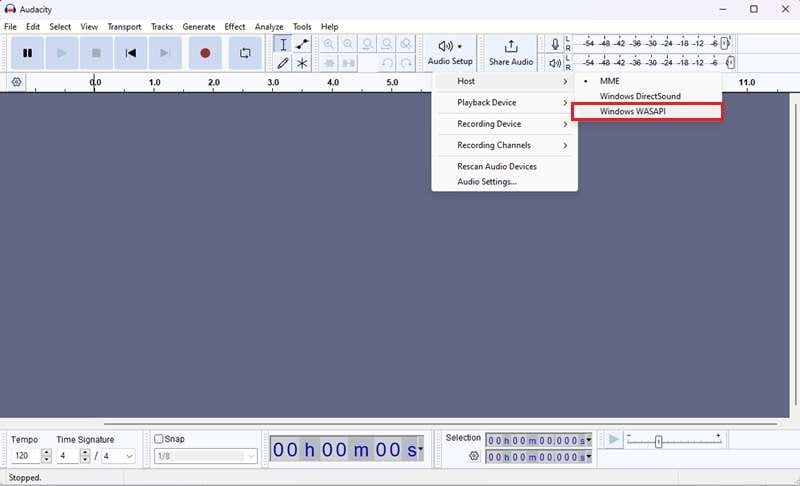
Step 2: On the top toolbar, click on “Audio Setup,” and select “Host” > “Windows WASAPI.”
Step 3: Click on “Audio Setup” again and choose your desired recording device.
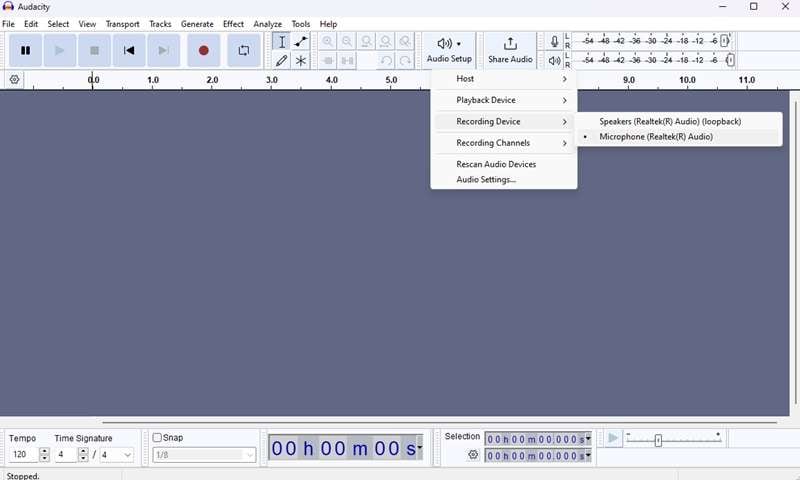
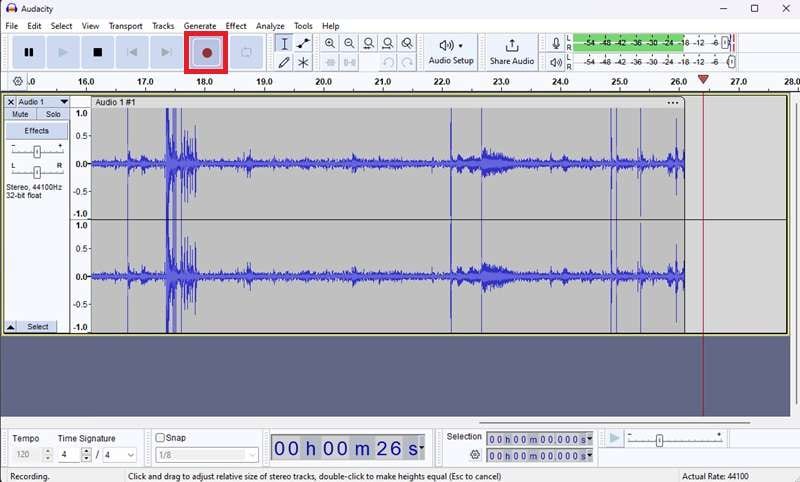
Step 4: Press the red circle button to start recording your audio.
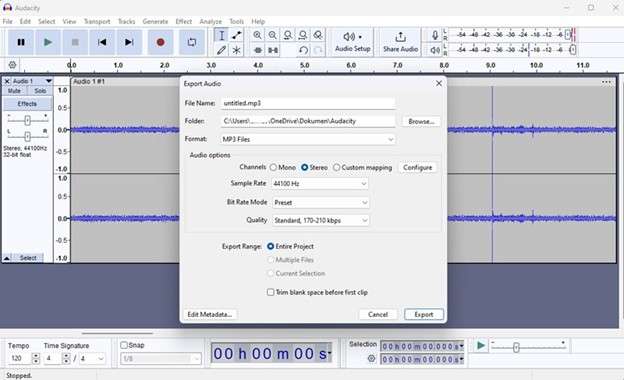
Step 5: After recording, go to “File” > “Export” to save your audio recordings and choose the file format you prefer. By default, recordings will be saved in MP3 format.
Part 4. Record Audio Output Using Windows Voice Recorder
For users who want to simply record audio from applications on Windows 10 or 11 without installing any third-party software, the Windows Voice Recorder (or Windows Sound Recorder in Windows 11) can be a great option. This built-in software is user-friendly and provides a straightforward way to capture sound.
Compatibility: Windows
Here are the steps to record sound on a computer on Windows 10 with Windows Sound Recorder:
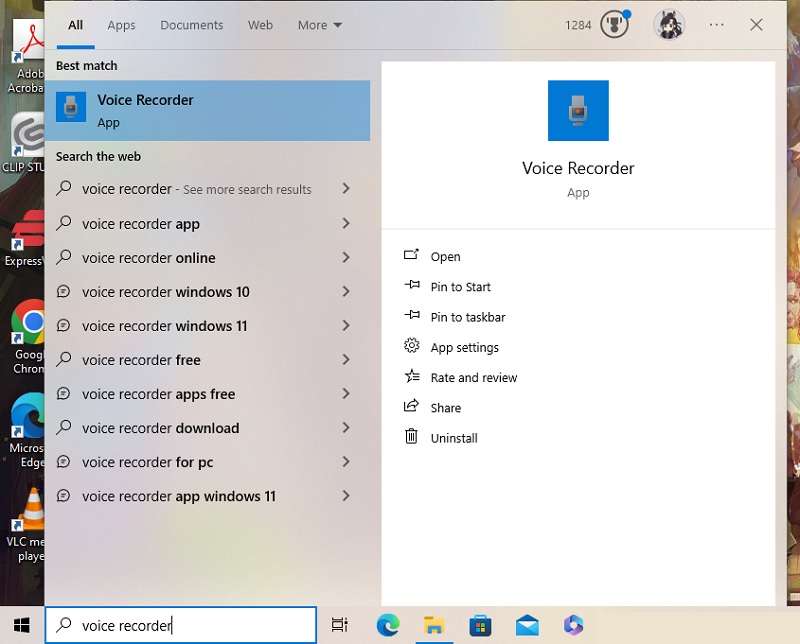
Step 1: Open the Start menu to search for Voice Recorder. Then, open the application.
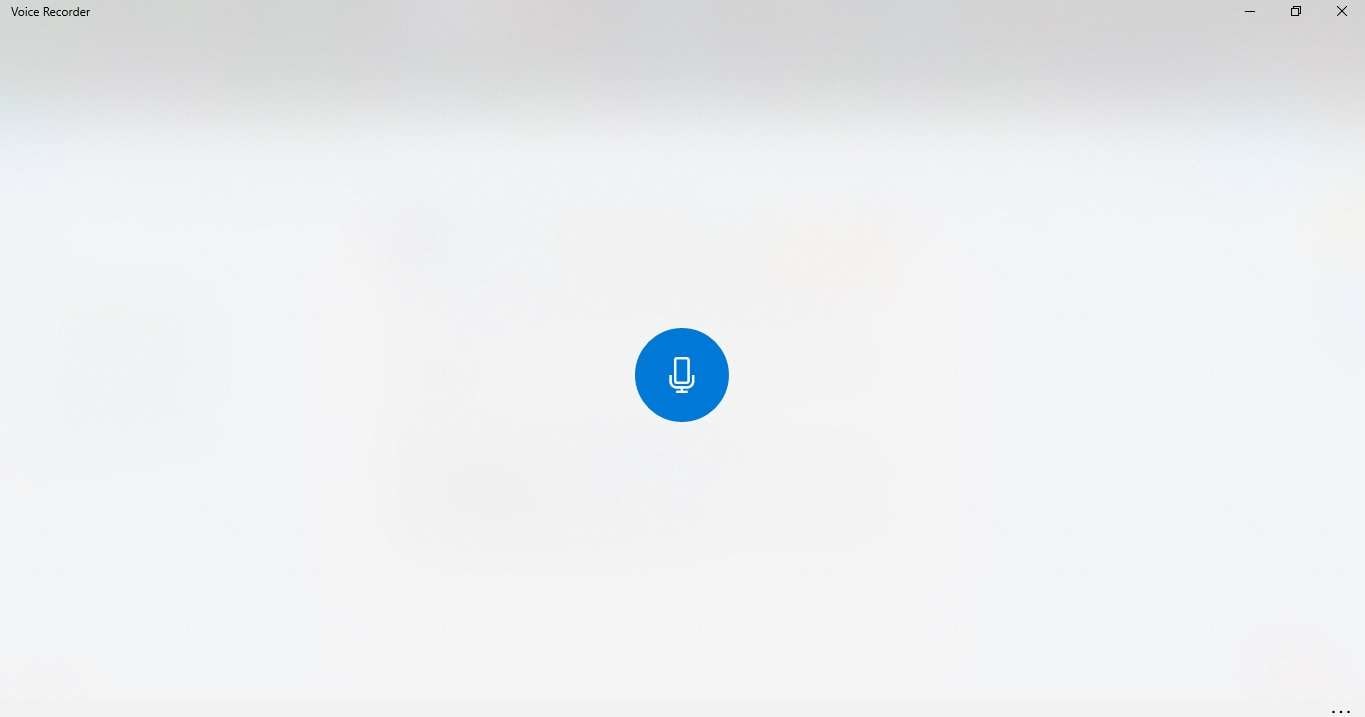
Step 2: Click the blue microphone in the center to start your voice recording. For Windows 11 users, you need to press the red button or use Ctrl + R to begin your audio recording.
Step 3: To end your recording, click Stop. Once done, you can find the recordings on your computer. Click more options (marked by three dots) and select “open file location” to locate the file.
Part 5. Tips to Get High-Quality Audio Recording
Does the recording not sound as good as you want it to? Then maybe you need to consider a few adjustments to improve the quality. Here are some tips that can help:
- Use a Good Audio Recorder
Invest in a reliable audio recording device or software like the ones we have mentioned above. High-quality recorders like Filmora or Audacity can capture sound more accurately and offer features that enhance audio clarity.
- Record in a Quiet Environment
Minimize background noise by choosing a quiet location for your recording. Turn off any noisy appliances and close windows to reduce external sounds.
- Use a Quality Microphone
A good microphone can make a significant difference in the quality of your recordings. Consider using a condenser microphone for detailed sound capture or a dynamic microphone for louder environments.
- Monitor Your Audio Levels
Keep an eye on your recording levels to avoid clipping and distortion. Ensure that your audio levels are within the optimal range to maintain clarity and prevent any sections from being too loud or too soft.
Conclusion
There are many easy ways to record audio from an application on Windows. By using built-in tools like Stereo Mix or Windows Voice Recorder, or opting for more advanced software such as Wondershare Filmora or Audacity, you can achieve high-quality audio recordings you need.
Remember to follow the tips provided for ensuring optimal audio quality, such as using a good microphone, recording in a quiet environment, and monitoring your audio levels. With the right tools and techniques, capturing clear and professional-sounding audio from your computer is accessible to everyone.
