Guide On New Features and Tools On Filmora
Video editing is a unique form of art that enables you to transform video quality and engagement to a whole new level. Apparently, many video editors use Wondershare Filmora for editing purposes. This tutorial is based on Filmora, and it will provide valuable knowledge on new features and tools. Stay connected till the end.
-
How to Place a Video Inside Text in Filmora | Tutorial
-
Guide on How to Place a Video inside Text using Filmora
-
Guide On How To Add a Video in Text Using Filmora
-
Guide On How To Add Cinematic Title Animation in Filmora
-
Guide On How To Add New Advance Text Customization In Filmora
-
Guide on Making Cinematic Titles in Filmora
-
Guide On How To Apply Best Title Effects And Text Animations in Filmora 11
-
Guide On How To Add Lyrics And Animation To Song Using Filmora
Guide On New Features and Tools On Filmora
What you need to prepare:
- A computer (Windows or macOS)
- Your video materials.
- Filmora video editor
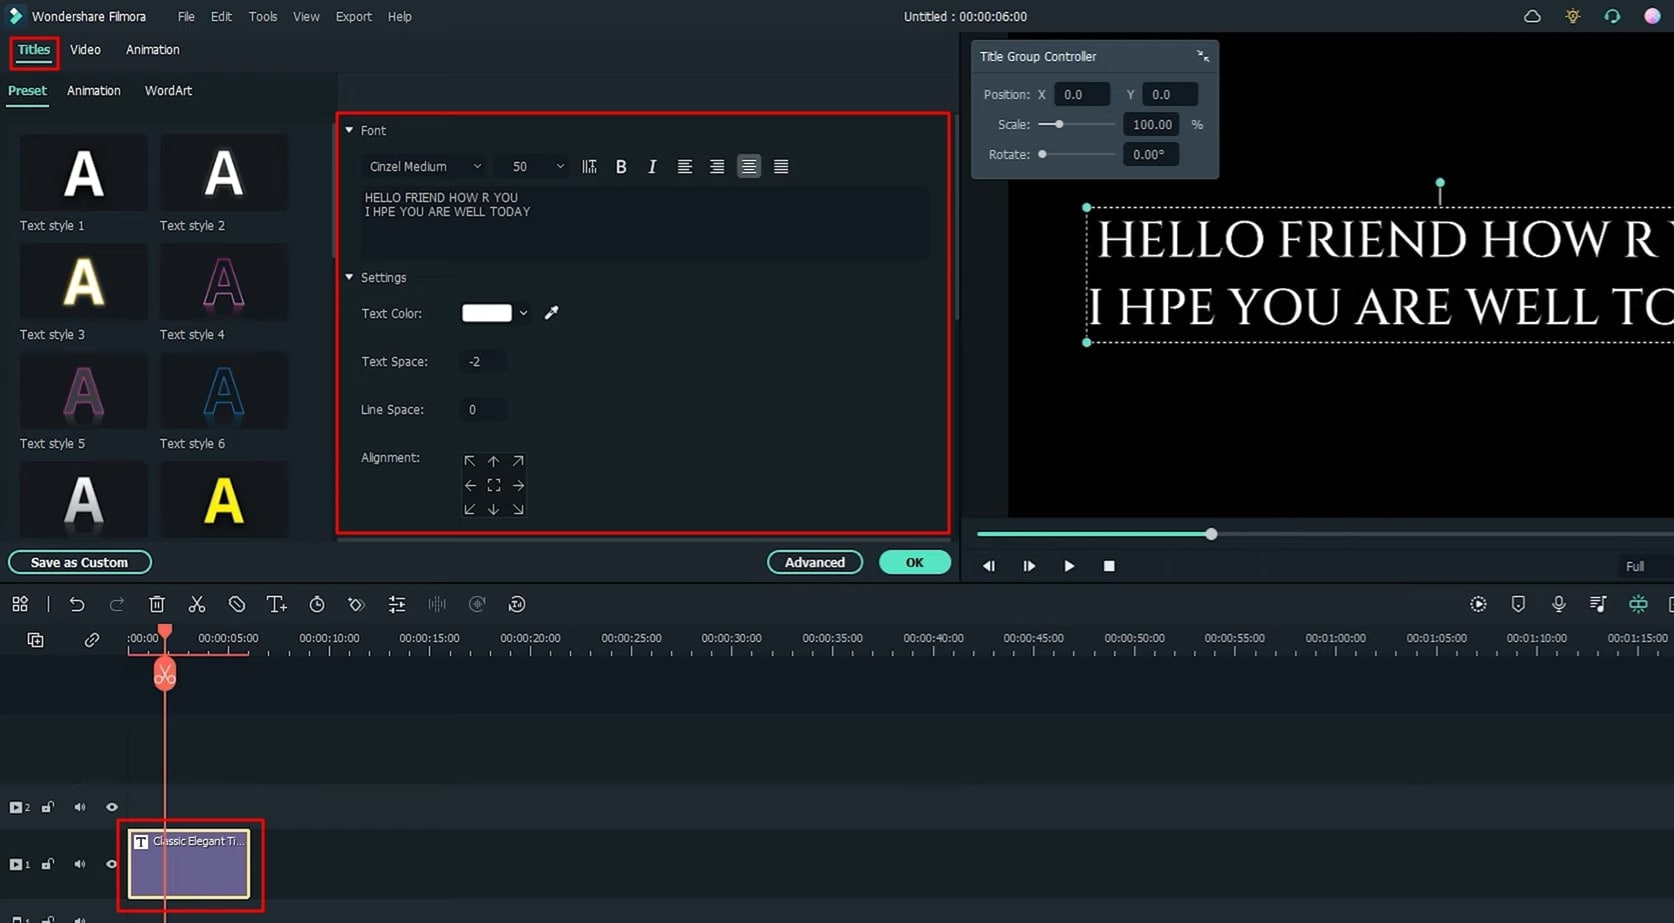
Add and Customize Text Title
Navigate into the “Titles” track from the top of your screen, select any title option, and drag it to the timeline below. Double-click on the title track to edit its text, font, style, size, layout, and other properties.
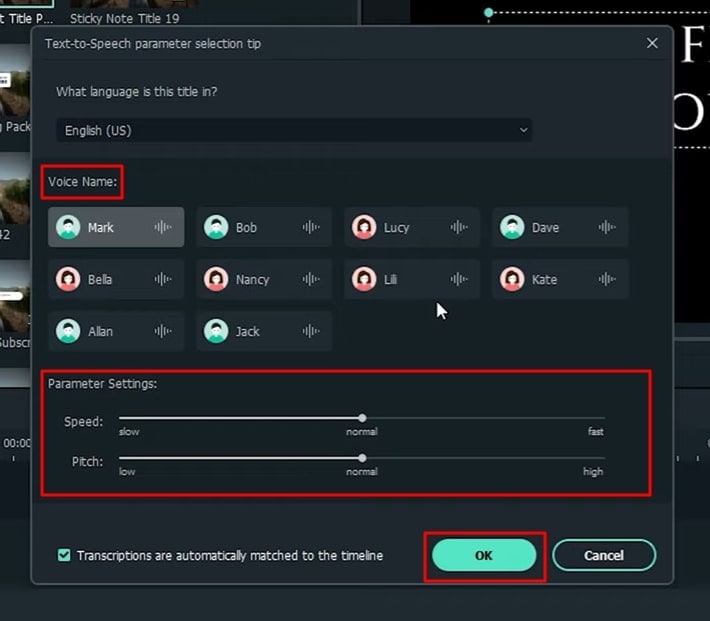
Utilize Text to Speech Functionality
To add voice to your text, click the "Text-to-Speech” icon. A window will open where you can select the language of your title, and from the "Voice Name," select the voiceover name from the available options. From the "Parameter Settings," you can also adjust the "Speed" and "Pitch" of the voiceover artist.
Click "OK" when you're done with changes. The audio will automatically be added to your "Media" section and your timeline. You have to adjust the duration as per your requirements.
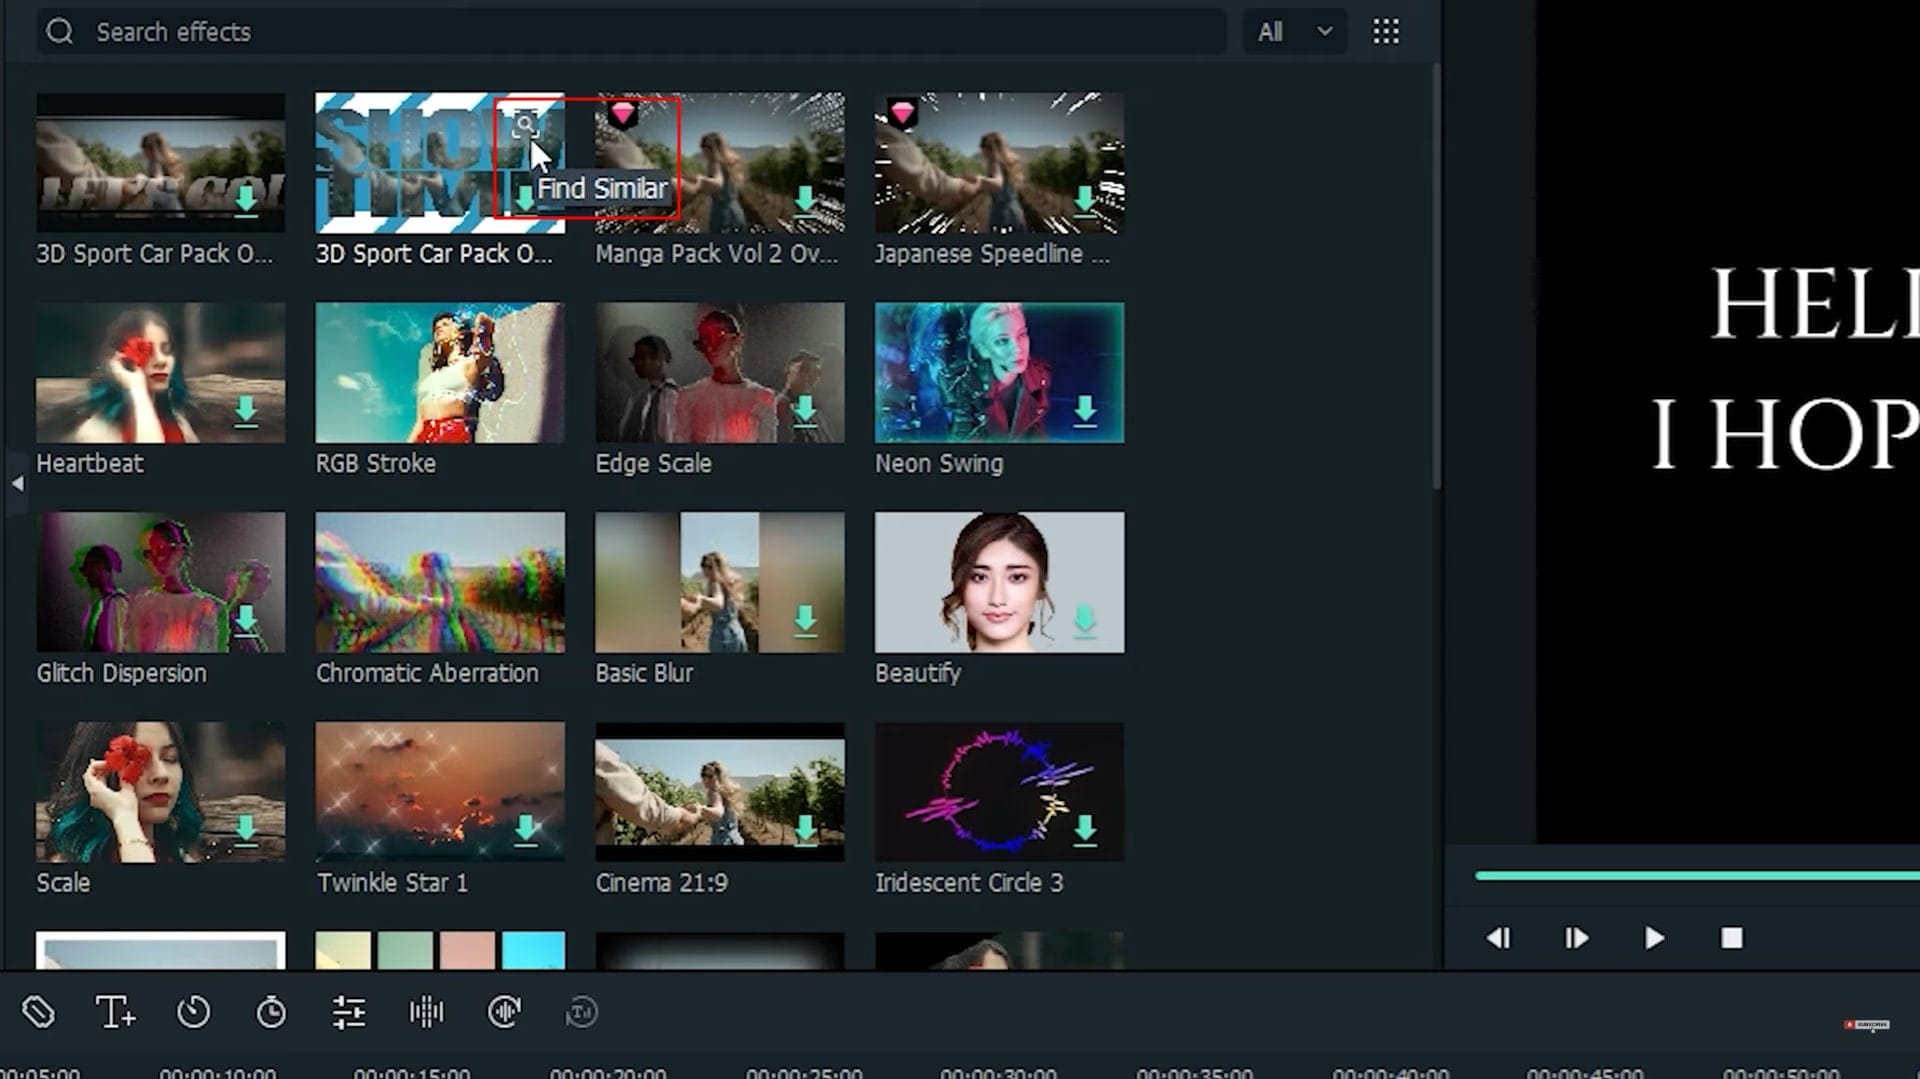
Find Similar Effects for the Project
Move into the "Effects" tab from the top of your screen, select your desired effect from the given options, and in the top right corner of the effect, choose the "Find Similar" button. Now you’ll see all the related effects according to your selected effect.
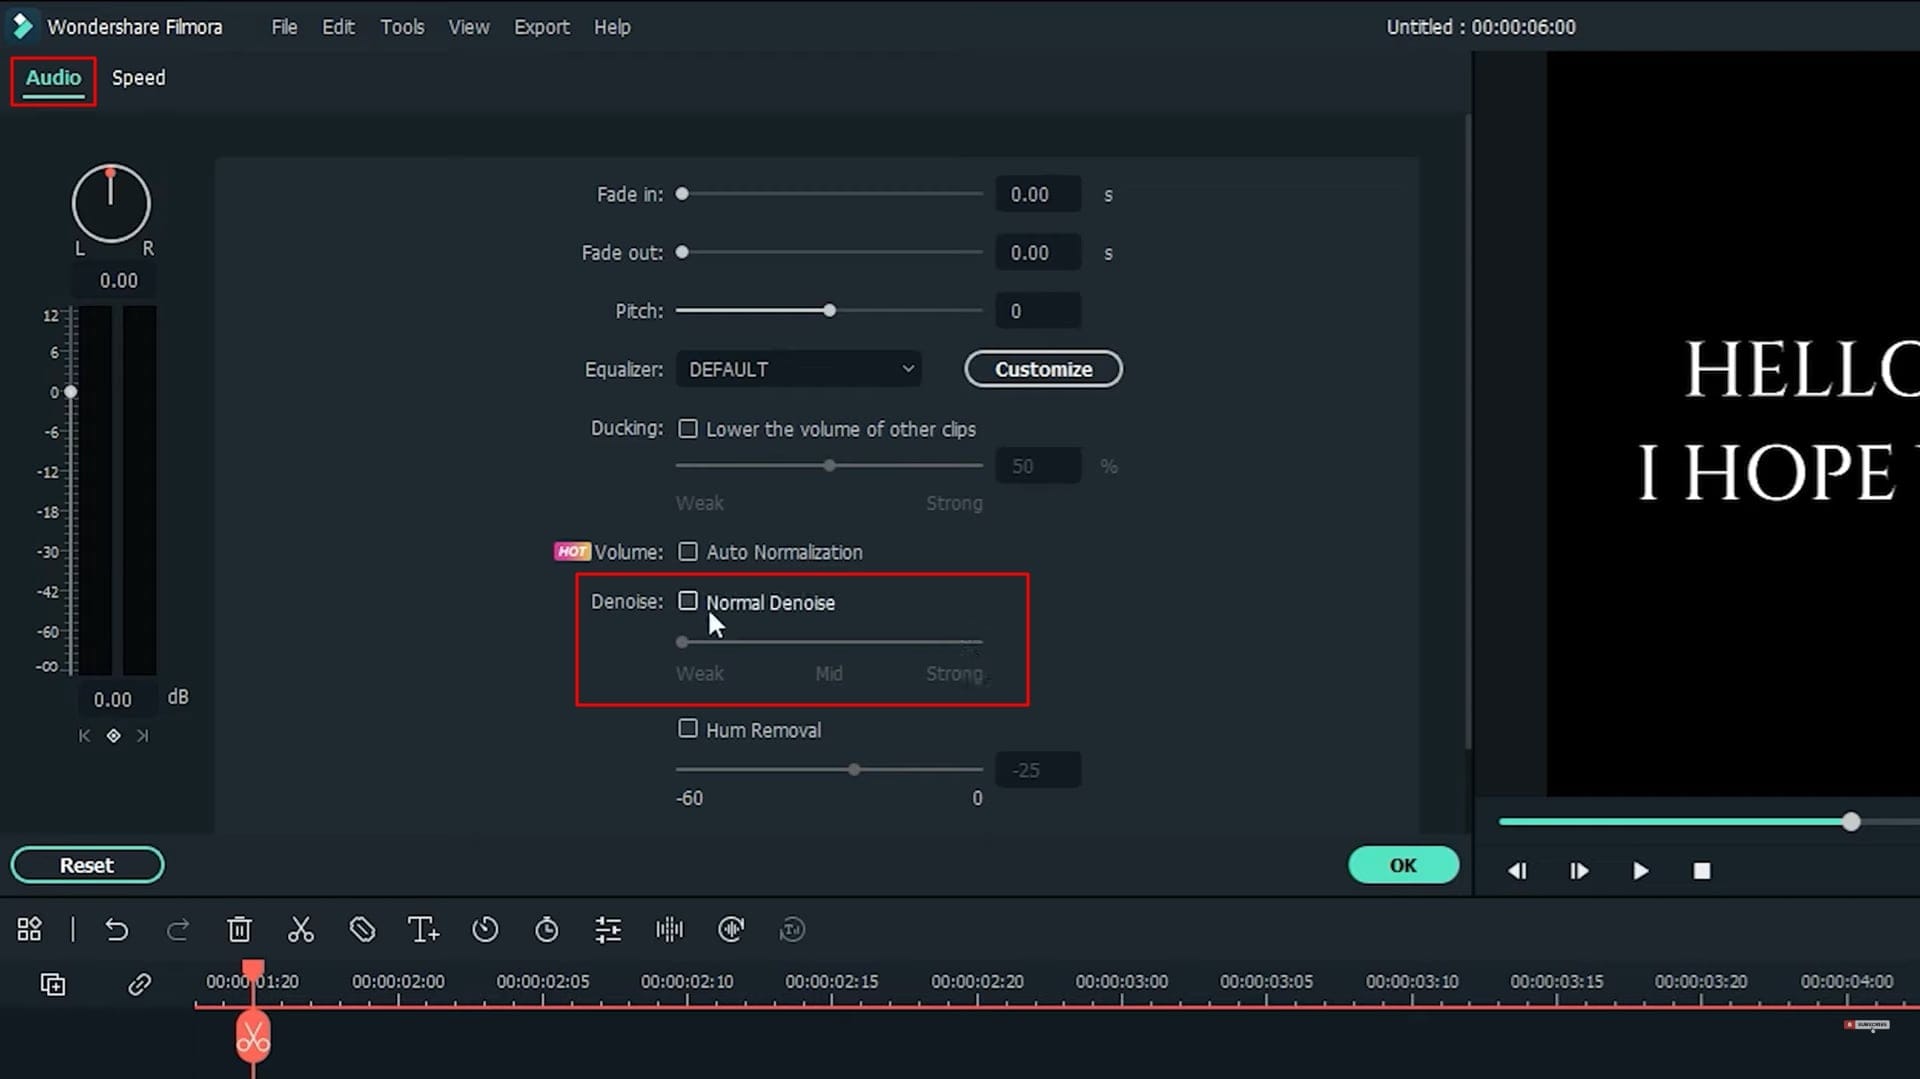
Use Denoise Tools to Adjust Sound
Double-click on your audio track if you're using audio in your project and want to edit the sound quality or solve the background noise issue. A window will appear on your screen, and you can now adjust the sound with multiple adjustments available.
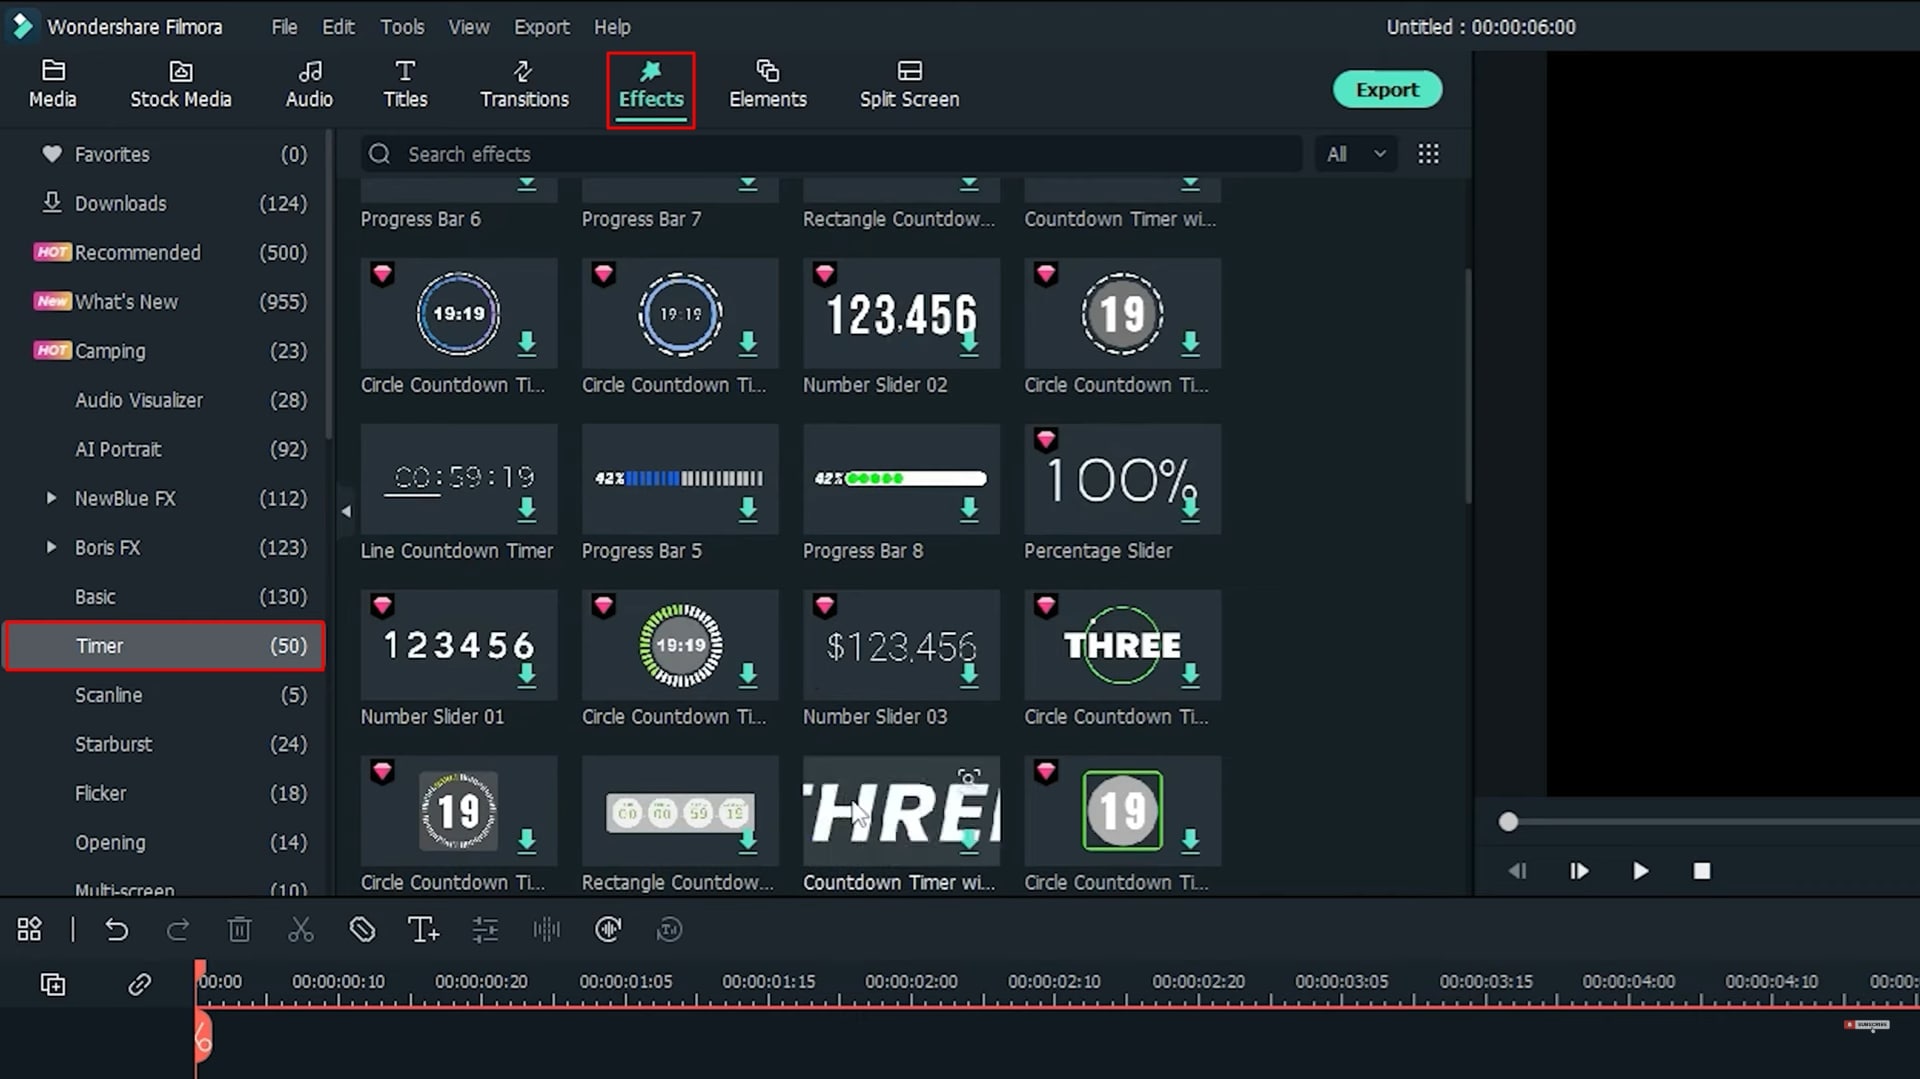
Integrate the Timer Effects
To make your video more interesting, adding a timer effect is a great option. For this, click on the "Effects" option from the top, and select the "Timer" category from the left. Now you'll see a range of timer effects in front of you. Select desired option and add it to the timeline below.
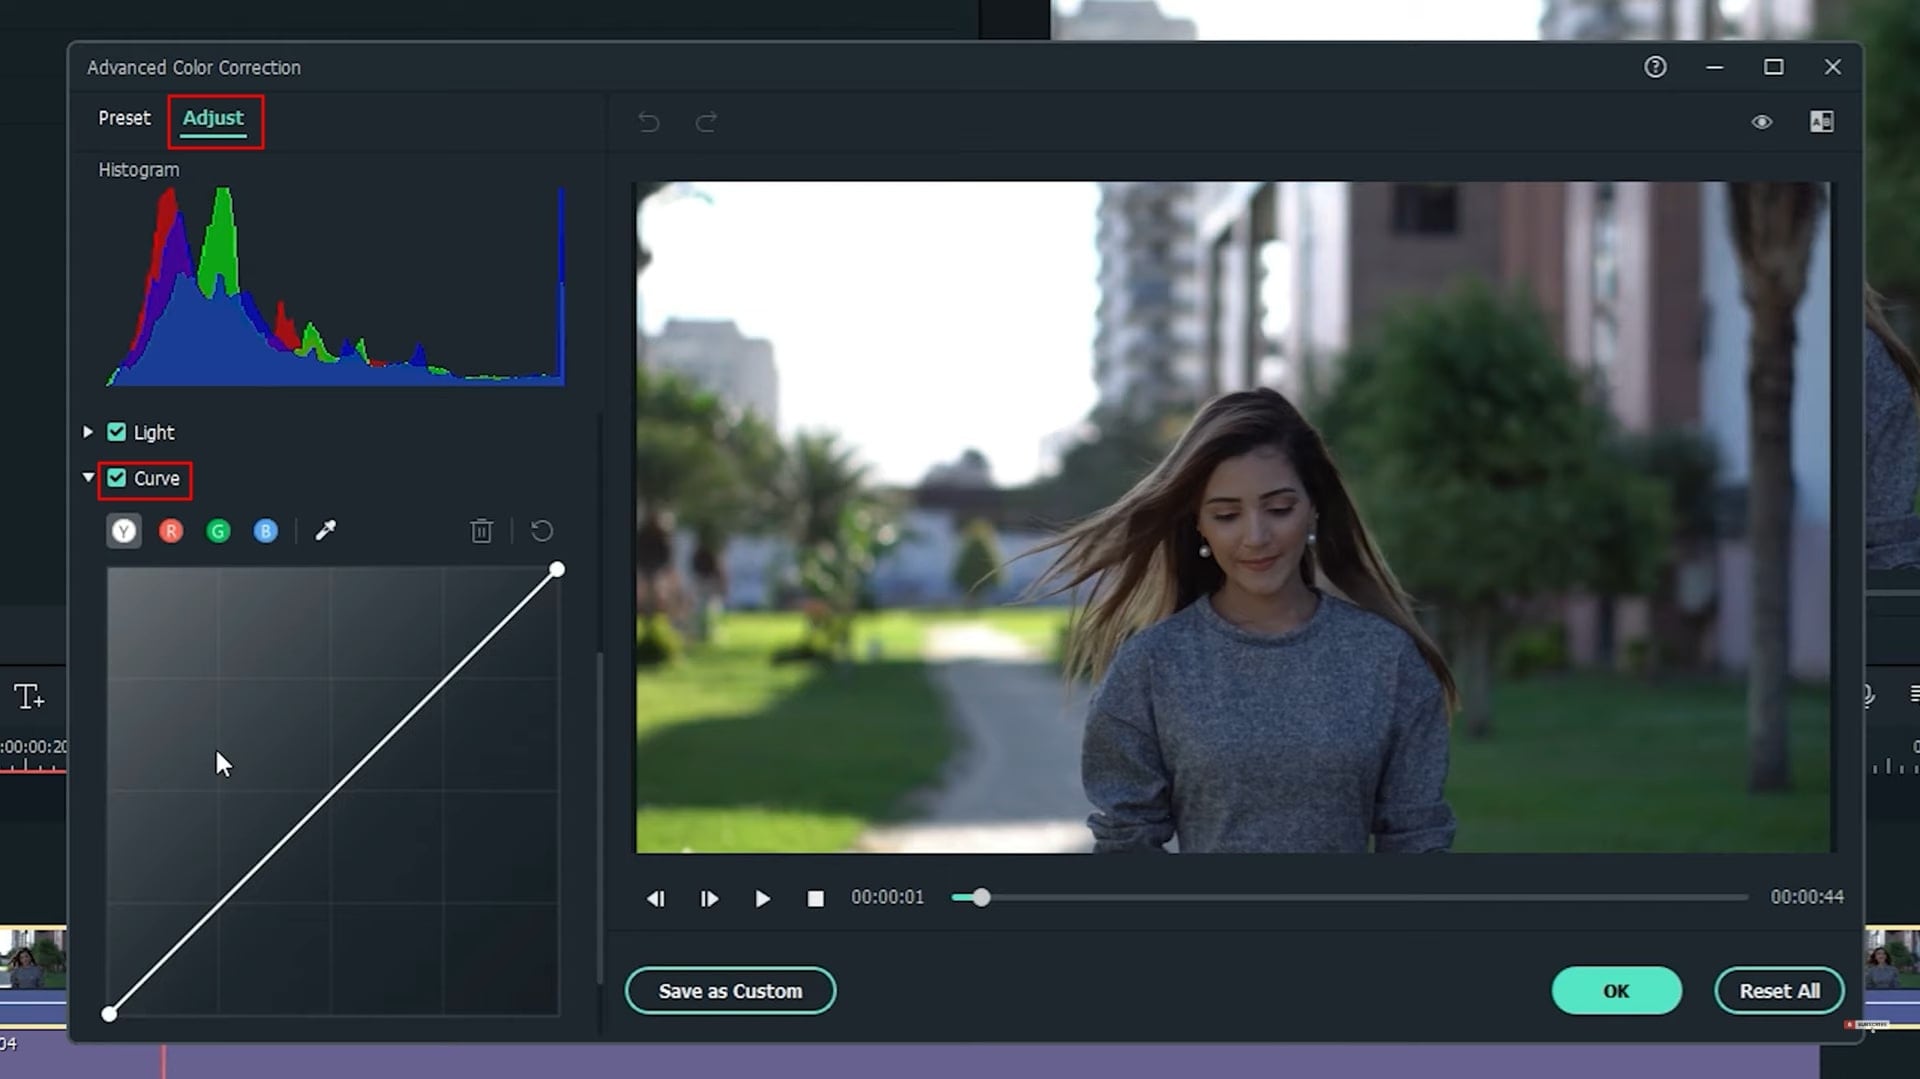
Apply Curve Tool Effect to the Video
Double-click on your video track from the timeline, and from the window, select "Color," click "Advanced," and access the option of "Adjust." A screen will appear before you; scroll down and turn on the "Curve" option. Now from the available points on the graph, you can adjust the curve tool effect as required.
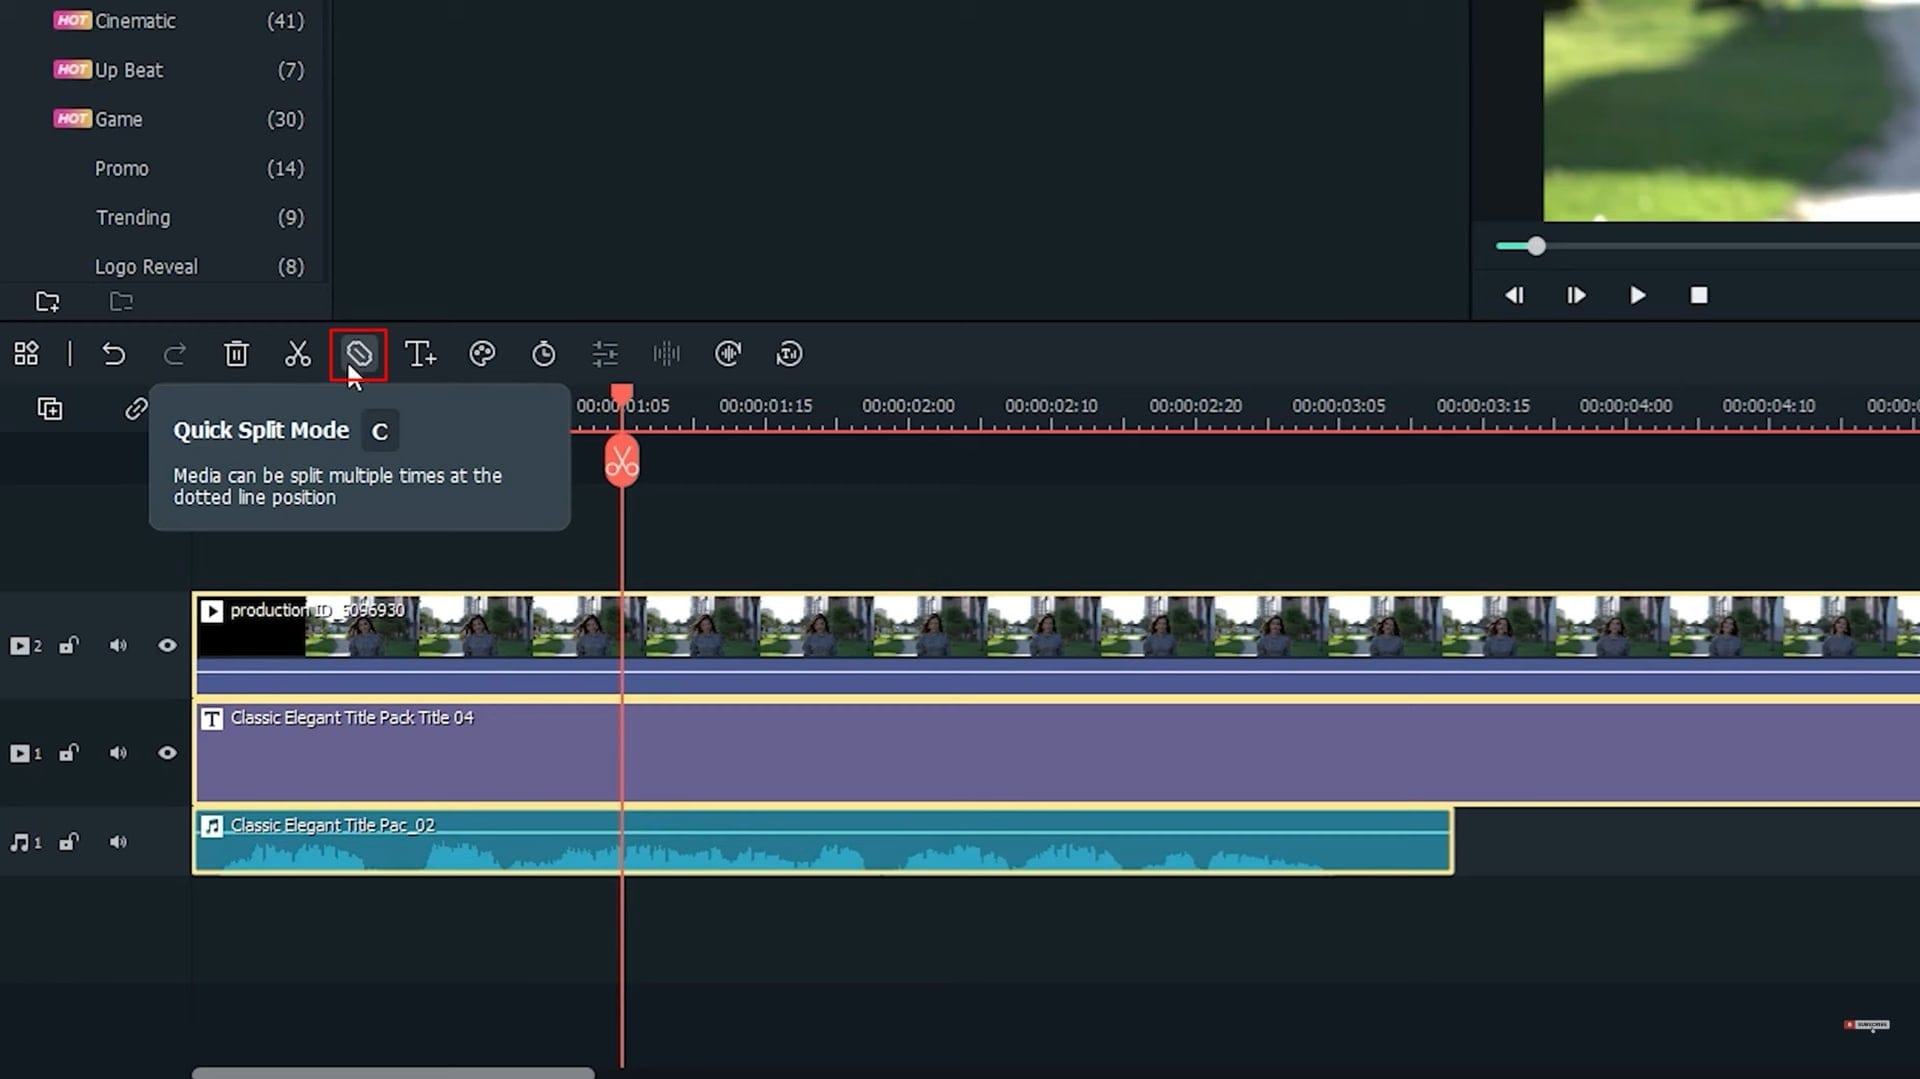
Quickly Split Timeline Tracks
To split your video tracks into different parts within a quick interval, click on the "Quick Split Mode" icon from the timeline panel bar. Afterward, with a single click of your mouse, a split will be added to your respective tracks in the timeline as required.
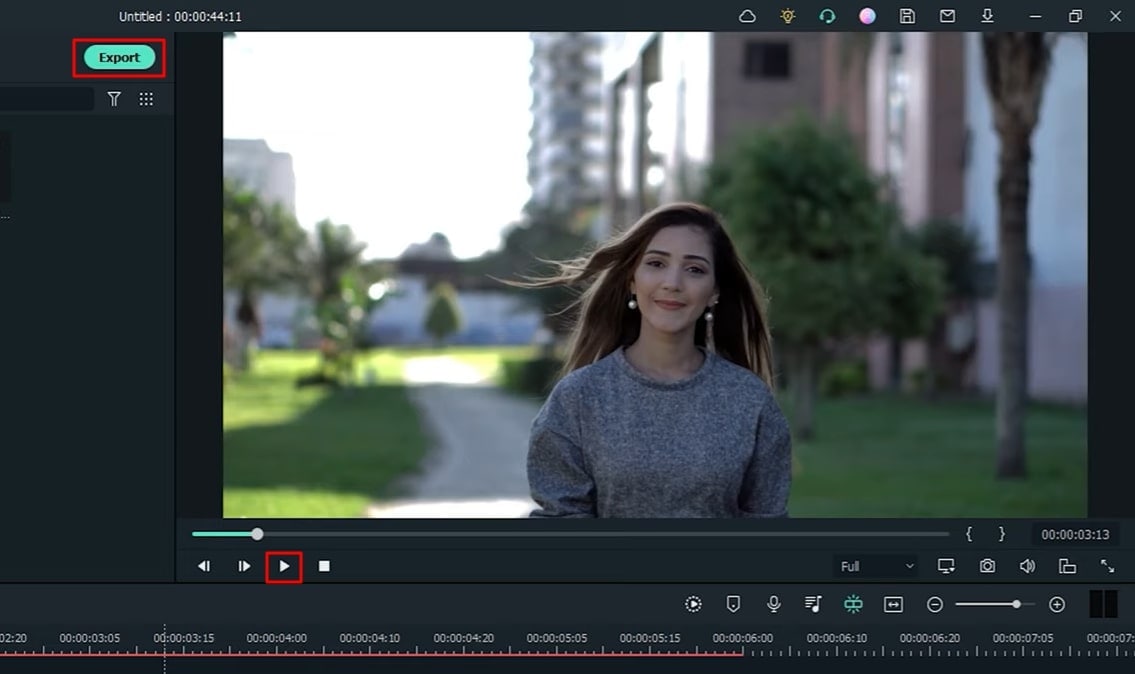
View Plus Save Project on Device
View your final video by clicking on the "Play" icon under the screen. Moving further, click the "Export" button to save the video to your device in the chosen file location.
Video editing is an increasingly growing skill with a lot of demand in and around. Already, a majority of video editors are using Filmora to execute their artistic creativity with respect to video editing. If you're also a video editor on Filmora, this tutorial is undoubtedly going to help you with the effective utilization of the latest features and tools.


Speak Your Mind