Guide On How To Apply Best Title Effects And Text Animations in Filmora 11
Videos are always considered exceptional because of their exciting visual appeal. Adding title text on videos does make them more special and definitely more interesting. Do you want to add the best title effects and animations to your most important videos? This tutorial on Filmora is your trusted solution for this task.
-
How to Place a Video Inside Text in Filmora | Tutorial
-
Guide on How to Place a Video inside Text using Filmora
-
Guide On How To Add a Video in Text Using Filmora
-
Guide On How To Add Cinematic Title Animation in Filmora
-
Guide On How To Add New Advance Text Customization In Filmora
-
Guide on Making Cinematic Titles in Filmora
-
Guide On How To Add Lyrics And Animation To Song Using Filmora
Transcript
Hey guys! How are you all? Today in this video, I will let you know how you can utilize cool enjoyable features of Filmora 11 for editing its titles and text by adding animations and how very beautifully animated text could be added. So in this video today, I’m going to tell you about all this.
As you can see on my screen, how can you add a similar effect to your video? So first, you've to download and install Filmora 11, and here you can add any media file in which you want to add animation. For example, I will select any city from here, and I am going to add this video. For the time it's getting downloaded, we can do another thing.
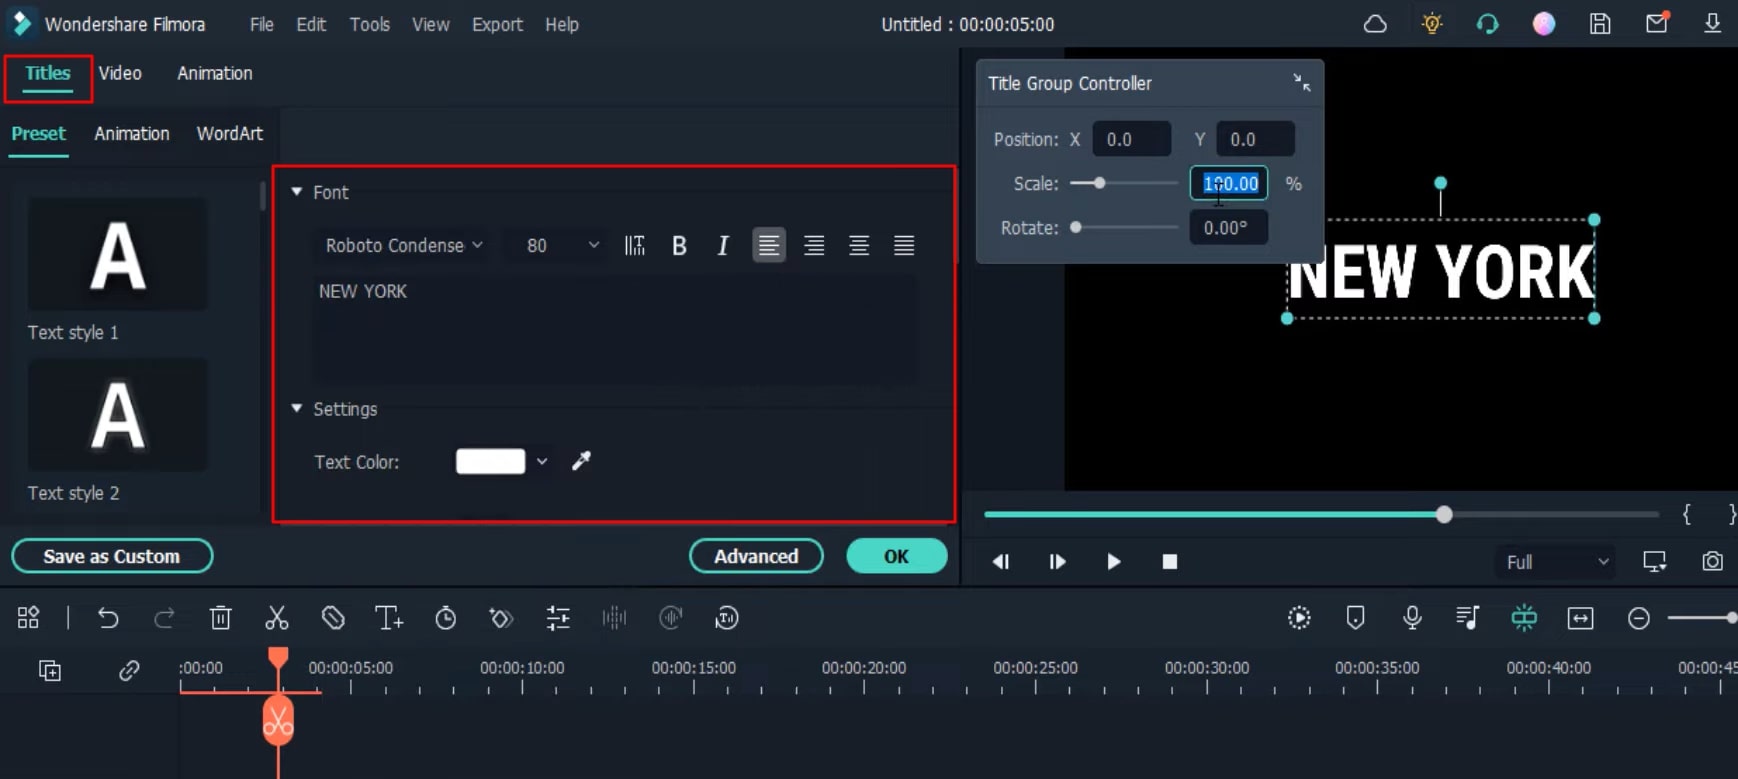
We will go to the top and click "Titles." After that, we will search for the default title and add it. After this, here we will write New York. Here we will change its font to "ROBoto," and we will change its size from 100 to 200.
Guide On How To Apply Best Title Effects And Text Animations in Filmora 11
What you need to prepare:
- A computer (Windows or macOS)
- Your video materials.
- Filmora video editor
Open Filmora and Select Video
After you've downloaded and installed the Filmora application on your device, open it to start your video editing process. Once the application is started, click the "Media" tab from the top-left side of the screen, and then press the "Import Media" button to import your required video from the device.
If you want a ready-made video, press the "Stock Media" tab from the top and select your desired video from the options.
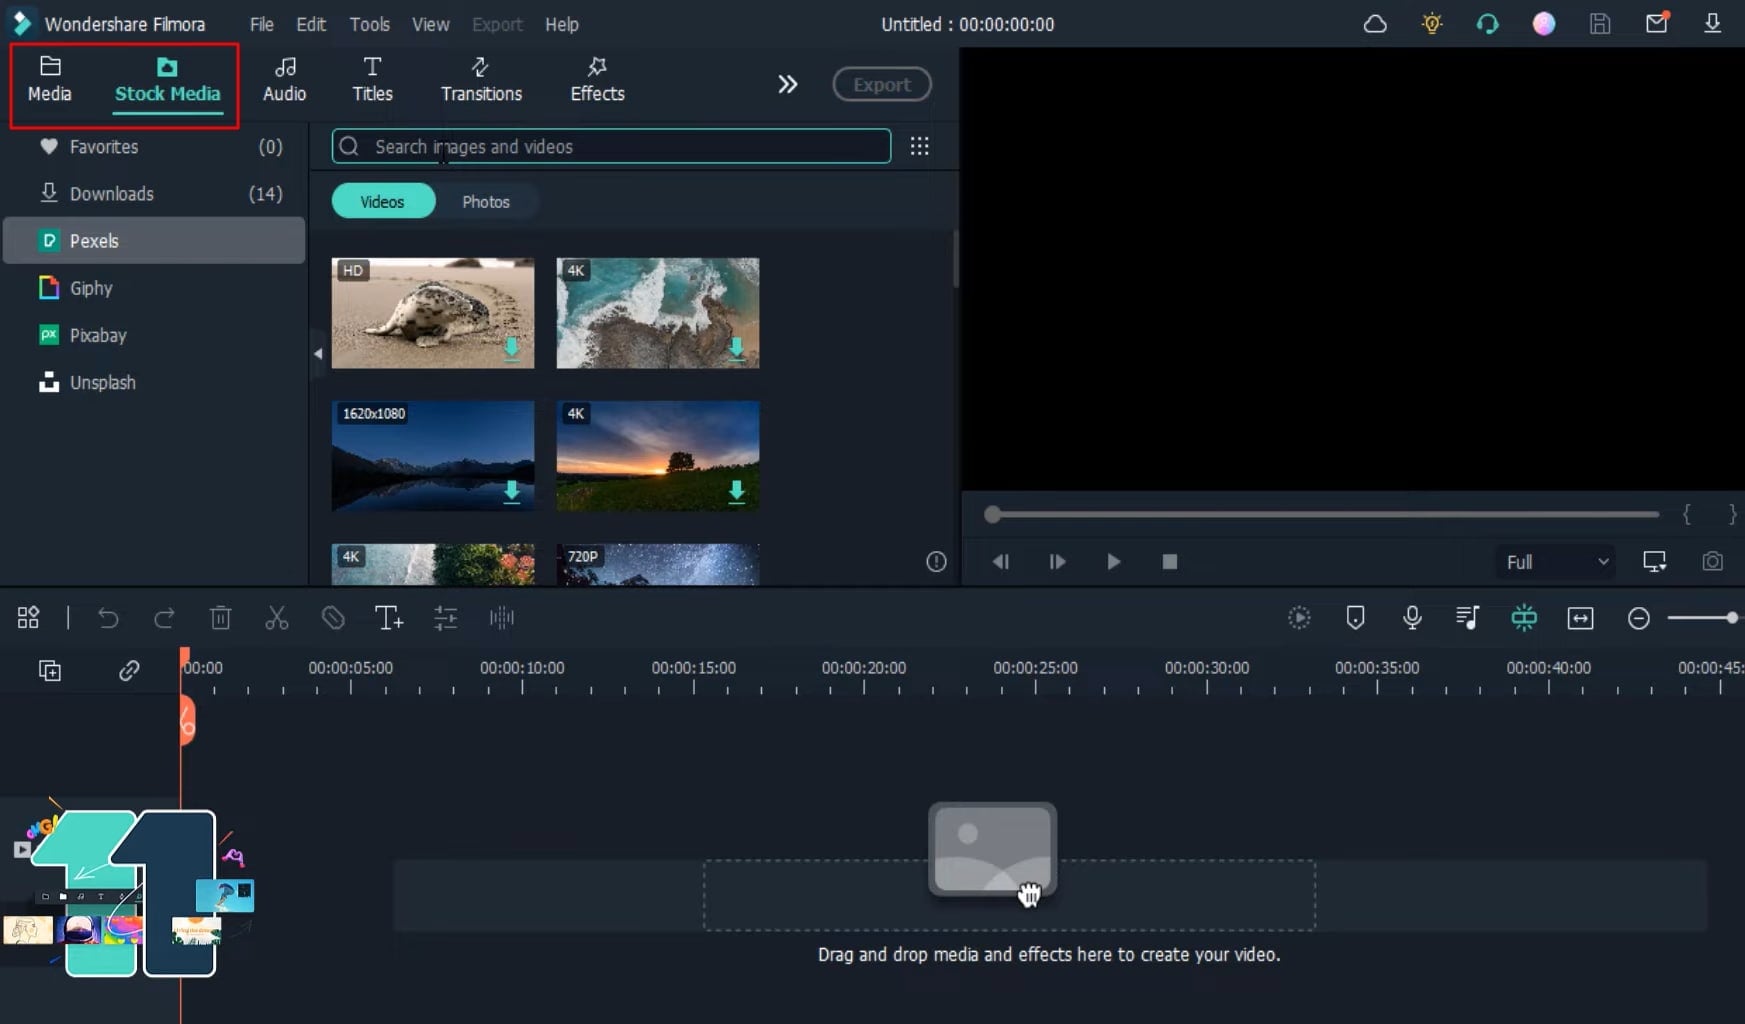
Add Media to Timeline
Whatever the video category you've selected, drag it to the project timeline below to continue the editing process.
Select and Edit the Text Title
Choose the “Titles” tab from the top of the screen and select “Default Title” for custom editing. Now add the title to the project timeline. Double-click on the text track, and an editing window will open that allow you to adjust the title’s text, font, color, size, style, layout, etc.
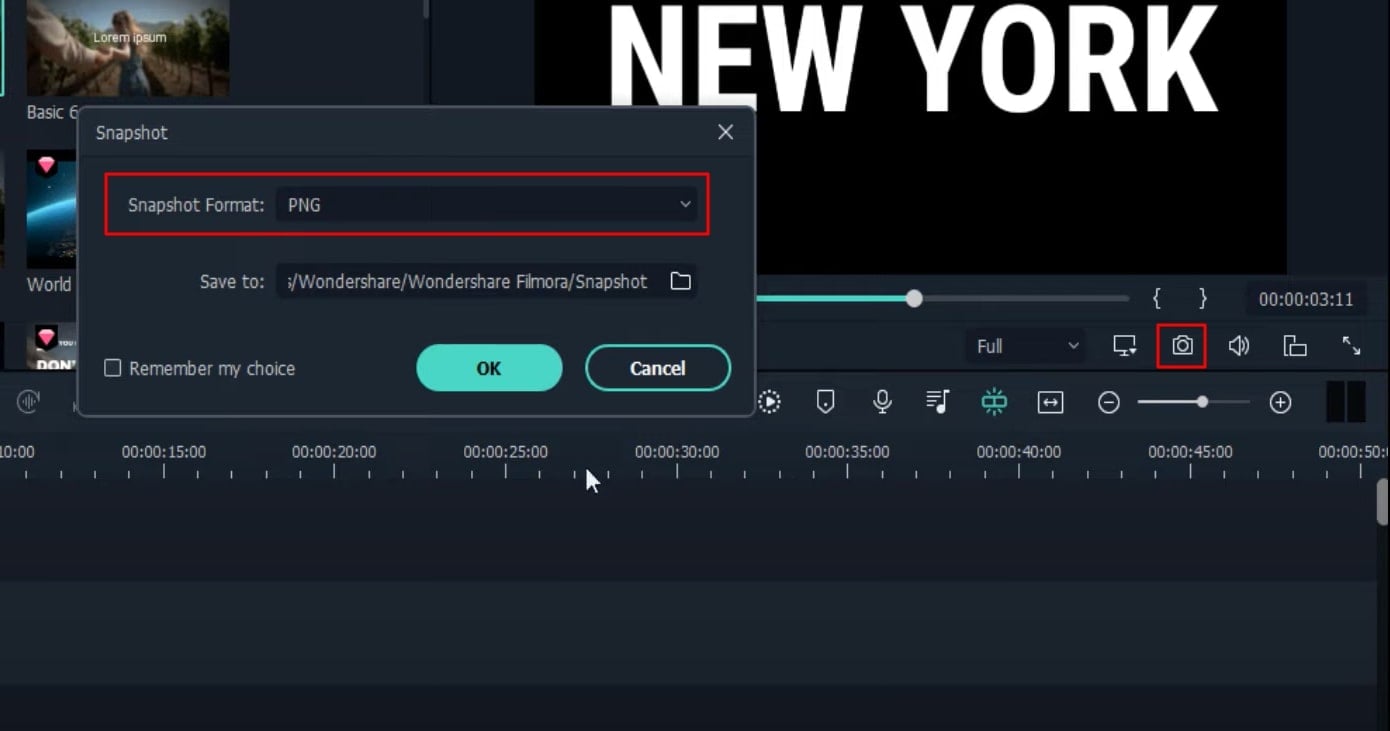
Take a Snapshot of your Title for Adding to the Project
Now you've to take a screenshot of your title, for which you have to click the "Snapshot" icon from the right side of the screen. Set the Snapshot Format to "PNG" and drag the screenshot to the project timeline below.
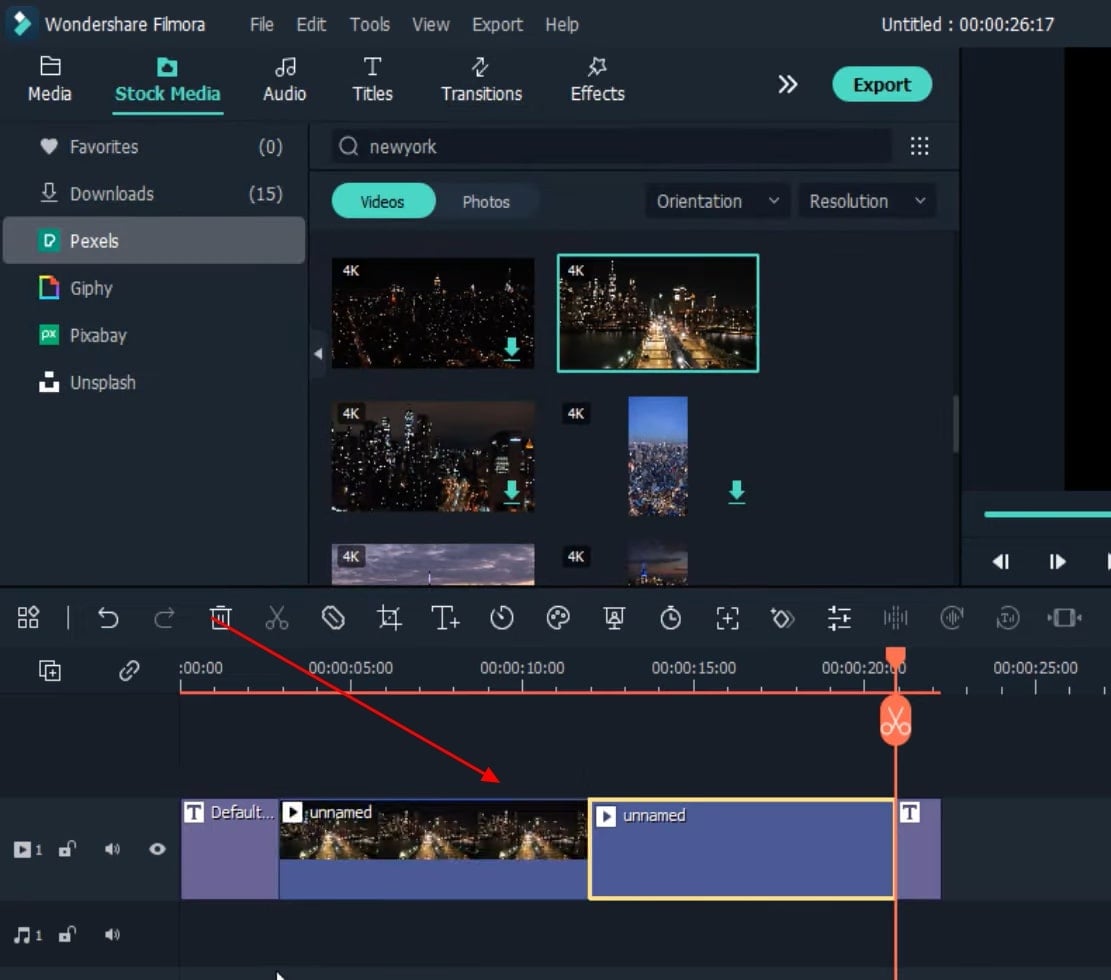
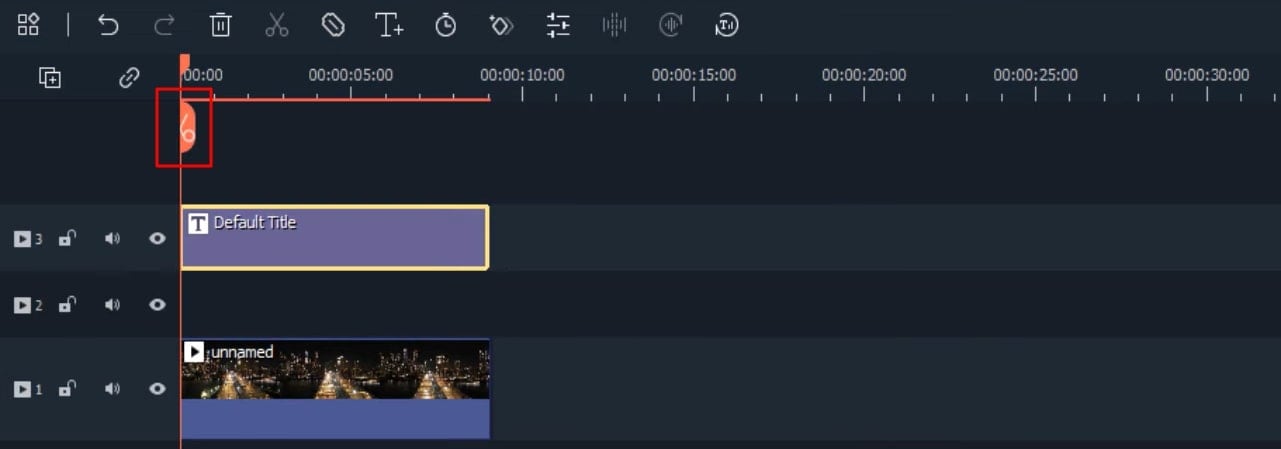
Adjust the Timeline Tracks
Now you’ve to set the duration of your entire tracks in a timeline and make their duration similar. You can do this by using playhead. If you need to delete unwanted parts of the video, it's possible by using the "Scissor" icon from the playhead.
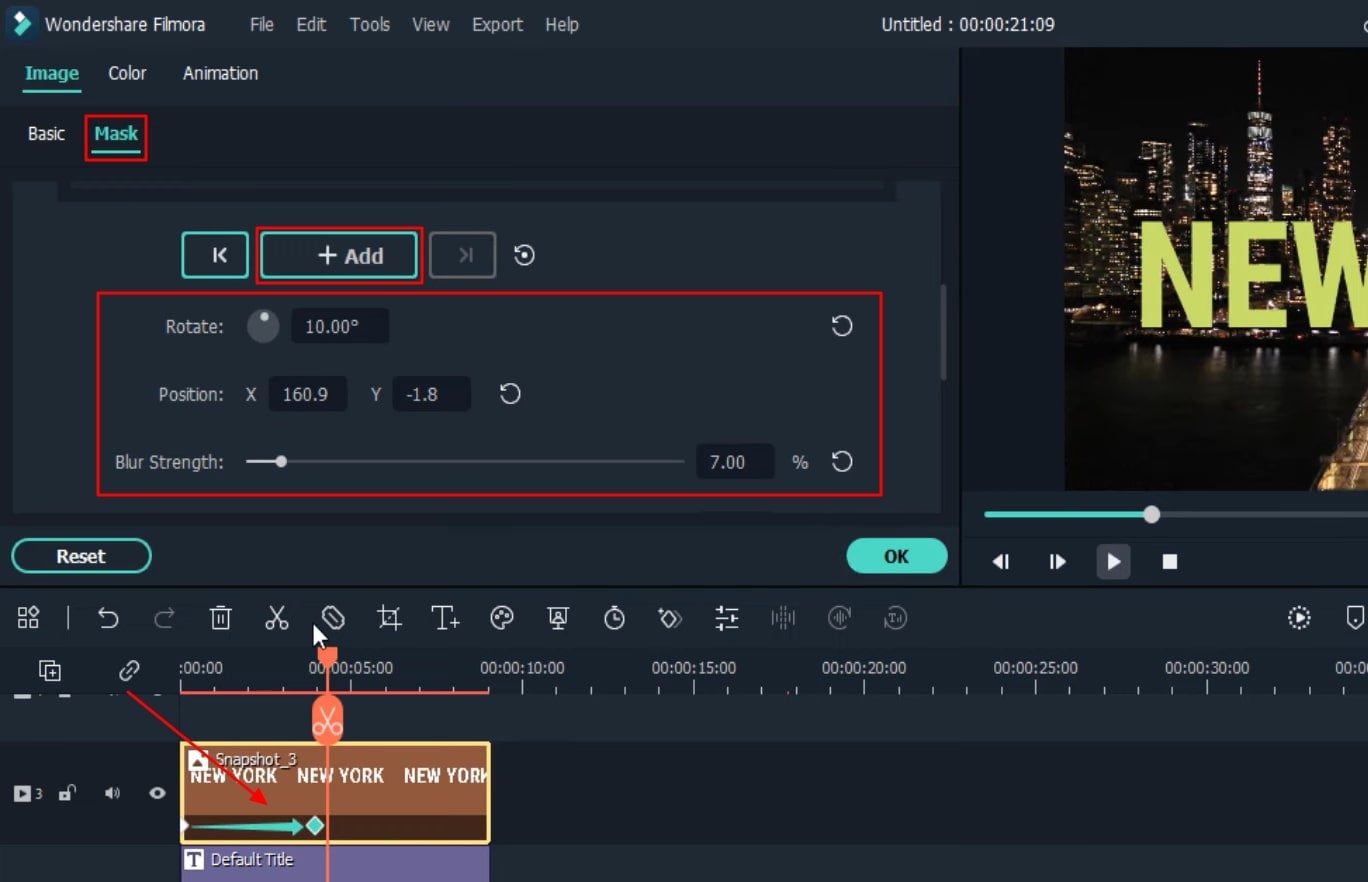
Apply Masking to Screenshot
Double-click on the screenshot from the timeline, and a window will open where you've to select "Image," then "Mask," and choose "Double line." After this, you can adjust the size and margins of the masking effect on the screen at the right. You can further adjust your masking effect from the editing window on the left by editing its “Blur Strength,” “Position,” “Rotation,” and much more.
Once the changes are done, apply a keyframe at the start of the video by pressing the “Add” button, and you can use playhead to place the keyframe in the desired position in the timeline. You can add as many keyframes as required.
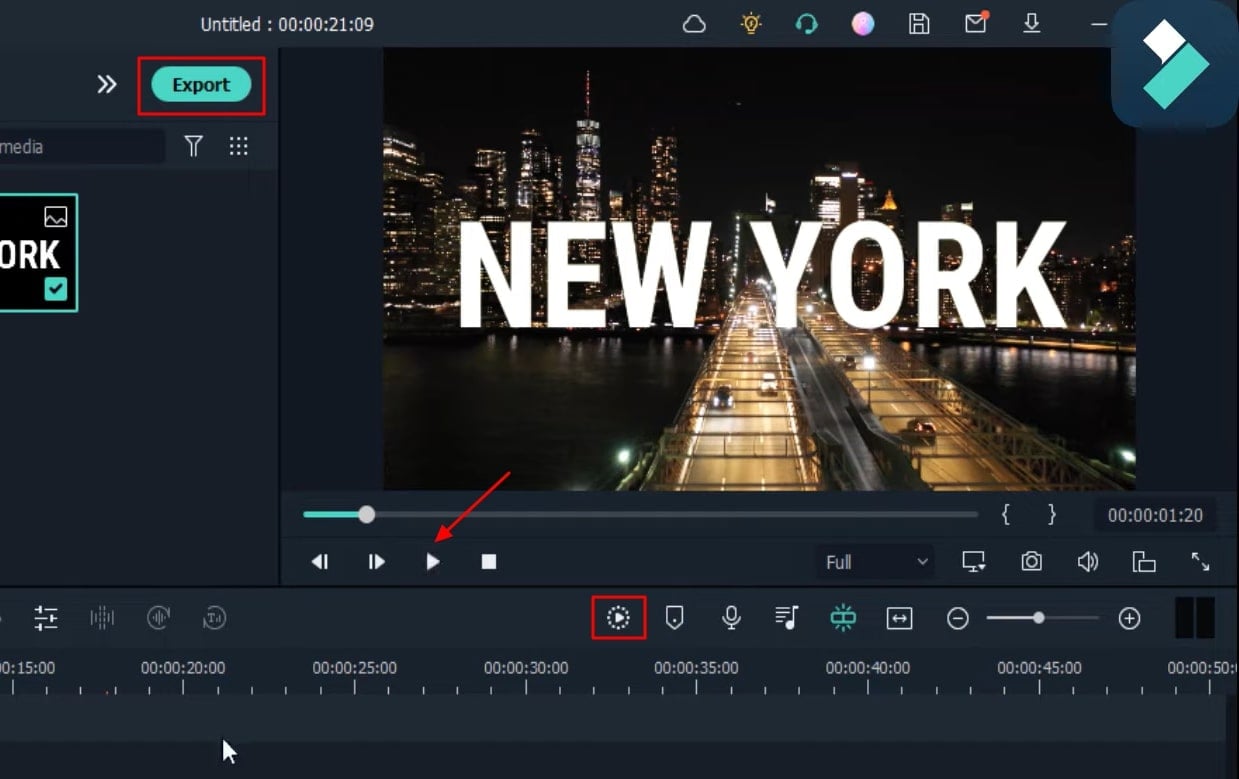
Preview, Render and Export Your Video
Once your final video is ready, it’s time to view it. Press the “Play” button and enjoy your video with text. Upon pressing the “Render Preview” icon, you can also witness a smooth playback of your video. To save your video on the device, click the "Export" button from the top, select the desired location, and your new video will be exported.
Videos are a very interesting form of visual media that stores crucial memories of our lives. Thus compromising on their quality is not a way to go, so adding titles and animations would be a perfect idea to make them more special and enthusiastic. Subsequently, this tutorial on Filmora has everything you need to start.


Speak Your Mind