

 ChatGPT
 Perplexity
 Gemini
 Claude
 Grok
Grok
Do you know what it takes to create good-quality videos that keep us engaged for a long time? Video editing has turned itself into the perfect answer to the problem. A well-edited video can undoubtedly transform an ordinary moment into an extraordinary experience. Other than engaging your audience, it leaves a lasting impression on them. One of these editing techniques includes applying tilt-shift after effects.
You can communicate complex ideas with precise cuts, transitions, and effects. Many different effects bring associating benefits to your content. Similarly, tilt-shift effects can improve the perspective of your video content. This effect lets you focus on a specific area of your video content by blurring the others. By adding a tilt-shift effect, you can entertain and inspire others with good-quality video content.
In this article
The best editor helps you edit and enhance videos without hassle.

Part 1: How Have Video Editors Improved Over the Years?
Video editors have improved over the years with new and better technology. Some tools let us create tilt-shift after effects with ease. However, let's discuss some key ways video editors have improved.
1. User Interface and Ease of Use
Modern video editing software has improved its user interface design and intuitiveness. Interfaces with drag-and-drop functionality and prominent editing options are now available. This has improved the visual feedback, making it easier for users to edit videos.
2. Real-Time Editing and Preview
Video editors provide real-time editing and preview capabilities. They allow you to see the changes you make immediately without time-consuming rendering. This feature enhances the editing workflow and even speeds up the editing process.
3. Advanced Editing Tools and Effects
New editing software has improved in providing better editing tools and effects. Editors can now access features like advanced color correction and countless enhancement effects. Such video editors now offer motion tracking, 3D effects, audio mixing, and more. These tools enable editors to achieve more professional and creative results.
4. High-Resolution and Multiformat Support
Editing tools have adapted to support the increasing demand for high-resolution videos. Now, you can import and edit 4K and even 8K resolutions. They also provide compatibility with various video formats, codecs, and file types. This allows you to use diverse media sources to deliver content on every platform.
5. Collaboration and Workflow Integration
These video editors now offer enhanced collaboration features to the user. This gives multiple editors the leverage to work on the same project at the same time. Integration with cloud storage has also helped us in many ways. Features like project sharing and version control facilitate seamless collaboration among users.
Part 2: What is the Tilt-Shift Effect?
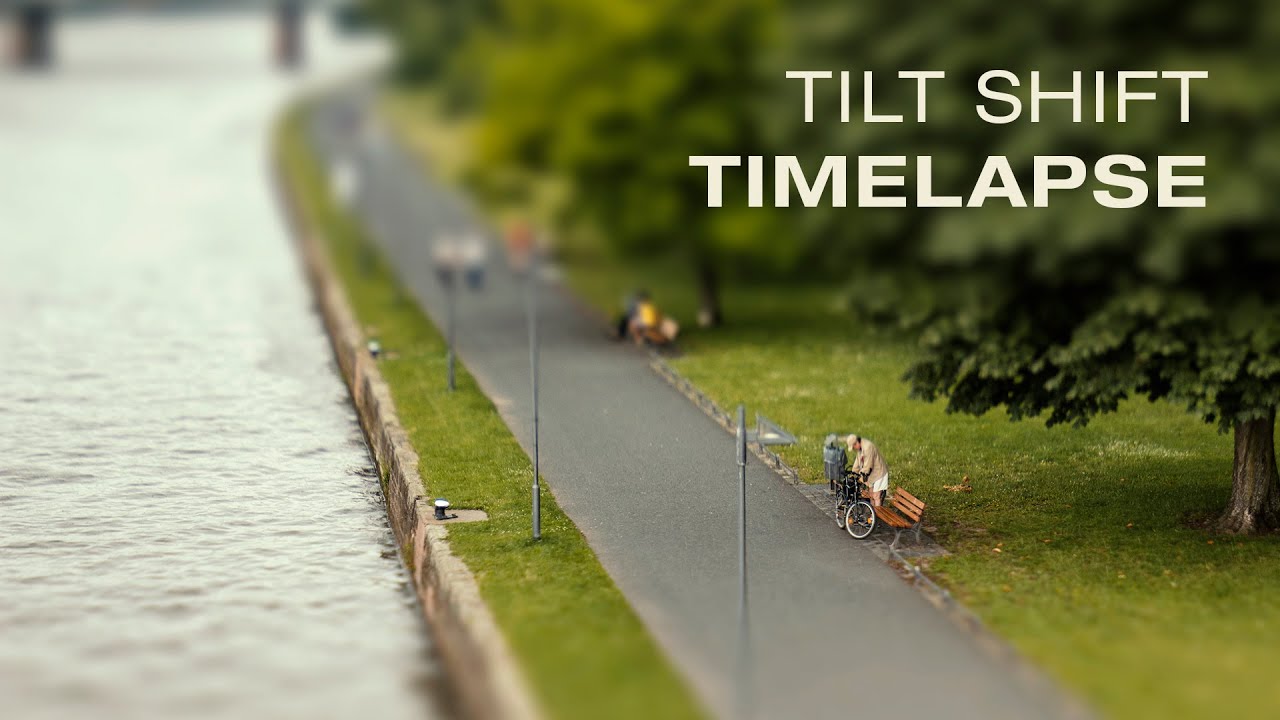
The tilt-shift effect is a technique used in video editing to create a shallow depth of field. This effect also creates a miniature or toy-like appearance in the subject matter. It simulates the effect only possible through a tilt-shift lens in photography.
This effect involves selective blurring of certain parts of a video. Meanwhile, it keeps other parts sharp and in focus in your video. The blurred areas create a shallow depth of field, giving the illusion that the subject is in miniature. This effect can make real-life subjects look like a part of a scale model.
Even the name "tilt-shift" refers to the specific movements of a tilt-shift lens. In traditional photography, these lenses allow photographers to tilt the lens plane. Moreover, this shifts the lens axis independently, enabling precise control over the focus plane. However, this effect is typically achieved by editing software tools or plugins.
Such effects are popularly used to capture or simulate scenes that depict real-life environments. These effects can be used to create cities, landscapes, and crowds that look small. It can give a sense of scale distortion, creating a visually interesting and creative look.
The tilt-shift effect is commonly employed in various contexts. These effects can be used in architectural photography, commercials, music videos, and films. It adds a distinctive aesthetic quality and can evoke a sense of playfulness or fascination.
Part 3: Wondershare Filmora: The Video Editor That Makes Things Look Easier
You can add a tilt-shift effect to your videos by using Wondershare Filmora. This tool allows you to apply the Filmora tilt-shift effect to your videos. These simple steps will let you easily understand the process of applying this effect:
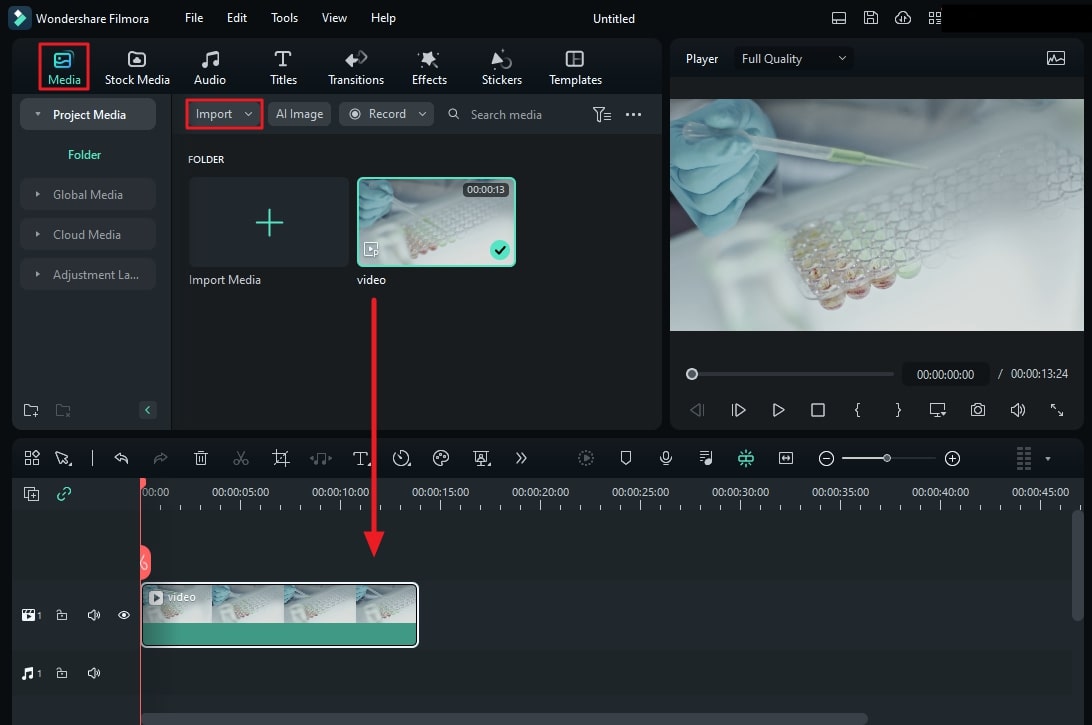
Step 1Open Wondershare Filmora and Initiate the Process
To create a tilt-shift video, open Wondershare Filmora to create a new project. Import the video of your liking into the tool. Further, drag and drop that video file into Filmora's timeline.
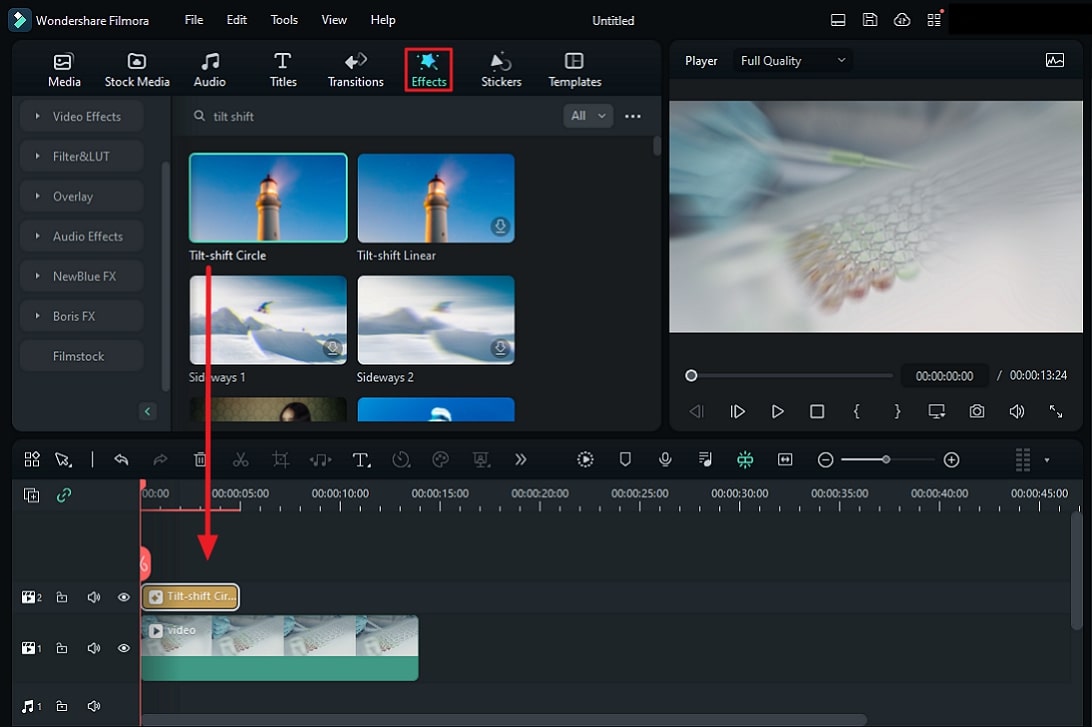
Step 2Access the Effects Option
Proceed further and search "Tilt-Shift" in the "Effects" tab. This will provide you with different similar effects to choose from. Double-click the effect and preview it across the window.
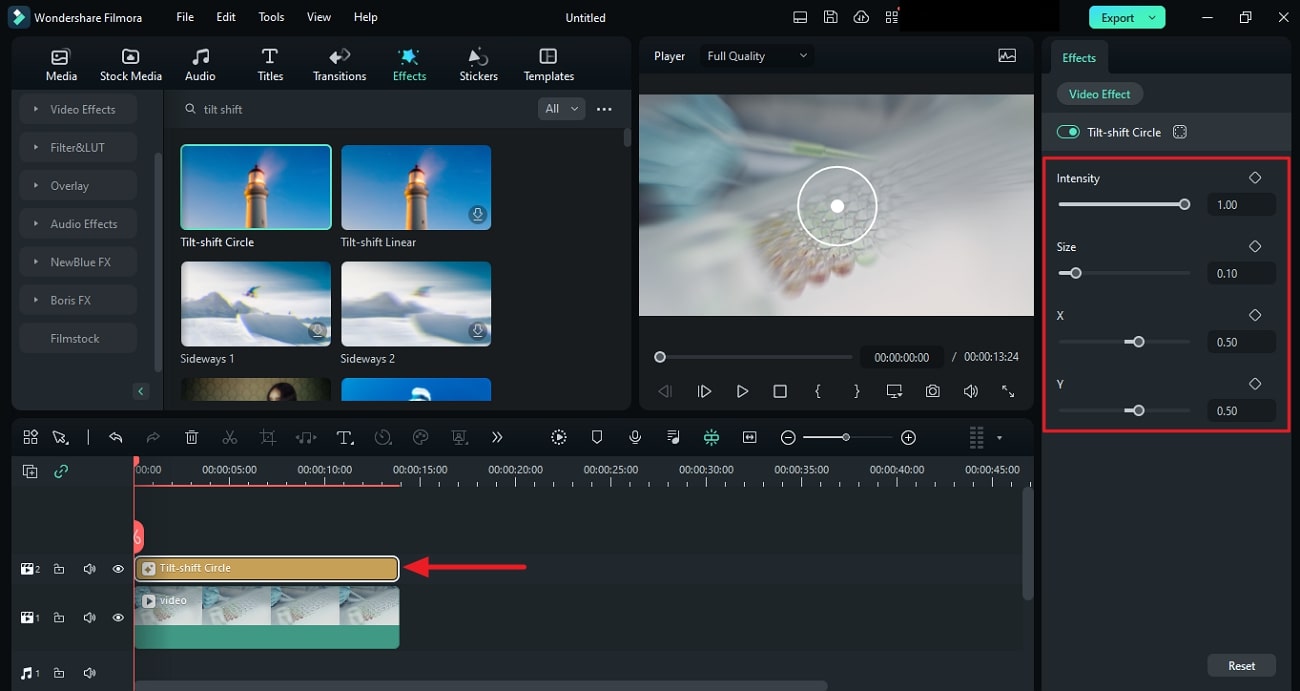
Step 3Modify the Settings To Your Liking
Next, drag and drop the effect on top of your video clip and match its duration. Continue to double-click the effect layer to open the adjustment window. Change the parameters like "Intensity" and "Size" of the blurriness of the effect. Also, adjust the "X" and "Y" scales to define the focal point of your video. Save the file once you are satisfied with the result.
Part 4: How To Create Tilt-Shift Effect on Adobe After Effects [Difficult Method]?
Creating a tilt-shift effect using Adobe After Effects is difficult and lengthy. Here are some in-depth steps that will help you to create this effect:
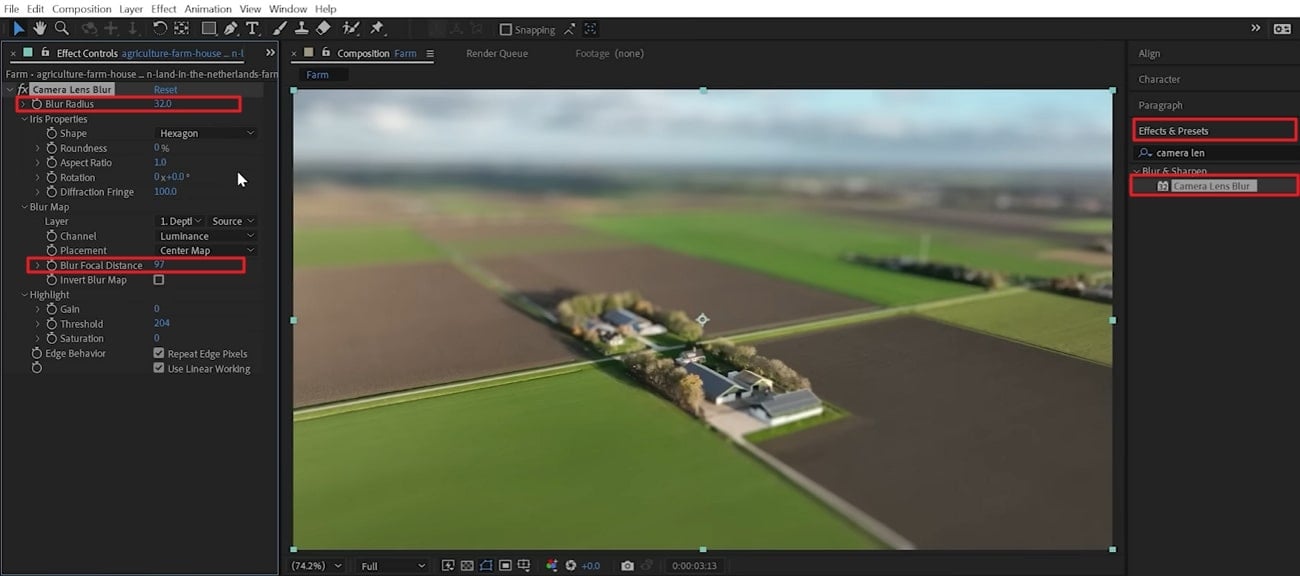
Step 1
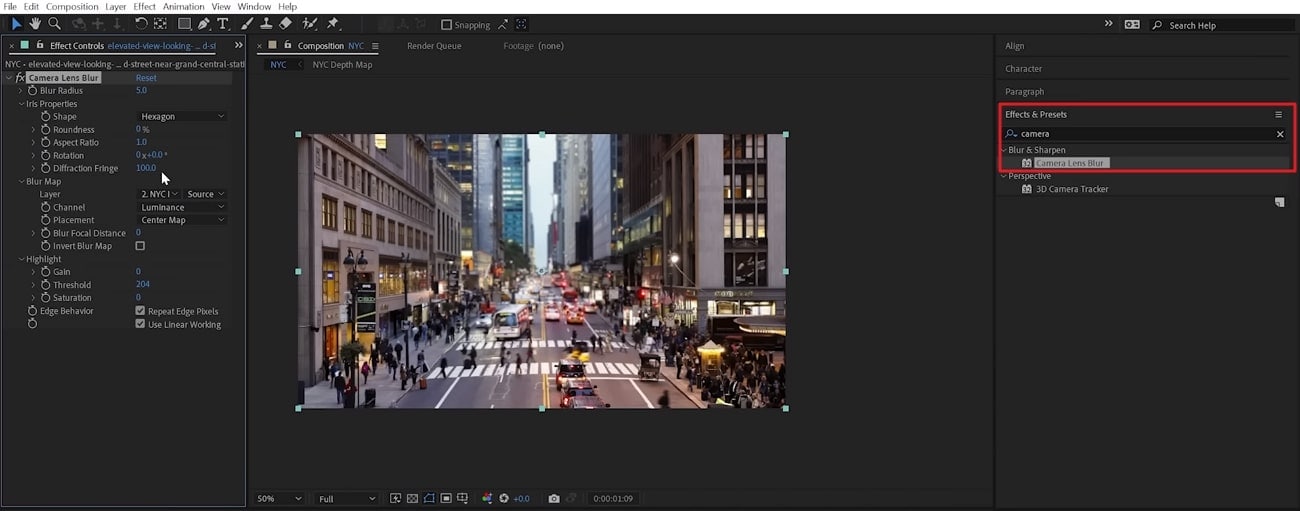
Open Adobe After Effects and import your video file. Click on your video and go to the "Effects and Presets" tab on the right side of the screen. In the search tab, type "Camera Lens Blur" and drag and drop it onto your video clip in the preview screen. Increase the "Blur Radius" to your preferred level in the "Camera Lens Blur" settings. Set the focal point by adjusting the value of "Blur Focal Distance."
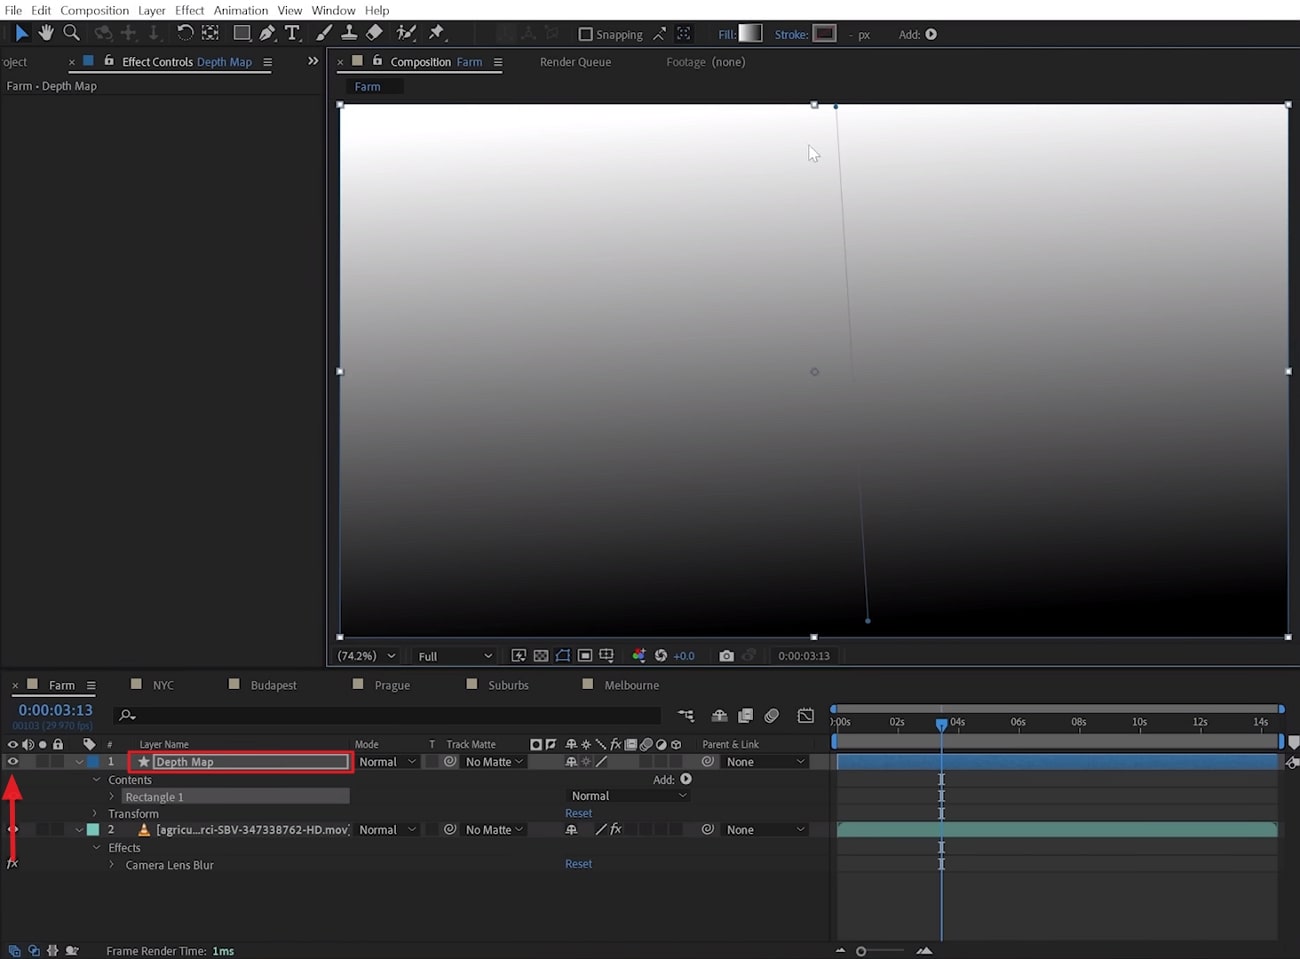
Step 2
Locate the "Depth Map" in the bottom panel of the interface and unhide it by clicking the "Eye" icon. Double-click on the preview screen to access the "Gradient Controls" and align it to the horizon.
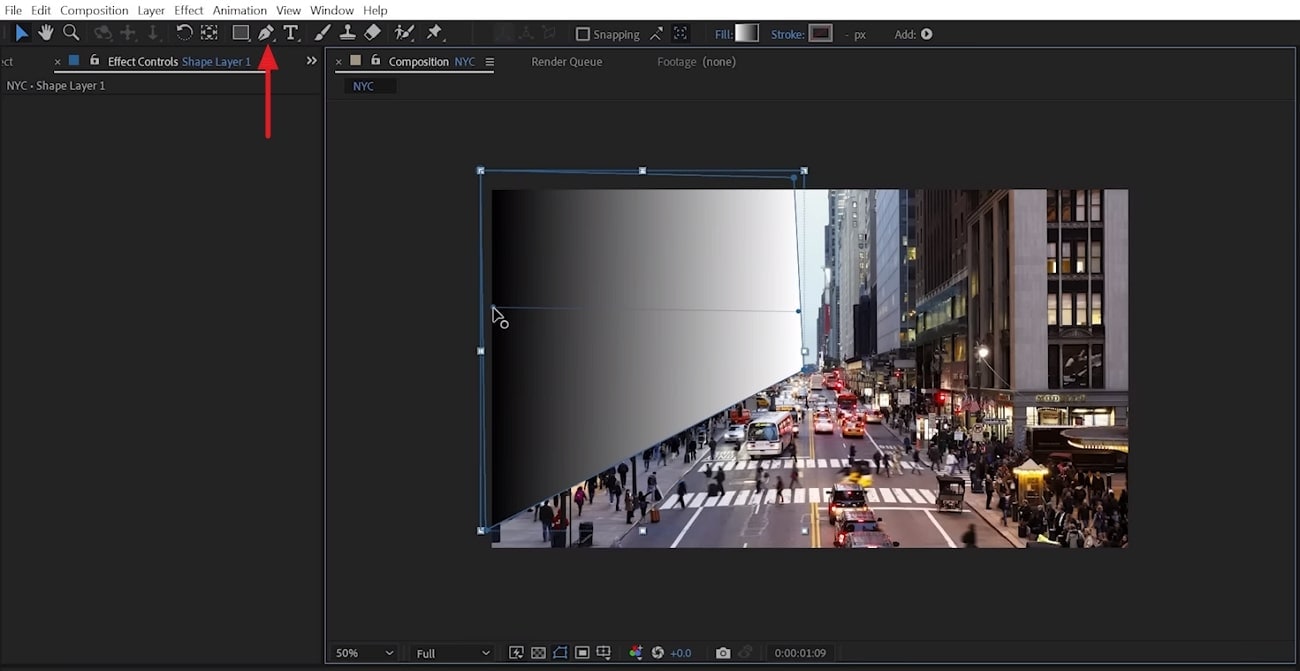
Step 3
Zoom out your video footage and switch to the "Pen Tool" from the top toolbar. Confirm if the “Linear Gradient” option is selected. After that, draw a shape that matches the left side of your video footage. Switch to the "Selection Tool" and double-click on the shape to bring up the points toward the middle. Further, adjust the gradient controls so that the white pixels are in the background.
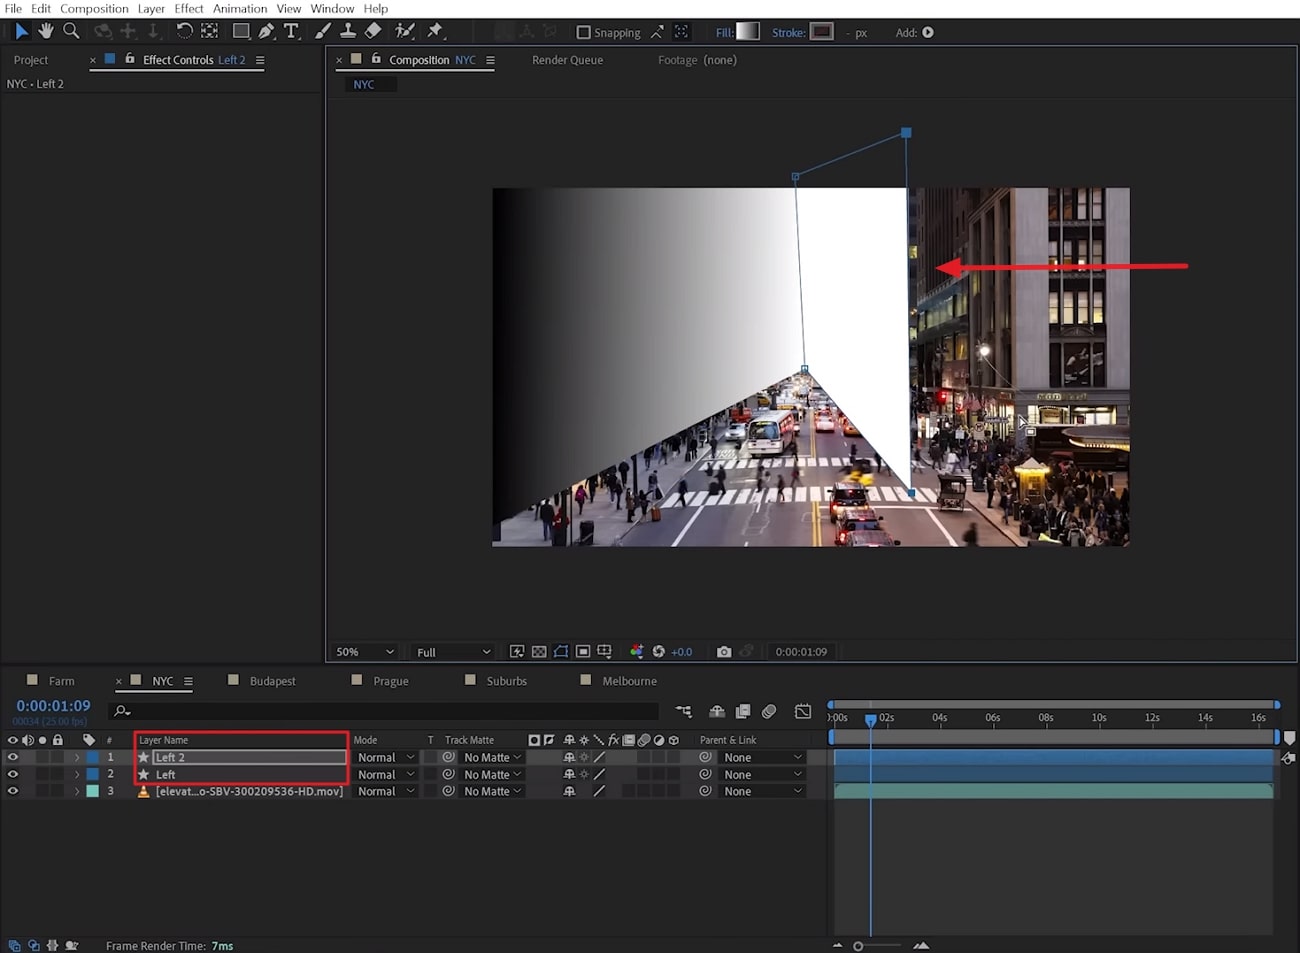
Step 4
Duplicate the shape and repeat the process for the entire footage. Select all the depth maps, and press "Ctrl + Shift + C" to copy and rename them accordingly. Move the preset to the bottom of your video and hide this preset layer.
Step 5
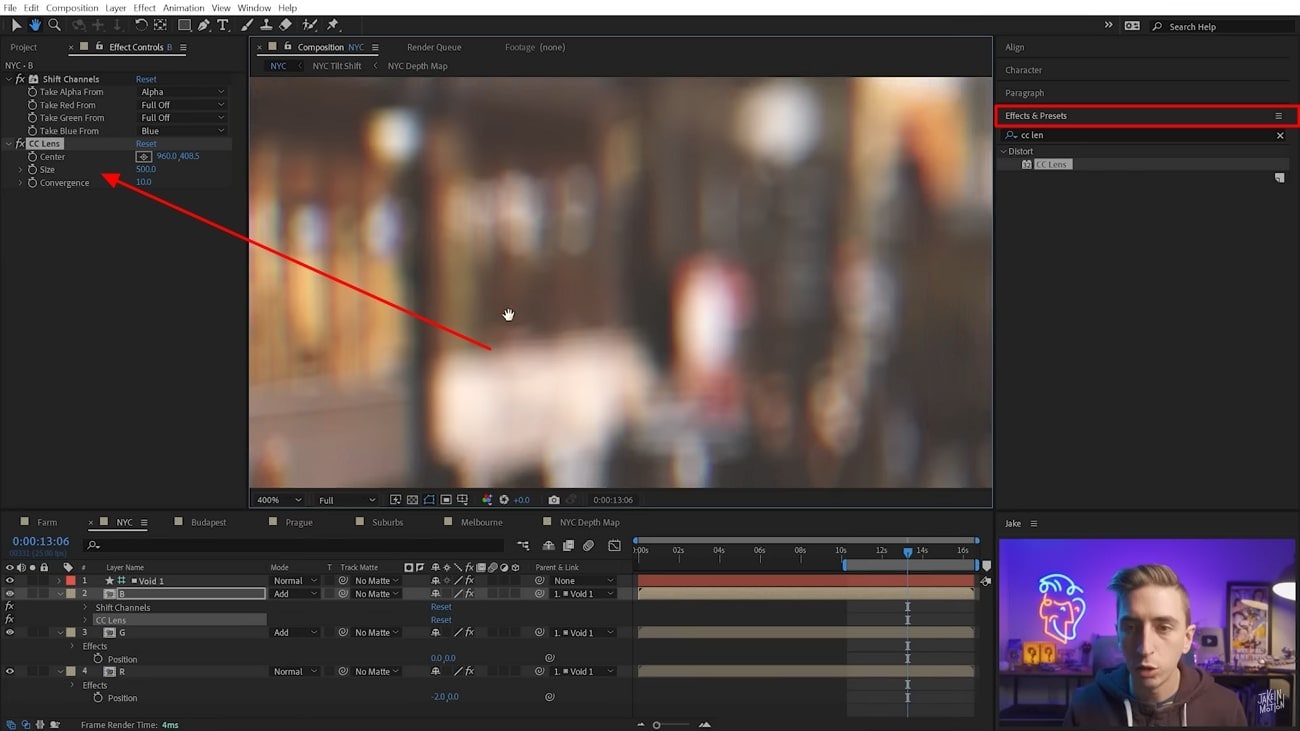
Proceed next to "Effects and Presets" to add the "Camera Lens Blur" effect. Change the "Blur Map" source to your preset and make further adjustments as desired.
Step 6
To change the shape of your bokeh, go to the "Iris Properties" within the "Camera Lens Blur" effect settings. Modify the "Shape" parameter according to your preference.

Step 7
Go to the "Effects and Presets" section again and select a suitable effect. Drag and drop it onto your video to access the color grading options. In the effect settings, choose a preset from the drop-down menu to adjust or achieve the desired color grading. By following these steps, you can create a tilt-shift effect using Adobe After Effects. Lastly, export your project video to your system.
Conclusion
In conclusion, a well-edited video is essential to communicate your perspective. You can create something that leaves a lasting impression using video editors. With its ability to grab attention, the tilt-shift effect is what you need. You can create tilt-shift videos with the right editing tools like Wondershare Filmora.
