


 TL;DR:
Use Canva for quick social media photo touch-ups, but opt for Wondershare Filmora when you need advanced AI super-resolution to rebuild lost details or upscale images to 4K.
● Canva restricts its AI image upscaler and advanced tools like Magic Expand to Pro subscribers, processing only one image at a time without dedicated noise reduction capabilities.
● Wondershare Filmora automates the entire enhancement process without manual sliders, utilizing specific facial refinement and grain removal algorithms to fix poorly lit or highly compressed internet photos.
● Filmora extends its functionality beyond static graphics with an AI Image-to-Video feature, though both tools require moderately clear source data and may struggle to fully restore severely damaged files or tiny text.
Ask AI for a summary
 ChatGPT
 Perplexity
 Gemini
 Claude
 Grok
Grok
Canva is a massive design platform that offers a built-in Canva photo enhancer to turn blurry or dull shots into crisp, high-quality visuals. It works by using smart technology to automatically fix lighting, sharpen details, and boost colors in just one click.
Continue reading our guide to learn how to enhance image quality in Canva, adjust colors, or try the Canva AI image upscaler! We'll show you how this tool handles the heavy lifting so your graphics always look professional.
How to Enhance Image Quality in Canva in 3 Steps
You can enhance image quality in Canva quickly without any editing experience. However, the image upscaler feature is locked on the Pro version, so you need to subscribe first. The whole process is simple and beginner-friendly.
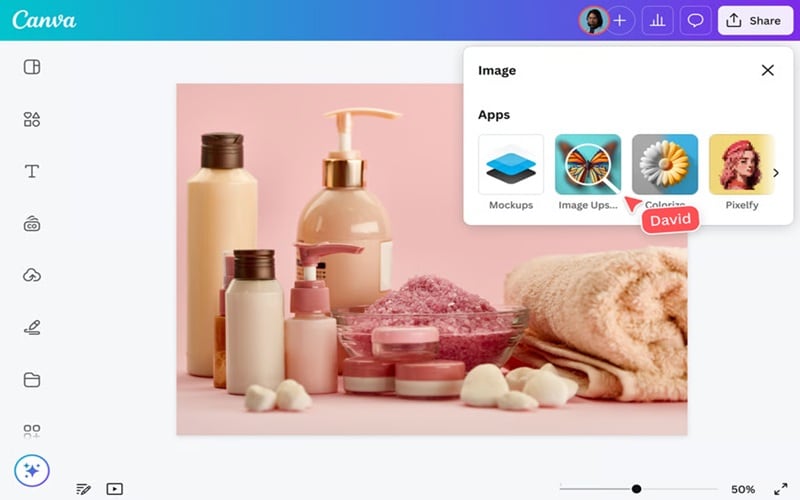
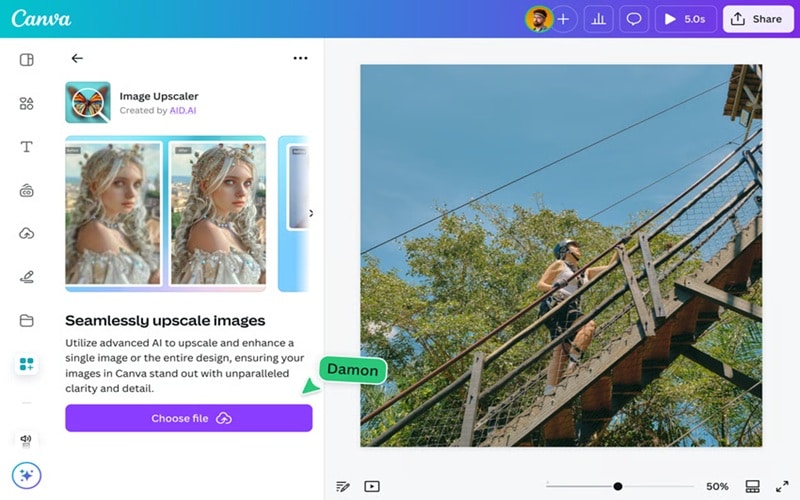
Here are the exact steps on how to upscale images in Canva:
- Visit https://www.canva.com/features/image-enhancer/ and log in to your account.
- Click 'Upload your Image'.
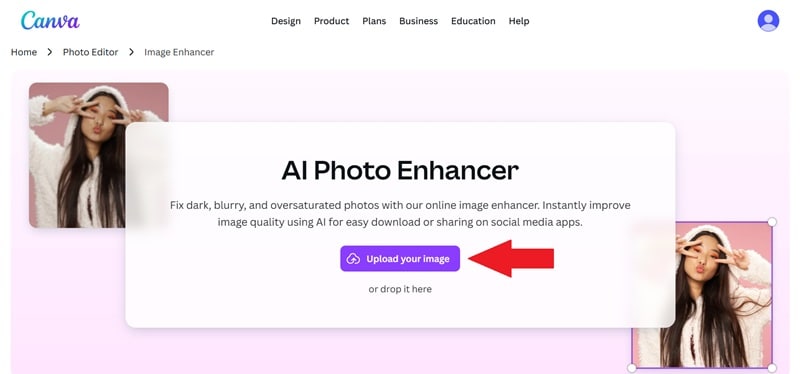
- Select the photo you want to edit and upload it.
- Click ‘Upscale image' to enhance image quality.
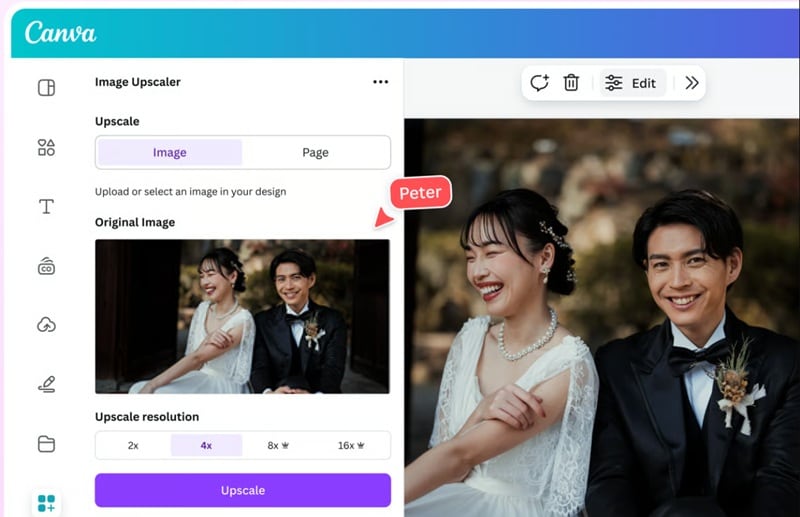
- Use the manual sliders to fine-tune the Intensity or brightness if it's not quite perfect yet.
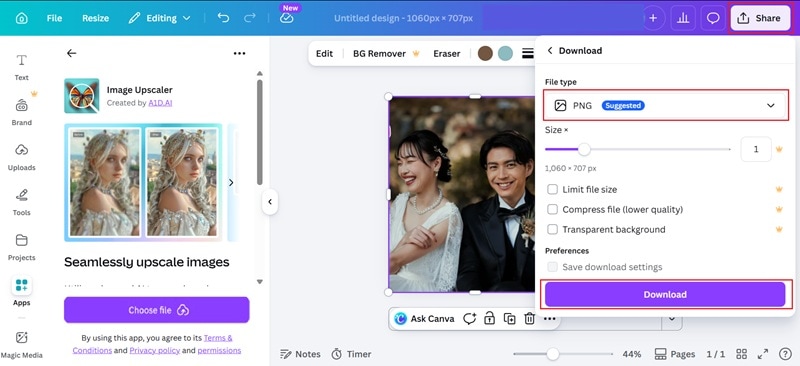
- Click Share > Download at the top right. Choose PNG for the best quality.
Canva's Image Enhancer Main Features: 3 Ways to Make Your Photos Pop
The Canva image enhancer is built for quick improvements without drowning you in complicated controls. Here are the three main ways it helps your photos look better fast.
1. One-Click Fix with Auto Adjust
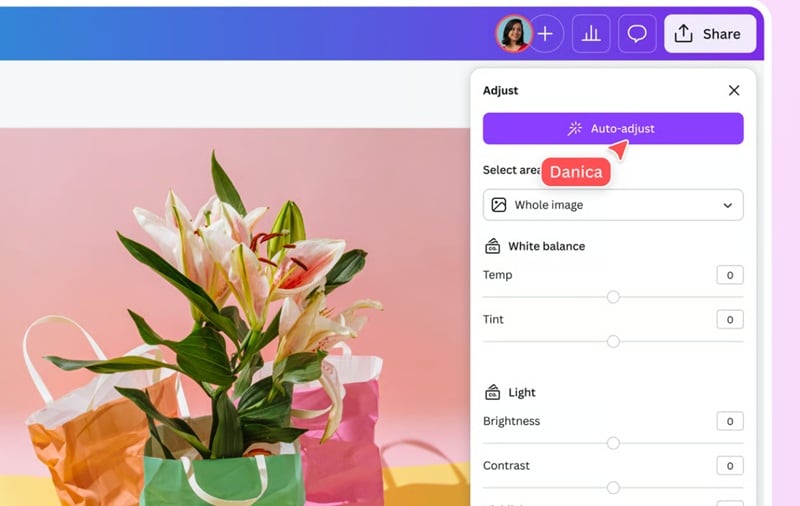
If you want to enhance your image in Canva without thinking about technical details, Auto Adjust is your best friend. Here's why:
- Instant Balance: It calculates the perfect level of brightness, contrast, and color temperature.
- Efficiency: Perfect for when you have a batch of photos and need them edited in seconds.
- User-Friendly: Designed specifically for beginners who don't want to mess with complex histograms.
2. Play Around with Filters for Style
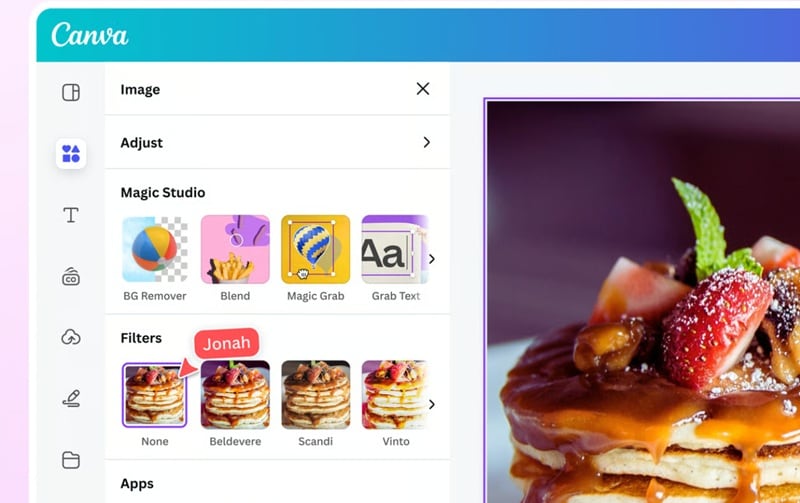
Filters let you set the visual tone of an image without touching a single slider. And photo enhancer in Canva offers a solid range of presets.
- Atmospheric Presets: Use filters like "Solar" or "Luna" to completely change the aesthetic.
- Custom Strength: You can adjust the intensity of the filter so it doesn't look "over-edited."
- Brand Consistency: Helps you keep all your social media photos looking like they belong to the same collection.
3. Manual Control + AI Tools for Extra Fixes
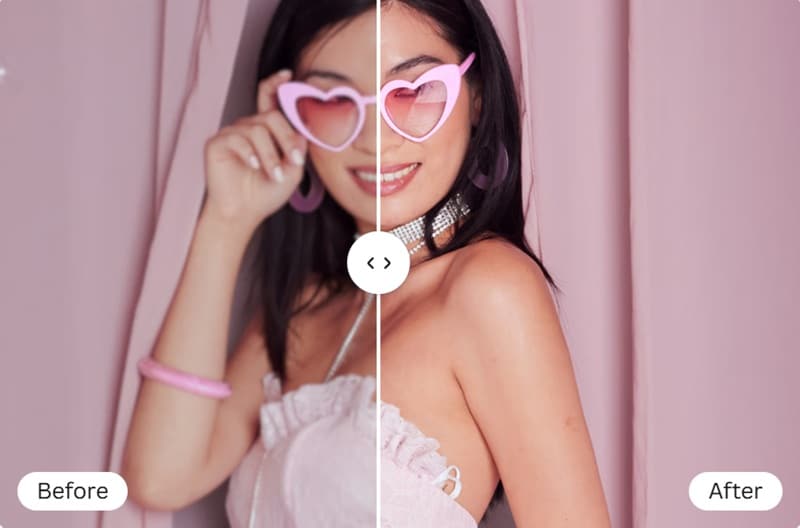
If Auto Adjust doesn't quite get you there, go manual. Canva Pro users also unlock AI-powered tools that can fix more complex issues.
- Background Remover: Instantly removes the background so you can isolate your subject or replace it with a new one.
- Magic Eraser: Lets you remove unwanted objects, people, or distractions from your image with a few clicks.
- Magic Expand: Extends your image beyond its original frame and fills in the missing areas naturally.
Part 3. When Canva Photo Enhancer Works Best
The photo enhancer in Canva is excellent for certain tasks, but it's not a one-size-fits-all solution. Knowing when to use it saves you time and gets you better results.
Let's break it down:
1. Quick Social Media Edits
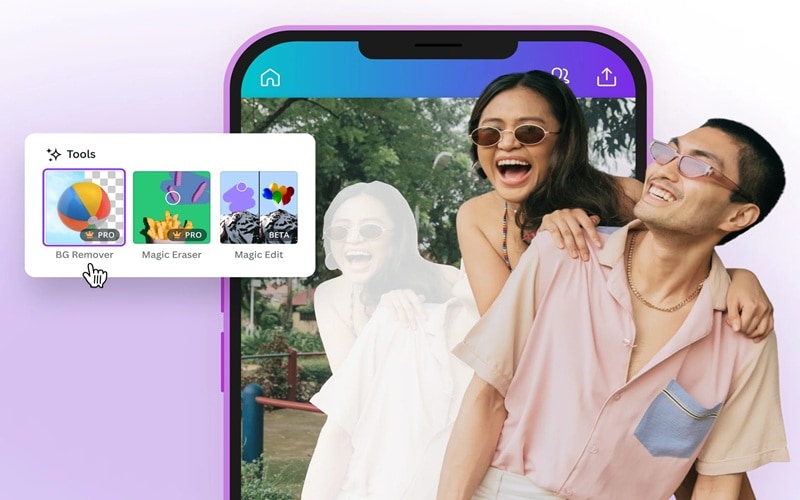
When you need to enhance photo Canva graphics for social media, these tools are unbeatable. Here are some of their key features:
- Improve photos for Instagram reels, TikTok thumbnails, or YouTube covers.
- Fix lighting issues and improve clarity in just a few seconds.
- No need to switch to heavy editing software just for a simple touch-up.
2. Basic Marketing Visuals
Business visuals need to look clean, and the Canva image enhancer ensures your marketing materials don't look amateur. Here's why:
- Product Clean-up: Make the colors in your product photos look accurate and vibrant.
- Banner Optimization: Ensure large website banners don't look muddy or low-quality.
- Professionalism: A sharp image suggests a high-quality brand.
3. Everyday Photo Fixes
Not every photo needs a dramatic transformation, and Canva's enhanced photo tools handle these everyday fixes with ease. Such as;
- Screenshot Rescue: Improve the readability of text in compressed screenshots.
- Dark Photo Recovery: Bring back details from shadows in photos taken in poor lighting.
- Blur Reduction: Use the Canva AI image upscaler logic to sharpen slightly soft images for better viewing.
Alternative to Canva Image Enhancer: Wondershare Filmora
If Canva's photo enhancer doesn't quite cut it for your needs, especially for deeper fixes, Wondershare Filmora offers a more advanced approach to image enhancement. It also offers a dedicated image enhancement feature, and the AI behind it is built for more intensive work.
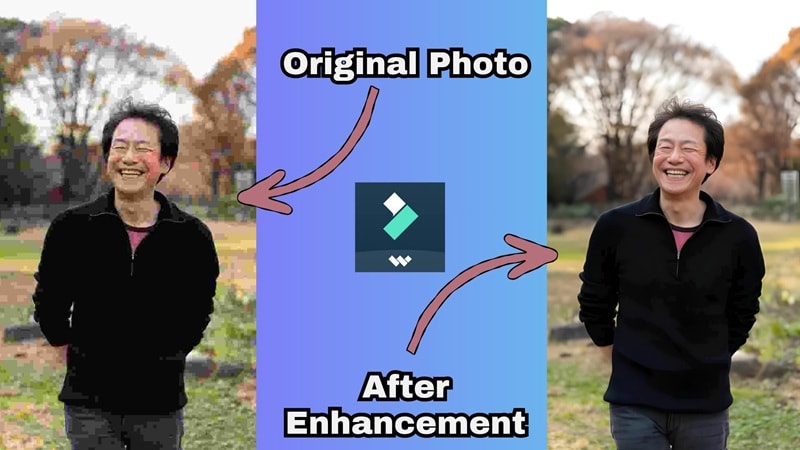
Filmora uses AI super-resolution to improve clarity, restore details, and reduce noise in images. When a face is detected, it applies extra refinement specifically to facial areas while keeping the result looking natural. The process is fully automatic. No settings to tweak, no sliders to adjust. It supports images up to 4K and maintains the original resolution size throughout.
 Secure Download
How to Enhance an Image Using Filmora's AI Tools
Getting started with Filmora's image enhancer is just as simple as Canva photo enhancer, but with noticeably stronger AI processing under the hood. Here's how to do it:
- Install Filmora and click ‘New Project' to start new.
- Select ‘Import” to upload your photo.
- Drag your image to the editing timeline below.
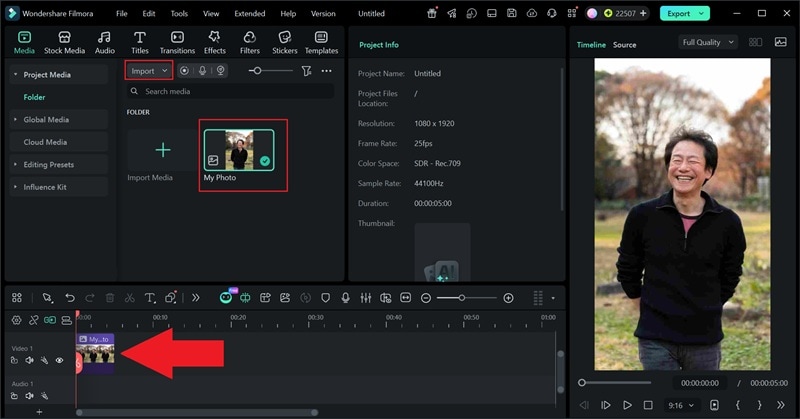
- Click your photo in the timeline.
- Select Image > Basic in the property panel.
- Find ‘AI Image Enhancer' and click ‘Generate'.
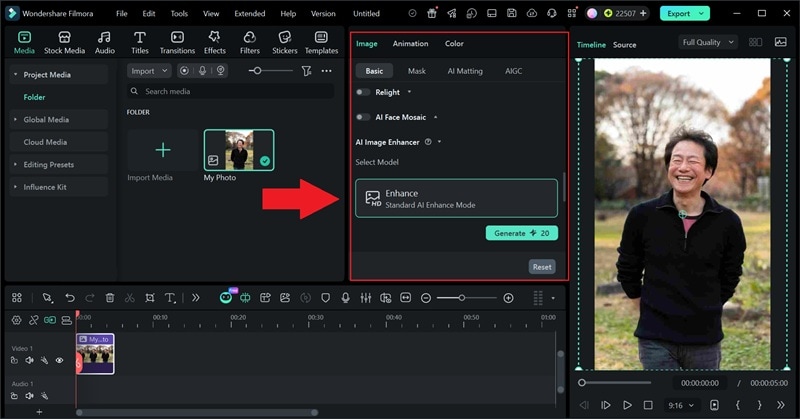
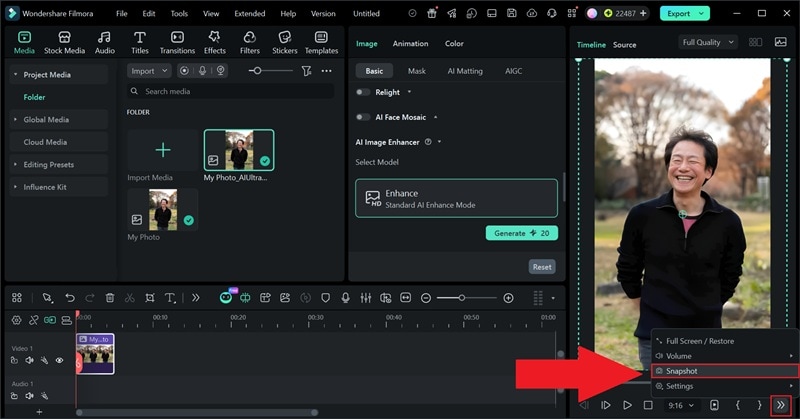
- Check the result when it's done.
- Click the >> symbol below the preview window.
- Choose ‘Snapshot' to save the photo to your device.
What Makes Filmora AI Enhancement Stand Out
Filmora AI image enhancer feature actually improves and rebuilds the image in a more noticeable way. And the whole enhancement process is handled automatically by Filmora's AI, so you don't have to tweak a bunch of settings to get a good result.
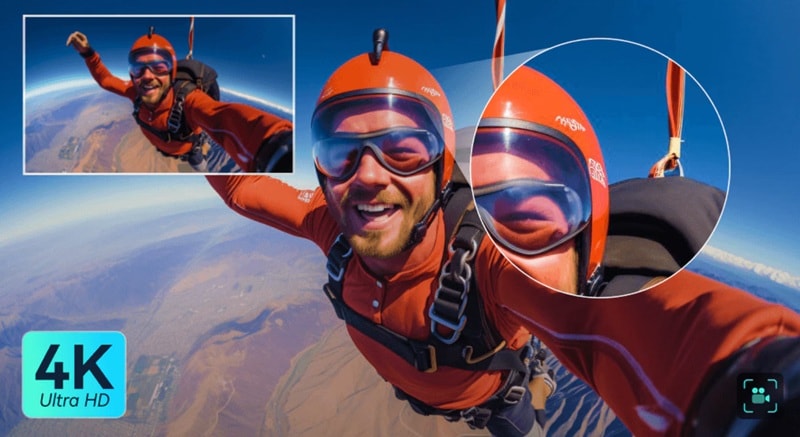
Here's what makes it stand out and feel different from basic enhancers.
- Super Sharpness: This tool improves the clarity of low-res or fuzzy images, making everything look much more defined.
- Bringing Back the Details: It focuses on "rebuilding" edges and textures like hair or product contours so they don't look muddy.
- Cleaning Up the Grain: It wipes away that annoying digital noise and "blocky" artifacts often found in compressed internet photos.
- Pro-Level Asset Creation: It can turn mediocre screenshots or low-quality images into high-end marketing graphics and covers.
Secure Download⚠️ Important Limitations to Keep in Mind
Even the smartest AI has its boundaries. Filmora's enhancement works best on moderately blurry or slightly compressed images where there is still some data to work with. If a photo is severely damaged or has super tiny, dense text, the AI might have a harder time making it look perfect.
Do More with Your Picture: Animate with Filmora
One area where Filmora goes well beyond Canva is in content transformation. Filmora isn't just an image enhancer; it can also animate still photos and convert images into video clips thanks to its AI Image-to-Video feature. This makes it a far more versatile tool for content creators, video editors, and marketers who need assets in multiple formats.
If your workflow ever moves from photos to video, Filmora keeps everything in one ecosystem, so you're not jumping between tools to finish a project.
Canva vs Filmora: Which One Handles Image Quality Better?
We've seen how both Canva AI photo enhancer and Filmora AI work, but which one should you choose? Here's a quick breakdown of how the two tools stack up when it comes to image enhancement:
| Feature | Canva | Filmora |
| AI Enhancement | Auto Adjust | AI Super-Resolution (advanced) |
| One-Click Enhancement | Yes | Yes |
| Max Output Quality | Up to 8x Upscale | Up to 4K Super-Resolution |
| Noise Reduction | Limited | Full AI-powered noise removal |
| Face Enhancement | No | Automatic face refinement |
| Editing Depth | Filters, Magic Expand | Advanced + creative tools like Image-to-video |
| Best For | Quick social media edits | Professional AI enhancement |
|
Show More
Show Less
|
||
Why Filmora Stands Out More
- Better for fixing low-quality or compressed images.
- Stronger AI for rebuilding lost details.
- Lets you go beyond static images into video creation.
- More control without becoming too complex.
Conclusion
The Canva photo enhancer is a great starting point if you want quick, clean improvements without learning complex tools. So, our guide explained how to enhance image quality in Canva quickly. It handles lighting, color, and basic sharpening well, especially for social media or everyday visuals.
That said, when you need more powerful AI enhancement, better noise removal, 4K upscaling, face refinement, or even image-to-video features, Wondershare Filmora is the stronger choice. If you want to try both, you can use Canva AI photo enhancer for speed and convenience, and Filmora when quality and advanced AI capabilities are the priority.
FAQs About the Canva Photo Enhancer
FAQ
-
Can Canva enhance blurry photos completely?
Not completely. The Canva image enhancer can sharpen slightly soft or mildly blurry images and improve overall clarity, but it won't fully restore a heavily blurred or very low-resolution photo. For more advanced sharpening and detail recovery, a dedicated AI tool like Filmora will give better results.
-
Is Canva AI image upscaler free to use?
No. Canva AI image upscaler, along with more advanced AI-powered tools, such as Magic Expand or background removal, are locked behind Canva Pro. You need to subscribe first before you can use it.
-
Does Canva reduce image noise automatically?
Canva doesn't have a dedicated noise reduction tool. The Auto Adjust feature may improve overall image quality, which can slightly reduce the appearance of grain, but it's not designed specifically for noise removal. If reducing digital noise is a priority, a specialized AI enhancer like Filmora handles this much more effectively.
-
How do I improve image quality in Canva without Canva Pro?
On the free plan, you still have access to the Adjust panel, which includes sliders for brightness, contrast, saturation, warmth, and sharpness. You can also apply filters from the Filter tab.
-
Can I enhance multiple photos at once in Canva?
Currently, the Canva photo enhancer works on one image at a time to ensure the AI applies the most accurate settings for that specific photo's lighting and composition.
