FFmpeg is an open-source video processing tool with many powerful features. Many of these features are exposed through FFmpeg’s command line interface but can also be accessed from the program’s Python bindings and its Qt GUI frontend, called QFFMpeg.
This article will explain using FFmpeg command line tools to record video streams on Windows and Mac computers with step-by-step examples and screenshots.
In this article
Part 1. What is FFmpeg?
FFmpeg stands for "FF Multi-Platform Executable" and was originally developed by Fabrice Bellard in the year 2000 as an extension of the MPlayer project. The sole purpose of the software command-line design is to provide a complete solution for users to record live streams (audio and/or video) from any type of device that supports either the RTSP or HTTP streaming protocols.
FFmpeg is a complete, cross-platform solution to record, convert, mix, and edit audio and video files. The software has over 250 input formats, which allows users to record video streams in any media format. The FFmpeg commands stream the video back after recording, convert it into MP4 or MKV file, and process incoming data on the fly, such as rtmpdump.
Part 2. How to Record a Video Stream With FFmpeg on Windows?
The free FFmpeg command line tool is a great way to record a live internet stream and listen back to it later. If you have a Windows PC and want to record a video stream or screen using FFmpeg, our following step-by-step method will help you go through this process without facing many difficulties.
Step1 First, launch a browser of your choice on your Windows PC and head to the FFmpeg website. Hover over the Windows icon in the middle pane and select either the gyan.dev or BTbn build.
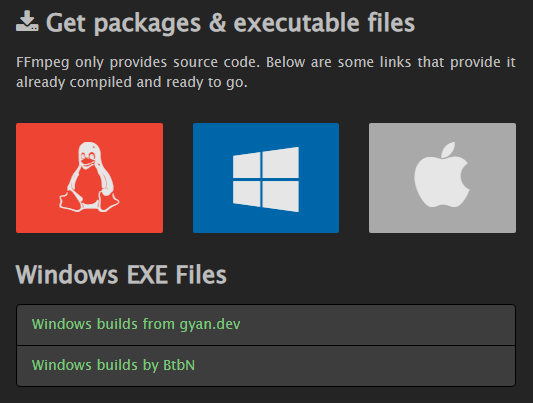
On the next screen, select the latest Windows 64-bit file from the list. Why? You need to use a computer compatible with the Windows 64-bit version. Next, download the ZIP file on your PC and use ZIP file extraction software to open the file contents.
Step2 Locate the ffmpeg.exe file on the extracted file and copy it to a new folder on your computer hard drive (e.g., C:\VideoRecorder).

Step3 In the next step, click the Start icon on your Windows dashboard and type cmd in the search box. Right-click on Command Prompt, select “Run as Administrator,” and launch the program.

Now, write the command to select the FFmpeg directory. For example, cd C:\VideoRecorder, and hit the “Enter” key.
Step4 To start recording the video stream, simply call FFmpeg and use the following command line. In this case, we are taking the example of capturing a YouTube video of “Running up that hill” from the top-rated TV show Stranger Things.
ffmpeg.exe -y -i https://www.youtube.com/watch?v=bV0RAcuG2Ao runningup.mp4
Hit the “Enter” key, and the output of this command will be displayed on the Command Prompt interface.
The command options have the following meanings:
-y allows automatic rewriting of existing files.
-i https://www.youtube.com/watch?v=bV0RAcuG2Ao is the stream URL that FFmpeg will record. You can change it with any video stream URL.
runningup.mp4 is the name of the output file.
Tips: Automatically Recording Video Streams on Windows PC
If you want your computer to record a specific video stream time automatically, use the Windows Task Scheduler to create a Timer to stop the recording after a particular time is passed.
Part 3. How to Record a Video Stream With FFmpeg on Mac?
You can use the Mac Terminal to record video streams via FFmpeg in the following way.
Step1 First, launch a browser on your Mac computer and head to the FFmpeg website. Hover over the Apple icon in the middle pane and select the macOS 64-bit static build option.
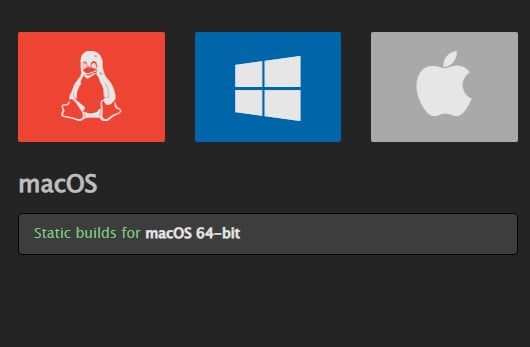
Download the ZIP file on your Mac and use ZIP file extraction software to open the file contents.
Step2 Launch the terminal on your Mac from the Apple menu, type the “ffmpeg -f avfoundation -list_devices true -i” command to let the system know which device to record from, and hit the Enter key.
Step3 Next, designate the path where you want to save your video, e.g., cd Path/to/my/videostream and press Enter.
Step4 Type in the “ffmpeg -f avfoundation -i "1:1"-c:v libx264 -qp 0-preset ultrafast out.mp4" command and hit Enter to start recording the video stream.
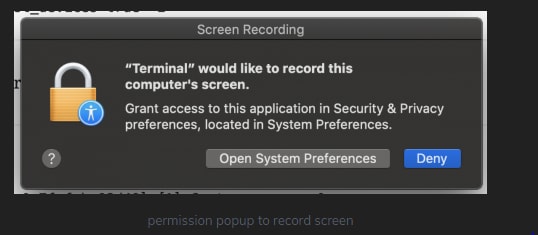
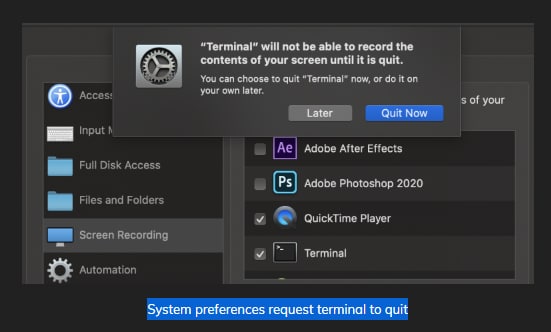
Stop recording the video stream by pressing “q.”
Part 4. How to Record Video Stream More Easily?
Sometimes, using FFmpeg to record a video stream on your Windows or Mac computer is too complicated. So, we recommend using Filmora Screen Recorder to make things a little easier for you.
A few benefits of using the Filmora Screen Recording software are as follows:
- Capture the computer screen and webcam at the same time.
- Select whether to record an entire screen or a part of it.
- Record your Windows or Mac computer audio and microphone voice at the same time.
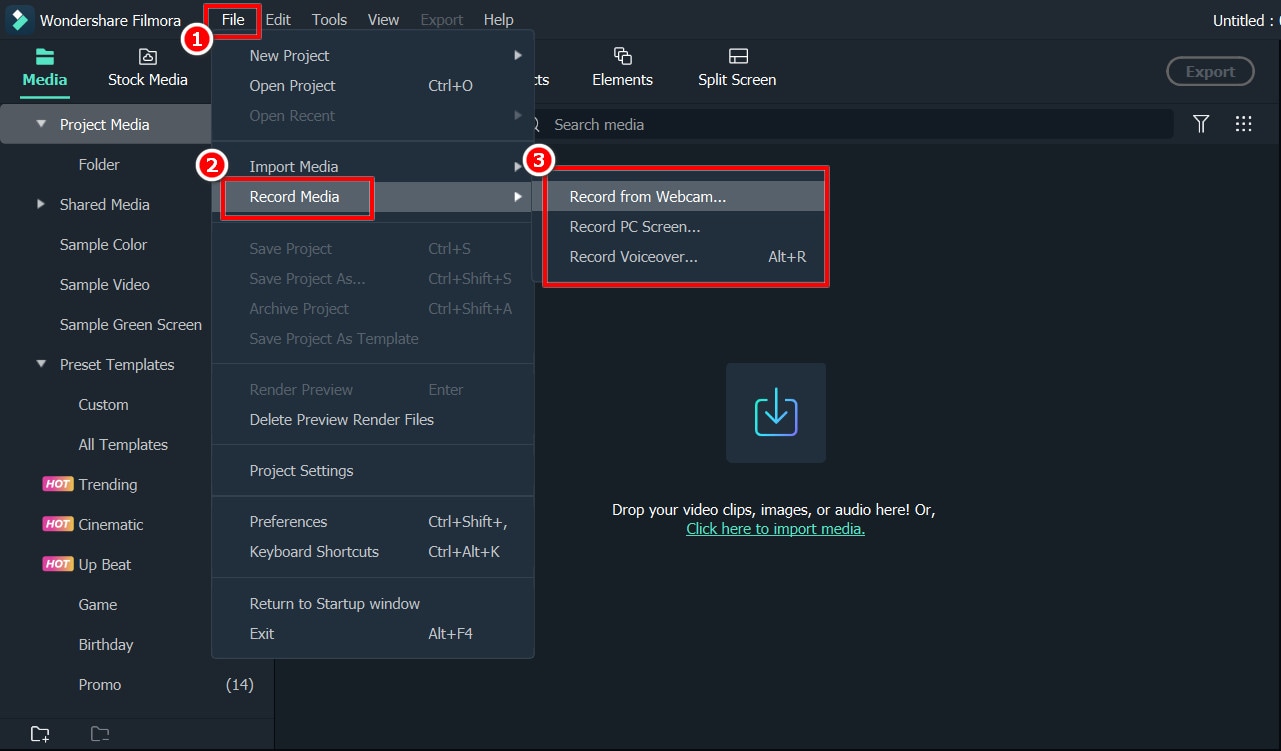
Step1 Launch a browser on your Windows or Mac computer, install the Filmora Screen Recorder software, launch it, and select a New Project from the dashboard. Next, click the File option and select Record PC.
Step2 On the new Scrn pop-up window, customize the recording size by entering your desired dimensions. Also, choose if you want to record audio and which device to record it from.
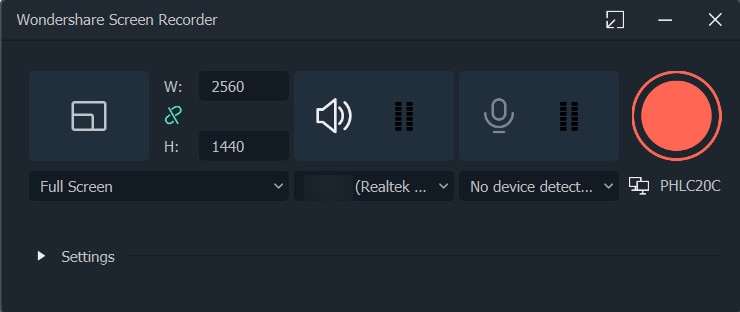
Step3 Click Record to start recording the video stream. Once you are done capturing the video stream on the computer screen, click the F9 button to stop the recording.
Conclusion
In this guide, we have discussed FFmpeg and explored how you can use it to record video streams on your Windows and Mac computer.
We have also discussed Filmora Screen Recorder as an easy alternative to FFmpeg. You can get started immediately with recordings or dive deeper into advanced options as you gain more experience with this software. To help you out, we’ve also shared easy step-by-step instructions to use Filmora Screen Recorder on your computer.
Hopefully, you can now record your video streams and save them in high quality to view or share later.


 100% Security Verified | No Subscription Required | No Malware

