Do you want to reduce echo in Premiere Pro? How often have you been in situations where you encountered conditions where there was annoying background noise on your video? There is no need to overthink, given that everyone has to deal with this problem. Your video may become intolerable if background noise, such as the sound of a fan or the wind blowing through a window, is present. Because of this, you need to take immediate action to remove echo in Premiere Pro to accomplish the task of uploading a video to YouTube or any other social media site.
Spending a lot of time on a recording, only to have the completed work have a terrible echo, is one of the most frustrating experiences. You will be relieved that there are methods by which you may take your audio clips and modify the audio on your clips to decrease the echo. The following explains how to remove echo from audio in Premiere Pro.

In this article
Part 1: How to Reduce Echo Noise with Premiere Pro
Reducing echo in Premiere Pro is straightforward with the application's built-in tools. It requires no additional plugins from other developers.
Step1 Deverb
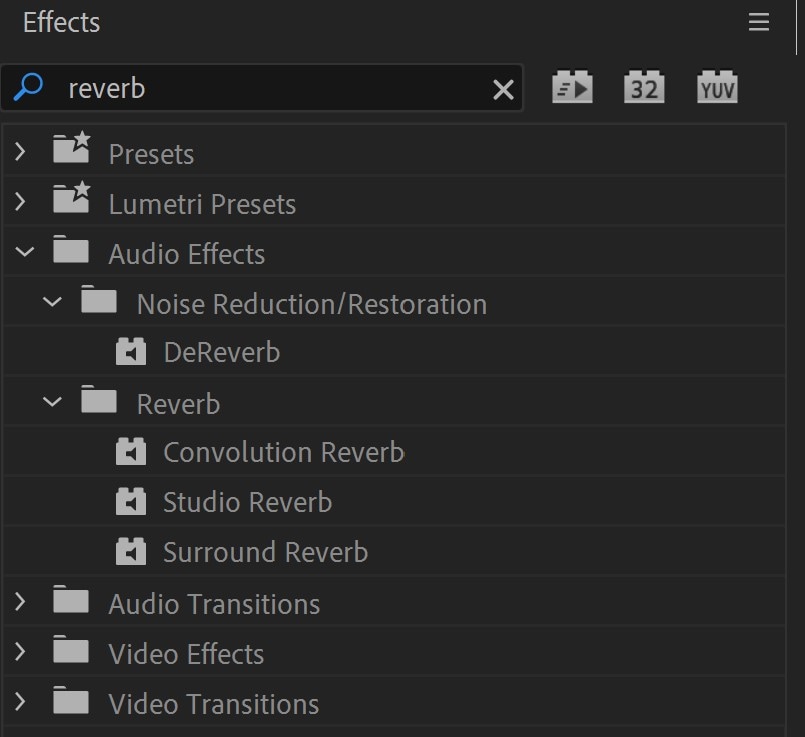
The first step is to look for an effect called "DeReverb" in the Effects box of the Effects workspace. Once you find it, you can easily add it to the clip in question by dragging and dropping it there. After that, it will show in the top-left corner of the effect controls inside your audio clip.

Step2 Edit
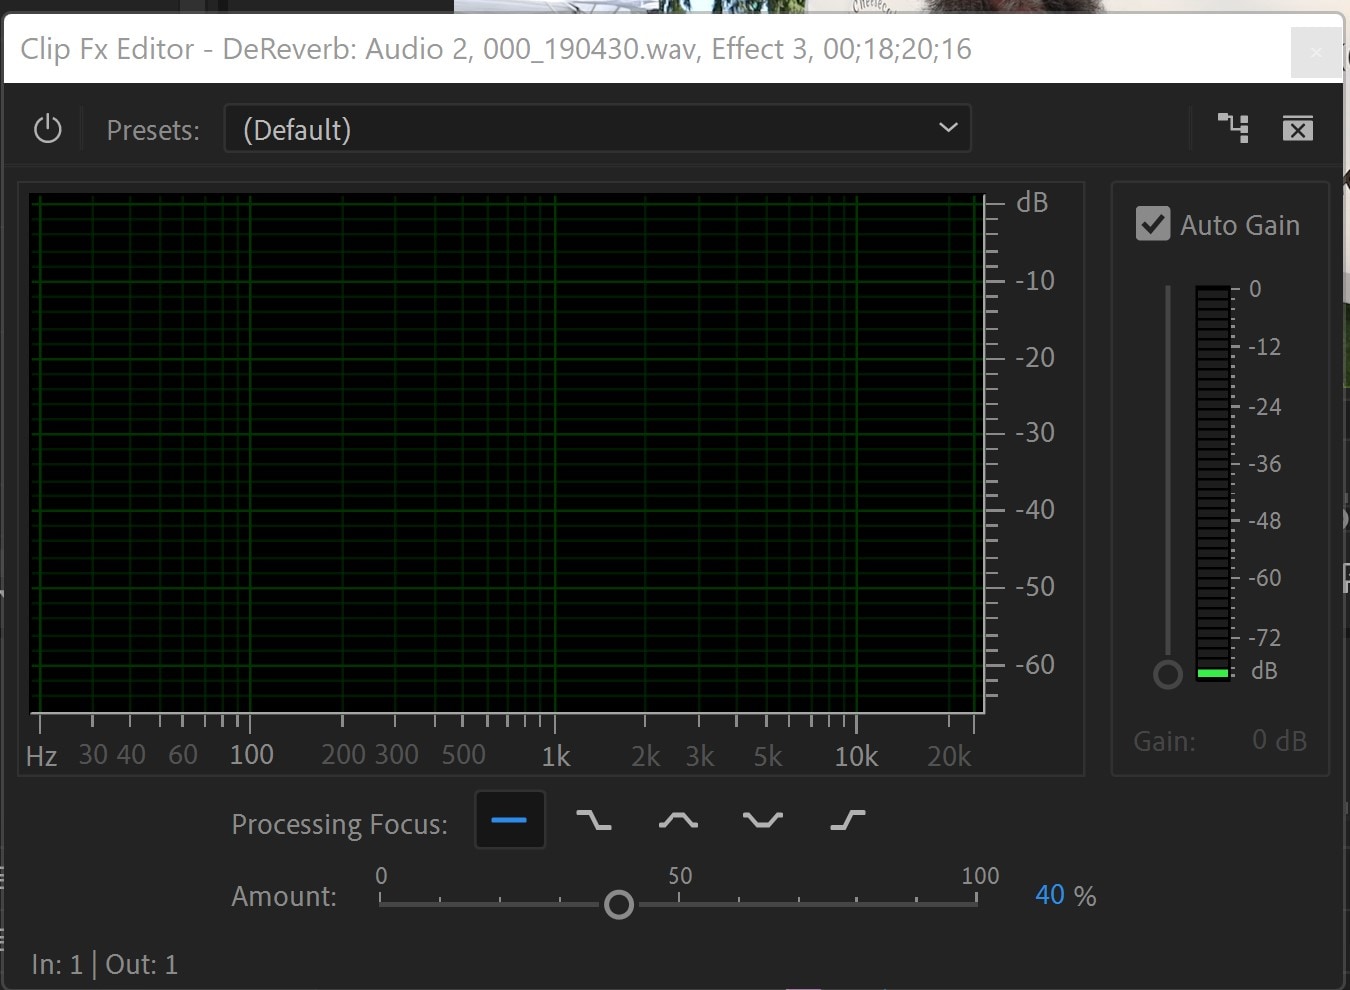
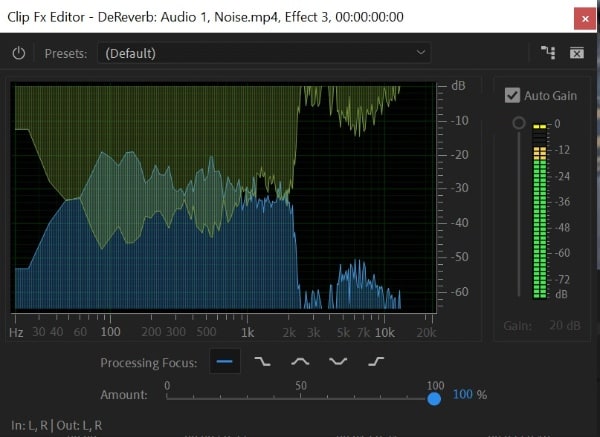
Next, choose 'Edit' from the drop-down menu, and then set the level of DeReverb by dragging the simple slider below your clip anywhere from 0% to 100%. As you move the slider closer to 100 percent, the echo should begin to vanish almost as soon as you do!
The processing emphasis should be around the flat line unless you know the frequencies you are working with. Additionally, ensure you activate the effect by clicking the button in the upper left corner of the effect window.
It is vital to bear in mind that less is more when it comes to this effect since it does have a somewhat negative impact on the quality of the audio you have captured.

Further Dialing in Your Settings
After you have reached a level of DeReverb that you are satisfied with, you may apply other modifications to the audio, such as compression and EQ. Still, it should already sound more distinct and more apparent at this point.
When you use the DeReverb effect to remove echo in Premiere Pro, there is one more cool thing about it. If you tick the box labeled "Auto Gain," the volume level does not decrease as it usually would when you remove echo using this effect. Instead, the volume level maintains the same level as you go from 0 percent to 100 percent of the effect.

The conclusion is as follows: When you are out and about or in an ample space with many echoes, here is a super easy method to manage the echo levels!
The 'Amount' option in DeReverb allows users to specify the percentage of echo they wish to remove. However, use caution while adjusting this parameter since setting it too high can decrease the quality of your audio.
Also, applying the DeReverb effect may decrease the audio level; but if you mark the Auto Gain check box, Premiere Pro will compensate for the decrease in volume. Hence, it is advisable to keep the box checked since this is the default configuration. You also can tinker with the Processing Focus settings, which let you zero in on a specific frequency or frequency.
Part 2: How to Denoise the Free and Easy Way?
Unparalleled videos are shared in clear voices by vloggers and filmmakers. But how do they manage to make such superb, noise-free videos? Your video would still pick up some background sounds even if you had the ideal acoustic conditions, had a high-end recorder and set the recorder and everything else up perfectly. Noise reduction is a crucial step in producing a high-quality video and is required for yours. After all, good audio is essential for video. Aside from removing echo from audio in Premiere Pro, here are other free and accessible ways.
1. Use Wondershare AILab [Free and online]
Wondershare AILab is an excellent alternative to removing echo in Premiere Pro with its various free online tools. You don't need to specify any settings since the AI will automatically identify and eliminate noise. So you can avoid an unwelcome sound in a crowd or a harsh breeze. AILab can help you create images, sounds, and clips that are simpler and more enjoyable.
Step1 To begin, use Add audio or drag it to upload.

Step2 As shown in the image below, the AI will automatically process the file and remove the static sound.

Step3 That’s it. Now, download the updated audio file at this point.
2. Use kapwing [Free and online with a watermark]
Another alternative to reduce echo in Premiere Pro is Kapwing. This noise-canceling program removes the audio in your movies by separating speech patterns, decreasing background noise, and eliminating background hums. It does this by removing background noise, reducing background noise, and removing background noise—no need to become proficient in high-powered and complicated audio editors such as Adobe Audition or iMovie. Suppose you host your podcast or live stream and utilize mics like the Blue Snowball. In that case, you can quickly and easily eliminate annoying background noise from every video you record with just one click.
Step1 Upload your video while it still has the background noise you want to remove by either uploading the video file straight from the device into your workplace or copying the URL link of the movie into your workspace.
Step2 Reach the "Edit" tab and pick the "Clean Audio" option from the drop-down menu. Kapwing will automatically clean up your video’s audio by removing any unwanted background noise. If necessary, you should make any essential extra adjustments to your video, such as adding subtitles, transitions, or sound effects.
Step3 When you have reduced the background noise from your movie, go to the "File" option and choose "Export Project." After a few moments, the improved version of your video will be available for you to download and share.

3. Use Wondershare Filmora to denoise
The Filmora Video Editor is easy to use and delivers various features superior to those provided by other video editors. Thus, it is one of the best audio/video editors for denoising backgrounds. The process we will follow is broken down into parts for easier understanding.
You can call this the best alternative to removing echo from audio in Premiere Pro.
Step1 Upload File and Preview
Start by importing your video into the interface of Wondershare Filmora. To get a video preview, trim the portions, and remove what don't want to keep.
Step2 Start Editing
You will need to enter "Smart Denoise" into the search bar in the Effects panel. After that, choose Edit Properties from the context menu that appears after right-clicking on the video.

Here, you can alter the clip's opacity, the threshold, and the radius.

Step3 Make Changes and Save
In this step, you can keep adjusting the Opacity slider until you get the perfect effect to satisfy your need. Afterward, reach the box beside the Smart Denoise to compare the scene before and after removing the noise and grain.
Finally, save the edited video and share it.
Part 3: FAQs
1. How can an echo be reduced in the sound of an audio recording?
For example, you might use anything that absorbs sound, like a foam pad or acoustic panels. You could alternatively record in a smaller space and use a microphone with a narrower pick-up pattern, or you could use a microphone that already has a filter built into it.
2. How can I get rid of the reverb that is on the video?
You can use either the DeReverb or the Parametric Equalizer tool to eliminate reverb or remove echo from audio in Premiere Pro.
3. Why does my recording have such a reverberant sound?
You may be in a room with hard surfaces reflecting sound waves, or your microphone is picking up an excessive amount of background noise. Try to remedy the issue by recording in a new place, using a different microphone, or modifying the settings in your recording program. All of these options are available to you.
Conclusion
This article presents how to remove echo from audio Premiere Pro and lists some of its alternatives. Have you ever wondered why so many professional content creators use Filmora? They opt to edit their content in Filmora because this tool provides complete support and reliable services.
However, all the above alternatives and Adobe will help you become better content creators by practice. So, choose the best software that is affordable and full of professional features to create flawless and eye-catching videos. Although, in my experience, Filmora is the best alternative to remove echo from audio Premiere Pro.


 100% Security Verified | No Subscription Required | No Malware

