Did you know it only takes a few clicks to key out the color in Filmora? It means that you can add green screen effects to many other objects. This article will show a cool chroma key effect you can try using written text.
In this article
Part 1. What Is Chroma Key Text Effect?
Composing of the chroma key effect is widely used in the gaming and newscasting industries. In this technique, you can make layering images and videos for the text together based on color hues.
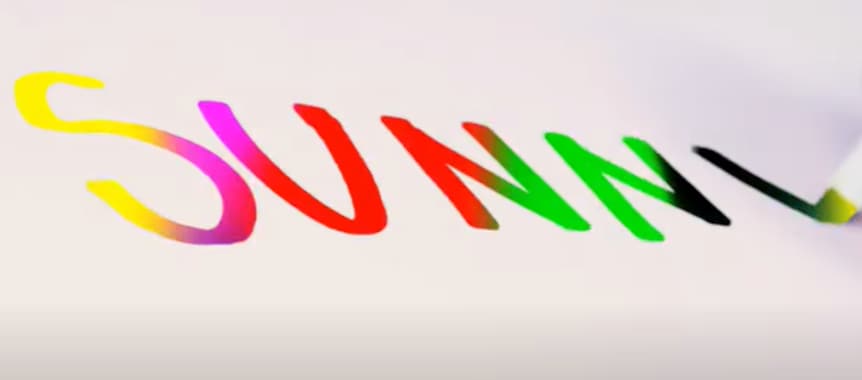
Video editors can eliminate the basis from a picture by automatically choosing a certain hue in post-production. An interactive animation results by adding different color schemes; it's an easy way to make 3D motion videos.
To make the effects on text, we have to film the subject writing on white paper. For this, follow the below instructions:
Part 2. Filming Tips for Written Texts
To write a key text before adding the chroma effect, we have to film the writing process to understand your next project better. You can create your own by following these tips. We are just concluding a single example here.
Tip 1. A Pen and a White Paper
We need blank white paper with no boundaries and lines for writing a text. Because the chroma effect will embellish the other lines if present on paper. Make sure to choose a prominent color for writing a text.
We are using a purple color pen here for writing an essential text to make it more prominent, as shown below:
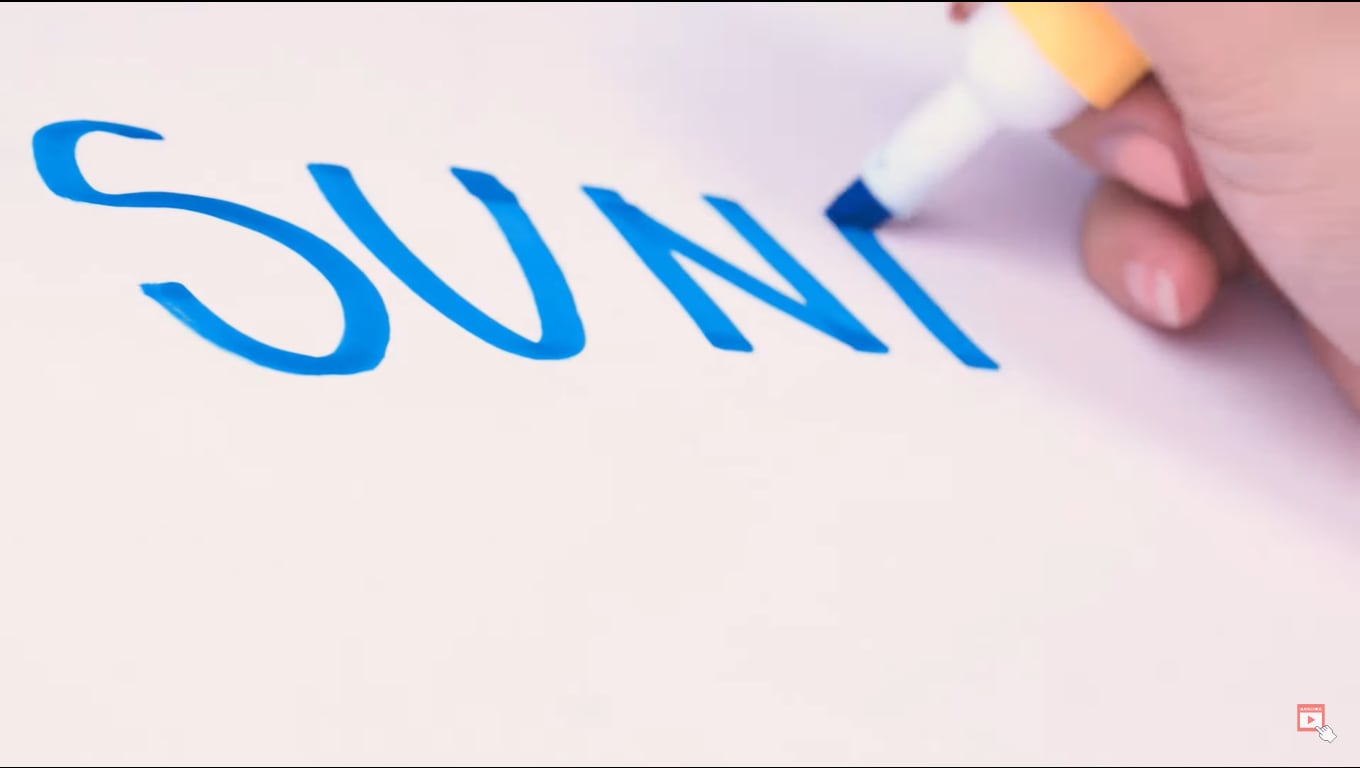
It all depends upon the contrast, and you can choose another color too but ensure that it's more apparent during filming.
Tip 2. Different Color Paper
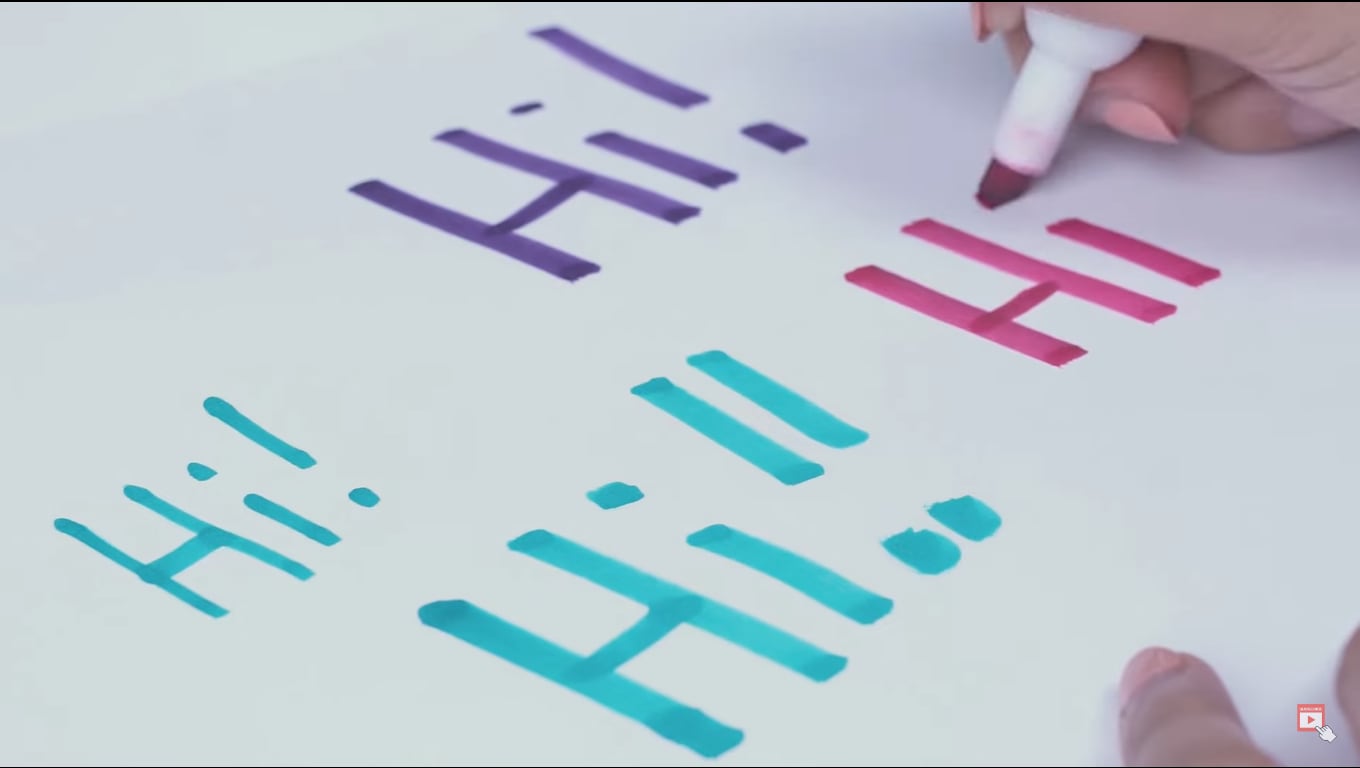
There are many chances that you don't have only white paper in your studio, or your requirement is not going with a blank white sheet. Then you don't need to worry because you can use different color papers too.
But always try to use clearer paper and a prominent pen or highlighter. See the below example of a different color paper with a different highlighter.
Tip 3. Camera Angles
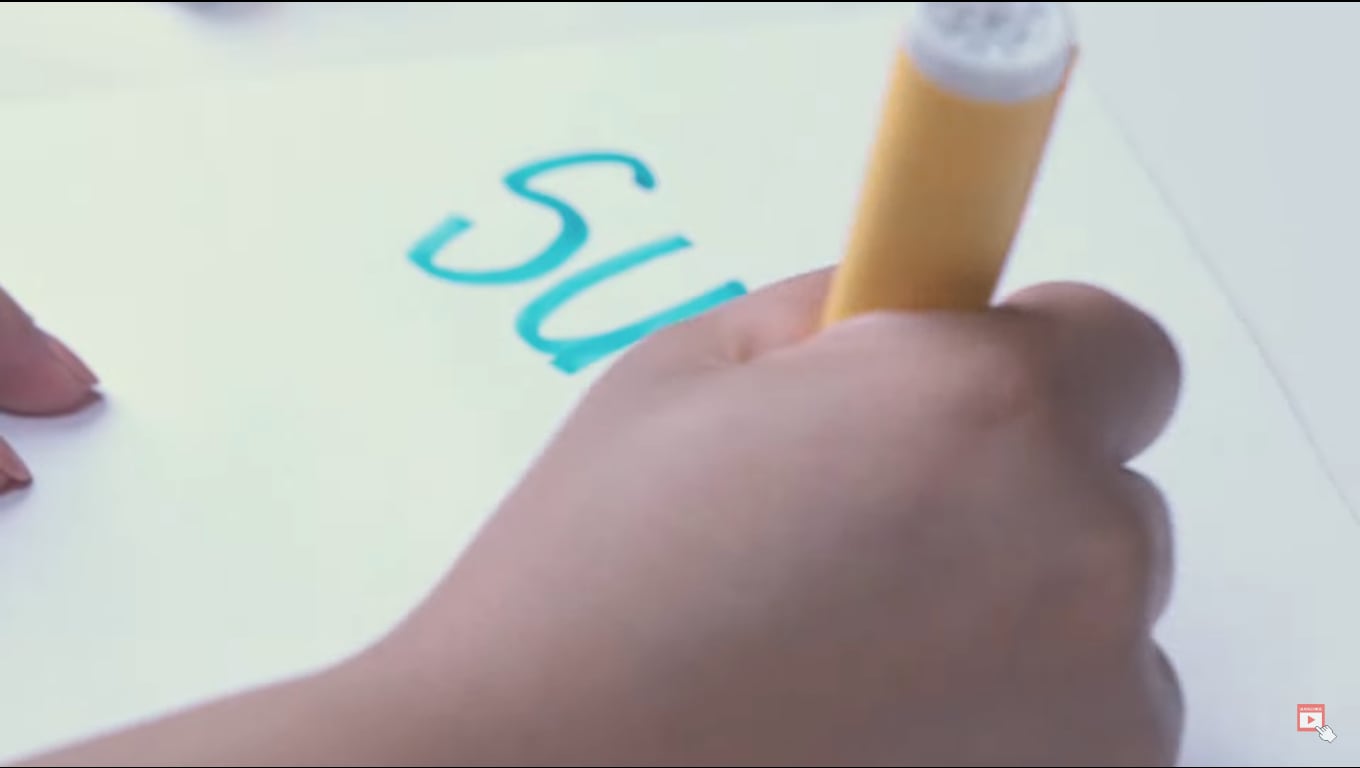
While filming a writing process for a video, you have to take care of the alignment of the camera. First, ensure the camera is at a suitable angle so it will not block the writing letters from the left side.
Sometimes, the writer's hand blocks the letters on the left side during writing. Take note of this tip during filming a professional video, as shown below.
After checking the alignment of the camera, it's time to look at what size we have to use for writing!
Tip 4. Larger Size of Letters
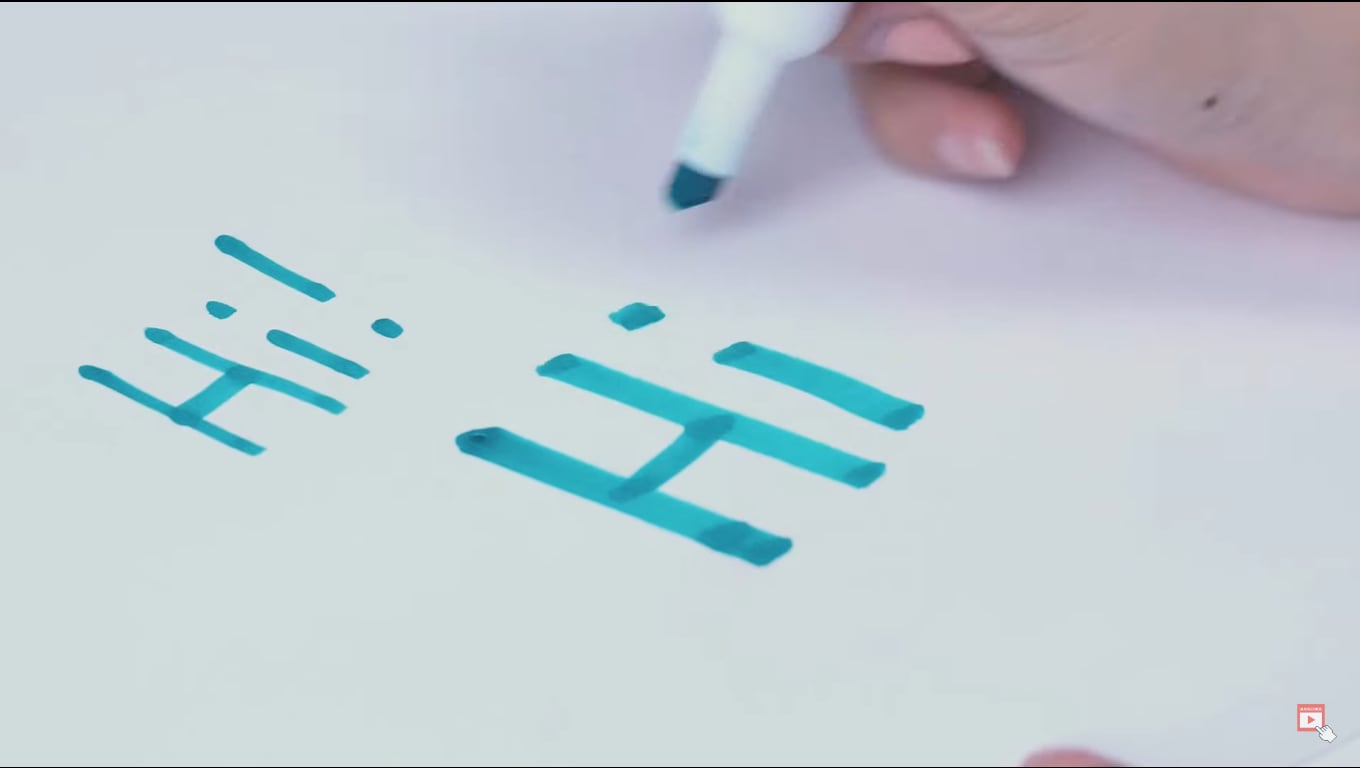
As we already said about the prominence of written text, we have to follow one more instruction related to the structure of the letters. Use the larger size and bold words when writing from a highlighter.
It is because the effect we insert during editing will be more standing and give a professional look to the video.
After filming all the clips, you must edit those shots on the Filmora to get the chroma effect. Scroll more to get the step-by-step process!
Part 3. Editing the Chroma Key Text With Filmora
We need software that will give great setting choices and stock videos for a more professional look. For this, Wondershare Filmora will work more than a robot and give high-resolution results. To do the editing process on Filmora, follow the steps below and enjoy yourself with your followers.
Step1 Download and install Wondershare Filmora
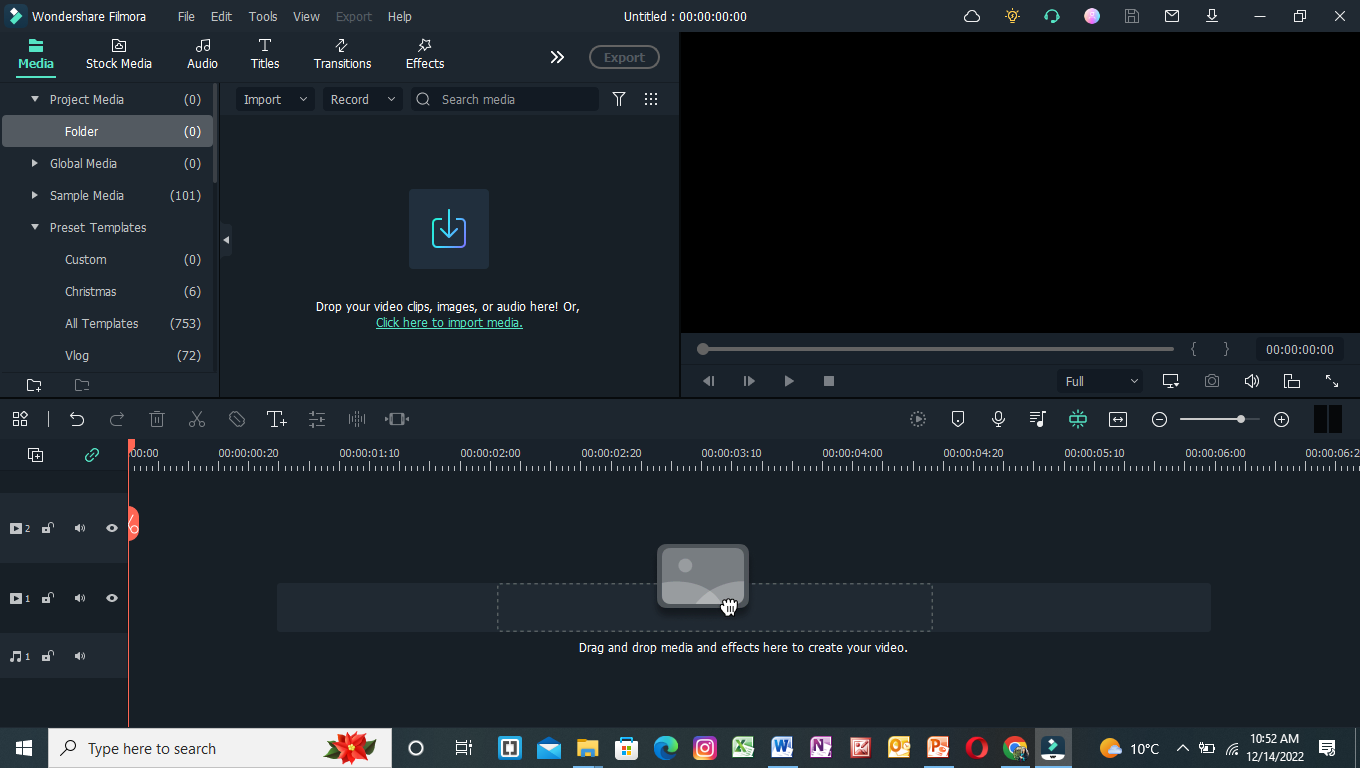
Launch Wondershare Filmora on your PC or Mac after downloading.
Step2 Import the clips to the Filmora
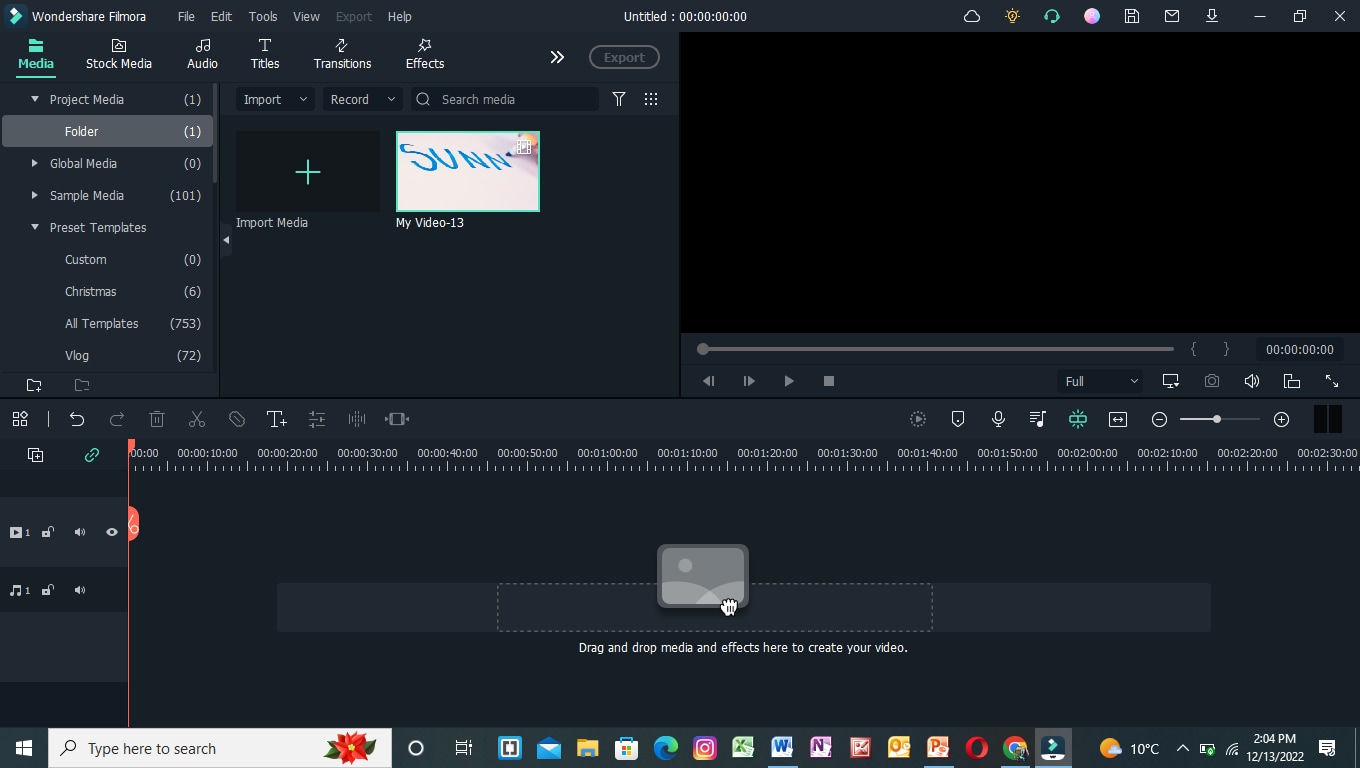
First, import the best footage into the filmora which you have shot. Ensure that the clip should have the best recording angle and that every word will be prominent on the page.
For this, click on Import Media and choose from the PC library what you want to edit.
Step3 Drag the clip to the timeline
Drag and drop the clip into the timeline from the import section. If you have more clips, choose first according to your script.
Add the text-written clip into the second video track because we have to insert the background into the first video track later.
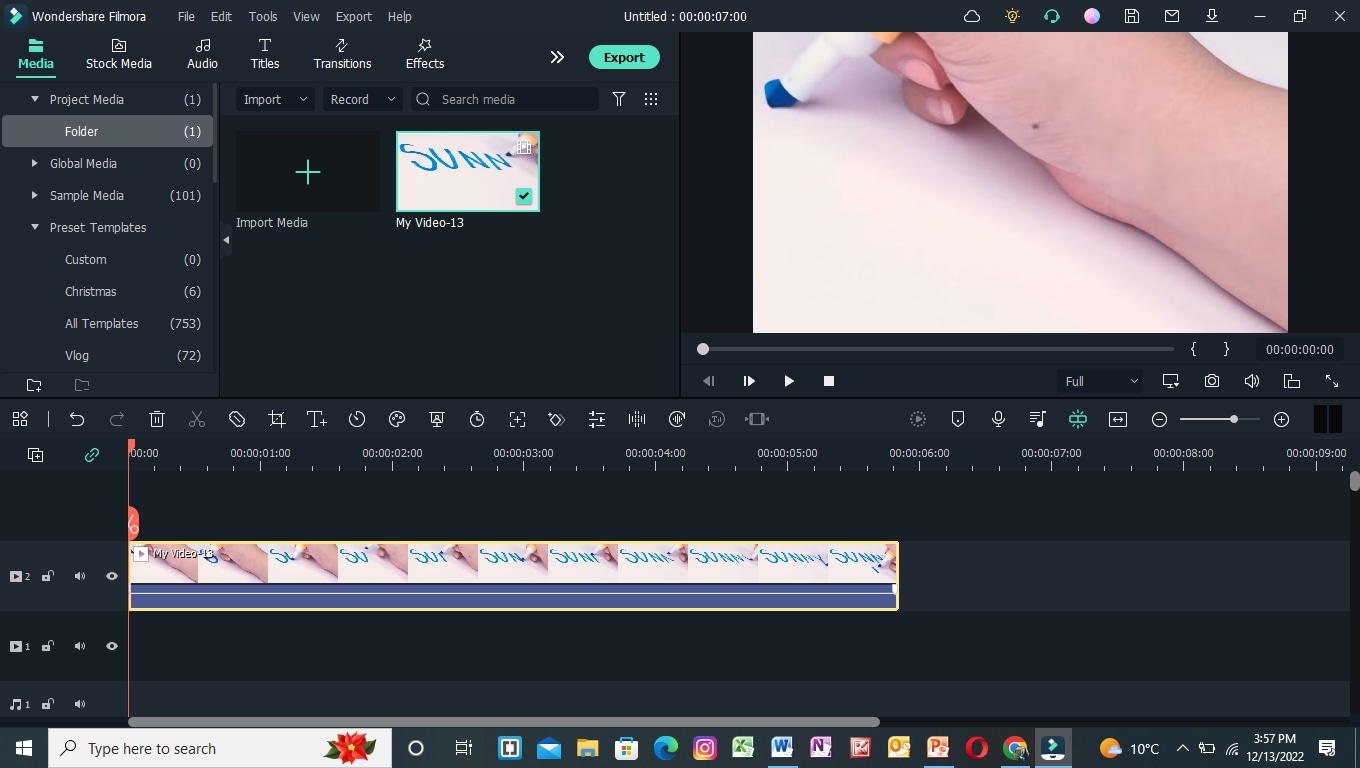
After inserting the clip into the timeline, it's time to edit it. For this, keep following the below-mentioned steps!
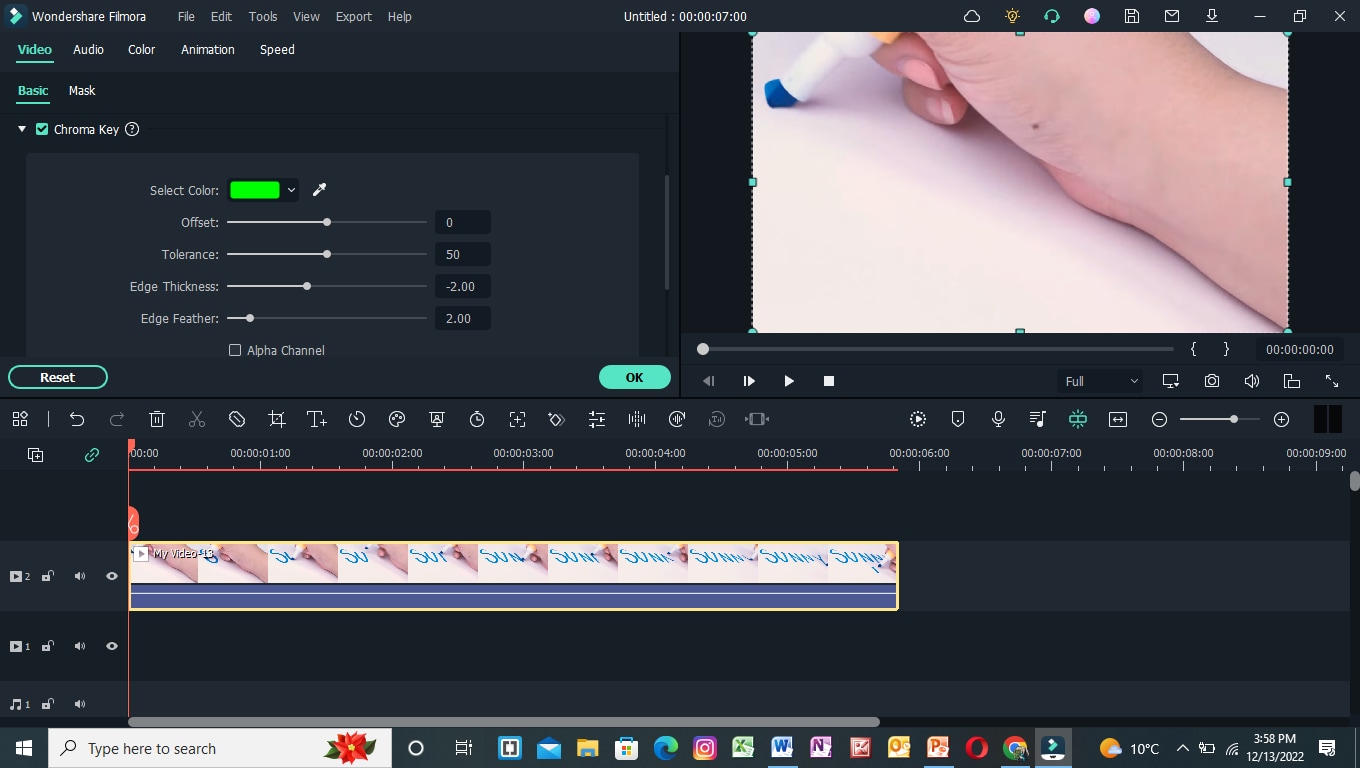
Step4 Chroma key settings
To edit the chroma key, you need to open the settings. For this, follow the below instructions:
- First, double-click on the clip in the timeline of the Filmora.
- Then, the setting section of the video will pop up at the top left side.
- Mark the tick in front of the Chroma Key section, and it will show the list of different features as shown below.
Step5 Color key out
To key out the specific color for changing its background, you have to perform the following actions:
- First, find the Select color option in the settings of the clip.
- Then click on the color dropper in front of the color tab.
- After that, pick the color dropper and move it on the video to select the color from the text.
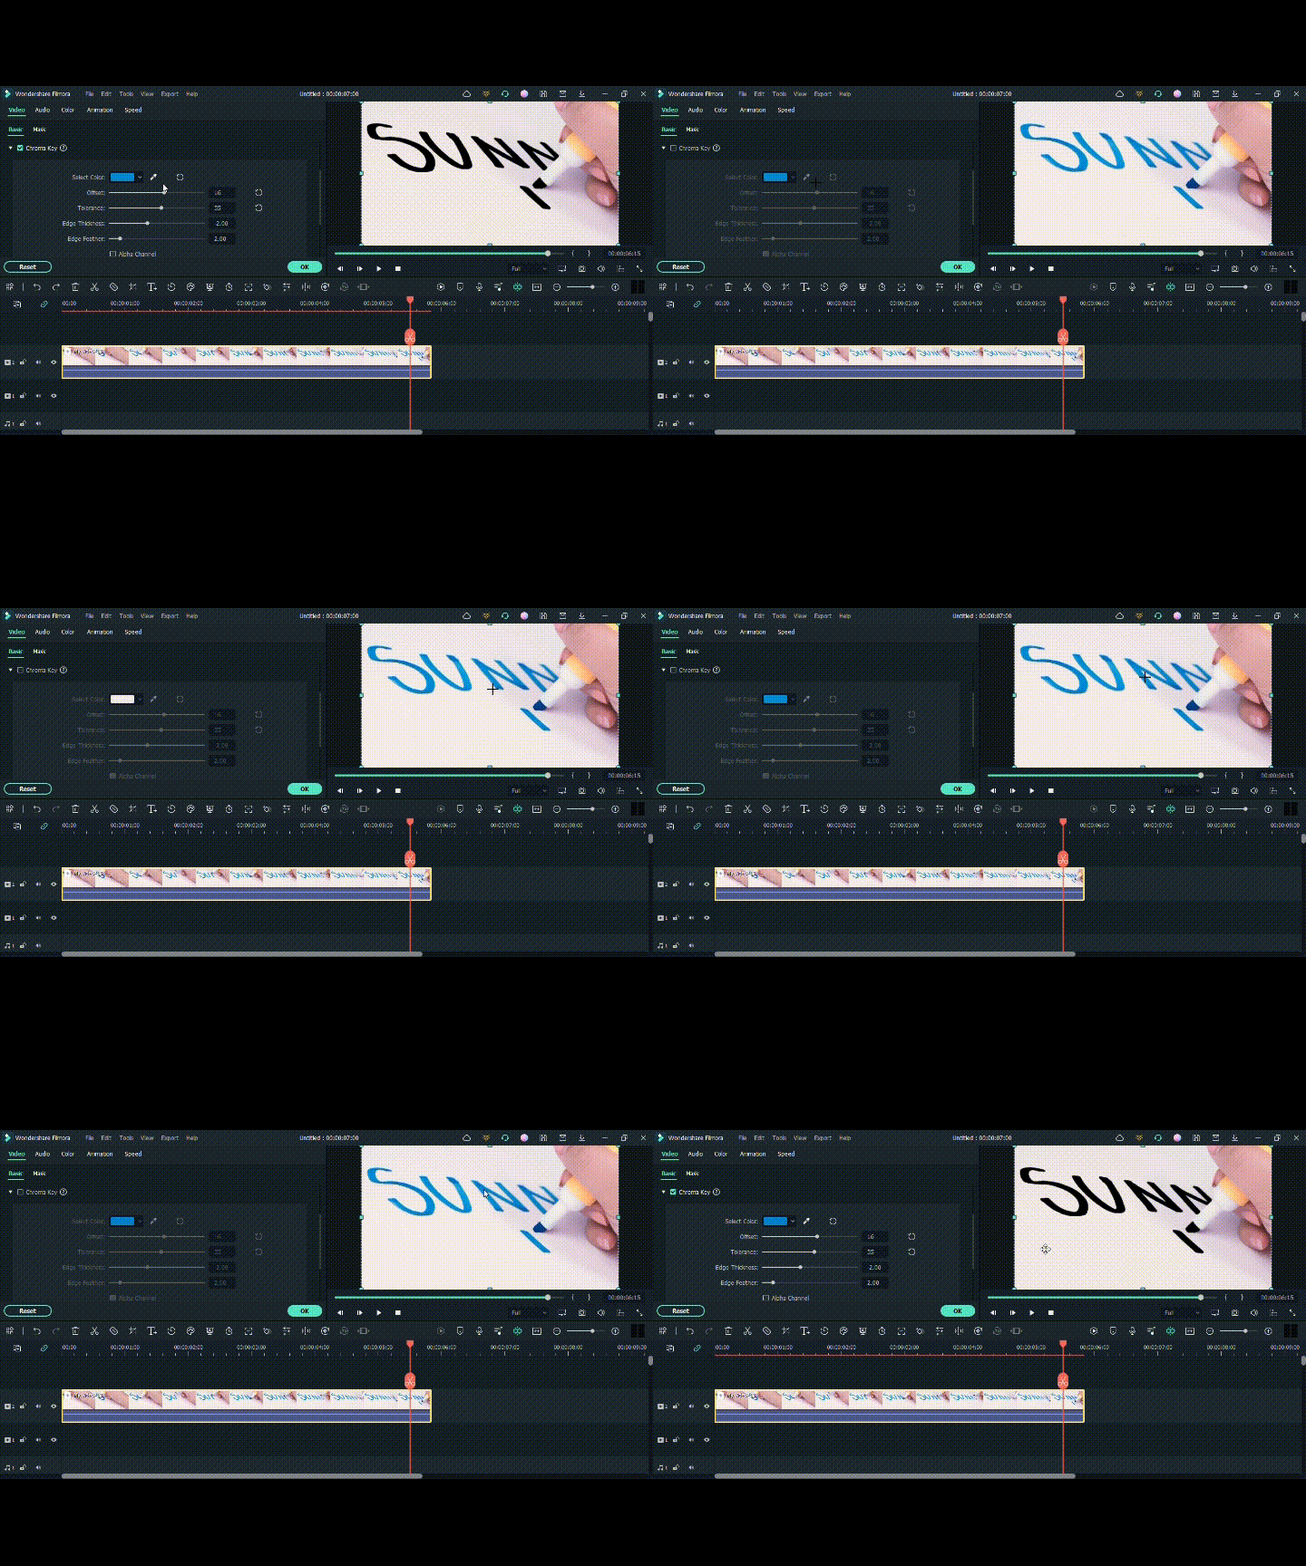
You have to adjust the size and thickness after selecting the key-out. For this, follow the next step!
Step6 Adjust the settings
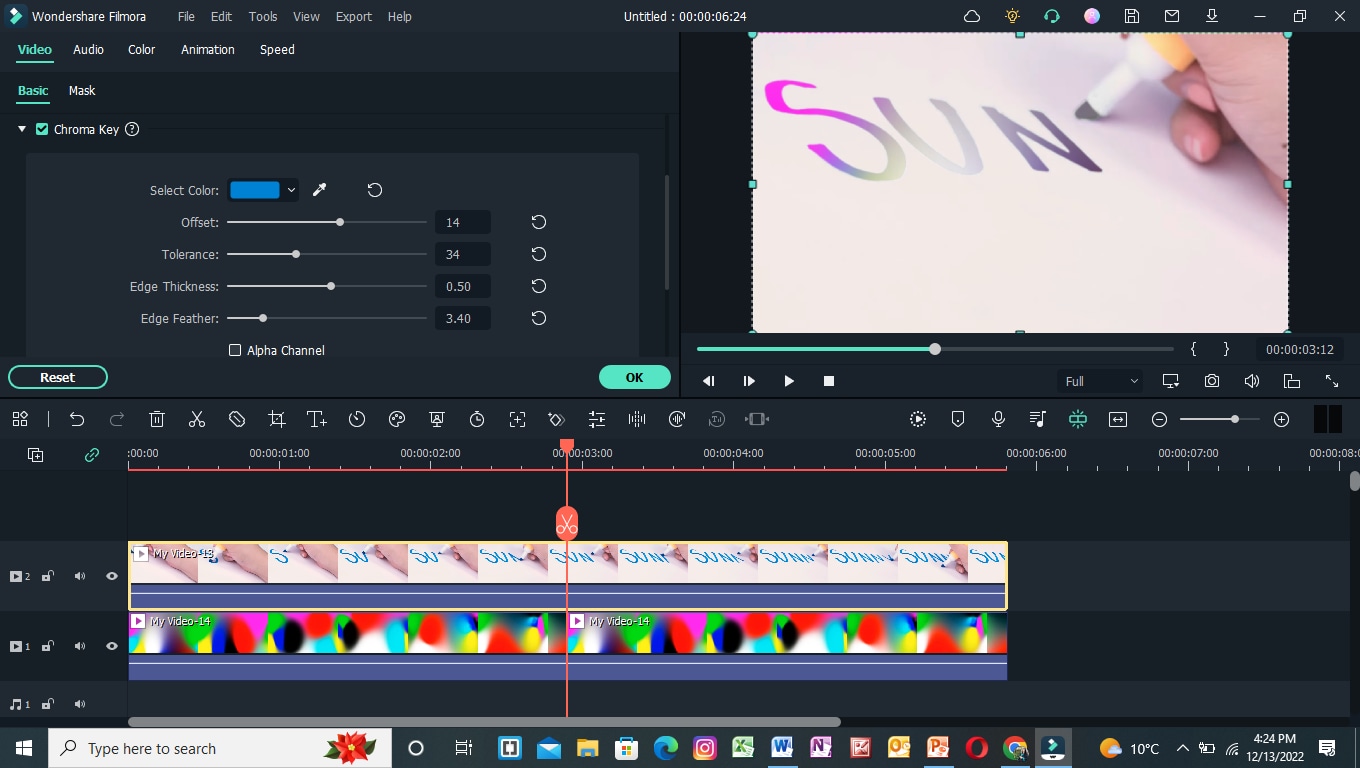
To adjust the Chroma Key's settings, set the offset, tolerance, edge thickness, and edge feather. Increase or decrease according to your range and that suits you the best.
Then click on Alpha Channel to mark the tick in front of the option. It is due to that chroma key effects will be more clearly shown.
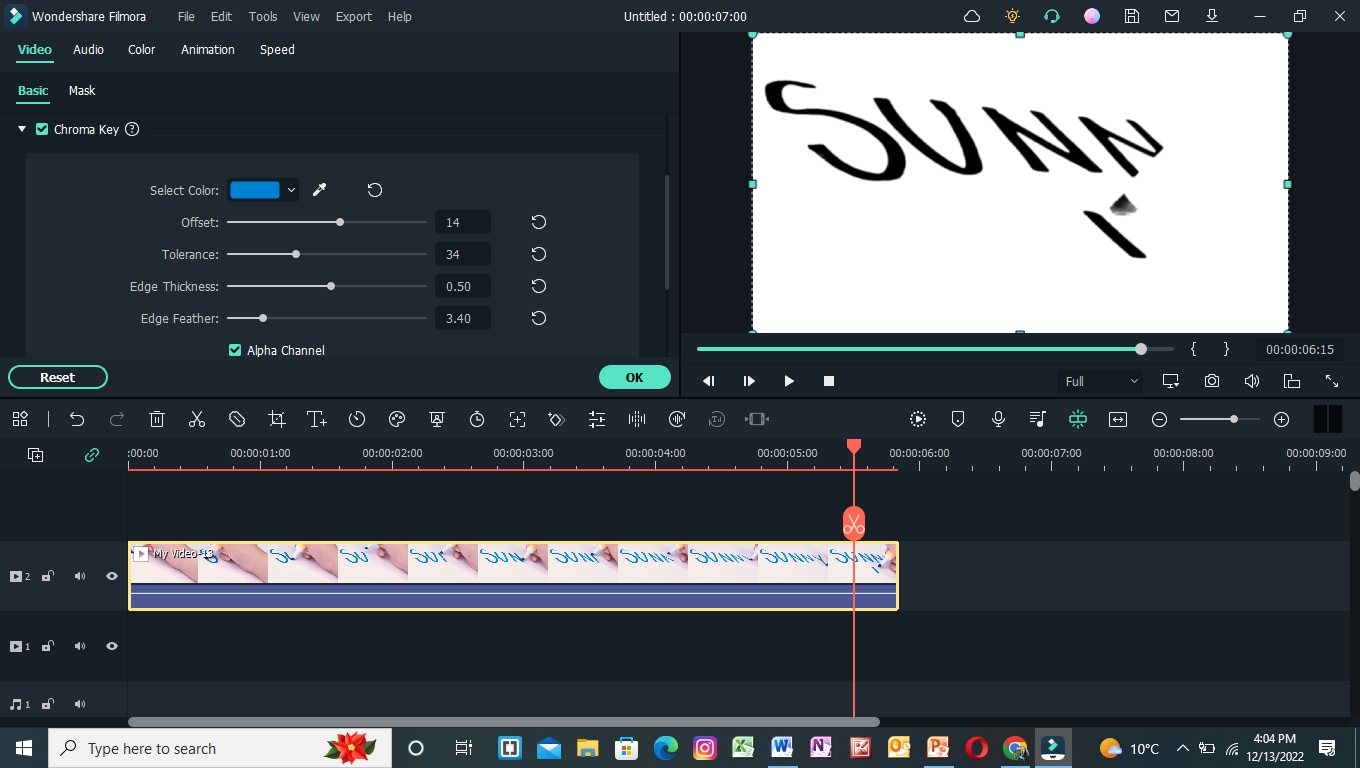
Now, it's time to set the background after fixing all the settings of the chroma key effect. To perform this, scroll more to get to the next step.
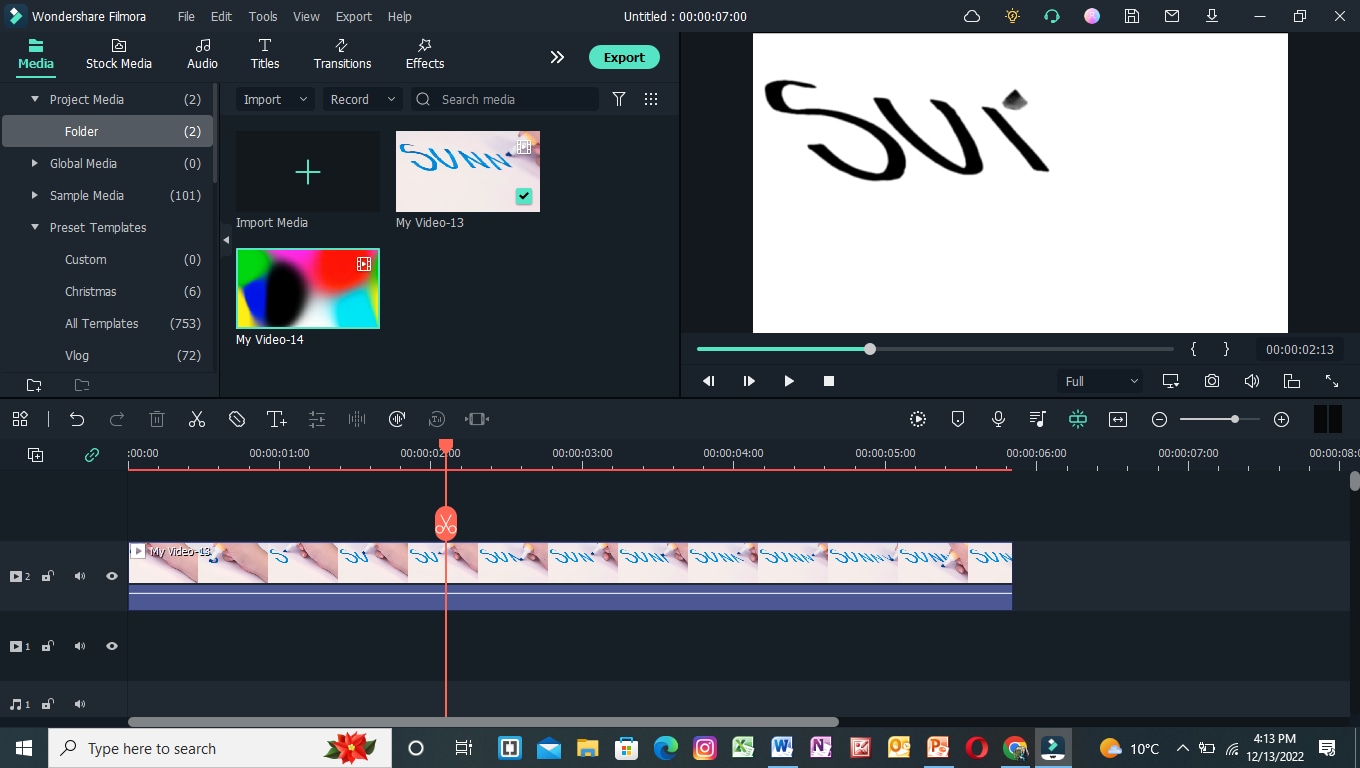
Step7 Import background clips
You have to add an excellent motion background in the handwritten text video. For this, you must first import the background clip into the filmora. Then, click on Import Media and choose what you want from your PC.
Step8 Add a background clip to the timeline
After importing the background clip, now drag and drop the clip into the timeline. Finally, add the background clip to the first video track at the bottom.
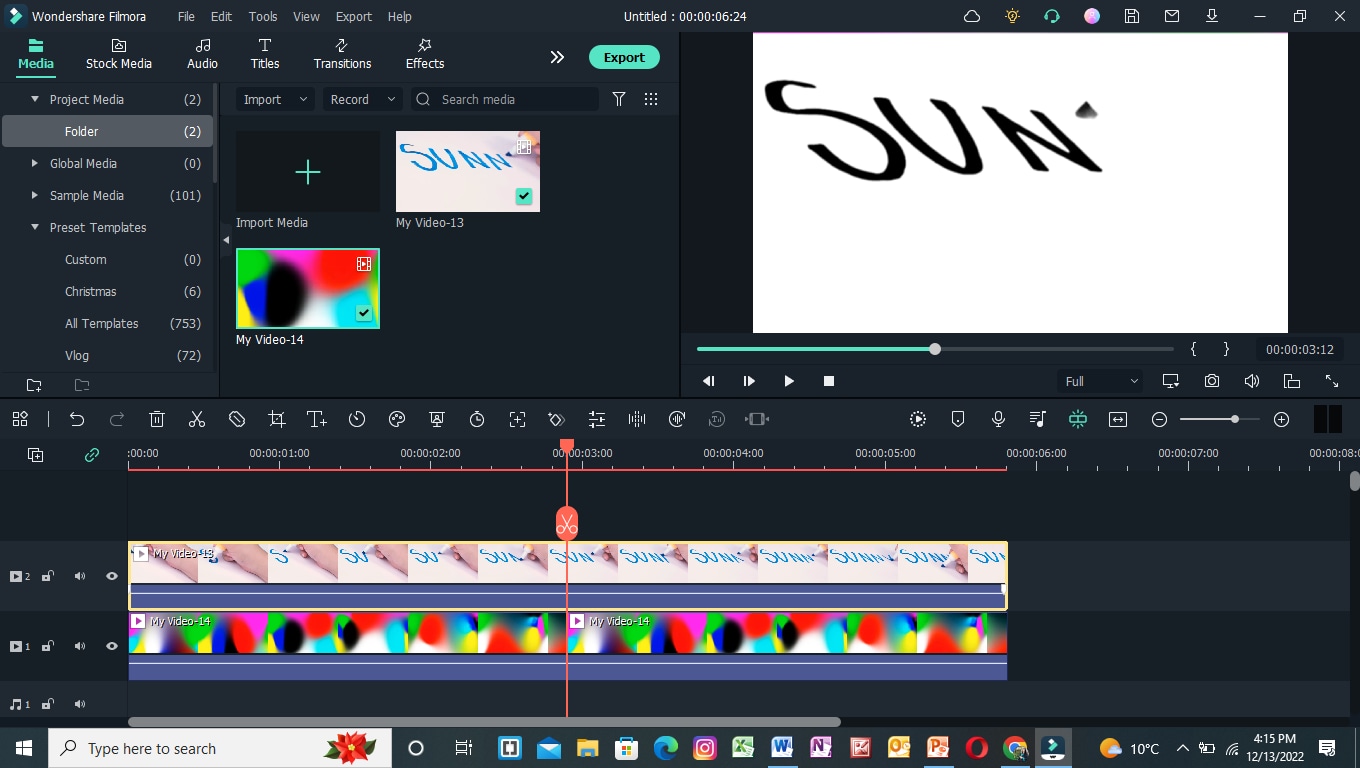
Step9 Turn off the alpha channel
The last step is merging the background clip with the first clip. For this, follow the below guidelines:
- First, double-click on the handwritten text video.
- It will show the settings section at the top left corner.
- Find the chroma key section and turn Alpha Channel
Final Results
You have all done with the steps and got such a fascinating result. Following the above tricks, you can easily make your vlogs and daily videos more professional and creative. Make sure to add a great and colorful background clip.
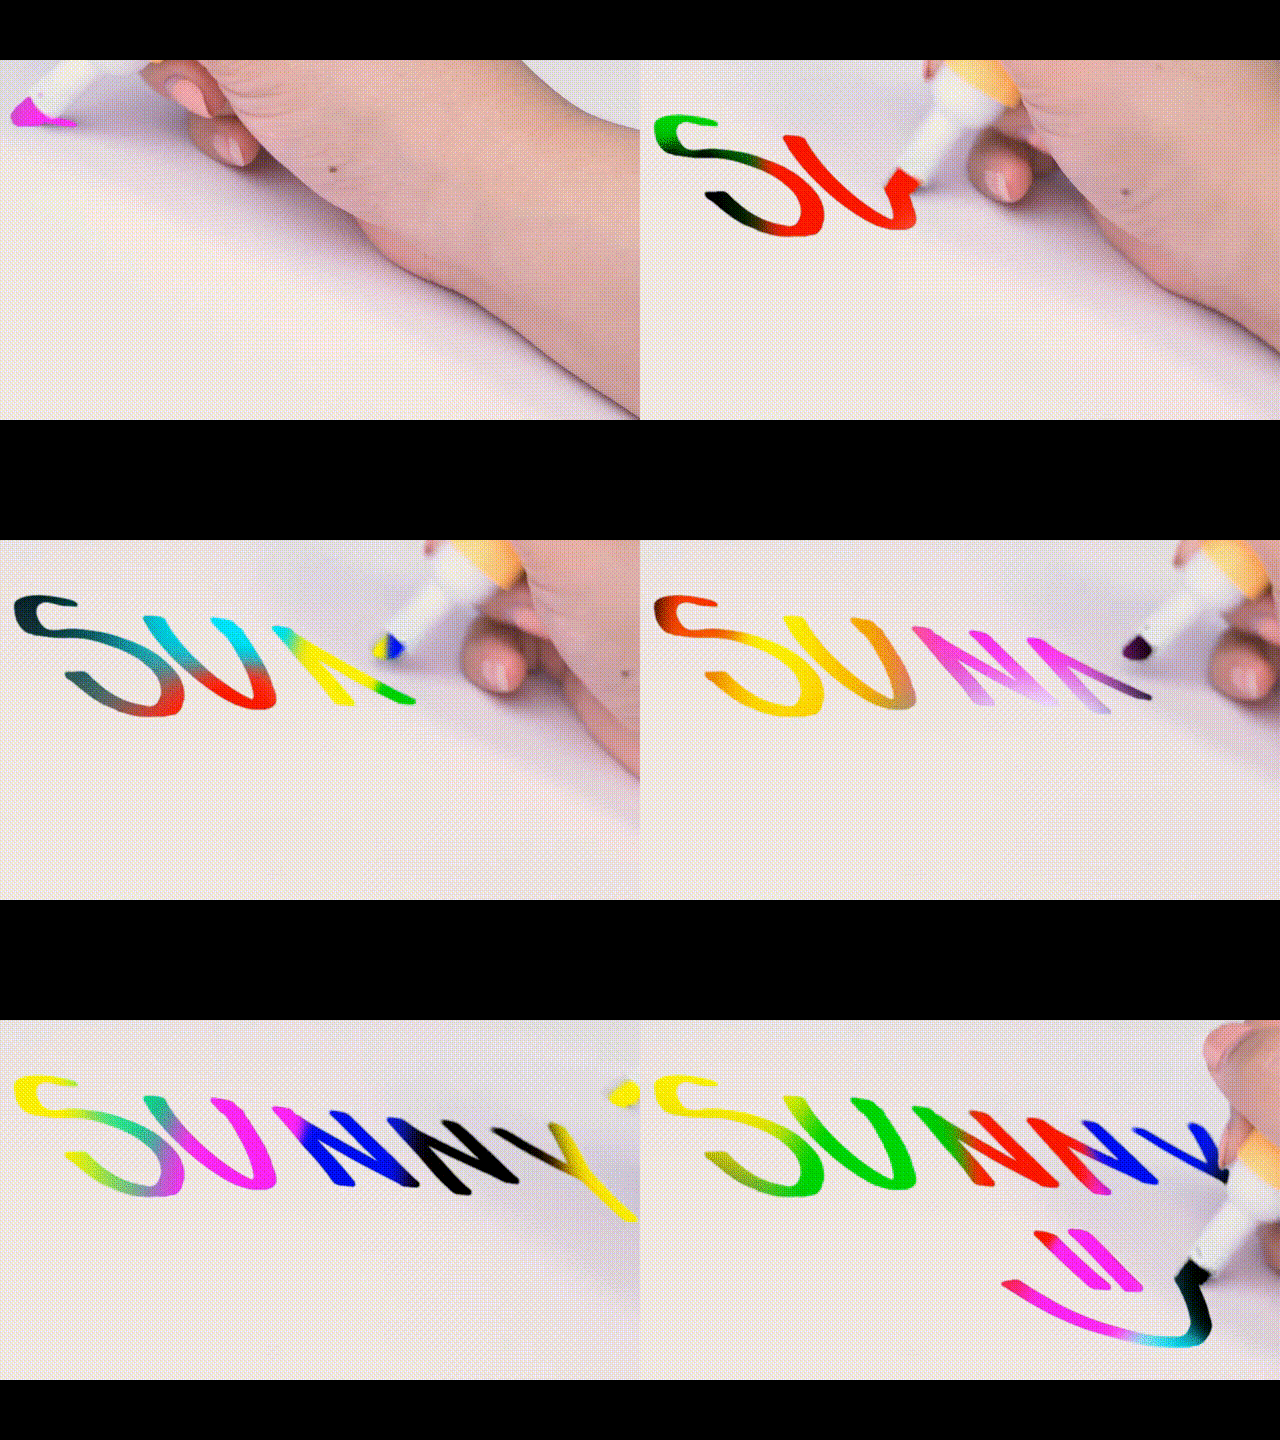
You can also use any other motion video of scenes rather than colorful videos to give a striking look.
Conclusion
Create more attractive looks and share them with your subscribers. Mainly, vloggers can attract many viewers by making the introductory part with this effect. Then, choose hundreds of other videos from the stock media and create different looks daily.
See how you can get editing tricks on Wondershare Filmora and use them in a few clicks to get an attractive look!


 100% Security Verified | No Subscription Required | No Malware

