
 100% Security Verified | No Subscription Required | No Malware

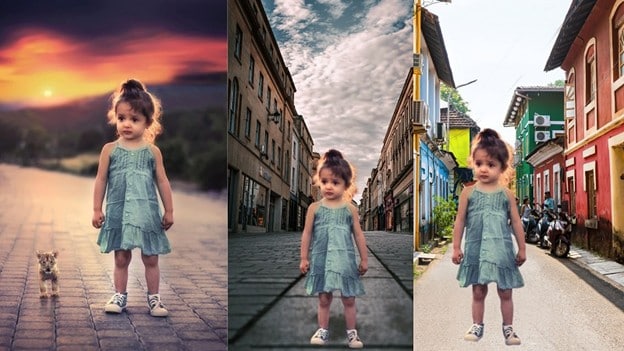
A cluttered shelf. A blank wall. Or worse, an unintentional photobomber. These silent distractions often say more than the actual content. That's why creators are rethinking what appears behind them. Backgrounds aren't just scenery; they shape perception, signal professionalism, and influence how long someone stays engaged.
To resolve it, you do not require a studio. With smart tools like AI segmentation, chroma key, and masking, anyone can now change video background with stunning accuracy, no green screen required.
This guide explores how you can achieve clean, dynamic background changes using desktop tools. You will learn how to practically eliminate distractions and add cinematic elements that truly set & polish your video scenes. Step-by-step frameworks will be provided for every section.

In this article
Part 1: Smart Ways to Prepare for a Background Makeover
Creators often lose impact to cluttered scenes. Adding background to video helps them stay focused, on-brand, and distraction-free, whether teaching, reviewing, or storytelling. It's a visual upgrade that viewers instantly notice.

- Select Crisp, High-Quality Backgrounds That Fit Your Message
Bad visuals spoil great content. Choosing themed templates that are high-resolution yet subtle vis-à-vis your content is very important.
- Light It Right: The Key to Seamless Background Swaps
Shadows confuse background tools. Soft, even lighting makes removal much easier and cleaner.
- Align Visuals with the Story You're Telling
Your background should fit your video. Mismatched scenes confuse viewers and break the flow.
- Build Visual Consistency to Boost Your Personal Brand
Consistent backgrounds build your brand. Familiar looks help viewers remember and trust you.
- Add Motion and Depth Using Animated Backgrounds
Animated backgrounds add life. Energy and depth can be increased with even minor motions.
Part 2: The Best Video Background Changer: Filmora Desktop
Great videos need more than just good content; they need the right setting. Wondershare Filmora gives creators the power to change video backgrounds fast, with tools that are simple but strong. You don't need expert skills or special gear. Just import your footage, pick your background, and start editing.
It's flexible, smart, and built for today's creators who want full control without wasting time.
Features that matter:
- AI Portrait (Human Segmentation): Automatically detects people and removes the background. You can add effects around the subject with no extra effort.
- Chroma Key: Replaces solid color backgrounds with any image or video. Perfect for green screen editing.
- AI Smart Cutout: Enables you to remove people from a picture or video footage. Great for detailed, frame-accurate background removal.
- Custom Backgrounds & Templates: You may also upload your own files and draw from the existing assets.
- Overlay Effects & Transitions: Add subtle effects for cinematic depth.
Part 3: How to Change the Background of a Video in Filmora
1. Remove a video background without a green screen
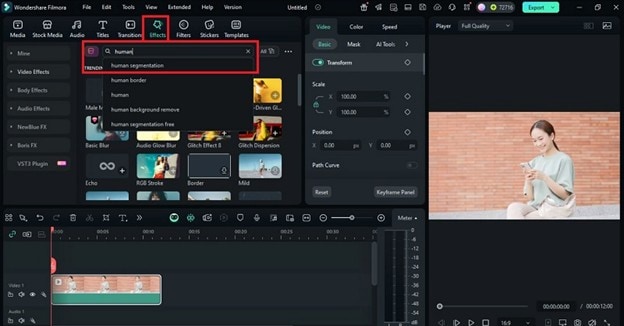
Filmora lets you erase backgrounds without using a green screen. The Human Segmentation effect is simple and quick to apply.
Step 1: Upload your video and then drag it onto the timeline. Look for Human Segmentation under the Effects option. Apply it to your clip. Adjust the clip to modify the edges and make cutouts smoother.
 secure download

Step 2: Make a new background out of anything you like. Place the image on the track below your main video.
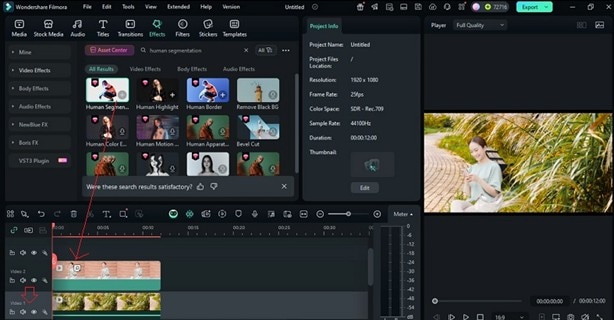
Step 3: Preview the result. Your subject now appears over a new background, no green screen needed.

2. Change Background using Green Screen
Want to drop your subject into a new world, like a rooftop, a galaxy, or a busy street? A green screen makes that possible. It's the classic way to change the video background for dramatic or creative scenes. Through Filmora, it does not matter what your skill level is, you can easily do this.
Step 1: Add your green screen clip to the timeline. Double-click it. Go to Video > AI Tools, then turn on Chroma Key. The green background becomes transparent.
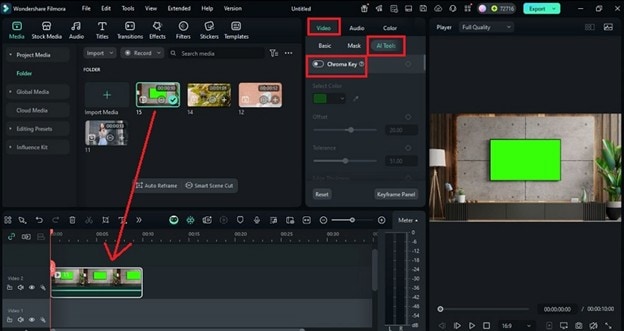
Step 2: Now insert your new background or object on the track below. This will replace the green area in your clip.
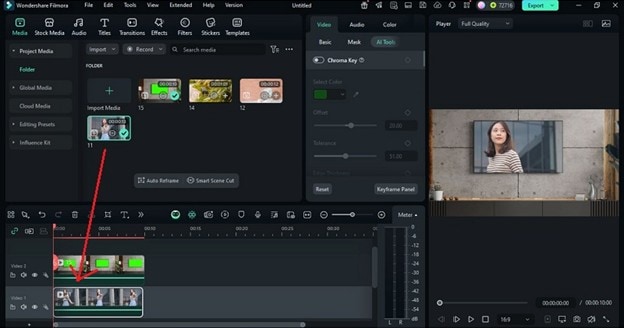
Step 3: Preview the result. The new background fits smoothly where the green used to be.

You can improve the scene even more using extra Filmora tools. To make the background of your video less shaky, you can use tools like stabilizer, adjusting colors and lighting, and reversing clips. These tools can help your video appear polished and realistic.
3. Change Video Background with AI Smart Cutout
With the use of AI Smart Cutout, you can remove unwanted elements from a scene. It uses smart edge detection to separate the subject with high accuracy. This works best when you want a video background change, creative touches, or to remove distractions.
Step 1: Put the clip on the timeline after you've uploaded it. Click on the clip and go to Video > AI Tools. Enable Smart Cutout.
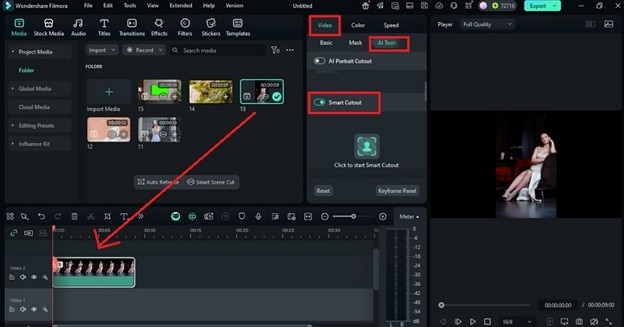 secure download
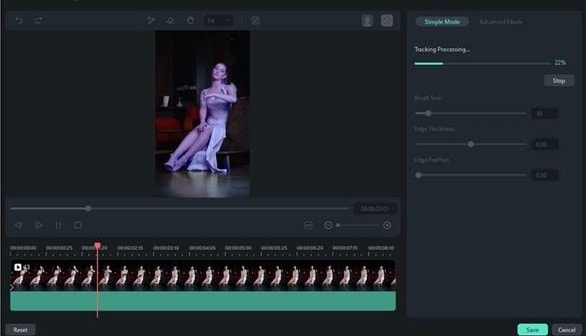
 Step 2: Mark the area you wish to retain using the brush. Filmora will detect the object automatically. Click Start Smart Cutout, then hit Save.
Tip: Adjust the thickness or softness of the edges to achieve better results.
Step 3: Now the background is transparent, and your selected object stays in view. Hit Play to preview the cutout.
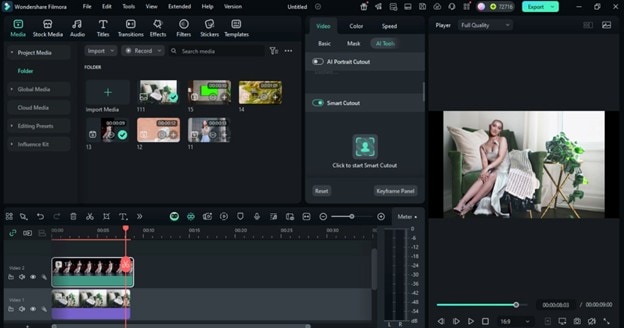
Step 4: To match your video's theme and style, you can now replace the video background with any images, scenes or effects.

Part 4: How to Change the Background Color in an iPhone Video
You can change the background of phone-recorded videos using Filmora. If your clip was recorded using a green screen, then this way is simpler.
Step 1: Get and install Filmora from the App Store. Launch the application and select New Project. Import your video from your device's storage.
Step 2: Tap the track and hit Smart Cutout > Remove Background to extract the backdrop. The tool will recognize and remove it automatically.
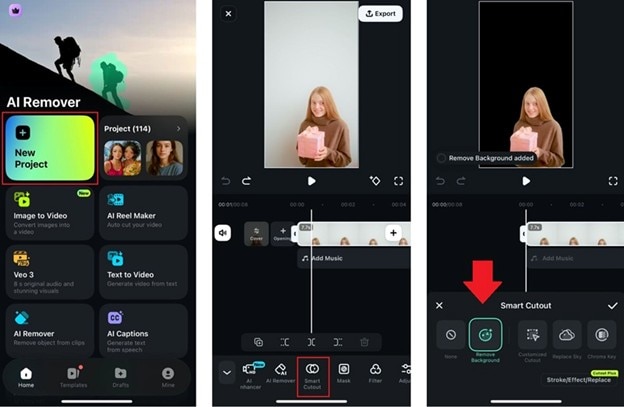
Step 3: To add a background, go back and tap "Background" from the toolbar. Here, if you want to know how to change the background color on an iPhone video, you can select from available color presets. You can also use the eyedropper tool to pick a custom color.
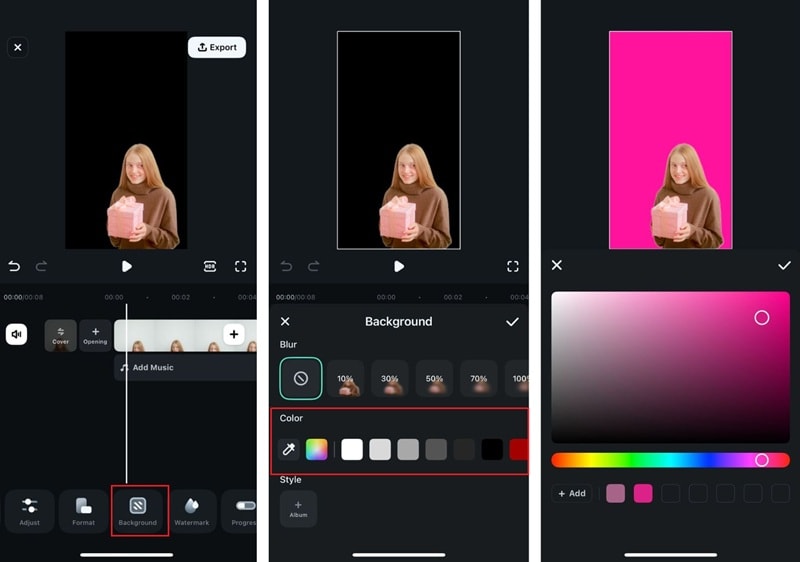
Or you can also upload your own image by tapping Album.

Now you've successfully changed the video background on iPhone! Preview and tap the checkmark button to save the changes. You can also blur it out if you want.
Part 5: Enhancing Backgrounds for a Cinematic Feel
Once you've changed the background, polish it with these effects to give your video a professional finish.
- Using Templates on Video Background: Filmora offers a variety of pre-made templates, ideal for intros, presentations, or branding. Drag and drop them to elevate your background style.
- Add Text on the Background: Overlaying text is perfect for tutorials or quotes. Use shadow effects or animation paths to match the flow of the video.
- Transitions Between Scenes: Moving from one background to another? Make it smoother with cinematic zoom, dissolve, or motion blur transitions.
- Add Subtitles for Engagement: Use subtitles to keep viewers focused, especially on social media. Filmora supports auto-captions and manual syncing.

Related Templates For You to Try


Conclusion
Visual clarity can define the success of a video. From removing clutter to adding dynamic scenery, learning how to change video background is now a core part of modern editing. This guide walks through every stage, from prep tips and lighting to desktop workflows and mobile techniques, empowering creators to transform footage with precision and creativity.
Knowing how to change background of video in Filmora unlocks more than just clean edits; it opens a canvas for storytelling. With AI precision, green screen mastery, and rich design assets, Filmora turns background editing into a creative advantage, not just a technical fix.
secure download 