
 100% Security Verified | No Subscription Required | No Malware

 ChatGPT
 Perplexity
 Gemini
 Claude
 Grok
Grok
Lighting is a crucial component of any YouTube video. Setting it poorly can be a major turnoff. If you get it right, however, it can drastically improve your video's quality and make your colors pop. It will attract viewers to click on your content and watch it from start to finish.
For those looking for the best lighting for YouTube videos, you need to start with the basics, such as understanding different types of lights and how to set up the key light, fill light, and backlight. Once you've got that down, you can further refine your video's look with color grading.

In this article
Types of Lights Used in YouTube Video Production
Lighting in YouTube videos can make a huge difference. It can transform a basic setup into a professional-looking production you often see in popular vlogs and tutorials. There are several lighting options that can help you get that look, depending on your needs and budget:
- Natural Light
The easiest light source to use and it's free! Natural light from windows can give a beautiful, soft look to your videos. This type of lighting is the best for vloggers. However, it's unpredictable and can change throughout the day.

- Ring Lights
Since you can't always rely on natural light, ring lights are popular among vloggers and beauty influencers. They create a uniform light that reduces shadows and highlights your face with a pleasing circular catchlight in the eyes.
Cost: $20-$200
Some of the best ring lights for YouTube videos:

- Softbox Lights
Softboxes are excellent lights for YouTube video recording in a studio. They provide a soft, diffused light that minimizes harsh shadows and is flattering for on-camera talent. These lights can be positioned to light the subject evenly and are adjustable to accommodate different shooting conditions and styles.
Cost: $50 and $100
Some of the best softbox lights for YouTube videos:

- LED Panels
LED panels are versatile and adjustable. You can fine-tune the brightness and sometimes even the color temperature, making it a popular choice for a YouTube background light. They're energy-efficient and offer consistent light.
Cost: $50 - $500
Some of the best LED panels for YouTube videos:

Three-Point Lighting: The Best Lighting Setup for YouTube Videos
Once you're familiar with the different types of lights, the next step is to set them up. One of the most effective lighting setups for YouTube videos is the three-point lighting system, which includes key light, fill light, and backlight.

- Key Light
This should be your strongest light source, ideally positioned at a 45-degree angle to the subject, either to the right or left of the camera. It's usually raised to be slightly above the subject's eye level to cast defining shadows that enhance the subject's facial features.
- Fill Light
Placed on the opposite side of the key light, the fill light counteracts the shadows created by the key light. It should be softer and less intense, ensuring the shadows are visible but not overly stark. This light is essential for softening your subject's appearance and bringing detail into the darker areas.
- Backlight
Positioned behind the subject, facing toward the camera, the backlight helps to separate the subject from the background. It creates a subtle halo effect or rim of light around the edges of the subject, enhancing depth and making the subject stand out more distinctly.
Once you arrange them together, you will get a result like this:

You can watch this video for a detailed explanation of how to set up the best lighting for a YouTube video:
Best Lighting Setup for Vlogging or Outdoor Filming
In the previous section, we've discussed the best lighting setup for YouTube videos if filmed indoors. Now, let's discuss how to set up lighting for outdoor filming like vlogging.

To maximize the quality of your outdoor videos, you can consider the following YouTube video lighting tips:
- Plan Your Shoot According to Sunlight
If you use natural light, schedule your filming times around the sun's position. Early morning and late afternoon, known as the golden hours, offer soft, diffused light which is ideal for video. Avoid midday sun and keep track of the weather.
- Make Use of Artificial Lighting
Aside from natural light, you can also use portable lighting solutions like LEDs. Portable LED panels are one of the best lighting for vloggers. They can fill in shadows effectively, especially during times when natural light is less favorable. Some cameras even have built-in LED lighting.
- Use Reflectors and Flags
If the lighting is harsh, you can use flags to block or diffuse it. This can be especially useful during midday shoots or when the light is overly bright. Meanwhile, use reflectors to bounce back sunlight or any ambient light onto the subject.
Finetune the YouTube Video Light and Color in Post-Production
After capturing the video with the best lighting for YouTube videos, the next step is to enhance and perfect it through color correction. This step is important as it enhances the overall look of the video, bringing out the best in your footage by improving color balance and setting the mood and tone of your video.


For this task, you will need video editing software like Wondershare Filmora. Filmora makes color grading easy with intuitive tools and presets, so you won't have to deal with complicated tools or settings. There are two ways to fine-tune colors in Filmora:
1. Using AI Color Palette
Filmora includes an AI Color Palette feature that simplifies color matching across your video clips. This tool analyzes the color tones of a reference image or a specific video frame and automatically creates a matching color palette. It's especially useful for ensuring a consistent look throughout your video, even if your clips were filmed under different lighting conditions.

How to use Filmora AI Color Palette:
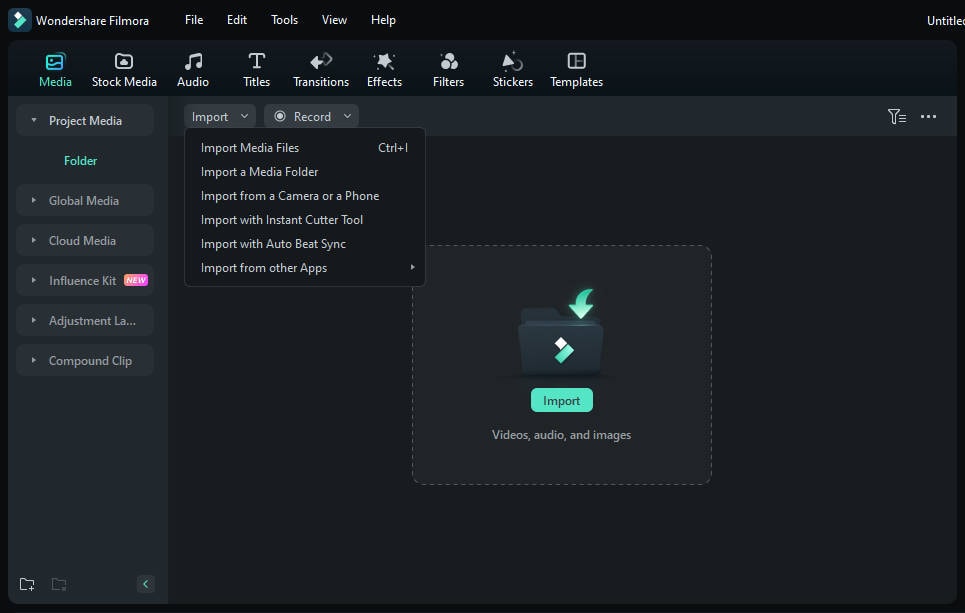
01of 05Import Media Files and Add Them to the Timeline
Open Filmora and create a new project. Import the video or image you'd like to use as a color reference, along with the footage you want to adjust. Drag both files to the timeline for editing.
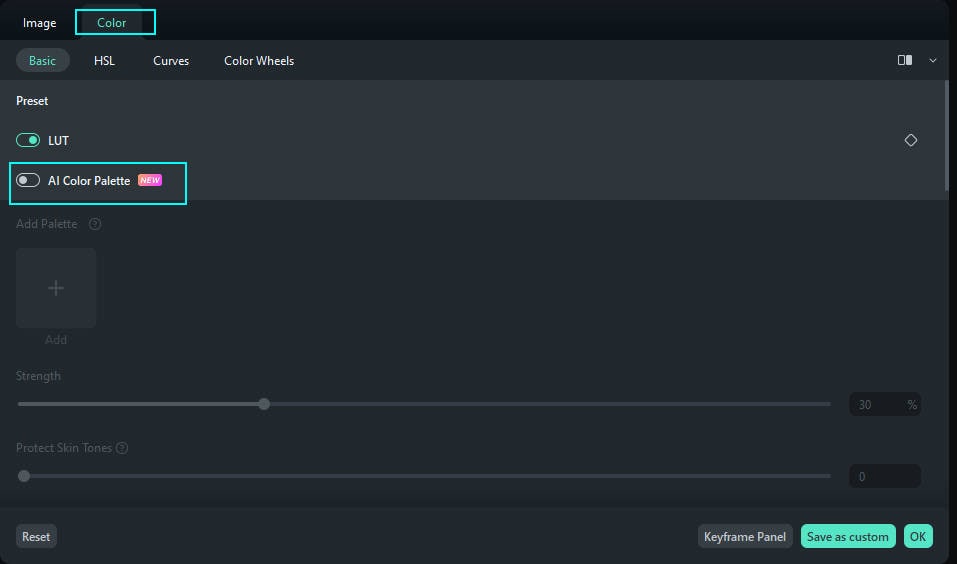
02of 05Activate the AI Color Palette
Click on the clip in the timeline that you want to color match. This will open the editing panel. Navigate to Color > Basic and enable the AI Color Palette by clicking the button.
03of 05Lorem ipsum dolor sit amet eam quas malorum
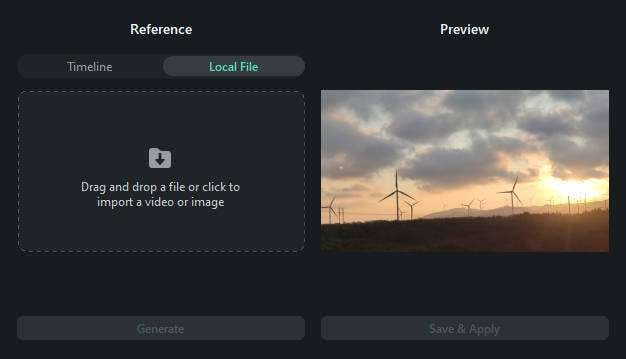
You can choose your reference frame using one of two methods. First, you can select a file that is already part of your project. Move the playhead to the desired frame, then click Generate to apply it as your reference.
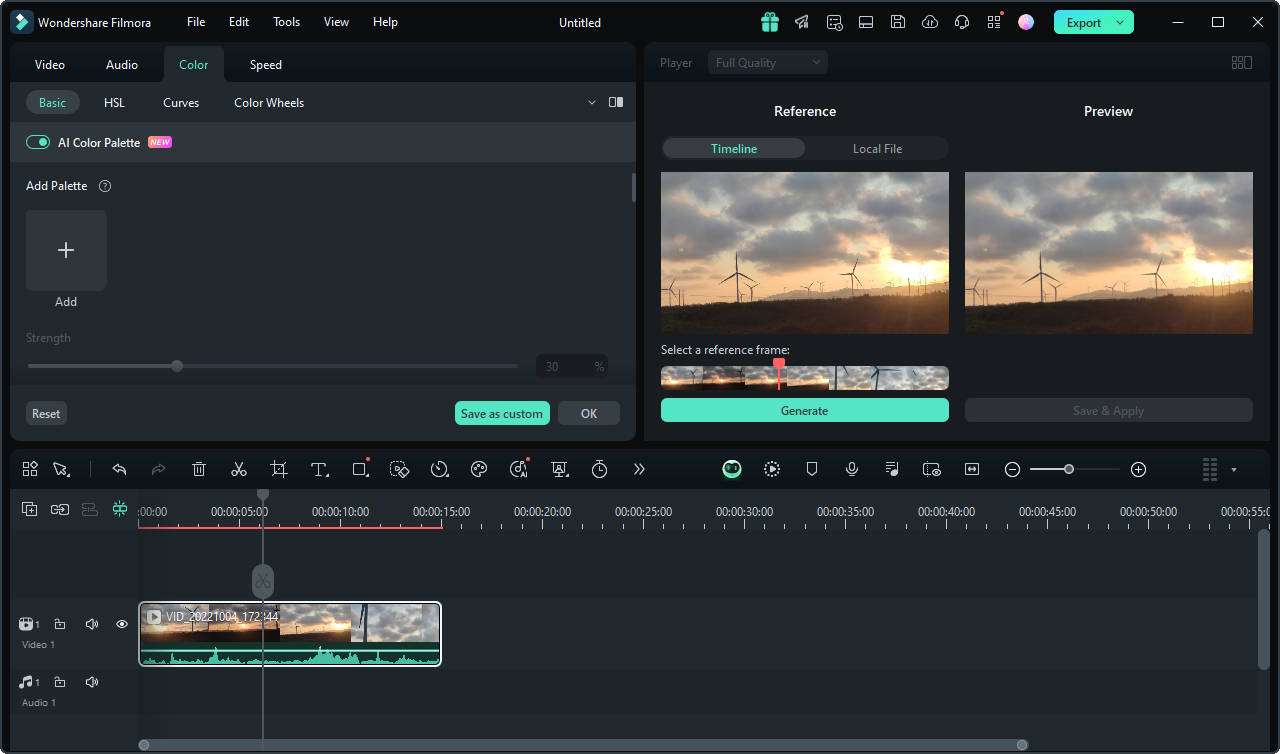
Second, you can import a file from your computer by selecting the Local Files button. If you need to replace it, click the Replace button. Move the cursor to the desired frame and click Generate to set it as the reference.
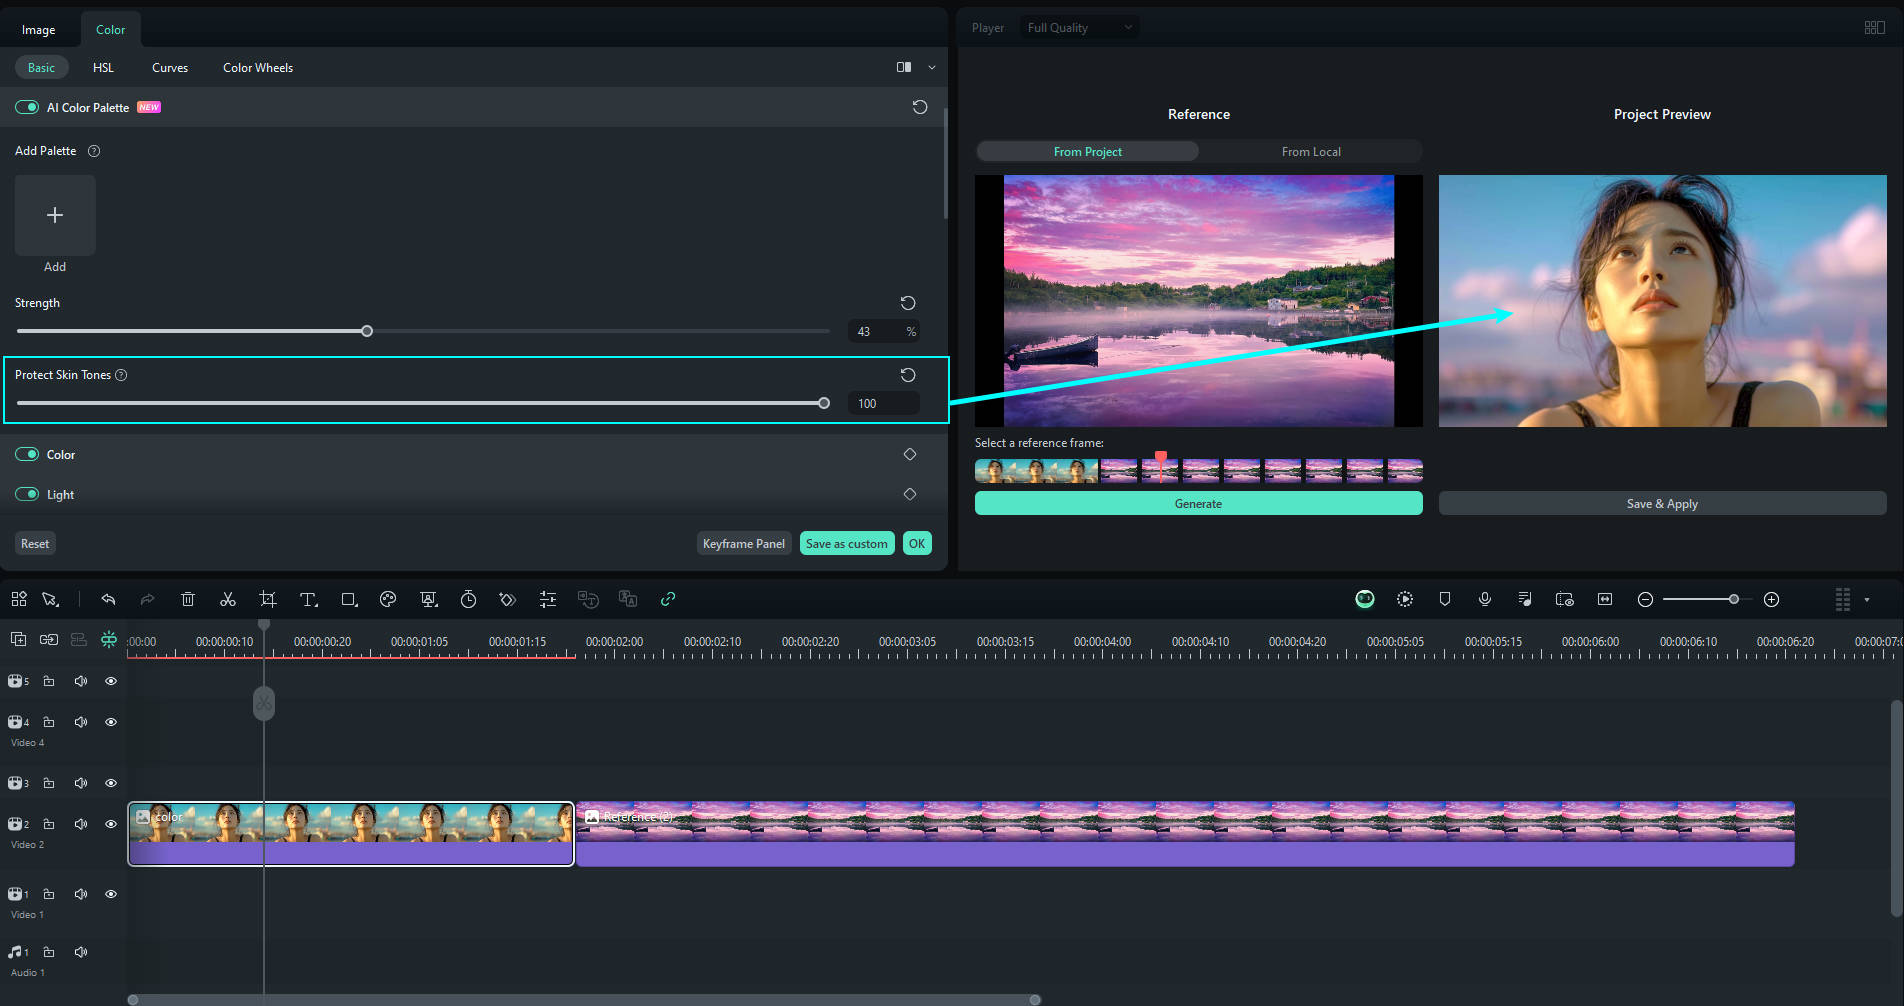
04of 05Preview and Adjust the Settings
Preview the adjusted video in the right-hand panel. Use the Strength slider in the property panel to control how much the colors match the reference.

Tip: If your video includes people, enable the Protect Skin Tones option to preserve natural skin colors while applying color adjustments.
05of 05Save and Apply the Color Palette
Once you're satisfied with the adjustments, click Save and Apply to finalize the changes and exit the color palette mode.
2. Using Color Adjustment
For more control, you can use Filmora's manual color adjustment options. Here, you can tweak brightness, contrast, saturation, and more to fix the color and lighting of your YouTube video.
How to use the Filmora Color Adjustment tool:
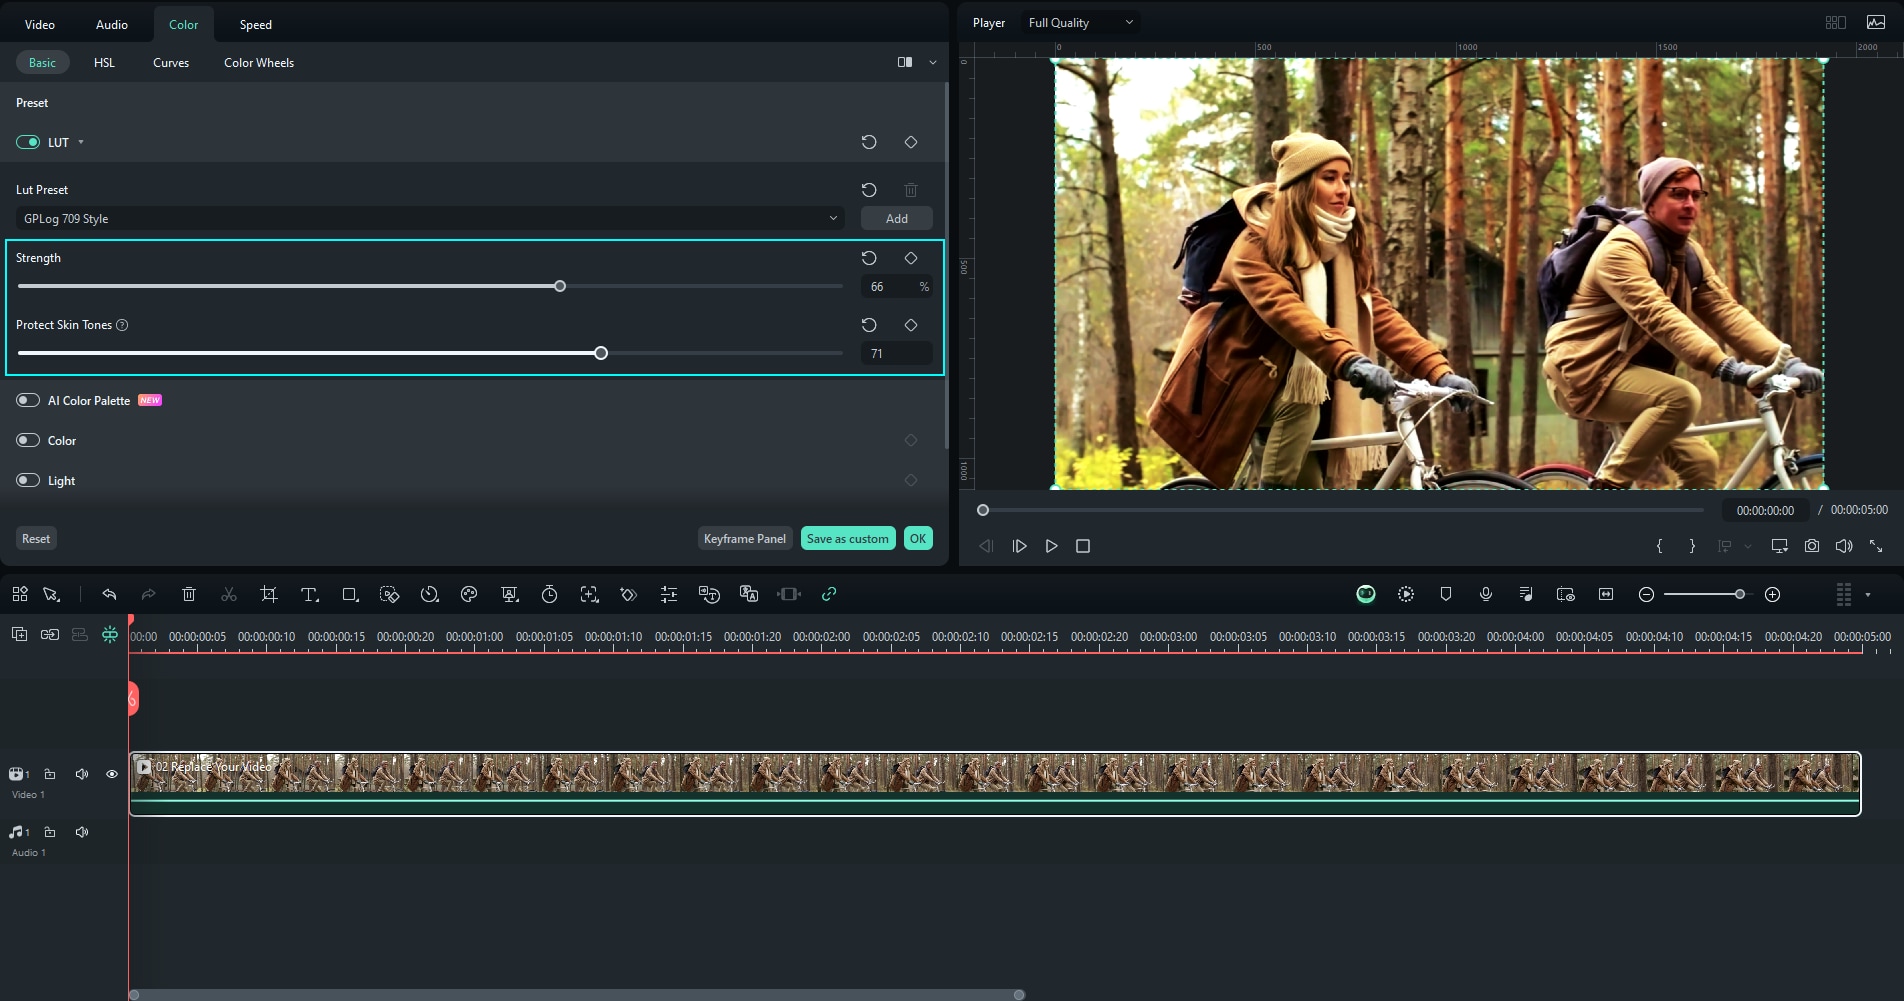
To get started, click on the video clip in the timeline to activate the color editing feature. In the property panel, select Color > Basic. This will display several options, such as LUT, Color, Light, Adjust, and Vignette.
- LUT: Use the LUT (Look-Up Table) option to apply pre-made color grading filters for a cinematic or professional look. Select the LUT preset and adjust the strength using the slider.
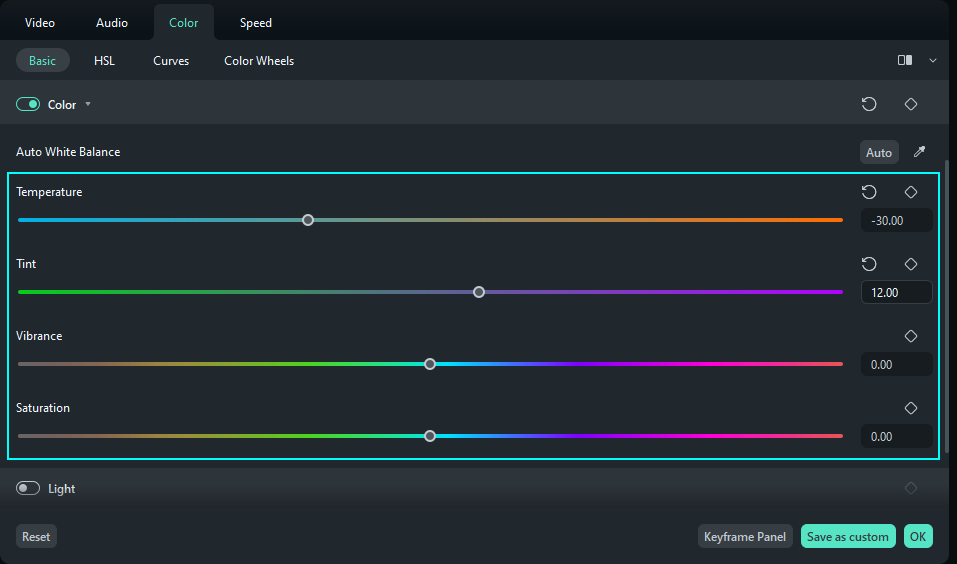
- Color: By enabling the Color option, you can adjust the color settings, including temperature, tint, vibrance, saturation, and more to enhance the overall tone and mood of your video.
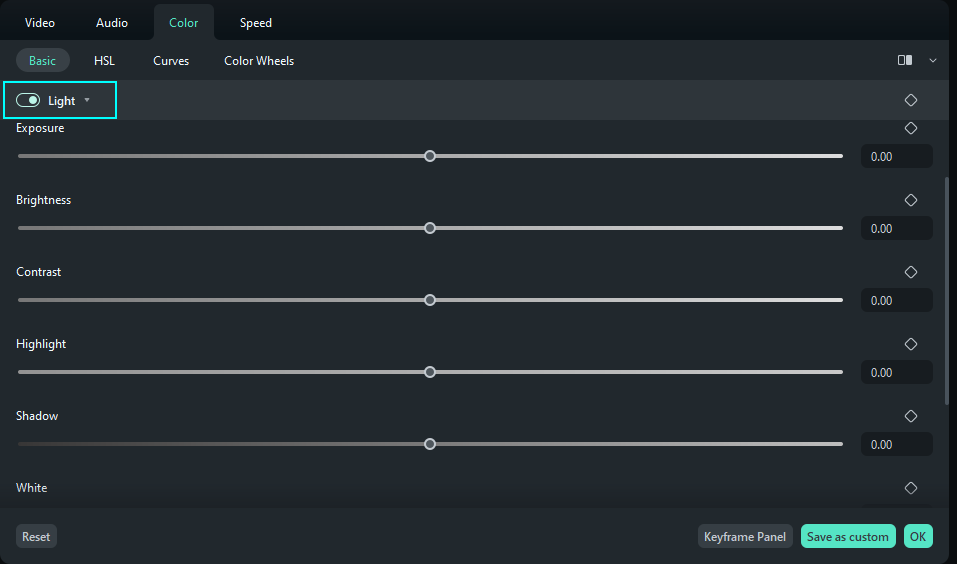
- Light: In the Light tab, you can adjust the lighting, such as exposure, brightness, contrast, highlight, shadow, and white to achieve the perfect balance and clarity in your footage.
There's also the Adjust tool for adjusting the video sharpness and the Vignette tool to add a subtle shadow or darkening effect around the edges of your video.
Conclusion
By now, you're ready to create the best lighting setup for your YouTube videos! Start with choosing the best lighting for your YouTube video according to your needs and budget. Then, experiment with setups like the three-point lighting system, and don't forget to enhance your footage further with color correction in a video editor like Filmora.
Thankfully, Filmora makes tweaking video lighting and colors easy, even if you're not a pro. With features like the AI Color Palette and color adjustment tools, you can quickly refine your footage to look just the way you want.
