
 100% Security Verified | No Subscription Required | No Malware


 ChatGPT
 Perplexity
 Gemini
 Claude
 Grok
Grok
If you are a content creator, you know how important it is to protect your intellectual property. The same goes for music creators and record labels, whose job is to protect their own and their artists' intellectual property. Therefore, if you use someone else's music in your video for your own gain, you risk your video getting demonetized.
Of course, you want to avoid this, and in this text, we will help you understand how to add copyright-free music to your YouTube Shorts. Stick around for a bonus tip that will improve your workflow significantly.

In this article
How to Upload an Audio File to YouTube with YouTube Studio
Using YouTube's proprietary method of adding music to your videos is the apparent choice here. The process is simple, and we'll guide you every step of the way.
Step 1 Open YouTube and Access YouTube Studio
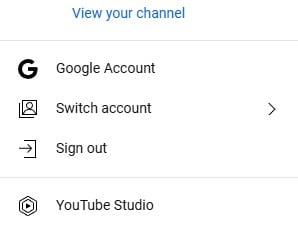
First, open YouTube in your browser. Click on your Profile Image in the top-right corner, and a drop-down menu will appear. Select YouTube Studio from the menu.
Step 2 Click on "Content" in YouTube Studio
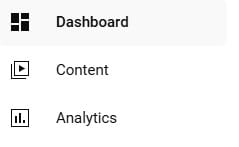
Once you're in YouTube Studio, focus on the left side of the screen and click on Content to view all your uploaded videos and Shorts.
Step 3 Select the YouTube Short You Want to Edit
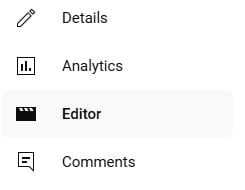
You will see a list of all the videos and Shorts you've uploaded. Click on the YouTube Short where you want to add music. You'll be taken to the Video Details page. Click on the Editor tab on the left.
Step 4 Go to the Video Editor and Select "Audio"
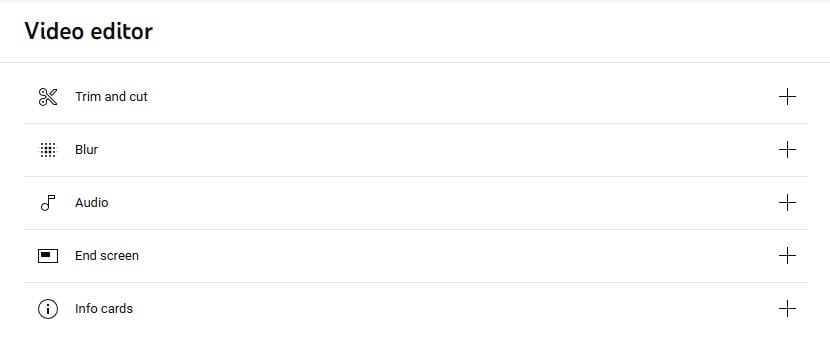
You will see the Video Editor in the center of the screen. Now, click on the Audio option.
Step 5 Choose and Add Music to Your Video
You will now see the Audio interface, where you can select a song. Double-click on the song to add it to your video.
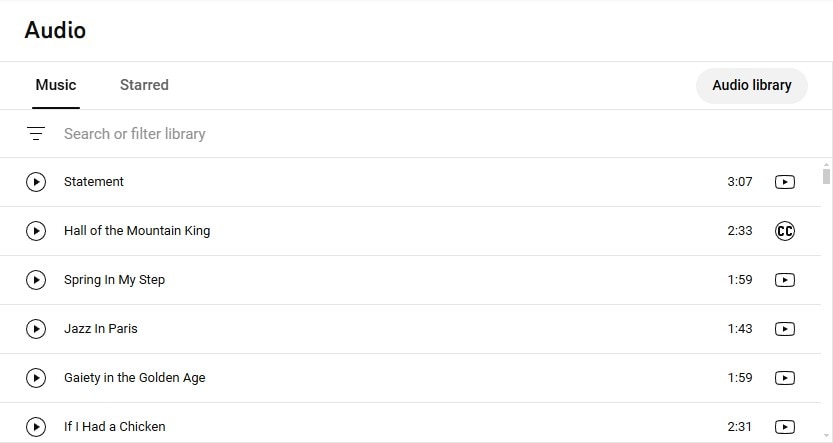
All the audio files you find here are free to use. YouTube has signed contracts with various record labels, and this allows creators to tap into a vast library of songs that they can use without worrying that their video will get demonetized due to a copyright claim.
The problem here is that everyone has access to the same set of audio files. The chances of you and thousands of other creators using the same exact song or sound effect in your videos are pretty high. Well, good news! As we promised at the beginning of the text, we will share a bonus tip with you. You can use Wondershare Filmora, the best video editing tool with audio editing capabilities designed for professionals and amateurs alike.
How to Edit and Add Music to YouTube Shorts with Filmora
The problem on platforms like YouTube, TikTok, Twitch, and many others, is the sheer number of competing creators. That's why, if you want to succeed, you need something that differentiates you from the crowd.
We'll explain how you can use the video editing capabilities of Filmora to first edit your YouTube Shorts to perfection and then use audio generation and editing capabilities to make something that will amaze your viewers.
 secure download

Audio generation and editing capabilities
This software offers useful AI features that can help you generate music that is not subject to any form of copyright claim. You can generate background music or make a new song.
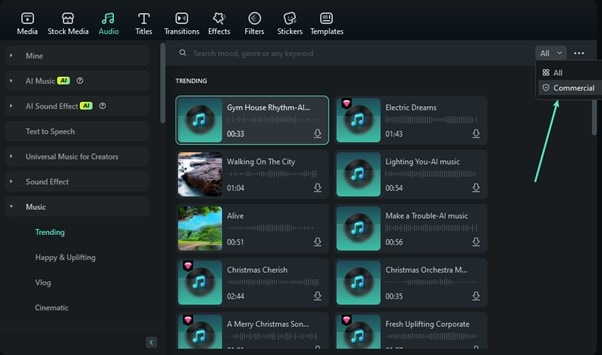
Use Filmora's massive library of royalty-free music
If you click on the Audio tab, you will be introduced to several songs that you can use for free. Just make sure to select Commercial in the search filter. Consider the screenshot for more information.
Royalty-free Music Generation
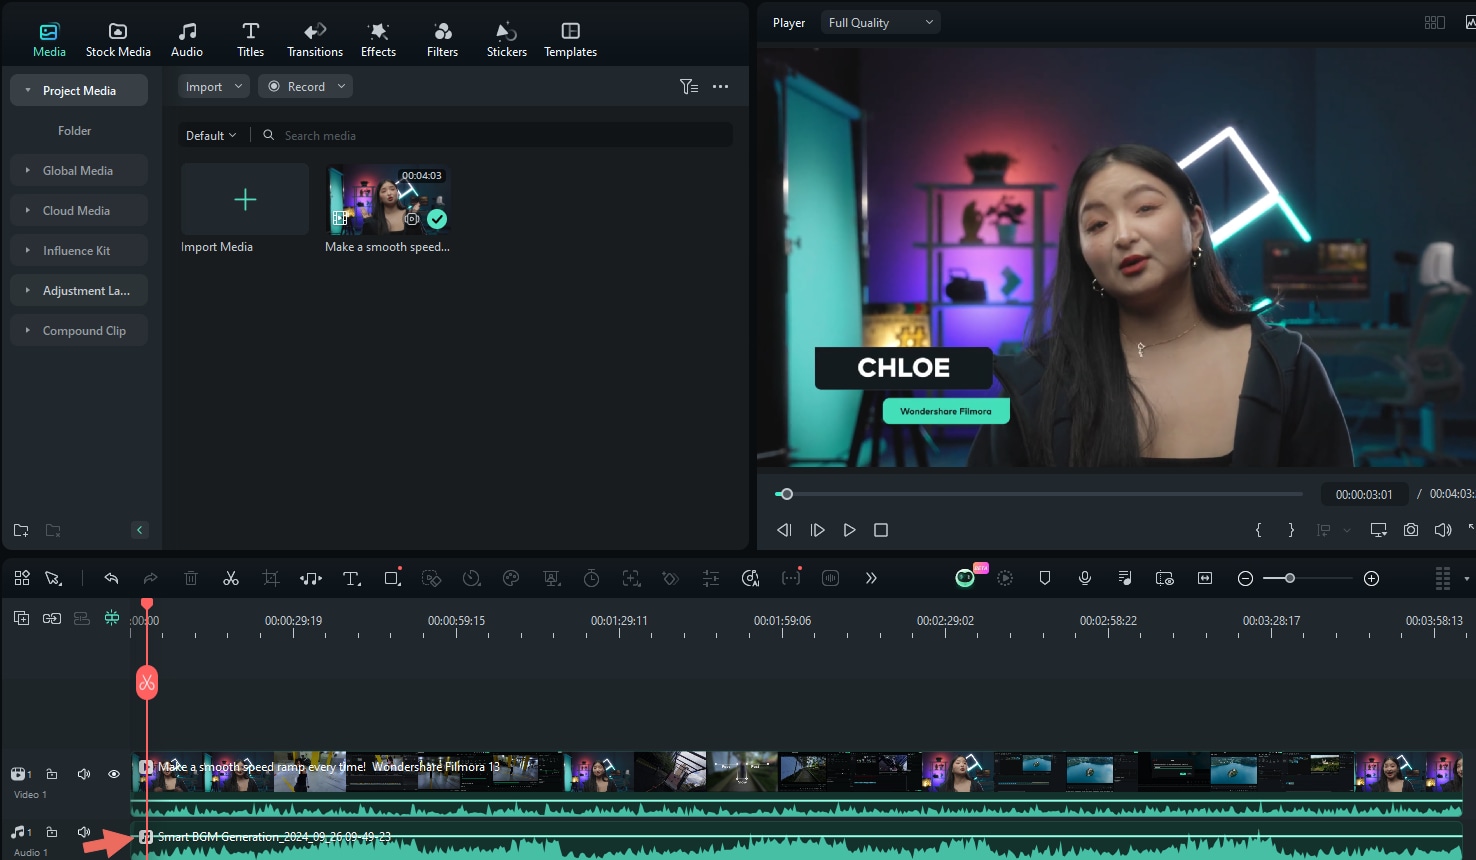
Method 1: Smart BGM Generation
Filmora offers a feature called Smart BGM Generation. Follow these steps to activate this feature.
secure download
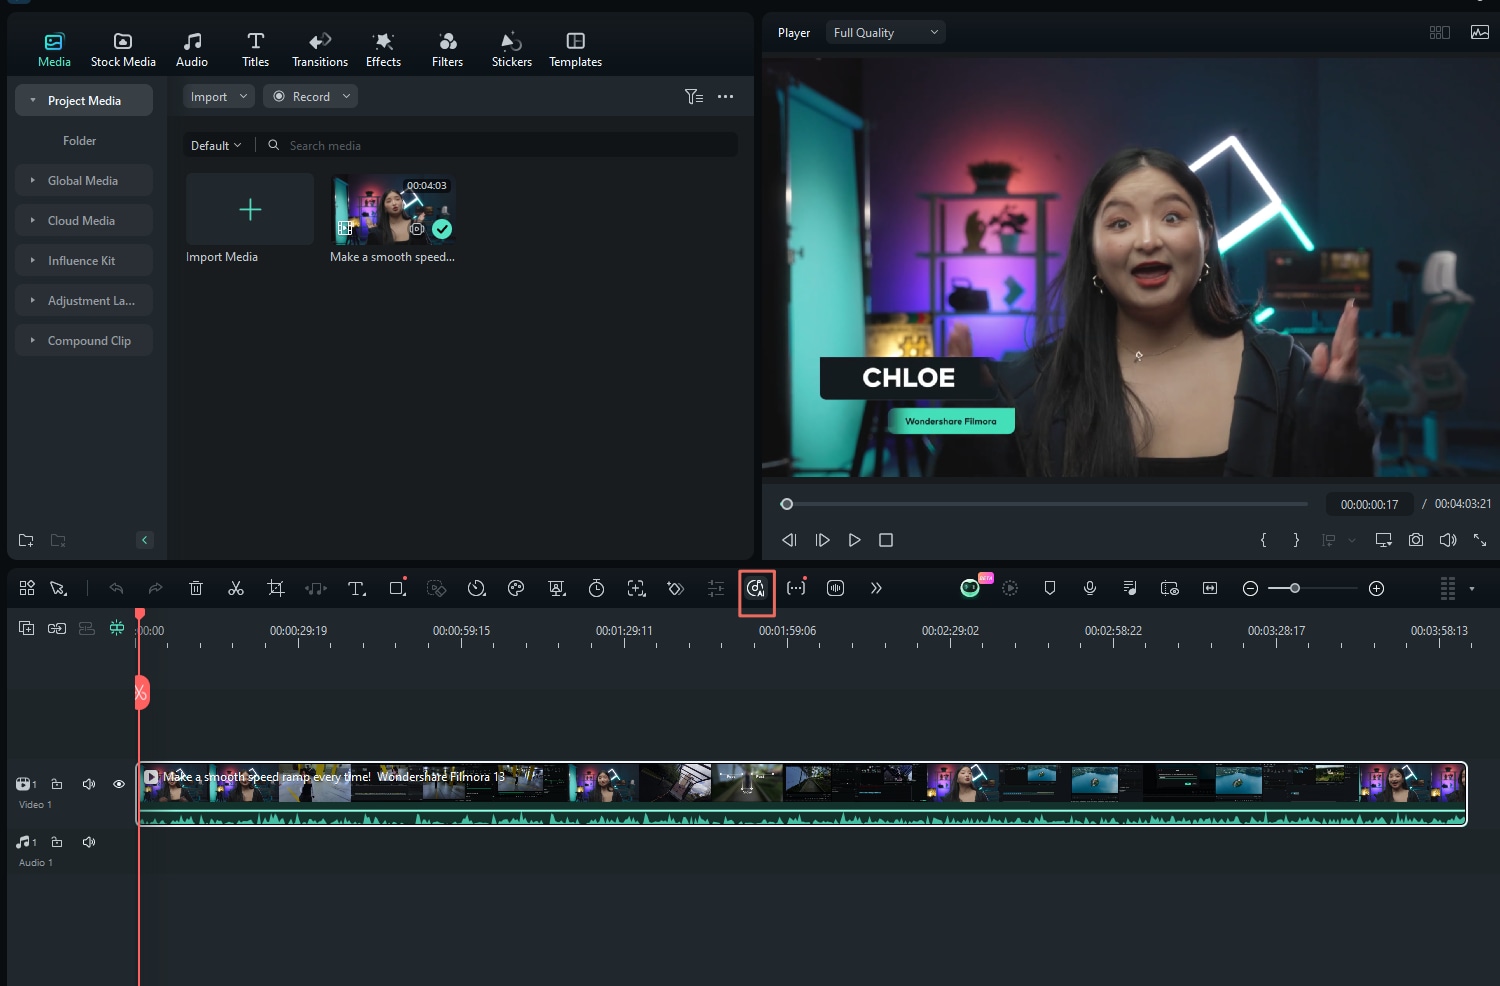
Step 1 Click on the BGM Icon Above the Video Timeline
To start, click on the BGM icon located right above the video timeline, as shown in the screenshot below.
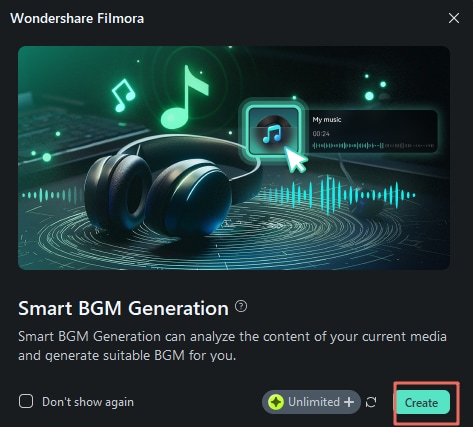
Step 2 Click on the "Create" Button
When a new window pops up, click the Create button to proceed.
Step 3 Let the Software Analyze Your Video
The software will analyze your video and generate background music that fits. You will see the audio file appear in the timeline. Check the screenshot below for more details.
Method 2: AI Music Generator
Background music works for certain types of videos where you have a person talking or explaining something. For other types of videos, you might need to add a song that will compliment the tone of the video.
secure download
For this purpose, you can use Filmora's AI Music Generator. Follow the steps below.
Step 1 Access the AI Music Generator
Click on the Audio tab located at the top left, then select AI Music on the left side, and finally click Start. Everything is shown in the screenshot below.

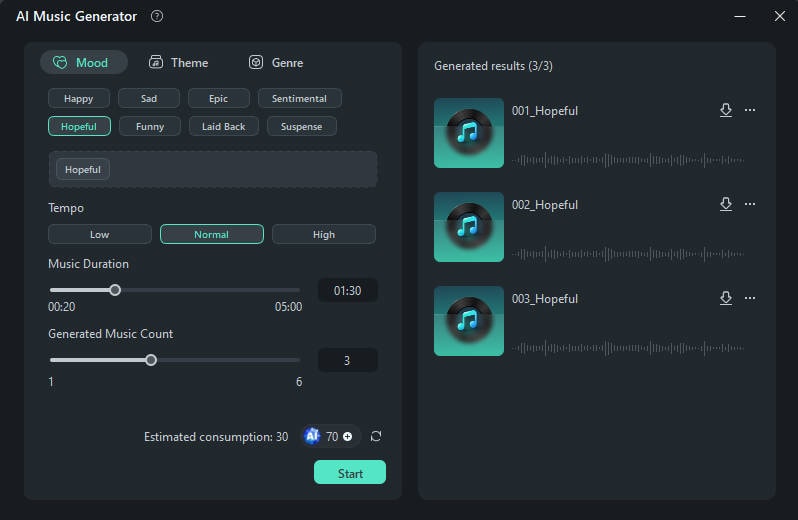
Step 2 Customize Your Song
A new window will appear, allowing you to customize your song. You can select the appropriate Mood, Theme, Genre, adjust the tempo, and set the desired length of the song. Once you're done, click Start.
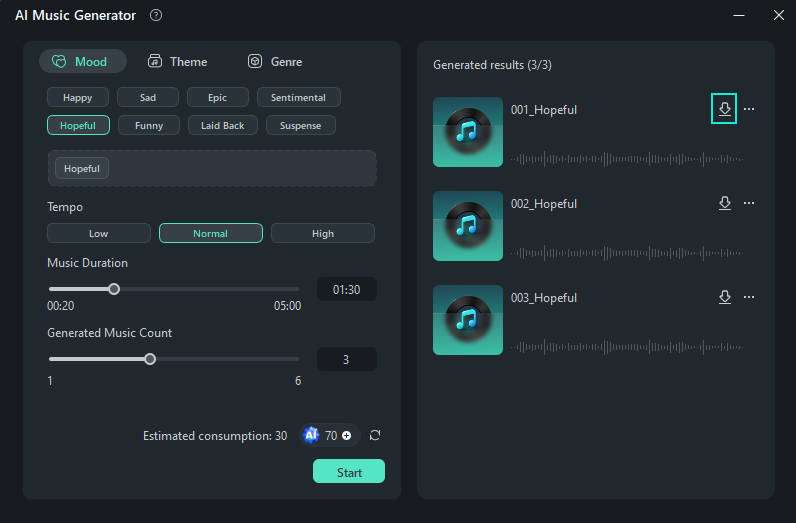
Step 3 Listen and Download Your Generated Music
Once Filmora finishes generating the music, you can listen to the tracks. To download your preferred song, simply click the Download button next to it. Check the image below for reference.
Step 4 Edit the Audio if Needed
Once you have the right audio file for your video, you might want to tweak it a bit. Filmora's audio editing features allow you to make further adjustments as needed.
Audio Adjustment
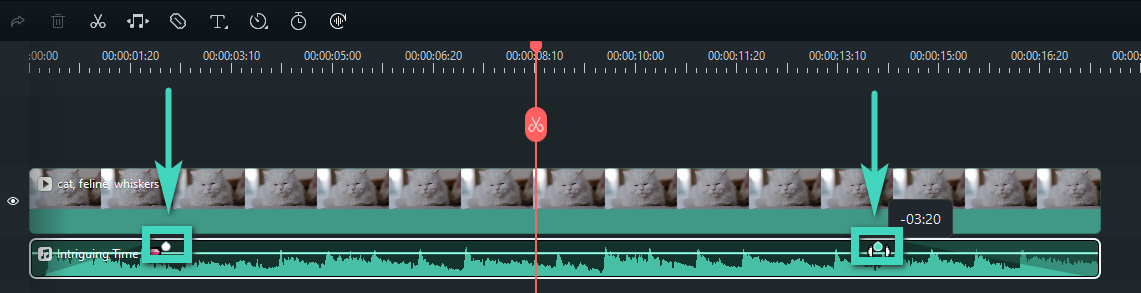
Method 1: Add fade-ins and fade-outs
In some instances, in terms of audio, it is not advisable to start your video loudly and end it abruptly. Adding a small fade-in at the beginning and a fade-out at the end will improve the quality of the entire video.
To do this in Filmora, you just need to locate the markers in the timeline and drag them left or right to apply the effect. The screenshot below explains it well.
Method 2: Normalize audio
Auto Normalization ensures that the audio sounds good on all devices. To achieve this in Filmora, simply click on the audio or video file you want to normalize, then go to Tools > Audio > Adjust Audio. You will see the Auto Normalization option.
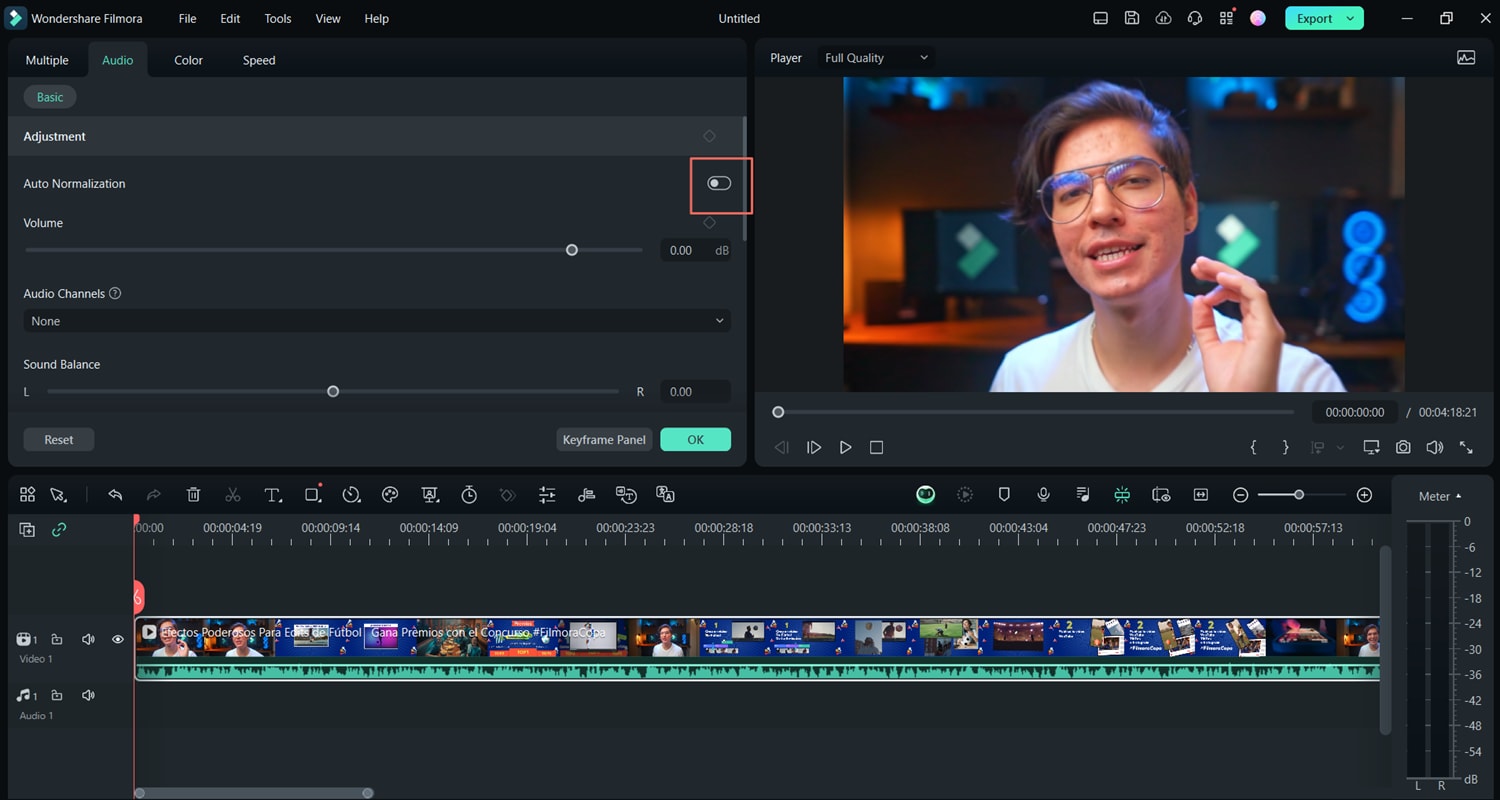
Just wait for the software to finish and review the results after the process is complete.
Video editing capabilities
Filmora is famous for providing users with professional-grade video editing tools, all packed into a user-friendly, easy-to-navigate interface. We will only introduce a small fraction of features, so be sure to explore the program and discover everything that it has to offer.
As with any other program, the first step is to download and install Filmora. When all this is done, use the knowledge you have gained from that tutorial and import the YouTube Short you would like to work on.
Add effects
Adding effects makes the video multiple times more engaging. Doing this in Filmora is easy. You just need to find the Effects tab in the upper-left side of the interface. Click on that, then browse through the options provided, and drag the one you like to the timeline above your YouTube Short.
secure download
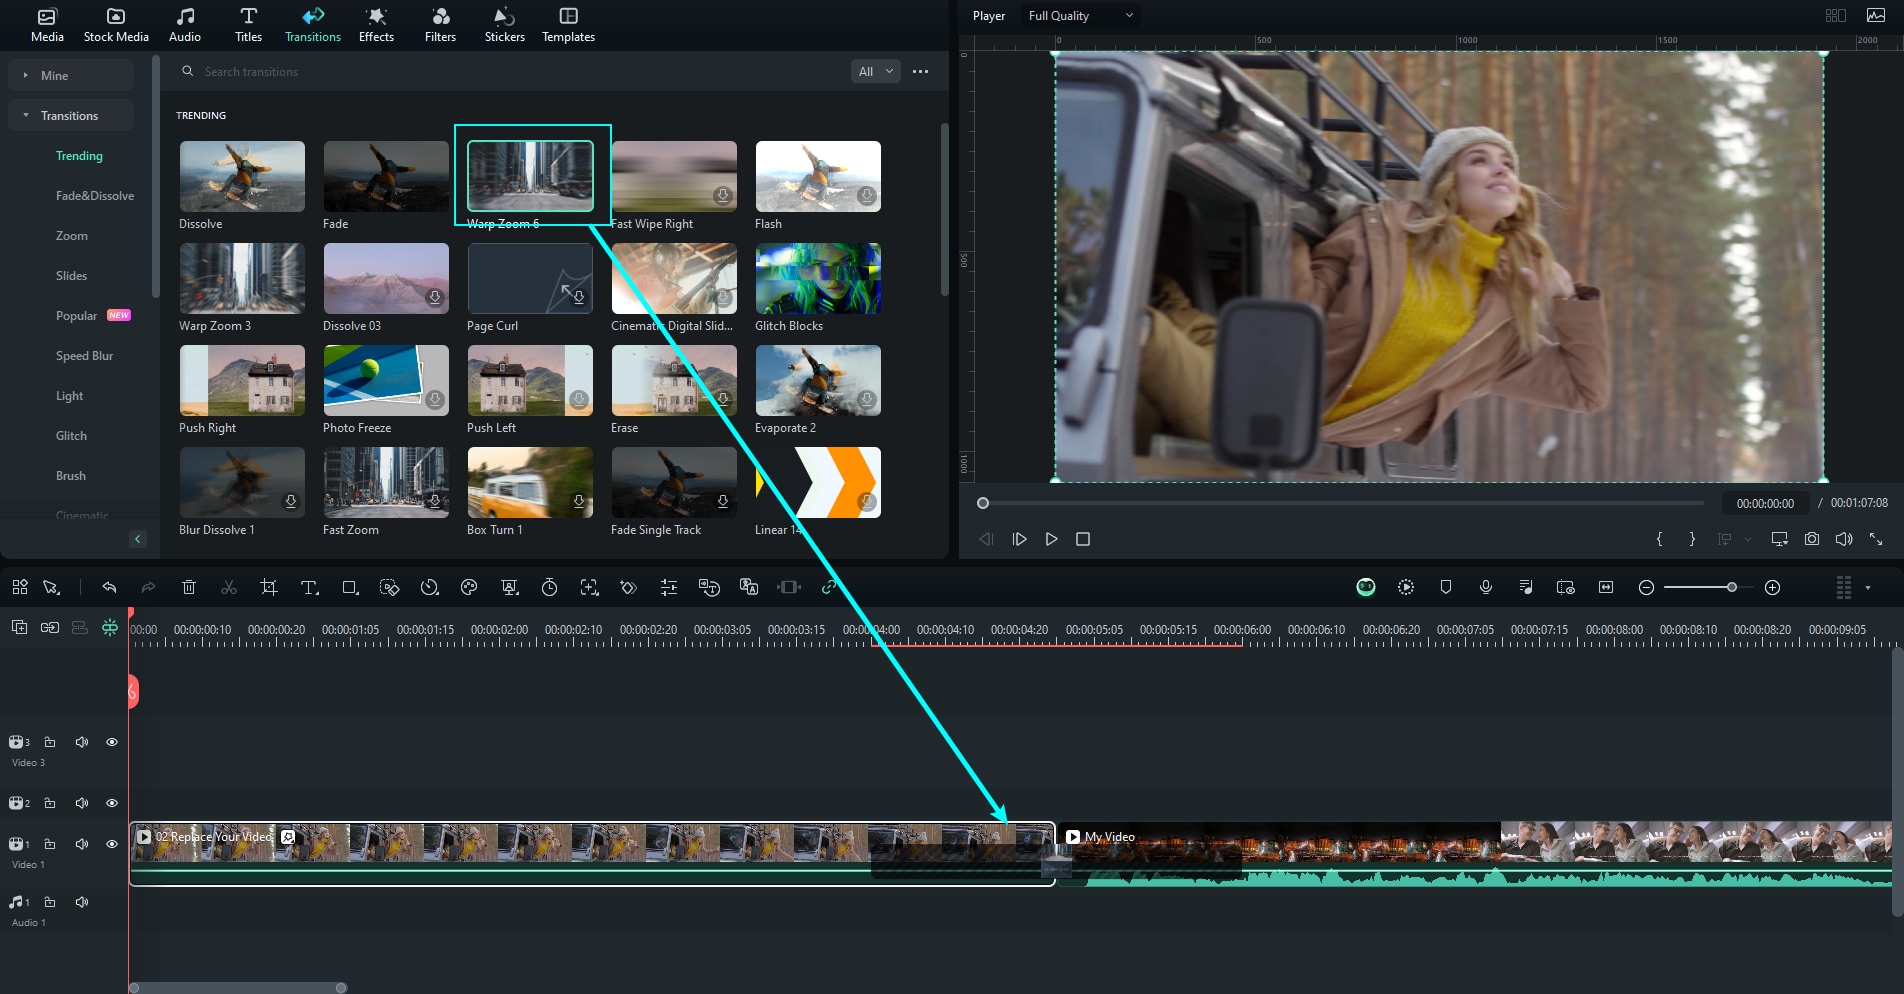
Add transitions
If you are making montages or compilations, transitions are a must. In Filmora, you will find the Transitions tab right next to the Effects tab. The process is the same. Find a transition that you like and drag it to the right place in the timeline. Usually, the transition effect goes between two video files.
Everything is clearly explained in the screenshot below.
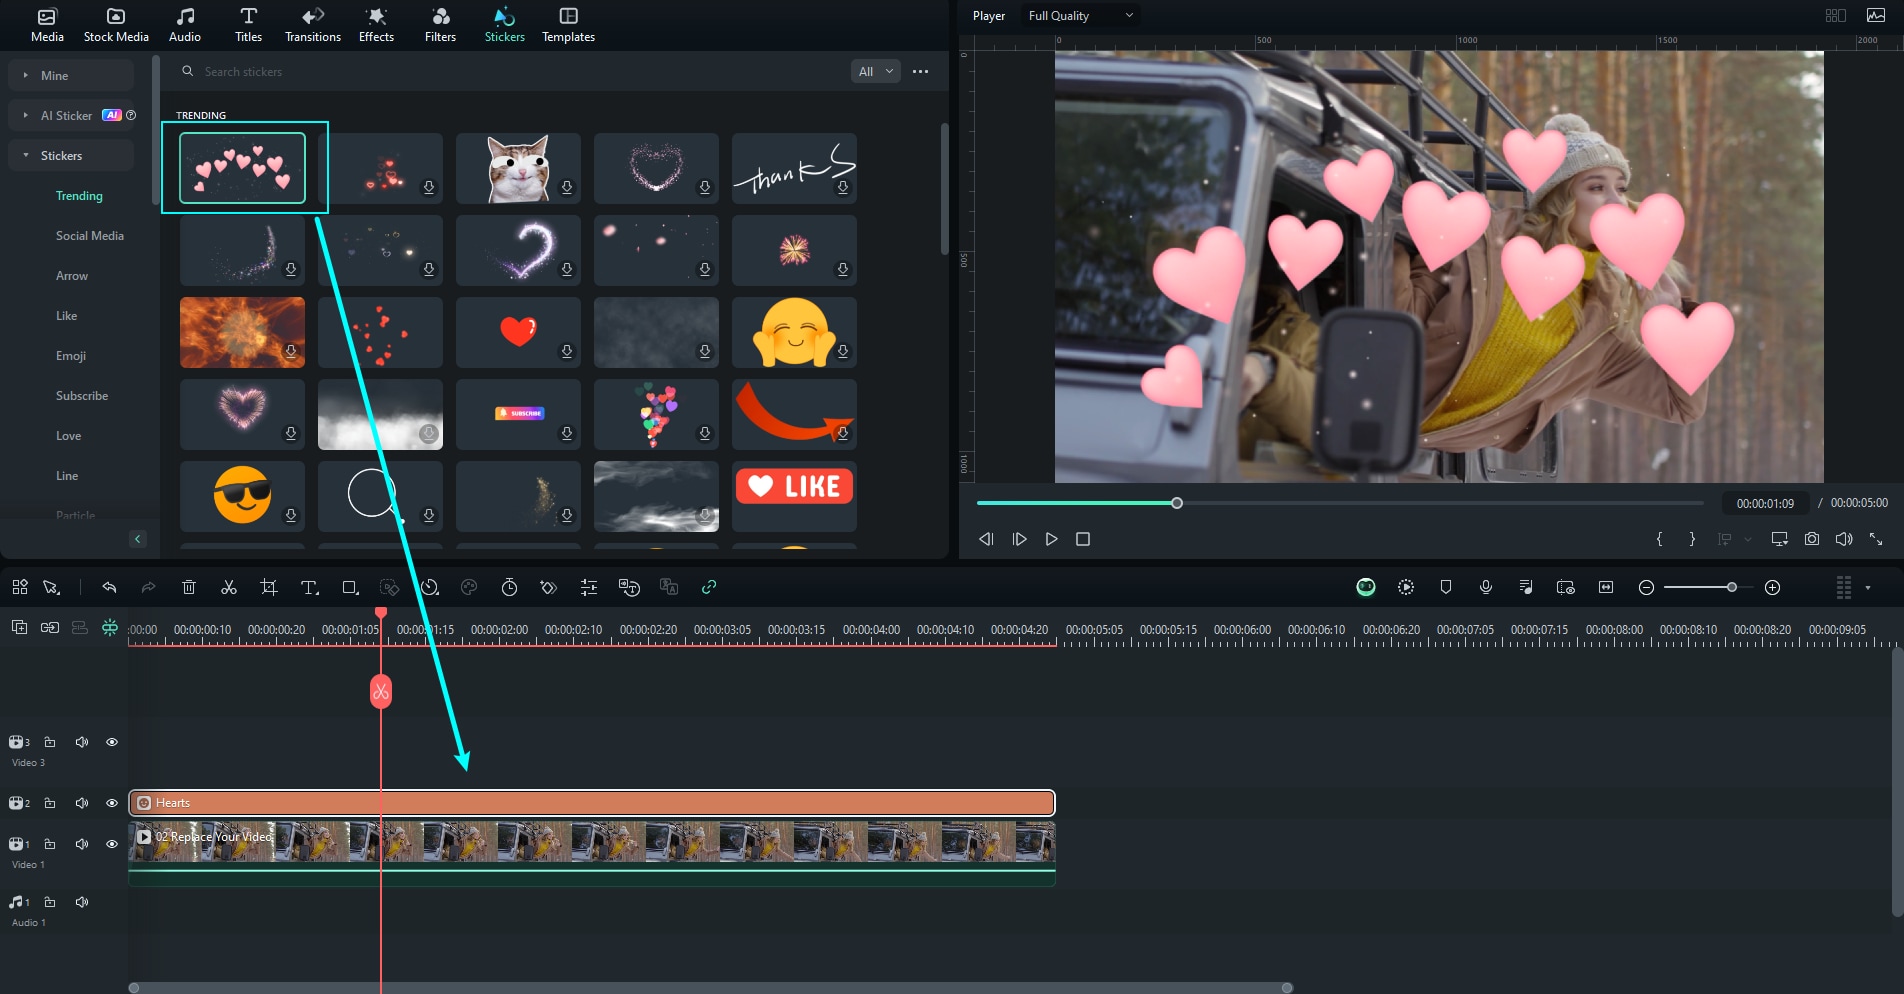
Add custom elements like stickers
Appealing to a younger audience is always a good thing because the majority of internet users nowadays are young people. Custom elements like stickers can be very fun, and adding them should help you expand your viewership.
To add elements in Filmora, you need to locate the Stickers tab, select the one you like, and drag it to the timeline. Take a look at the screenshot.
Conclusion
As you can see, adding royalty-free music to your YouTube Shorts is not as challenging as you might have thought. While doing this using YouTube Studio is a fine approach, using Filmora is a much better alternative, as you can edit your video and add original audio to it all in one place.
It is so much better for your workflow if you can finish everything in one sitting and move on to the next important task swiftly. You'll end up making more videos than you thought!
secure download
