
 100% Security Verified | No Subscription Required | No Malware


 ChatGPT
 Perplexity
 Gemini
 Claude
 Grok
Grok
You might be tasked with a dynamic web banner or a captivating YouTube introduction. However, you are concerned about the static text within the content as it won't grab attention in a fast-paced, visually driven digital world.
Adobe After Effects is a leading visual effects and motion graphics software used by many professionals. Whether you want a kinetic logo and craft bouncing titles, mastering After Effects text animation becomes indispensable. This article will help you learn the skills to animate texts for impactful engagement and marketing campaigns.
In this article
Part 1. Different Methods to Animate Text in After Effects
Adobe After Effects is a fully featured video animation tool for bringing dull text to life as a living piece of art. From its movement graphics to persuasive under thirds, Adobe After Effects provides an enormous range of built-in equipment and methods of animation.
It is meant to be used by both novices and professionals to create professional text effects so as to increase engagement. Below are the methods for text animation in AE, along with their corresponding instructional guides:
Method 1. Animate Text Using Text Animator Properties
Creators can utilize the "Text Animator Properties" system in Adobe After Effects to modify individual letters, entire lines, or words. By applying these properties, such as rotation, scale, position, and opacity, to the text layer, you can gain control of character animation. A step-by-step guide for animating text in After Effects is discussed below:
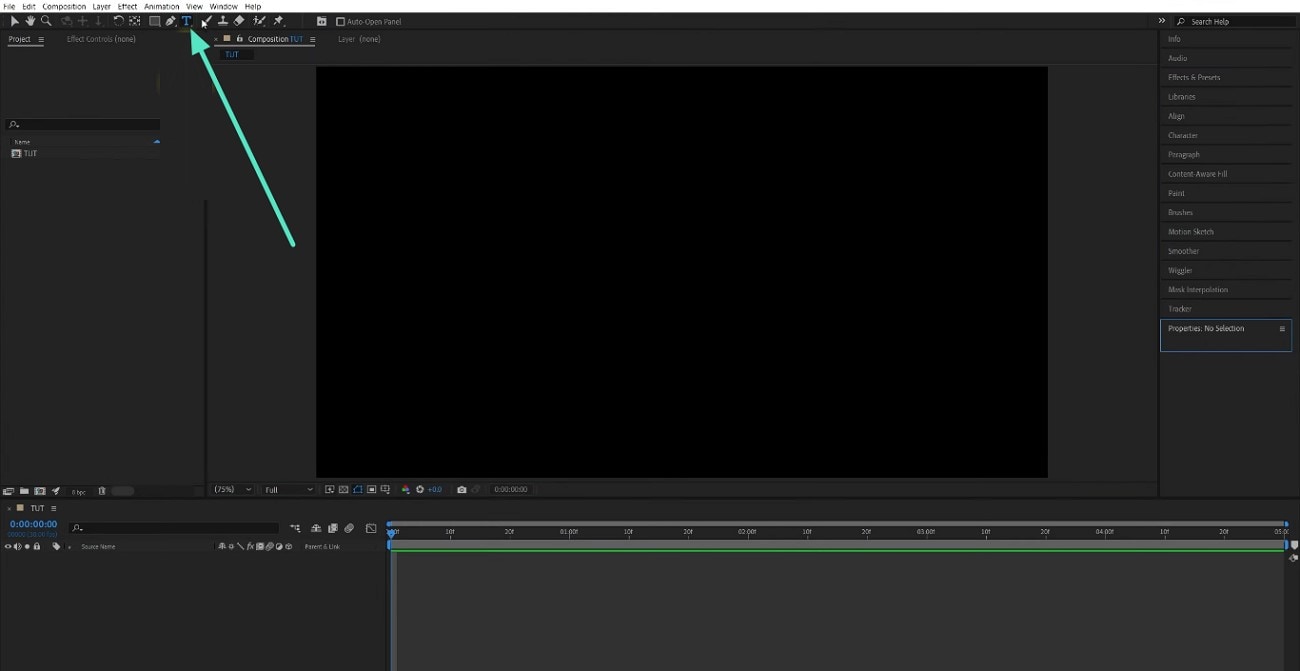
Step 1. Access Adobe After Effects timeline to start a new composition, and add your desired text using the "Text" tool in the top menu bar. Arrange the position and style of text on the timeline and select the text layer that will serve as a template for adding animation.
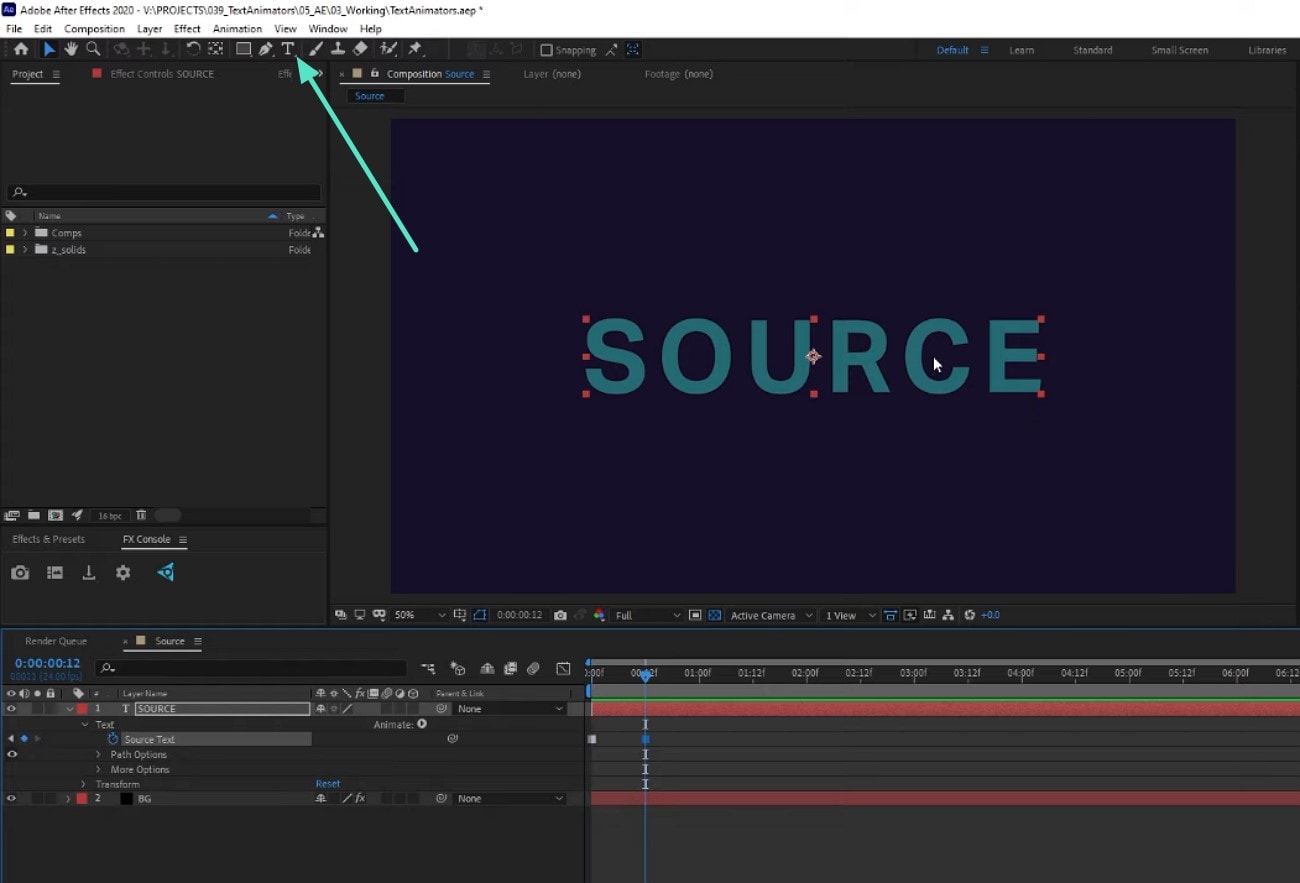
Step 2. Once you have added the text, head to the layer and tap on the "Animate" button to enable a list of options. Next, choose the property on which you want to add the animation, such as offset or opacity.
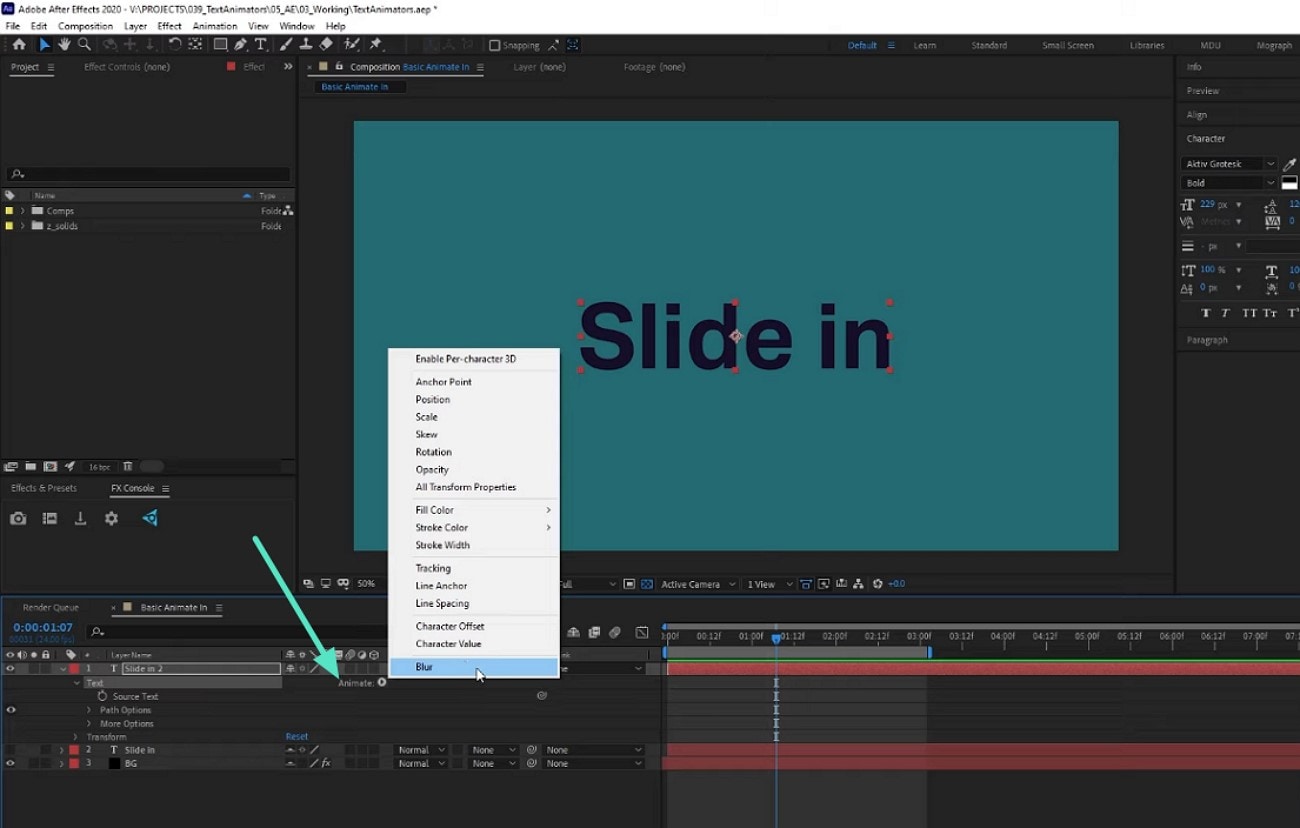
Step 3. Moving forward, adjust the offset by swiping through its amount and head to the editing timeline. Place the playhead at some distance to mark it as a keyframe and again adjust the "Offset" from the same layer. Now, play the video within the preview window to review the text being animated successfully.
Method 2. Apply Typewriter Text Effect in After Effects
Typewriter text effect is another attention-grabbing method to animate text in After Effects. This tool is perfect for creating informative captions, modern presentations, and title sequences. It mimics the look of letters in real time, adding a touch of flair and personality to the project.
With the built-in presets of After Effects, you can easily customize typewriter effects with fine-tuned timing and style for a professional look. Here are the detailed steps discussed in the following for users to add AE text effects:
Step 1. In the main interface of Adobe After Effects, create a new composition, and go to the top taskbar to use the "Text" tool. Type your desired text in the text box and select the text layer as a template.
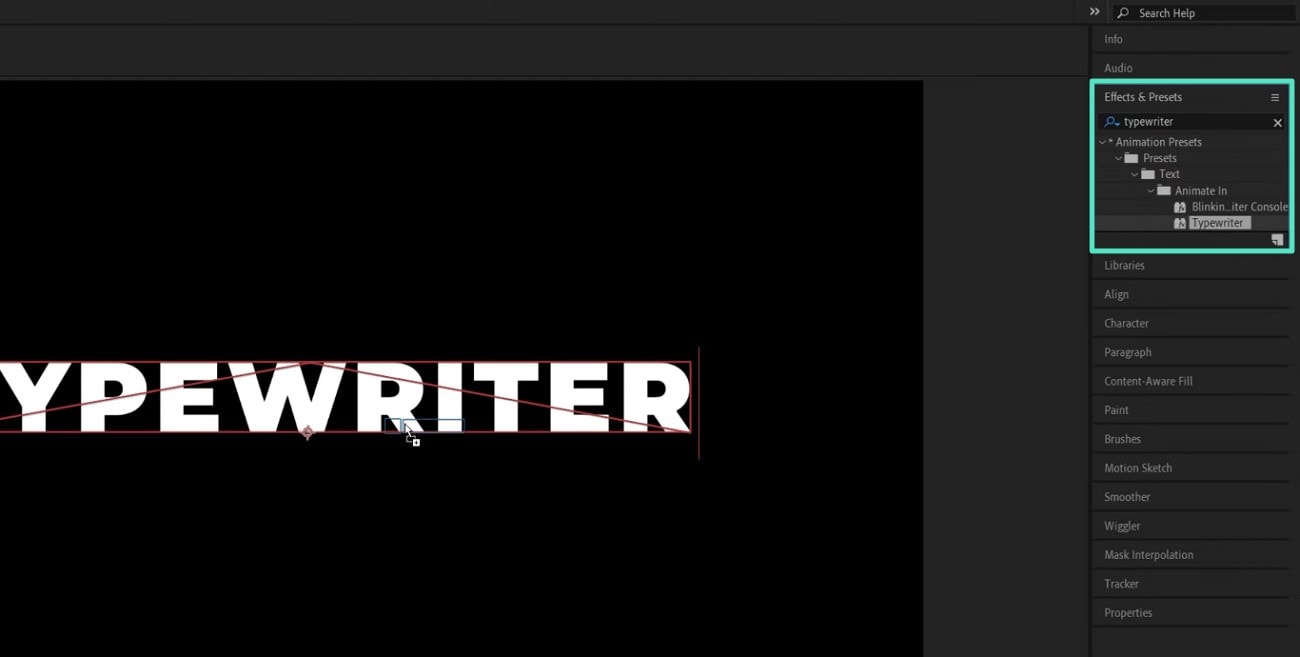
Step 2. Access the right-side panel of "Effects and Presets" and search for "Typewriter" in the search bar. Select the preset and apply it to the text by dragging it to the preview window.
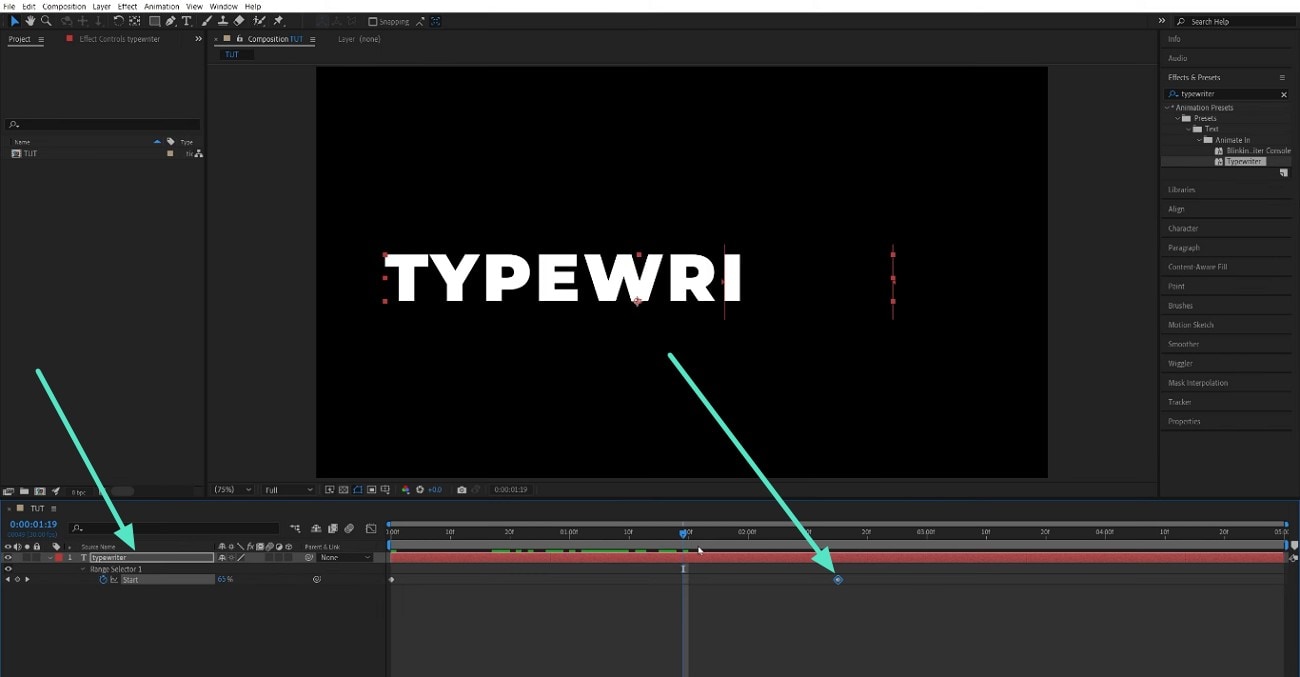
Step 3. Next, enable the text layer from the panel on the bottom left and press the "Ctrl + U" keys on your keyboard. Reposition the key frames by dragging them within the timeline to adjust the animation.
Method 3. Use the Animate Text Position Tool in After Effects
Animating the position of text involves smoothly sliding text into or out of frame. This method is recognized for the addition of direction and sense of energy, as it emphasizes key messages in lower thirds, captions, or titles. The position animator can precisely choreograph the moves of letters and words across the screen. A roadmap with navigation for After Effects text animation is discussed in steps in the following:
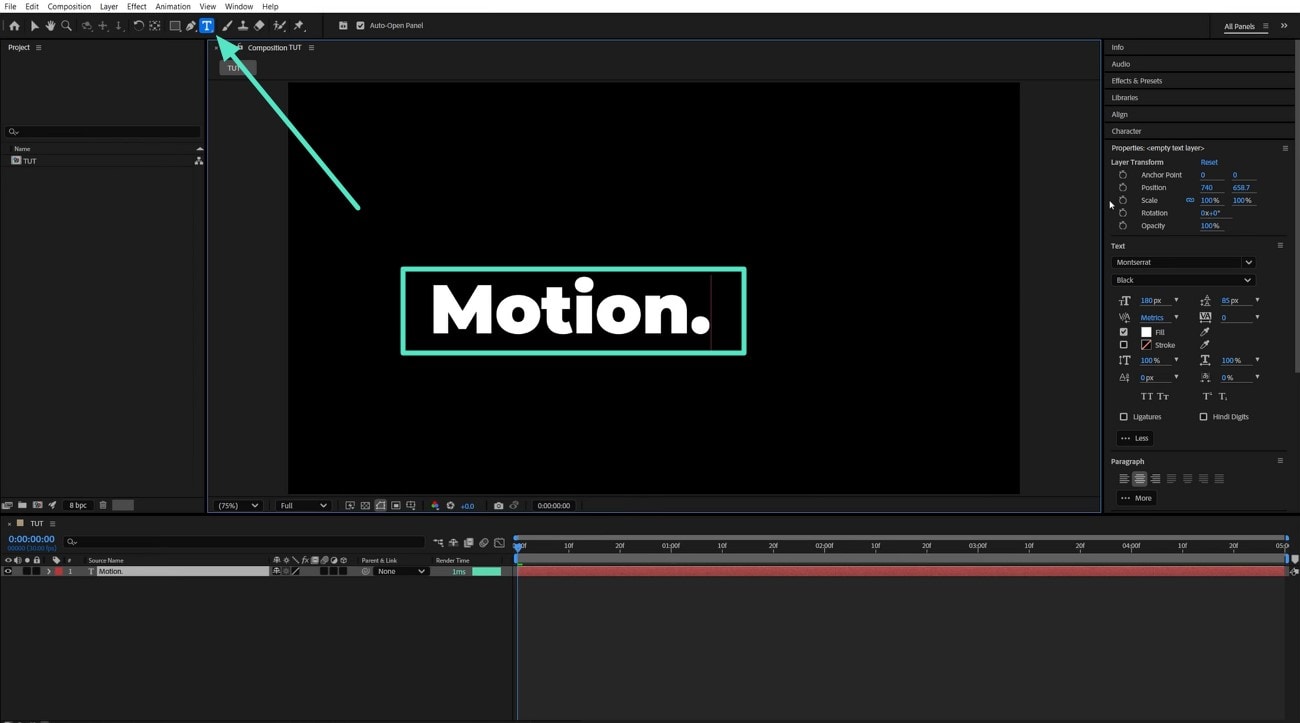
Step 1. Launch the tool and select the "Text" icon to add text to the text box that appears on the video.
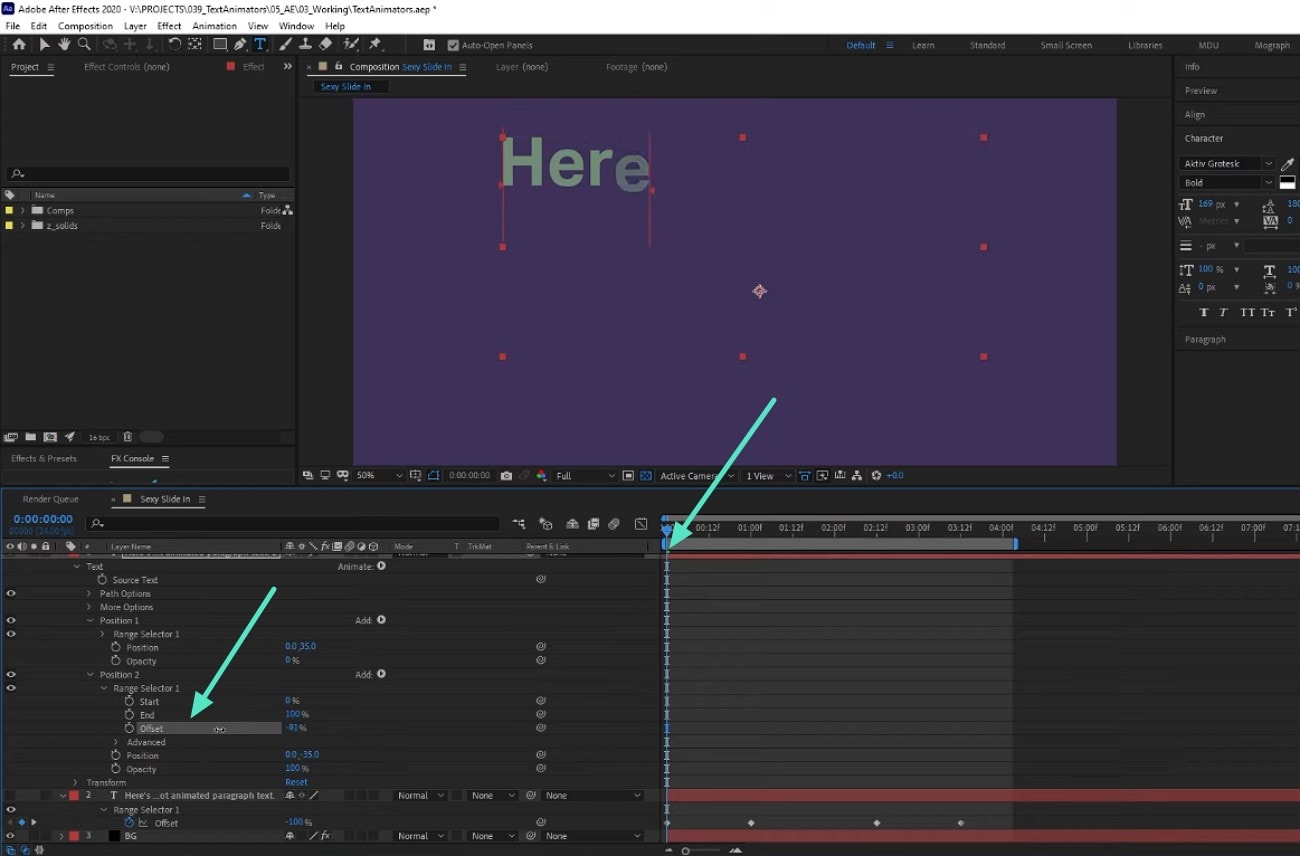
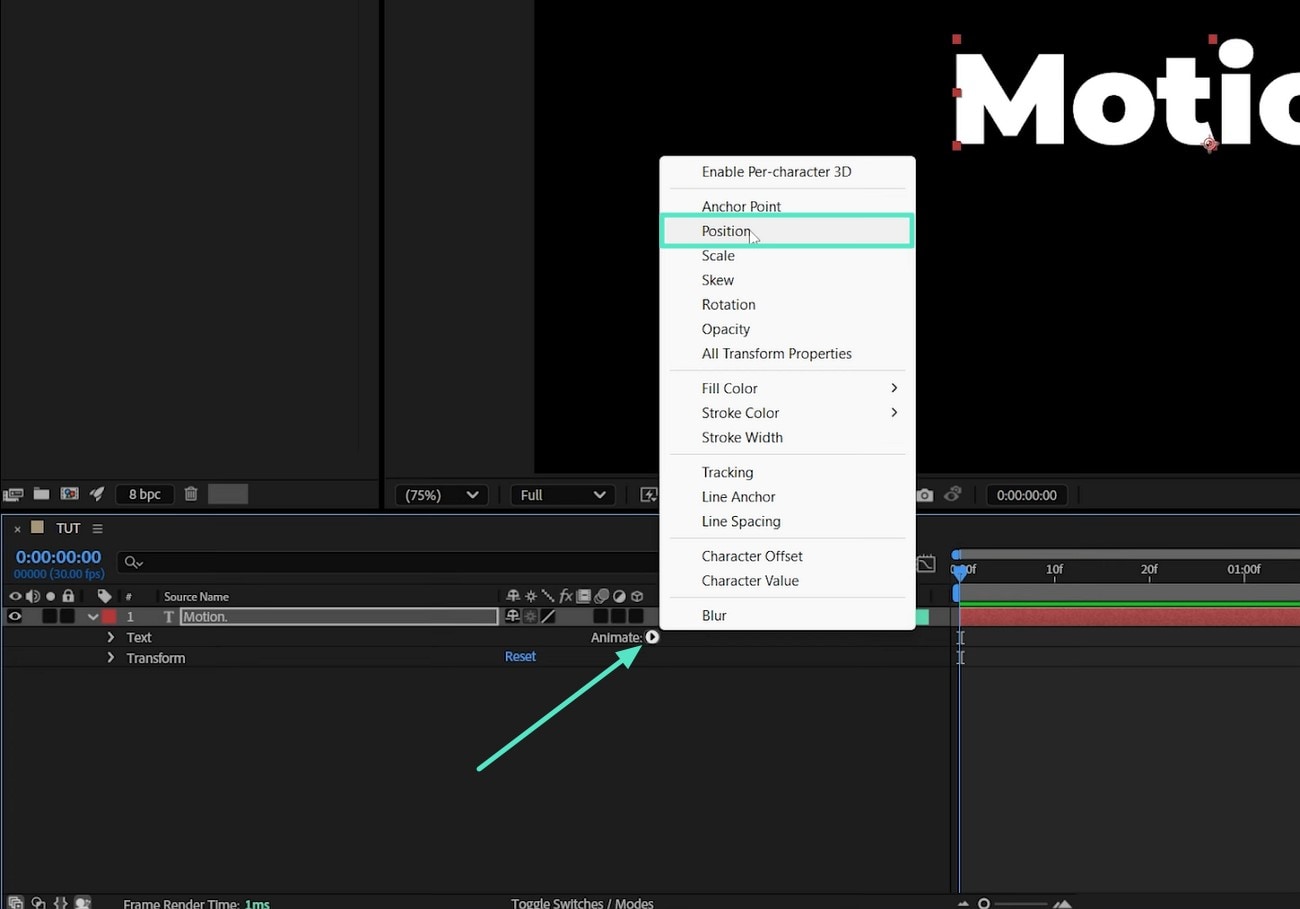
Step 2. Scroll down to the left bottom editor panel to click on the ">" icon across "Animate" and choose the "Position" option from the extended menu.
Step 3. After that, you need to move the keyframe on the timeline a few seconds ahead. Extend the "Animator" tab and the "Advanced" one to choose the "Position" option. This will allow the added text to be animated and move across the video.
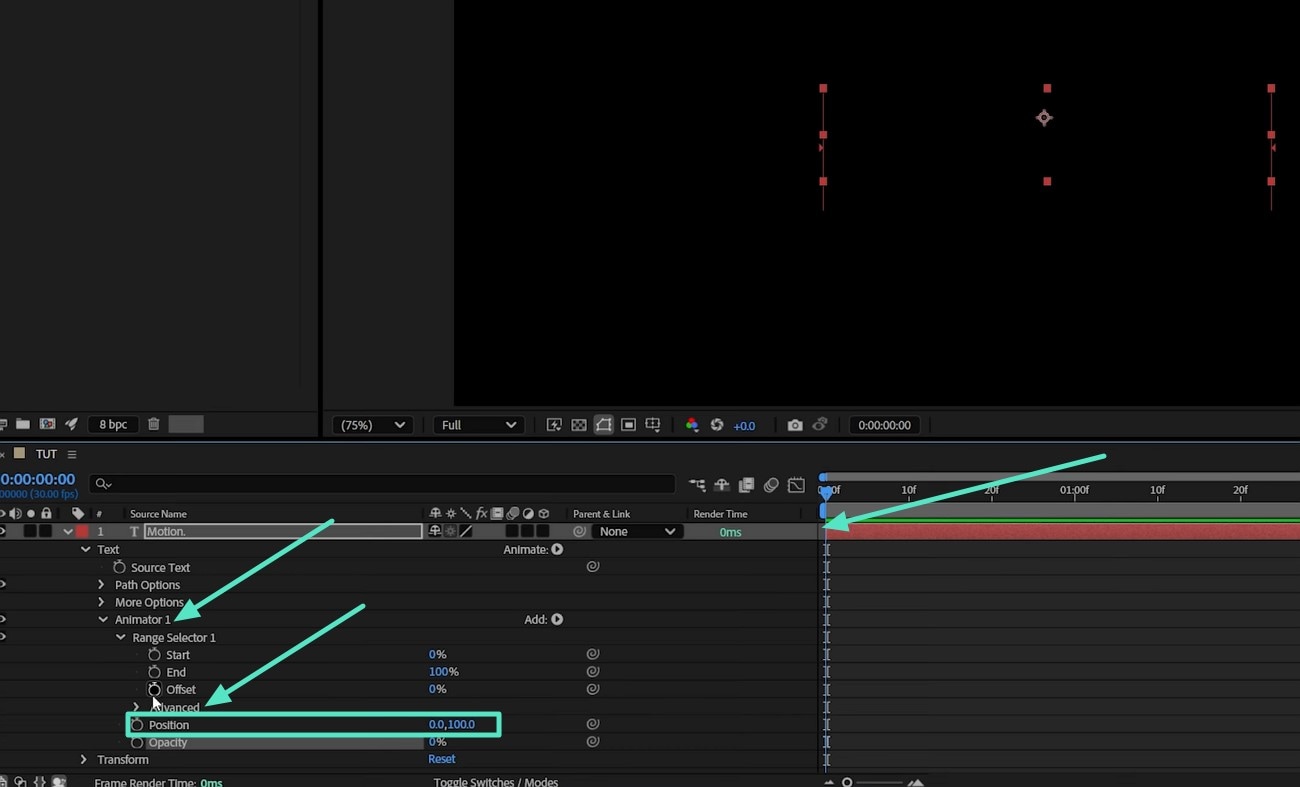
Step 4. Finally, scroll up and locate the "Motion Blur" icon and tick the checkbox under it to ensure the animated text is smooth throughout the video.

Part 2. Enhance Adobe Animate Text Using Enhanced Tools - Wondershare Filmora
Imagine you have generated an animated text in After Effects and realized that you want to enhance its visuals for your branding. Taking your text animations to the professional level is easier by utilizing Wondershare Filmora. This platform offers simpler operations in engaging motion graphics and text animation presets. Its keyframe editor provides control over scale, rotation, text movement, and opacity.
Filmora allows its users to pair brand fonts with color gradients, drop shadows, and animated outlines. You can also add auto music sync for text motion, matching its beat. All these progressive tools, along with an AI-powered toolset in Filmora is accessible on both desktops and smartphones.
 secure download

Guide to Enhance Animate Text Using Wondershare Filmora
Picture yourself editing an explainer animation or a promotional video, you understand that dynamic text animation is a ticket to stand out in the market. Using Wondershare Filmora, you can access a motion design experience to create an eye-catching result. Its intuitive interface offers dozens of animated text templates, such as glowing typewriter effects. Here is a detailed roadmap to navigate text animation for improving text templates in AE:
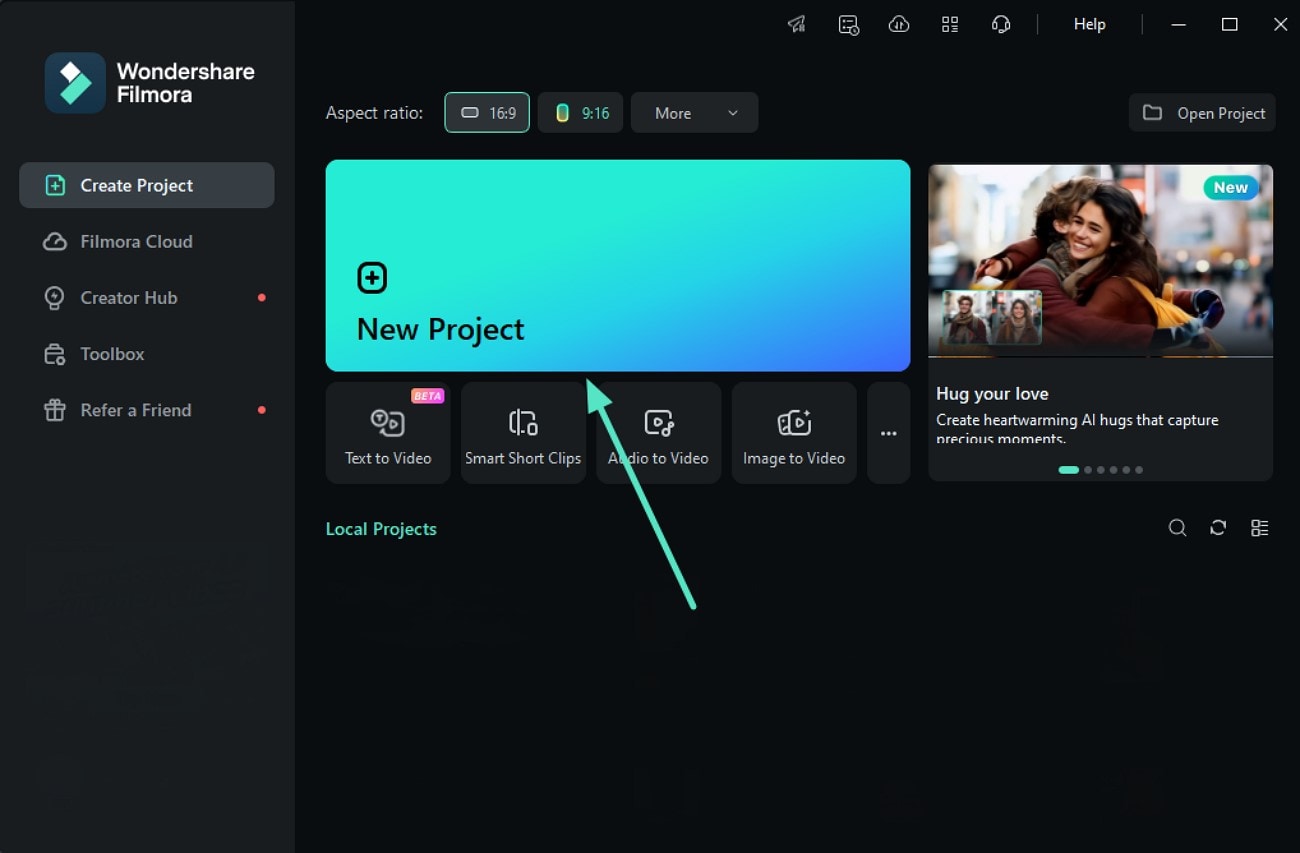
- Step 1. Launch Filmora and Start a New Project. Start by accessing Filmora's main interface and clicking the "New Project" option to import your text animation video and drag it to the editing timeline below。
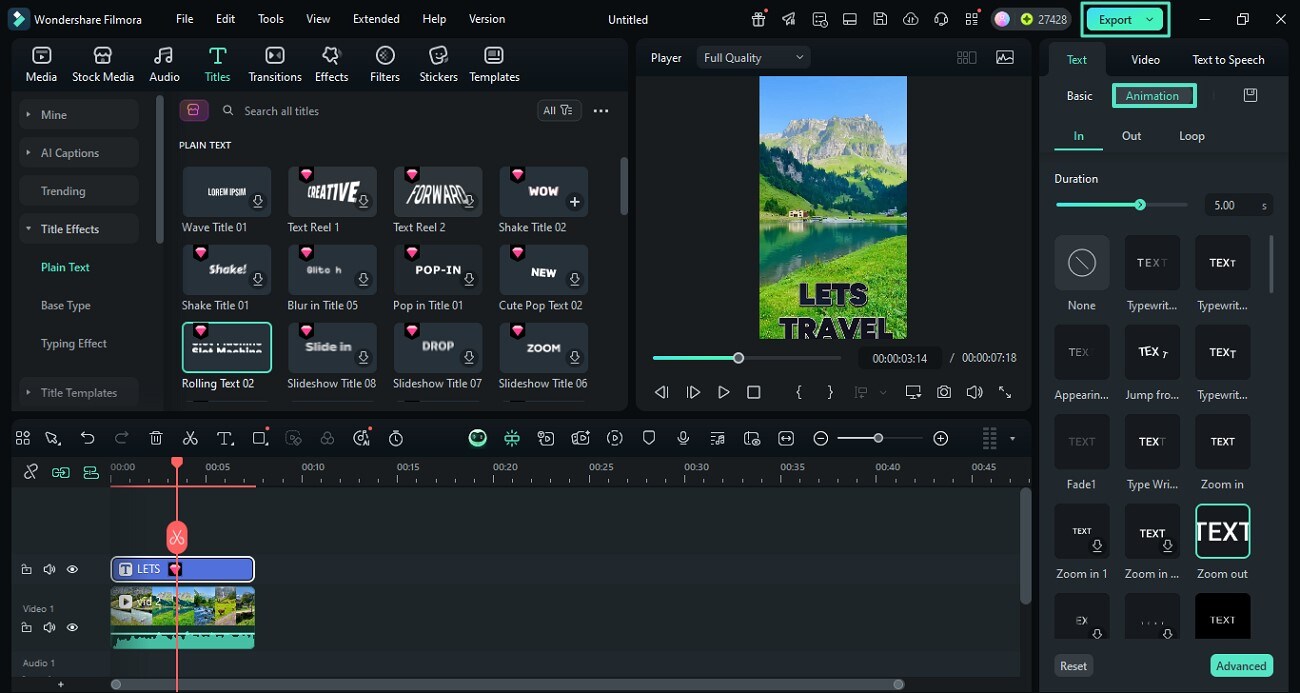
- Step 2. Add Text from the Titles. Go to the top menu bar and choose "Titles" from the left corner. Opt for "Title Effects," select your favorite template from presets, and drag it to the timeline. Click on the effect template and add "Text" in the text box shown in the preview window。
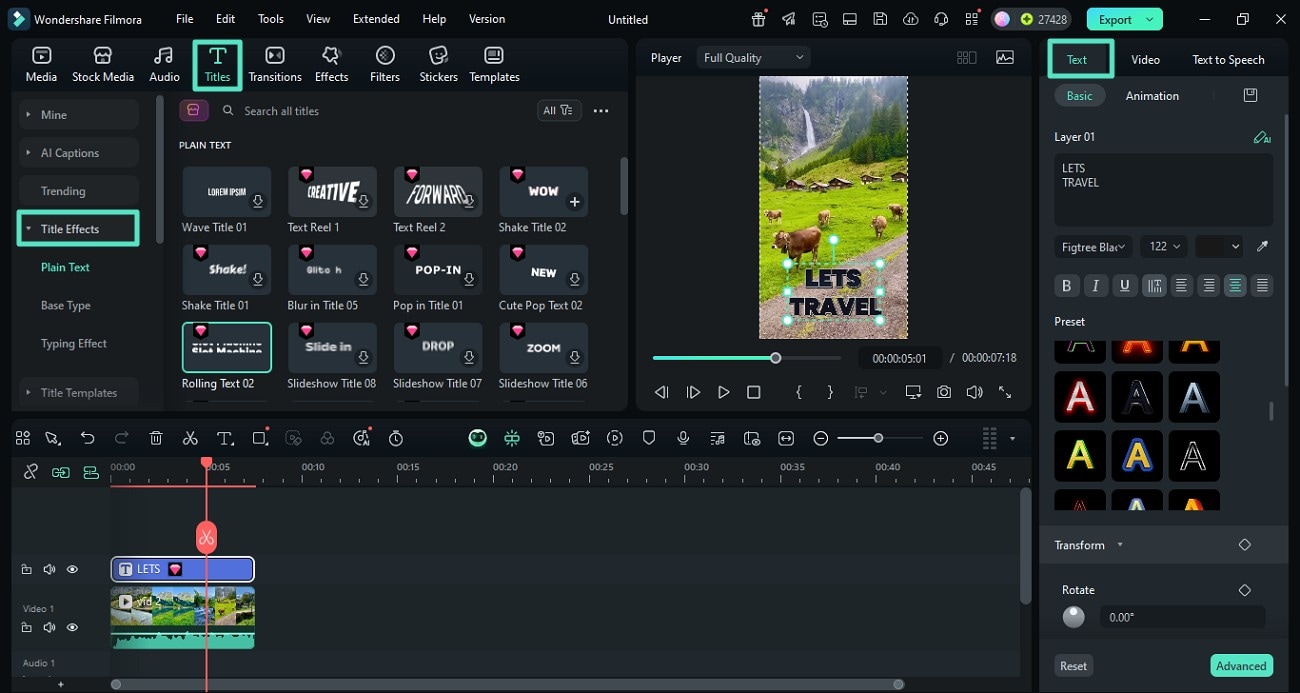
- Step 3. Choose an Animation for the Text and Export. Access the panel on the right and enable the "Animation" section to choose the animation style from the options provided. You can animate the start or end of the text or create a loop animation by making the desired selection. Once you are satisfied with the results, press the "Export" button located at the top-right corner of the interface。
A Roadmap to Enhance Text Animation Video with Filmora App
The Filmora App (iOS/Android) helps you elevate your video instantly to a studio-level output. Filmora synchronizes animated text with the videos and adjusts music beats that match your text effects. A detailed roadmap is discussed below to enhance videos with AE text animations:
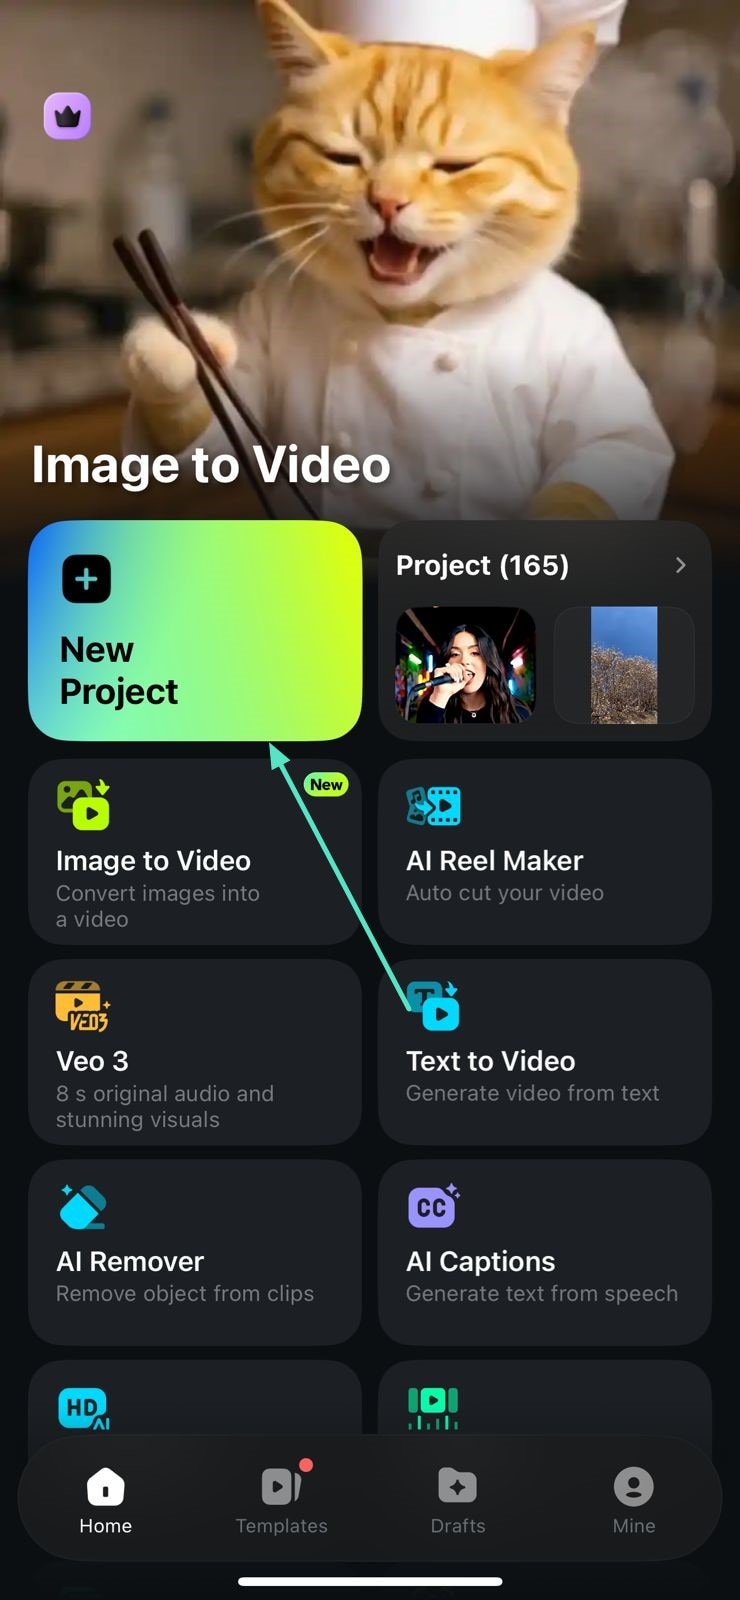
- Step 1. Access the Main Interface of Filmora. After launching the application on your smartphone, tap on the "New Project" tab located on the homepage. Import the video to the interface for which you want to add the text animation。
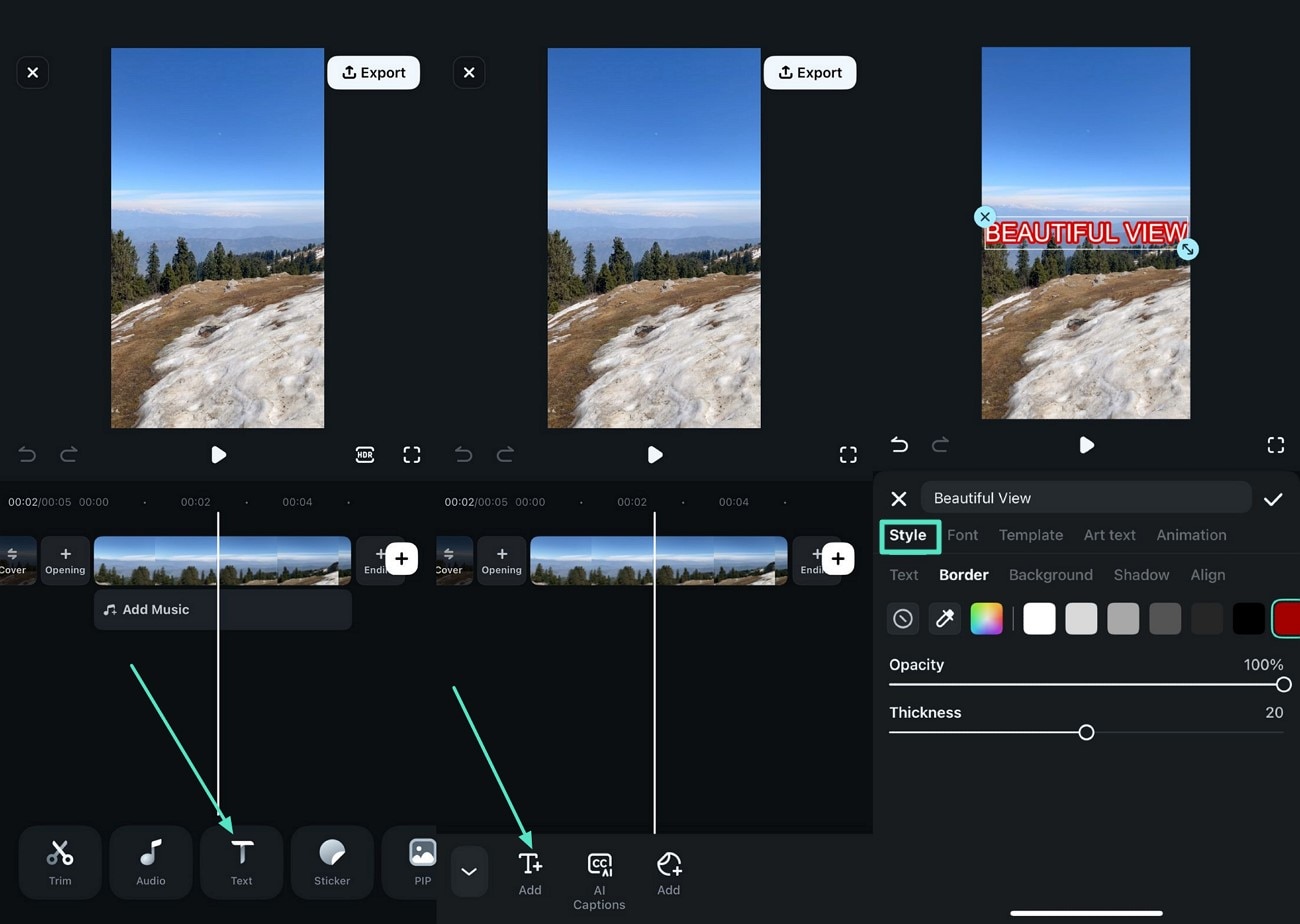
- Step 2. Press Text to Add your Desired Text. Hit the "Text" option from the menu bar given below, tap "Add Text" from the taskbar, and enter your text in the text box. Select the "Style" to pick any template, tap on the relevant case, and scroll down to adjust the size on the slider。
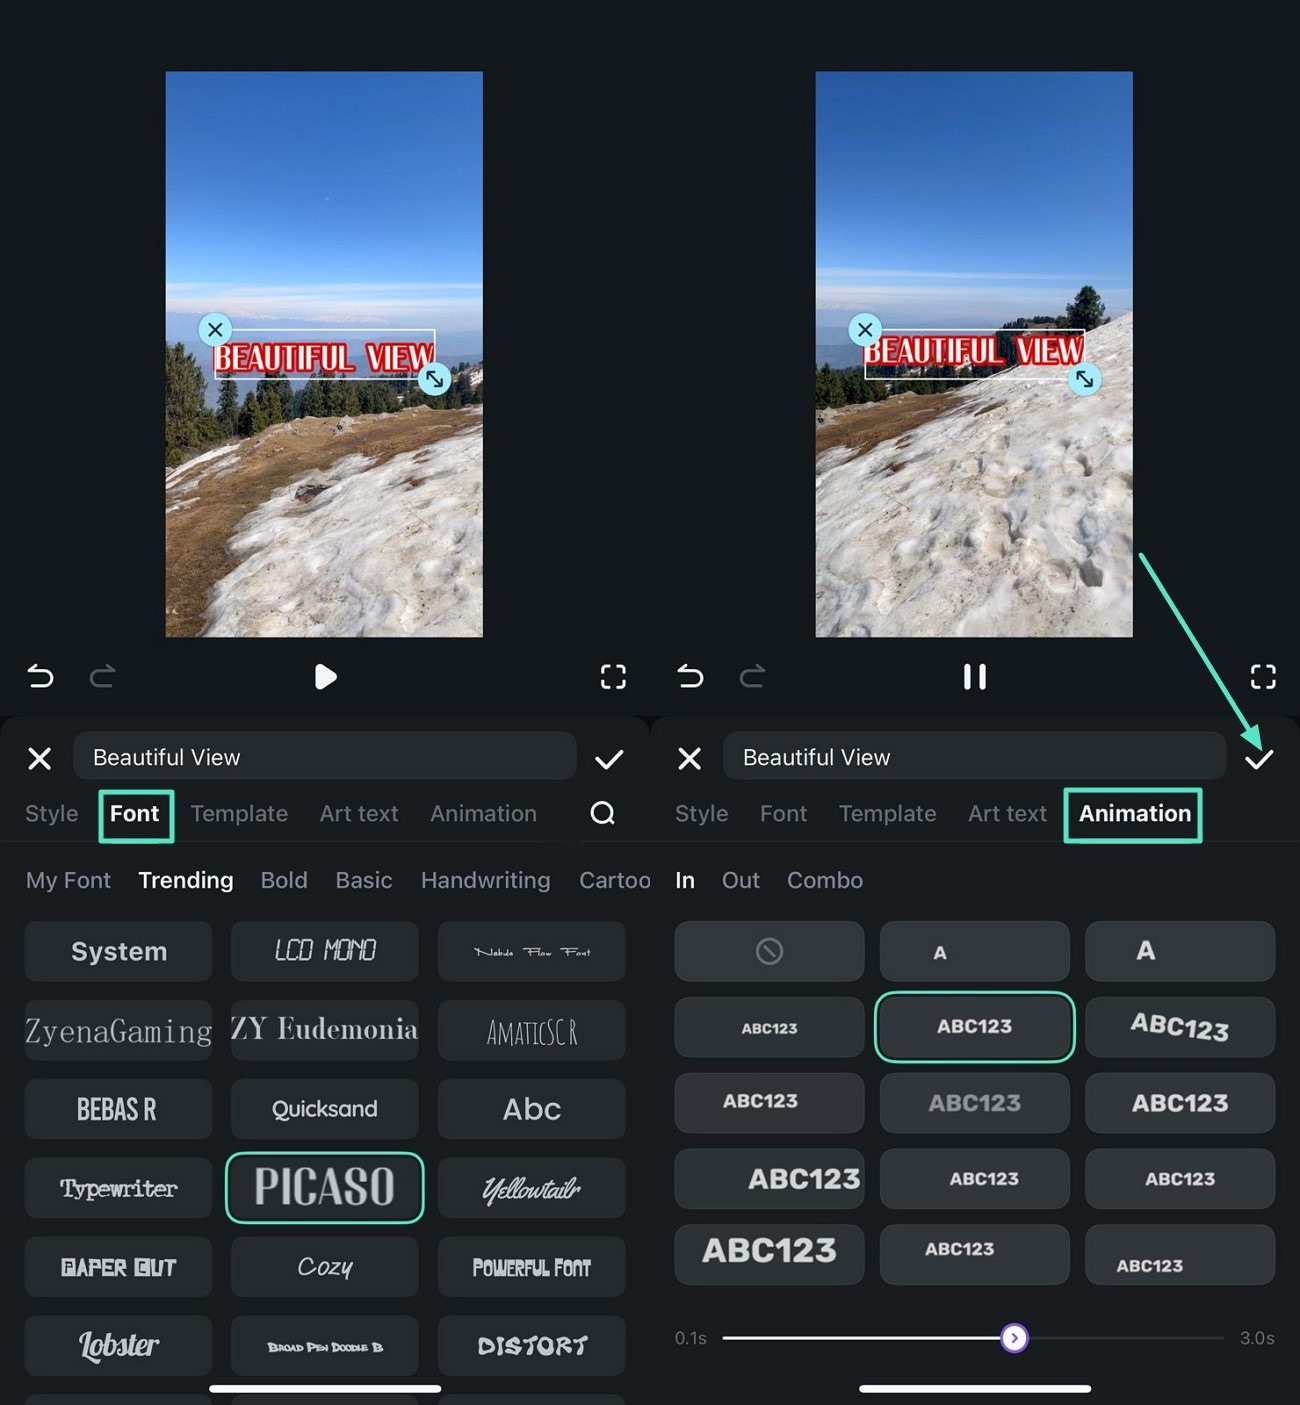
- Step 3. Choose Font and Animation For Your Text. Later, select "Font" to opt for the desired font preset from the library and hit "Animation" to select an animation for your text. Save the applied changes by tapping on the small "Tick" icon located on the right。
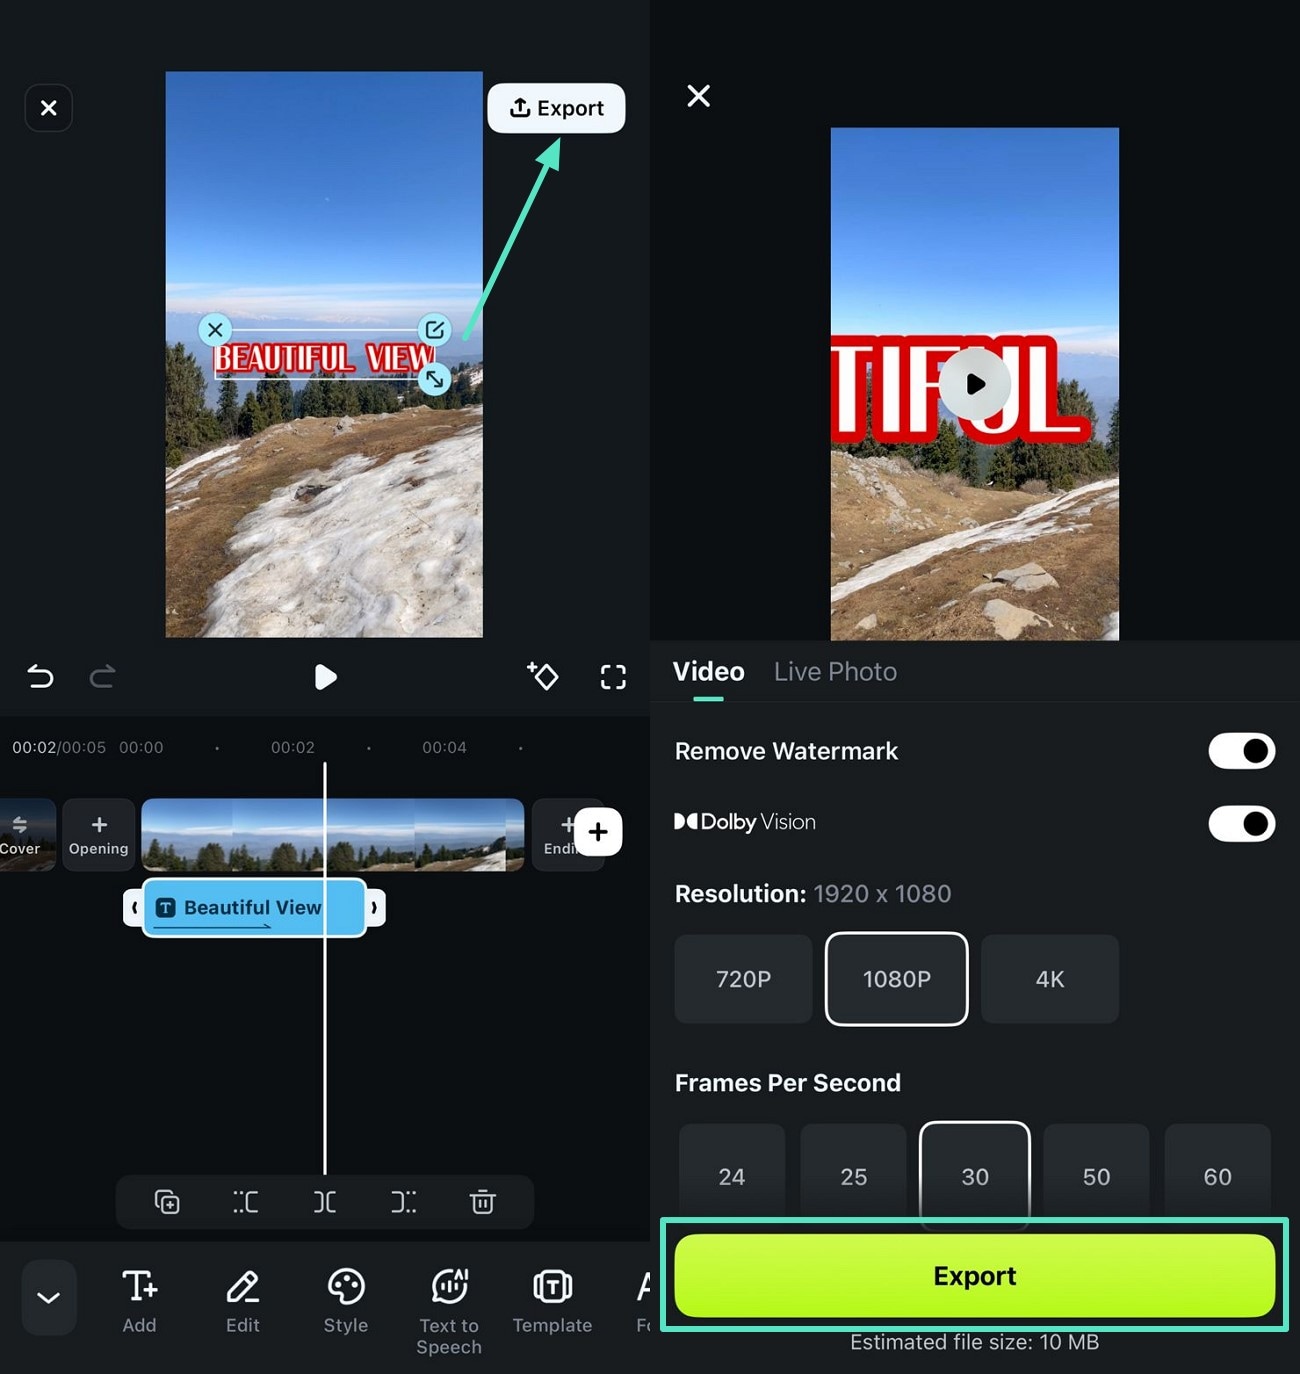
- Step 4. Preview the Video and Export. Check the final animated video and tap the "Export" button, modify settings in export display, and press "Export" to download it。
secure download
Conclusion
To wrap it up, this article discussed various methods to add After Effects text animation in your visual content effortlessly. The article also showed how Filmora is one of the more convenient options to animate text in your videos. The platform offers various animated presets and styles to automatically make the text move and make the visuals more compelling.
