By using waveform of the sound waves in Premiere Pro, we can better edit audio. In the following article, we'll learn how the audio waveform auto-sync feature in Premiere Pro helps automatically align and merge clips in the Project panel, in the timeline, and when setting up a multicamera project and how to insert audio waveform on your clips using Premiere Pro.
In this article
- Offer 25+ audio visualization effects.
- Create waveforms from audio tracks automatically.
- Sync waveforms with video beats and transitions.
- Export videos with audio waveforms in various formats.
- Works on Mac, Windows, iOS, and Android.
How to Show Audio Waveform on Clips in Premiere Pro? (2 Ways)
Users frequently complain that the audio waveform can suddenly disappear while editing audio in Premiere Pro, which is quite annoying to deal with. In the following tutorial, I'm going to show you how to make the audio waveforms visible.
1. Click the Wrench Icon on Settings Button
If you are not seeing them on audio clips on your timeline, then you drag on an audio clip to your timeline or your sequence and just click on the wrench and check to show audio waveform.

Once you check that you should see the audio waveforms on your clip you can click it again you should see a checkmark and it is highlighted in blue and if you don't want to see them all you have to do is click it again.

That will toggle off the audio waveforms and that is how to show the audio waveforms on your audio clips in adobe premiere pro.

2. Automatic Generate Audio Waveform
Make sure "Automatic audio waveform creation" is selected by going to "Edit > Preferences > Audio" first. When importing files, no waveforms are generated if option is unticked. Only clips you import moving forward will be impacted by this; clips already imported won't be affected.
Second, for creating audio waveforms on clips that don't have them, select the clips in the Program panel and go to "Clip > Generate Audio Waveform".

How to Add Audio Waveform Animation in Premiere Pro?
If you want to simply add a dynamic effect to your audio, just follow the tutorial below.
Step1Click After Effects Composition
First, make sure both the video and audio are selected. Right-click and select replace with After Effects composition.

Step2Create a new solid in After Effects
After creating a new project in After Effects, you need to choose a new solid of any color in your composition.

Step3Open audio waveform effect
Search audio waveform and drag and drop this effect on your solid. The waveform will now respond to the audio in your film if you use the audio layer option for your clip in the effect parameters for your solid change.

Step4Adjust the audio waveform effect
The position of the waveform on your video can be changed by utilizing the start and end point settings. Make sure the last values for each selections are the same to maintain an even level. Next, you can change the characteristics to give your waveform the desired appearance. Here, I applied some fundamental settings that are effective for singing. Using the two-color picker options and the display options, you may also change the waveform's inner and outer colors.

Step5Check the animation and export the video
Back in Premiere, you can pick whether you want the traditional analog lines to appear or a more contemporary digital waveform. Your clip will now be replaced with an After Effects composition that is dynamically tied to the audio waveform.

How to Change the Incorrect Audio Waveform in Premiere Pro?
These problems typically result from corrupted cache/peak files. If you have cleared the cache from the application. I will recommend cleaning them manually by going to the location specified in "Preferences > Media Cache".
Clean the contents of the folder named Media Cache, Media Cache files, and Peak files (Before cleaning them, please ensure to open these folders once and verify if they have any of the media files in them to avoid any accidental deletion of required media or asset).

Please make sure that the option "Save.cfa and.pek cache files next to the original media files when possible" is unchecked. If it is ticked, you will have to remove them by hand from the folders where the media files are kept.

The Audio previews can also be cleaned (File > Project Settings > Scratch Disks > Audio Previews).
The following time you open the project, these files will be cleared. Rebuilding the necessary cache and peak files could take some time.
The Simpler, More Creative Alternative: Filmora Audio Visualizer
You've seen the process in Premiere Pro—it's powerful, but it often involves switching to After Effects and manually troubleshooting cache files. For a faster, more intuitive workflow packed with creative options, many editors prefer Wondershare Filmora.
Filmora's approach is different. It doesn't just simplify the process; it enhances it. One of the biggest advantages is its all-in-one design. Before you can create a waveform, you need a great audio track. Filmora provides a massive built-in library of royalty-free music, saving you from searching external sites and worrying about copyright.
Here's a taste of the kind of tracks you can instantly use for your next audio visualizer project:


How to Make Audio Visualizer in Filmora
Step1Download and install the software
Visit the official Wondershare Filmora website and follow the on-screen instructions.
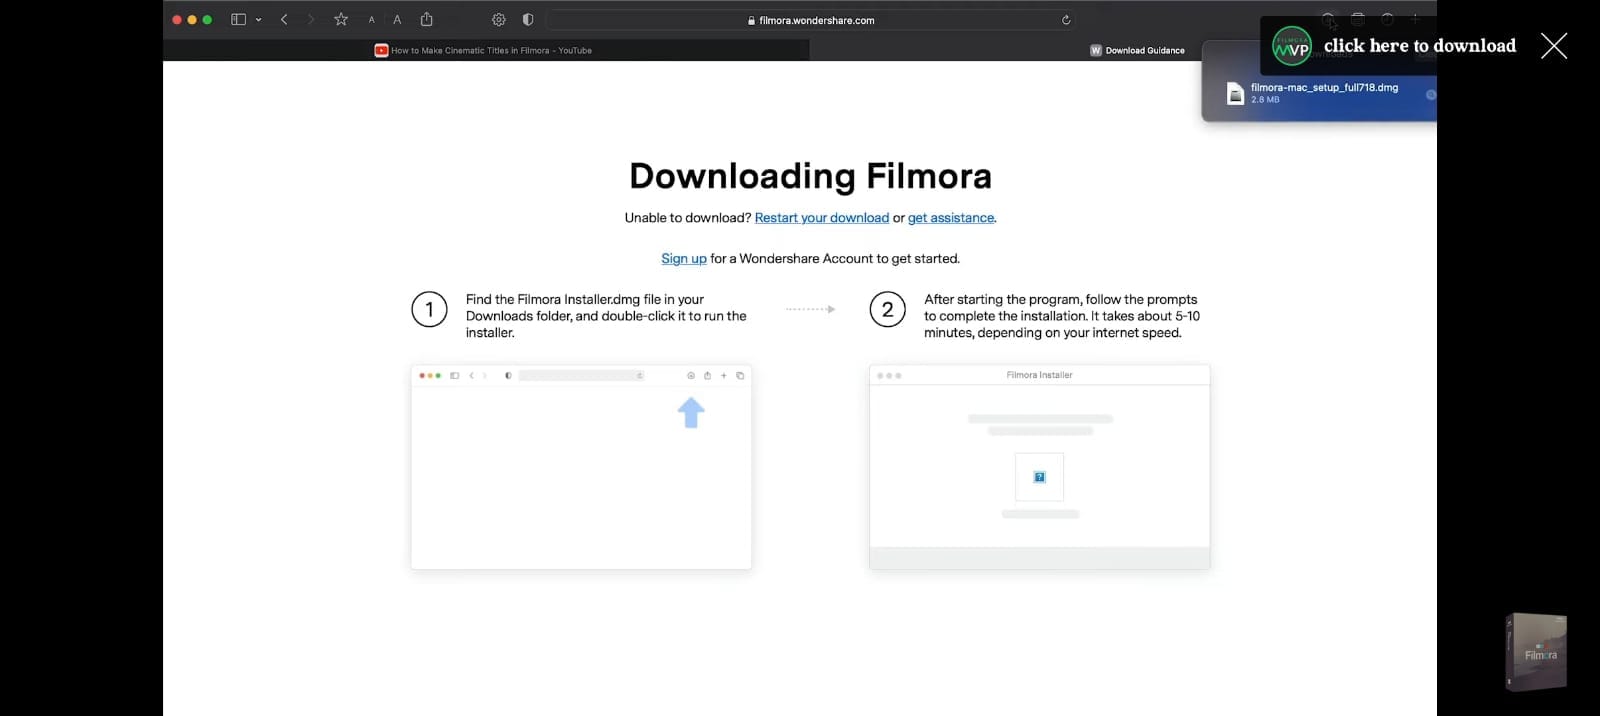
Wait for the software to install completely, and then the main homepage will open automatically on your screen.
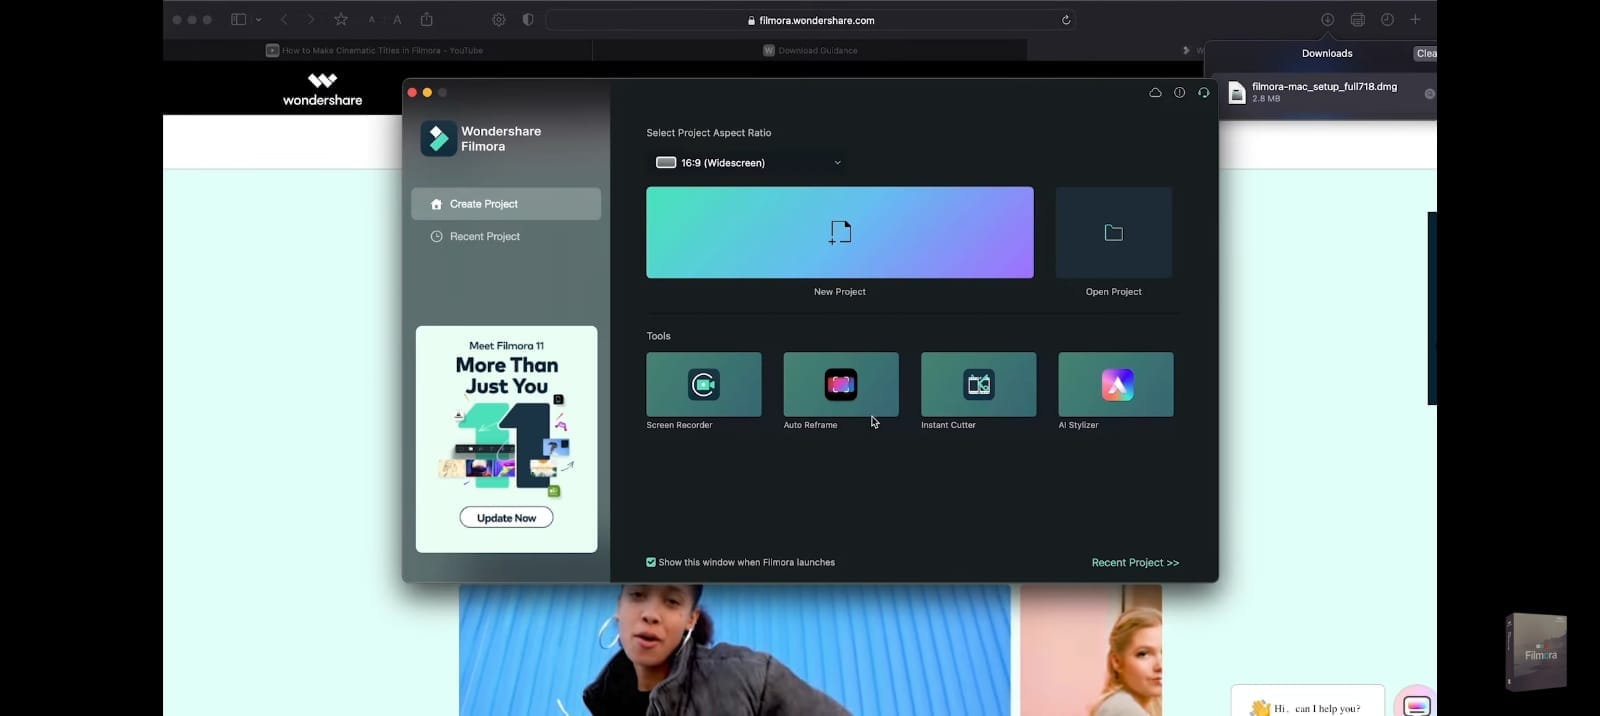
Step2Add the music file
Click on the "Create New Project" button from the homepage. Then, tap on the "Click here to import media" section when it opens and add the file to the software window from your internal storage.
Then, drag the audio file you have imported down to the editor timeline. Add a stock image from your Stock Media section.
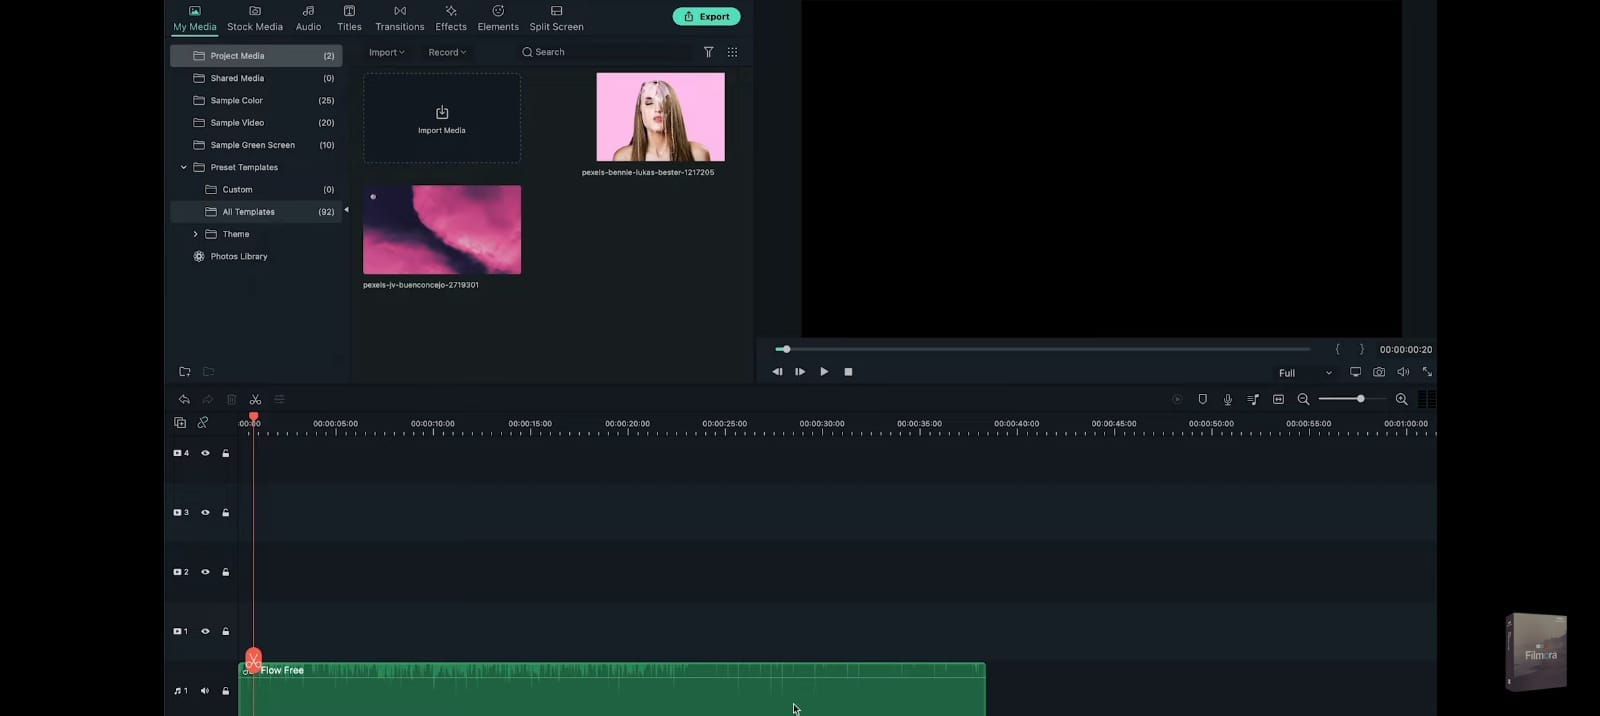
Step3Add the Audio Visualizer Effects
Go to the Effects tab. Choose one of them that you prefer from the list of different visualizer effects and download it.
Drag the visualizer effect selected from the collection to the editing timeline above the background image you added previously. Again, use the slider on the clip to drag it forward and fit the size of both the music clip and the image.
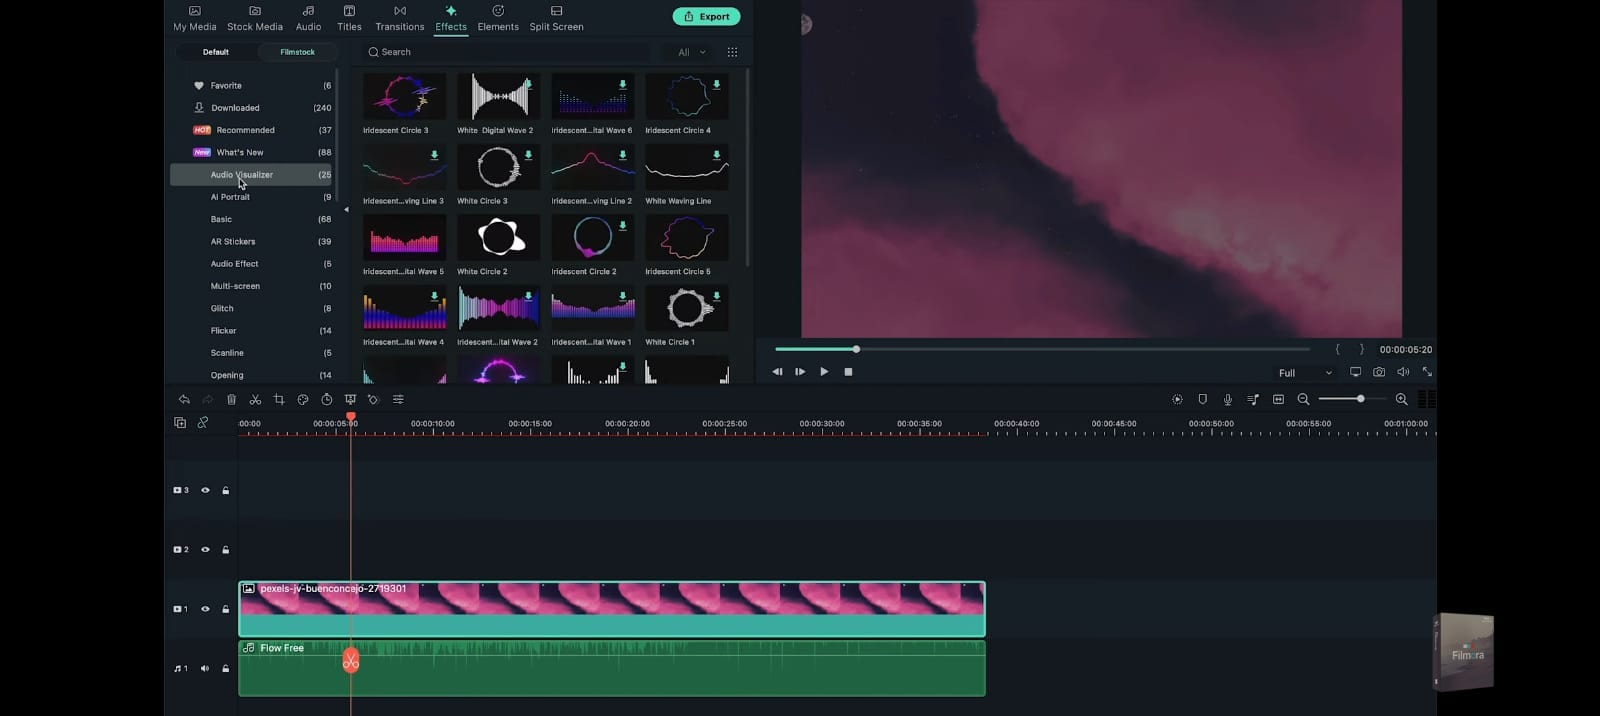
Step4Edit the Audio Visualiser
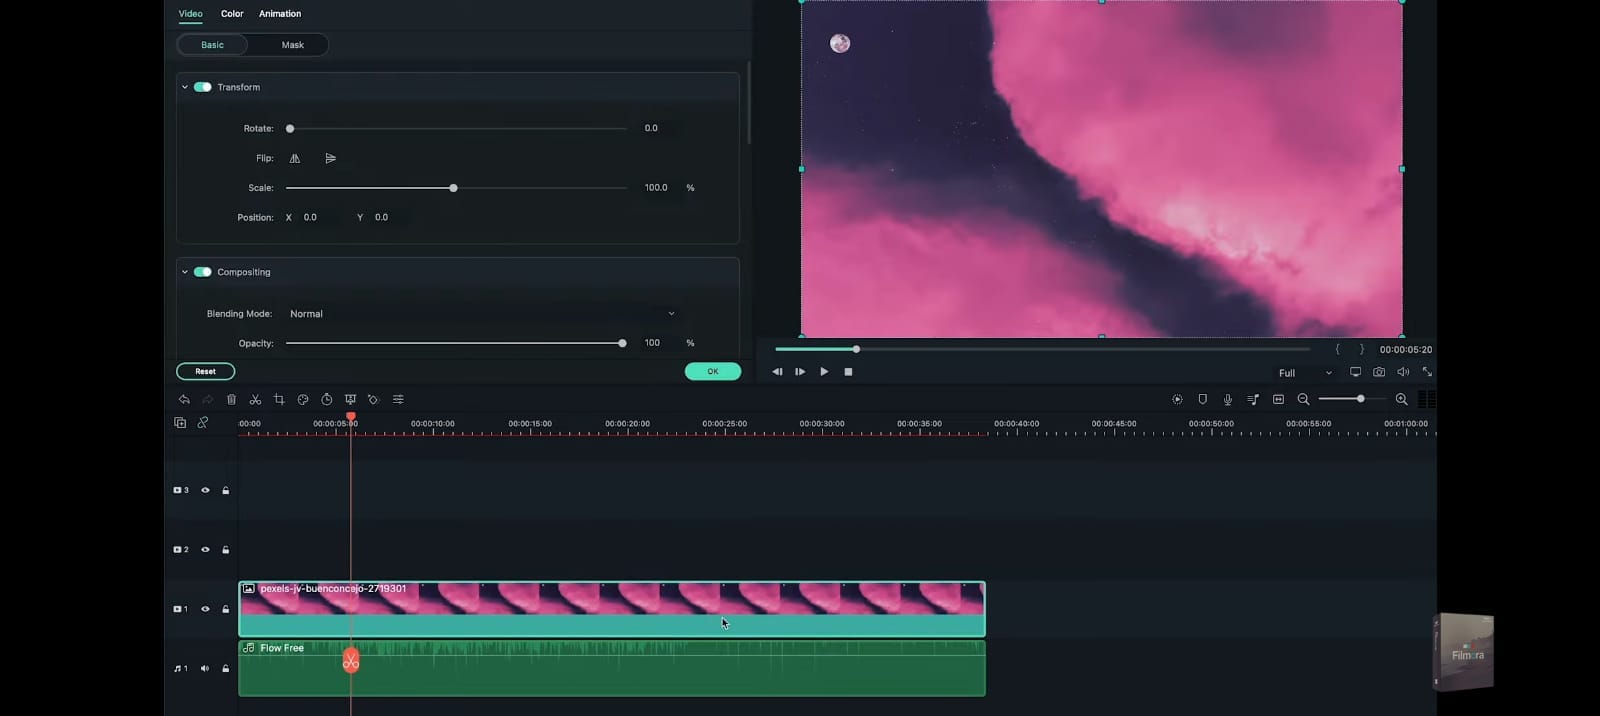
Double-click on the audio visualizer effect you dropped in the timeline. Adjustment options available here include position, scale, Opacity, and Intensity.
Drag the sliders for them to adjust the visualizer effect as needed. Change the color of the visualizer as well from here, and then use the slider on the visualizer effect on the timeline to see the effect change. Press the OK button after you are done.
Step5Add the Portrait Image
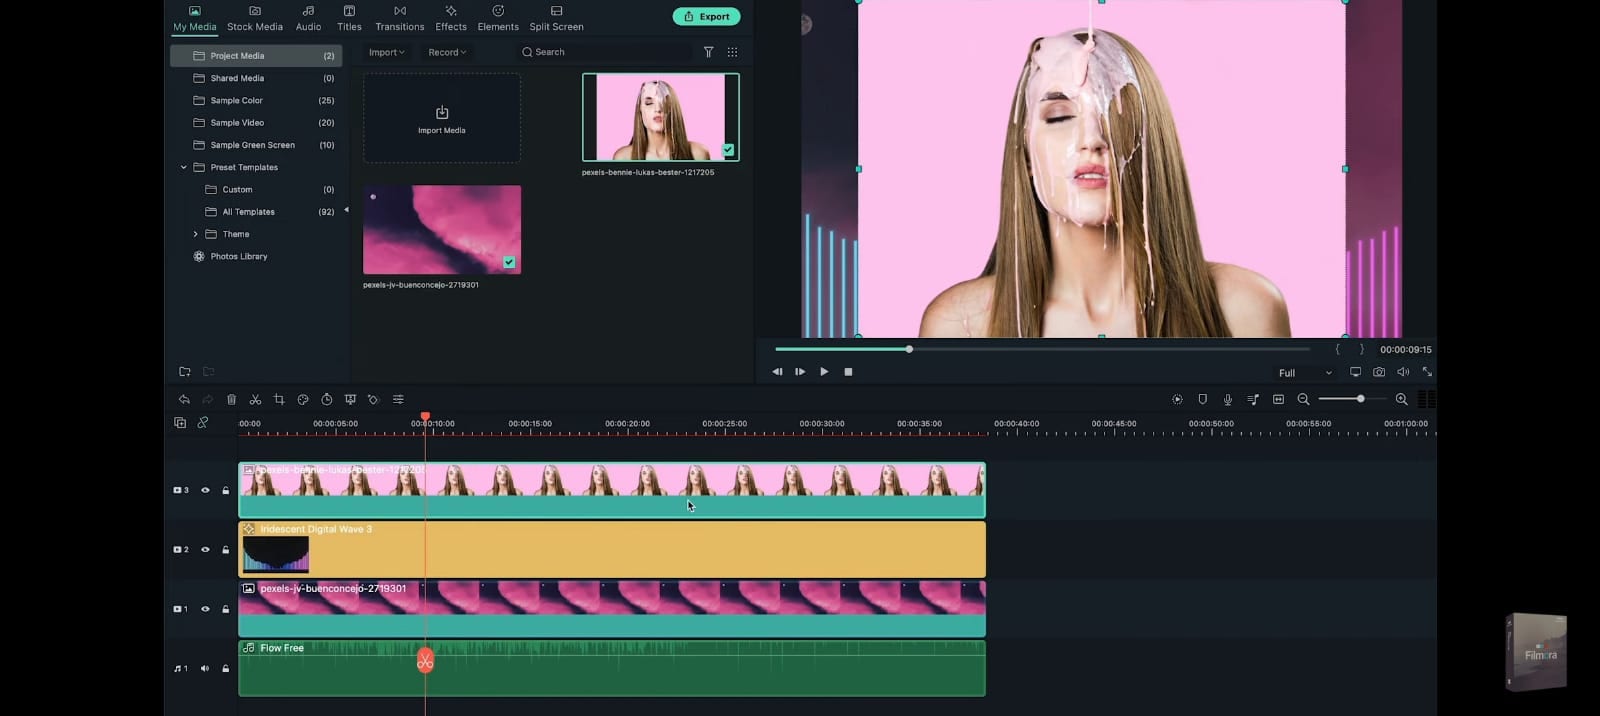
Go to the My Media tab next to get the Portrait image into the project. If you previously imported the image to Filmora, drag it to the timeline. Or, you can add it later by clicking on the Import Media button and adding the Portrait photo from your device.
When it is available on the media window, hold, drag, and then drop it above the visualizer. Like in the case of the previous parts, use the slider end of this image in the timeline to drag it and fit the size of the other clips.
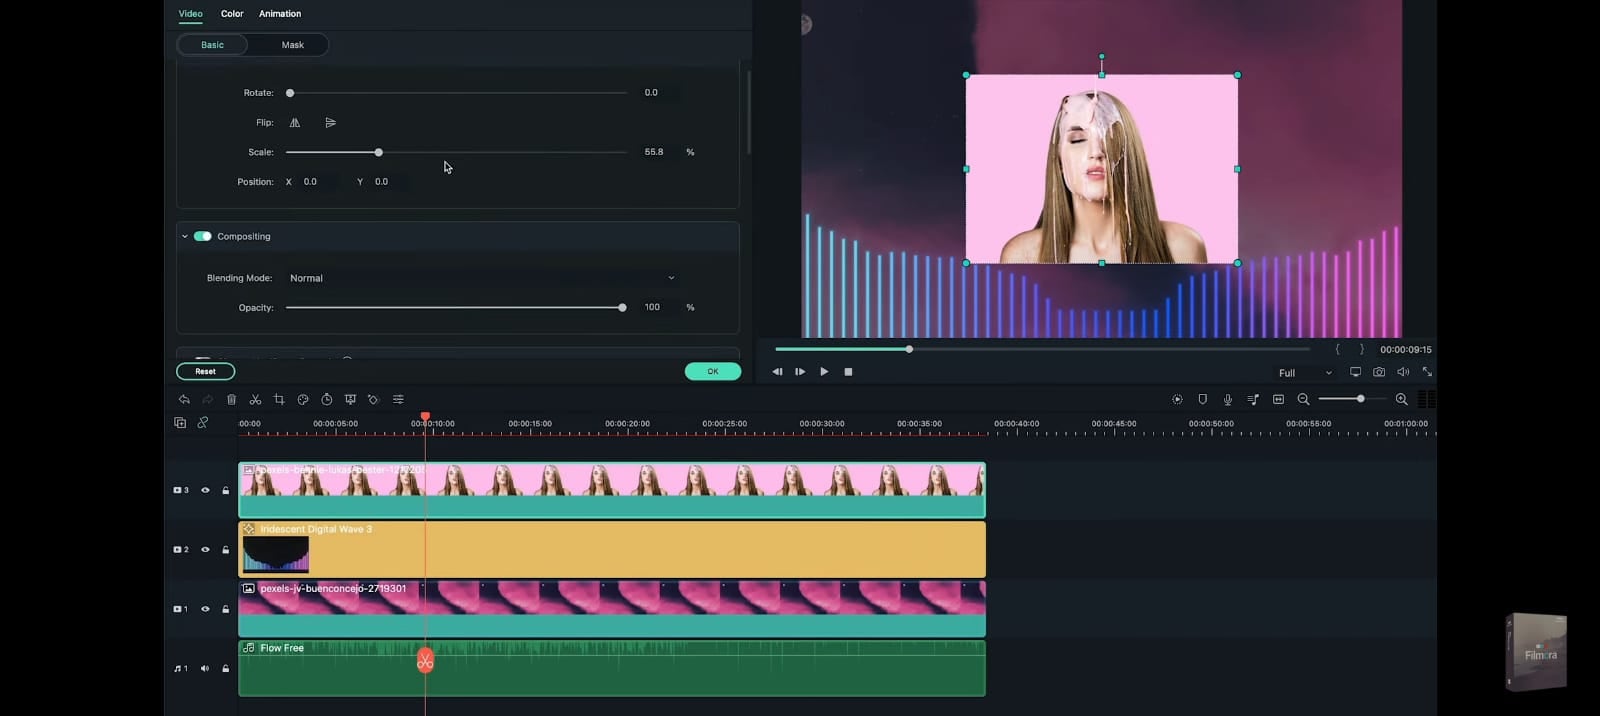
Next, the editing window for that will open. Make changes to the size and placement of the portrait photo, with elements like scale, position, rotation, opacity, etc. Move the photo in the preview window to the section where you want the image to appear. Then, tap the OK button under the window.
Step6Add the overlapping visualizer effect
After adding the portrait, you can add another audio visualizer effect to the project. For this, again, tap on the Effects tab and choose the Filmstock option. Select Audio Visualizer and click on the circular visualizer effect from the list. Repeat the dragging and dropping step for this effect as well.
On the timeline, you have to adjust the visualizer effect over the portrait photo to match the length of the previous clips. Then, please tap on the portrait photo in the timeline again and adjust its appearance, like reducing the image size to fit the second visualizer effect size.
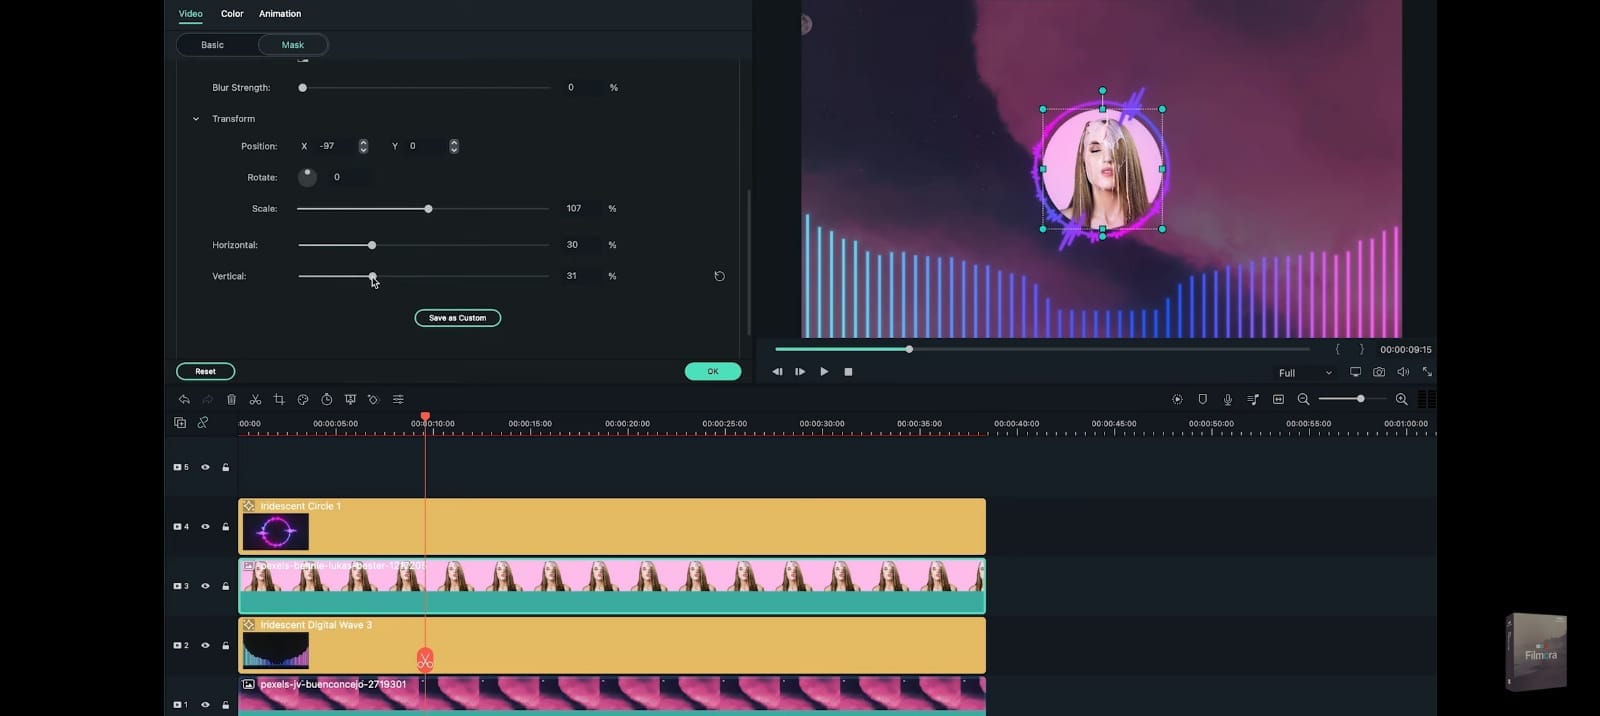
After fitting the image within the visualizer, click on the Mask tab in the same editor window. Choose the circular shape preset and scroll down to find the adjustment parameters like position, scaling, horizontal/vertical lining, etc. Keep making the changes per your needs, like fitting the image to the same size as the circular visualizer.
Move it to place the image inside the visualizer. After you are done, press the OK button.
Step7Add a Title
An attractive title is the next element you should add to the project. You have to click on the Titles tab from the top toolbar. Choose the titles option from the drop-down list and move it to the timeline below. As you did with the previous elements you added to the timeline, move the slider onward and fit it with the previous one's length.
Next, you should click on the Title in the timeline you added for the Title editing window to open. Here, you have to tap on the Advanced button.
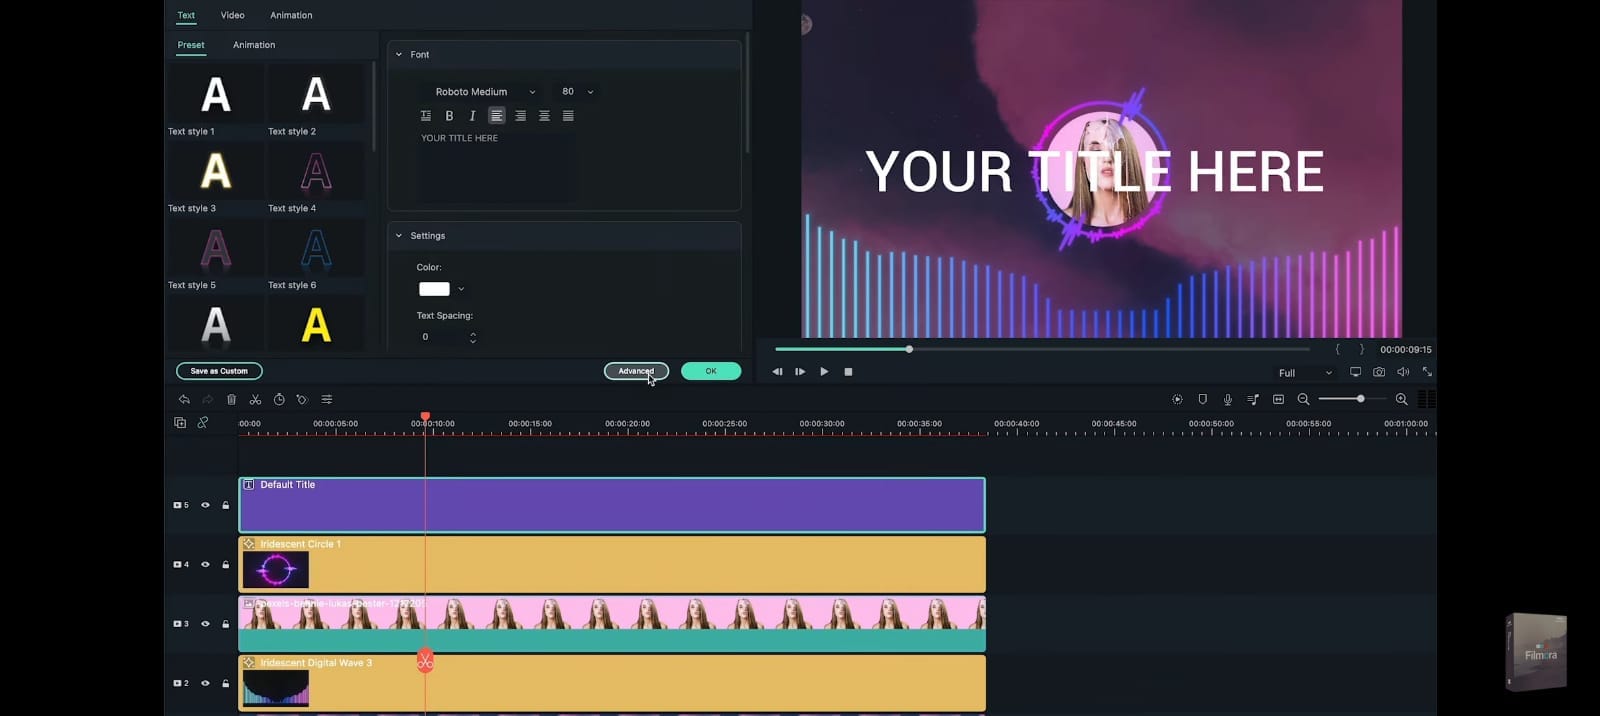
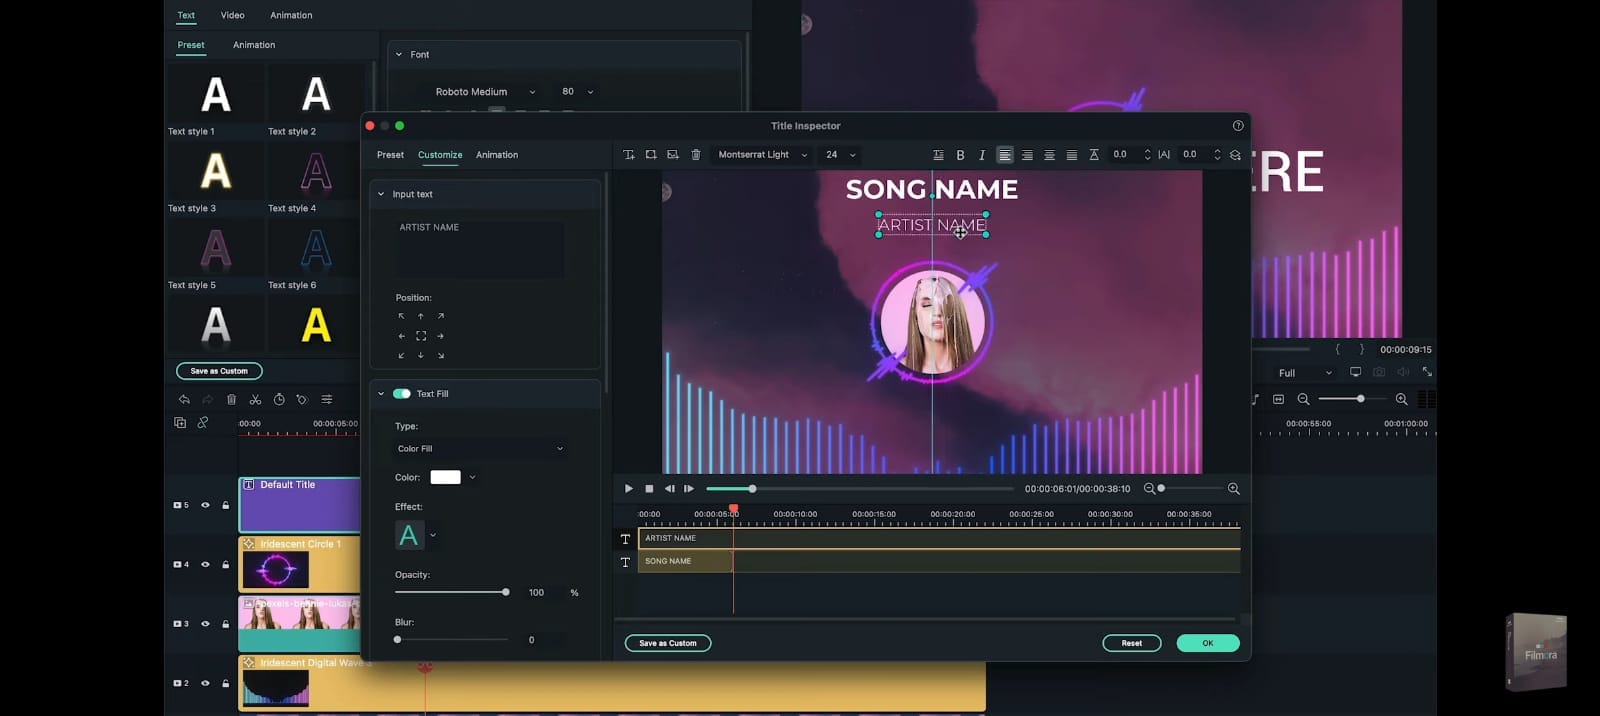
In the next window that opens, tap on the Customize tab and add the song name in the title area. Make other font-related changes as you see fit, like the font size, font style, indentation, color, etc. Tap on the add text icon in this window to get another text field in which you can add the artist's name. Make sure to reduce the size of it to lower than that of the main song title text.
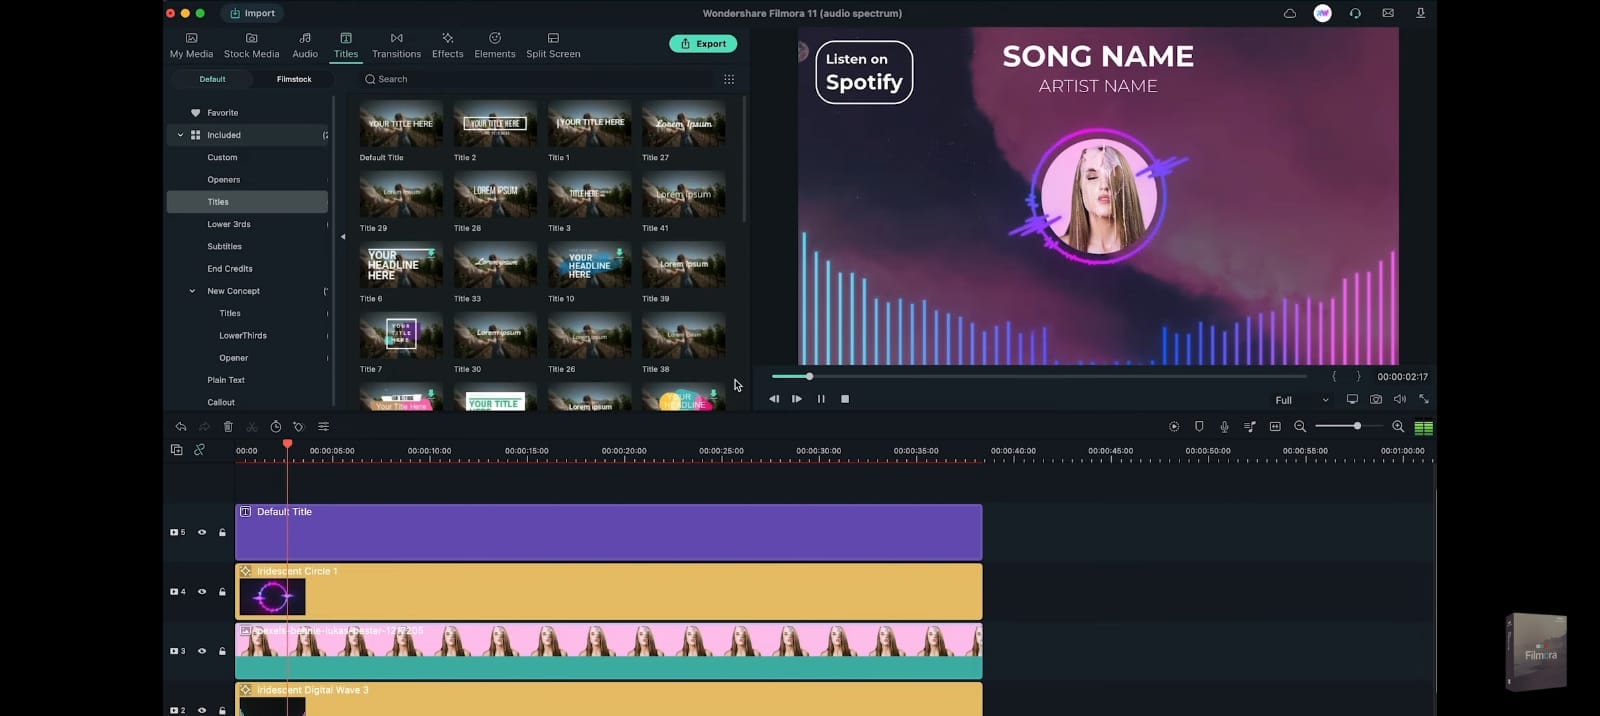
Following that, you can tap on the shape icon to add a shape to the project by adding the name of the streaming service provider, like Apple Music or Spotify. Choose the Rectangle option, for example, and move it to the side of the screen. Click on the shape editing option and adjust the border size of it to three.
If you want to create a rounded-off edge look to the rectangle shape, tap on the small yellow icon that you will see at its edge. Move it slightly to adjust. Then, type the information into the shape text field, like "Listen on Spotify," and make font and shape size adjustments. After you have completed this step, press the OK button below.
Step8Preview and Export
After making the changes, you will return to the main editor timeline. Press the play button under the preview window to see how the final project looks, and tap on the Export button to download it offline. Make changes to the exporting file after clicking on the Local tab and choosing the file format you will download it as. Then, press Export again.
Conclusion
This article will help you in resolving various audio waveform issues in Premiere Pro. Additionally, you can discover how to create waveforms in your audio clips. You should try Wondershare Filmora to add the waveform animation even if Premiere Pro is one of the greatest audio and video editing programs. Beginners will find it more convenient and simpler. If you simply want to quickly polish your music video or podcast video, the Filmora audio visualizer is a better option.


 100% Security Verified | No Subscription Required | No Malware

