

 TL;DR:
For adding text to videos, Avidemux requires manually importing pre-written subtitle files through its filter manager, whereas Wondershare Filmora offers a streamlined alternative featuring both manual text overlays and automated AI speech-to-text transcription.
● Adding subtitles in Avidemux specifically requires creating a separate subtitle file in advance, changing the default video output format, and using the "Filters" menu to import and position the text over the video.
● Positioned for users seeking the simplicity of mobile editors like Gopro Quik with desktop-level capabilities, Filmora allows direct manual text insertion via drag-and-drop templates on PC, Mac, iOS, and Android.
● Bypassing the manual file dependency of Avidemux, Filmora includes an AI Auto Caption tool that automatically detects spoken words and generates customizable, synchronized, multi-language subtitle tracks directly on the timeline.
Ask AI for a summary
 ChatGPT
 Perplexity
 Gemini
 Claude
 Grok
Grok
Adding text and subtitles to your videos is a key step, and for many, Avidemux is the go-to tool. However, finding clear steps for "avidemux add text" and "avidemux subtitles" can be tricky. This guide provides a complete, step-by-step tutorial on how to add text and subtitles in Avidemux. Plus, we explore Wondershare Filmora, a modern and more powerful Avidemux alternative for users needing advanced features like AI captions, similar to what Gopro Quik users seek.
Step-by-Step: How to Add Text & Subtitles with Avidemux
- Look for a text file containing all the titles that you would like to add to your video clip.
- Go to the menu bar and select "filters".
- Choose "subtitles" from the filter manager.
- Add the subtitle by clicking on the "add" icon before configuring.
- Save all the changes that you have made to your video file.
Detailed Steps to Add Subtitles to a Video with Avidemux Filters
- The very first step is to click on the "Open" button on the toolbar to open the video file in Avidemux.
- Now tap "Copy" in the drop-down box and choose a new video format.
- In the video section, click on the "Filters" button and then select the "Subtitles" category.
- After this, select the format of your subtitle file and click on the "Add" button to add a filter.
- Tap the "Open" button; look for the subtitle file on your PC. On finding it, double click it and personalize the color, size, position, font, etc of the subtitle by using the options given in the dialog box.
- Close the filters window by clicking on the "Close" button. Now go to "File" menu> Save> Save video and give a name to the video created.
Beyond Avidemux: Why Filmora's Text Tools Satisfy Users Seeking Gopro Quik Alternatives
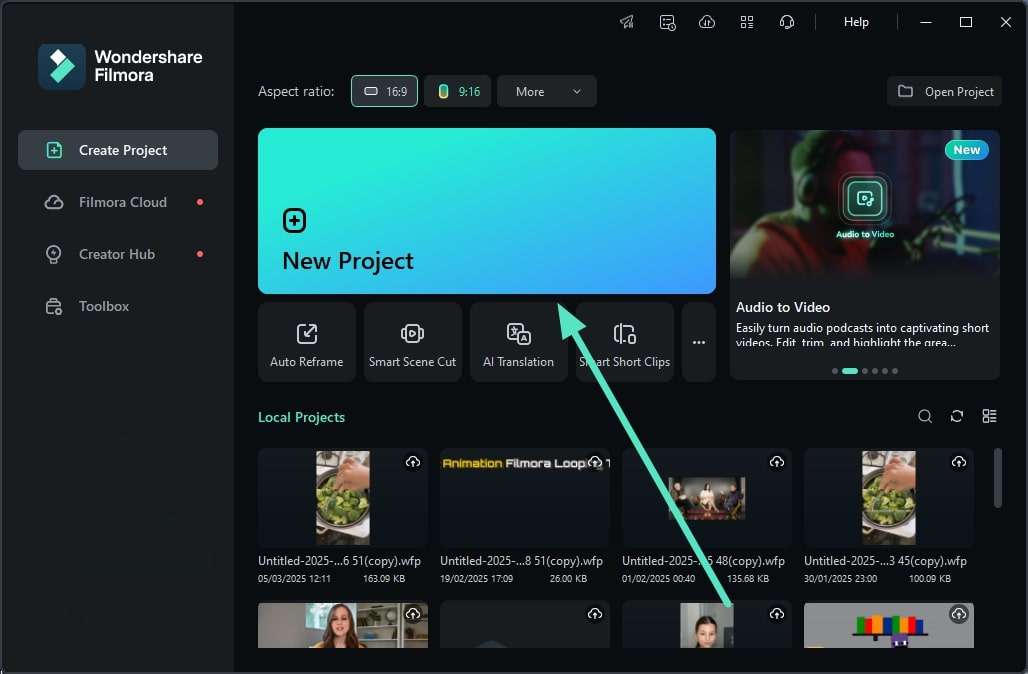
Filmora is designed for users who want the ease of mobile editing apps, like Gopro Quik, but with professional desktop power. If you are looking for advanced title options and text overlays, Filmora is a superior choice, offering the simplicity of Gopro Quik and the functionality of a full editor.
Wondershare Filmora: The Powerful Avidemux Alternative for Seamless Subtitling & More
One of the most powerful and user-friendly alternatives for Avidemux subtitle generation is Wondershare Filmora. While Avidemux requires a multi-step process, Filmora simplifies text and subtitle addition with manual and AI-powered tools (including features often sought by users of apps like Gopro Quik). Filmora offers superior flexibility and ease, allowing you to add text and subtitles seamlessly on desktop (PC/Mac) and mobile. Its key feature, AI Auto Caption, instantly converts spoken words into accurate text, which is a major upgrade from the manual processes in Avidemux.
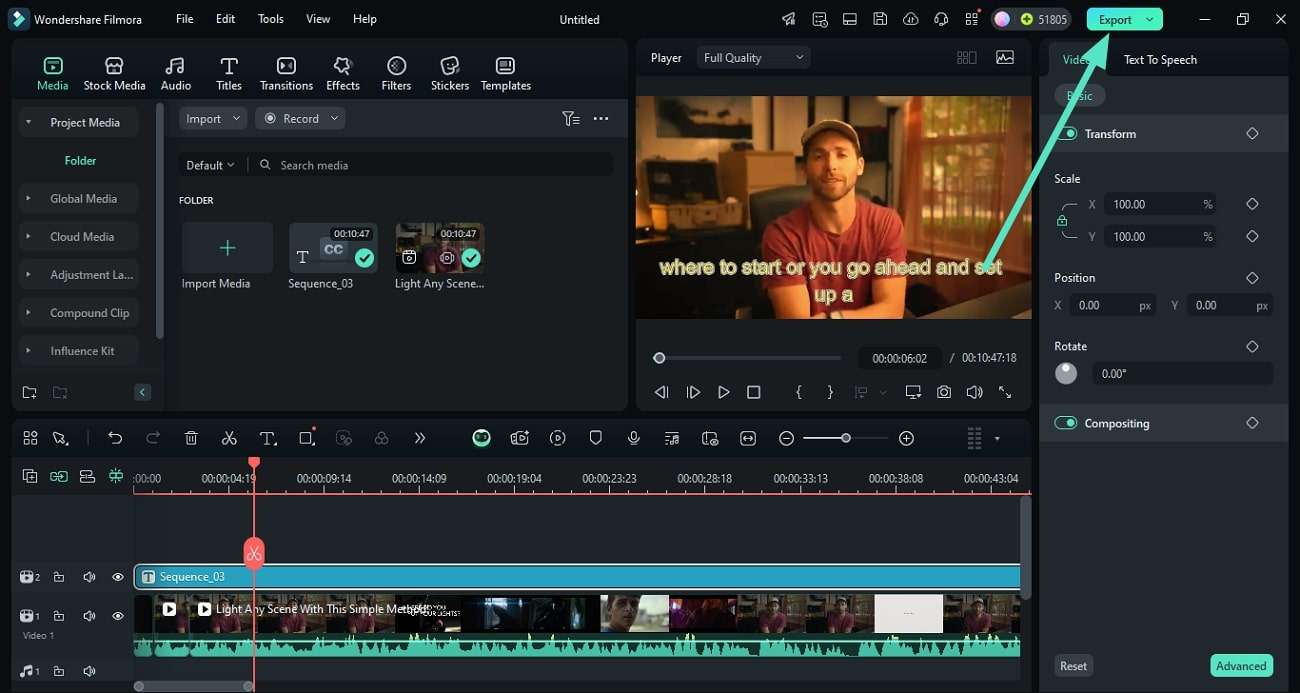
Using Filmora Desktop for Subtitles
This all-in-one multimedia editor offers manual as well as automated subtitles across the spoken words in your videos. Explore the section below to learn about both these methods in detail:
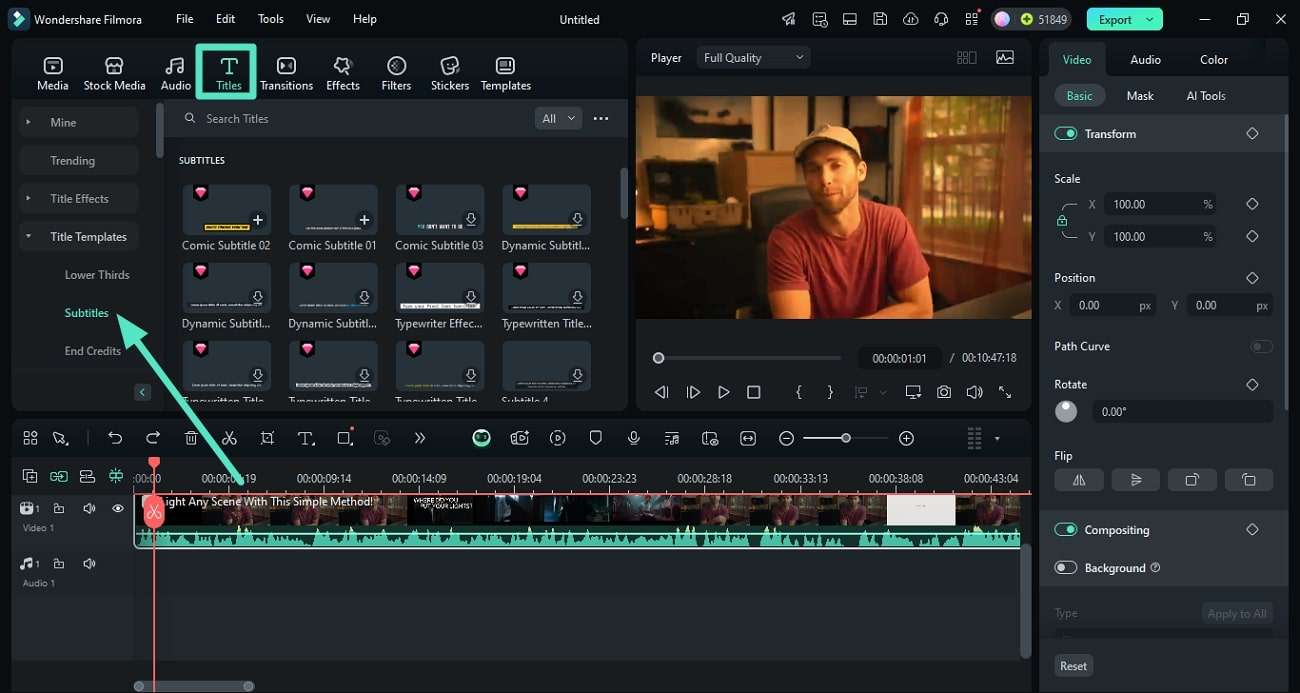
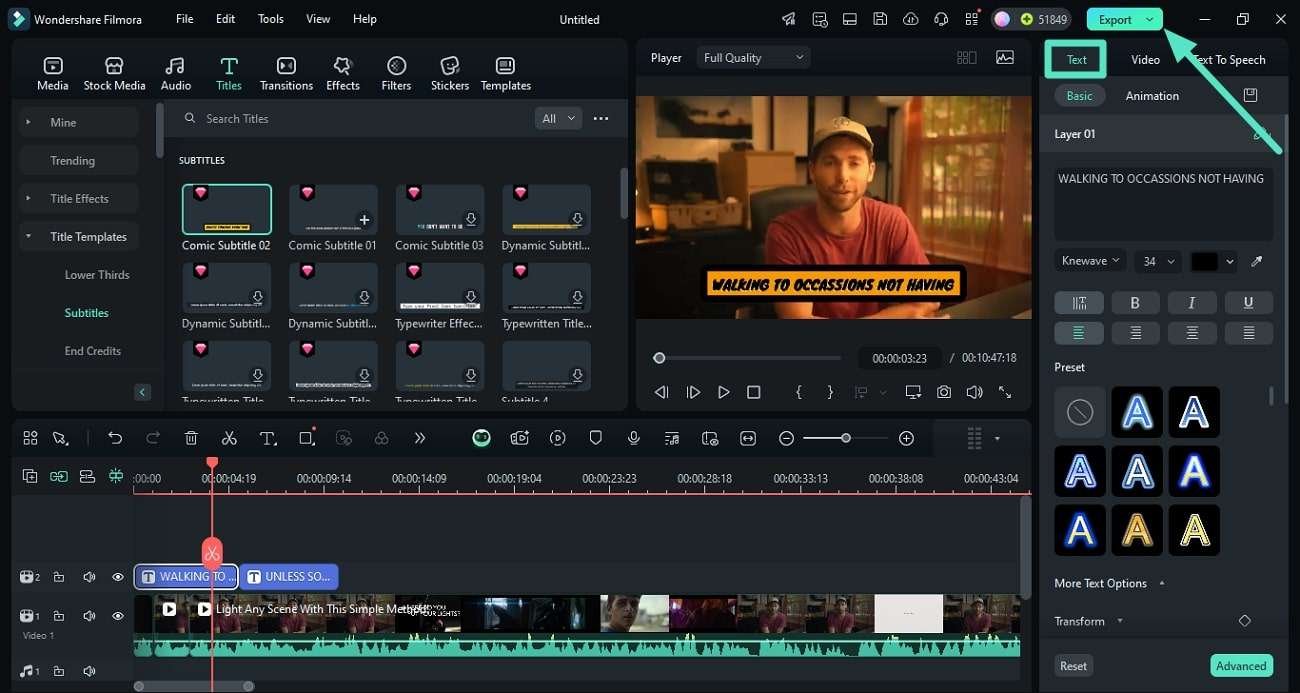
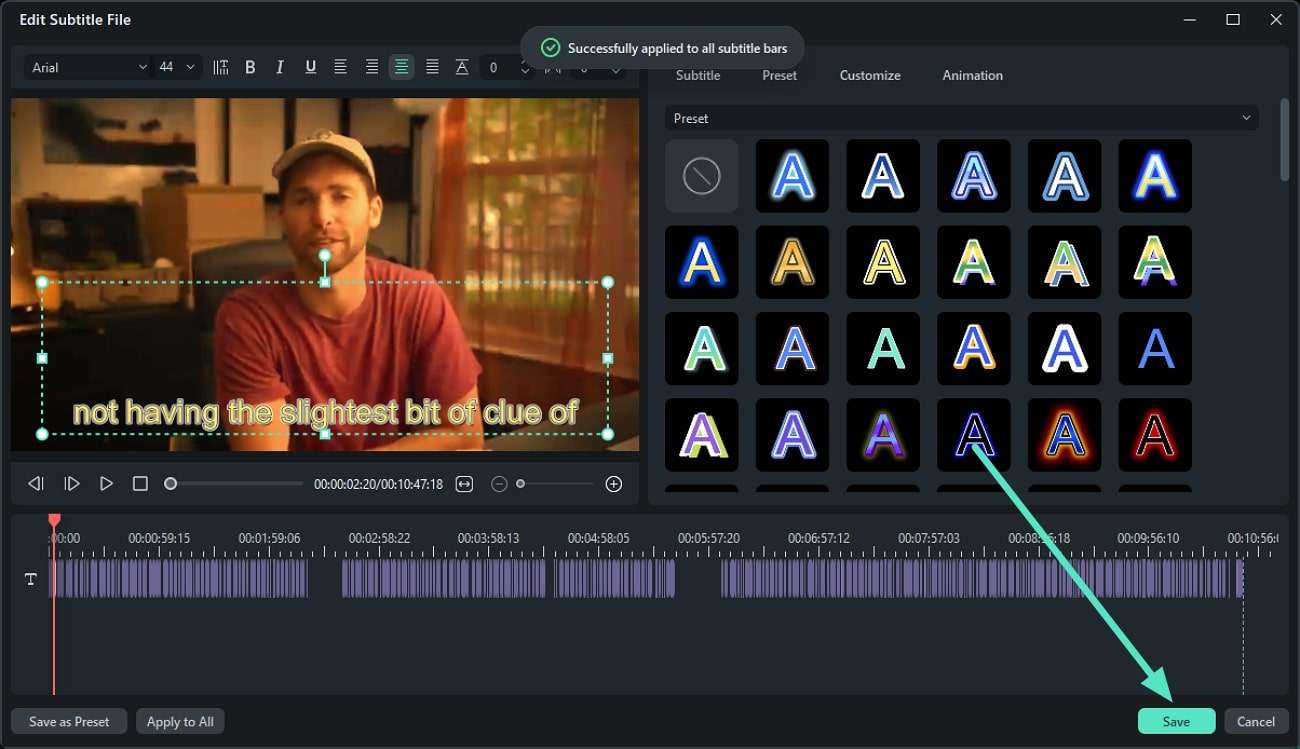
Method 1: Add Manual Subtitles with Filmora
If you want to add subtitles manually by typing in the text across each spoken word, Filmora provides you with all the required tools. You get various pre-designed templates that you can integrate into your video and input the captions. Moreover, you also get the ability to stylize your subs from scratch by customizing font, style, and color. To learn how to use this tool for manual subtitling, read the steps mentioned below:
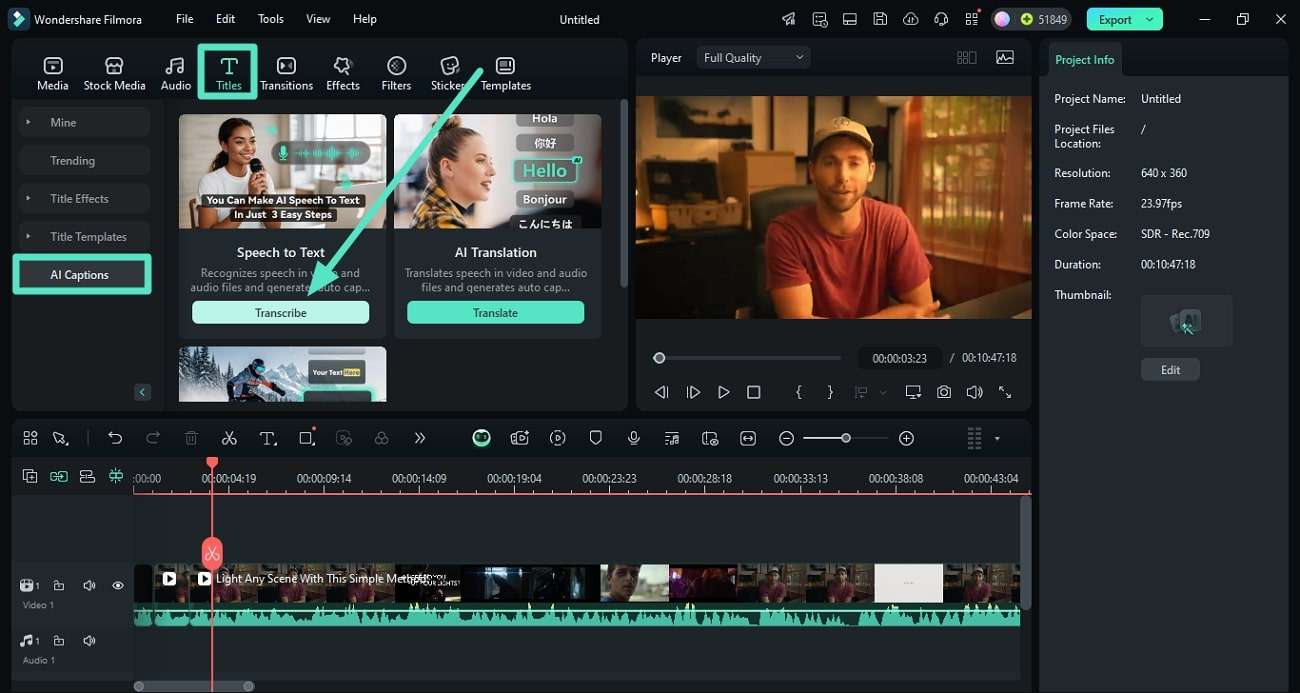
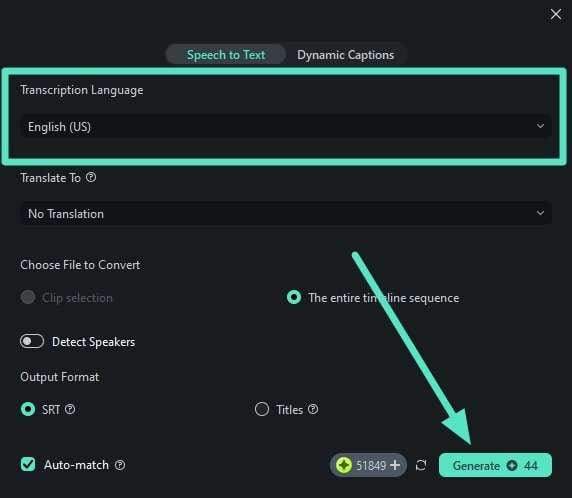
Method 2: Use AI Captions for Automated Subtitles
You can consider using the automated captions feature of Filmora to generate automated captions instantly. The tool uses Auto Captionadvanced AI to detect the spoken words in your video and generate accurate text. Moreover, you can create subs in multiple languages, expanding the accessibility of your content. To learn how to craft captions instantly, read the steps provided below:
Using the Filmora App for Subtitles
Filmora also offers a quick solution to generate subtitles right from your smartphone with the Filmora App [iOS/Android]. The app allows you to add manual text along with AI-generated captions.
Filmora for Mobile Filmora for Mobile Filmora for Mobile Filmora for Mobile Filmora for Mobile
Edit Videos on Your Mobile Phone with 1-Click!
- • Powerful Brand New AI Features.
- • User-friendly video editing for beginners.
- • Full-featured video editing for professional.


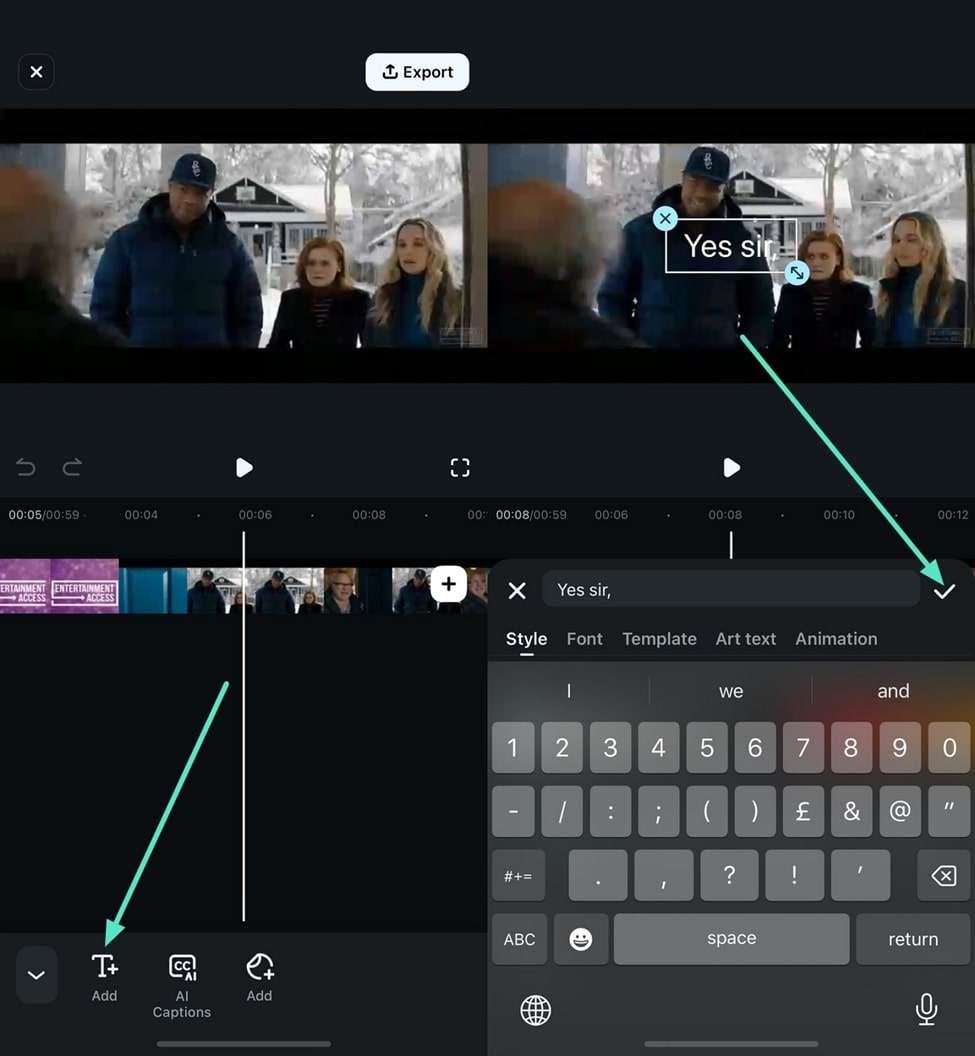
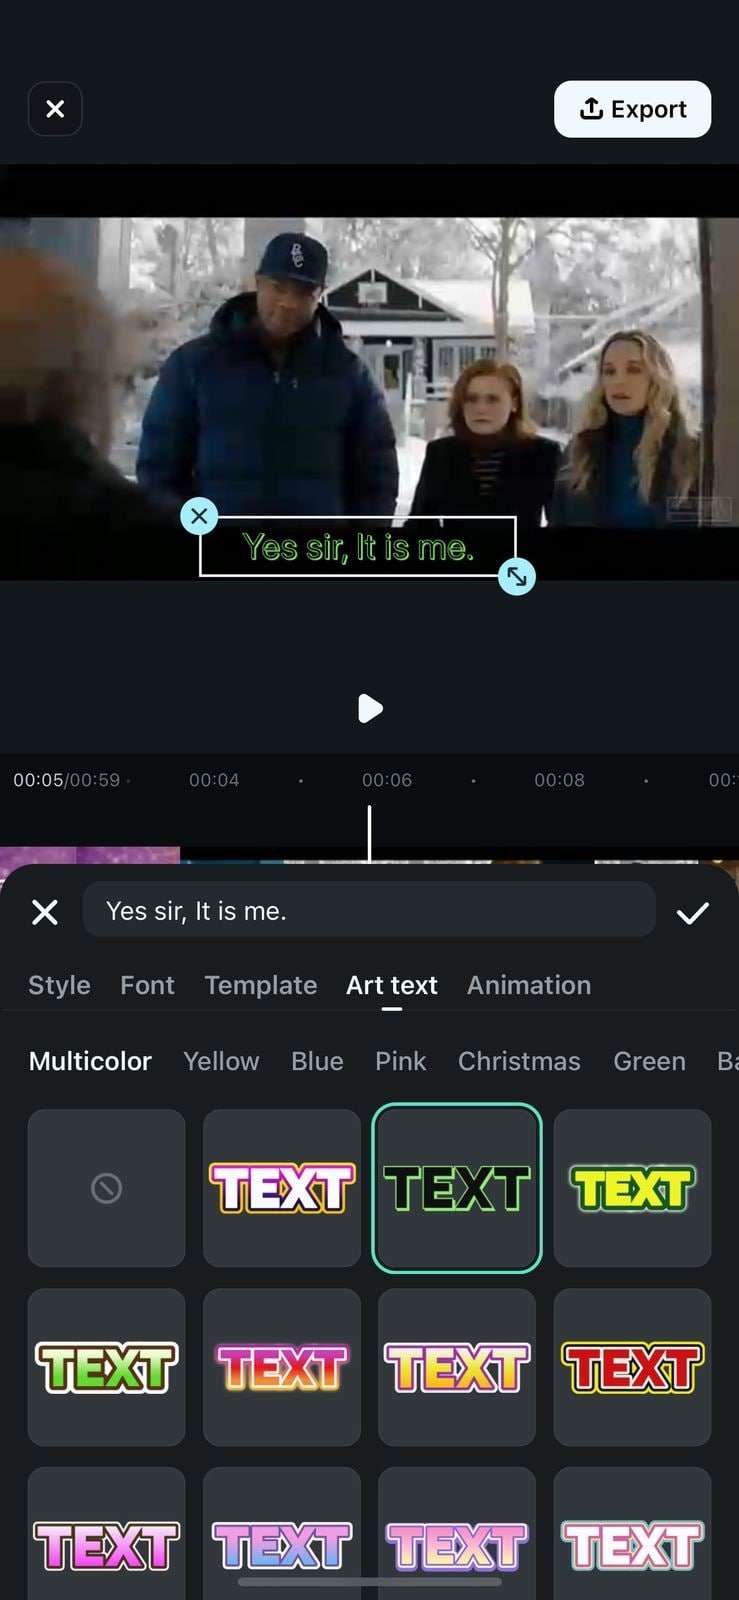
1. Manual Subtitling With the Filmora App
Filmora App allows you to type in the captions manually for the dialogues spoken in the video. Users get the ability to modify the layout of the text according to their preferences. Moreover, the app also offers various templates to apply to their subtitles for a unique look. To learn how to apply manual captions, read the steps provided next:

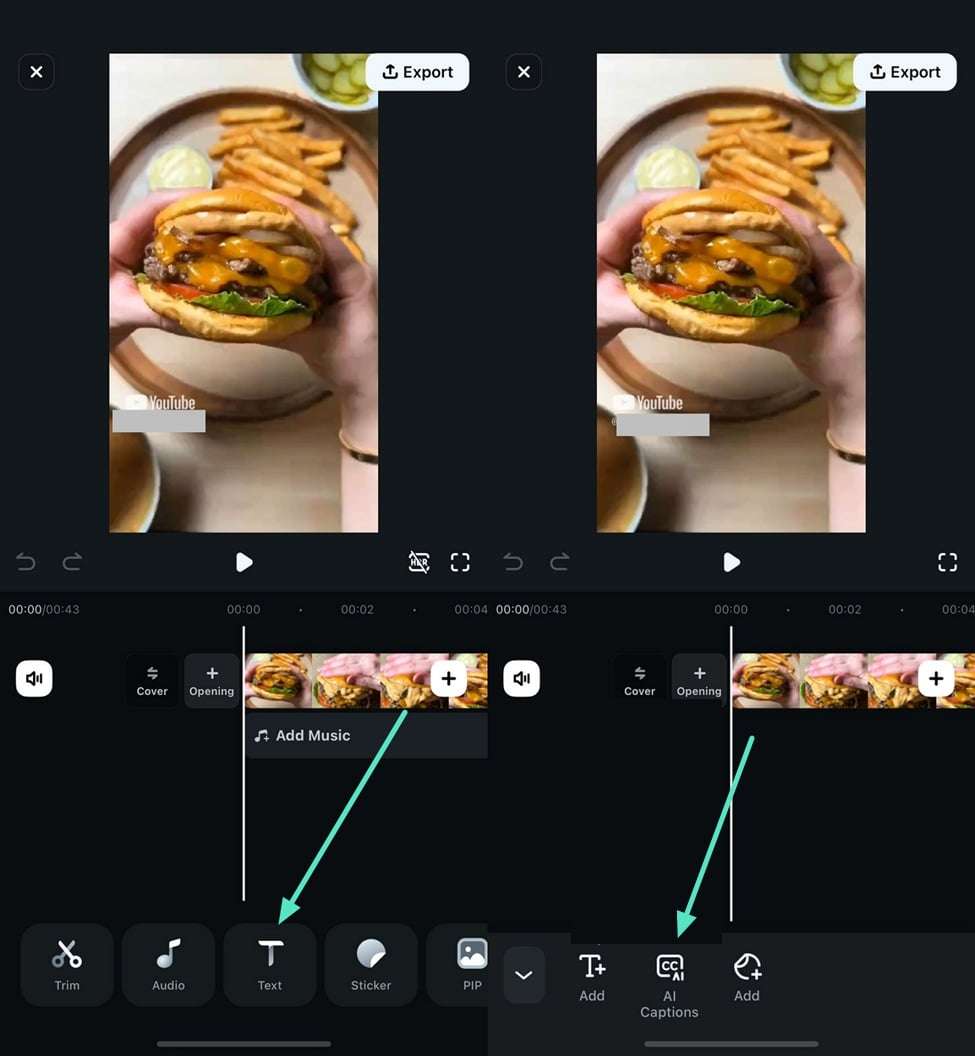
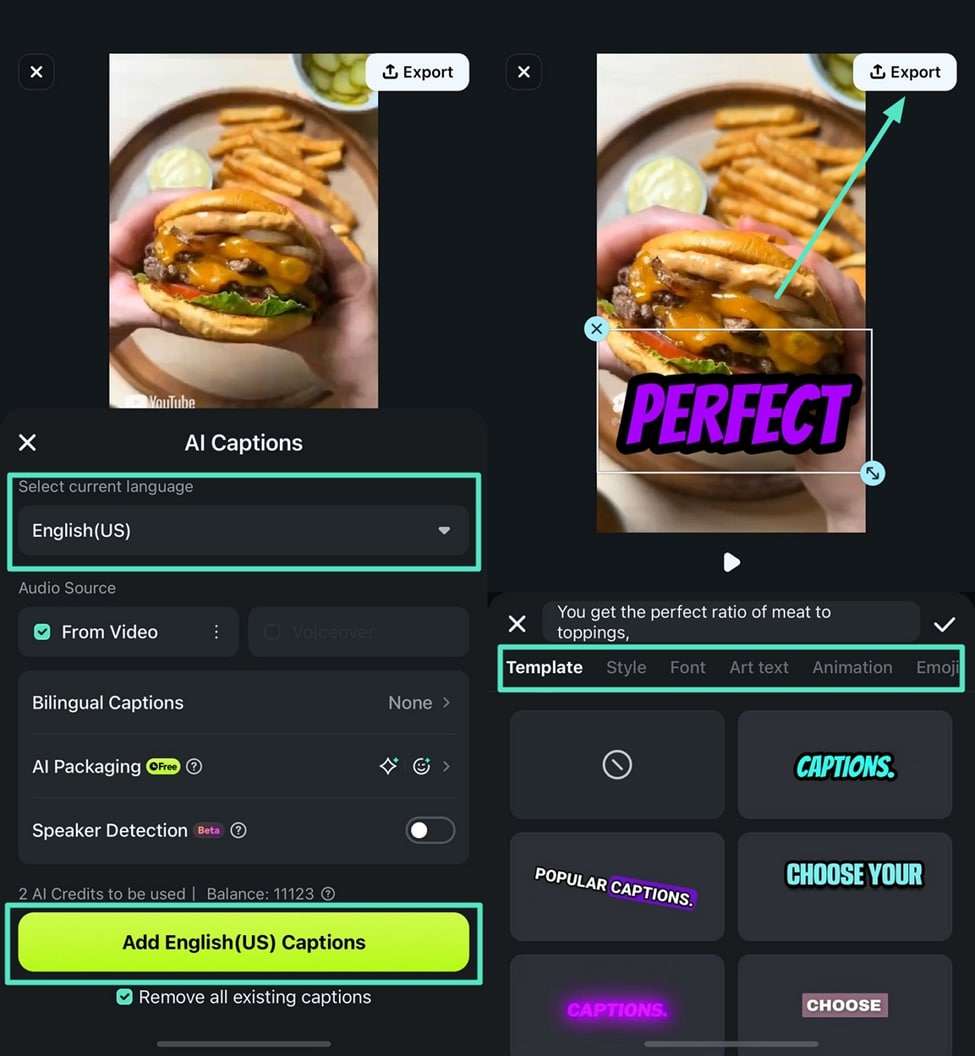
2. Automated Subtitles Using the Filmora App
Besides manual text addition, the application provides automated captions for your videos. It uses AI to detect spoken words and convert them accurately into text. Apart from English, users can also generate subtitles in multiple languages. Moreover, the app also offers adding AI emojis within the captions to make them more attractive. Provided below are the steps for using the AI captions facility offered by the Filmora App:
Conclusion
This guide has walked you through the steps for adding text and subtitles with Avidemux, a solid choice for basic video editing tasks. However, if you're looking for a more powerful, user-friendly, and feature-rich alternative that can handle everything from manual text insertion to AI-powered automated captions, Wondershare Filmora is the clear answer. Its intuitive interface and advanced tools make it the best option for both beginners and professionals aiming to create stunning videos with ease. Download Filmora today and elevate your video editing projects.
