

 TL;DR:
Color correction is the technical prerequisite used to fix camera inaccuracies for a true-to-life baseline, whereas color grading is the subsequent creative process applied to establish a specific cinematic mood and visual identity.
● Editing workflows must always sequence correction before grading, particularly with flat RAW files, because applying stylized grades to uncorrected media amplifies underlying camera flaws and causes unstable color shifts.
● Correction adjustments rely on basic exposure, contrast, and white balance controls to reflect reality, while grading utilizes Look Up Tables (LUTs), HSL controls, and color curves for artistic interpretation.
● Skipping the foundational correction phase is only viable if the source footage is perfectly exposed and balanced straight out of the camera, otherwise technical errors will inevitably distort the final aesthetic.
Ask AI for a summary
 ChatGPT
 Perplexity
 Gemini
 Claude
 Grok
Grok
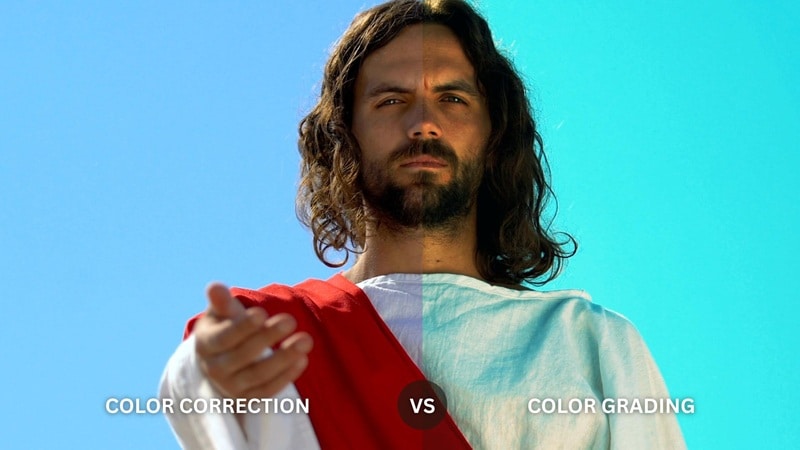
Color correction and color grading are essential post-production steps that often get confused. While they both involve adjusting your footage, they serve very different purposes in your editing workflow. Understanding color correction vs. color grading is key to achieving a professional, cinematic look.
Color correction focuses on correcting camera issues, such as exposure, white balance, and color balance, to make the image appear more accurate, closer to its natural appearance in real life. Color grading comes after that, focusing on creating a specific mood or visual tone for the scene.
To give you a clearer picture, let's break down the differences between color correction vs color grading and see how they do their magic to your footage.
Part 1. What is Color Correction? (Definition & Basics)
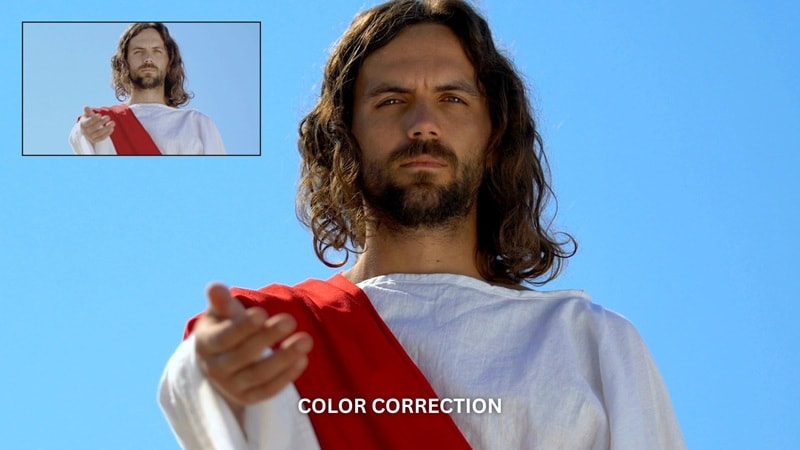
Cameras are not perfect, and lighting conditions are not always ideal. When the footage you captured appears too dark, too bright, too warm, too cool, or slightly off in color, and you want to balance it out to match how your eyes see it, that process is called color correction.
Color correction is a technical process used to adjust and normalize the colors in a video or photo. Its purpose is to make the image look true to life, so the tones and lighting reflect the scene as it actually appeared.
Most filmmakers and photographers capture their footage in RAW format to have more flexibility during the color correction process. RAW format preserves more image data directly from the camera sensor, which gives more room to work on without degrading the quality.
Part 2. What is Color Grading and Why It Matters for Filmmaking?
After the footage has been corrected, color grading comes next. This is where the magic happens. Color grading is a stylized post-production process that gives the image a distinct visual character.
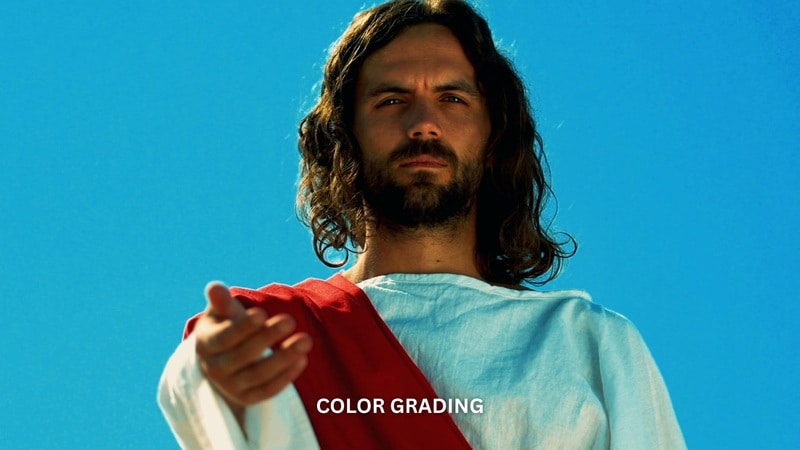
Rather than fixing technical issues, color grading gives the image a more creative direction to convey certain emotions or moods that influence how the audience feels about a scene. The process often involves refining color tones, hues, contrast, and saturation.
The Importance of Color Grading
While color correction and color grading work together, grading is what gives your video its emotional impact. It has several important roles in shaping the final result, such as:
- Shapes the audience's emotional response by influencing how viewers feel about a scene
- Supports the narrative visually without relying only on dialogue or actions.
- Builds a strong visual identity by creating a consistent and recognizable style throughout the video.
- Enhances cinematic quality by adding depth, contrast, and refinement to polish the footage.
- Directs attention to key elements and highlights characters or important details within the frame to guide the viewer's focus.
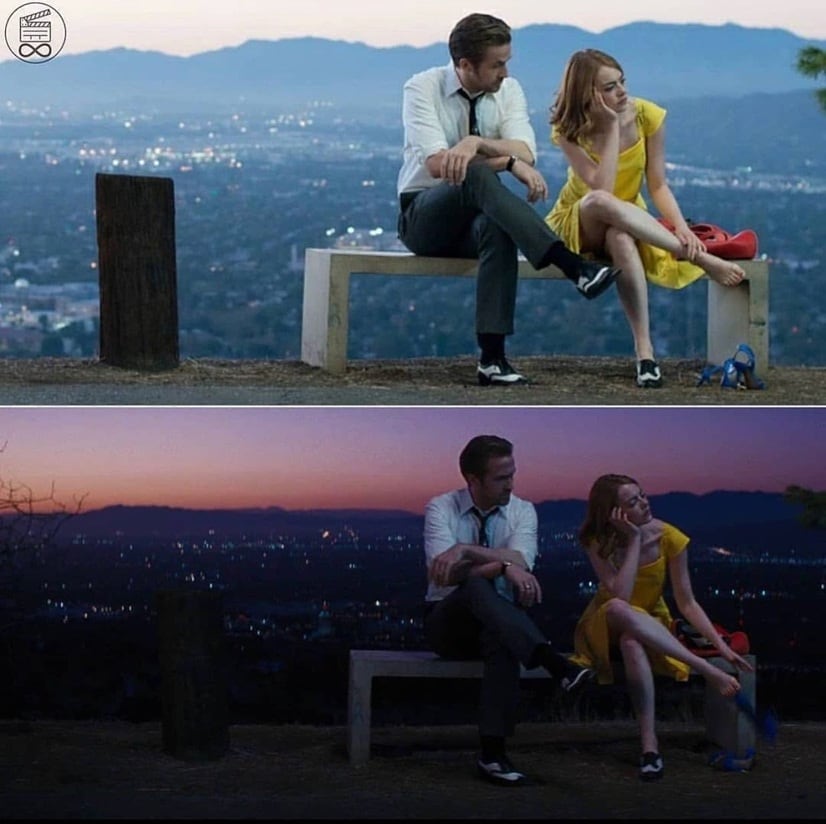
Image: Color Grading of La La Land (2016) via FilmUp
One of the most common formulas when color grading a scene is to use color temperature to shape emotion. Darker tones and cooler colors are often used to build tension, sadness, and mystery, while warmer hues help to evoke intimacy, comfort, and emotional connection.
Take a look at the sample clip from the film John Wick below.
The shift from a warmer flashback scene to a dark, cool tone already shows how color grading can be used to signal a change in time and emotion. The colder palette emphasizes isolation and grief in the present, while the warmer flashback tones suggest memory, love, and a sense of comfort that once existed.
Those color choices are intentional and carefully designed to support the story. In real settings, it's almost impossible to have such a contrast naturally. The scene wouldn't be as powerful if you didn't shape the colors in post-production.
Part 3. 5 Key Differences Between Color Correction and Color Grading
From the explanation so far, we can summarize the main differences between color correction and color grading in the following table for easier comparison.
| Feature | Color Correction | Color Grading |
| Primary Goal | Fix technical issues and balance the image | Create a specific mood, atmosphere, and visual style |
| Workflow | Done first in post-production | Done after correction is complete |
| Focus | Exposure, white balance, contrast, and color accuracy | Mood, atmosphere, and visual identity |
| Tools | Exposure, white balance, contrast, highlights, shadows, color balance | LUTs, color wheels, curves, split toning, color adjustments |
| Result | Focused on natural and accurate visuals | Allows artistic interpretation and stylization |
Despite those differences, a good video or film actually comes from the combination of both color correction and color grading. They work together to help you achieve the look you are going for.
When comparing color grading vs. color correction, remember that correction is about reality, while grading is about artistry. For instance, fixing a blue tint from incorrect white balance is correction; adding a teal-and-orange look to evoke a summer blockbuster vibe is grading.
Part 4. The Ideal Video Editing Workflow: Which Comes First?
You can't build a great building on a weak foundation. Ideally, you need to correct and make sure the footage is balanced first through color correction. After making sure the overall color accuracy is properly set, you can continue working on color grading more easily.
Working in this order prevents unwanted color shifts and keeps your final look stable and consistent. If you color grade first, you may end up enhancing the flaws, which can make the image harder to fix later.
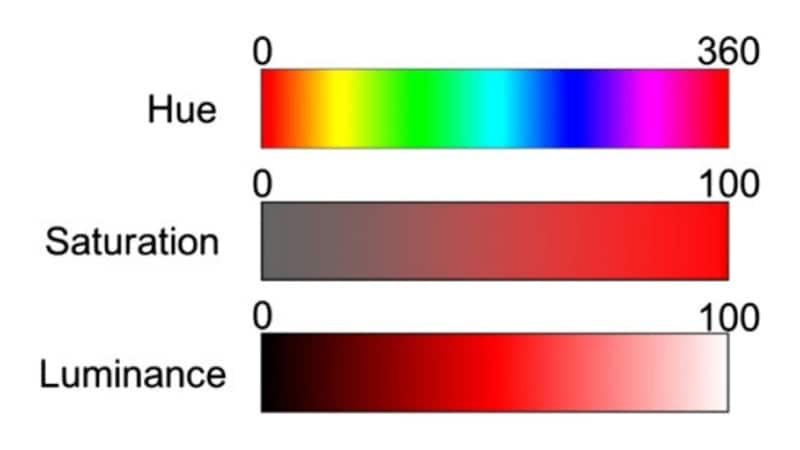
During the process, both color correction and color grading rely on several core elements that shape how color appears, such as:
- Hue: The base color itself, such as red, blue, or yellow.
- Saturation: The strength or intensity of a color, ranging from soft and muted to bold and vibrant.
- Brightness (Luminance): The overall lightness or darkness of the image.
- Tint: A slight color shift across the image, often influenced by lighting or camera settings.
We'll look at how these elements translate into practical adjustments and how they are applied during editing in the next section.
Part 5. How to Achieve Professional Results in Filmora
With your knowledge of color grading and color correction differences, you can now move forward and apply it directly to your own footage. If you are just starting out, a recommended way to get started is by using Wondershare Filmora, as it offers user-friendly tools that are powerful enough for making advanced edits but still easy to understand for beginners.
You can begin with basic color correction tools in Filmora to fix exposure, white balance, and contrast. After your footage looks balanced, you can explore grading features such as LUTs, color wheels, and tone adjustments until you achieve the style you want.
How to Apply Color Correction and Grading in Filmora
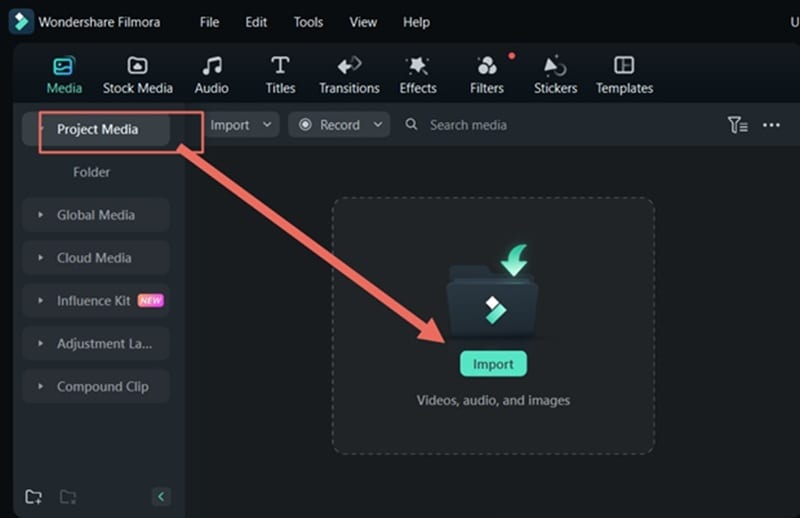
Start with a New Project, and then import the clips you want to edit into the media library. Drag them onto the timeline to begin working.
Navigate to the Color tab in the properties panel to access professional tools like Auto White Balance and Color Match. You'll see basic controls such as Exposure, Contrast, Highlights, and Shadows, which you can adjust with the sliders.
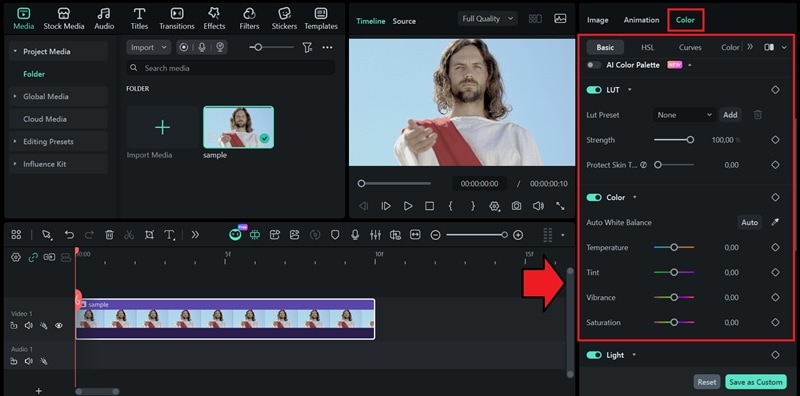
If you want to skip the hassle, you can use the Auto White Balance option to automatically correct color temperature.

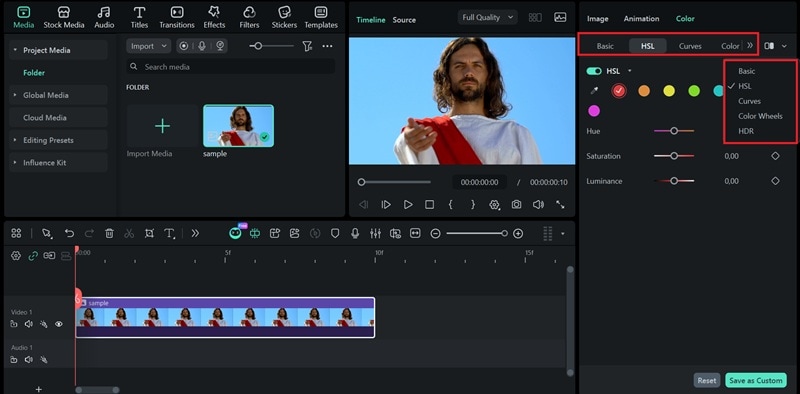
Still under the same Color tab, you can use LUTs, Color Wheels, HSL controls, or Color Curves to start grading your footage.
- LUTs (Look Up Table) are a preset color profile that instantly applies a specific cinematic look to your clip. You can use built-in LUTs or import custom ones.
- Color Wheels allow you to adjust highlights, midtones, and shadows separately using the color wheel.
- HSL Controls help you fine-tune specific colors without affecting the entire image.
- Color Curves give you precise control over brightness and color channels with an interactive graphical tool.
- HDR Color Wheel gives you extended control over brightness and color depth, which is helpful when working with high dynamic range footage.
To further enhance your results, you can also use:
- Filters to quickly establish a certain visual tone.
- AI Relight to improve lighting and add more depth to flat shots.
- Video Enhancer to sharpen details, reduce noise, and improve overall clarity.
- AI Color Palette to generate a color palette from a reference or current project to apply in your clip.
These features are all available in the same workspace, along with other editing tools that you can use to complete your edit.
Conclusion
You should have a clearer understanding of the color grading vs correction by now. Color correction comes first to make the colors look as realistic as possible. Then, color grading comes next to make your footage more stylized. Both are important parts of the editing process that deal with color tones, but they serve different roles. To implement what you have learned today, try applying color correction and color grading in your project with Filmora, and see how your clip starts to look like a blockbuster.
FAQs
-
Can I skip color correction?
Technically, yes. But ideally, no. It depends on the footage you captured. If you're working with RAW files, you shouldn't skip color correction, since they need to be properly balanced and exposed first.
RAW footage often looks flat and washed out, and it can be harder to control if you jump straight into color grading without correcting it first. Skipping color correction may only work if your footage already looks well-exposed, balanced, and consistent straight out of the camera.
-
Does color grading vs color correction apply to photos too?
Yes, color grading and color correction also apply to photos. It even shows up in games and other visual media, where color plays a big role in setting the atmosphere and guiding the viewer's emotion.
