How to Blur Faces Online is becoming increasingly important for protecting privacy and security when sharing content on social media. Whether you're looking to blur faces online in photos or videos, there are a variety of user-friendly platforms available that make it simple to anonymize sensitive parts of your images without needing complex software. If you don't have permission to share someone's likeness publicly, blurring faces online is the best way to conceal their identity. In this article, we'll guide you through some of the best online tools for blurring faces and show you how to easily blur a face in a photo online or blur a face in a video online.
In this article
Part 1. Blur Faces in Photos and Videos Online
Before you choose a platform you want to use to blur faces in your images or videos, you first need to check the file size since some online tools may have a file size limit. Even though online photo and video editing platforms offer support for a wide range of file formats, checking the compatibility of your images with the online image editor is advisable since it may save you some time. Let's look at some of the best online solutions for concealing private information.
1. Facepixelizer
Price: Free
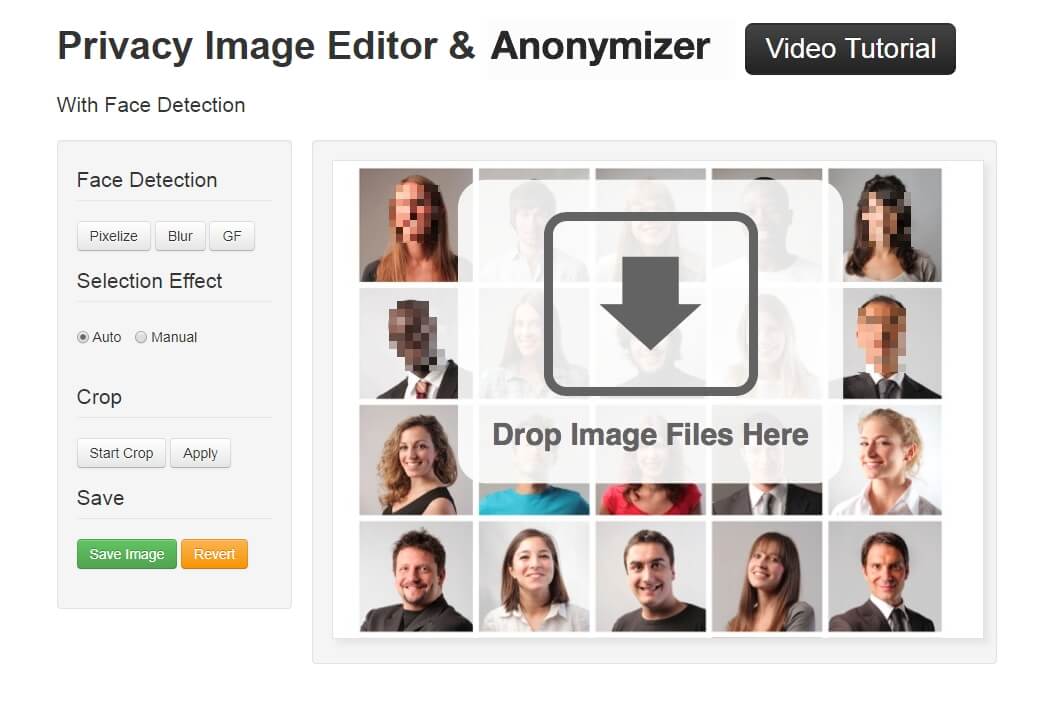
This privacy image editor offers a quick way to blur faces in your photos because it features a face detection technology that automatically detects faces. You can choose from Pixelize, Blur, and GF settings that conceal faces immediately after selecting them, while choosing the Manual option enables you to choose which part of the image will be pixelized, blurred, or completely blacked out.
Facepixelizer also offers the Crop option, which lets you remove all unwanted parts of photos. You can easily control which segments of the image will remain in the final version of the picture. To start anonymizing a photo, you have to drag it from a folder on your computer and drop it to the designated spot in the editor's window. Afterward, you need to select Blur or Pixalize option, crop the picture if you want and click on the Save Image button.
2. LunaPic
Price: Free
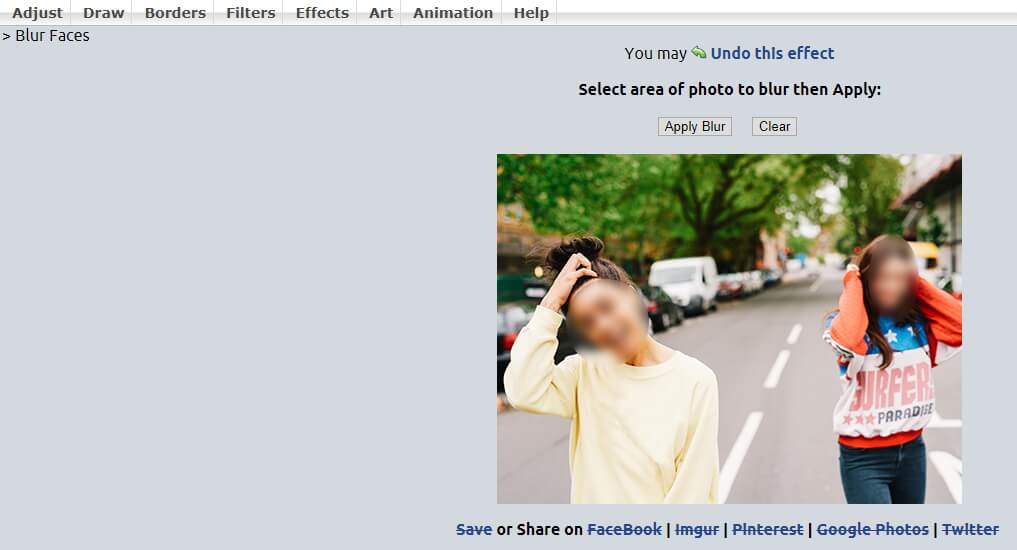
The wide range of photo and video editing options this online image editor provides makes it one of the best options for concealing private information. You can upload pictures from your computer or Instagram, Facebook, Dropbox, Google Photos or URL, etc. LunaPic also offers basic video editing options, but it lets you upload videos larger than 100MB.
To blur face with LunaPic is easy. After you've uploaded your photo or video file to this platform, go to the Draw option and select Blur a face to enter the face blurring interface. You can choose to blur a face only or blur multiple faces by selecting the target objects you want to hide and then clicking the Apply Blur button to add the blurring effect.
The Video Editing option is located in the Animation menu. By clicking on it, you will be able to import a video file or an Animated GIF into the LunaPic image editor, so you can easily blur the faces in your videos.
3. Ezgif
Price: Free
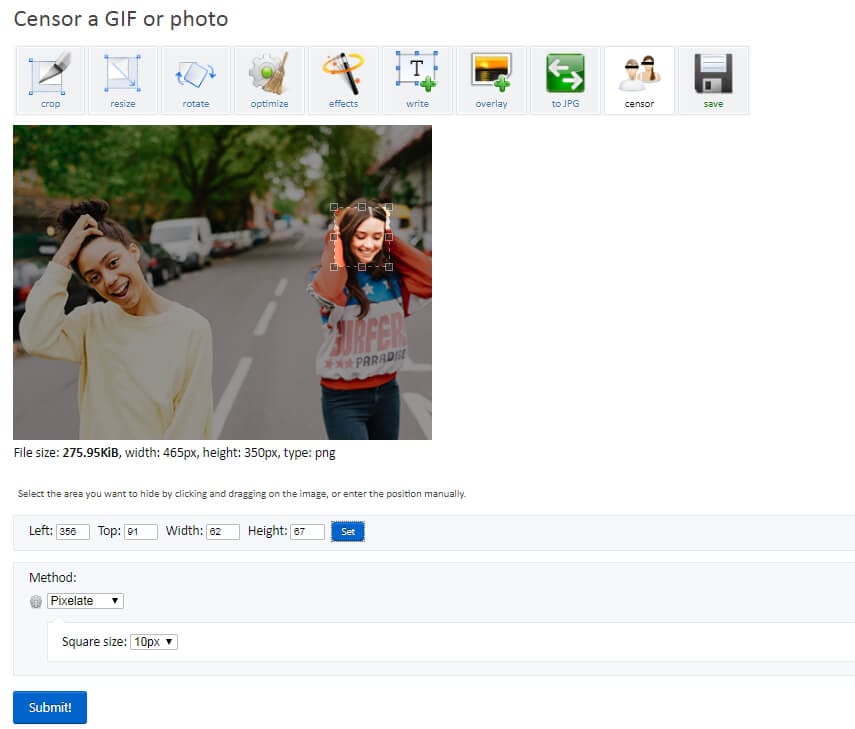
Ezgif is one of the most popular online destinations to create GIF files. The Censor option is designed to enable its users to conceal faces effortlessly. After you click on the Censor GIF feature in the Effects menu, you'll be asked to upload your photo or GIF. When the file is uploaded, you have to hold the left mouse click and drag the cursor to select the part of the picture you'd like to blur. Alternatively, you can insert new values into the Left, Top, Weight, and Height boxes and click the Set button to confirm the changes.
The Method drop-down menu lets you choose between Pixelate, Blur, and Solid Color options, so you can select the one that is best suited for the effect you're trying to achieve. Click on the Save icon located under the blurred image, and choose the destination on your hard drive where the new photo or GIF will be saved. When done, hit the Submit button, and the editor will display the results below the original image, which allows you to preview the result before saving or sharing.
4. PineTools
Price: Free
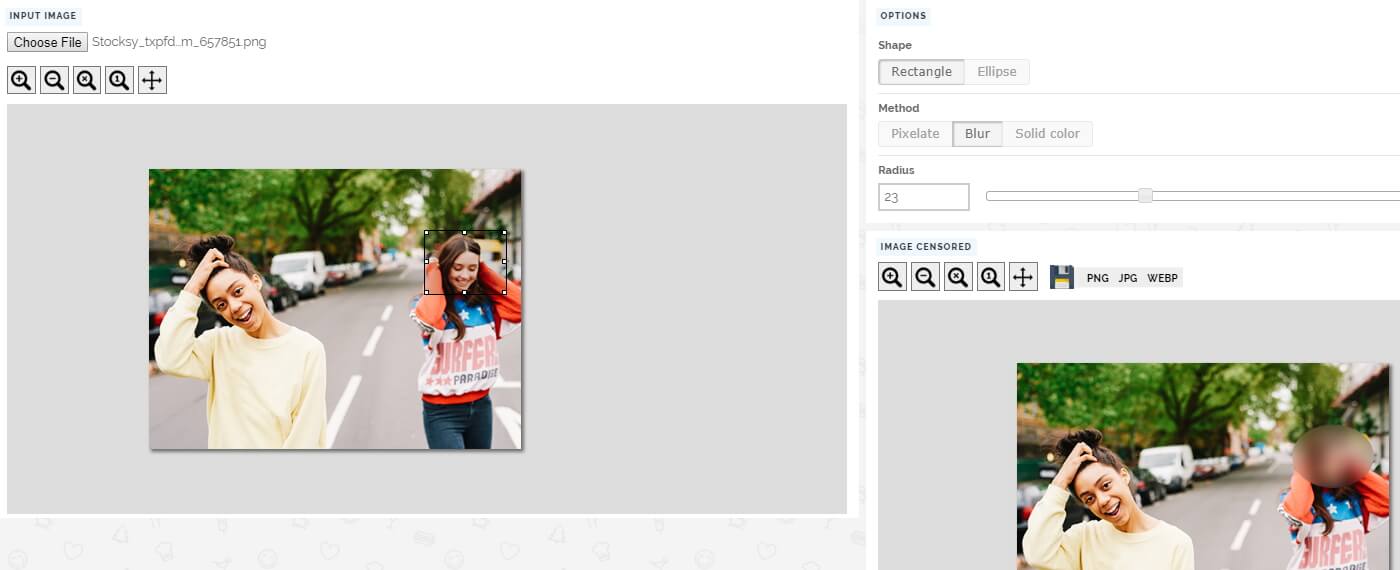
The PineTools platform features various tools organized in different categories, such as Mathematics, Programming, or Images. Clicking on the Images category will grant you access to all photo editing tools this online platform offers. Sharpening, resizing, or colorizing images are just a few among the numerous options you'll have at your disposal if you choose to edit your photos with PineTools.
The Censor Photo feature is fairly simple to use, as you have to upload a picture, define the area that needs to be concealed, and choose either of the Pixelate, Blur, and Solid Color options. If you select the Pixelate method, you'll be able to adjust the Block Size slider, while choosing the Blur method will enable you to adjust the Radius. If you opt for the Solid Color method, you will be asked to select the layer's color you'll be adding to the photo.
5. Watermarkly
Price: Free
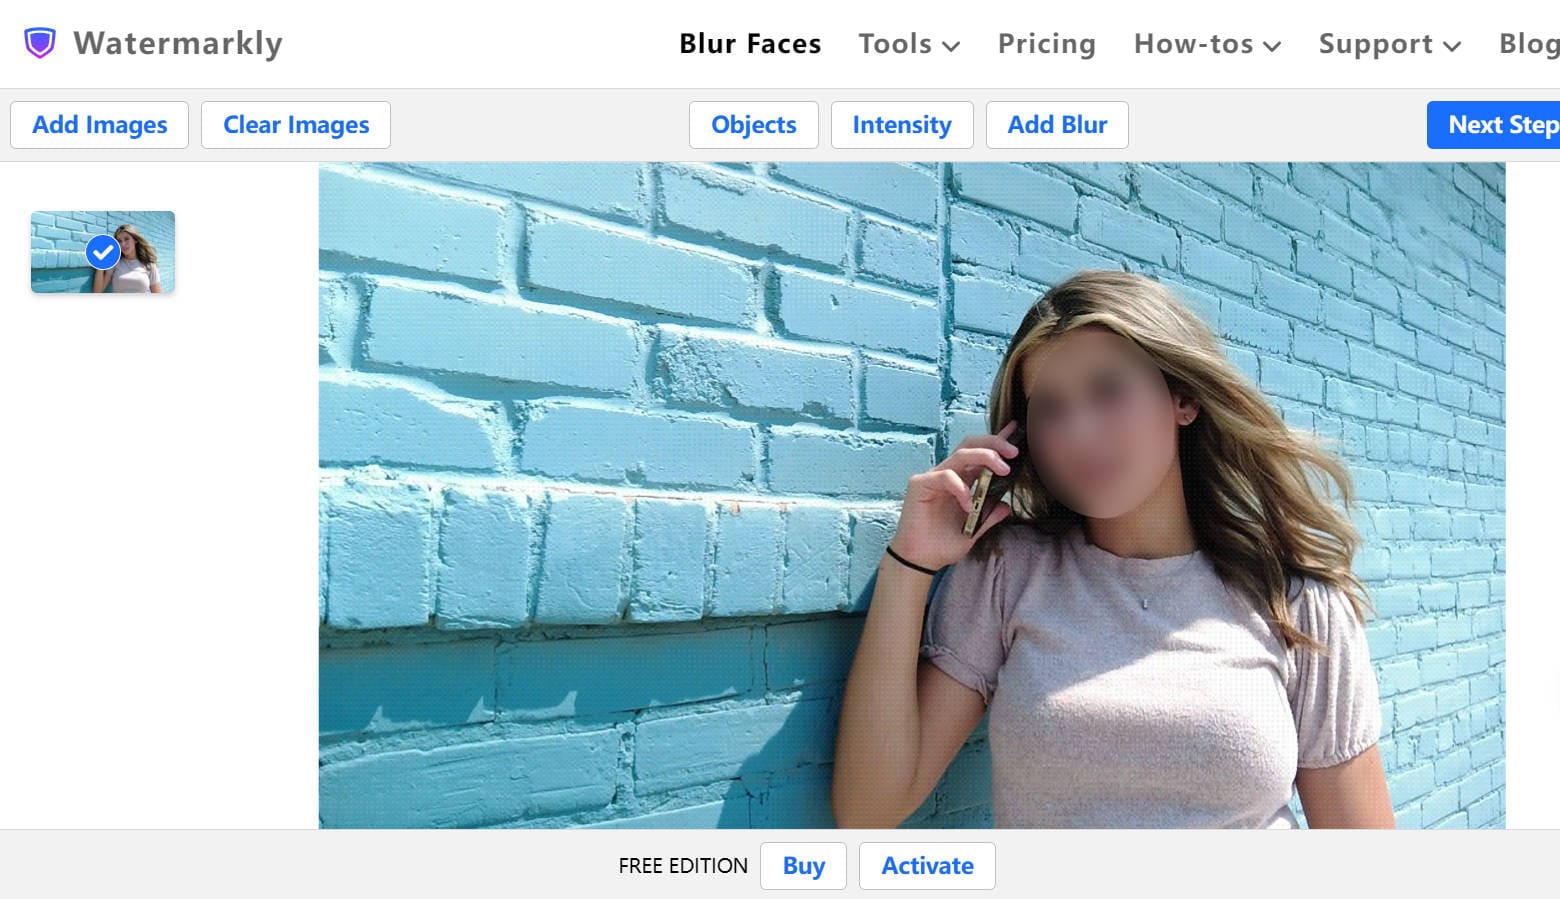
Watermarkly is an online tool primarily known for its watermarking capabilities, but it also offers a powerful face-blurring feature. The face blur tool allows users to anonymize images by blurring faces, making it an ideal solution for protecting people's privacy in photos and videos shared online.
6. GIMP
Price: Free
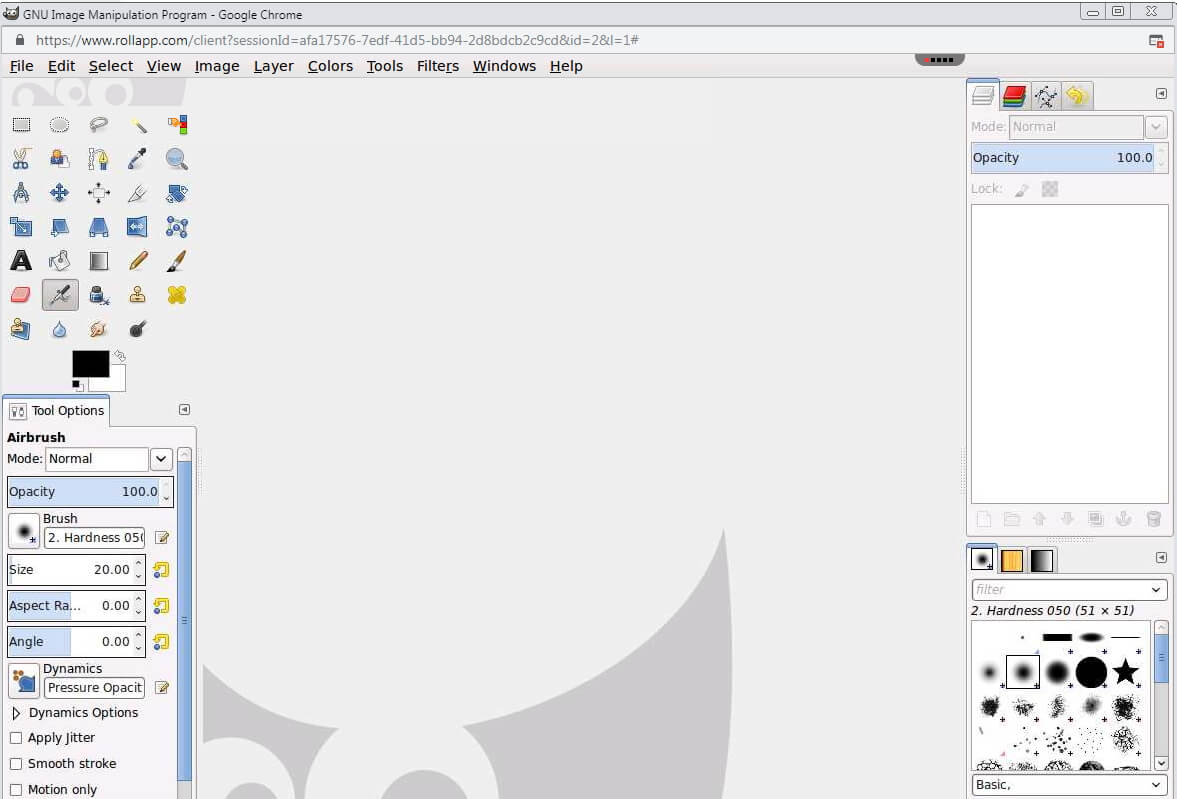
Even though this famous open-source software is commonly used on Windows, Mac, and Linux operating systems, there are several ways you can use it in your browser. Creating an account on Turbo.Net or RollApp platforms will enable you to hide information in your photos without installing this photo editor on your computer.
Like all powerful photo editing software products, GIMP offers a quick and easy way to blur faces in your photos. You have to import an image into a computer-based or online version of the software and use the Ellipse tool to select a person's face. Optionally, you can use the Blur or Gaussian Blur effects located in the Blur submenu to conceal the faces of the people in your photos. You can find the Pixelate effect in the Blur submenu of the Effects menu, and you should click on it to bring up the Pixelate window. Adjust the Pixel Width and Pixel Height options and confirm the changes by clicking OK.
Part 2. Wondershare Filmora: Offers Multiple Options for Face Blurring
While online tools offer quick solutions for face blurring, they often lack the advanced features needed for professional editing. For those seeking more precision and creative control, Wondershare Filmora stands out as an excellent choice, providing powerful tools and an intuitive interface for all your video editing needs.
It allows you to blur the faces with few clicks. It's one of the most reliable platforms that you can come across to edit and modify your videos. It also offers preset templates and an Instant Mode that can help you create a video from scratch efficiently. Also, it provides fast rendering speed so that you can see your final results instantly.
3 Methods To Blur Faces Using Filmora
There are three major and easy ways to blur faces in videos using a desktop app. These methods include using the AI face mosaic, the face-off effect, and motion tracking. In this section, you will discover how to blur people’s faces in videos using both methods.
How To blur faces using the AI Mosaic feature
AI Face Mosaic is a new feature available in Filmora version 14 and above. It helps users quickly apply mosaic coverings to sensitive individuals who should not appear on screen, especially in scenes with multiple people. Let's take a look at the steps to use this feature.
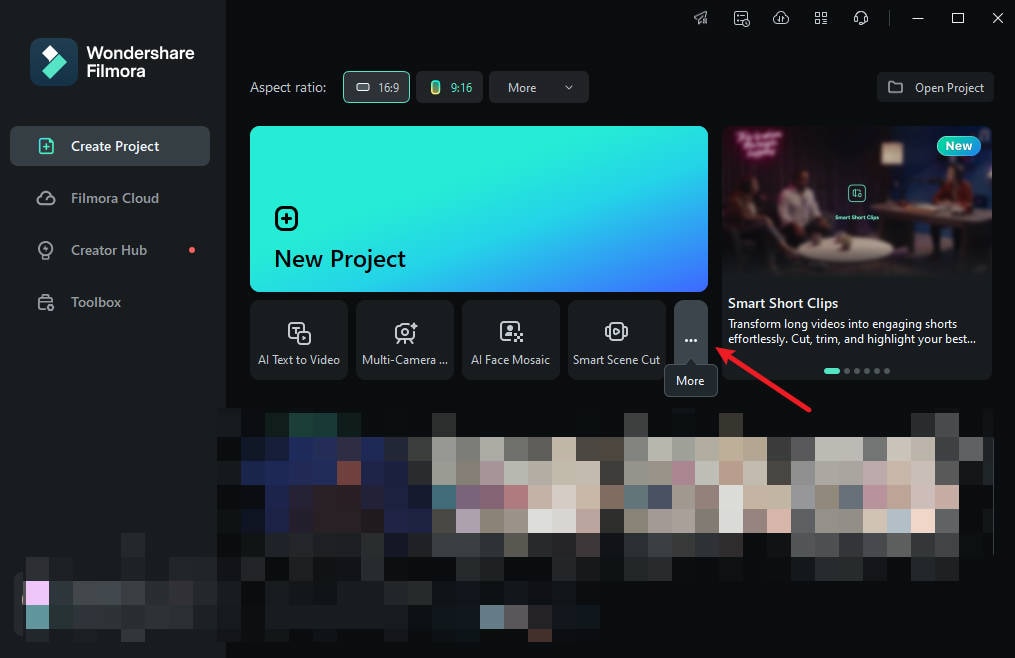
Step 1: Launch Filmora on your PC and go to "More" or select the three dots at the end of the editing options.
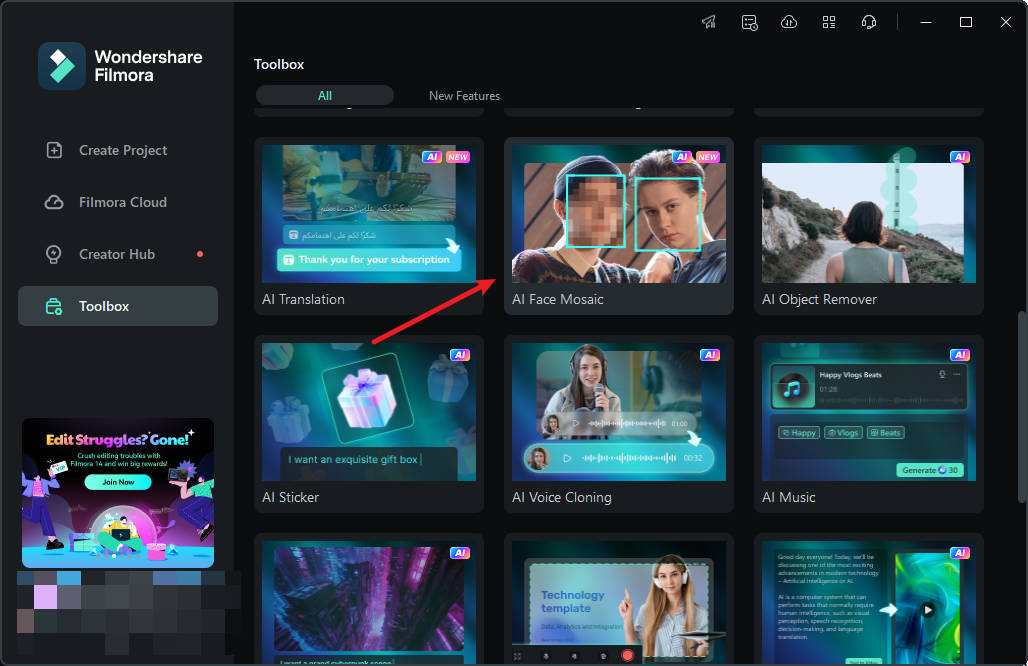
Step 2: Click on "AI Face Mosaic". Then, import your media for editing.
Step 3: Filmora will automatically analyze the video to apply the blurring effect to faces throughout the footage. Once the analysis is done, each face will have the mosaic effect.
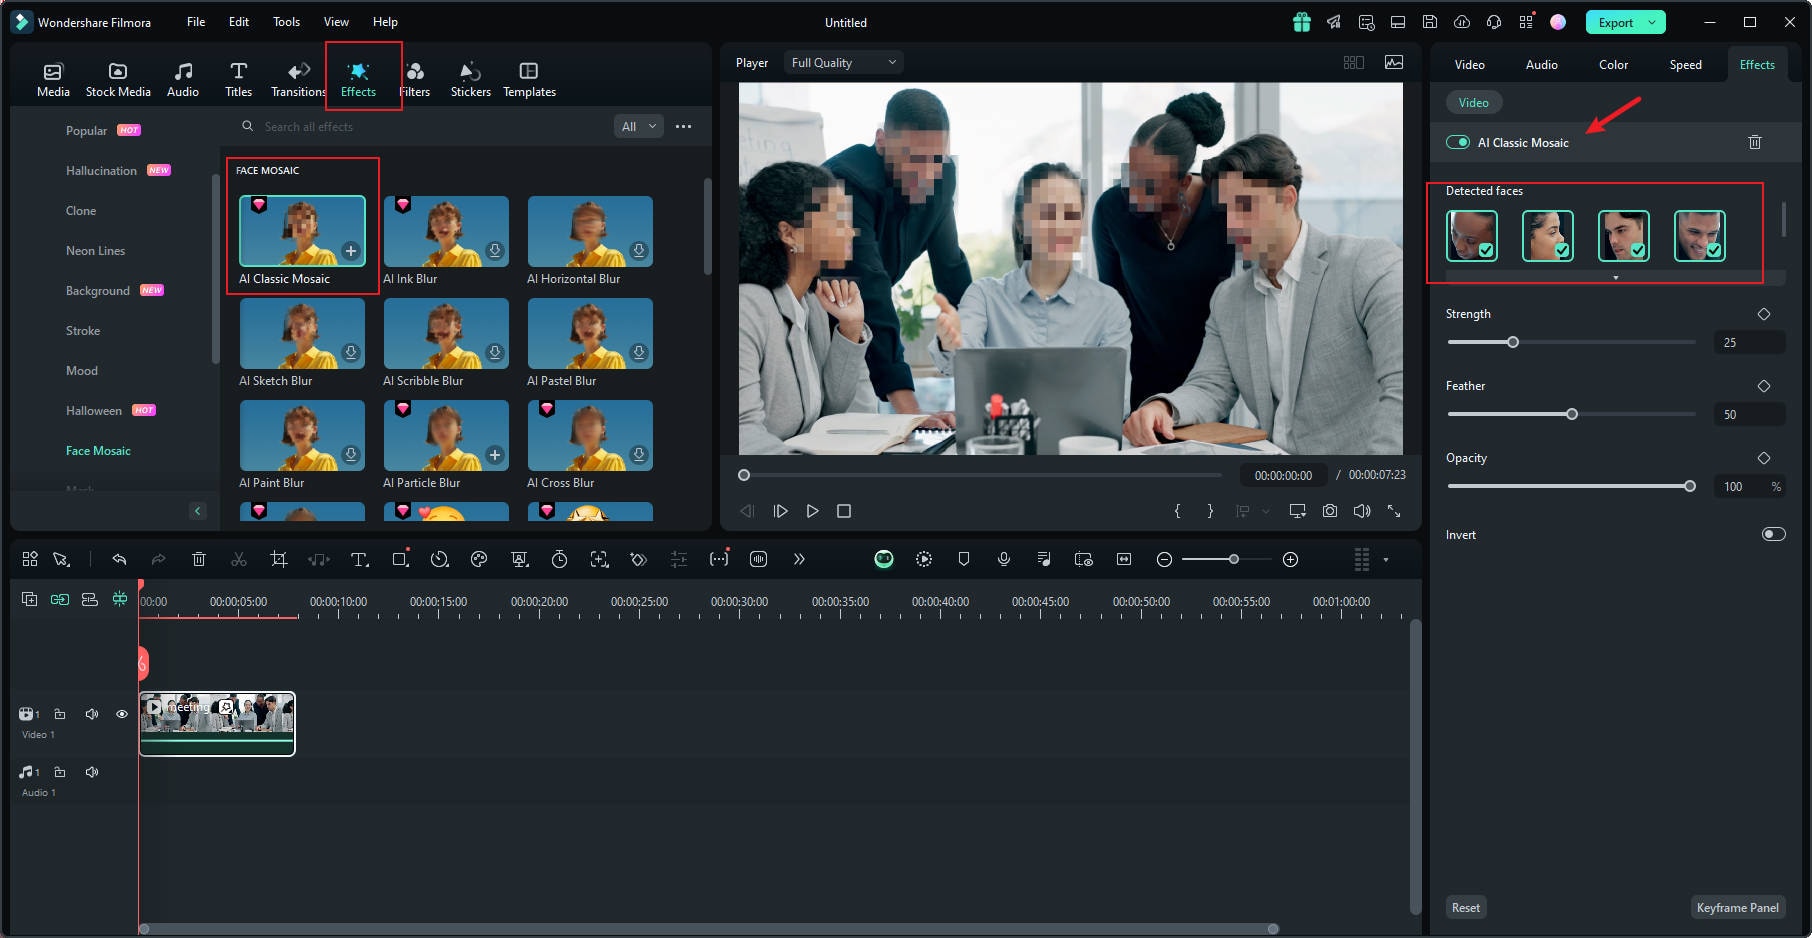
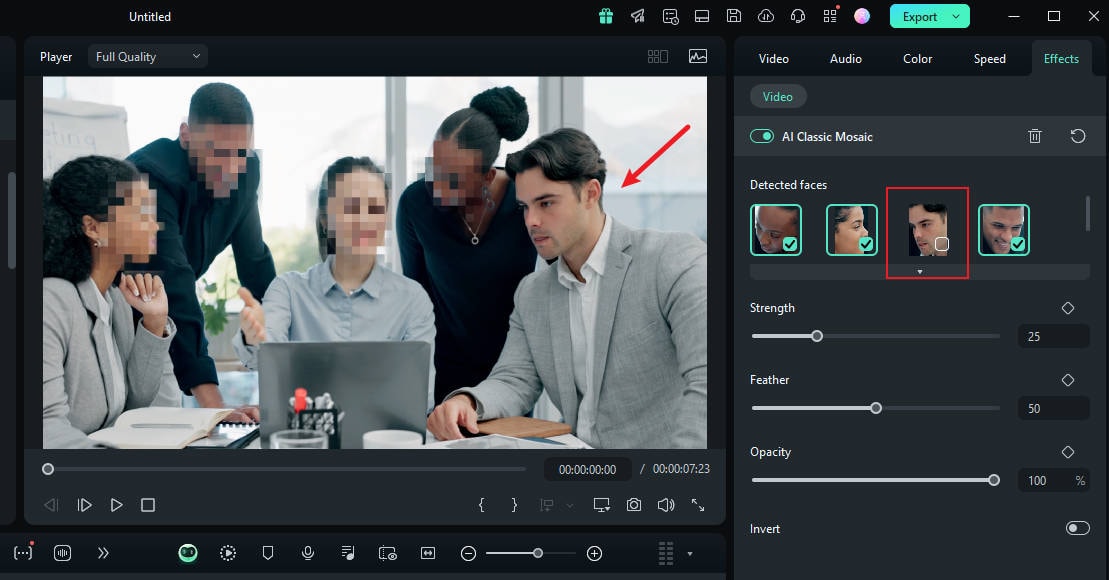
Step 4: To choose a face to remove the mosaic effect, deselect it from the right-hand panel.
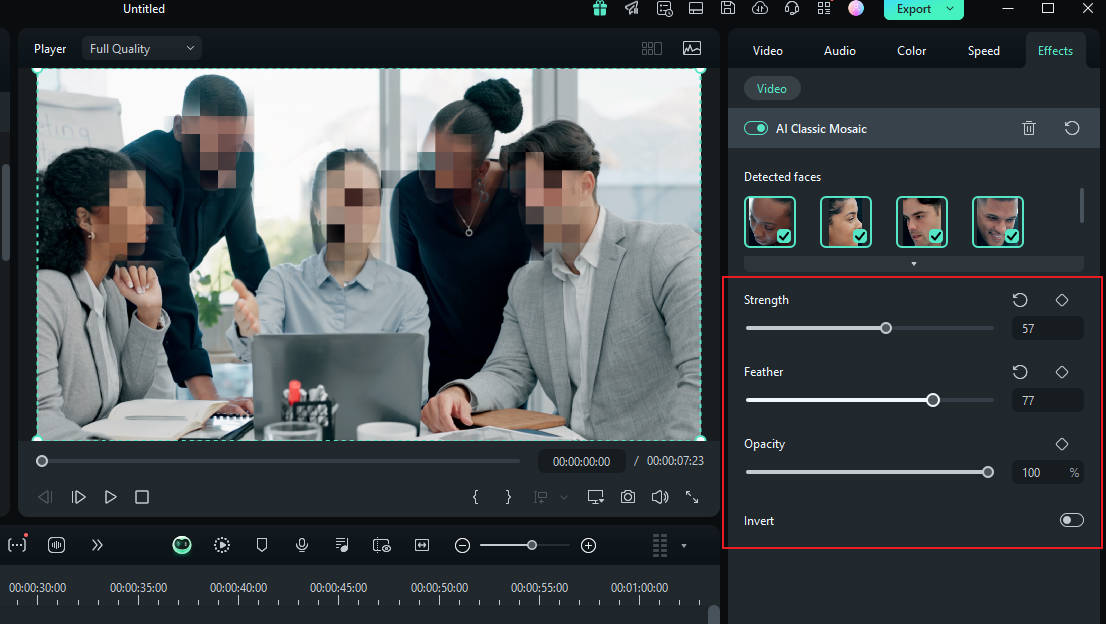
Step 5: You can also use the grader to adjust the strength, feather, and opacity of the blur.
Step 6: You can also invert the mosaic by clicking "Invert". This makes everything else, except the faces, have the mosaic effect.
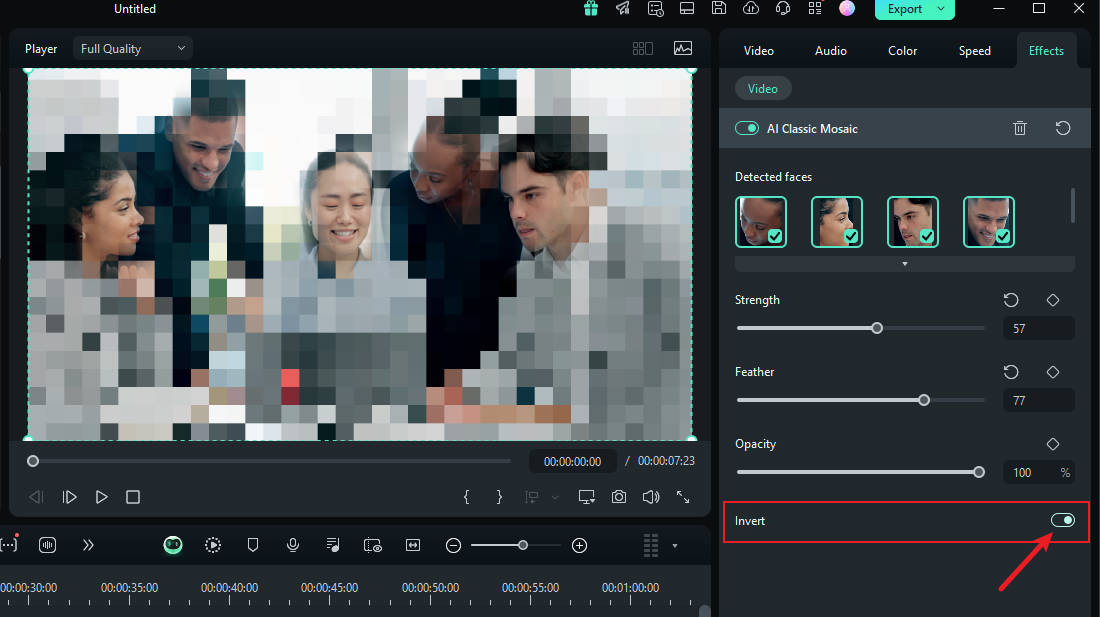
And that's it! Once you're done, preview your video and export it.
How To Blur Faces Using the Face-off Effect
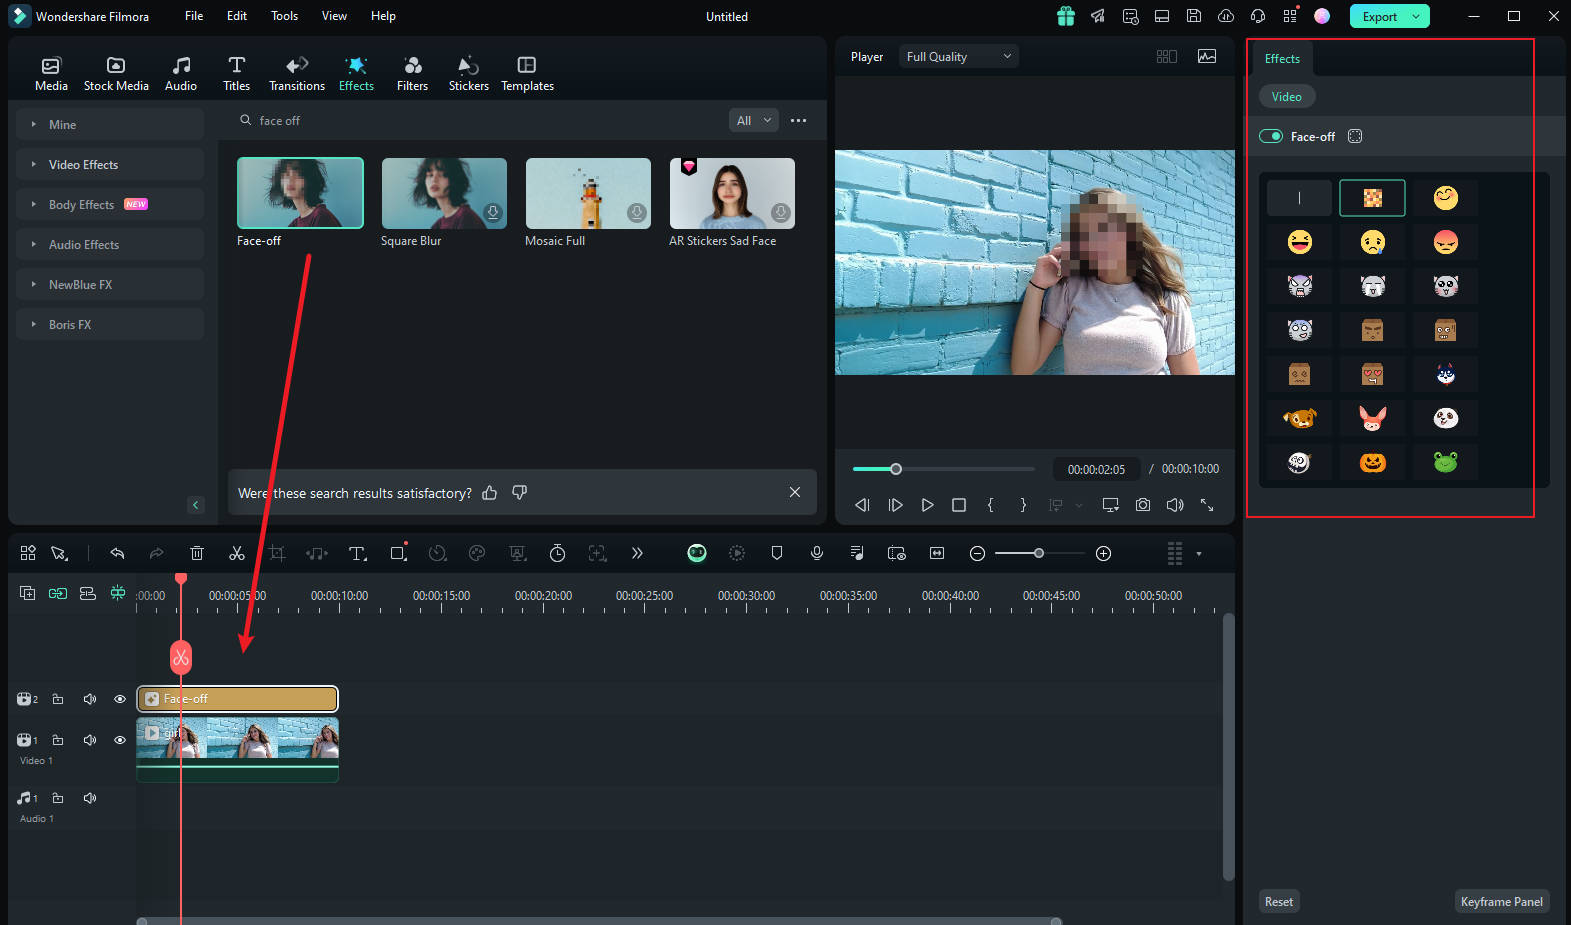
Another quick and easy way to blur faces in Filmora is by using effects from the editing suite. You only need to select the face blur effect to add a mosaic to a person's face. Here is how to blur someone’s face in a video using Face-off:
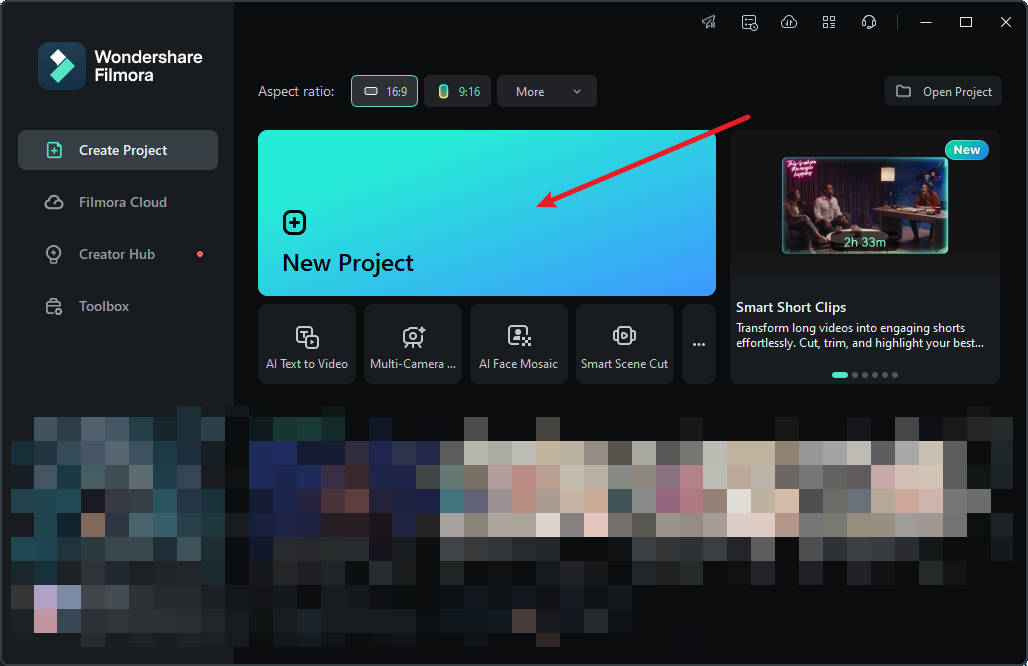
Step 1: Launch Filmora on your PC and click on "New Project".
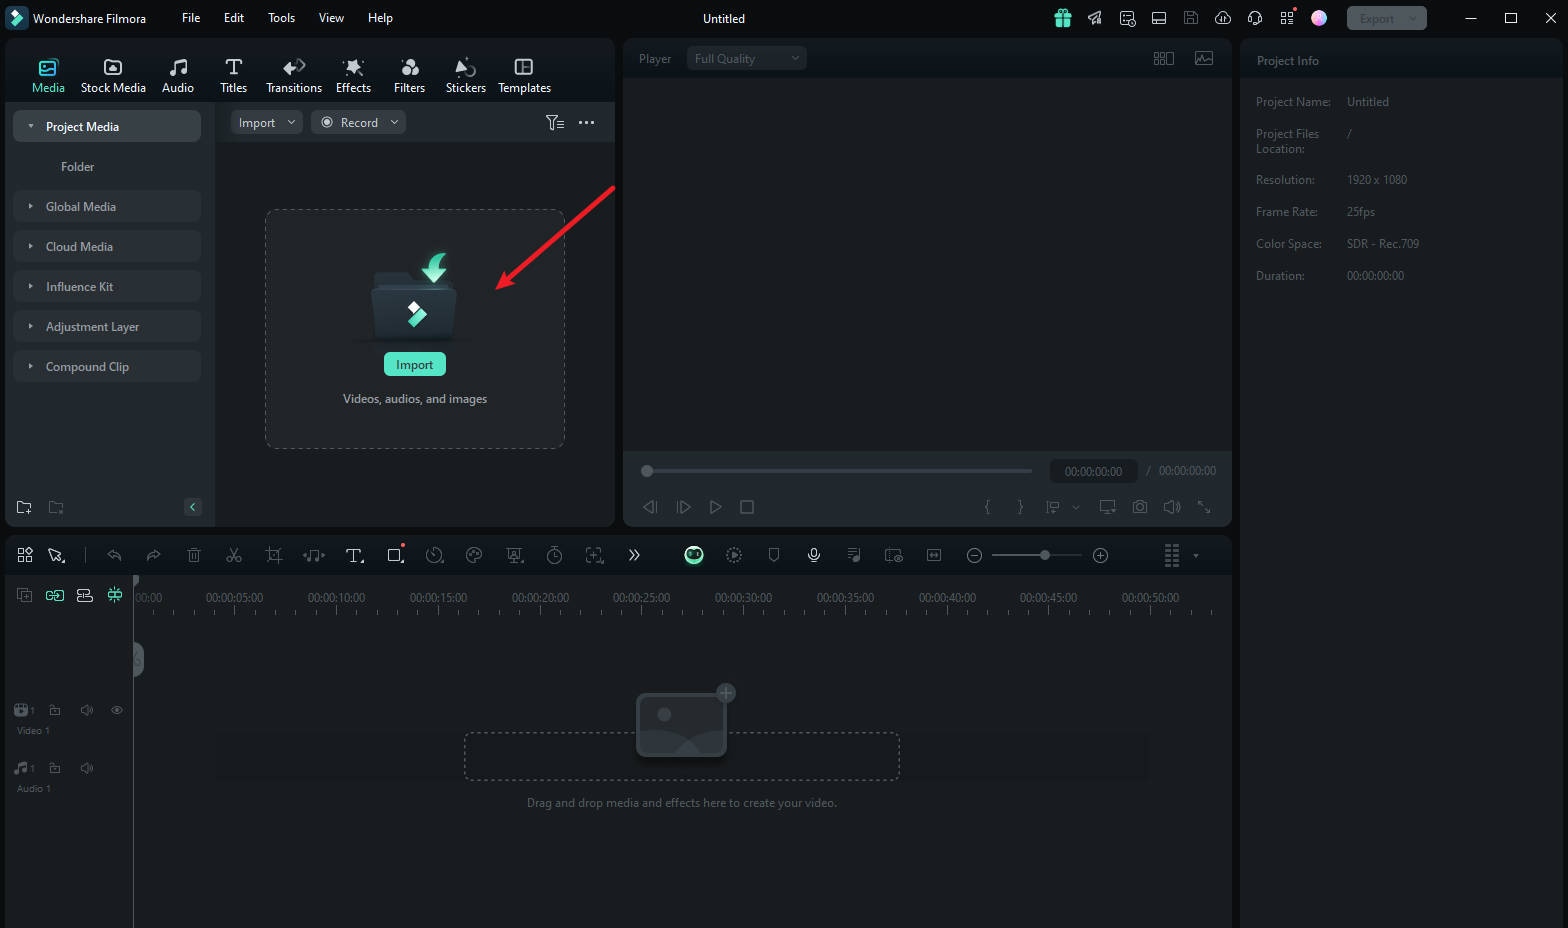
Step 2: To import your media, drag and drop it into the editing suite or click "Import".
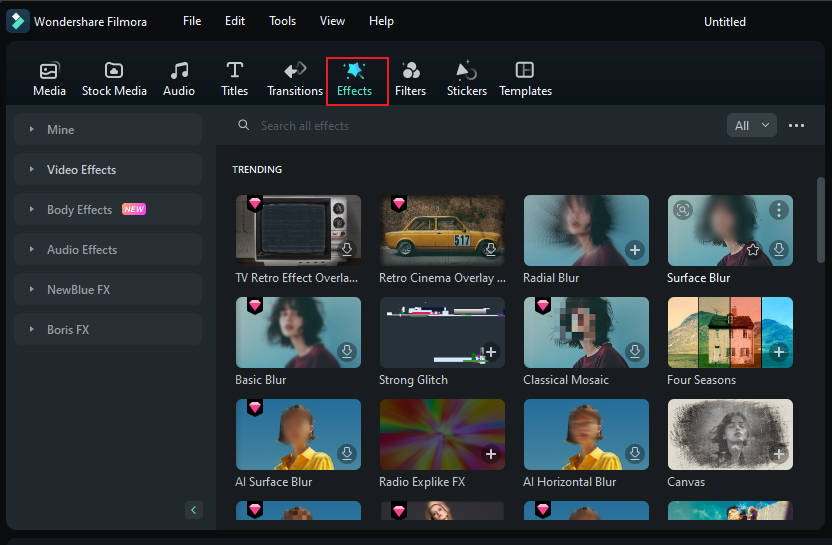
Step 3: Tap "Effects" from the main menu at the top of the suite.
Step 4: If you don't see the Face-off effect on the first effects page, search "Face-off" in the search bar.
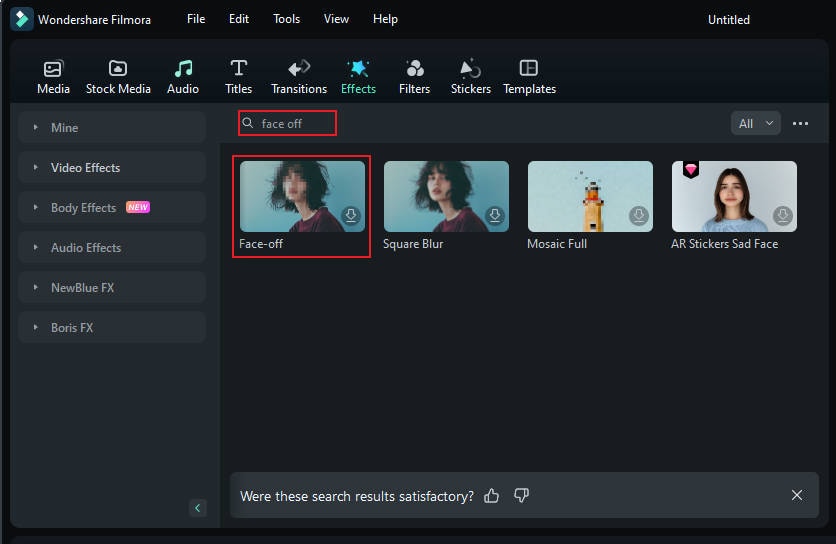
Step 5: Click on the "Face-off effect" to download it. Then, drag and drop it onto your media in the timeline. Next, preview the video to ensure the blur is in the right spot throughout it and export it.
How To Blur Faces Using the Motion Tracking
If you want to apply a mosaic to a moving person's face, the motion tracking feature in Filmora is your best choice. Let's take a look at how this feature can be used to mosaic a face.
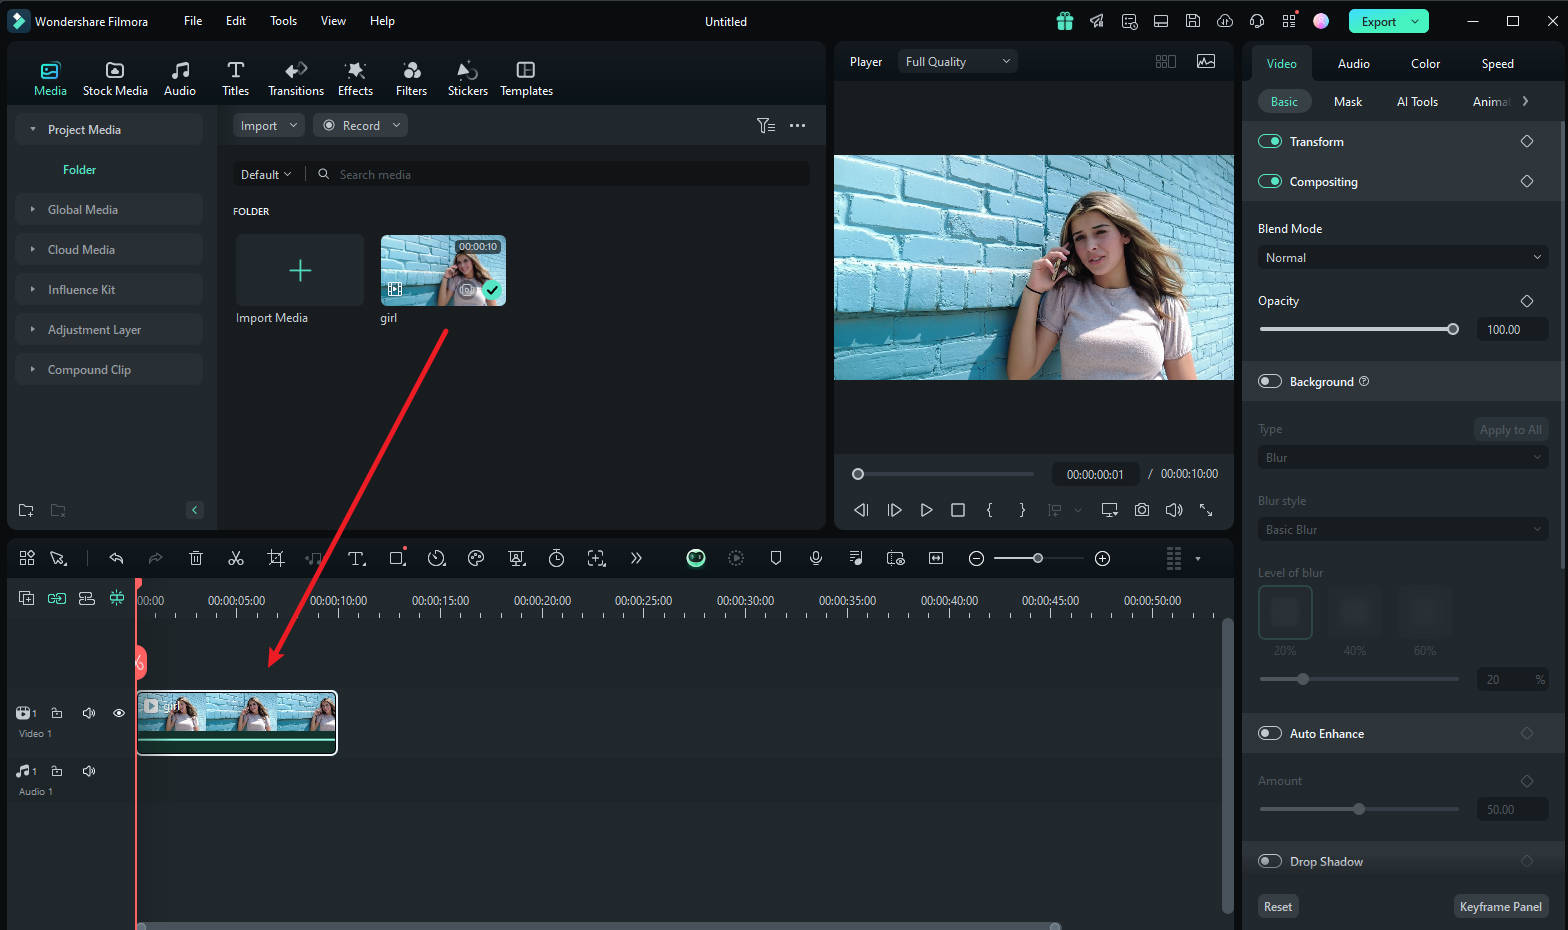
Step1 Import the Video and Drag It to the Timeline
Once you are done launching Filmora, select "Create New Project". Afterward, import and drop the video into the timeline.
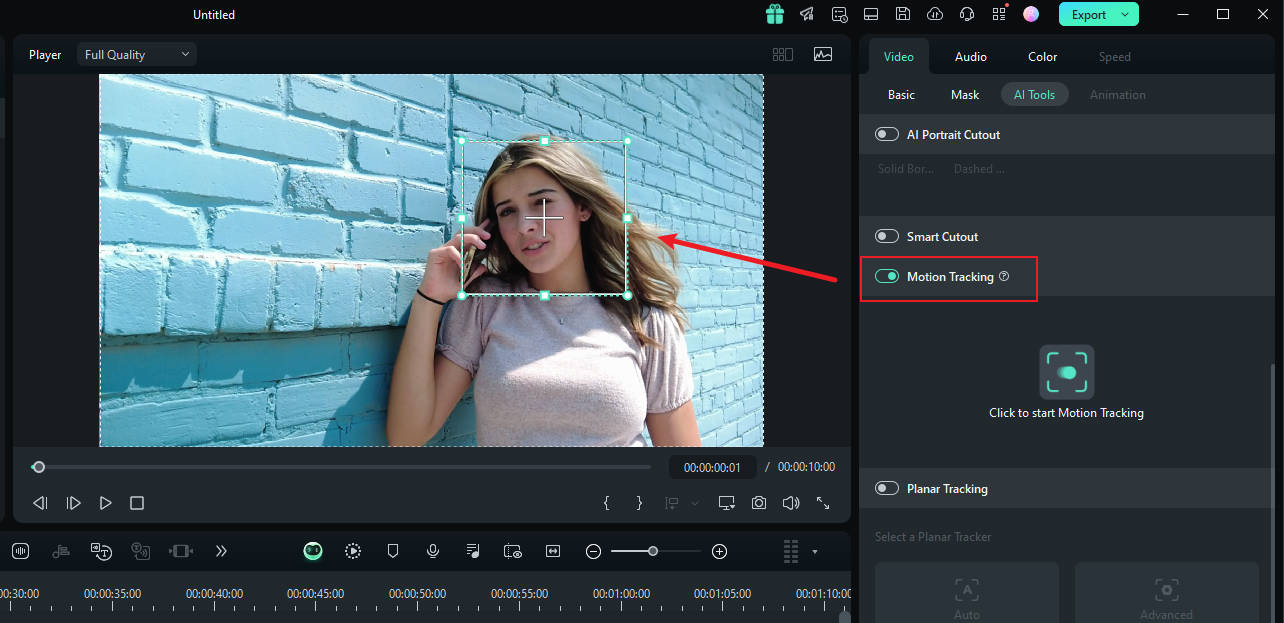
Step2 Adjust the Motion Tracking Space
Now place the play head at the start and proceed with the "Motion Tracking" tool, and adjust the motion tracking space from your preview window.
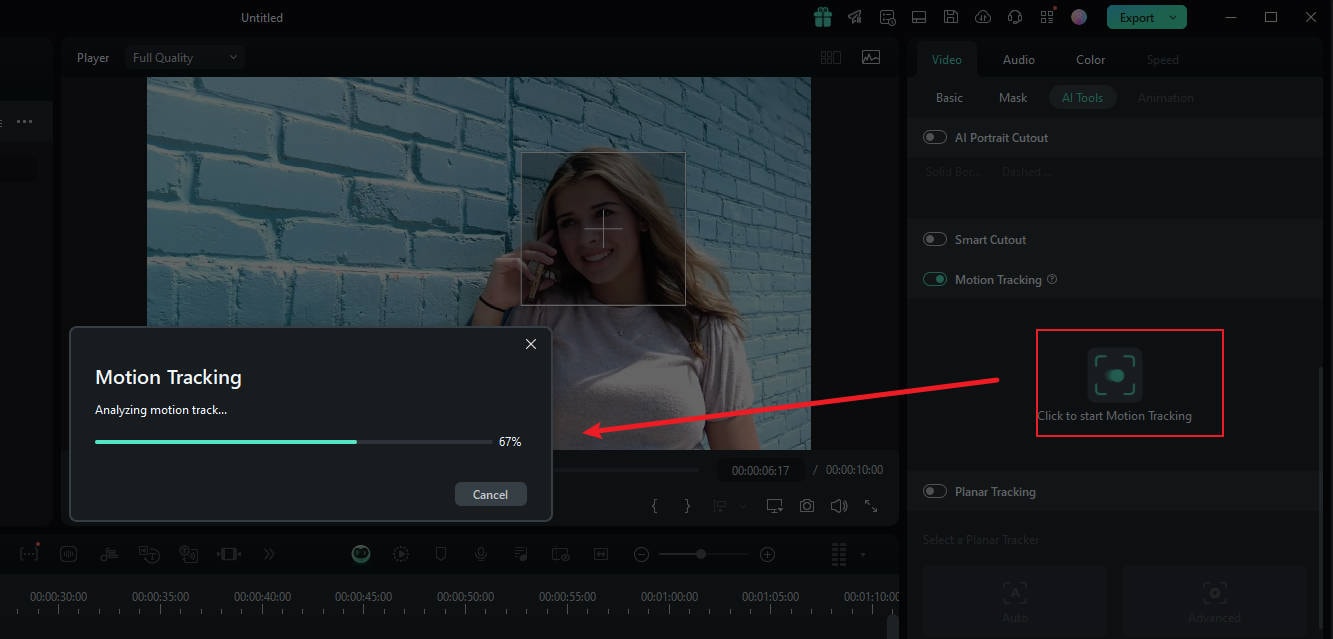
Step3 Start the Motion Tracking Process
Once done, hit the "Start Tracking" button. Within a few minutes, you will be able to finish this process.
Step4 Customize the Blur Settings
Now, click the video on the timeline. In the pane on the right, under the "link element" option, you can select the overlay element you want, such as an image or mosaic.
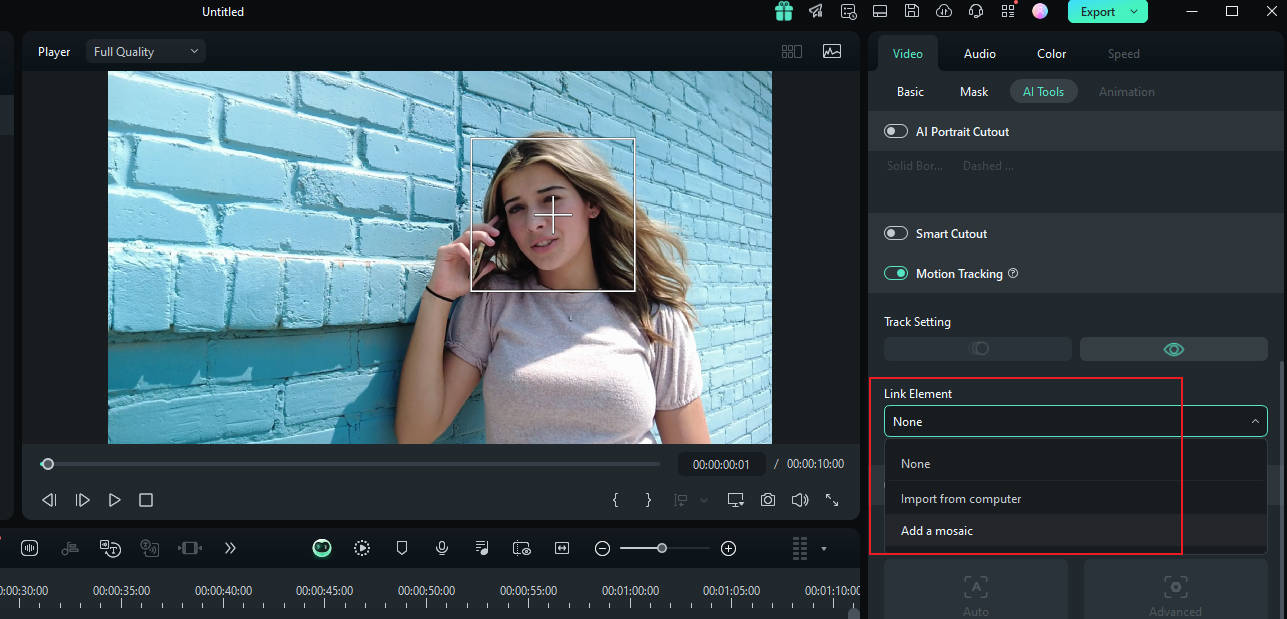
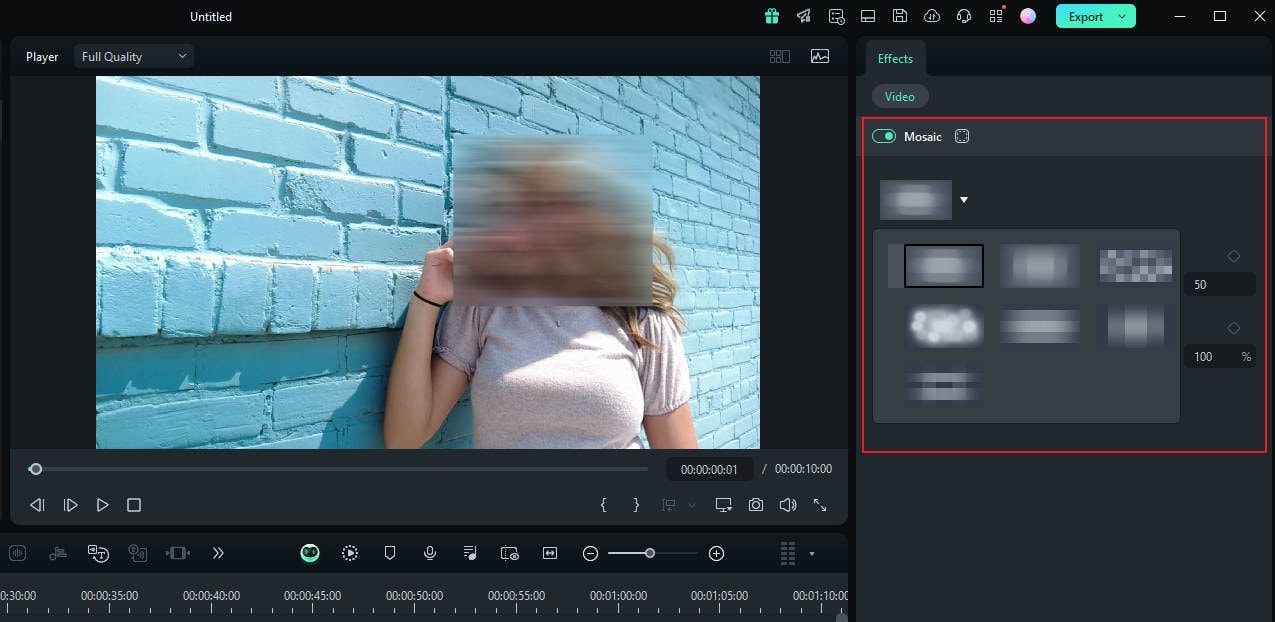
Step5 Choose Mosaic in Motion Tracking
If you choose the mosaic, a mosaic will appear over the person's face. Also, you can change the blur amount and blur opacity. Afterward, adjust the blurred space on your preview window. Once confirmed, you can export the video.
Conclusion
Learning how to blur faces online can be convenient for quick edits, whether you need to blur a face in a photo or video. However, for those seeking more robust features and greater creative control, Filmora is highly recommended. It offers an intuitive interface and diverse options for face blurring, making it perfect for both novices and professionals. Filmora simplifies the editing process, ensuring high-quality results and a seamless experience for all your video projects.


