


An eye-catching visual layout is a unique way to make your clip stand out on any feed. After all, plain flat captions are everywhere these days, making videos feel repetitive and dull. One way to switch things up is to add perspective text on video, giving your words a more dynamic, 3D-like look.
If you’re new to the effect, you might be wondering how to alter text in perspective without dealing with complicated tools. There's no need to worry, because Wondershare Filmora makes the entire process seamless. So, our guide will show you how to make perspective text in Filmora so you can master this cinematic effect in just a few quick minutes.

Part 1. Perspective Text Explained: Adding Depth to Your Videos
Perspective text changes the angle, scale, and proportions of your words so they look like they're sitting inside a 3D space instead of floating flat on your screen. Done well, it can make a caption look like it's receding into the distance, leaning across a wall, or wrapping around the edge of a building, basically, whatever angle matches the world you filmed.
That said, perspective text and fully 3D text aren't necessarily the same thing. You don't need to turn your words into a fully modeled 3D object to add perspective to a video and create a convincing sense of depth. Perspective manipulation can be enough to make ordinary text look like it belongs in a three-dimensional space.
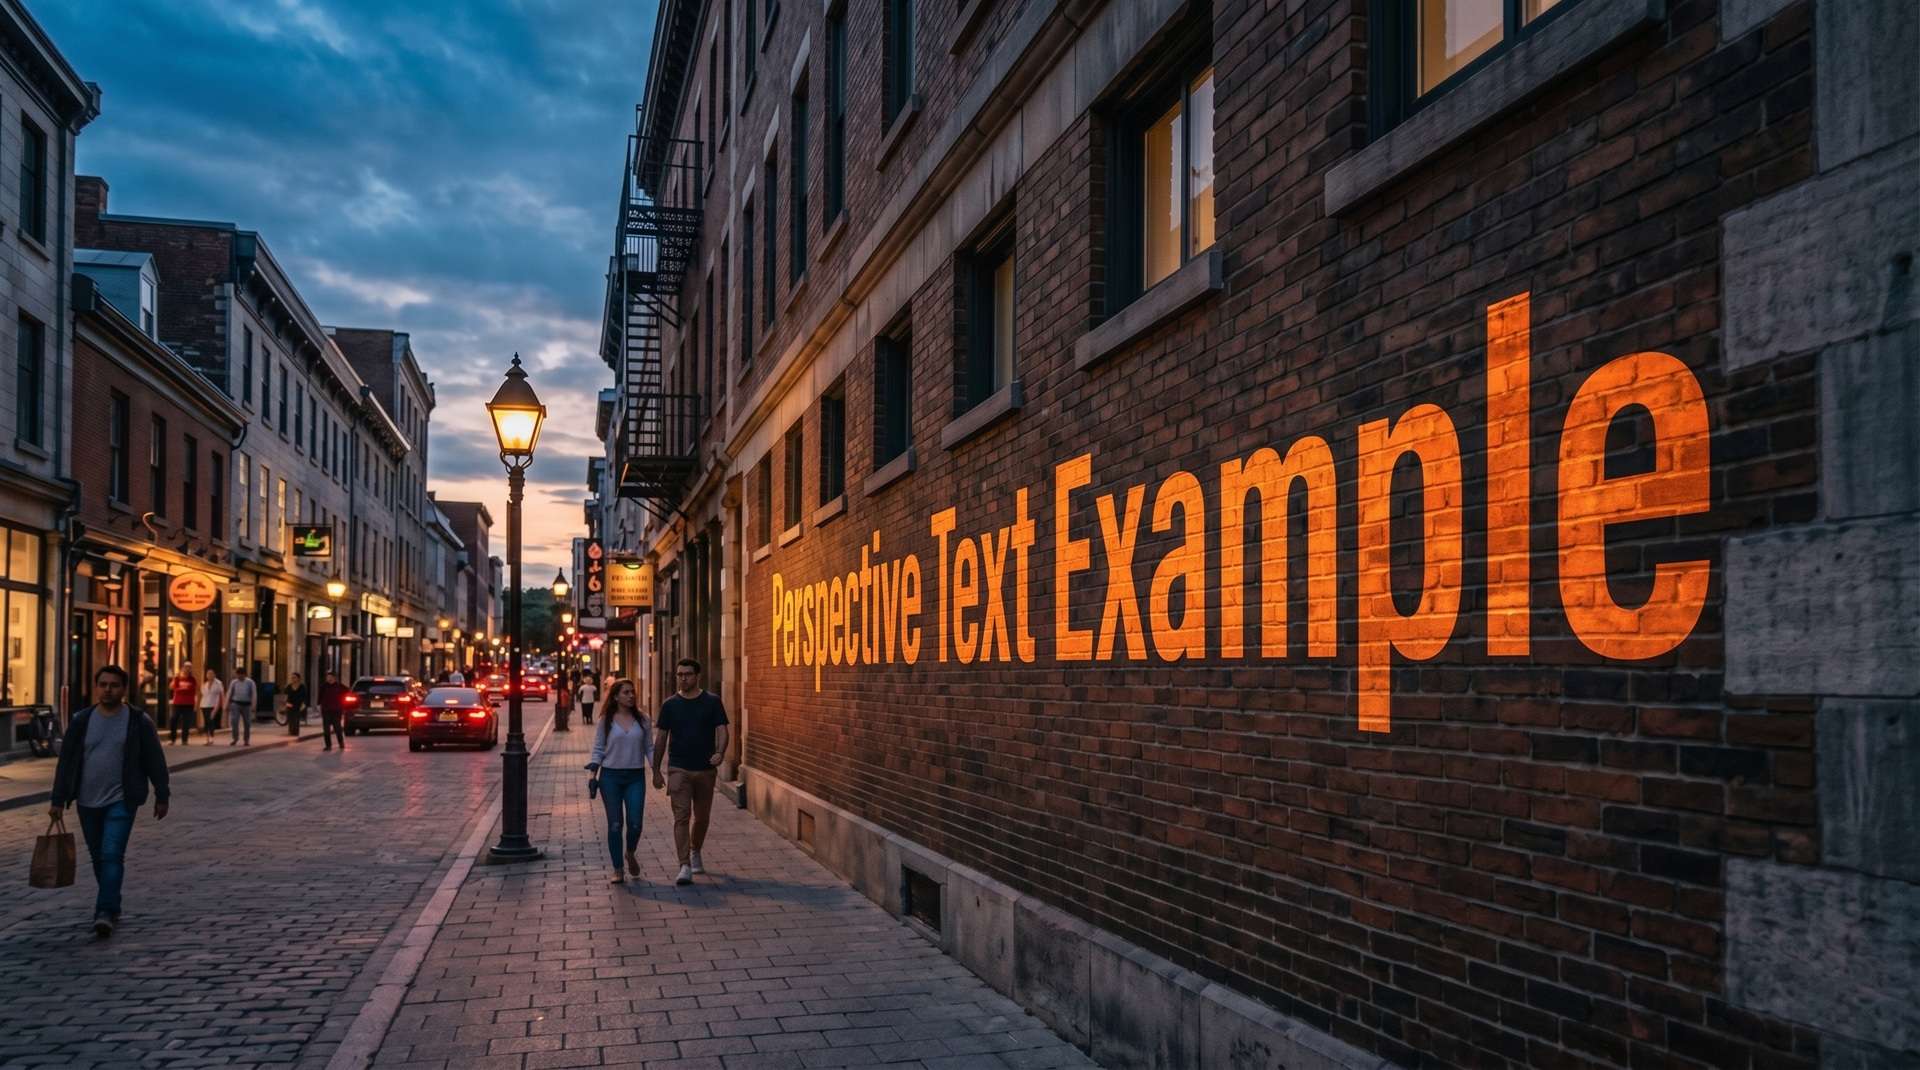
How Perspective Text Makes Your Clip More Engaging
It's a small detail, but using perspective text can change how a video feels the moment it shows up on screen. Here are a few ways the effect can work in your favor:
- Breaks Feed Monotony: Most captions just sit on top of the frame, so anything that looks like it's actually part of the shot instantly stands out.
- Enhances Visual Immersion: Instead of text that floats awkwardly over your footage, this effect makes titles look like they were built into the environment you filmed.
- Guides Viewer Focus: Angled text naturally follows lines already in your frame, like a street, hallway, or building edge, so it guides attention without you saying a word.
- Delivers Professional Production Value: Gives short-form videos and vlogs a high-budget cinematic feel without extra camera gear.
- Complements Motion Shots: Because the effect tracks to a plane in your footage, it holds up well during pans and moving shots instead of looking like a sticker slapped on top.
Part 2. The Best Editor to Make Perspective Text: Filmora
If you have ever tried bending text in older video editors, you probably remember how frustrating it was. You had to stack multiple rotation masks, stretch image files manually, or rely on a third-party perspective text generator plugin just to pull off a basic angle shift.
But don't worry, Filmora removes that headache by bringing a built-in perspective text feature straight to your main editing workspace.
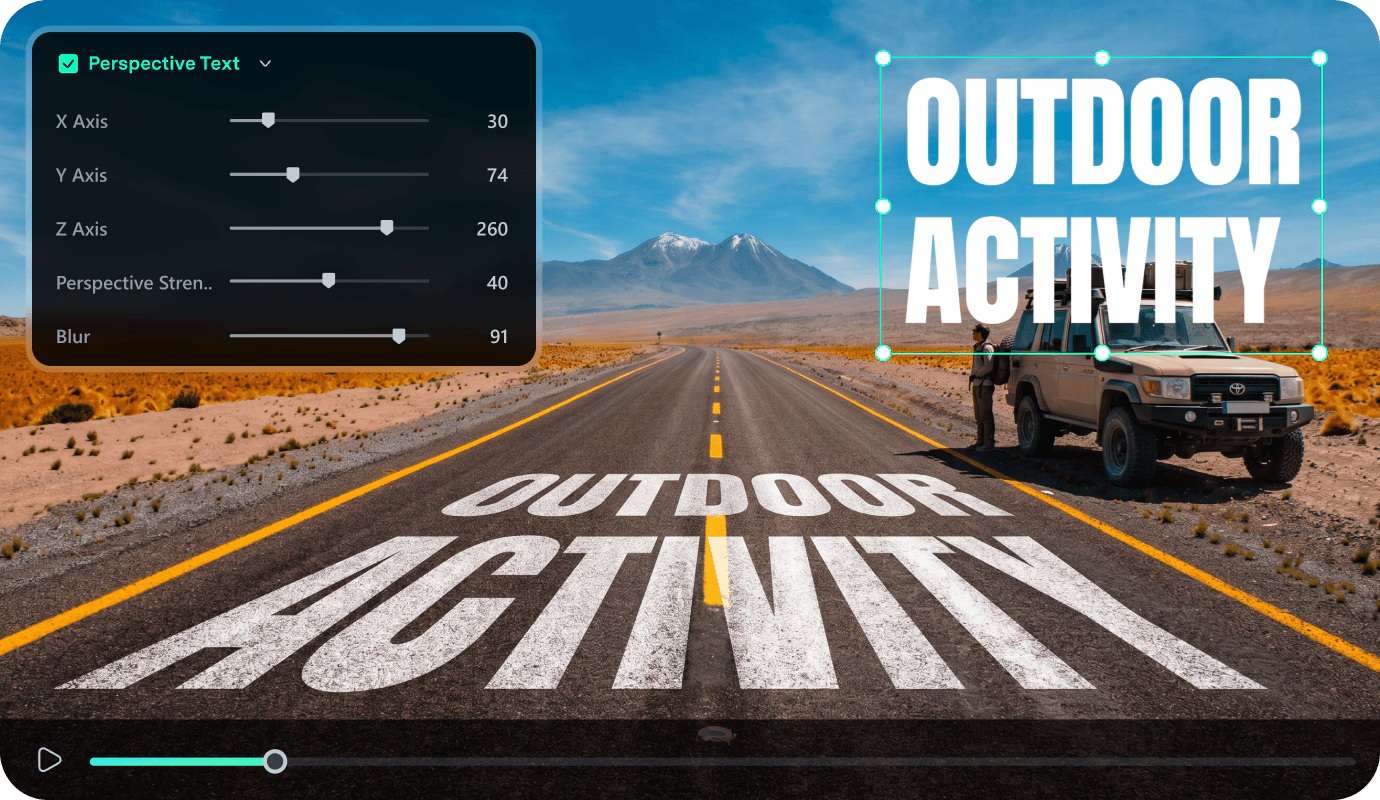
Why Choose Filmora for Perspective Text?
There are a few practical reasons Filmora's perspective text feature works well for this type of text treatment:
- All-in-One Workflow: Edit, angle, track, and color grade your text within a single timeline without switching programs.
- Direct X, Y, and Z Axis Controls: You have dedicated axis controls for adjusting the perspective text. These let you fine-tune where the text sits and how it is positioned within the perspective space.
- Perspective Strength and Blur Controls: You can decide how pronounced the perspective effect should look. You can keep it subtle for a more natural result or push it further when you want the text to have a stronger visual distortion.
- Plenty of Text Style Options: You can still customize the text itself with different fonts, sizes, colors, and other text treatments before settling on the final look.
- Built-in Motion Tracking Integration: Anchor angled perspective text directly to moving objects or camera pans with one click.
 Secure Download
Part 3. Make Flat Text Look 3D: How to Create Perspective Text in Filmora 16
Here's the part you're actually here for. Luckily, learning how to make text perspective in Filmora is surprisingly quick, even if you are touching video editing software for the first time. The whole idea is to drag your text until it lines up naturally with the planes already visible in your camera shot.
To show you how simple it is, follow this tutorial on how to create perspective text in Filmora without hassle:
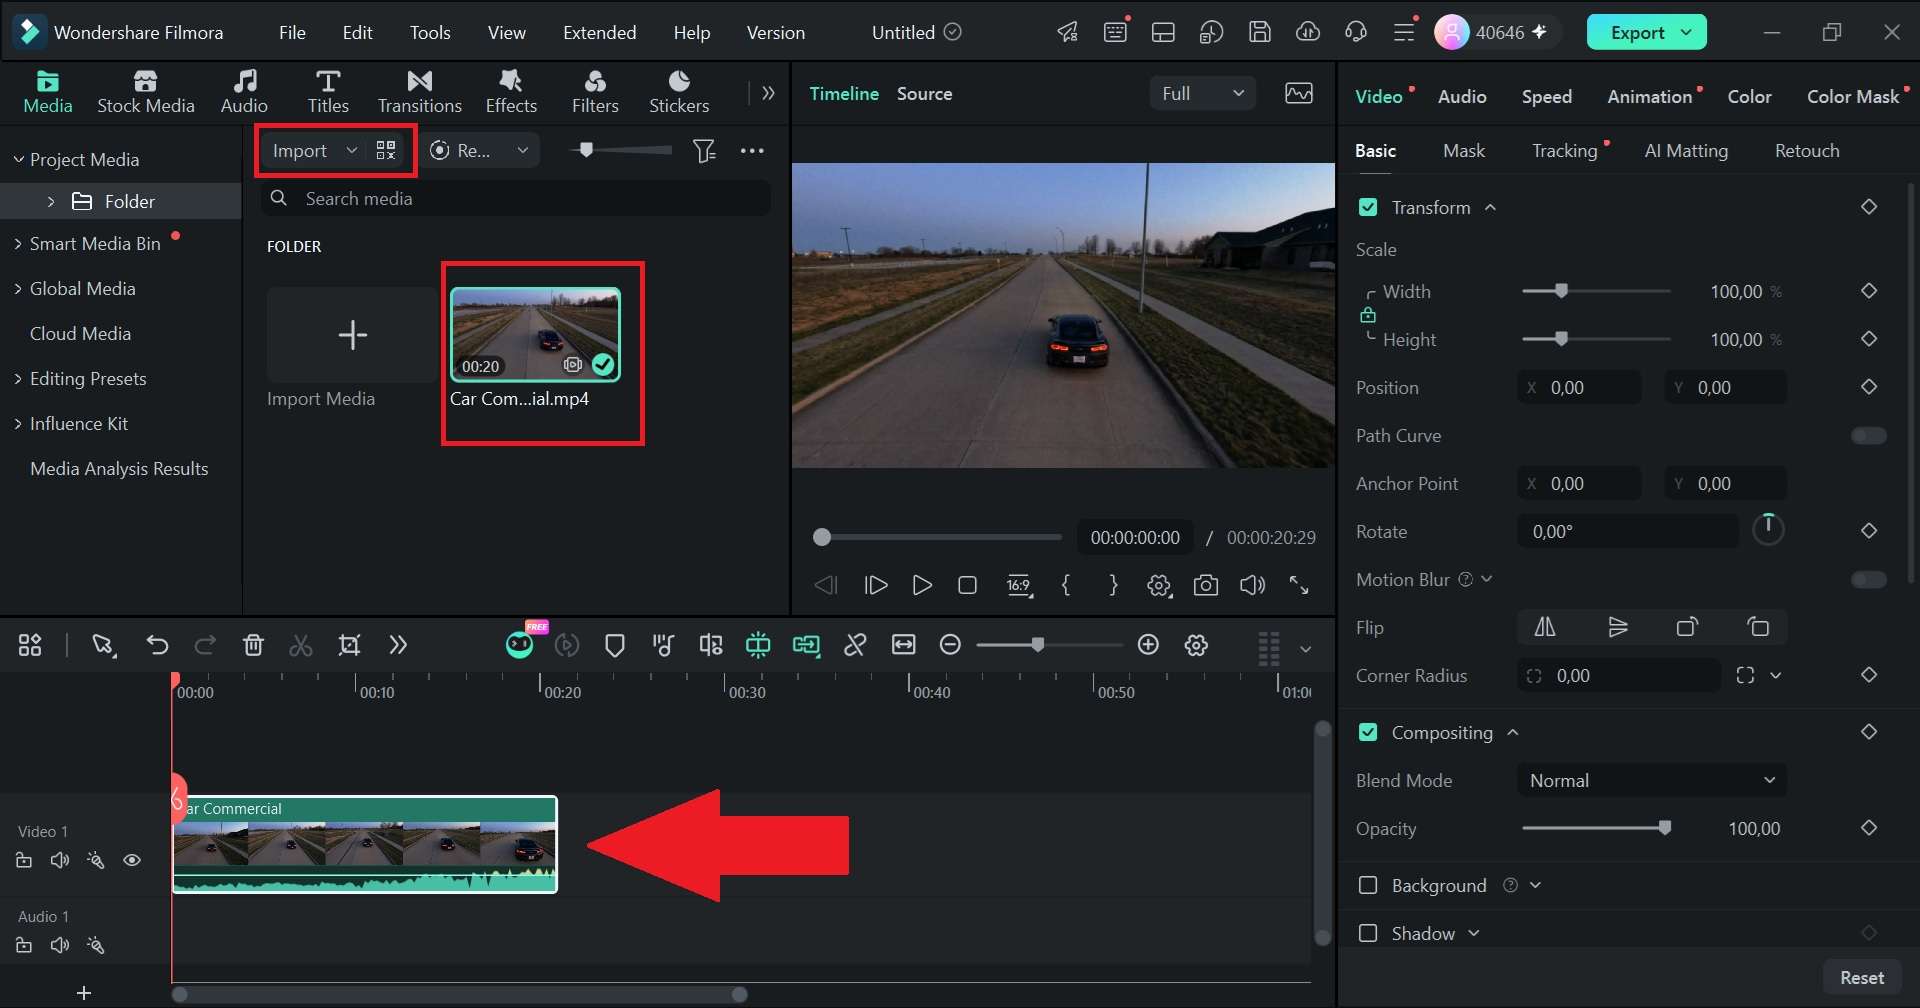
Go to the Titles tab and select the kind of text you like. Drag it to the timeline above your video clip. In the Property Panel on the right, type in the text you want to put in the clip.
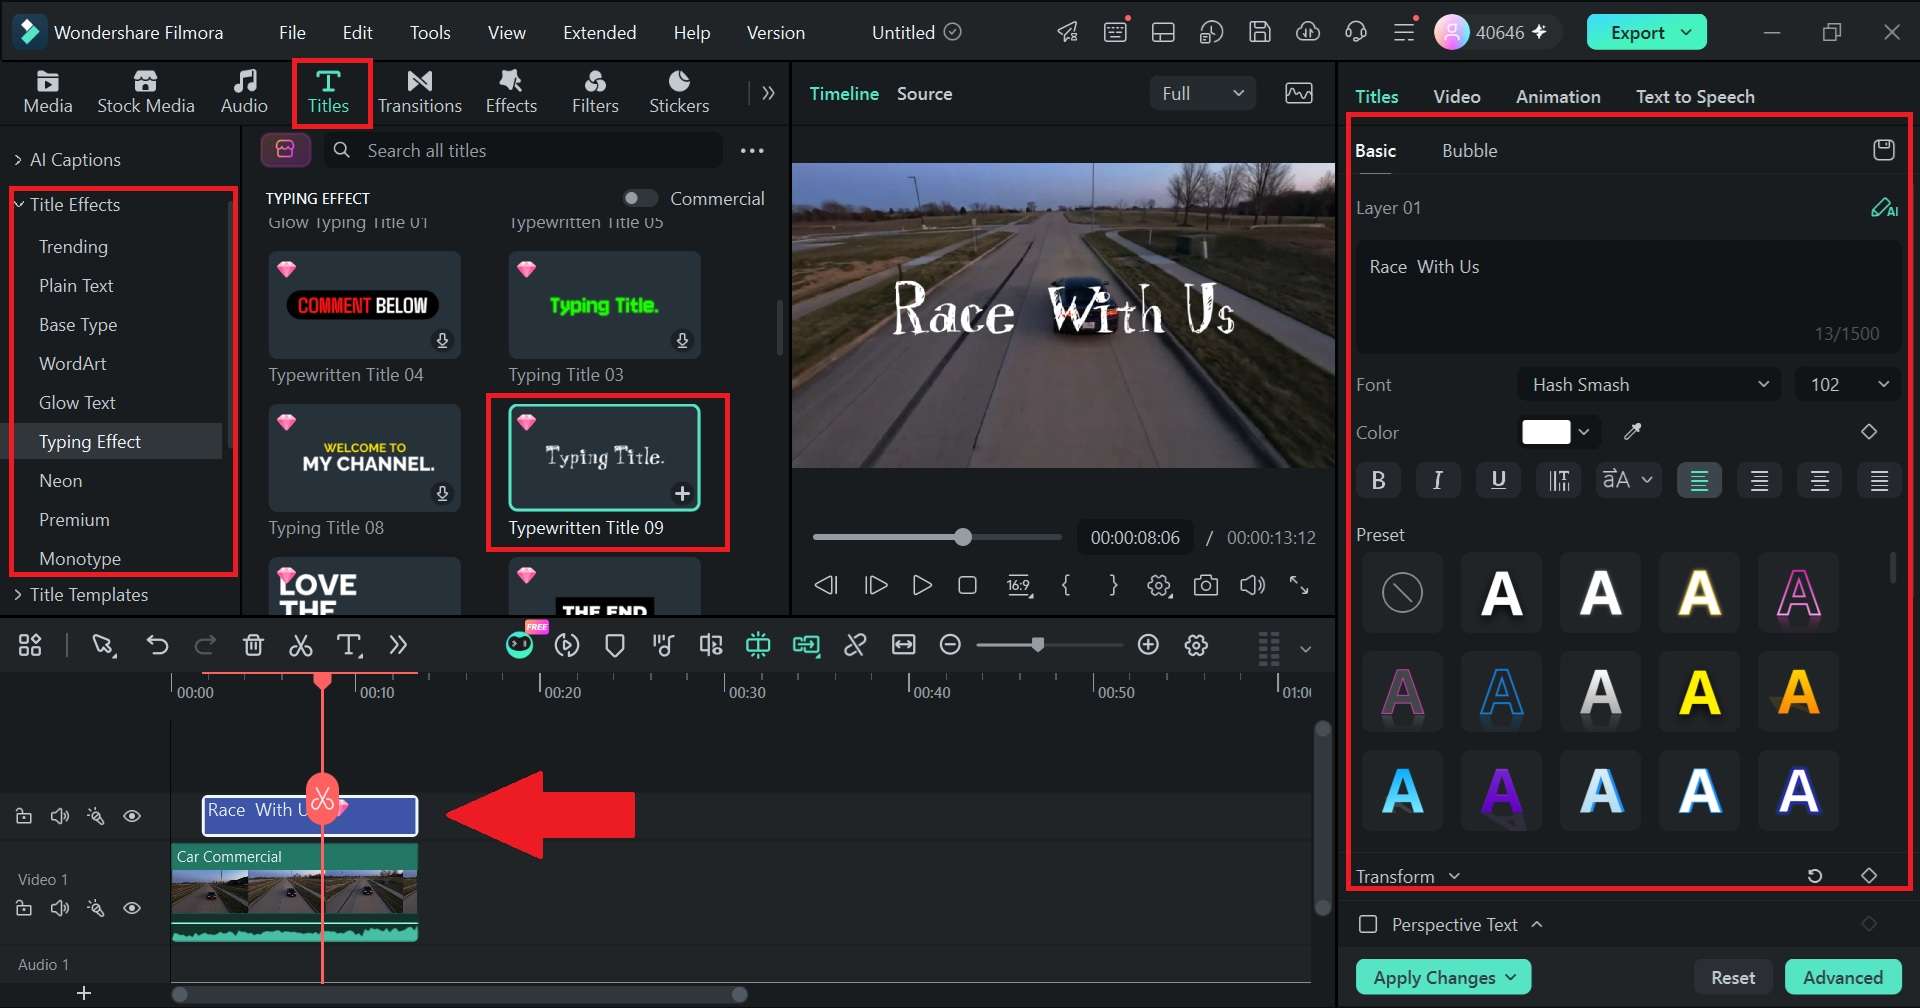
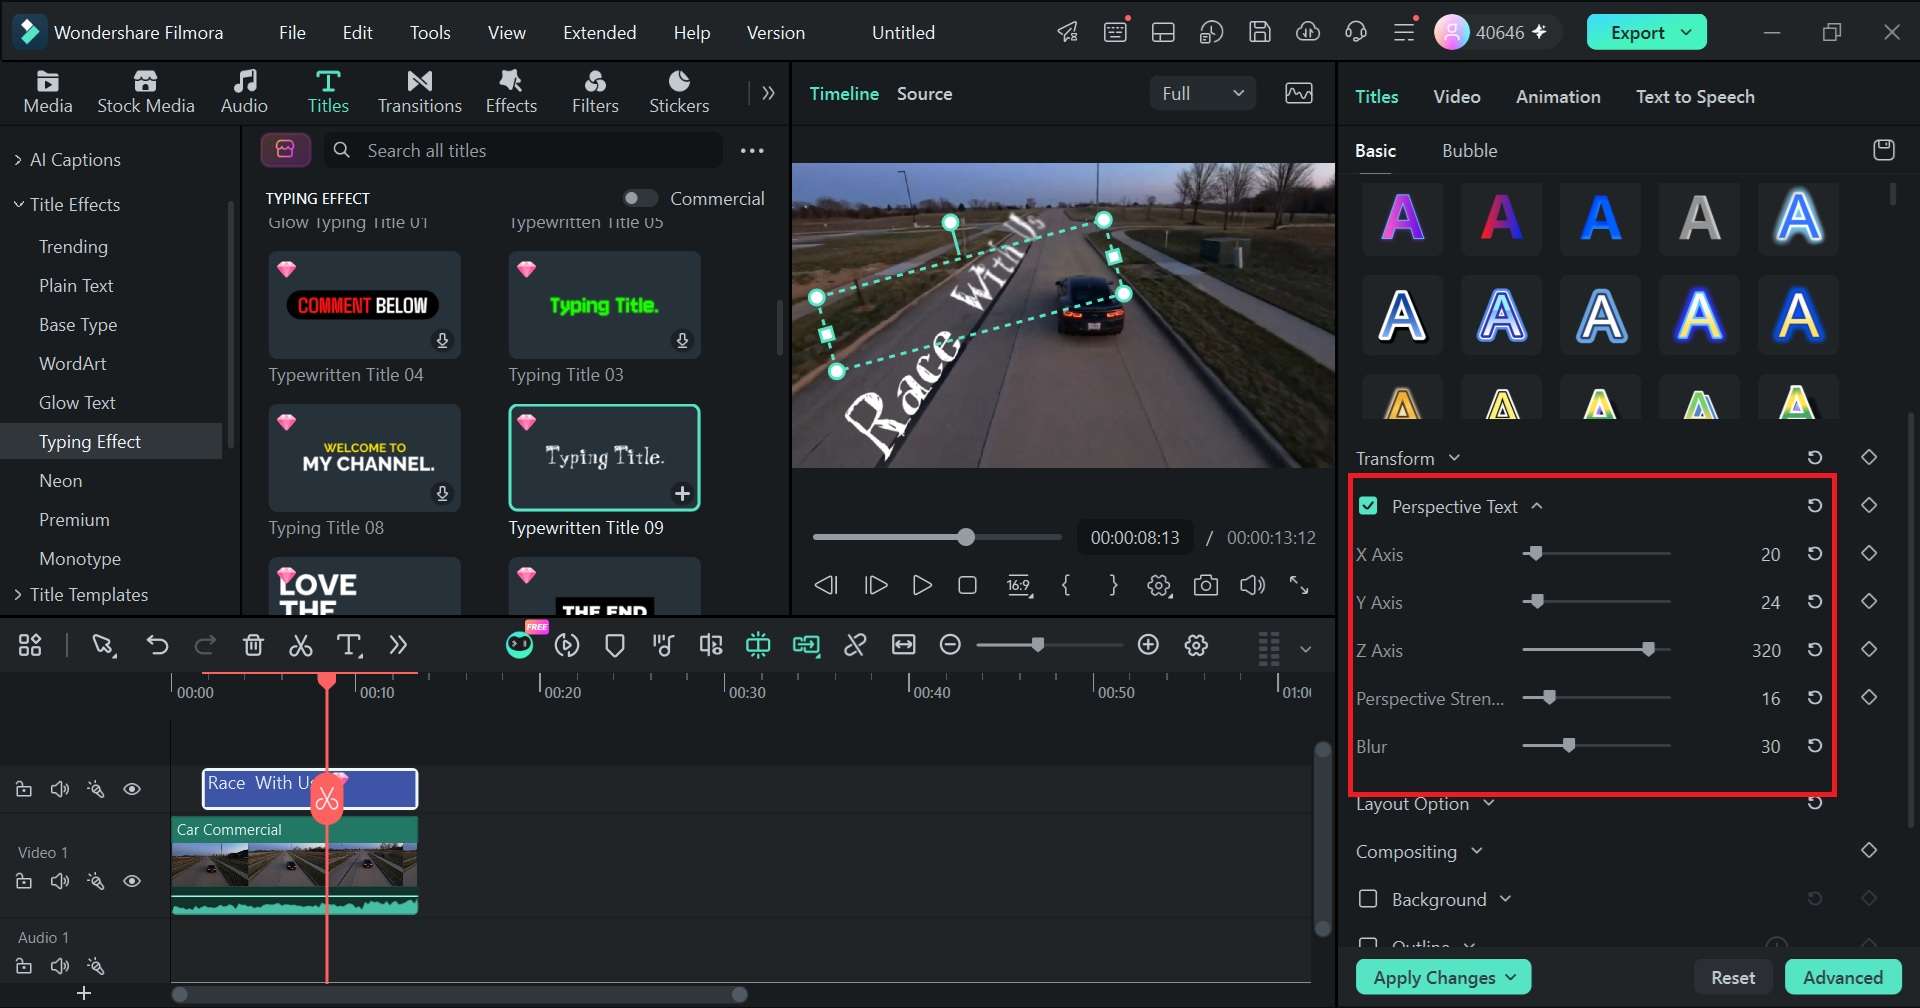
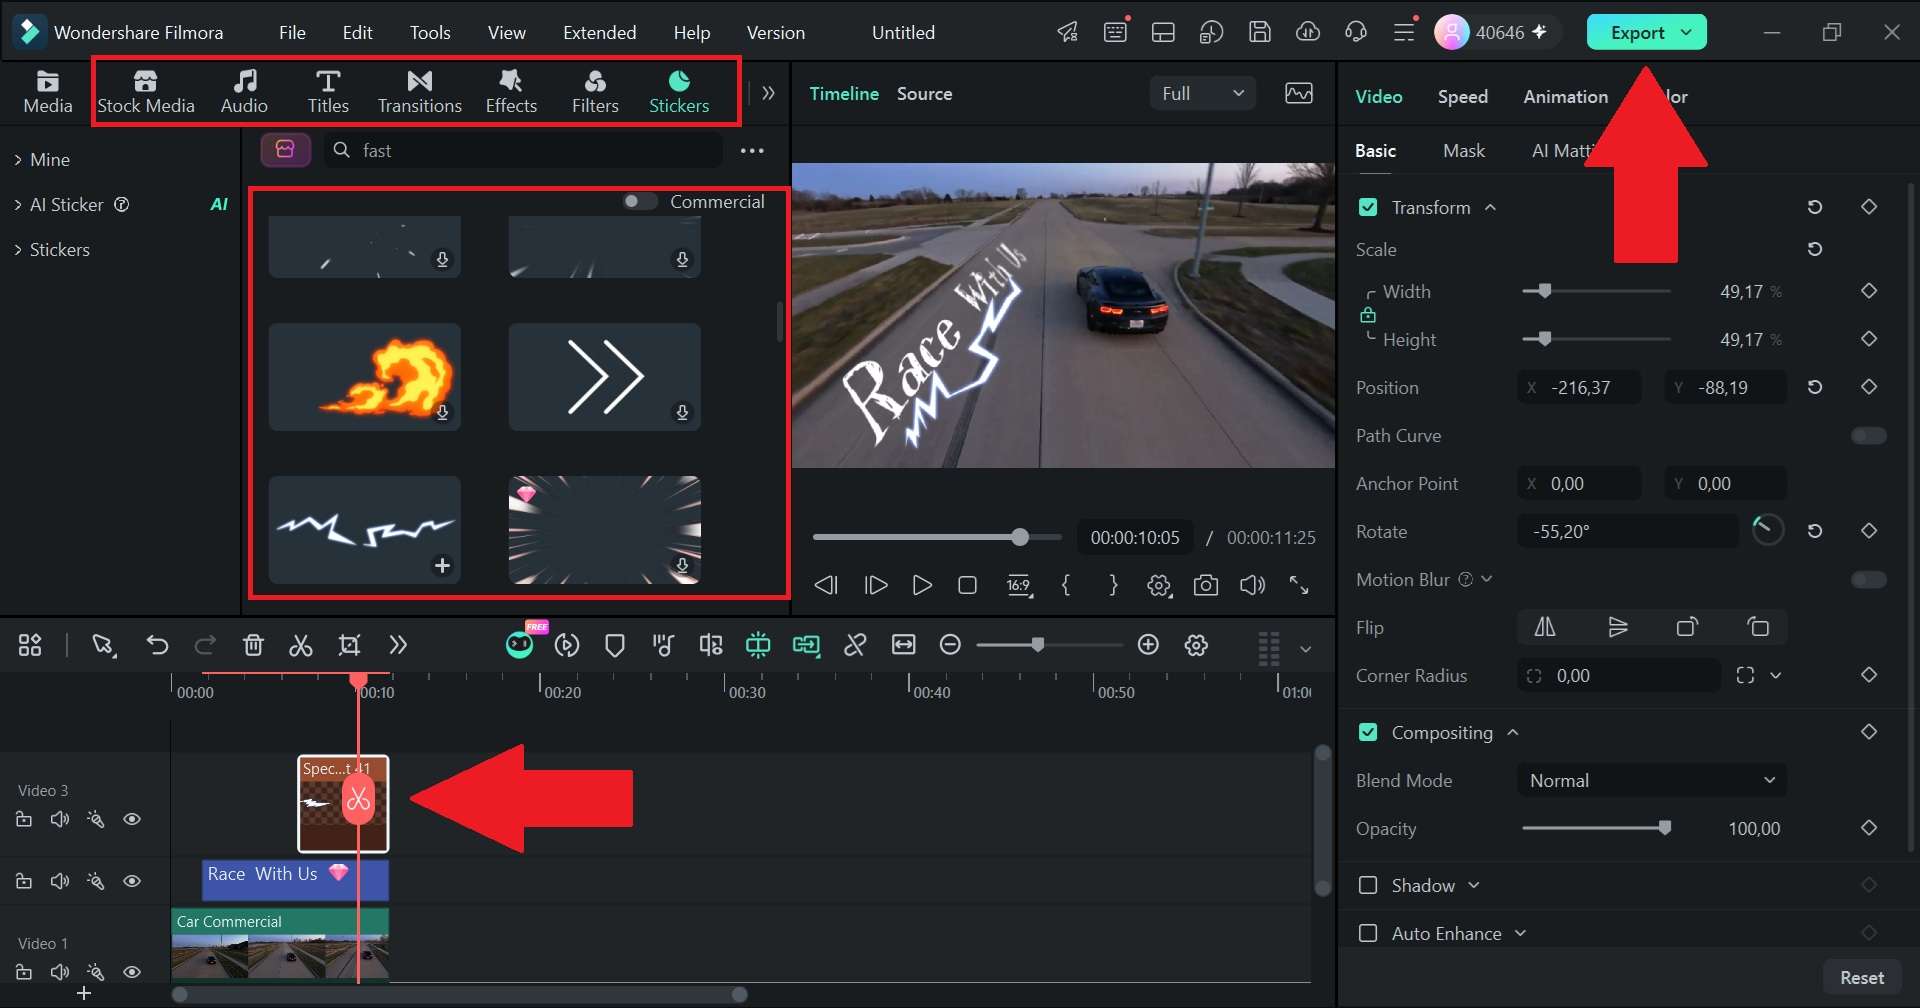
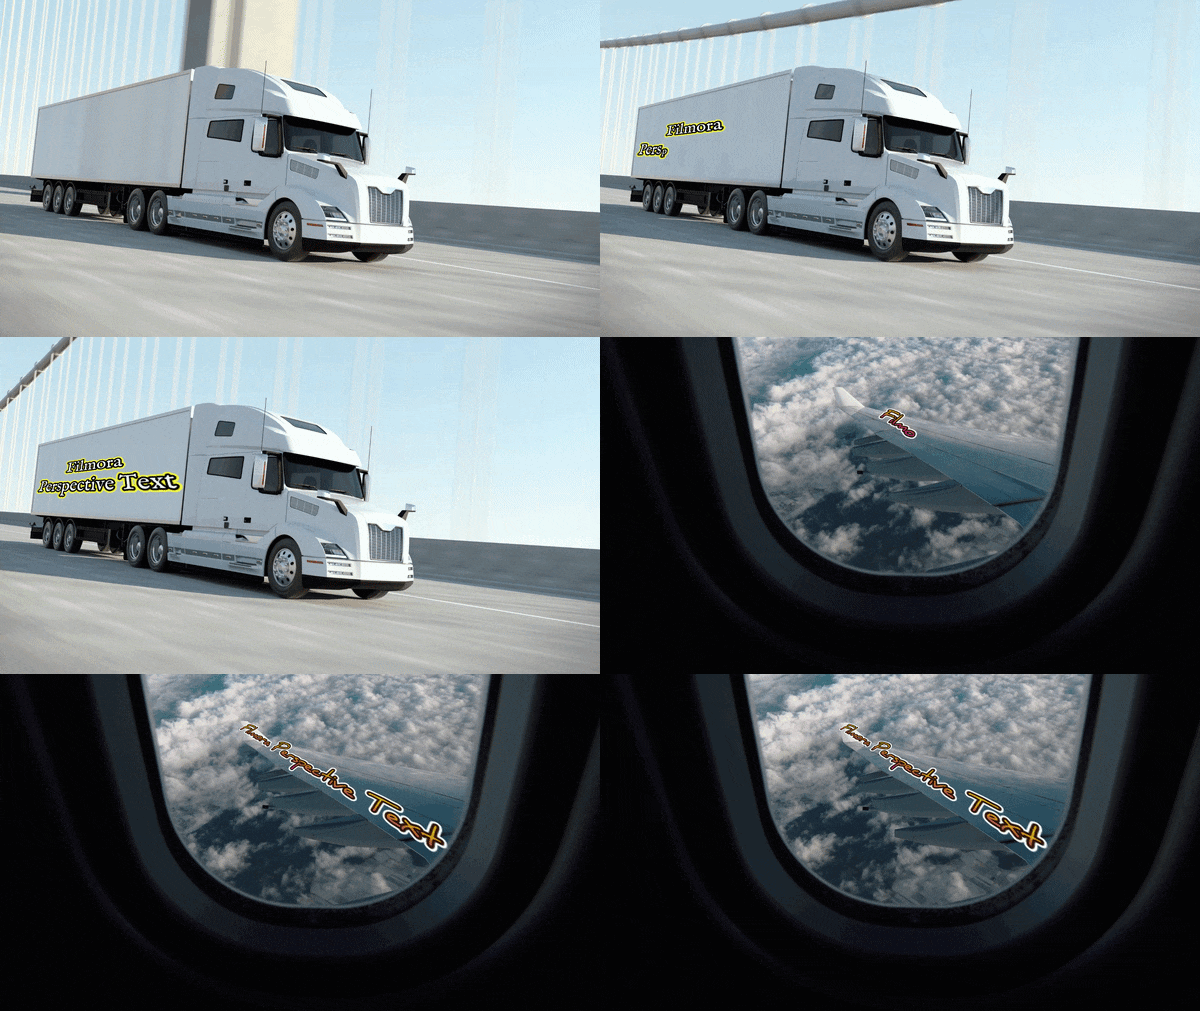
And that’s pretty much all the steps needed to learn how to make text in perspective with Filmora. It’s very straightforward, right? Now, see the result below.
Part 4. How to Master Perspective Text: Essential Editing Tips
Nailing the technical steps of perspective text in Filmora workflows is only half the battle. That said, making text truly blend in requires a few small visual tweaks. If your text has perfect geometry but bright, blinding neon colors on a dark, gritty brick wall, it will still look out of place.

Here's what tends to separate an amateur attempt from something that actually looks like it belongs in the frame.
- Match Scene Lighting: Adjust text brightness, contrast, and color temperature so your typography matches the natural light sources in your clip.
- Use Blending Modes: Set your text layer blending mode to Overlay, Soft Light, or Multiply so physical surface textures like concrete or wood grain show through the letters.
- Add Subtlety to Angles: Avoid turning the angle sliders to extreme limits; realistic camera perspective usually calls for soft, subtle tilt shifts.
- Apply Motion Blur: Turn on motion blur when your text moves or when the camera pans so your typography avoids artificial digital sharpness.
- Combine with Masking: When learning how to make 3D perspective text in Filmora, draw a quick mask around foreground objects or people passing by so your text sits neatly behind them in true 3D space.
Bonus: More Ways to Make Text Stand Out in Filmora
Perspective text is a great trick, but it's not the only text customization to make your content stand out. And luckily, Filmora's perspective text is only one piece of Filmora's massive typography features to keep your edits creative and varied across different projects. Let's take a look at some of them!
1. Text Path
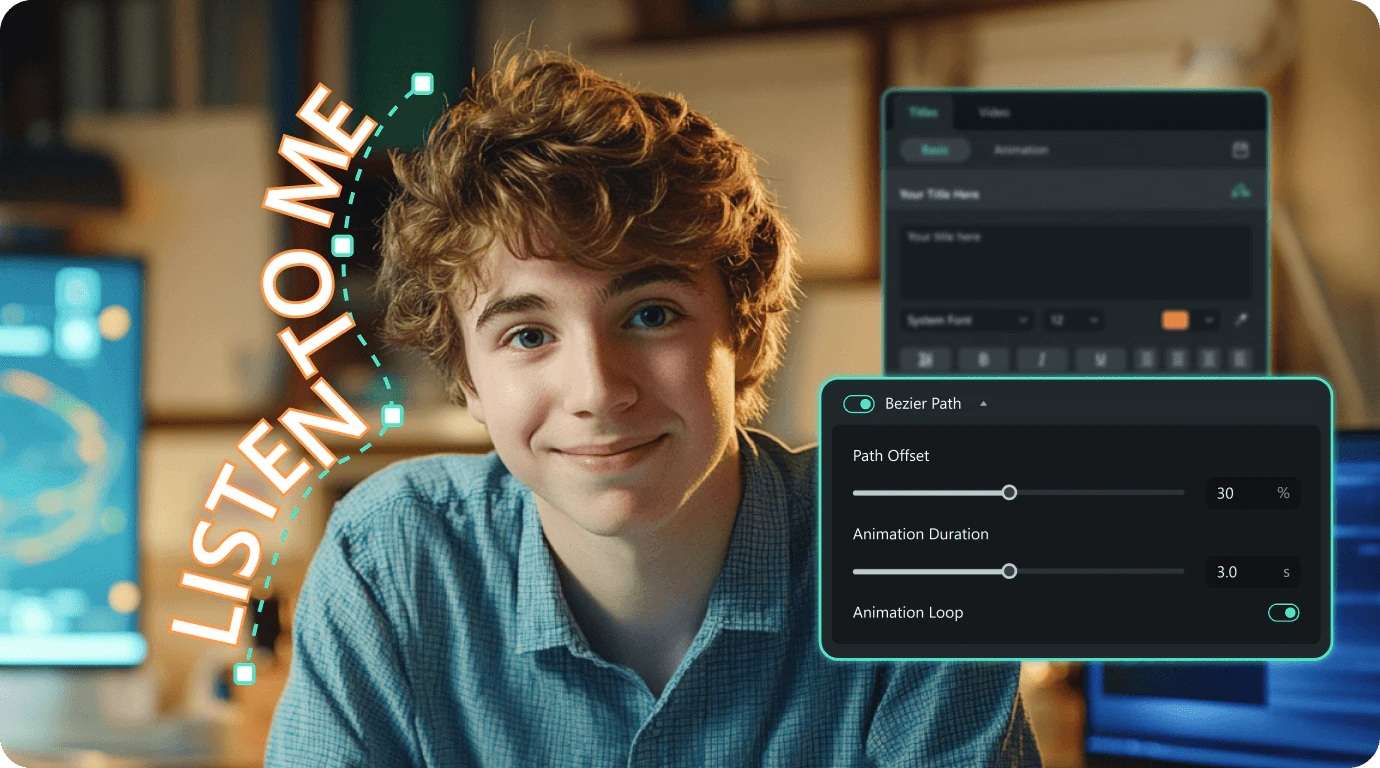
If you want your words to move somewhere other than in a straight line, Filmora's Text Path lets you draw a custom path and have the text follow it. You can create curved or more complex paths using the Bezier tool, then adjust the movement duration and starting point. It can be useful for titles that follow an arc, circle, or custom route across the frame.
2. Text Animation Presets
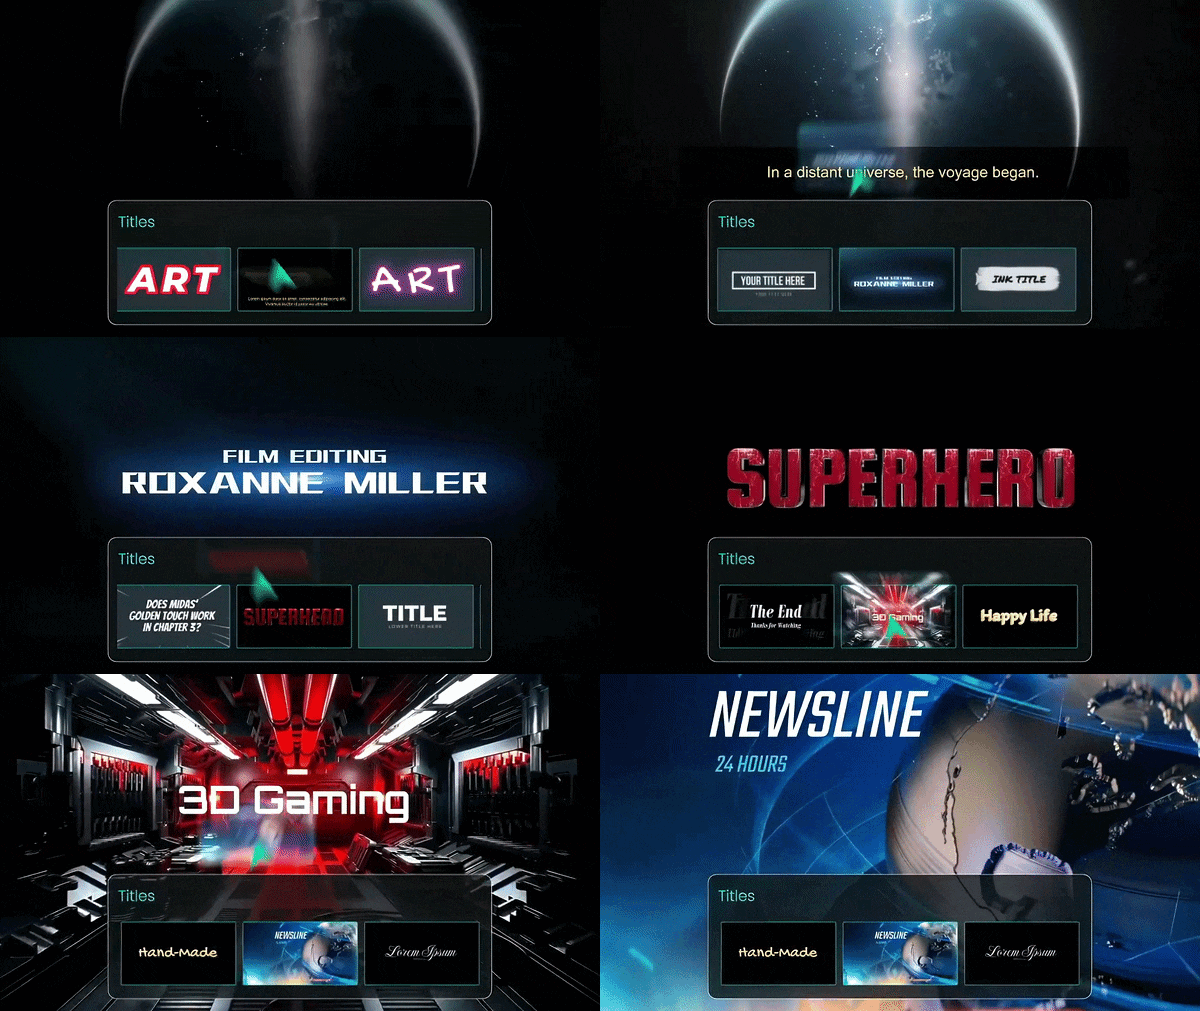
You do not need to manually set keyframes every time you want your titles to move. Filmora includes dozens of drag-and-drop animations like typewriter reveals, glitch glitches, bounce drops, and smooth kinetic wipes that pop up with one click.
3. Music Beat Text Animation
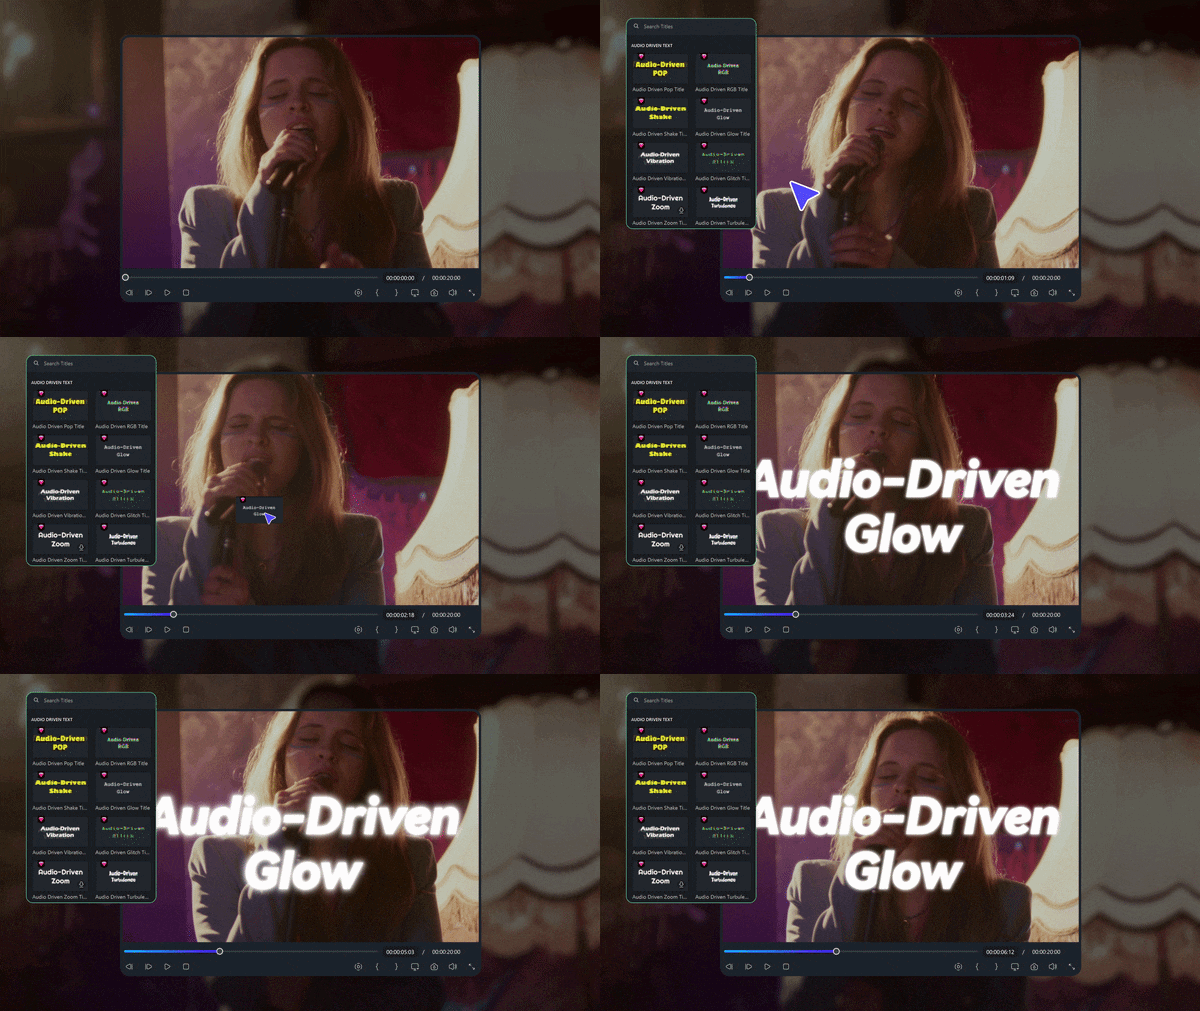
Keeping graphics synced with your background track usually takes a lot of manual trimming. But don't worry, Filmora's Music Beat Text Animation, also presented as Audio Driven Text, can analyze the audio rhythm and make text animations react to it. You can choose from different effects and adjust settings such as sensitivity and strength to control how strongly the text responds to the music.
Secure DownloadConclusion
Mastering perspective text is one of the quickest ways to break away from flat, boring video edits. It doesn't take much time to add, but it changes how a caption feels, turning a flat overlay into something that looks like it was filmed into the scene rather than slapped on top of it afterward.
If you are ready to experiment with perspective text free of complicated workflows, Filmora 16 provides a dedicated Perspective Text feature and controls for the X, Y, and Z axes, Perspective Strength, and Blur. Give it a shot on your next edit, and you might be surprised how much more polished a simple caption can look.
FAQs
-
Can I apply perspective text effects to imported PNG logo files or images?
Yes, Filmora 16 allows you to apply perspective transformations and corner pinning to graphic layers like PNG icons, logos, and custom watermark files just like standard text tracks. -
Does perspective text support custom uploaded typography fonts?
Yes. Filmora supports custom fonts, so you can use an uploaded font for your text and then customize the text's appearance. -
What is the difference between perspective text and 3D text?
Perspective text alters the visual angles, scale, and corners of flat 2D lettering to fit a scene's perspective lines, whereas 3D text generates volumetric depth with physical side-extrusion edges and mesh geometry.
