
 100% Security Verified | No Subscription Required | No Malware


 ChatGPT
 Perplexity
 Gemini
 Claude
 Grok
Grok
Sharing stories on social media intends to make you focus on certain objects. When posting content on Instagram, zooming in helps creators draw attention towards the key subjects. It allows you to highlight emotions, capture details, and draw your audience closer to your world. This article sheds light on the methods of Insta Story zoom to help your audience see what you want them to see.
In this article
-
- Problem 1. Using the Wrong Gesture
- Solution 1. Use the Fingers Correctly
- Problem 2. App Glitch or Outdated Version
- Solution 2. Update the App
- Problem 3. Device Compatibility
- Solution 3. Change Devices
- Problem 4. Camera Permissions Not Granted
- Solution 4. Grant Permissions
- Problem 5. Instagram Testing or Regional Restrictions
- Solution 5. Enable VPN
- Problem 6. Temporary App Bug
- Solution 6. Restart Your Phone
-
- Using Filmora to Zoom Videos Through Various Methods
- Method 1. Pinch in the Preview Window
- Method 2. Adjust the Zoom Level
- Method 3. Fixing the Aspect Ratio
- Method 4. Use the Crop and Zoom Technique
- Method 5. Use the Basic Video Panel to Zoom In
- Method 6. Apply a Zoom-in Animation to the Video
- Method 7. Use the Auto Reframe Feature
Part 1. How to Zoom In/Out in Instagram Stories
While you are taking the picture, there are many ways you can make it bigger. The following section covers all the possible methods you can zoom in on Instagram Story:
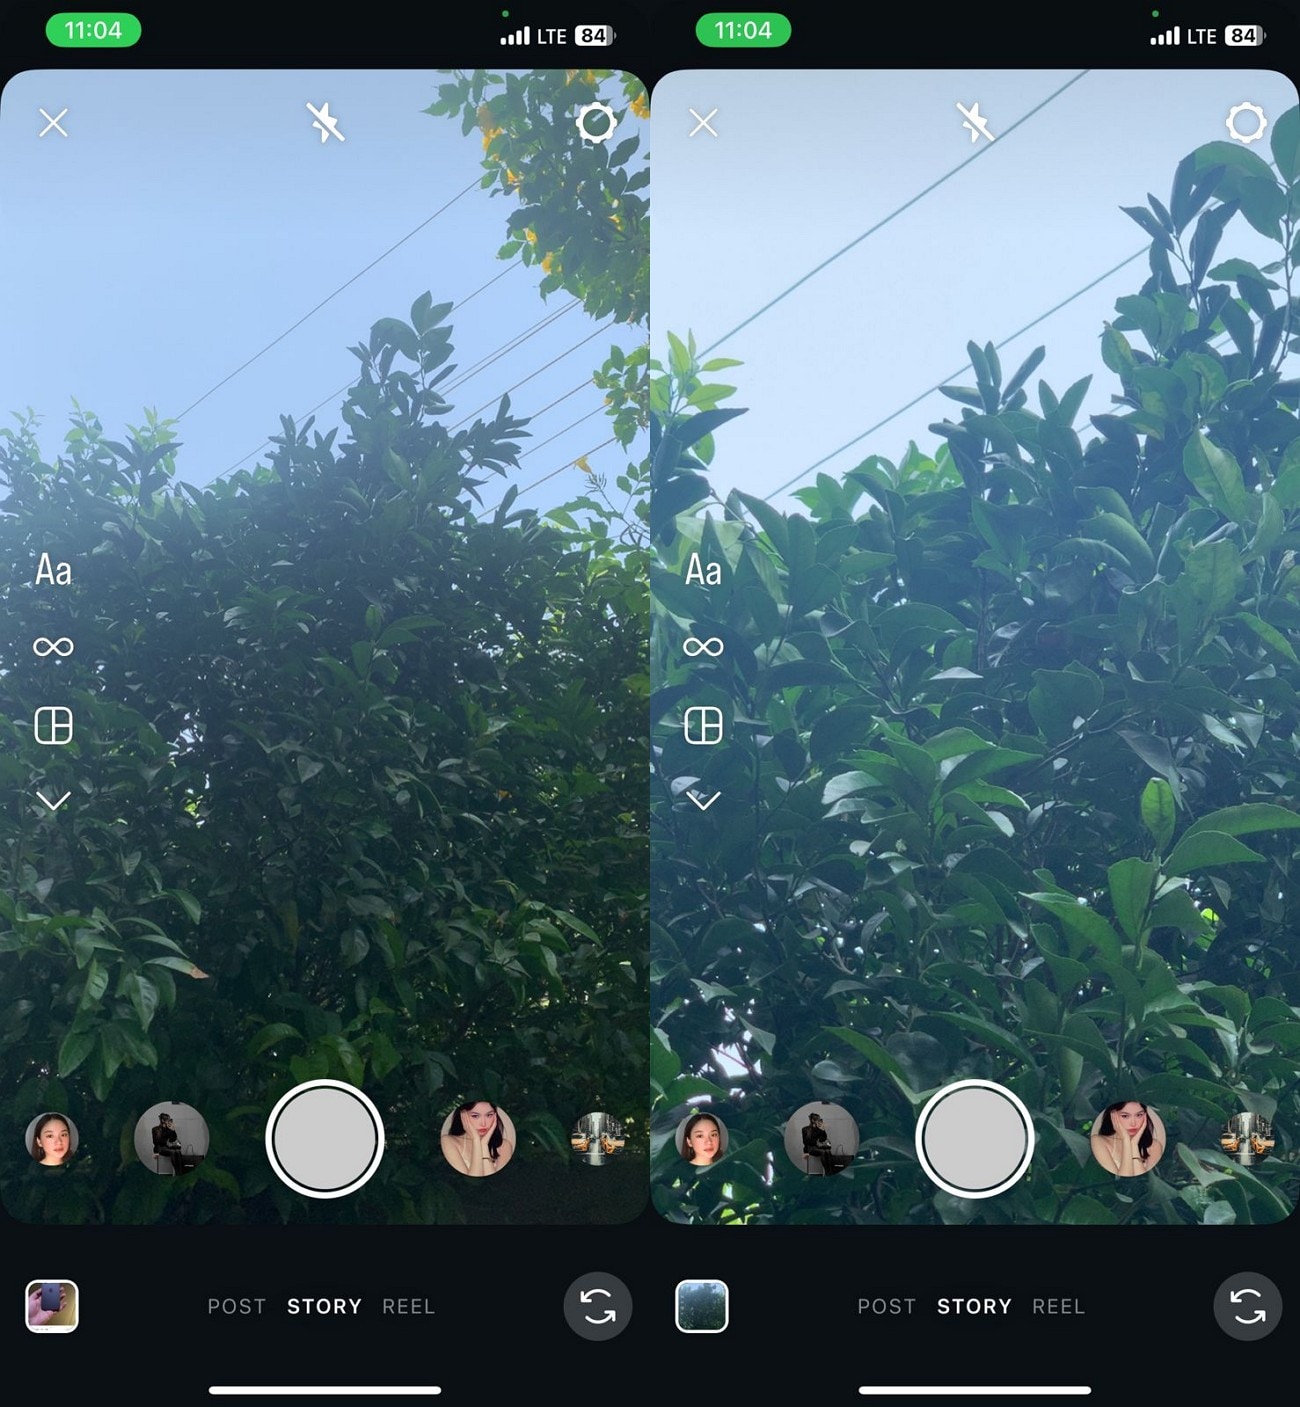
Method 1. Zooming in Before Capturing
The most straightforward way of expanding is to do it before capturing. This technique helps you build focus on the main object and capture it later. You can prevent the shakiness in the footage as you try to zoom in during the capture. Follow this guide to zooming in before capturing on Instagram:
Instructions. After opening the Story camera of Instagram, decide the object in focus and use your pinch to zoom in. Now, capture the image or video while keeping the object in the frame.
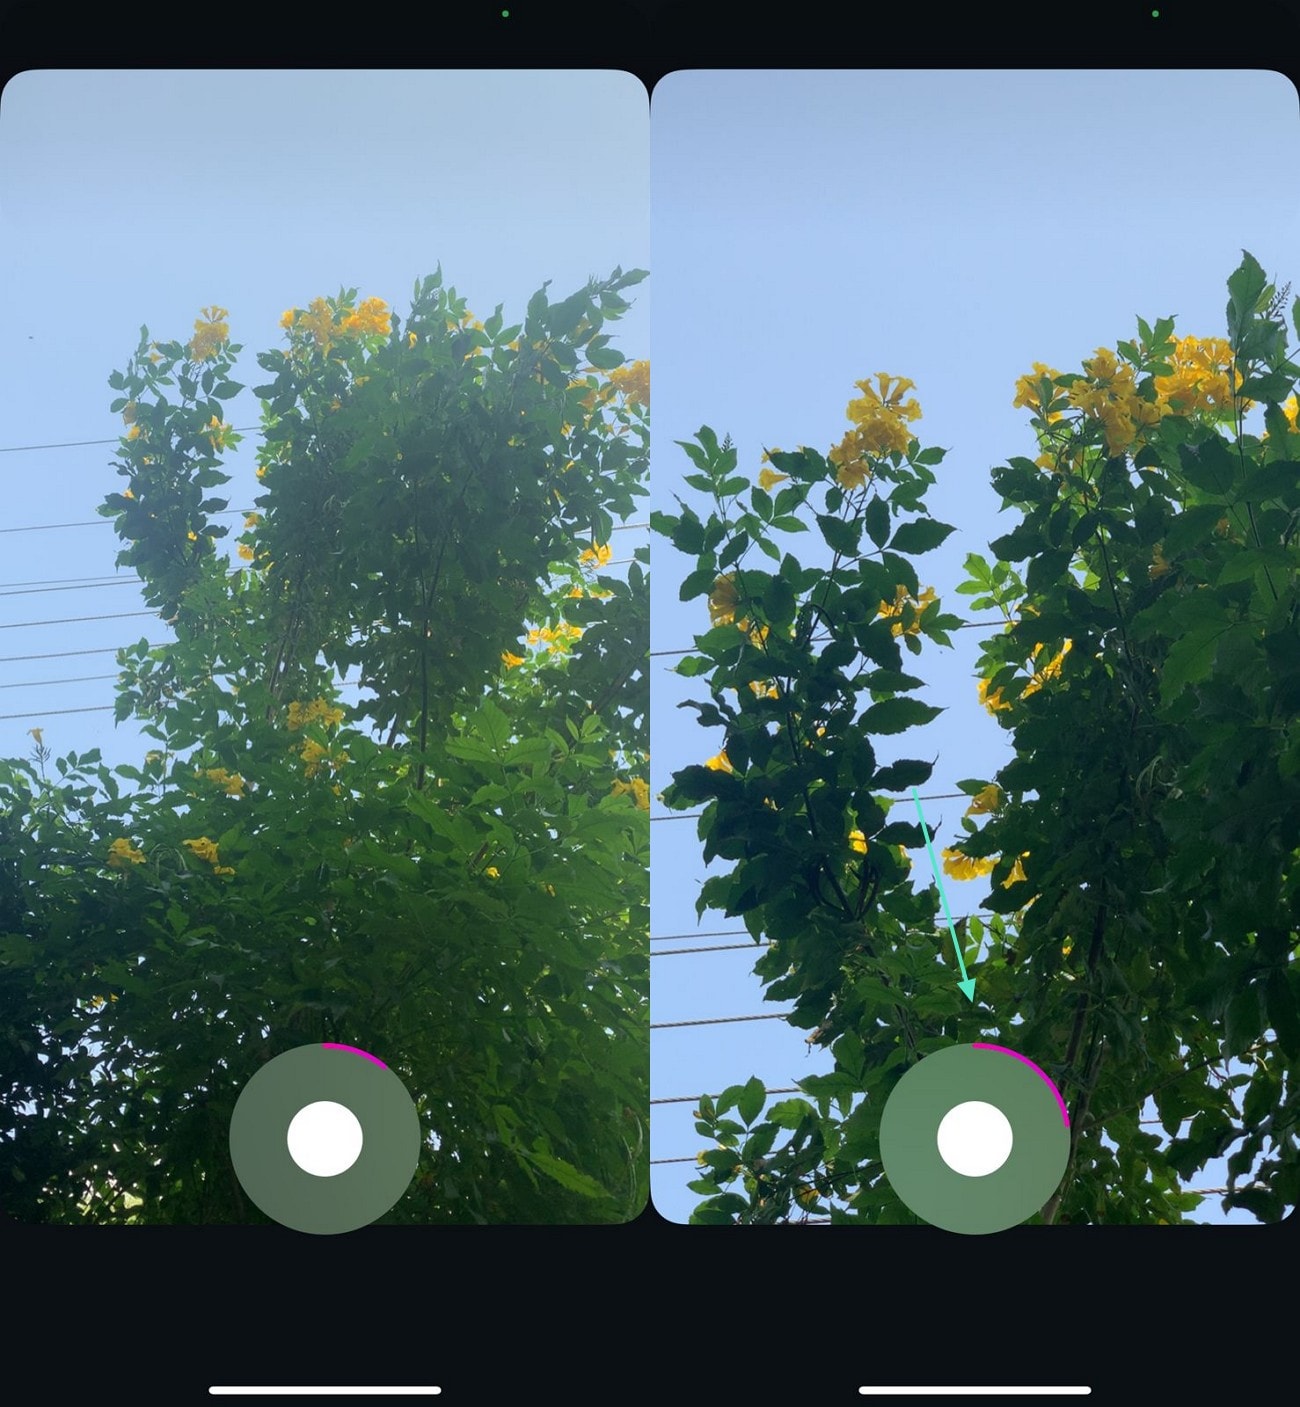
Method 2. Zooming in During the Capture
When you suddenly see an important detail while making a video, this is a workable option. This feature allows you to capture scenes like a rare bird without going closer to it. The instructions below will help you zoom in on Instagram while the video is recording:
Instructions. While your Story camera is open, press and hold the record button to start shooting a video. When you need to zoom in, move your finger upwards while recording. In contrast, slide your finger downwards when you need to zoom out.
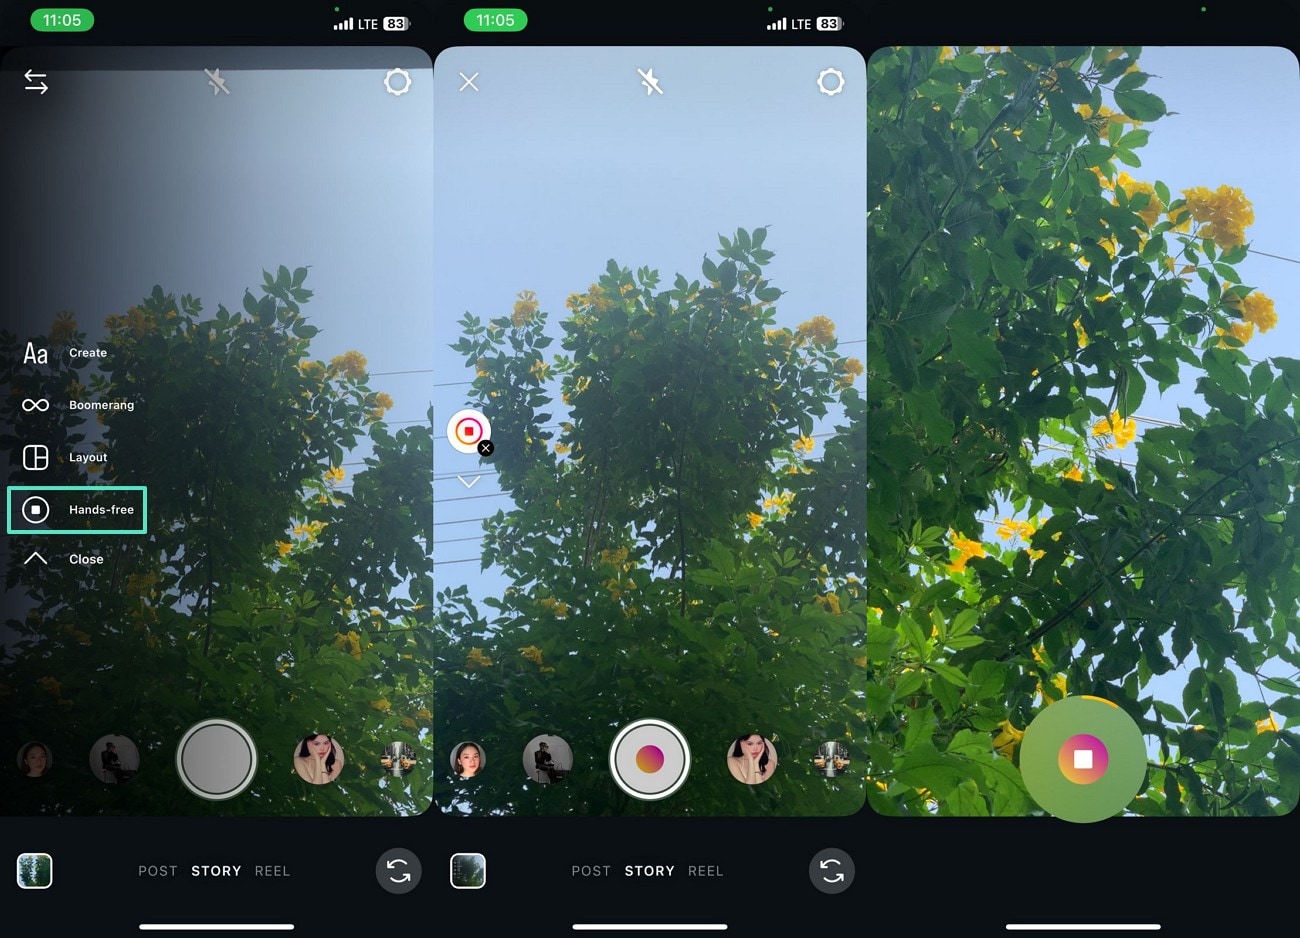
Method 3. Using the Hands-Free Mode
The Hands-Free mode on Instagram enables creators to record videos without holding the "Record" button. This helps them zoom Insta Story conveniently, without keeping the Record button pressed. Follow these instructions to easily zoom in while using the Hands-Free mode on Instagram:
Instructions. In the Story camera, access the left panel and enter the "Hands-Free Mode." Now, tap the "Record" button once to start shooting the video. When the video is recording, use your fingers to zoom in on important objects.
Part 2. Why Can't I Zoom In on Instagram Stories? (And How to Fix It)
Not being able to zoom in on stories can be handicapping for Instagram users. The following list features the causes and solutions for why I can't zoom in on Instagram Story:
⚠️ Problem 1. Using the Wrong Gesture
On Instagram Stories, zooming works differently, and a pinch gesture will not work. Using the pinch during video recording does not do anything.
💡 Solution 1. Use the Fingers Correctly
The right way to zoom in is to use one finger to press the record button. Another finger should slide up or down to zoom in or out.
⚠️ Problem 2. App Glitch or Outdated Version
Having occasional bugs or an outdated app can be a reason for this zooming-in issue.
💡 Solution 2. Update the App
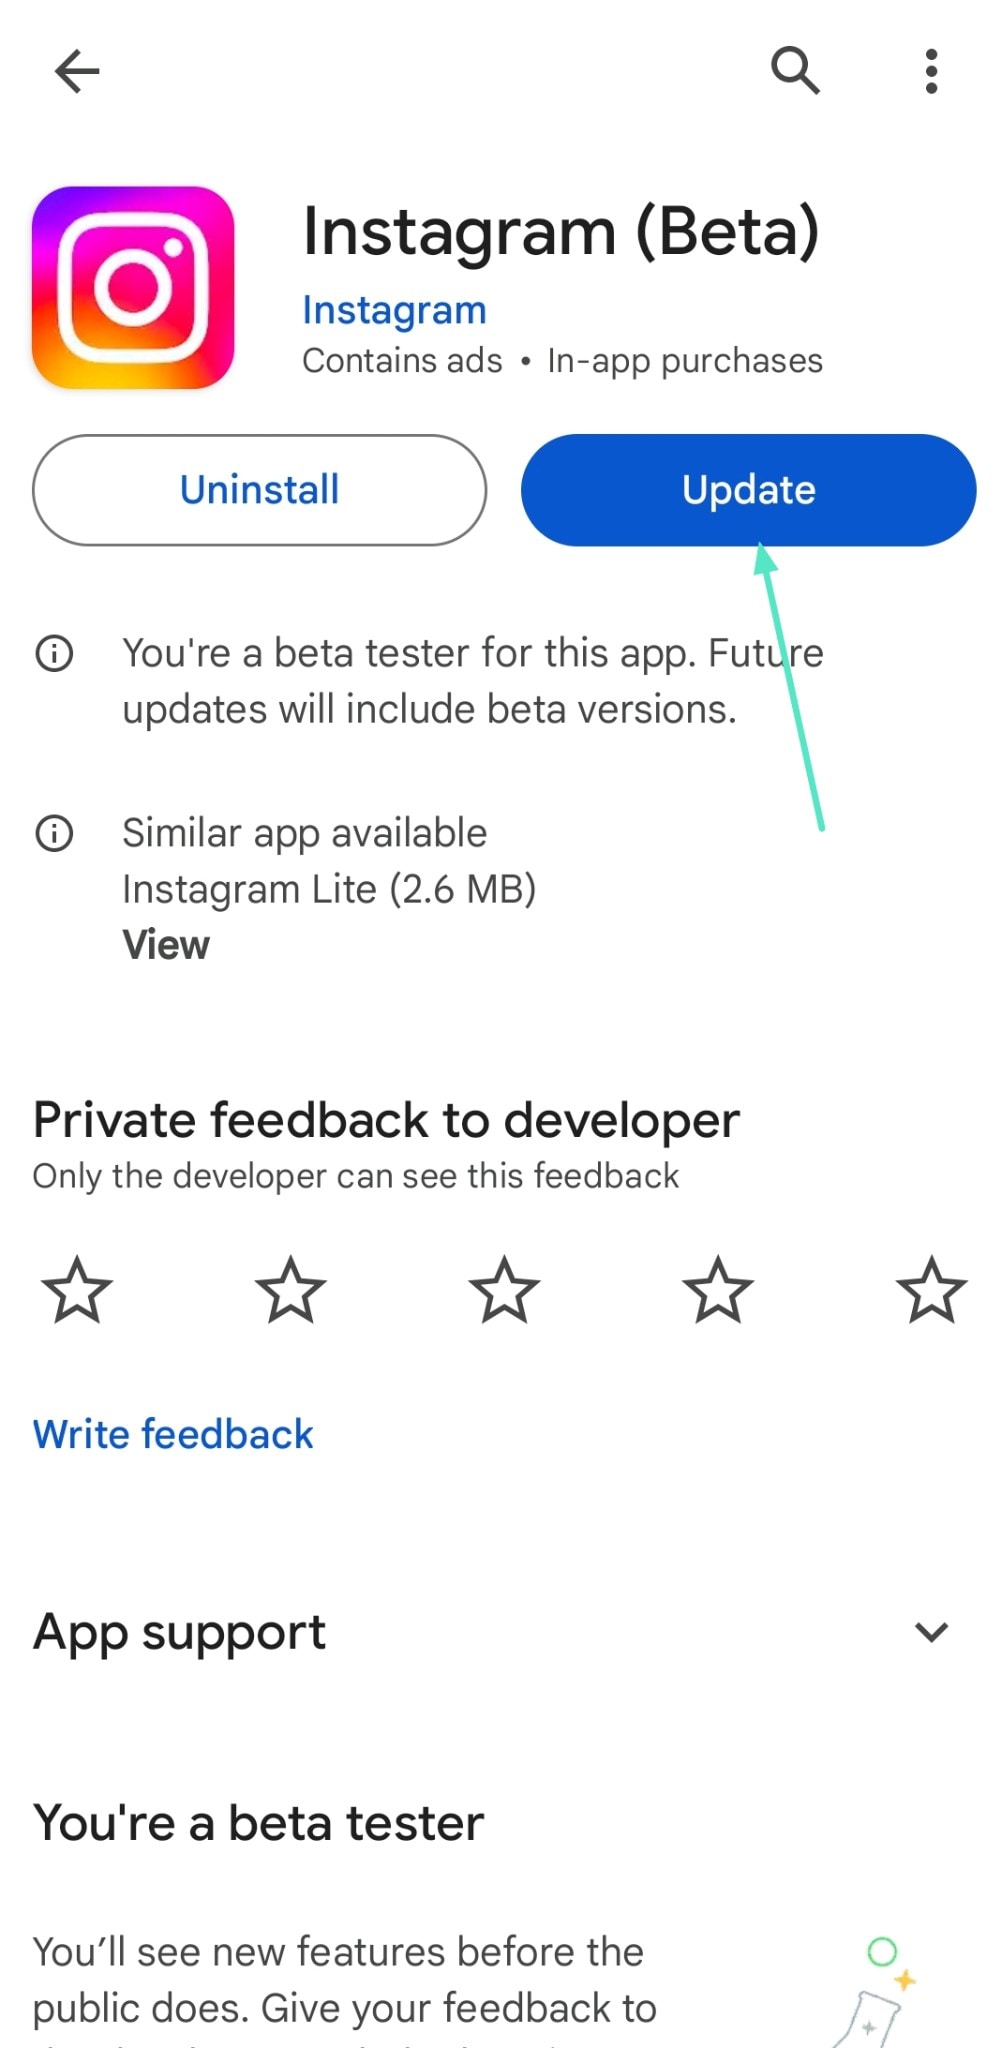
To remedy this, update the application from the Play Store or App Store. The instructions below will guide you on how to do it:
Instructions. From App Store or Play Store, search for "Instagram" and select the "Update" button if an update is pending.
⚠️ Problem 3. Device Compatibility
Older phones or low-end devices may not support all Instagram camera features, including smooth zoom Insta Story.
💡 Solution 3. Change Devices
Try another device with Instagram installed. If it works there, your phone hardware may be the limitation.
⚠️ Problem 4. Camera Permissions Not Granted
If Instagram doesn't have full camera permissions, certain features can malfunction.
💡 Solution 4. Grant Permissions
Giving your Instagram app the necessary permissions will help you zoom in and out. Follow these guidelines offered across the iOS interface, which will also allow Android users to get an idea on granting permissions:
Instructions. In your Settings app, access the "Apps" section and go for your installed "Instagram" app. Upon leading onto a new window, toggle on the "Camera" permissions.

⚠️ Problem 5. Instagram Testing or Regional Restrictions
Instagram features act differently in all regions of the world, making the zoom utility complicated.
💡 Solution 5. Enable VPN
Log in with another account or enable your VPN to change the IP Address. You will be able to enable VPN in the Settings app only if you have a VPN app installed. Follow these guidelines to turn the VPN on your phone:
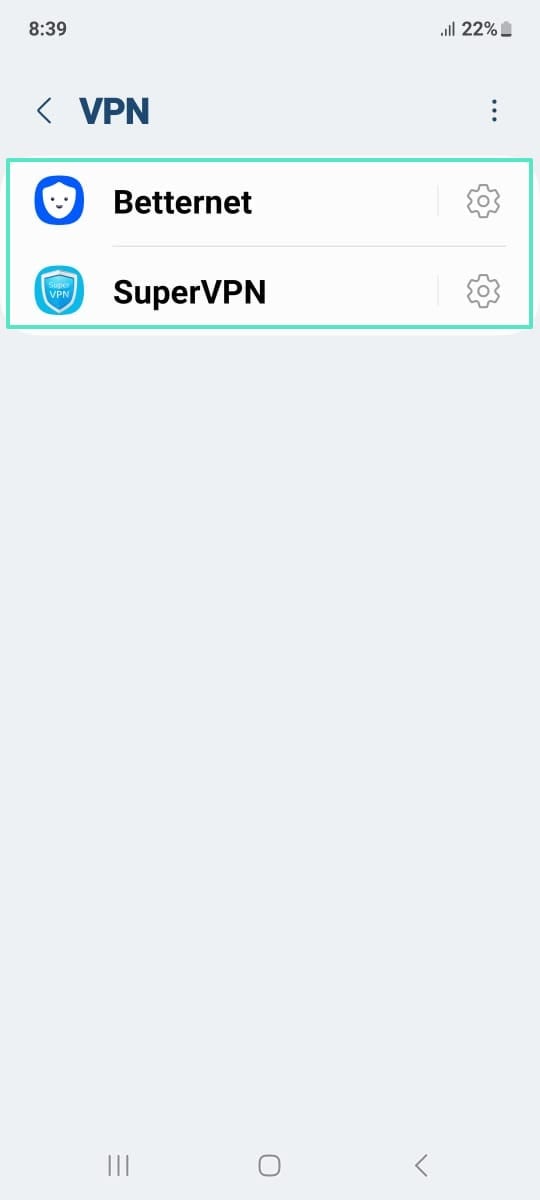
Android
Instructions. After opening your device's "Settings," lead into the "Connections > More Connection Settings" option. Enable VPN by selecting "VPN" and tapping your selected VPN app. You will then be taken to the app's interface, where you can turn it on.
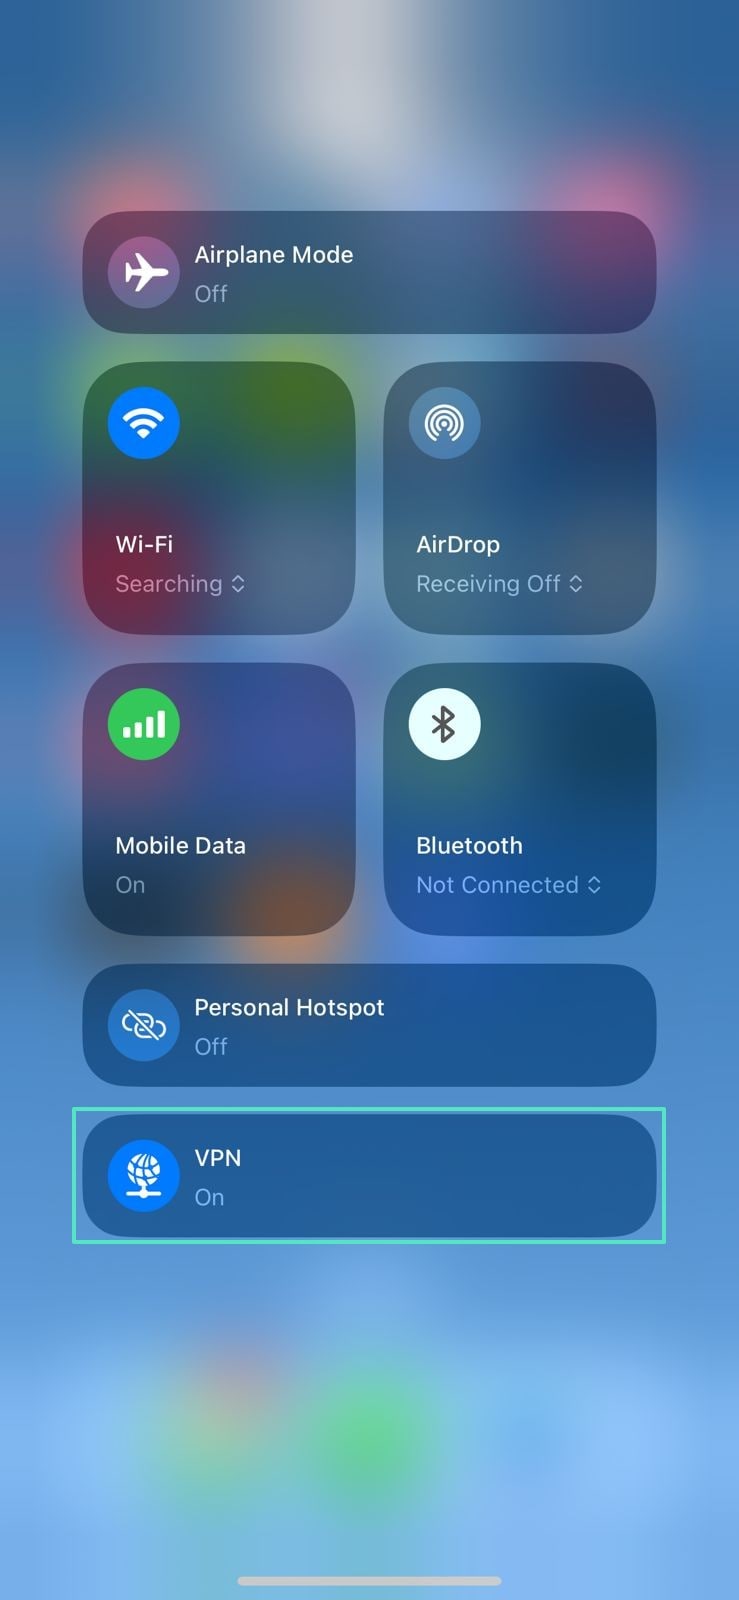
iPhone
Instructions. To enable VPN on iPhone, swipe down to unveil Control Center and tap the "VPN" icon to turn it on.
⚠️ Problem 6. Temporary App Bug
Instagram servers or app processes sometimes glitch and block camera functions, including Insta zoom highlights.
💡 Solution 6. Restart Your Phone
To fix the bug, close all apps and reopen Instagram. If it does not help, restart your phone and open the app again. For that, you simply need to use your "Power" button on your smartphone for accessing the phone reboot options.
Part 3. Edit Instagram Videos with Wondershare Filmora
We are now aware of the potential issues that may be causing the "Instagram Story zoom not working" problem. However, it is better to use a foolproof method that can never go wrong. With Filmora, you can benefit from various methods of magnifying videos. Besides conventional pinching zoom, users can also avail themselves of advanced expansion features. This platform allows you to pan as the zoomed video playback starts.
In addition to size adjustment, Filmora offers various visual enhancement features that help you breathe life into your videos. With a variety of filters and effect overlays, you can decide the vibe of your video. When you import multiple videos, the built-in transitions will help you smoothly shift from scene to scene. Besides the visuals, users can also elevate the audio quality using the dedicated audio adjustment panel.
Using Filmora to Zoom Videos Through Various Methods
As stated, Filmora offers an array of zoom features for videos and images. The following section covers each method of Insta Story zoom in detail:
Method 1. Pinch in the Preview Window
First things first, Filmora offers the conventional pinch zooming method. This utility enables users to have a clear view of every object in the frame. As you magnify the frame, you can also pan and focus on every object individually. Follow these instructions for zooming in using this Filmora feature:
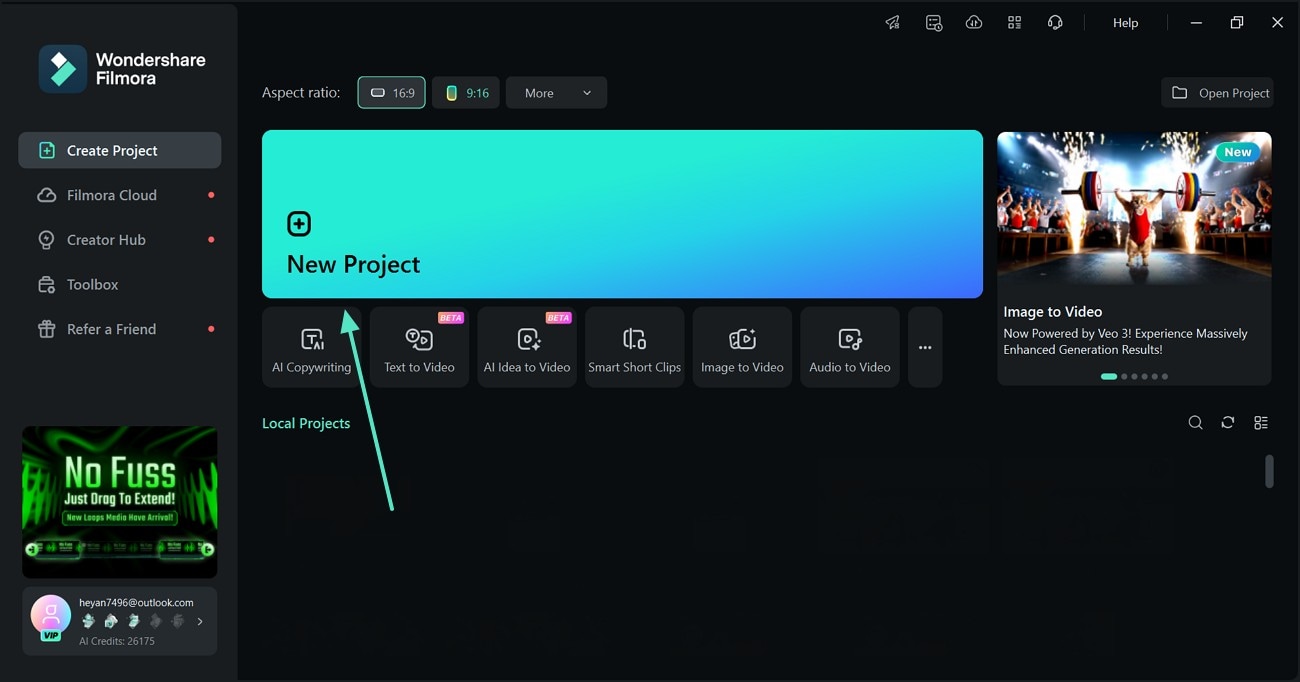
- Step 1. Start a New Project. To begin with, select the "New Project" button and import a video in the following interface.
- Step 2. Magnify the Frame and Pan. After dropping the video to the timeline, use your fingers to zoom in on the frame. Using the panning window on the bottom left, you can pan to view each part of the screen.
Method 2. Adjust the Zoom Level
To have a personalized magnification impact, you can adjust the zoom level using the presets. This utility allows you to magnify the frame up to 800% the original size. Users can also enter a custom figure and get the desired zoom. This guide features instructions on using this zoom-in on Instagram Story method on Filmora:
- Step 1. Select a Zoom Value. First, click the "Settings" option below the preview window and hover your mouse over the "Zoom Level" option. From the extended menu, pick a magnification level to get the desired outlook. You can also scroll through the menu and add a "Custom" value.

- Step 2. Pan and Zoom. When the frame is zoomed in, use the panning window on the bottom left to move around the scene comfortably.
 secure download

Method 3. Fixing the Aspect Ratio
Another way you can magnify a frame is by adjusting the aspect ratio. Choosing a different size lets you make the video look smaller or bigger. Besides setting a freestyle aspect ratio, you can lock the resolution to get a proportionate outlook. In addition to using the aspect ratio presets, users can pick a custom size of their own. Follow these instructions to learn how to use this method of zoom Insta Story:
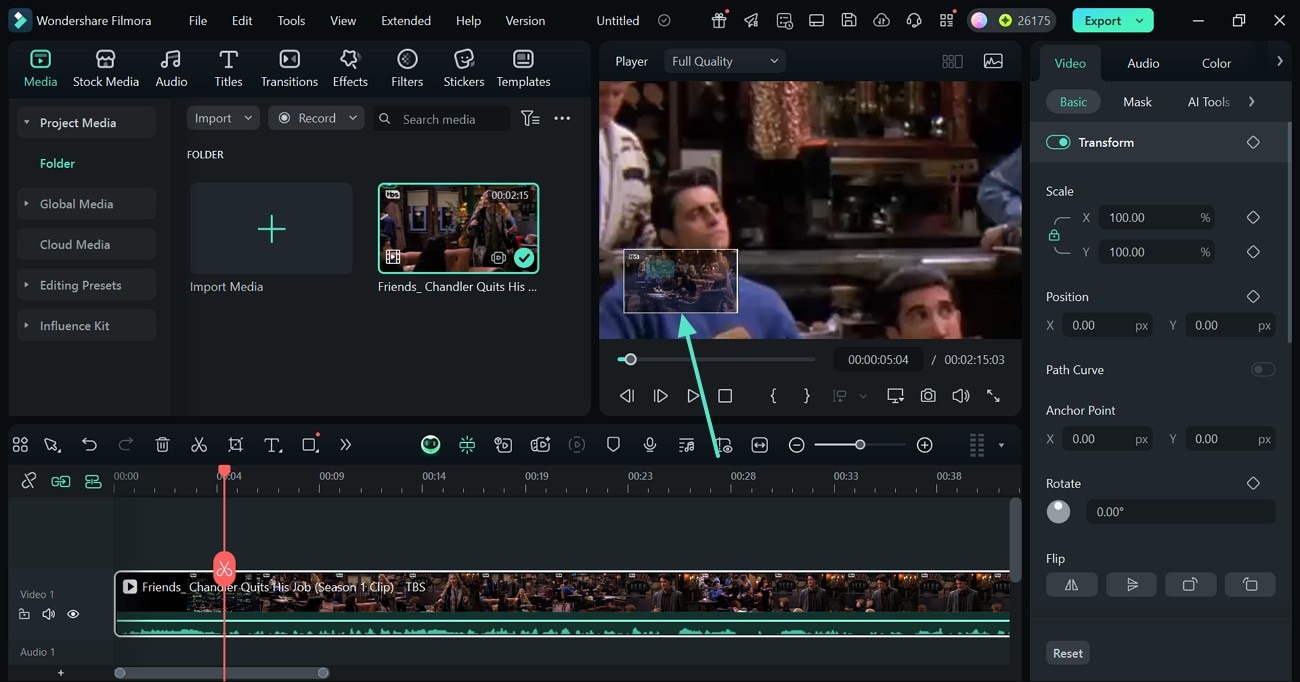
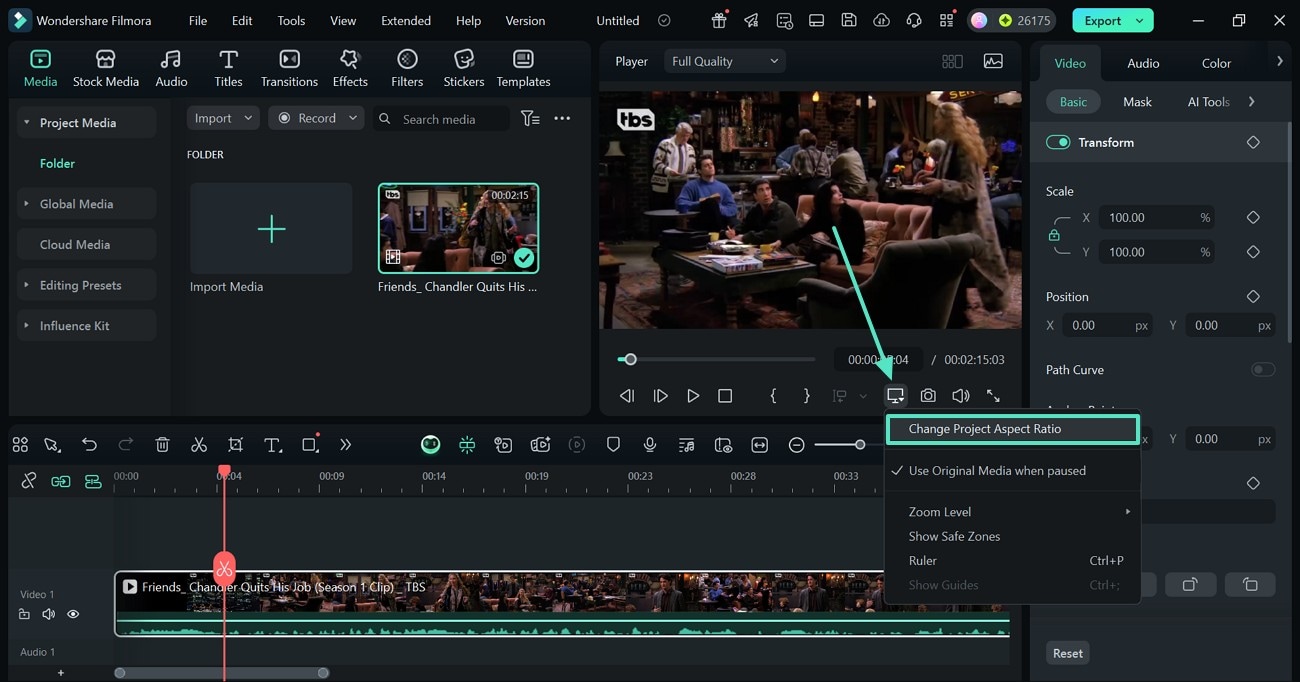
- Step 1. Access the Aspect Ratio Window. To start, press the "Settings" icon at the bottom right of the preview window and select the "Change Project Aspect Ratio" option.
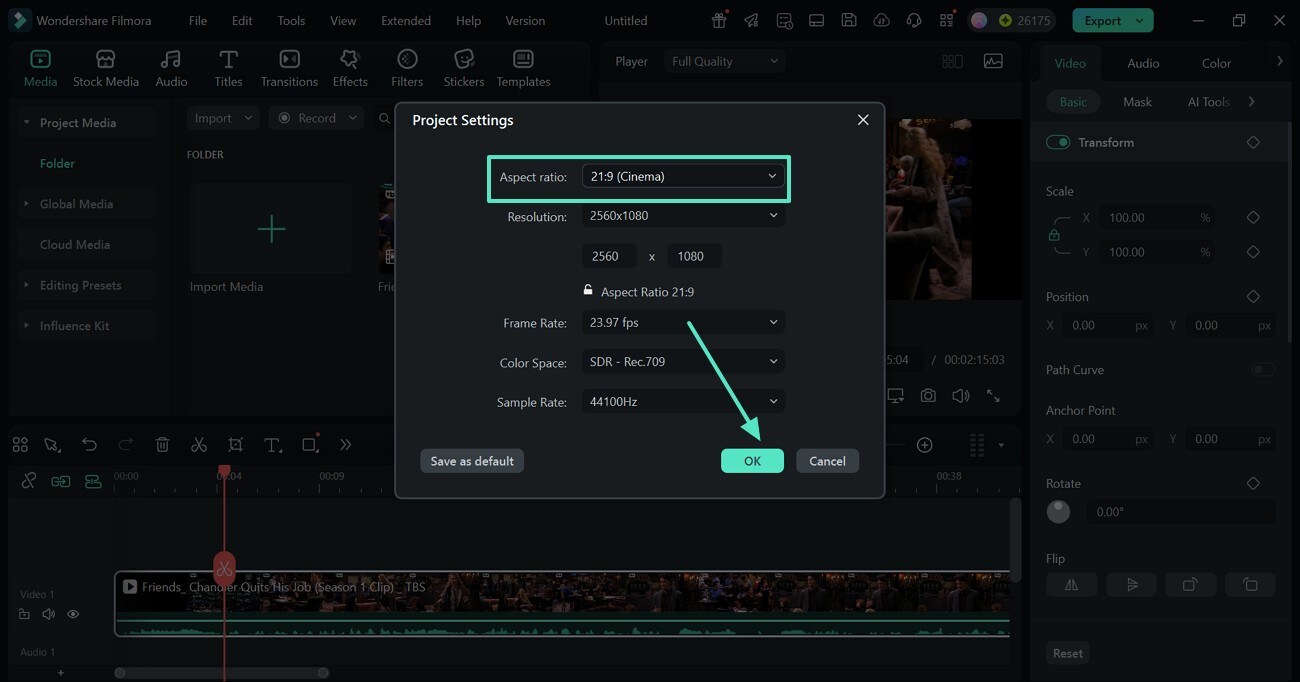
- Step 2. Set an Aspect Ratio. When the "Project Settings" window unfolds, select the desired "Aspect Ratio" from the presets. Click "OK" to apply the chosen aspect ratio to the frame.
Method 4. Use the Crop and Zoom Technique
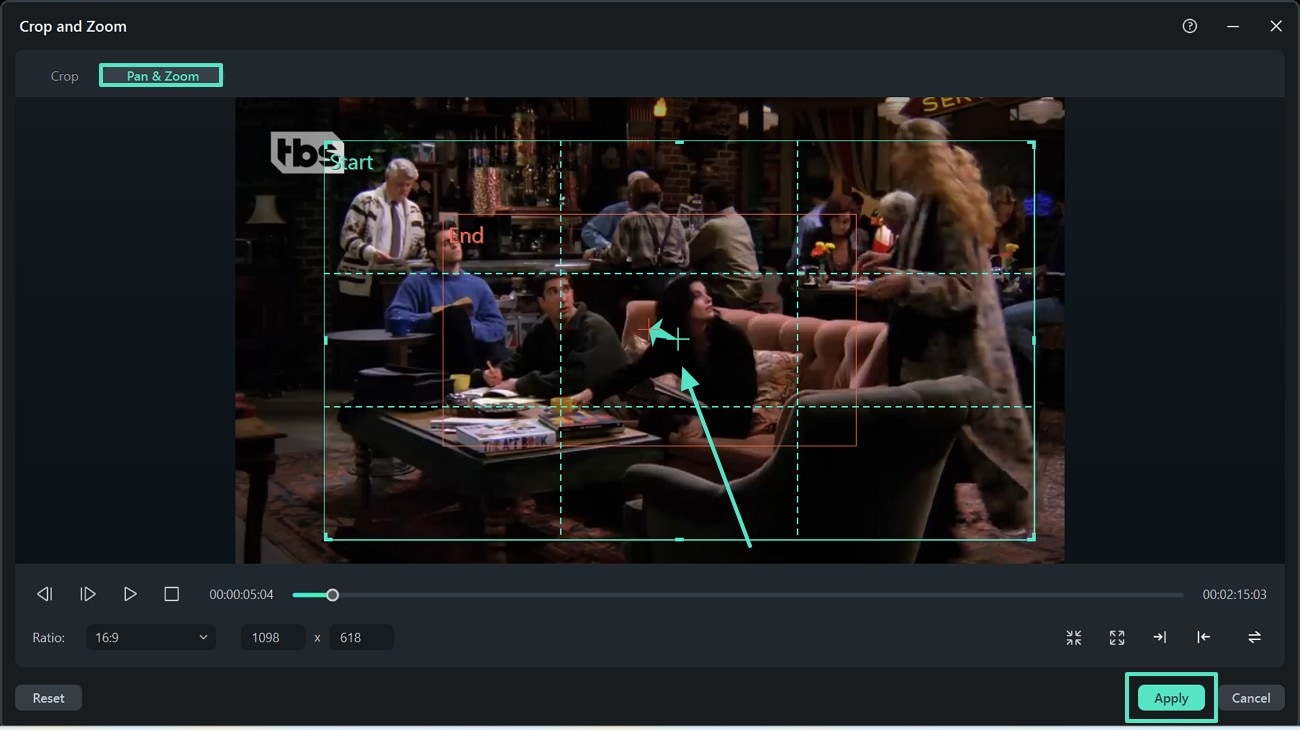
With the Crop and Zoom method, users can resize the frame while focusing on the key objects. The Pan and Zoom window allows you to set a preset aspect ratio, along with the direction in which the user wants to zoom in. Follow the instructions below to learn how to use this method of Insta Story zoom Filmora:
- Step 1. Select the Crop and Zoom Option. To begin with, access the video timeline and right-click on it to select the "Crop and Zoom" option.
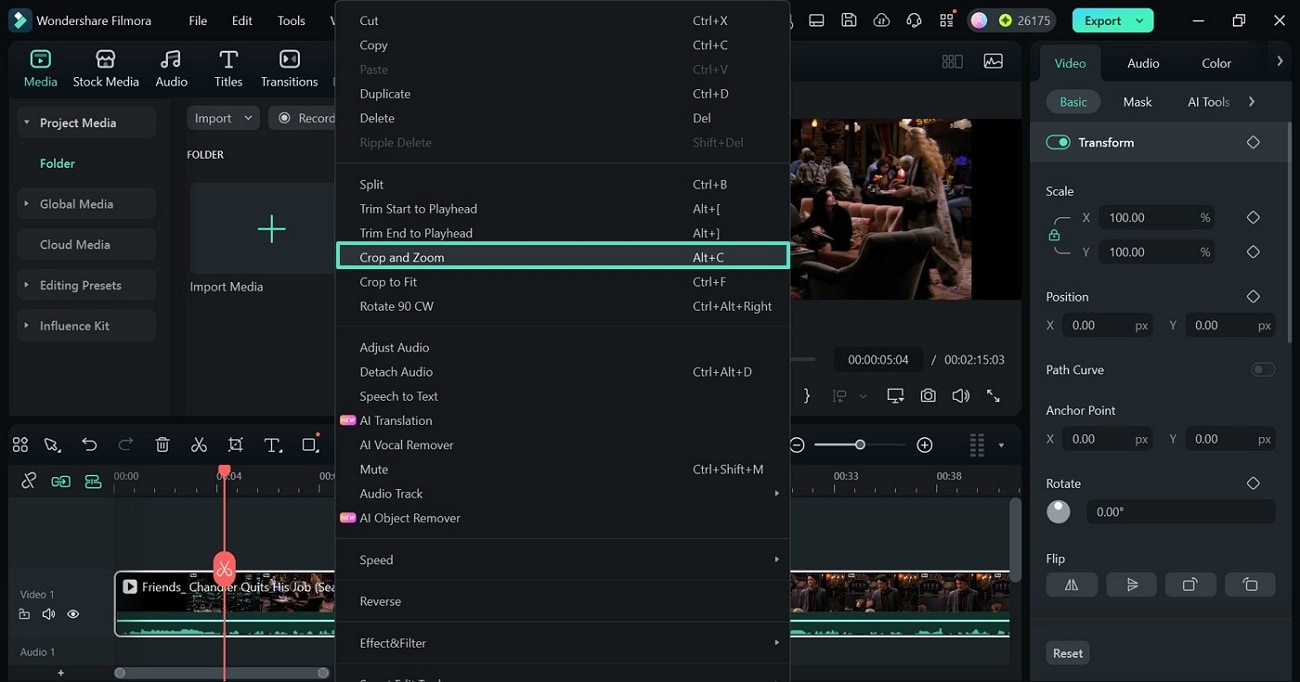
- Step 2. Enter the Pan and Zoom Window to Continue. In the "Pan and Zoom" window, use the cropping box to manually resize the video. Now, drag the "Pan" arrow in the direction where you want the zoom to progress. Once done, click the "Apply" button at the bottom right and set this zoom to the video.
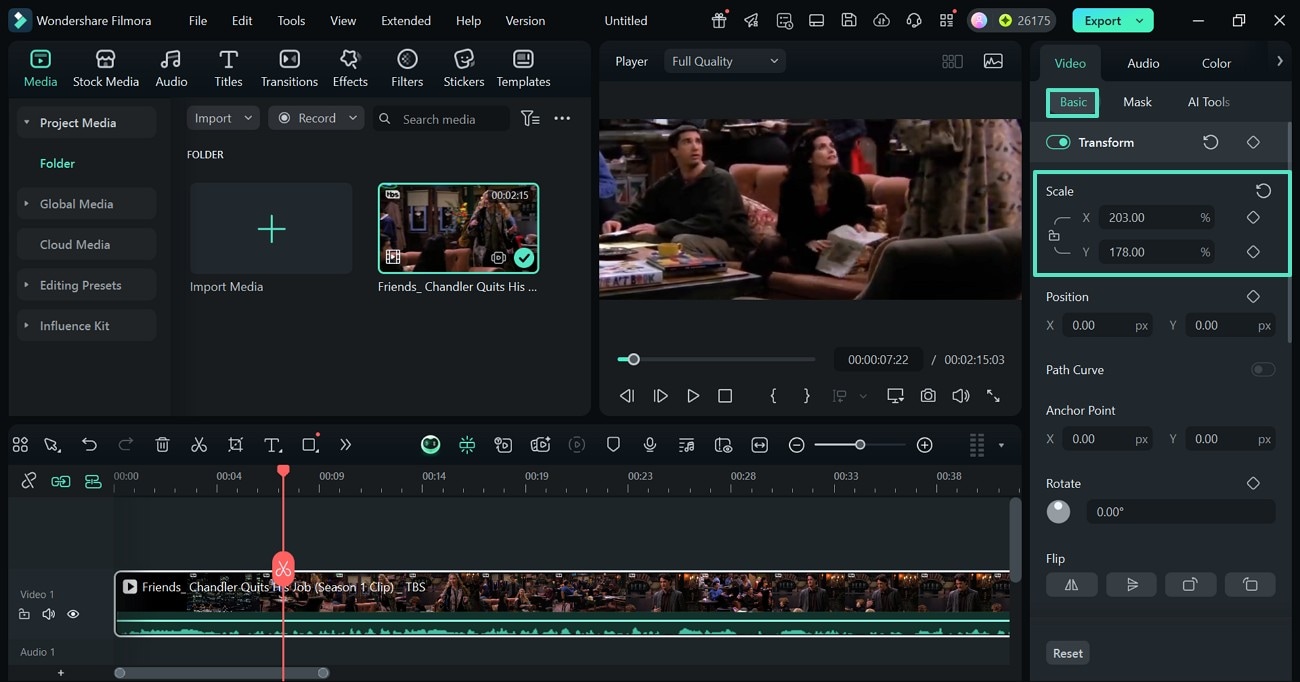
Method 5. Use the Basic Video Panel to Zoom In
In addition to using the above-mentioned zooming methods, you can benefit from the right panel to adjust the magnification level. This technique allows you to keep a check on the zoom levels by entering a precise value. The following guide features detailed instructions on using this technique for Insta zoom highlights:
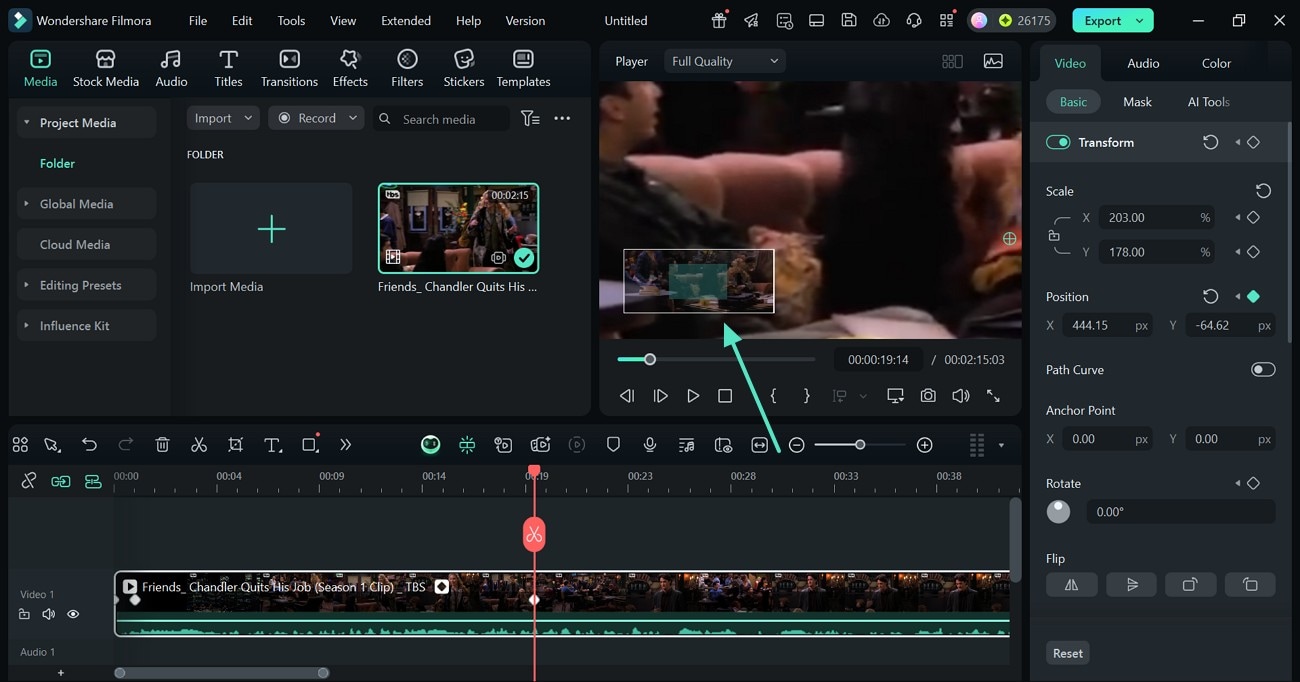
- Instructions. Pick a Scale. First, select the video timeline at the bottom to unfold the right panel. Here, enter the "Basic" settings and use the "Scale" section to type a suitable "X" and "Y" ratio. Besides typing, you can also bring your cursor to the "X" and "Y" fields to press and drag until you get the desired value.
secure download
Method 6. Apply a Zoom-in Animation to the Video
When you need to playfully zoom in and out in the frame, this method is right for you. You can use the zoom in and out video animation effects and get a significant frame adjustment. Similarly, the zoom-out asset shrinks your frame to the smallest possible size. Follow these instructions and learn how to use this Story highlight cover zoom:
- Step 1. Access the Video Animation Panel. To begin with, select the video timeline and use the "Video" panel on the right. Here, enter the "Animation" section and double-click to apply the "Zoom In" preset. You can also choose the "Zoom Out" option to shrink the video size.
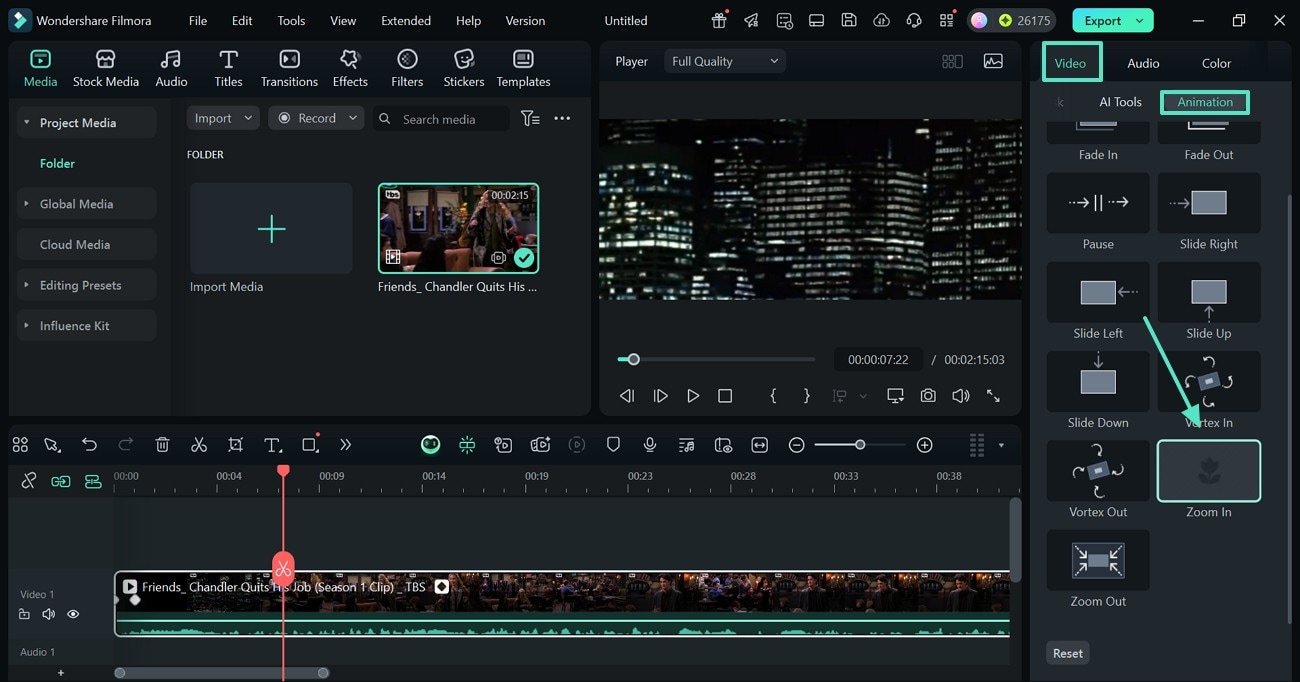
- Step 2. Use the Panning Window for Frame Adjustment. When the effect has been applied, you can use the "Panning" window to adjust the frame where you need it.

Method 7. Use the Auto Reframe Feature
If you want to adjust the frame of the entire video by zooming in, the Auto Reframe utility is the best for you. It enables users to pick an aspect ratio and adjust the frame as they need. You can draw the viewer's focus to one object by drawing the frame around it. Follow these instructions to learn how to use this zoom effect Instagram Story on Filmora:
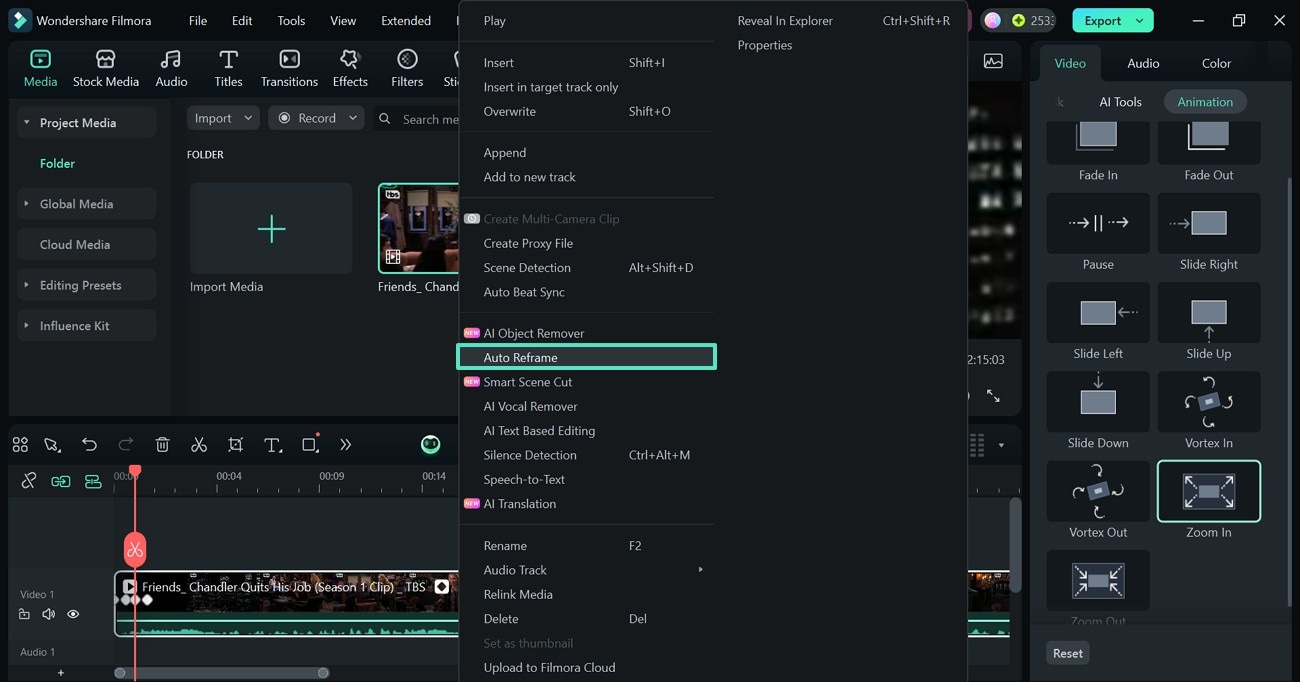
- Step 1. Select the Auto Reframe Option. To begin with, select the video timeline and right-click on it. Now, select the "Auto Reframe" option from the pop-up menu.
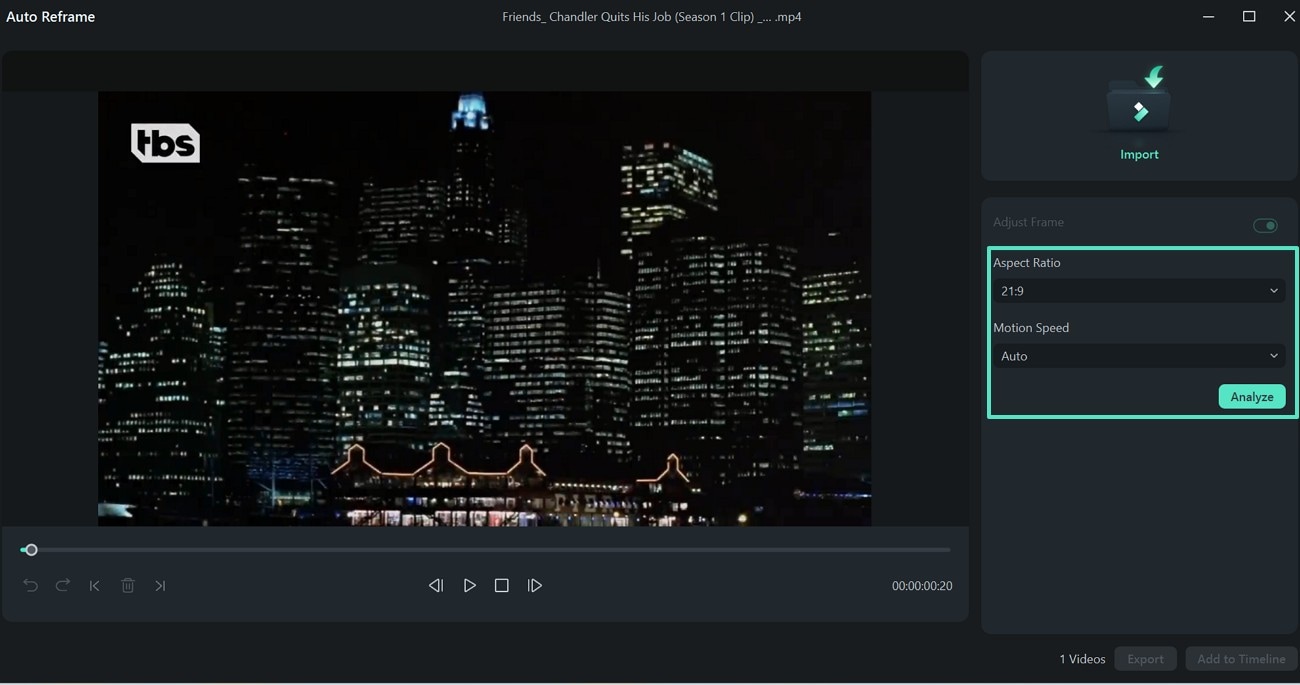
- Step 2. Pick an Aspect Ratio to Analyze the Frame. When the "Auto Reframe" window opens, select an "Aspect Ratio" and click "Analyze" to let the AI scan the frames.
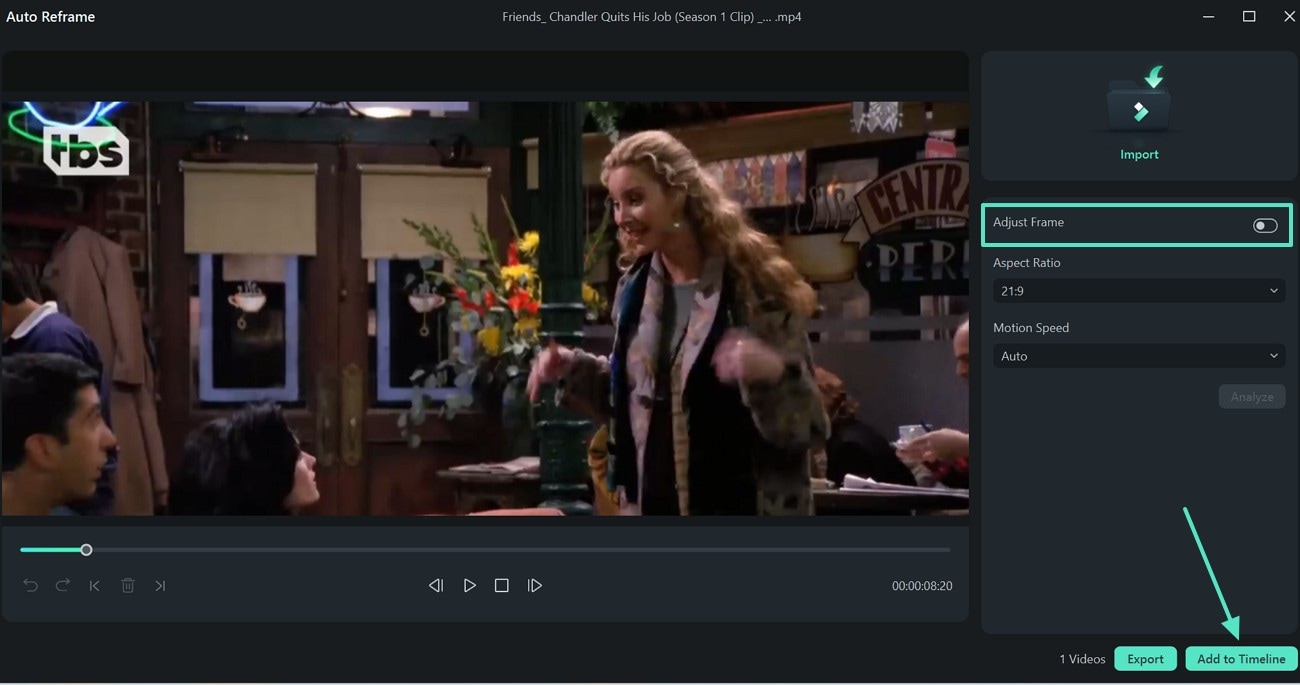
- Step 3. Disable the Adjust Frame Option. When the preview window shows the desired scene or key object, disable the "Adjust Frame" toggle to stop the scanning. Now, select the "Add to Timeline" button on the bottom right to edit the video.
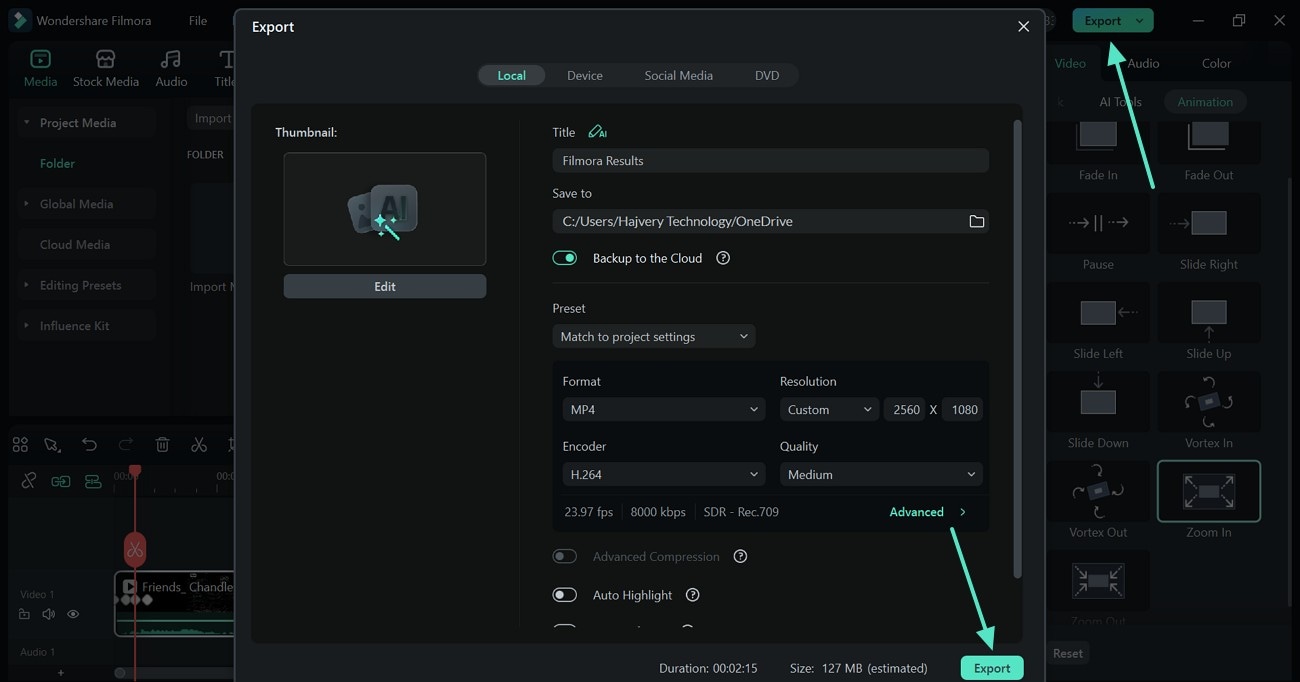
- Step 4. Export the Magnified Video. Once you have magnified the video, use the top-right corner of the screen to "Export" it.
secure download
Conclusion
In essence, zooming in on videos means you get to make the audience focus on key objects. Despite the efforts, many users fail to expand images and videos on stories. This article explored the reasons why you might be unable to Insta Story zoom. After looking into the fixes of each problem, we introduced Wondershare Filmora, which offers numerous methods of making frames bigger or smaller.
