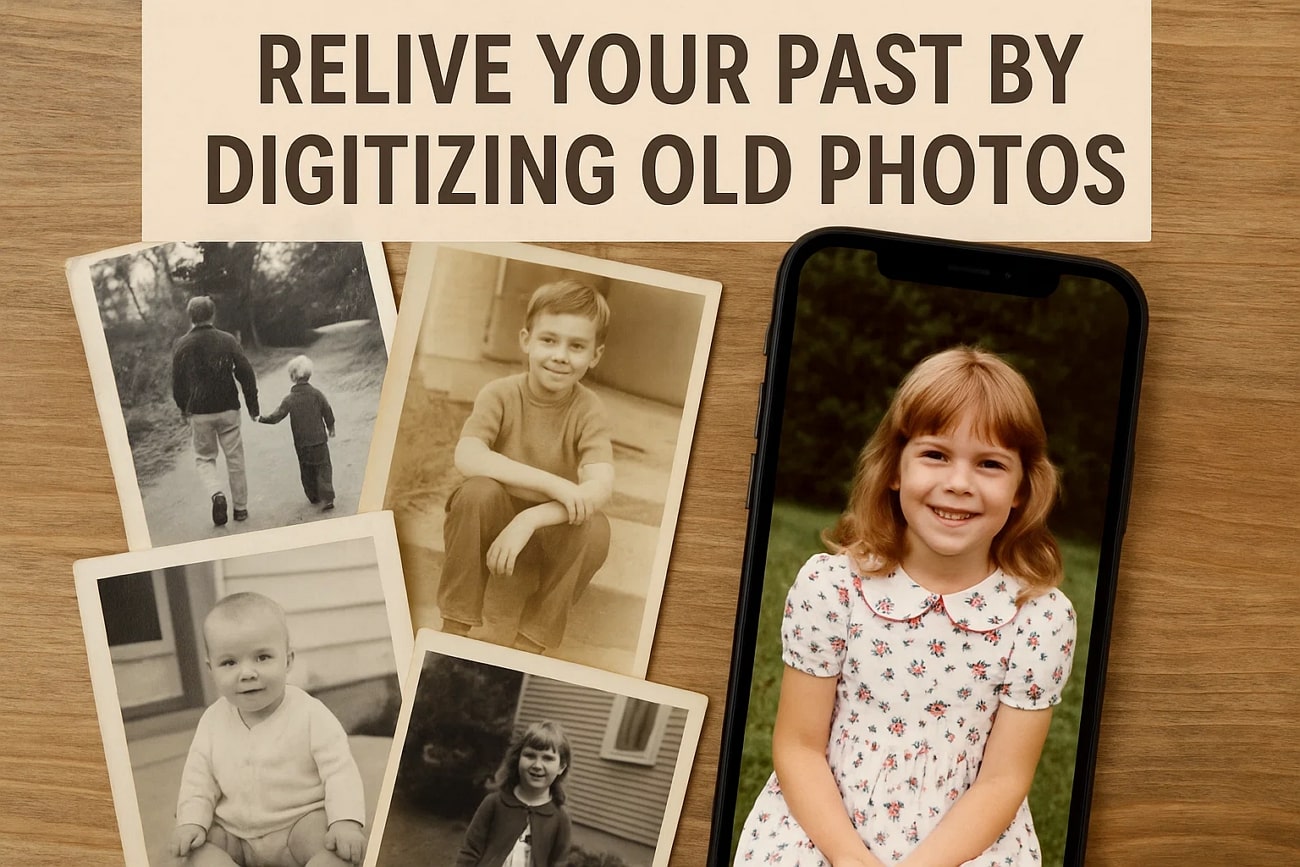
Timeless Memories: Cherish Your Reimagined Moment by Digitizing Images
James HoganOriginally published Jul 21, 25, updated Mar 26, 26
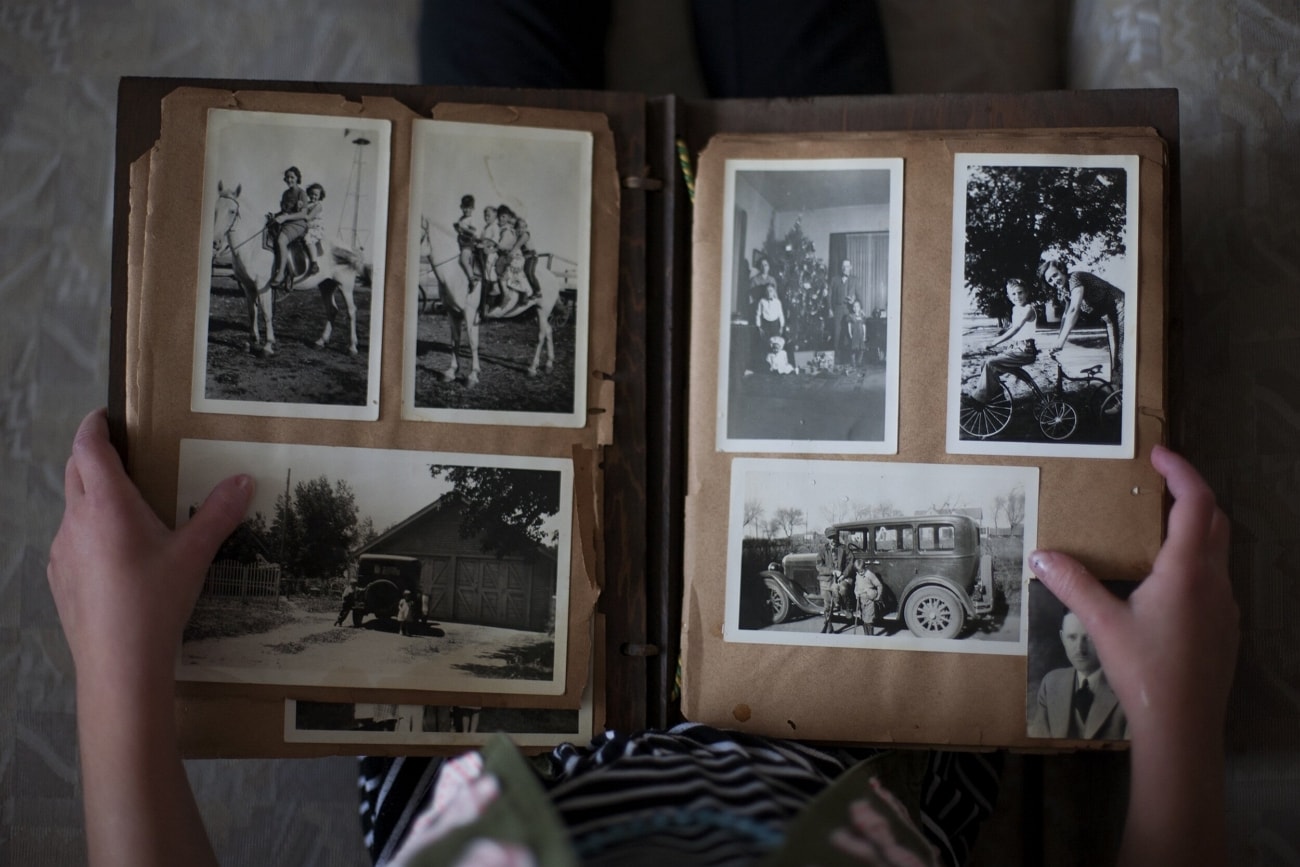
Imagine opening a box of faded family pictures, each telling a silent story of unforgettable milestones. As time passes, these old photos risk fading away, making it harder to enliven precious memories. Converting old pictures to digital format brings life back to a cherished past. Digitizing old photos ensures your history is remembered and celebrated for the next generations. This article will teach you ways to transform your old photos into videos.
Transforming old pictures enables preservation of your precious memories against deterioration and fading. By converting negatives into digital files, you can easily enhance your personal history for future generations. There is a list of 7 innovative ways to digitize old photos, along with their technical tips, as follows:
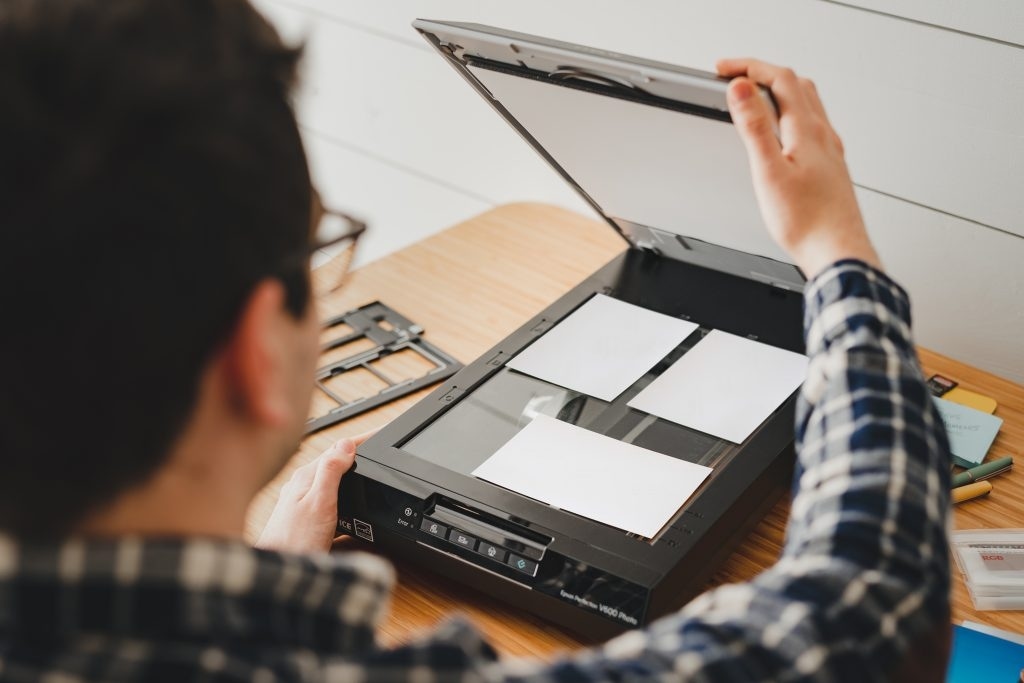
1. Flatbed Photo Scanner
Flatbed scanners offer a unique combination of high-resolution scanning and gentle treatment to irregularly faded prints. The flat and open surface of these scanners accommodates a wide range of photo sizes, providing image clarity, minimal damage risk, and color accuracy. Some techniques to digitize your photos are discussed below:
Clean both the scanner glass and the photo surface with a soft microfiber cloth to wipe out smudges.
Scanning vintage photos at 300 or 600 DPI is suitable for capturing fine details for restoration.
Save your images in TIFF or JPG formats, which are lossless and better for further editing.
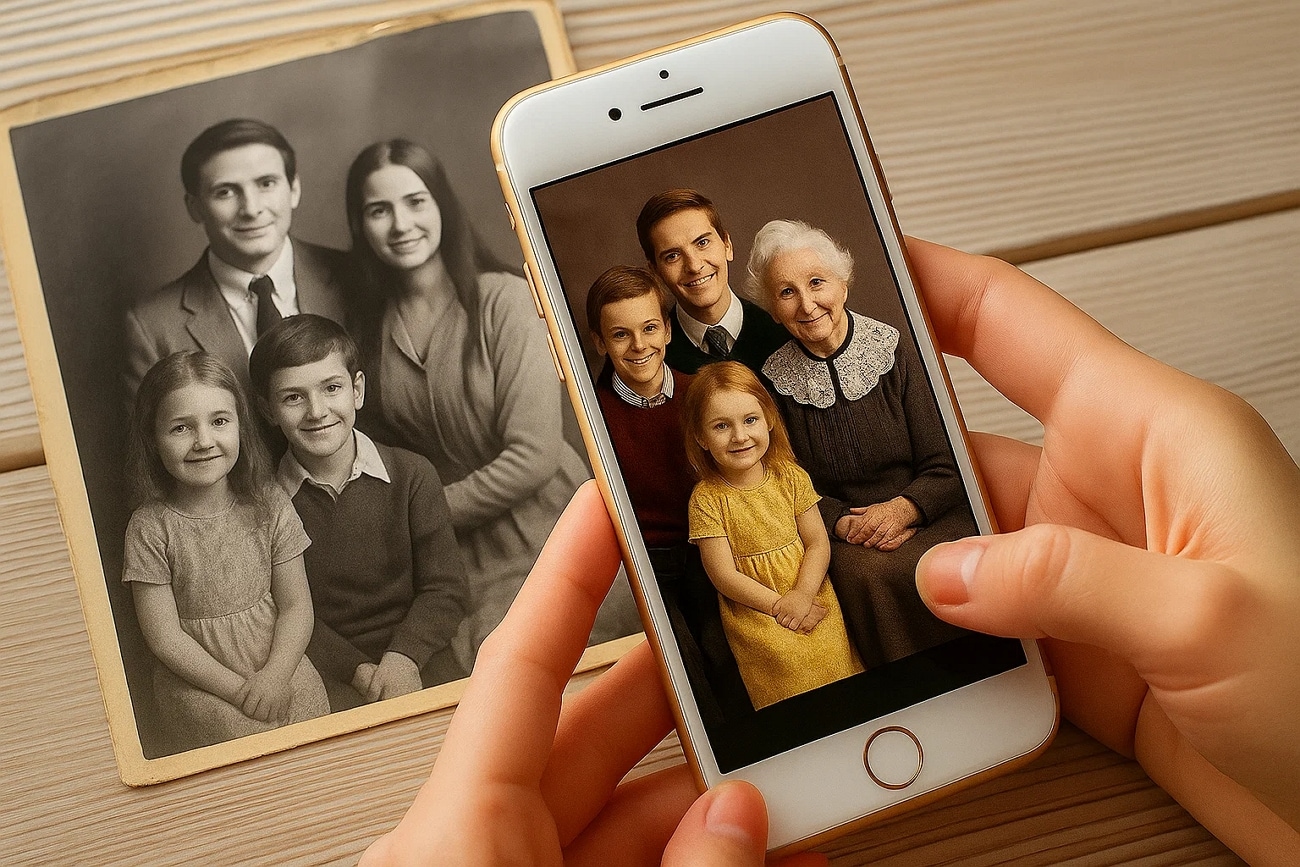
2. Photo Scanning Mobiles
Photo scanning mobile apps have revolutionized the way to turn old photos into video. These apps help you use your mobile phone to capture high-quality images, eliminating misalignment and glare. These AI tools simplify transformation using edge detection, auto-cropping, and glare removal. There is a list of digitizing pictures in a better way, mentioned below:
Photograph your images using soft indoor lighting or natural light to reduce glare and shadows.
Stabilize your phone utilizing a stand to correct the image perspective.
Many apps support batch processing to ensure efficiency and save time.
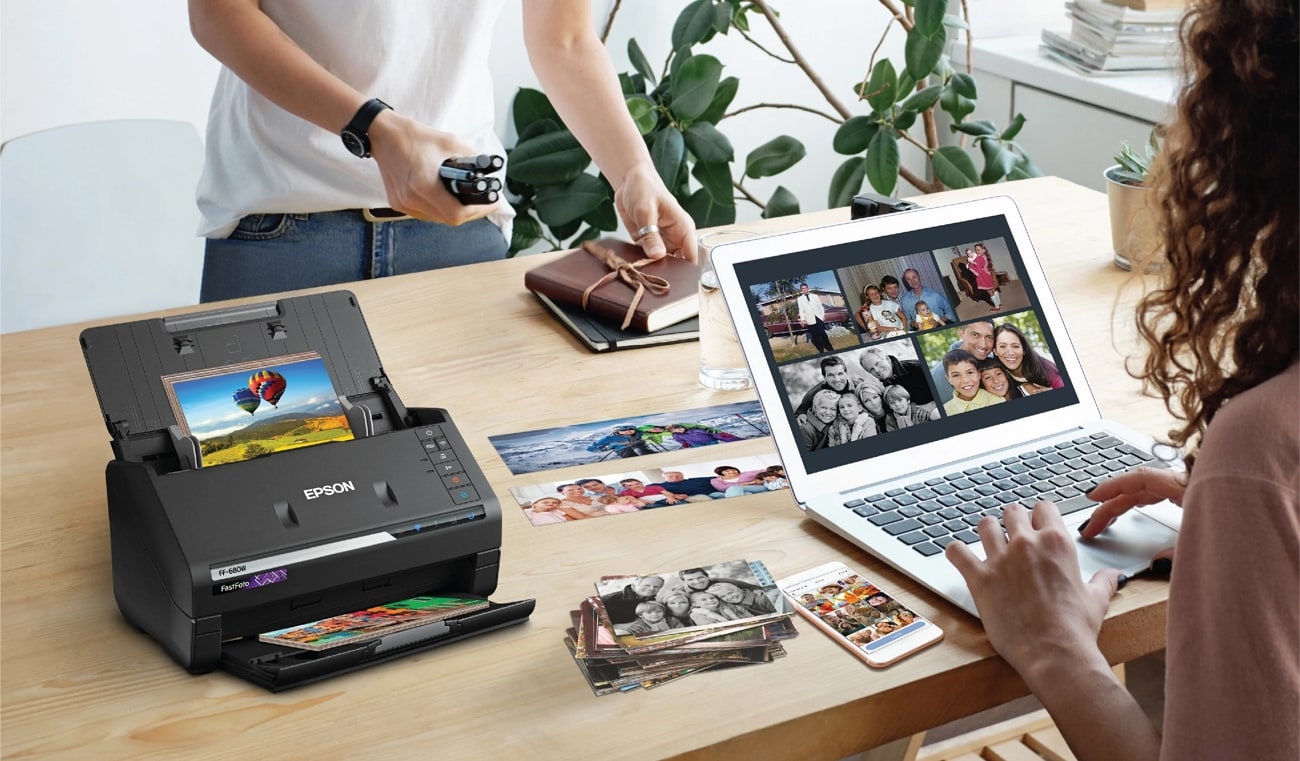
3. Bulk Photo Feed Scanners
These scanners include the Epson FastFoto FF-680w model, which is designed for extensive batch digitization and high-speed printing of time-worn photos. The intelligent software and advanced feeding mechanism streamline workflow consistency, reducing labor and time. Here are some technical tips for converting old photos to a digital format:
Carefully inspect the stack of vintage photos to avoid jams and brittleness.
Save time using software offered by scanners to detect and auto-split images for image stacks.
Inspect periodic cleaning and recalibrate the scanner if artifacts appear.
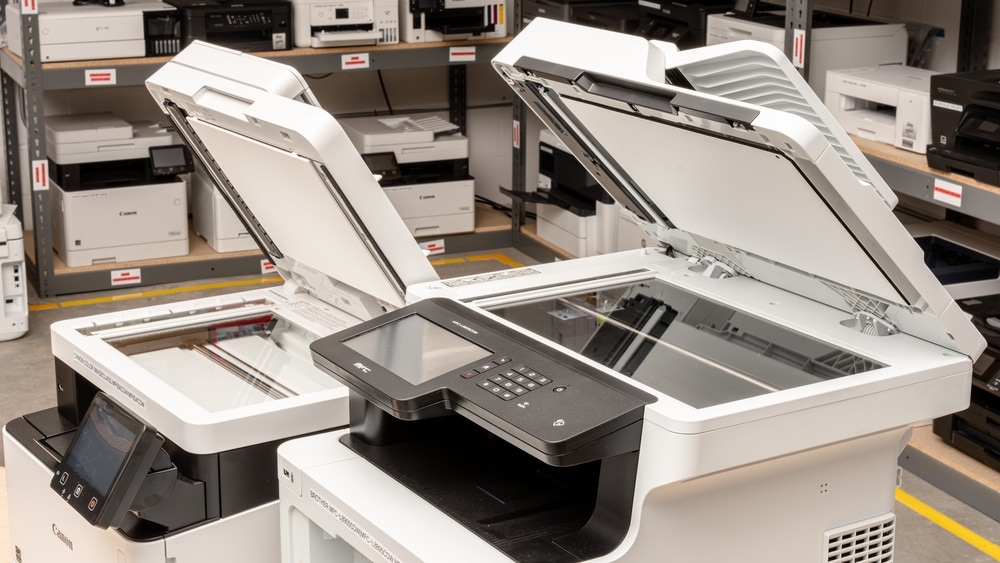
4. All-in-One Multifunction Printer
An all-in-one multifunction printer can combine printing, scanning, and copying in a single device, making it a cost-effective solution. MFPs offer sufficient resolution and image clarity for everyday photo digitization, making them ideal for home users. The tips for using MFP to digitize old photos are discussed below:
Select high-quality preset modes to improve sharpness, tonal range, and contrast.
Manual color adjustments are better for scanning your photos to avoid reducing details.
One photo scan at a time minimizes the risk of cropping mistakes or overlapping.
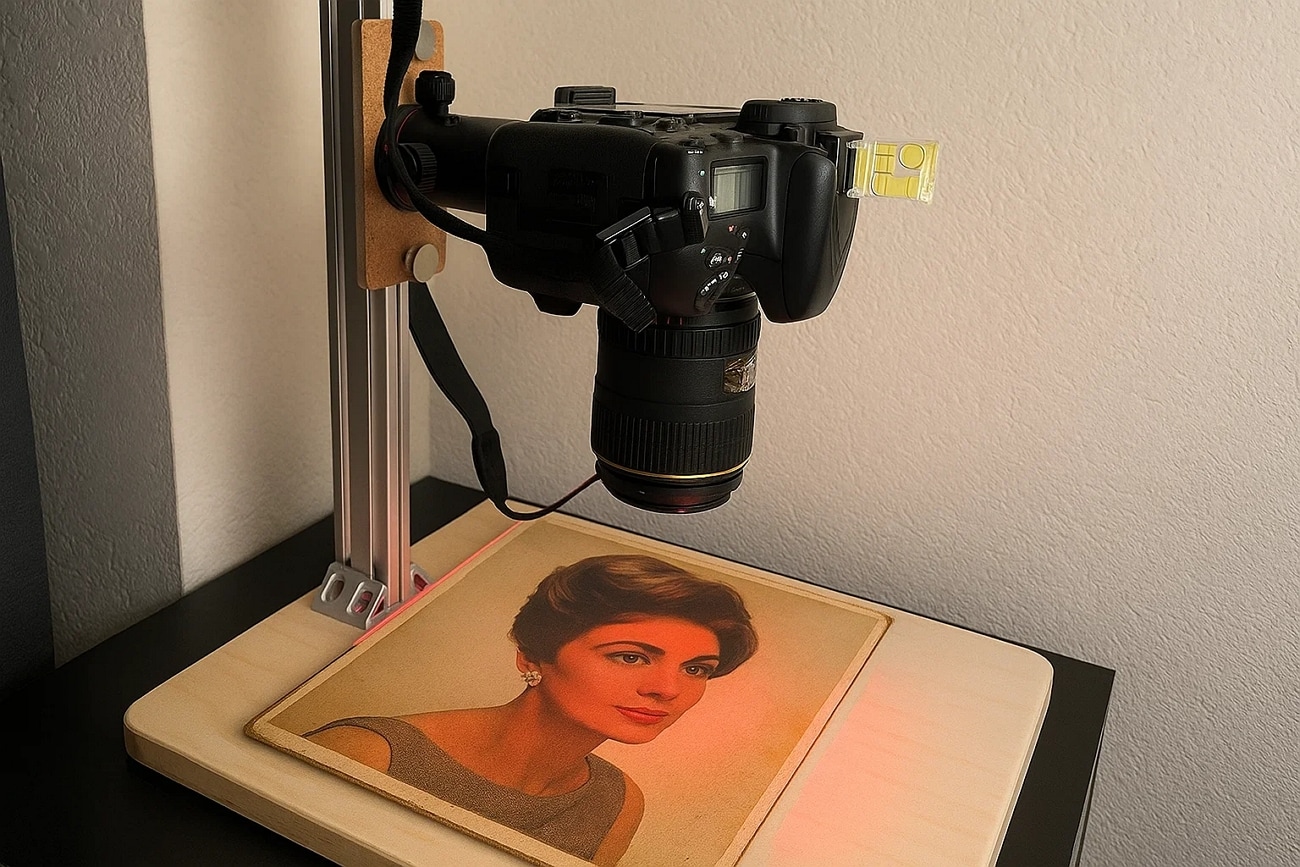
5. DSLR or Digital Camera Copy Stand
Using a digital camera copy stand or DSLR is a smart way to turn old photos into stunning, lifelike videos. This professional-grade digitizing service is available for framed and oversized images. This setup allows you to take control over composition and lighting to restore photos. Digitizing old photos can be optimized using the following tips:
Balanced lighting avoids color inconsistencies and glare from your artwork.
Using a tripod stand eliminates shaky movements, resulting in crisp, clear images.
Go for photo editing tools to remove excessive background and make necessary color adjustments.
6. Professional Photo Digitizing Solutions
These services offer a facility to convert physical photos into studio-quality digital formats. Mailing your photos to professional digitizing services helps streamline workflows for bulk processing. Digitizing old photos with options for long-term accessibility and backup is available, referring to more tips in the following:
Opt for services offering both TIFF and JPEG formats for editing and archiving.
Confirm the scanning DPI from the provider to get suitable reprinting or enlarging.
Ensure the process of returning, such as tracking, packaging, and insurance.
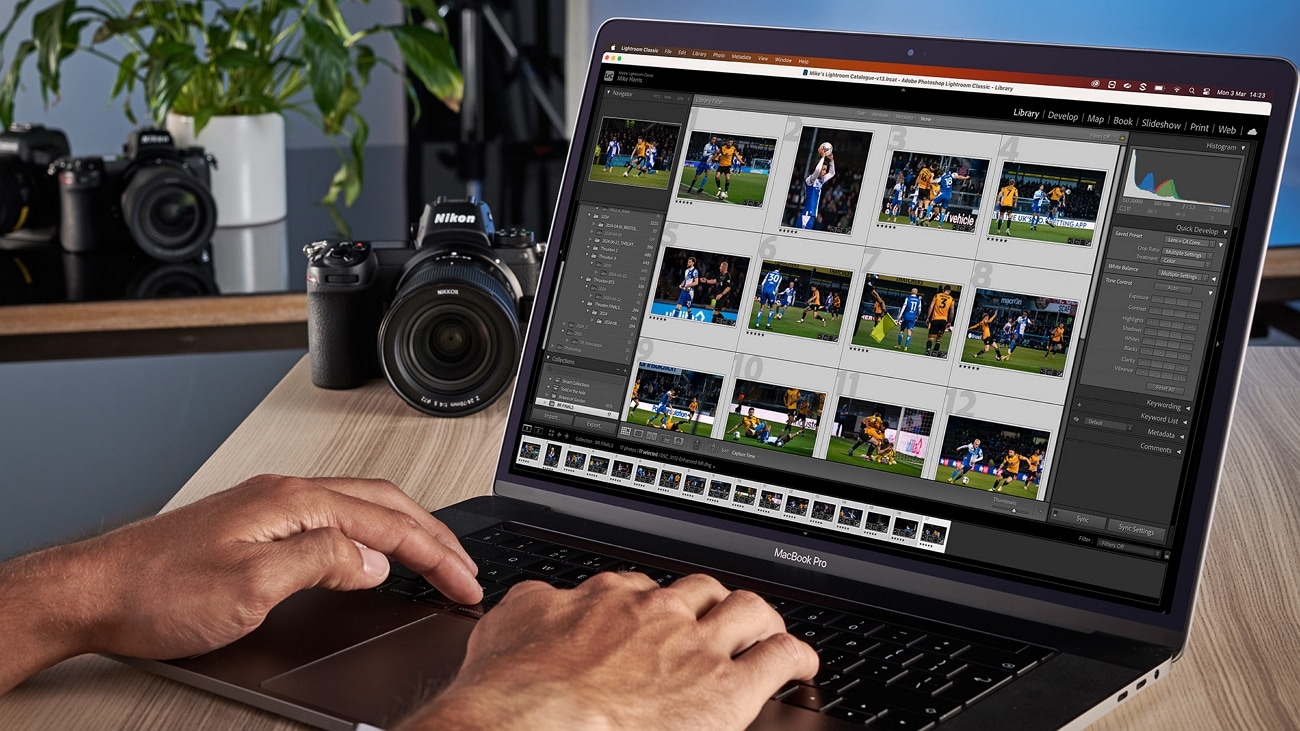
7. Organizing Software for Photo Editing
There are various photo editing software programs playing a pivotal role in converting basic scans and preserving digital archives. They can enhance image quality and correct damages to make your precious moments accessible and protected for a long time. Some essential technical tips for converting old photos to digital format are mentioned in the following:
Rename your image files for efficient organization in systematic batches.
Utilize modern editing programs for seamless color enhancement and to repair damage.
Regularly back up digital archives in multiple locations to avoid accidental losses.
Part 2. How to Digitize Old Photos into a Video Using Wondershare Filmora?
Imagine rediscovering a box filled with time-worn photographs to enliven your cherished memories. Digitizing old photos in Wondershare Filmora gives you creative freedom to convert your static family snapshots into emotional videos. This tool is the best alternative to other digitizing methods, as it offers an intuitive interface along with AI technical tools.
Built-in templates in Filmora also provide predefined video structures to help you tailor your video. These templates add transitions, title overlays, or audio to polish your thematic videos. Filmora is distinguished by its intuitive interface, which maintains a balance between AI-driven features and advanced manual editing tools. This tool offers flexibility for precise timeline editing, keyframe animations, and color adjustments to digitize old photos into videos, as mentioned below:
Method 1. Transforming Photos into Videos Using AI Image to Video Veo 3
Filmora offers the latest features of digitizing old photos into videos using Veo 3 technology provided within the Image-to-Video utility. This technology converts static photos into videos by adding automated audio and dynamic features. A detailed roadmap with straightforward navigation is given below:
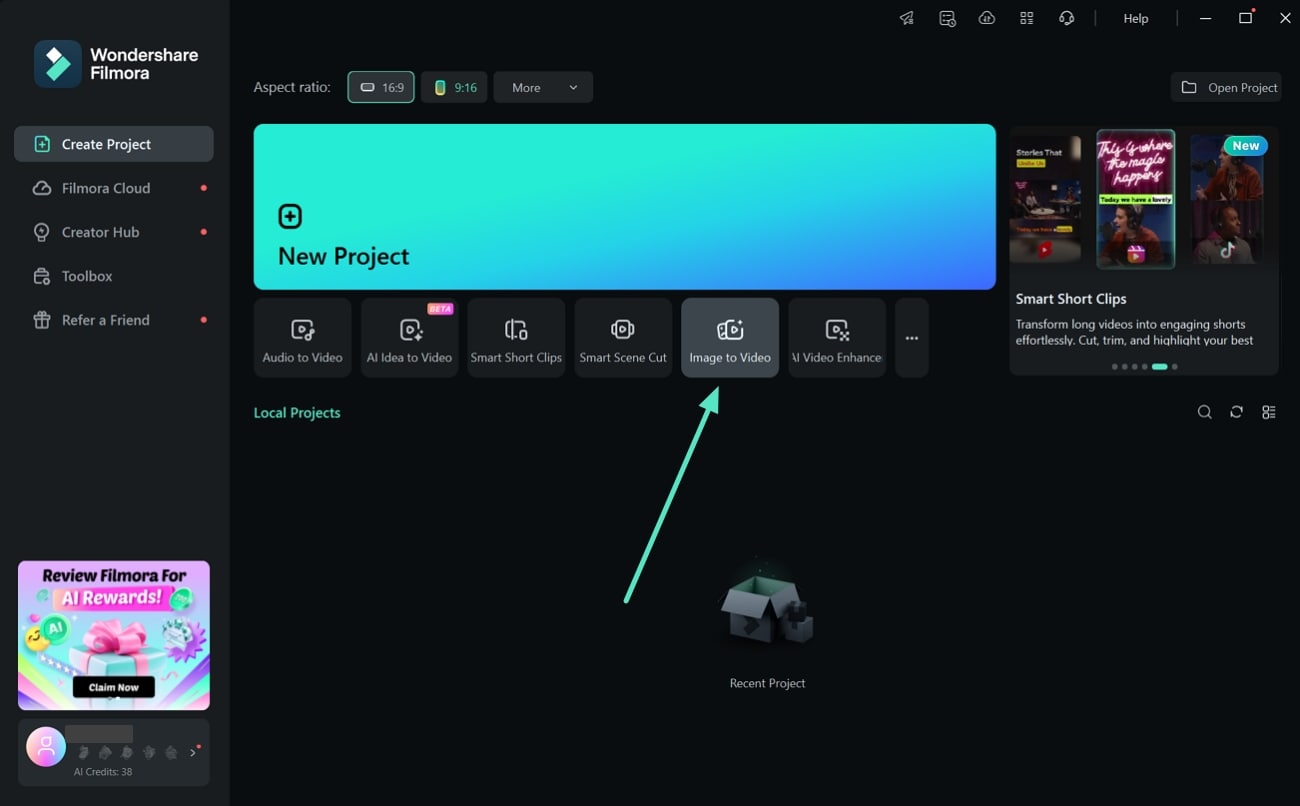
Step 1. Access the Homepage and Select the Image to Video. By accessing Filmora’s home page, select the "Image-to-Video" option to proceed with digitizing your photos。
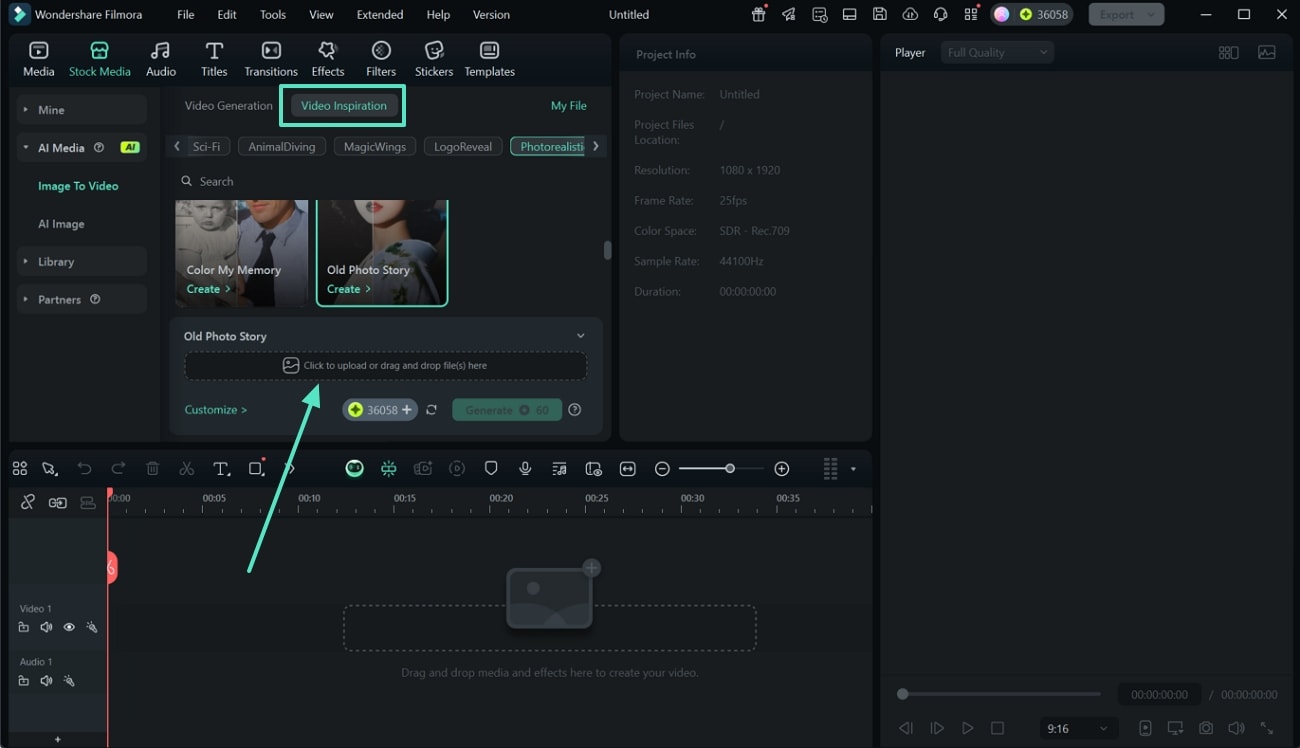
Step 2. Select Video Inspiration to Choose a Template for Old Photos. Next, click "Video Inspiration" from the top toolbar and search for the "Old Photo" template in the search bar. Then, tap the template and import your photo into the “Image to Video” section。
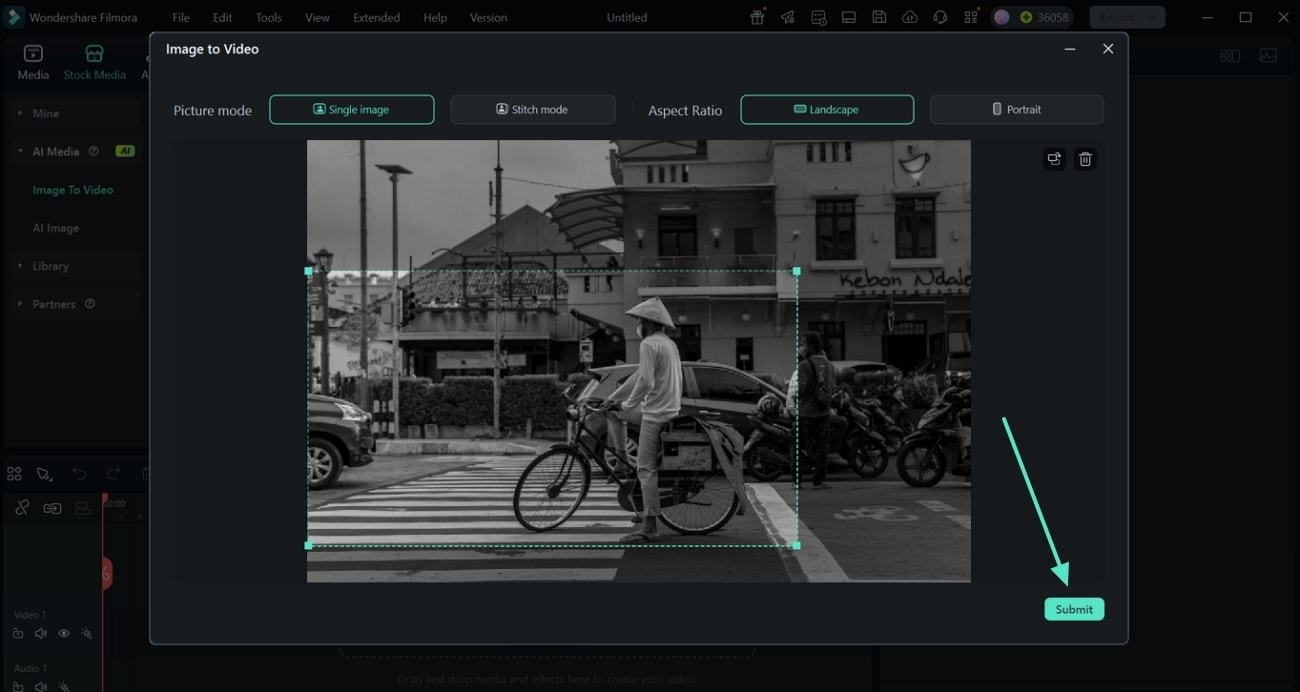
Step 3. Adjust Settings to Submit Photos. Afterward, adjust the "Aspect Ratio" of each photo, and choose "Picture Mode" from the top of the screen. Later, click on the "Submit" option given below the screen to apply settings to photos。
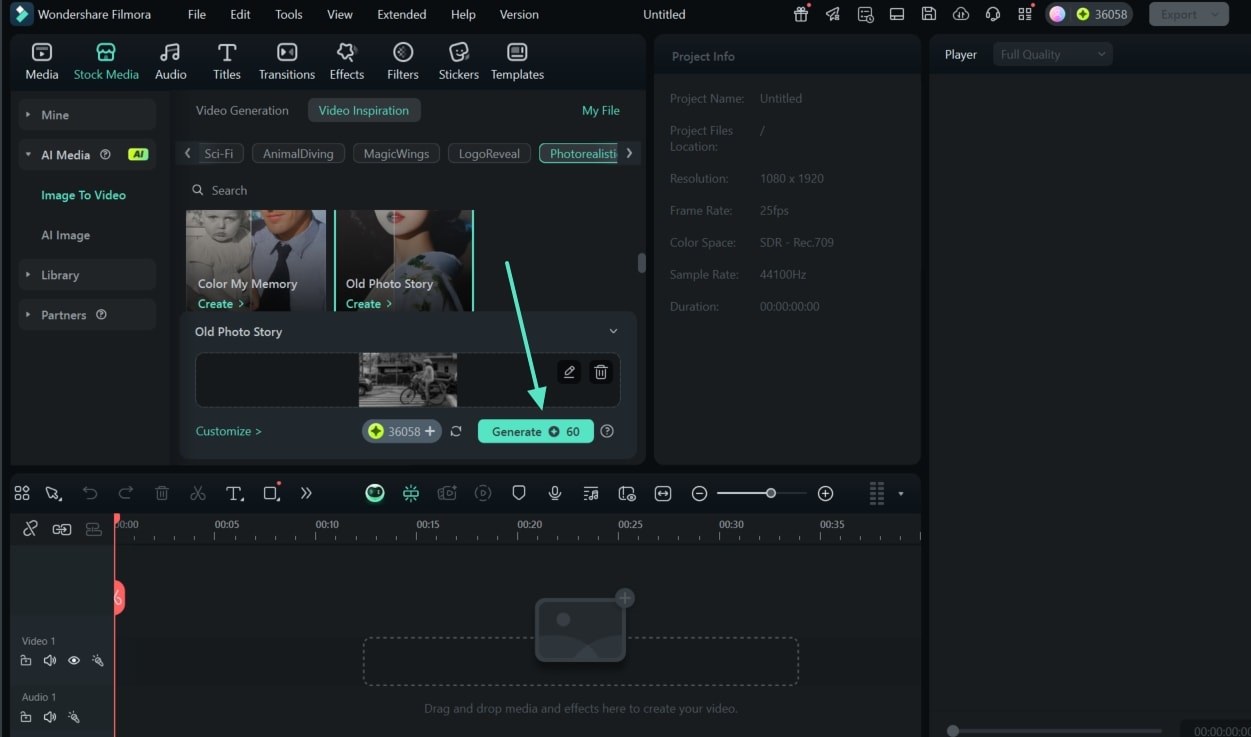
Step 4. Press Generate to Proceed. After adjusting settings, hit the "Generate" button to proceed with the video generation。
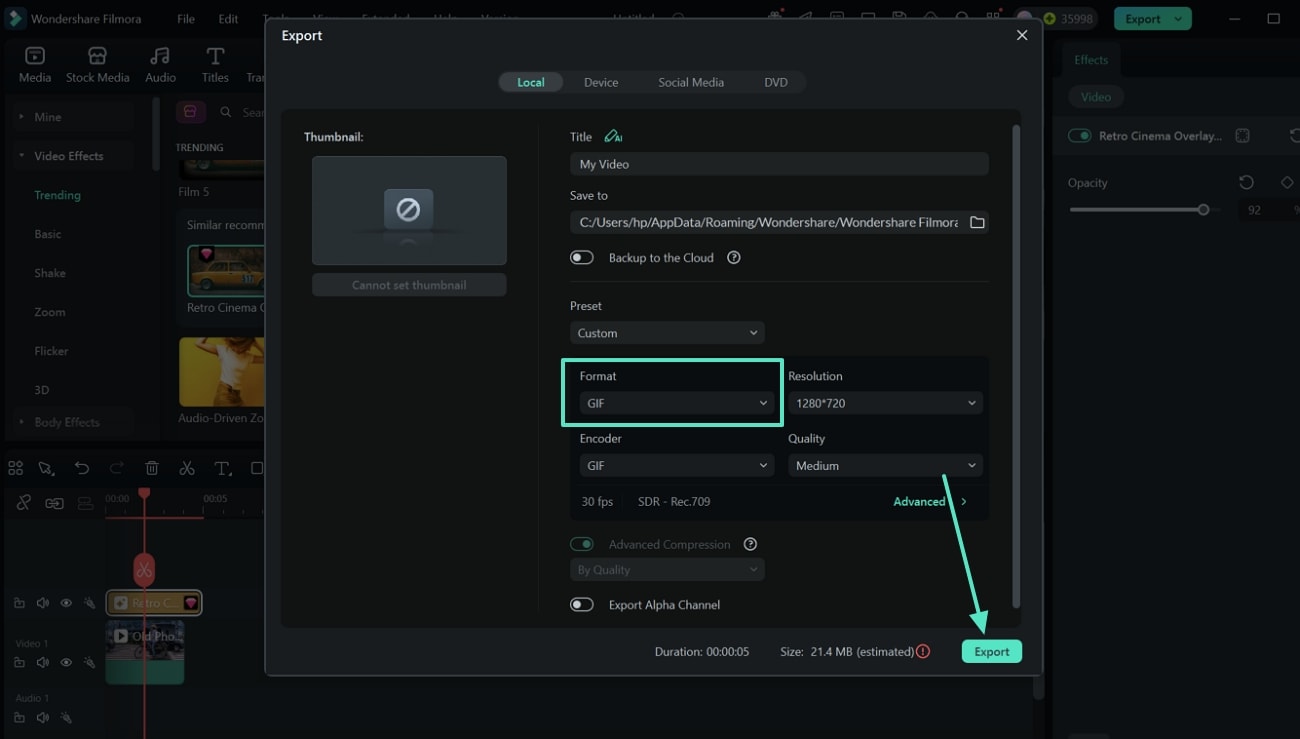
Step 5. Apply “Effect” to the Video. Moving on, select “Effects” from the top taskbar and choose your favorite effect to apply to the video. Drag it to the editing timeline and manually adjust “Opacity” using the slider from the right-side panel. Afterward, preview the video in the preview window shown on the right side of the screen, and press the "Export" button at the top。
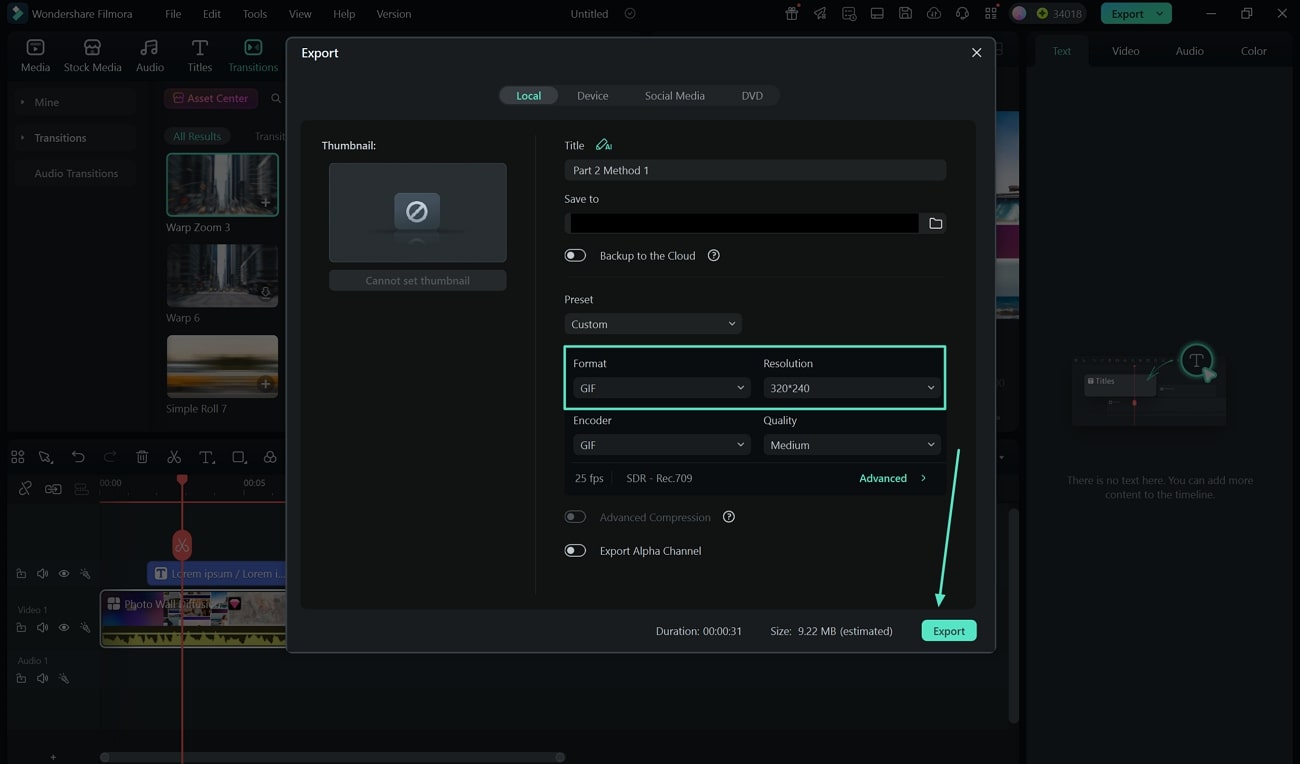
Step 6. Modify Settings and Save GIF. Finally, change the video format to "GIF" and then tap on the "Export" button to save it to your desktop。
Method 2. Converting Photos into Videos Through Template Resources
Converting photos into videos is convenient using Filmora’s vast library of templates. Choose the relevant template for your photos and apply various effects and music to create visually engaging videos. A comprehensive guide for transforming photos is discussed in the following:
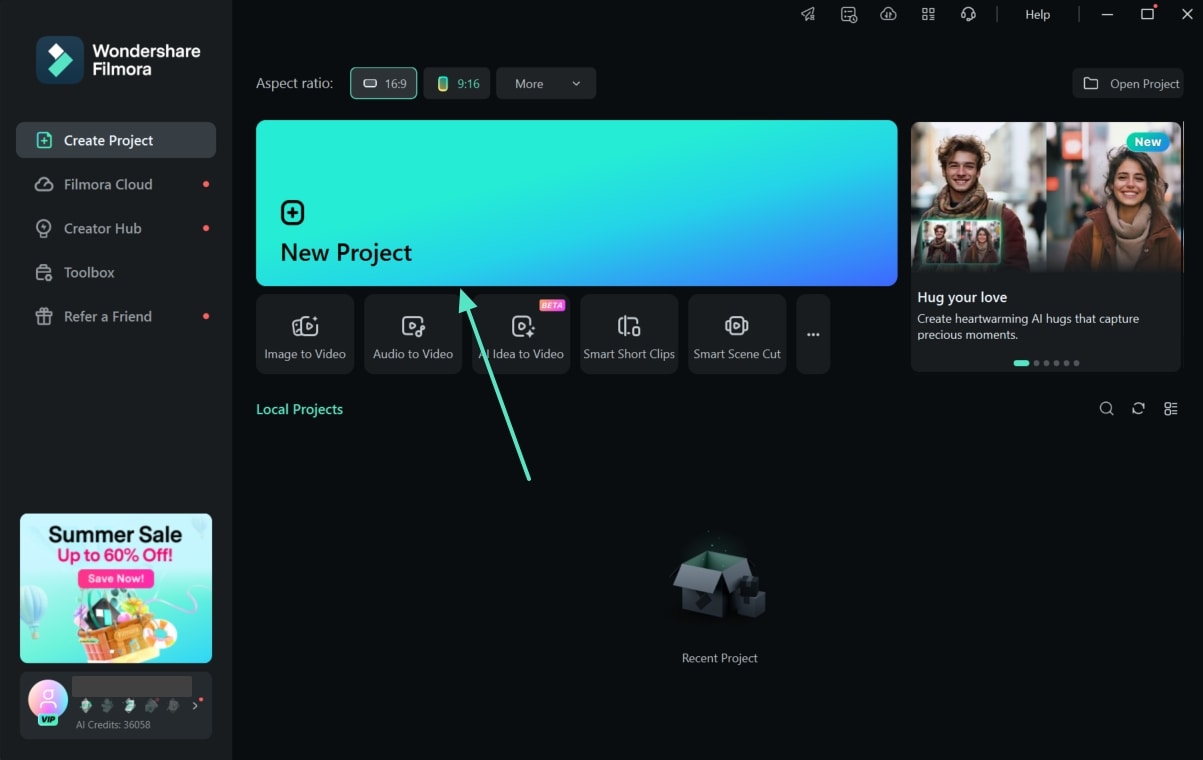
Step 1. Press New Project From Filmora’s Home Page. Begin by tapping the “New Project” from the main page of Filmora to import your photos。
Step 2. Choose Templates that Match the Photos' Theme. Then, press “Templates” from the top menu bar and search for your favorite template by writing a prompt in the search bar. Now, drag your template to the editing timeline given below and double-click on the timeline to add your photos。
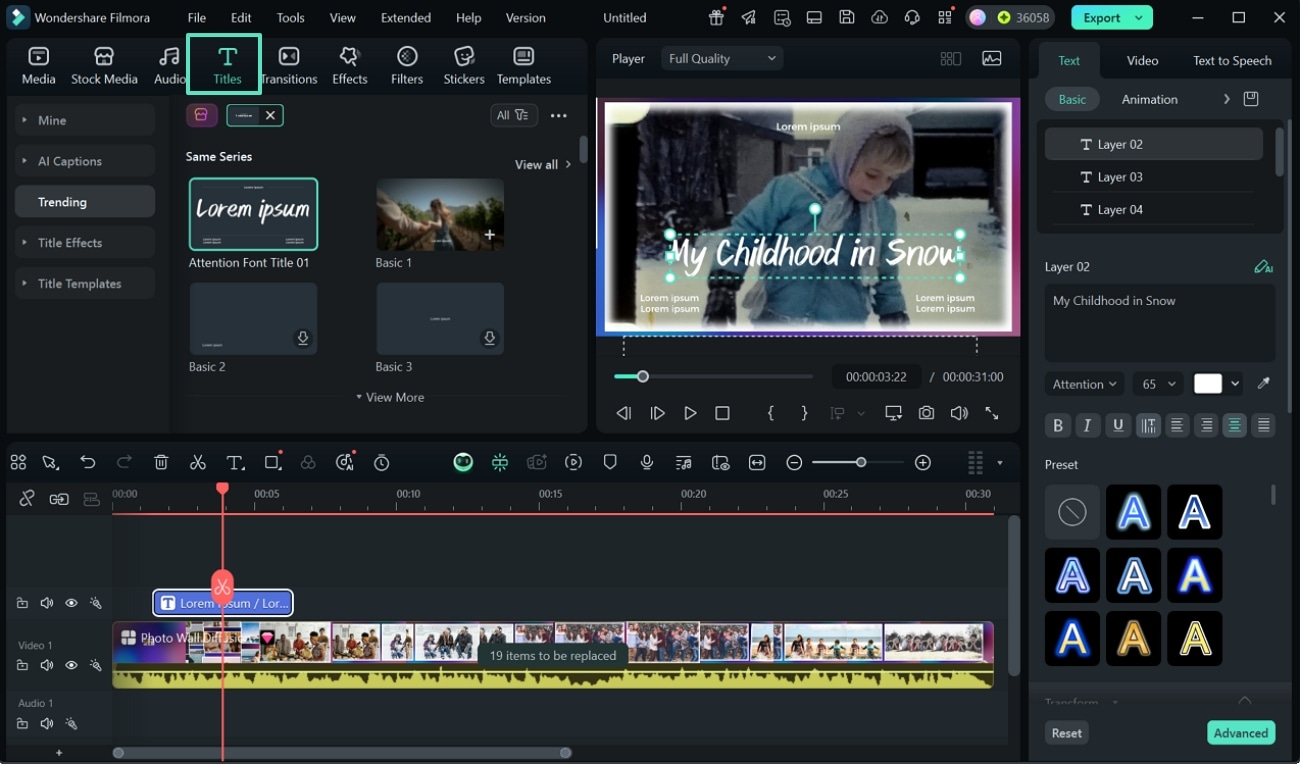
Step 3. Add Titles to Your Video. Once you have added all the photos to the timeline, now press “Titles” from the top left corner and choose your desired text template. Then, drag it to the timeline and add desired text by double-tapping the screen。
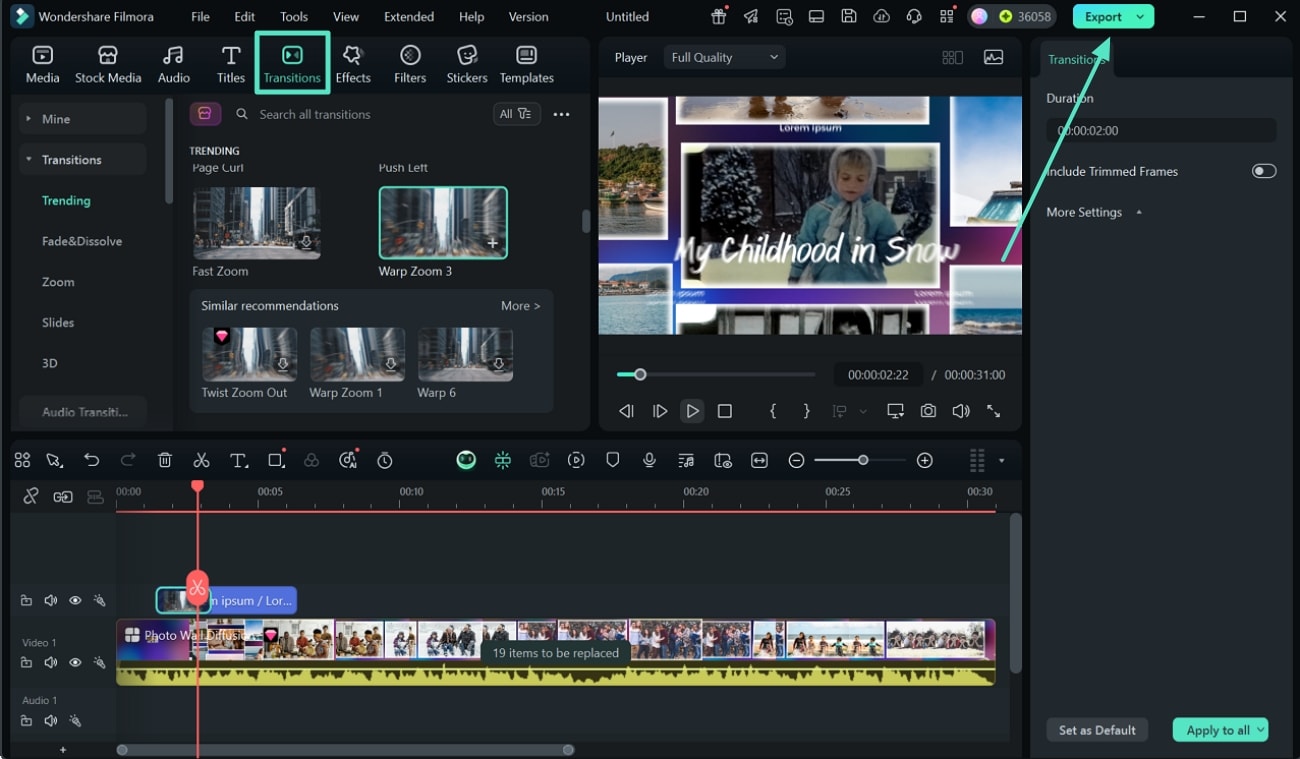
Step 4. Adjust the Transition to Your Video. Choose "Transition" from the top left corner of the menu bar to select your desired transition. Next, drag it to the editing timeline provided below, preview it in the preview window, and click the "Export" button。
Step 5. Alter Advanced Settings to Export Your Video. At the end, change the "Format" of the video to MP4 in the export window and set its "Resolution", then tap on the "Export" button to save it to your device。
Filmora App (iOS/Android) offers a seamless experience for turningoldphotosintovideos. It features an AI Image to Video tool that converts static images into dynamic videos by adding motion tracking and audio. This tool also offers built-in templates for animated transitions and free music integration.
Method 1. Turning Photos into Videos Using AI Image to Video Veo 3
Turning photos into videos using AI Image to Video Veo 3 provides a captivating experience to add dynamic effects and free music to static pictures. It results in a studio-style video that brings life back to your still images through cinematic transitions. Here is a method described below in detail, following the key steps:
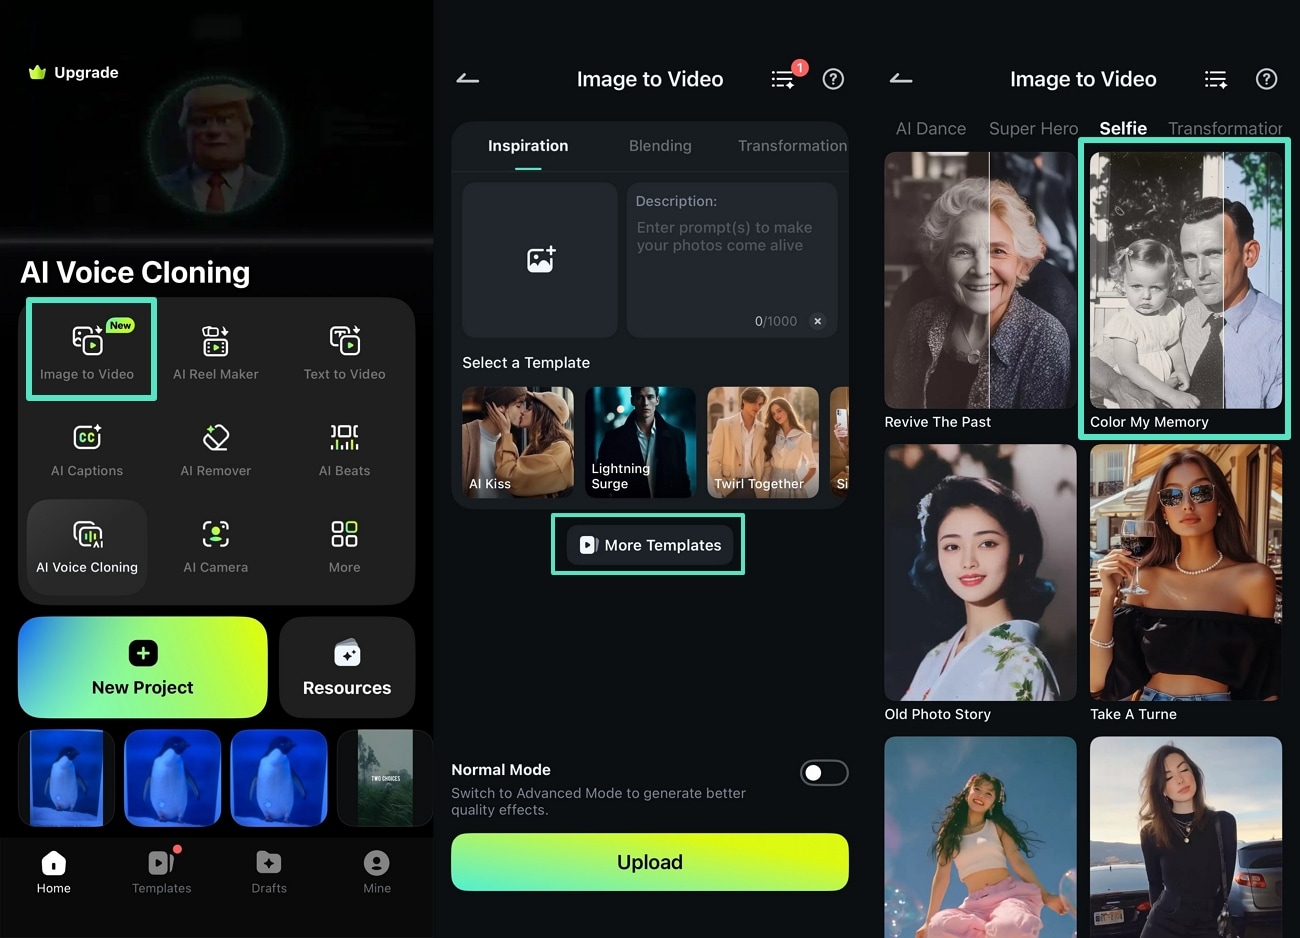
Step 1. Select Image to Video and Choose Template. After launching the app, select “Image to Video” from the options at the home page. Next, press the “More Templates” option to select your desired template, then hit the “Color My Memory” template from “Selfie” section。
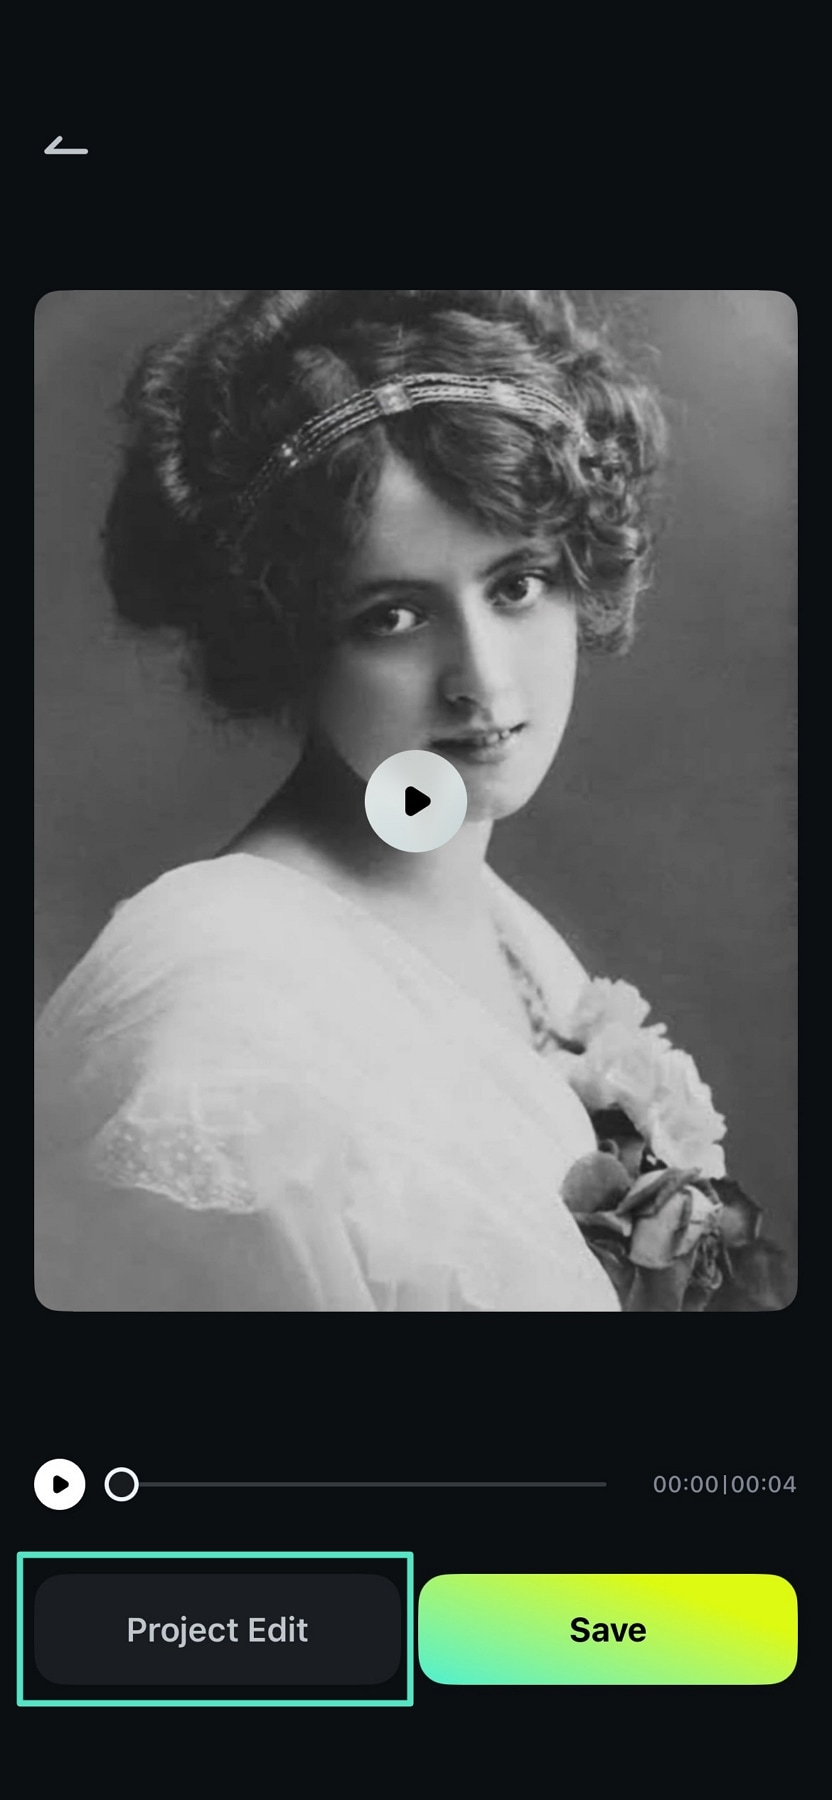
Tap the “Generate” button to pick your photo from the phone’s gallery. Once your image is transformed into a video, hit the “Project Edit” option to make further changes。
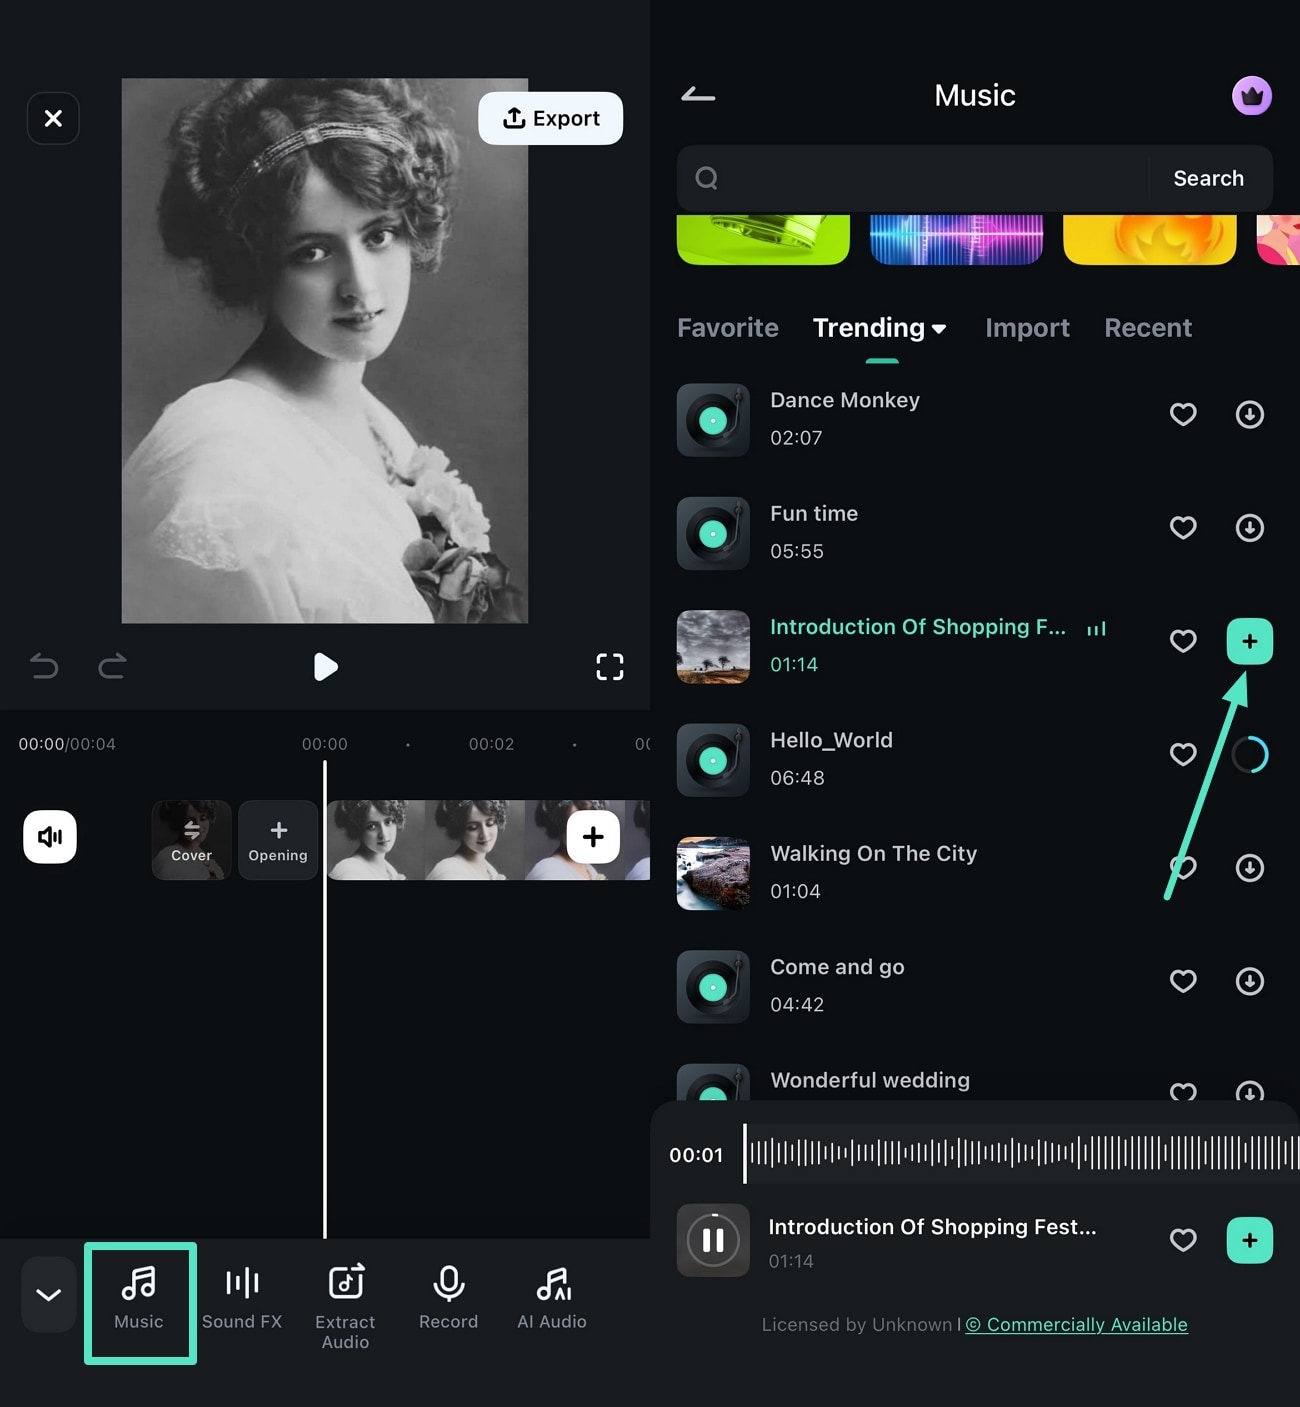
Step 2. Add Audio to the Video. Next, hit "Audio" from the toolbar and choose the "Music" option below. Select your favorite song from the gallery and press the "+" icon to add it to your video。
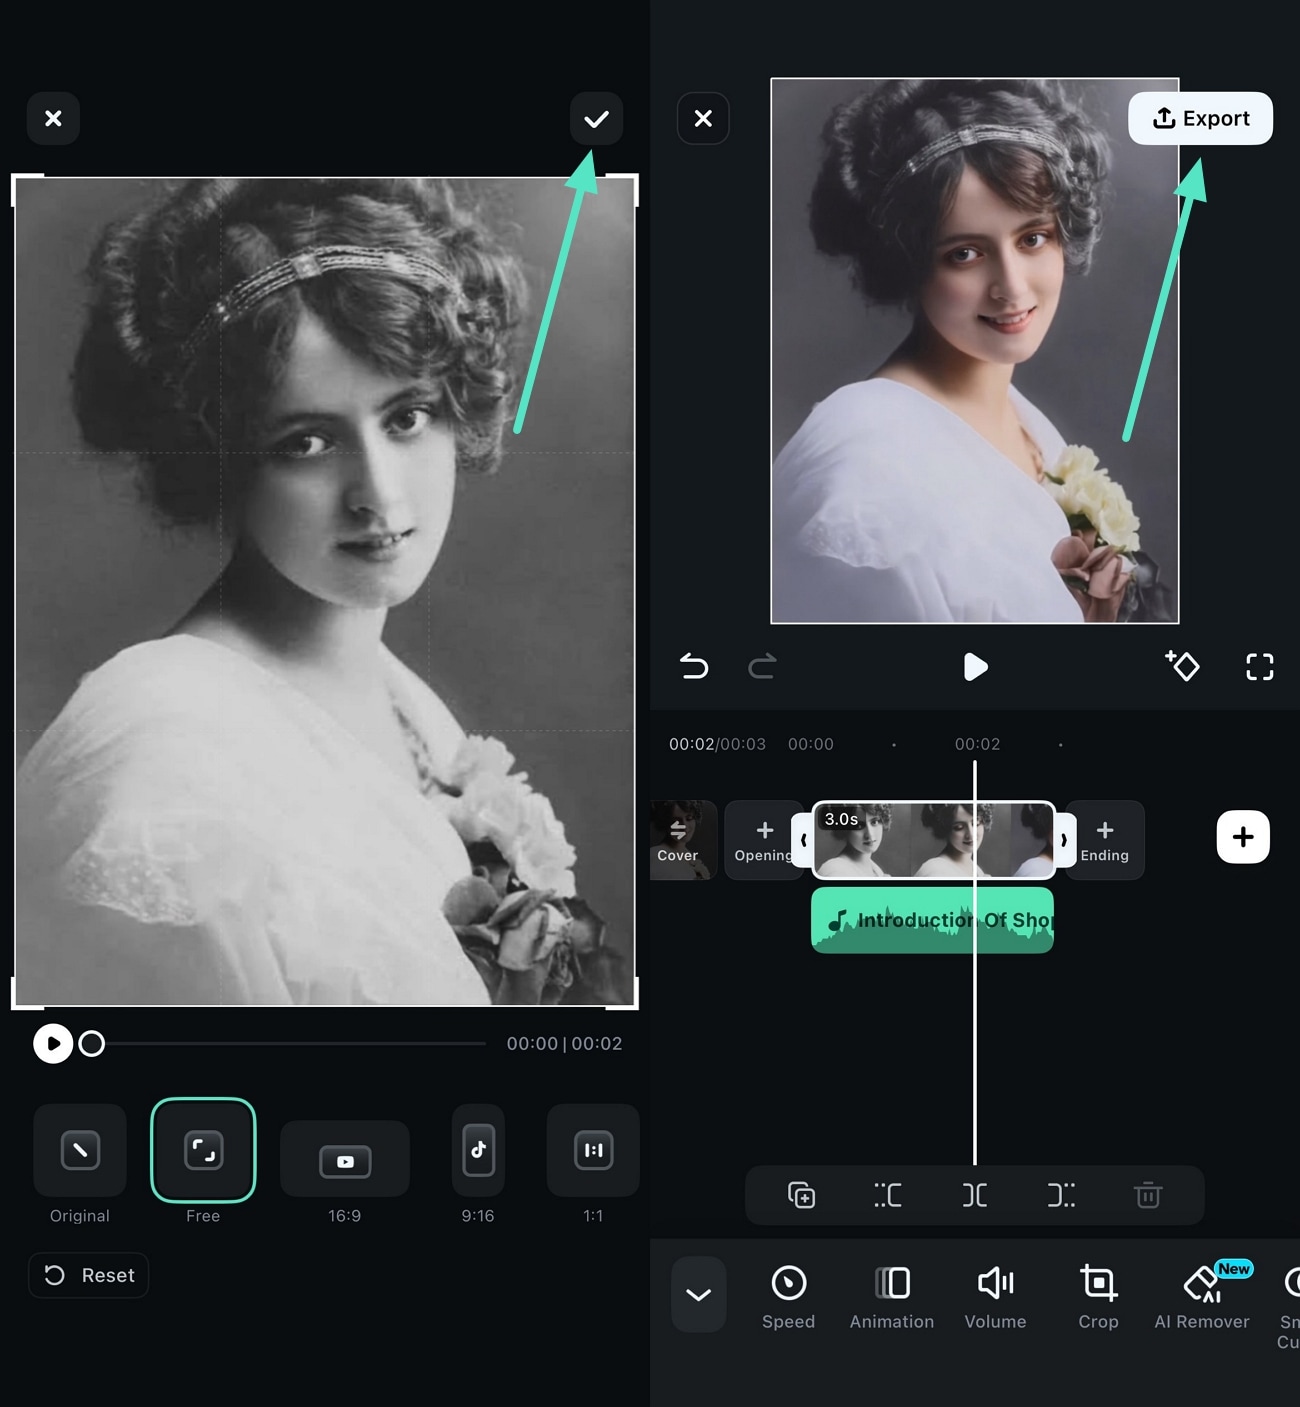
Step 3. Adjust the Aspect Ratio from Scale. Tap on the “Crop” from the toolbar given below and select from the predefined options, press the “Tick” icon at the end, and hit “Export’ at the top。
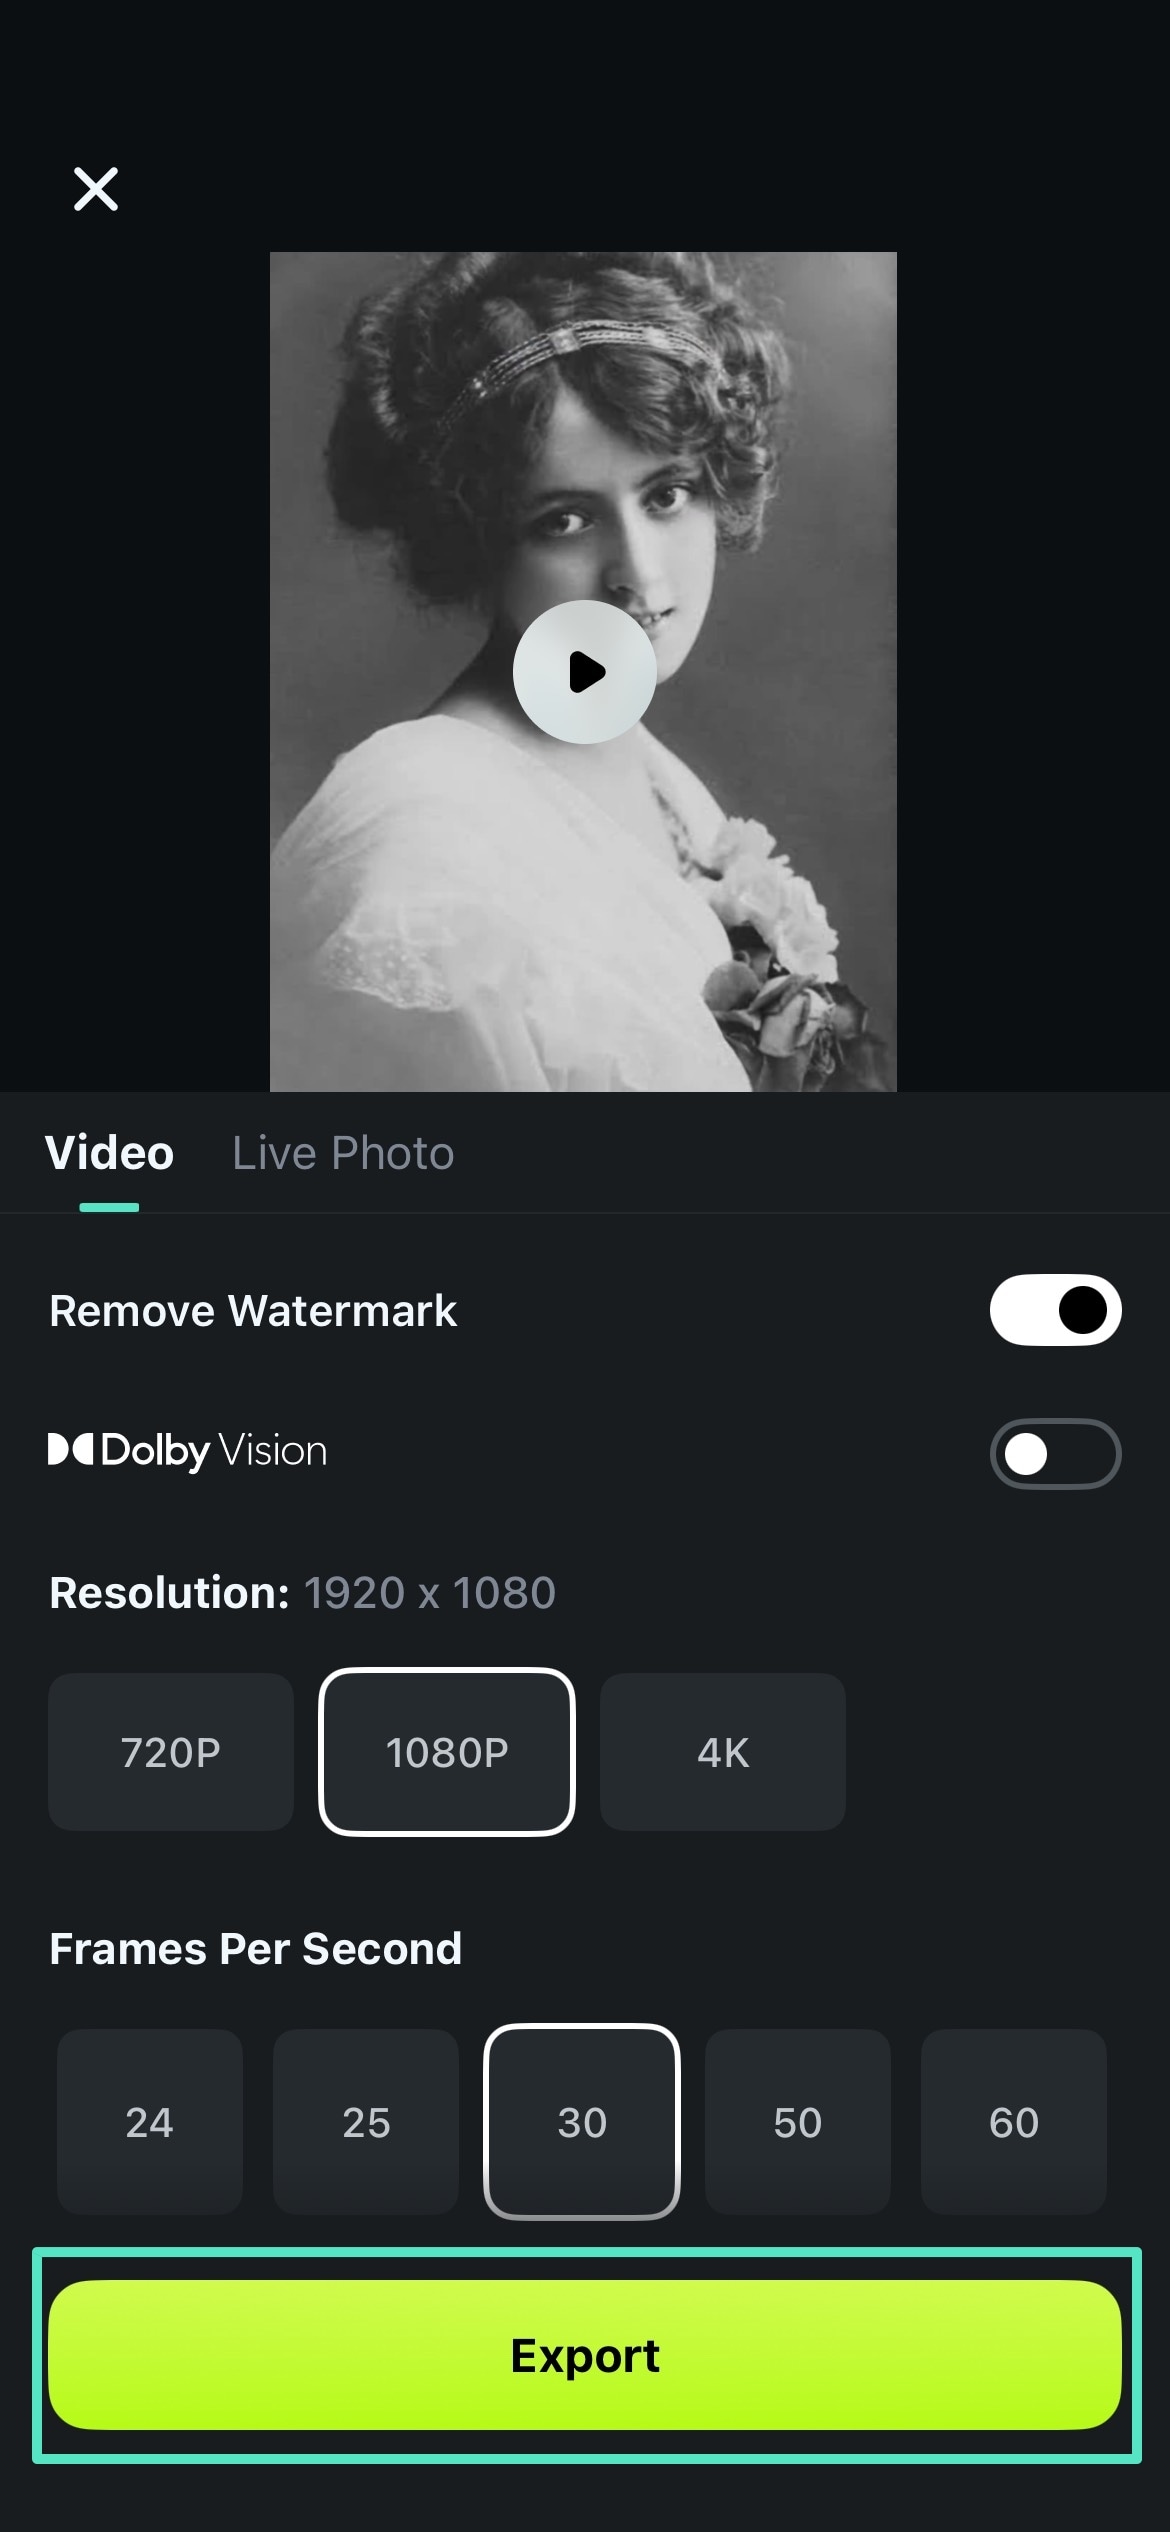
Step 4. Modify Advanced Settings to Export Video. Finally, modify the resolution and adjust other settings, then hit “Export” to proceed。
Please take a look at the export effect video below.
Method 2. Digitize Vintage Photos into Videos using Template Resources
Template resources in Filmora make it easy to transform vintage photos into video. The software applies stylish overlays, background music, and animated transitions. The tool provides a wide range of templates designed with various themes. A detailed step-by-step guide is mentioned in the following:
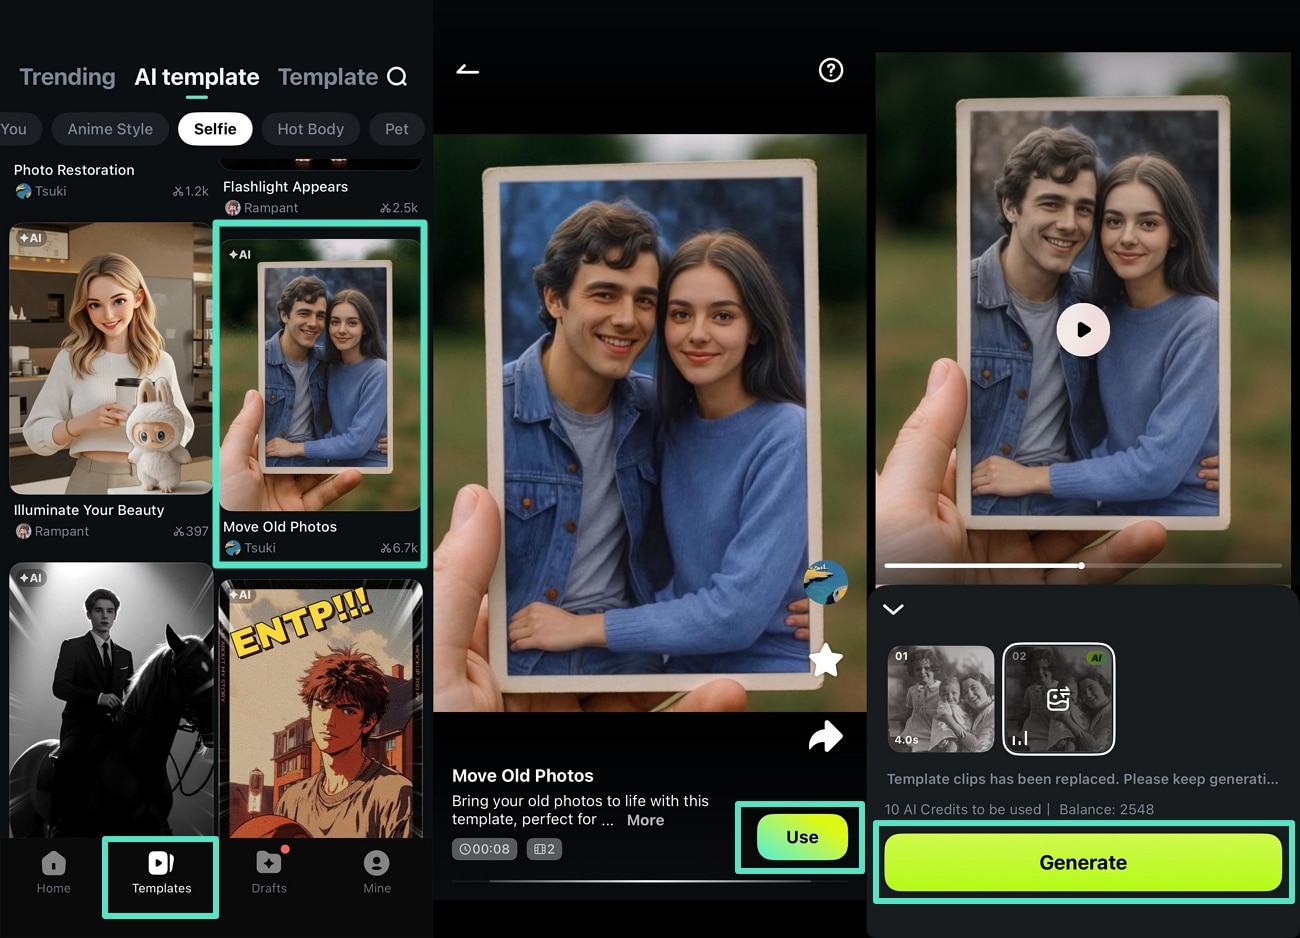
Step 1. Access the Home Page and Press Templates. By accessing the main page of Filmora App, hit “Templates” from the bottom and choose your desired template. Press the “Move old Photos” template and hit the “Use” option to import your photo from the gallery, then press “Generate” to proceed。
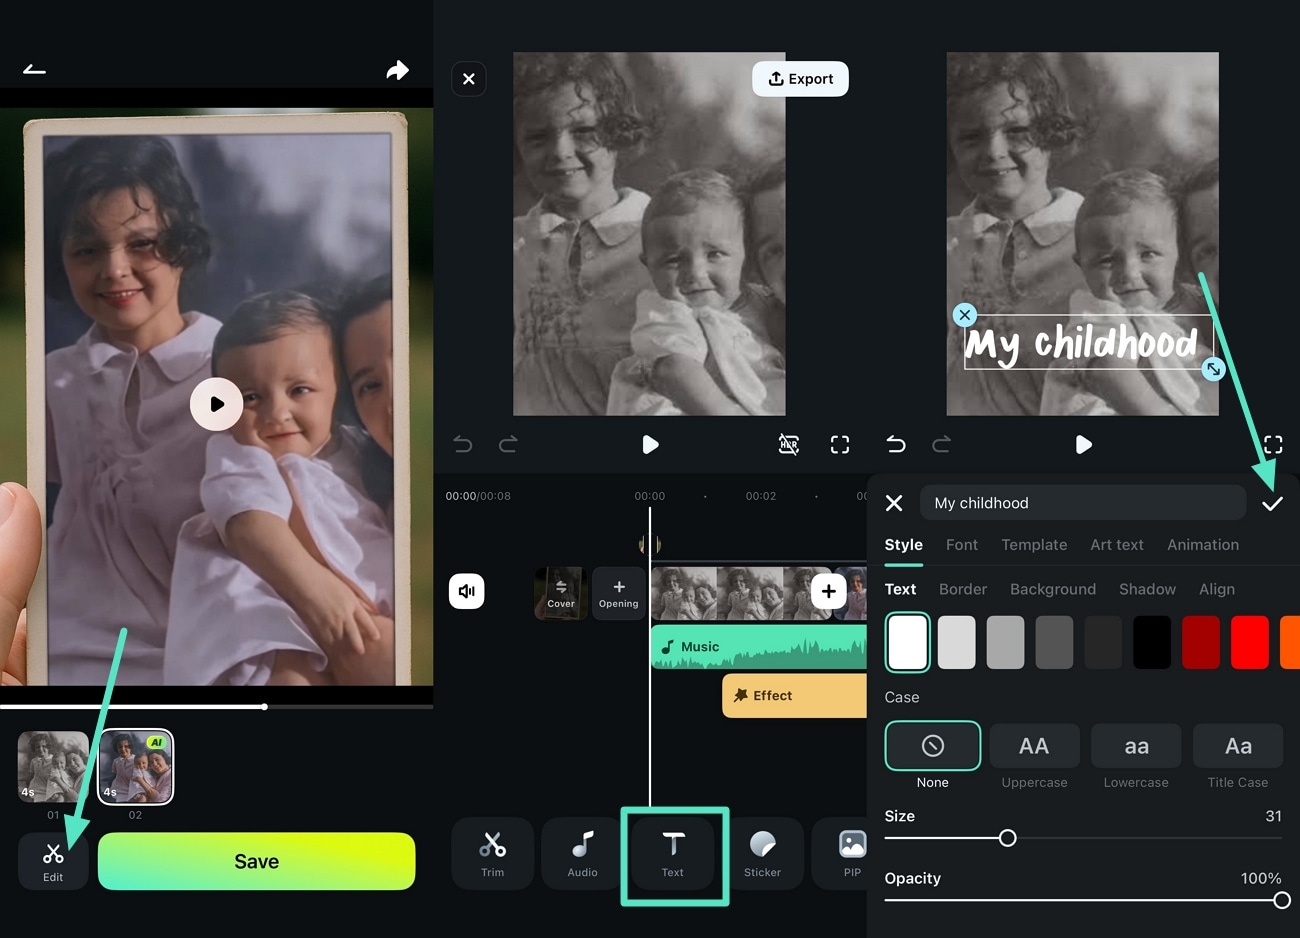
Step 2. Add Text to Cherish Your Memories. As video is generated, use the “Edit” icon and enter the editing interface to Press “Text” from the bottom and add your desired text. Afterward change the font and style from the options given at the bottom of the screen and hit the “Tick” icon。
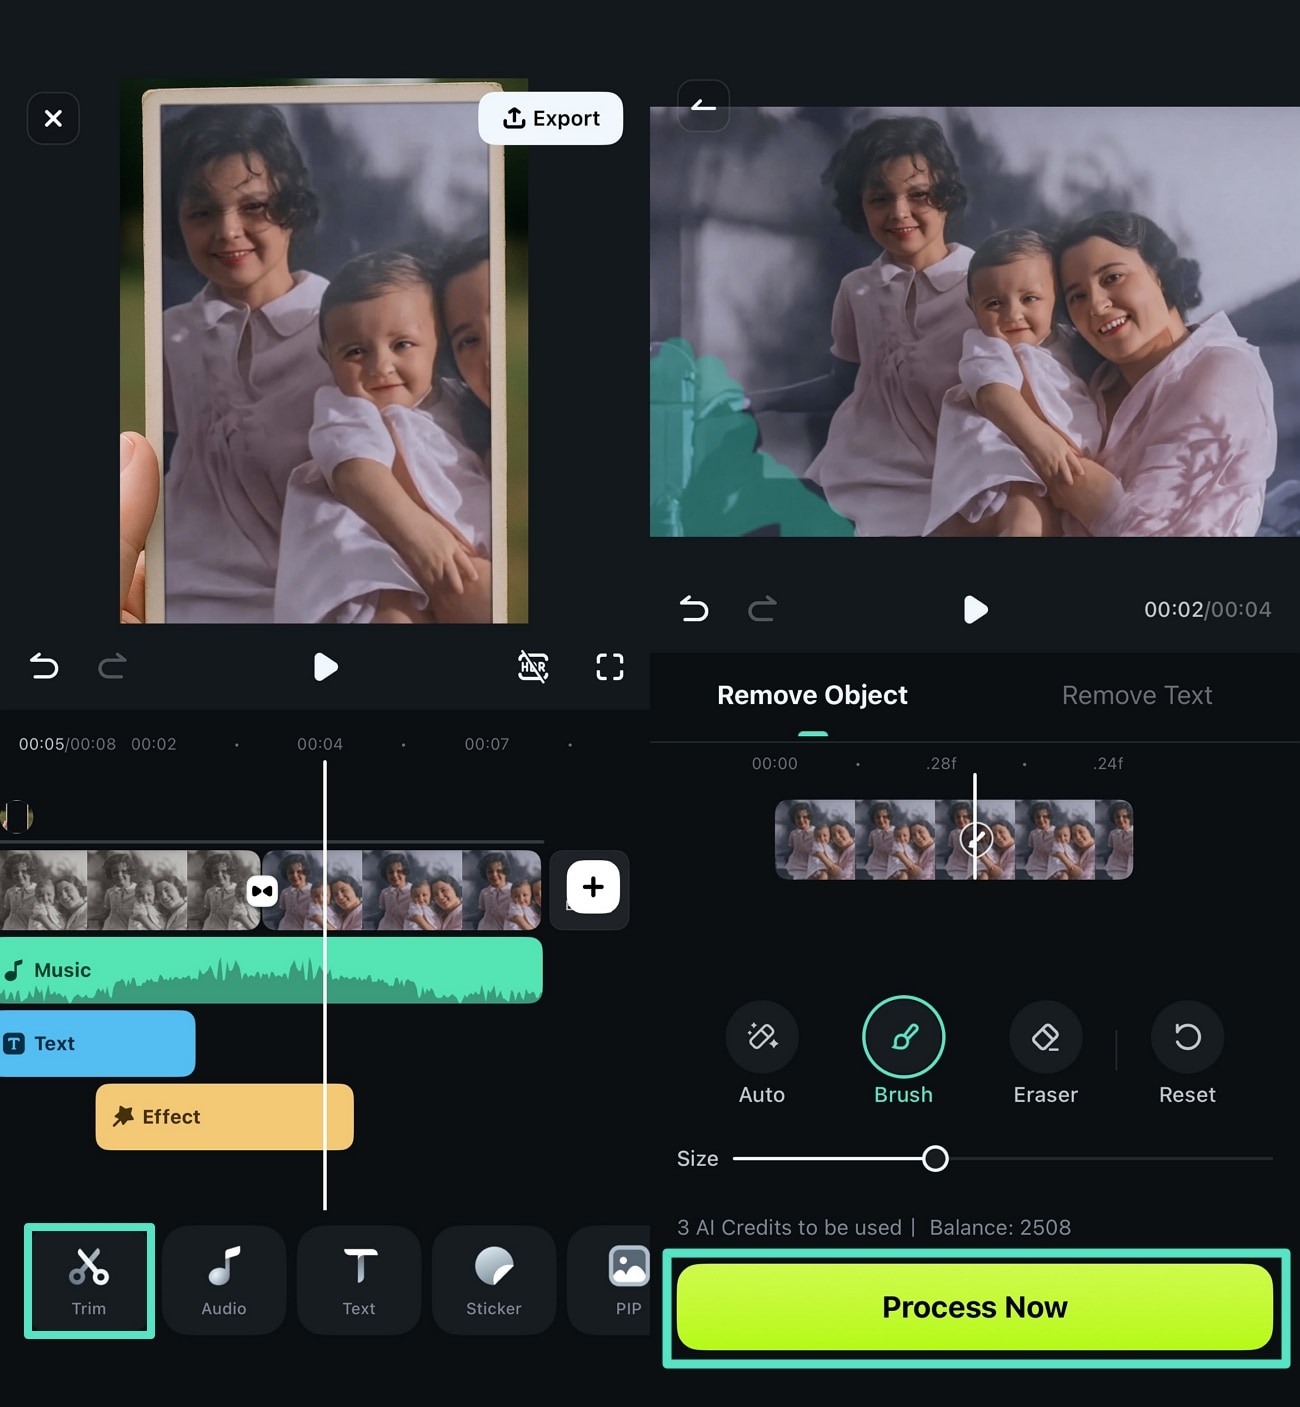
Step 3. Trim and Crop Your Video. Later, press “Trim” to crop your video and remove unwanted objects using “AI Remover” and hit “Process Now” to apply settings。
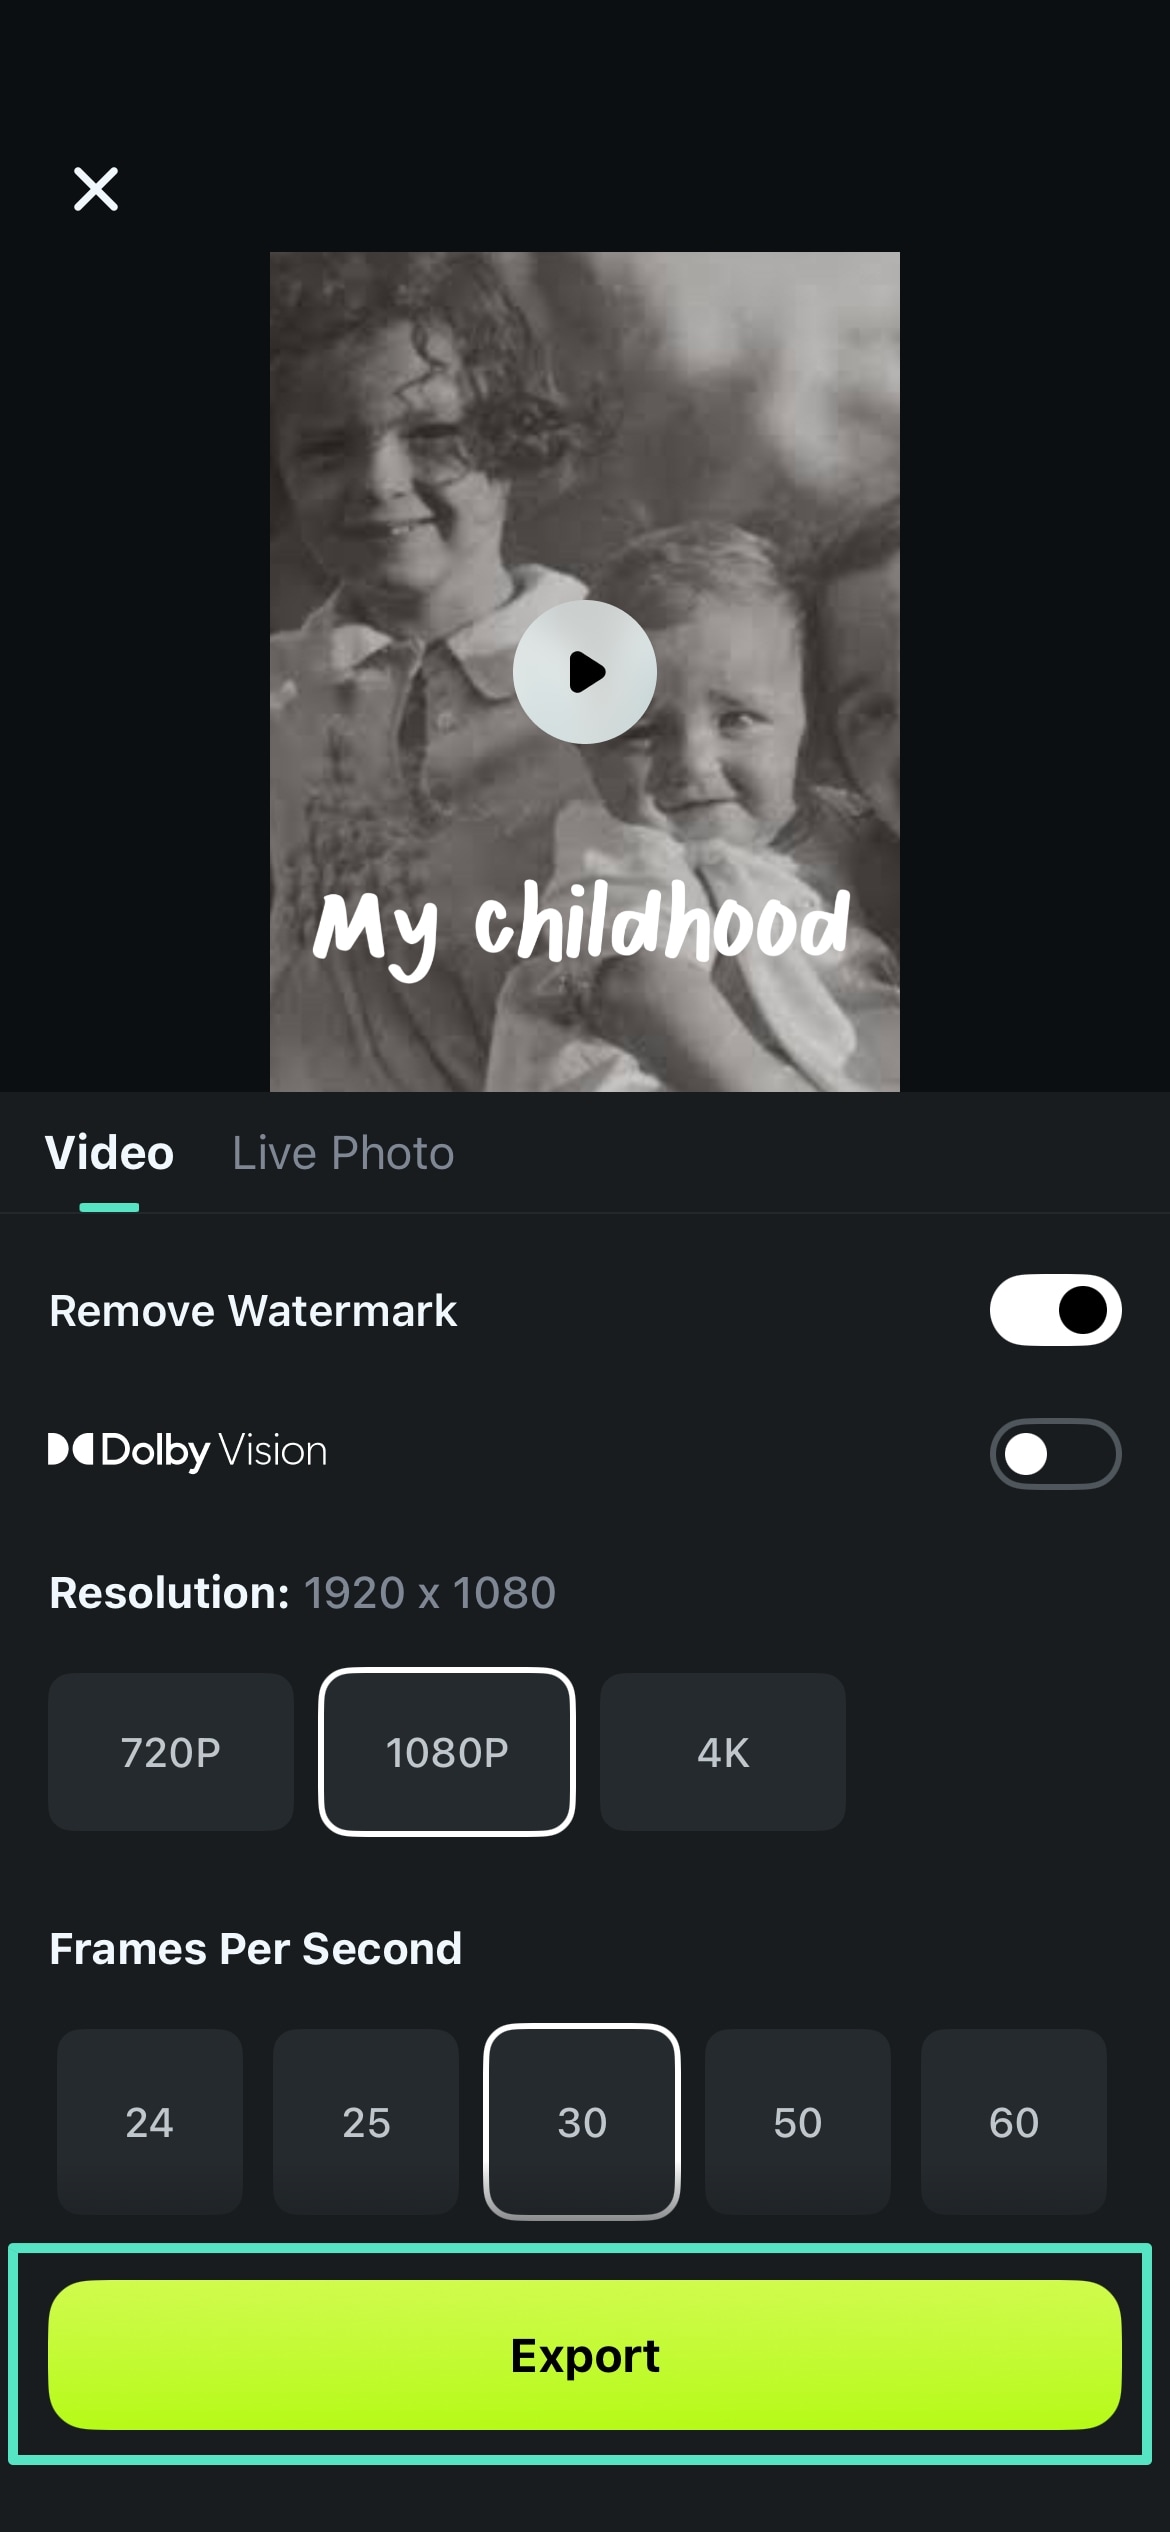
Step 4. Adjust Advanced Settings and Export Your Video. Finally, adjust further settings and hit “Export” to save your video to the phone’s gallery。
Please see the video below showing the export effect.
Upgrading vintage photos into striking visuals is an easy process using creative pop-up features in Filmora. These editing tips are mentioned below to turn old images into a video:
Use AI-powered background removal to automatically eliminate distractions from vintage photos.
Add meaningful titles to highlight memorable moments in your old photos video montage.
Experiment with creative filters to maintain a mood through your photo slideshow.
Restore sharpness and enhance colors by using a one-click auto enhancer.
Insert compelling transitions between the images to make the switch between them smoother.
Conclusion
In conclusion, converting your old photos into videos is an attractive way to preserve your family history and heritage. The process transforms vintage and faded photos into emotional and heartwarming videos. Using digital tools, precious moments can be easily shared, resulting in professional outputs. Wondershare Filmora is the perfect choice among all, as it offers advanced features for digitization.
Filmora
⭐⭐⭐⭐⭐
The Best AI-powered Video Editing Software and App

 100% Security Verified | No Subscription Required | No Malware


 secure download