
 100% Security Verified | No Subscription Required | No Malware

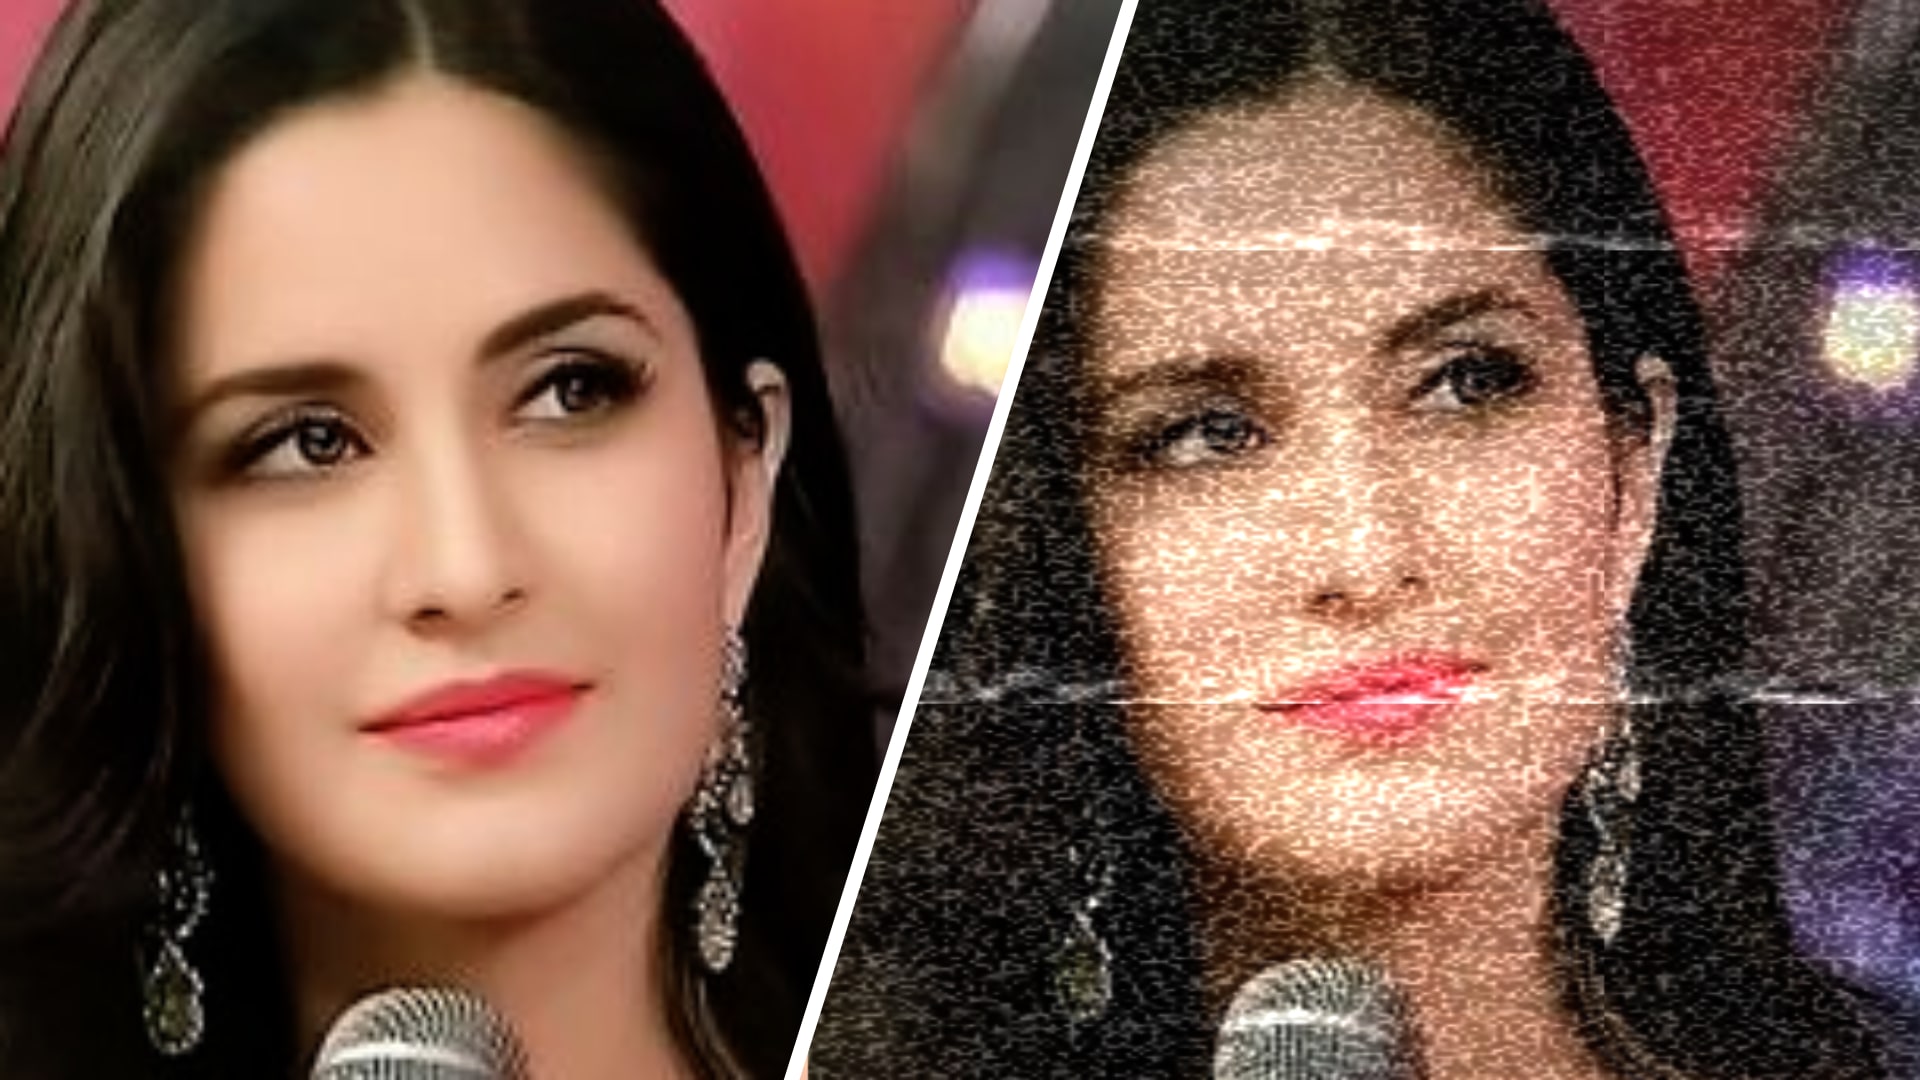
Want to give your photos a timeless, nostalgic touch? With just a few simple steps, you can add a vintage filter to Photoshop and transform any modern image into a retro masterpiece. Whether you're aiming for a faded film look, warm sepia tones, or classic grainy textures, Photoshop offers powerful tools to achieve that old-school aesthetic.
"How to make photos look vintage in Photoshop?" You may ask. In this article, we will introduce a detailed guide to adding vintage photo filters in Photoshop. Let's dive in.
In this article
Key Elements of a Vintage Photo Effect
A standardized approach fails to exist in vintage photography practice. Based on your desired era for a photo restoration, all key elements of vintage photography incorporate updated technological advancements.
Monochrome
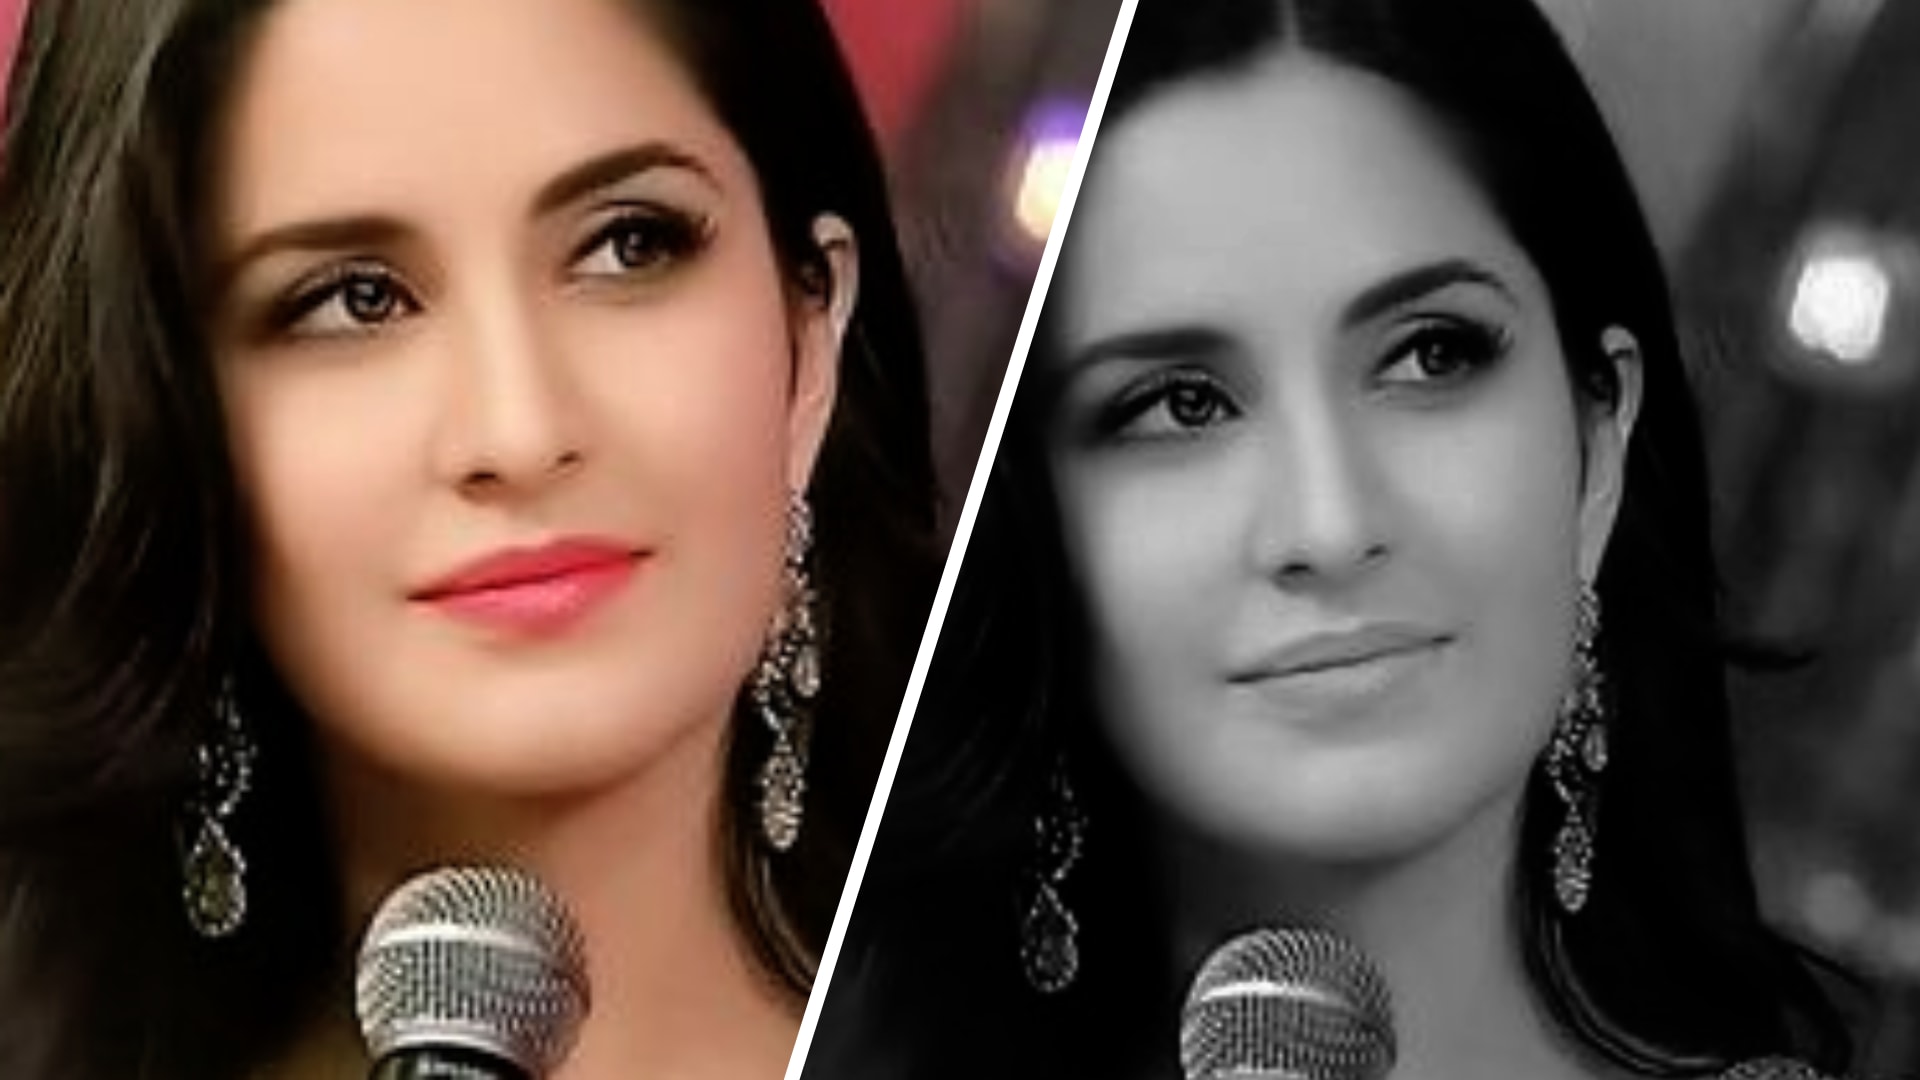
In its early days, you could convert digital images into antique designs by transforming them into black and white format.
Sepia & Retro
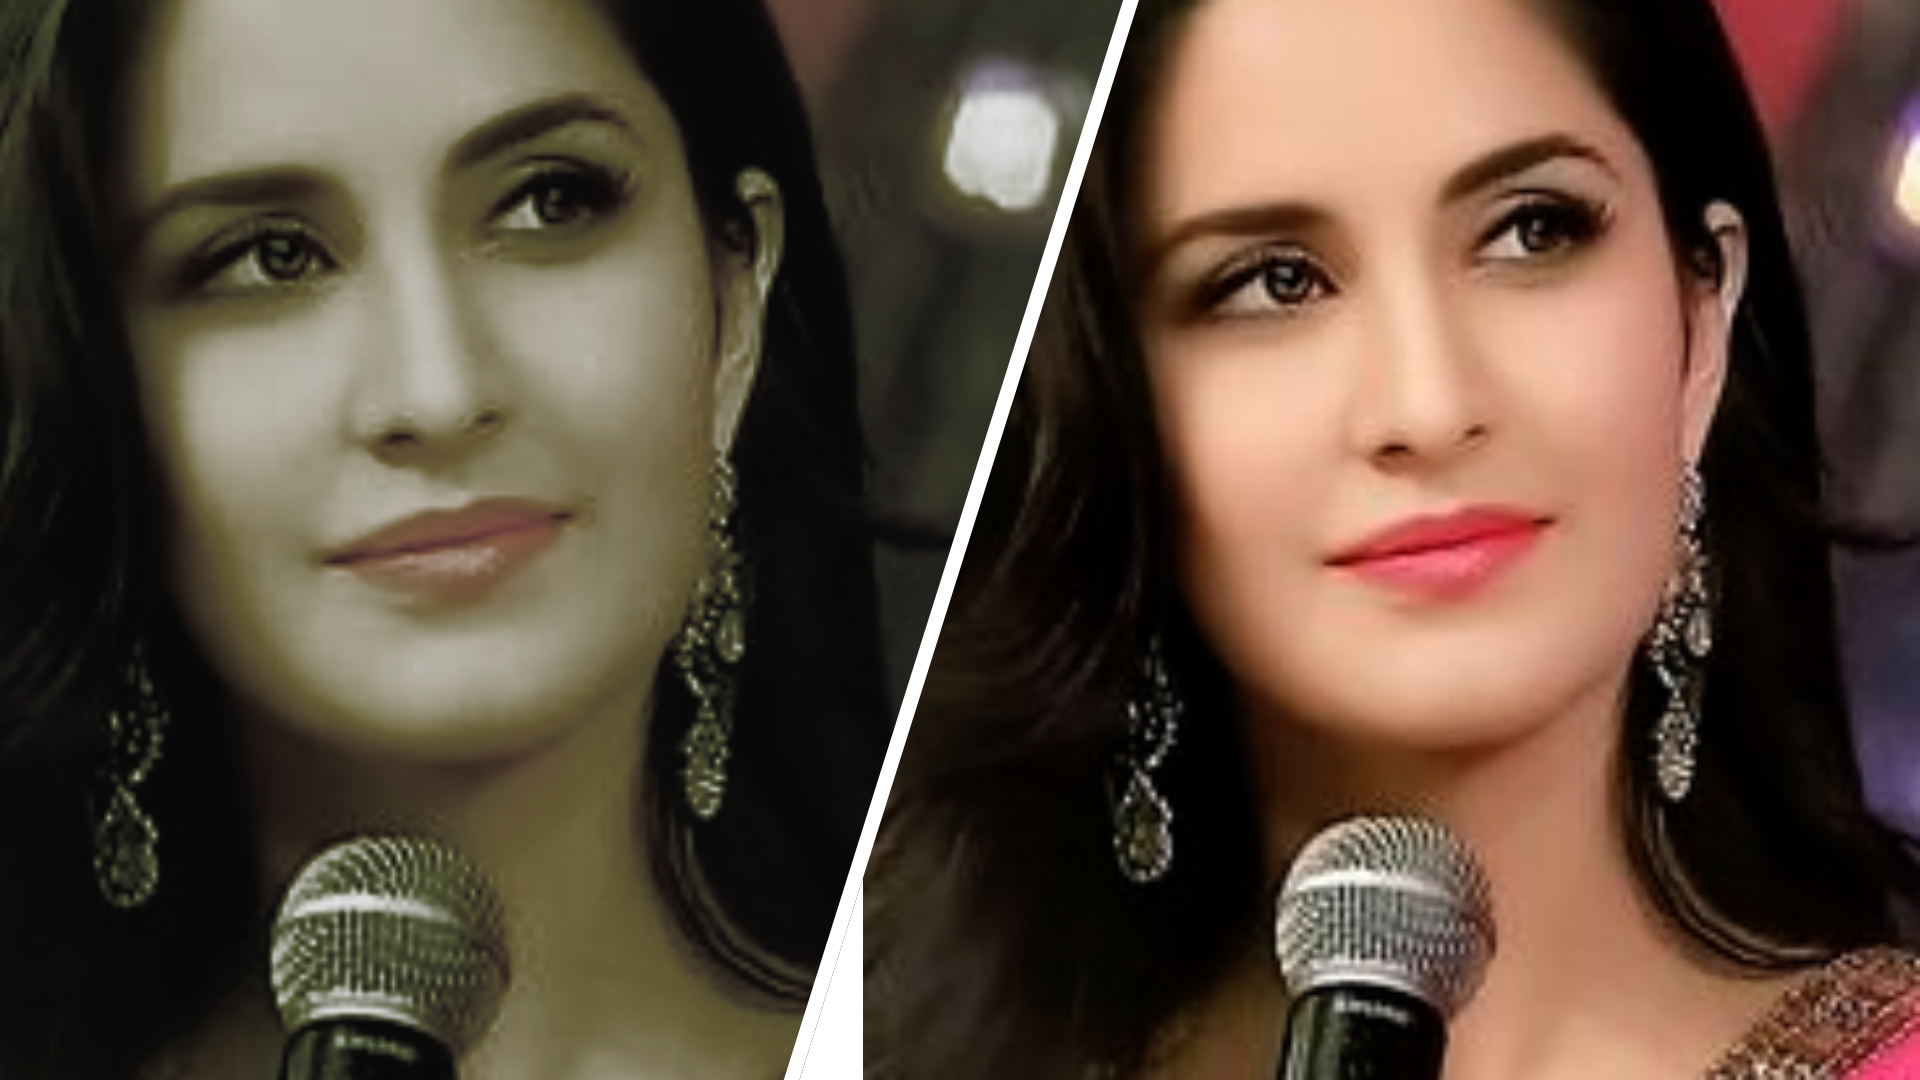
When people observe the soft reddish-brown color in vintage photos, they see sepia, which stands out because of its vintage feel. An earlier black-and-white photographic development method caused this effect by reducing photo destruction.
Tintype
The creation of tintypes follows a photographic process that requires the darkroom development of photosensitive chemical-coated metal sheets for making images. Black-and-white images emerge from these plates, which create a darkening pattern at the edges that has a metallic appearance. Tintype aesthetics can be applied through shadow adjustment and contrast manipulation in your photographic work.
Polaroid
Using Polaroid cameras along with exact film produces rapid photo development and printing capabilities. Instant photos enjoyed popularity during the 1970s because they feature a unique border area. By producing this effect, images acquire a spontaneous appearance alongside a slightly imperfect aspect.
Glitch and grunge
The quality of photo scans, together with prints during that period, used to fall shorter than the current digital standards. Different camera scanning issues, tracking errors, and improper shooting development resulted in old-school photographs showing visual irregularities like scratches and material deterioration.
Based on these aspects, let's construct a retro filter in Photoshop.
How to Make a Vintage Filter in Photoshop?
Using Photoshop, you can apply vintage filters that create a retro appearance with faded colors while adding grain and warm tones or different curve adjustments and saturation to help you achieve old-fashioned effects.
For your convenience, we have tried to make Photoshop editing easier. Below is the step-by-step guide to making photos look vintage in Photoshop.
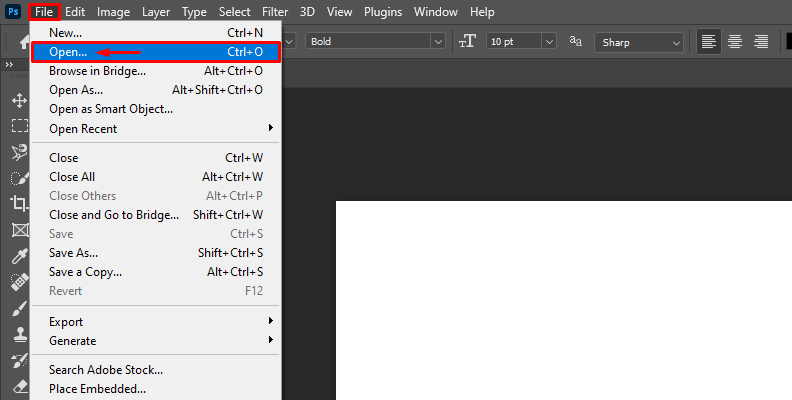
1. Open Your Photo & Duplicate the Layer
Open your image in Photoshop. To do this, press the Ctrl + J key on your keyboard if you're on a Windows computer or the Cmd + J key if you're on a Mac device.
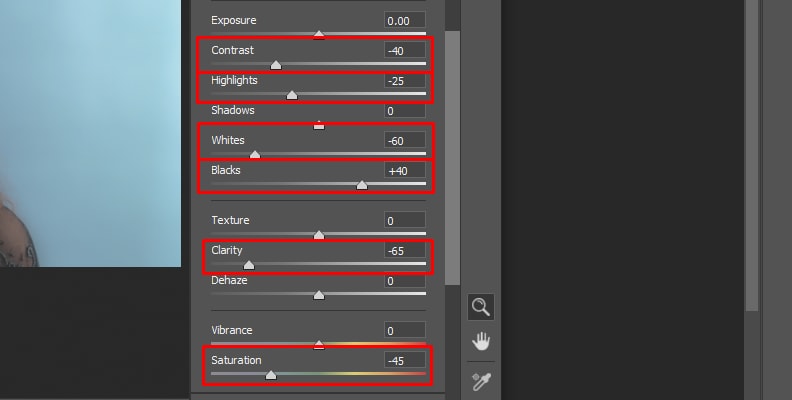
2. Add Manual Photo Adjustments
Adjust the intensity, temperature, sharpness, shadow, tint, grain, and noise. Noise everything to achieve the right amount of warmth and an old/antique look.
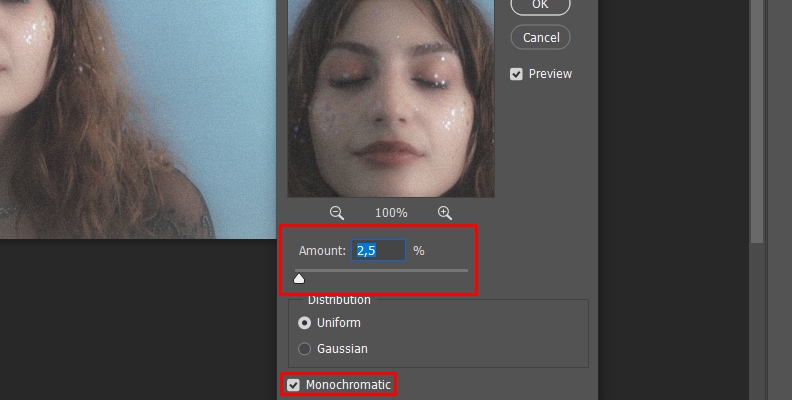
3. Adopt grain for a Film Style
The dampening of foreground noise does this through a series of manipulations: Click Filter > Noise > Add NoiNoise.
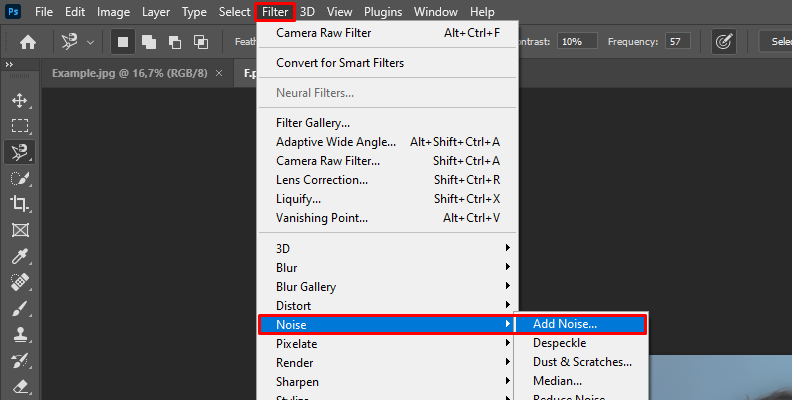
It will help to set the deposit amount between 5% and 15%, depending on your preference. Select Gaussian and Monochromatic for a natural look.
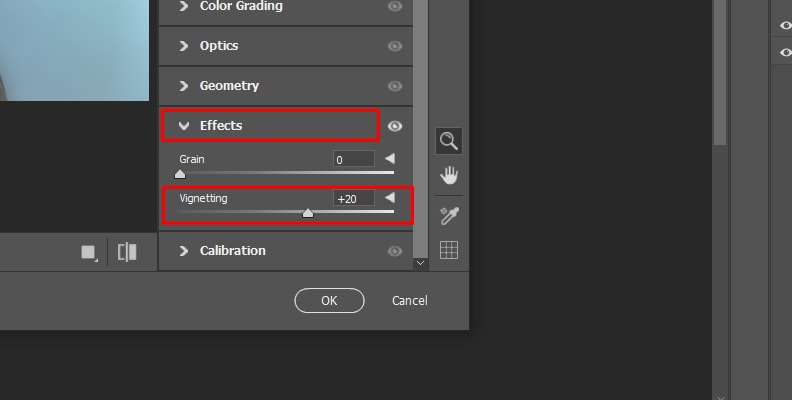
4. Create a Vignette
Access the top toolbar on the right side and navigate to Effects > Vignette. Now click on the Custom tab and change the place of the Vignette Slider.
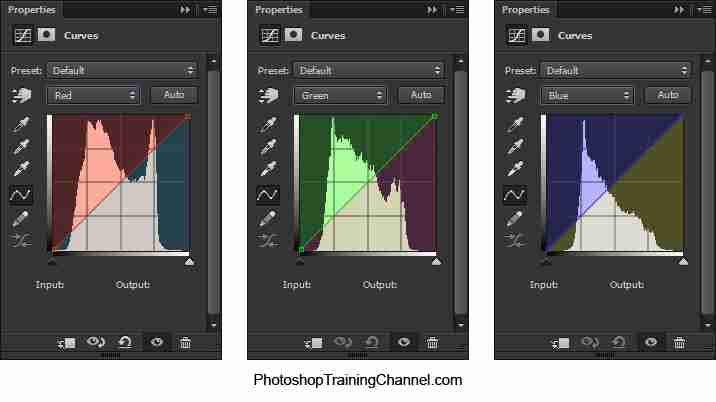
5. Color Correction with Curves & Gradient Map
Open the Properties option at the top of the screen in the Photoshop app. Tweak the aggravation slightly to give it a more desolate and worn-out appearance. First, add a Gradient Map Adjustment Layer and select a warm brown or blue color for the gradient effect.
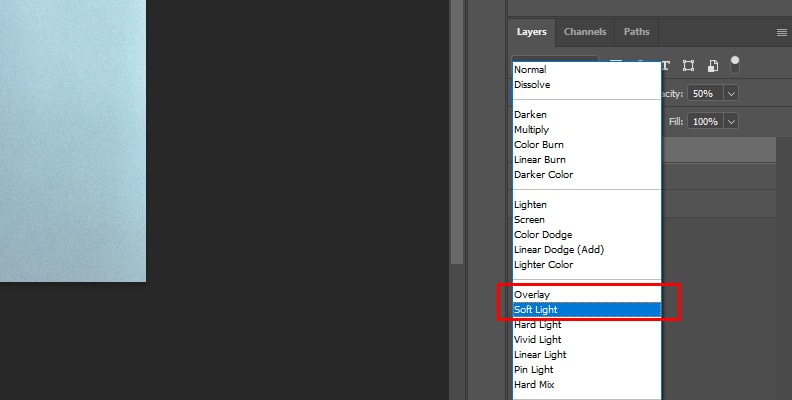
6. Add Either Light Leaks or Film Edge Burns
Go to Layers > Add a New Layer, and make the new layer Overlay. Take a soft brush and use the colors of the red, orange, or yellow paint on the outer margins.
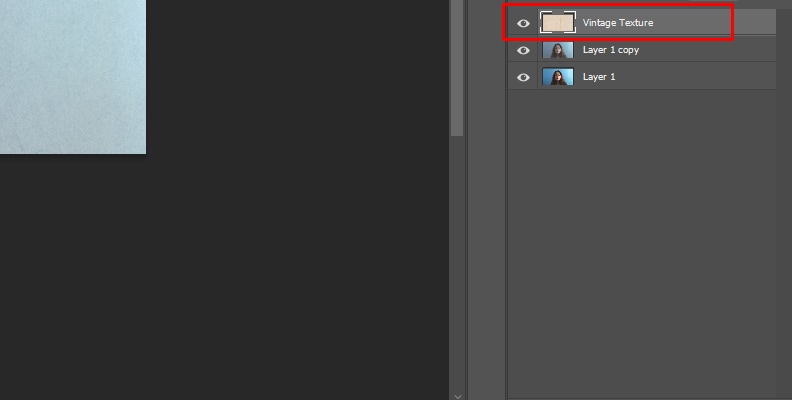
7. Add Vintage Texture
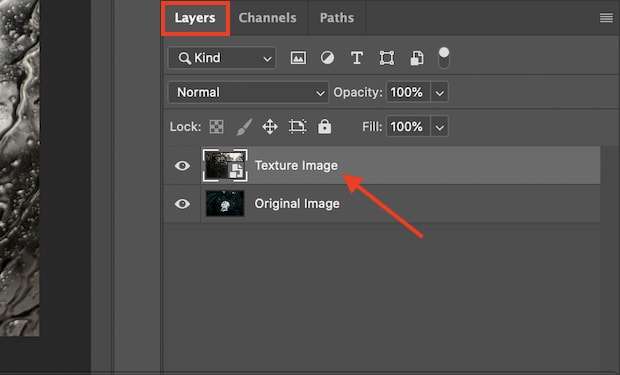
Find the Layers panel in Photoshop situated on the right side of the screen. After that, double-click the image layer to enable a renaming option. Select the image layer before double-clicking to change its name.
Adjust the vintage texture option to blend the image of a particular layer seamlessly.
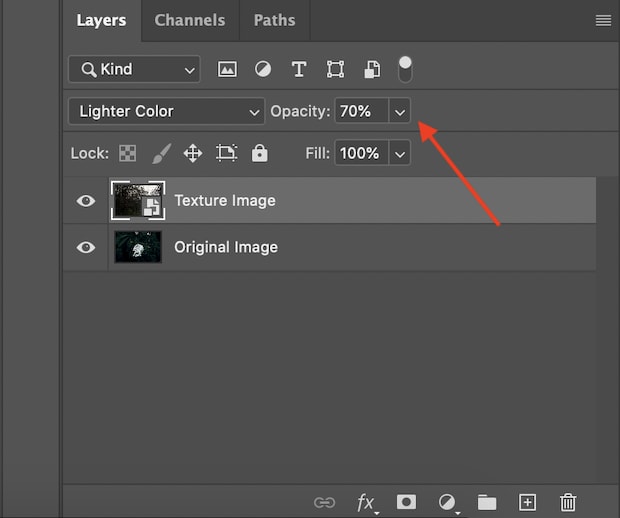
8. Adjust Opacity and Export the Final Image
You can now fine-tune the intensity of the texture overlay and control its impact on the underlying image. To minimize the texture's visibility across the entire image, simply adjust the opacity of the Texture Image layer.
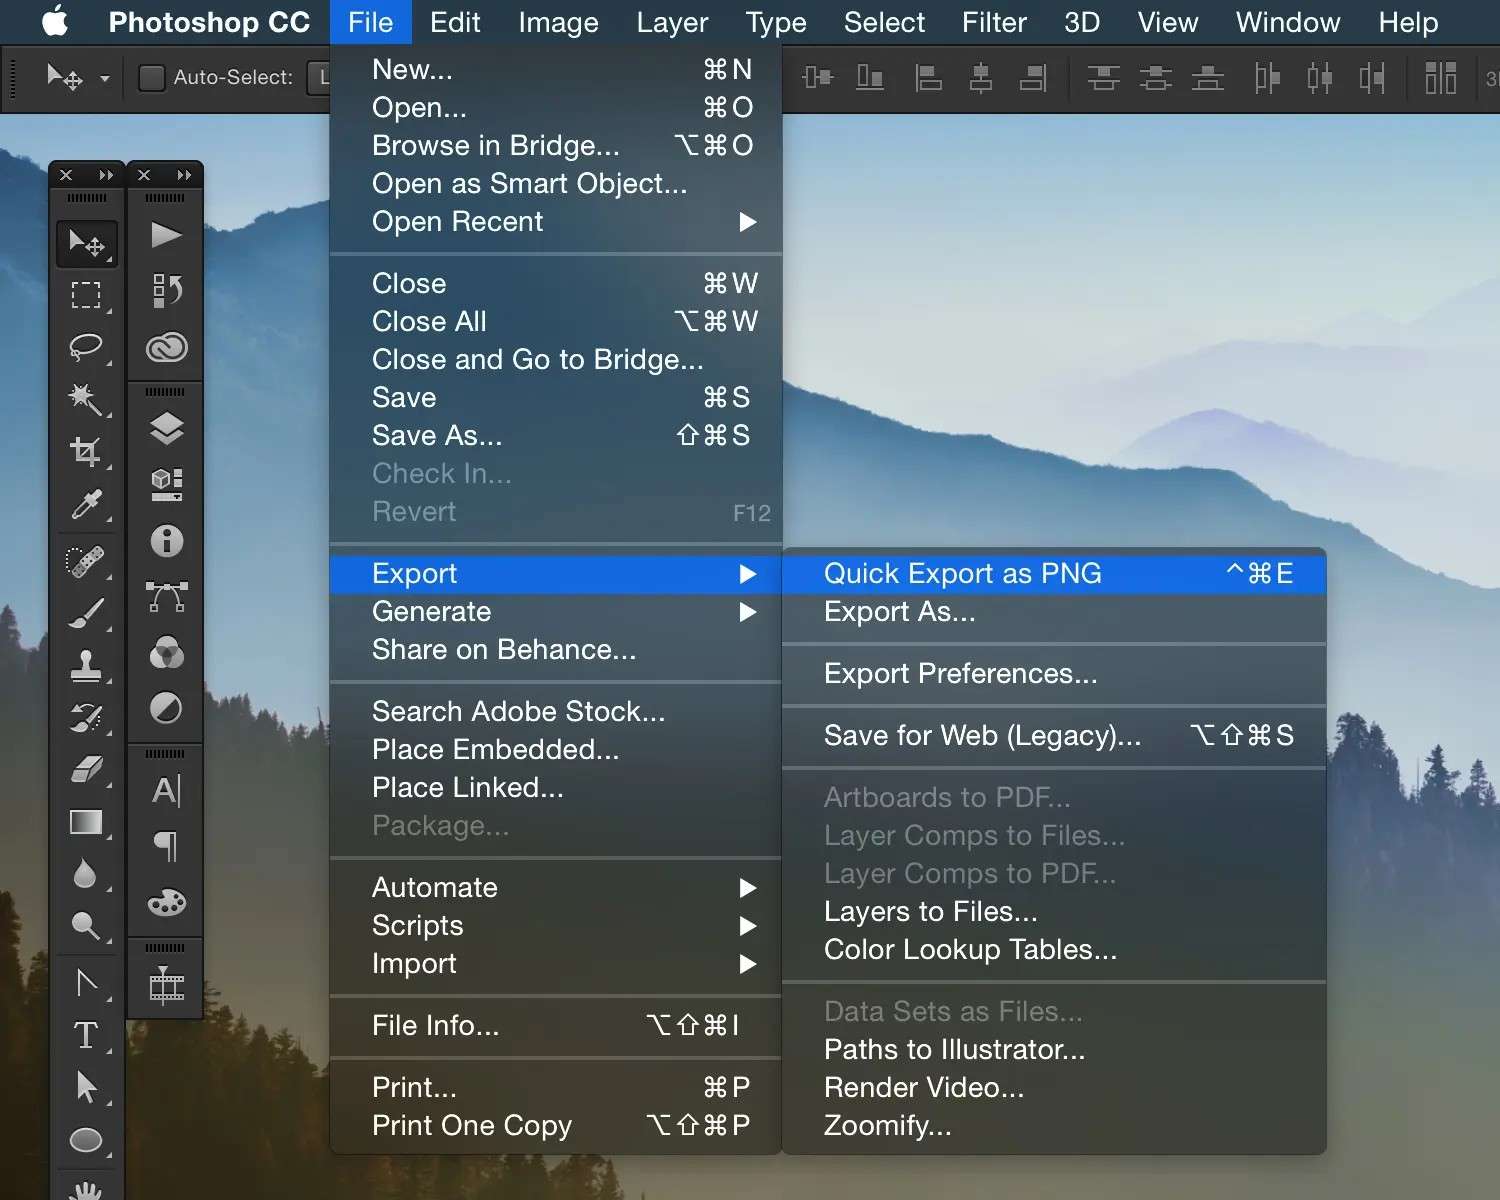
Go to File > Export to save the images.
Bonus: Filmora As An Easier Alternative
If Photoshop feels too complicated, Filmora provides an easy way to apply vintage effects with a single click. It allows you to apply vintage effects to photos in clicks from its rich library of 2.9M+ visual assets. In addition to that, it also lets you adjust manually, such as editing its light, color, shadow, sharpness, and more from 0 to 100.
 secure download

Why Is Filmora a Powerful Photoshop Alternative?
- A set of all-ready vintage filters and pre-made vintage effects.
- Easy to use for beginners and immediate results.
- Works on Android, iOS, Windows, and Mac.
- No expensive subscription, and more affordable than Photoshop.
Steps to Create a Vintage Look on Filmora Desktop:
- Open Filmora and Import Your Media: Select your photo or video, import it, and drag it to the timeline.

- Go to the Effects Panel: Find vintage, sepia, and retro filters under the Effects tab. You need to type "Vintage" or "Retro," and you will see multiple filters.

- Apply the Vintage Filter. Drag and drop the filter onto your media. For example, let's apply the "Vintage Glitech 01" filter and how it looks.

Another effect is "Old video," which gives a monochromatic look with varying white and black levels.

The nostalgic filter also brings vintage vibes.

- Go to the Filter Panel: navigate to filter > search vintage in the box.

You can apply any of them, like "Vintage," "Vintage Vibe," etc.

Another "Antique" one:

- Adjust Advanced Settings. Refine the look by using color grading, vignette, and sharpness.

- Save or Export in High Quality. Choose your desired resolution and file format.

secure download Tips for a Perfect Look in Vintage Costume
Here are some additional tips for a more genuine feeling of an aged photo in Photoshop:
- Use different effects, filters, and manual adjustments to represent a bygone era more effectively when using warm, faded, or sepia tones.
- The vintage profiles in Photoshop and the LUTs could also be worth experimenting with.
- Get pictures using an old film camera for the base to replicate the historical appearance.
- Substitute a higher ISO or manually apply more grains as it contributes to helping the natural film feel.
- Don't replicate the colors of the actual photos to make them blend with real-life tones.
- Screen duplicates of aged paper or film scratches should be blended nicely.
- Distortions were made while using the lens to emphasize realistic aspects.
Conclusion
In this article, we have discussed the step-by-step guide to making a photo look vintage in Photoshop. Hopefully, you will find it helps. If you are also looking for a Photoshop alternative, you can meet Filmora. It allows you to make a photo look vintage in seconds with retro filters and effects.
secure download 