
 100% Security Verified | No Subscription Required | No Malware


 ChatGPT
 Perplexity
 Gemini
 Claude
 Grok
Grok
Minecraft can be defined as a creative open-world game that has attracted millions of fans and survivors who build new environments and explore pixel worlds. In fact, for many players, taking screenshots of exploration, building, and battle are even as significant as playing a game. Whether you want to showcase your amazing constructions, interesting quarries, or even Minecraft survival techniques, it is quite possible to record yourself with Minecraft screen capture while playing on a Mac.
This guide will examine five simple ways to capture Minecraft on your Mac. These methods differ in features and usability, allowing you to record your gameplay using simple tools and no-cost programs.
In this article
Part 1: Can Minecraft Screen Capture Be Done As A Beginner?
Yes, you can record Minecraft on a Mac even if you are a complete beginner! There are several tools available that allow you to capture your screen and gameplay and you can try their free version and then purchase the premium versions for more control over advanced features. These tools offer various features, from basic screen recording to advanced options for editing and enhancing your videos. In this guide, we will cover five efficient methods that are both cost-effective and user-friendly.
For Minecraft players, especially beginners or those on a budget, these beginner-friendly screen recording solutions are excellent choices for creating gameplay videos, tutorials, or content for YouTube and social media.
Part 2: 5 Efficient Minecraft Screen Recorder to Record Minecraft Easily (No Lags)
Method 1: Using Filmora Screen Recorder for Mac
Filmora is one of the most widely used video editing software, including a screen recording facility. As stated, Filmora has an easy-to-navigate interface and excellent video quality, making it ideal for recording Minecraft playthroughs. Moreover, its application introduces built-in features that facilitate recording videos and sound, making it an all-in-one package for content creation solutions.
Key Features:
- The voice recorder can simultaneously capture the computer system audio and external microphone sound.
- Easy-to-use recording interface.
- Support record on multiple occasions, including on-screen instructional videos, streaming videos, and so on.
- Create customized videos, including audio, and add them to different tracks.
- Record and share gaming videos, tutorials, and presentations before compounding the latter in one tool.
- Edit recordings with unlimited editing templates, special effects, and other resources.
- Export to MP4, MOV, MKV, GIF, AVI, and many other formats.
Steps to Record Minecraft Using Filmora for Mac
Step1Open the Screen Recorder in the Filmora Mac
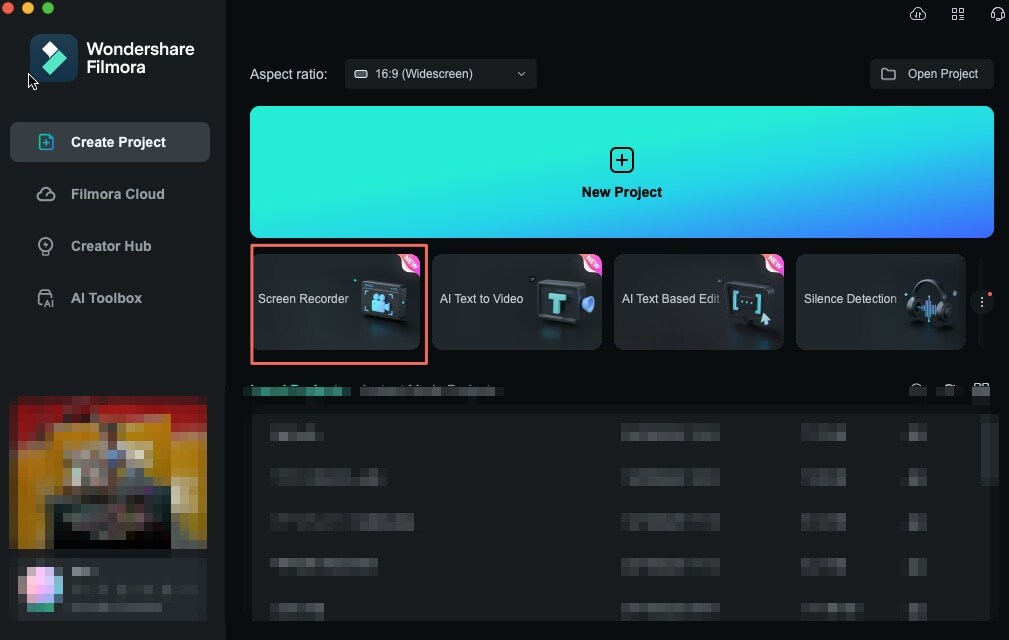
On the main screen of the Filmora, there are many options to choose from; therefore, click on the tab with the inscription "Screen Recorder". You will find the screen recorder window on your screen.
Step2Go to record option in Filmora screen recorder
While in the screen recorder option, you can select the resolution button under the "Square" icon and then choose from the resolutions provided. Users have three options to choose from: It has three modes – "Full Screen", "Custom", and the "Target Window". Therefore, the Length and Width of the screen can be set by hand, or there is a ratio box on the screen.
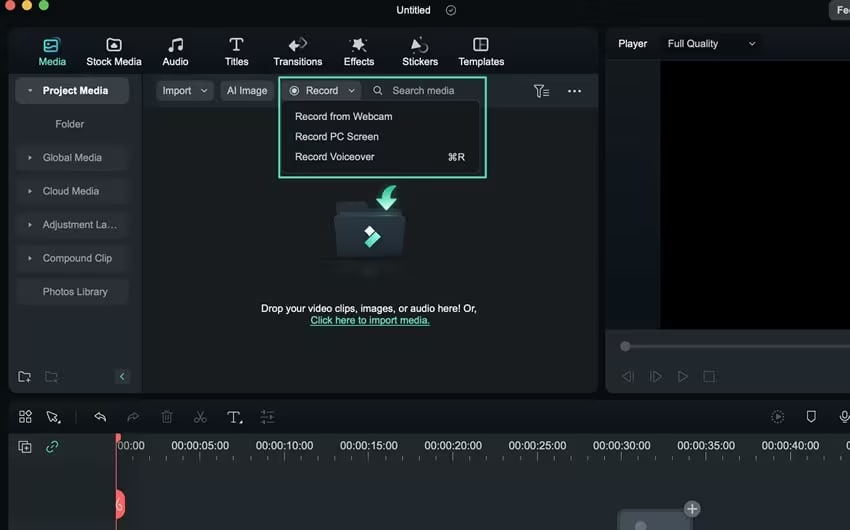
Step3Selection of the type of recording
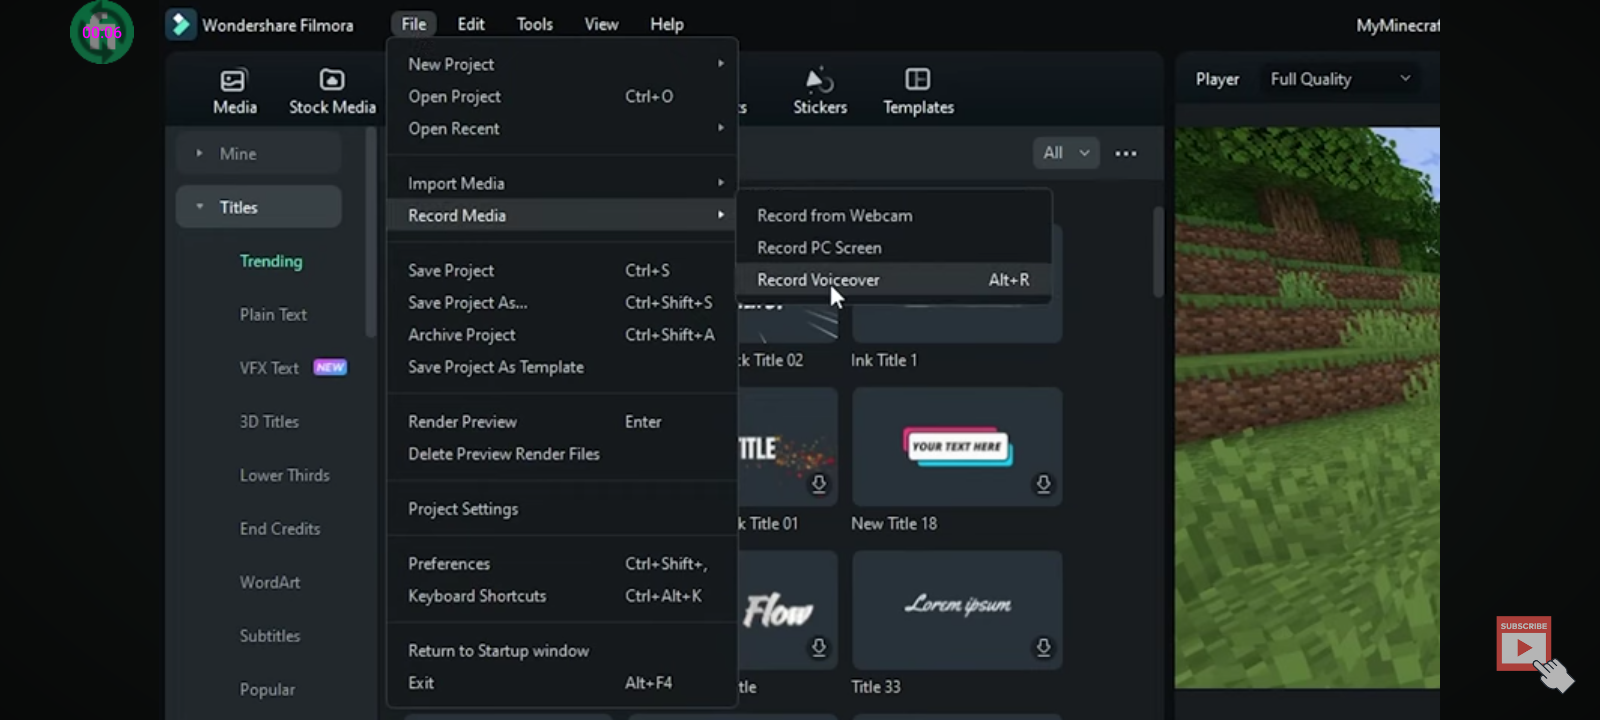
In Filmora, three recording options are shown in the screen recorder window: schedule, start recording now, and stop recording. Others have the "Microphone" used to record voice at some point during the recording session.
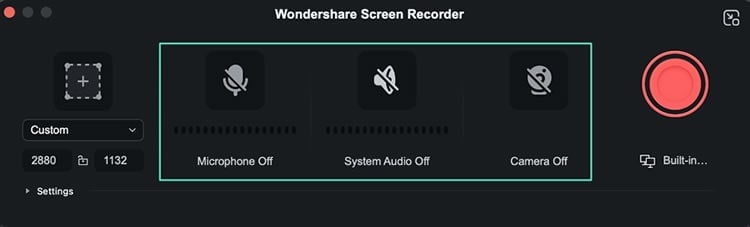
Besides, the users can try configuring the "System Audio" or "Camera". The good thing is they can turn on or off all three options on the site.
Step4Design Preferences to Accommodate Recording
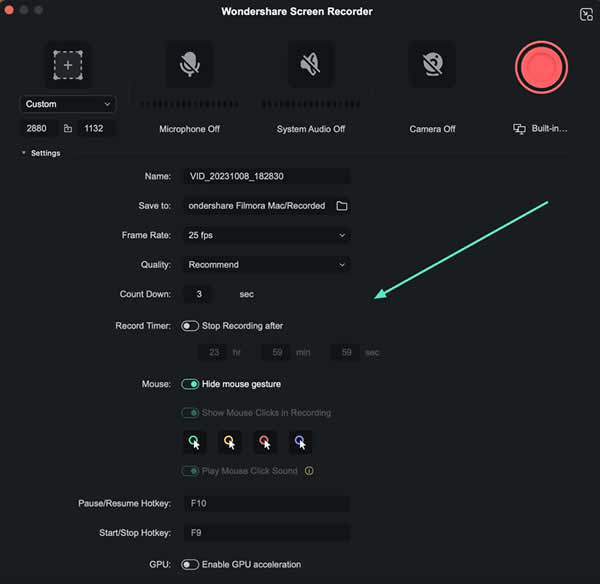
Click "Settings" on the extreme left toward the recording window's lower part and open it up. Users can also adjust other settings depending on their needs.
Step5Start the recording
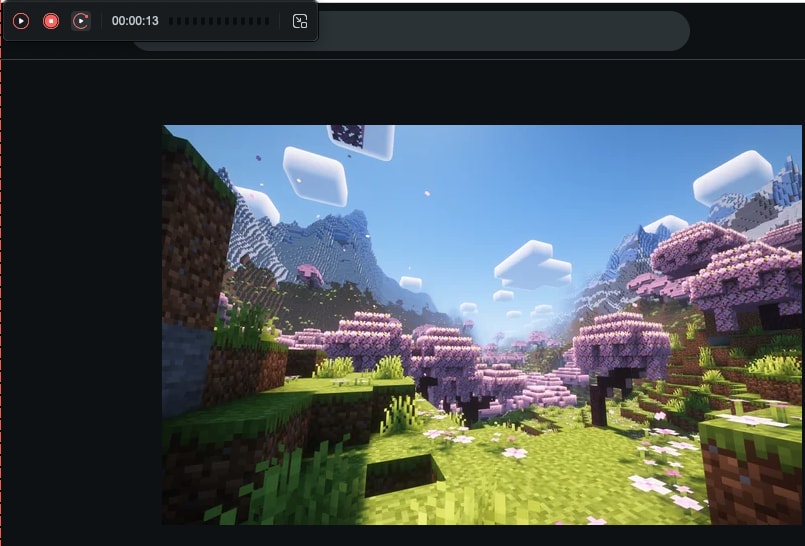
Hit the red start button to start directly.
The player under the screen recording shows buttons such as "Pause" and "Stop". You can step whenever you want.

If the subject wishes to begin again, they can press the "Re-record" option on the extreme right. The recording process will simply begin again once you click the re-record option after stopping the recording.
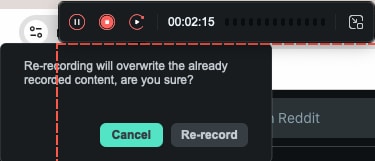
Re-record feature is beneficial as you do not have to redo the entire video if you accidentally record something wrong or if you selected the wrong option on the screen.
Method 2: Using QuickTime Player
QuickTime Player is an inherent application on macOS devices that facilitates the user in different multimedia operations, such as Minecraft screen capture. It is easy to use and can be easily accessed; hence, it serves a good purpose of recording simple gameplay.
Key Features:
- No additional software is required.
- Simple interface.
- Basic screen recording capabilities.
- Supports Ultra HD 4k, as well as 5k display.
- Has many different recording modes and mouse capturing modes available.
Steps to Record Minecraft Using QuickTime Player
Step1Go to QuickTime player in Applications Folder
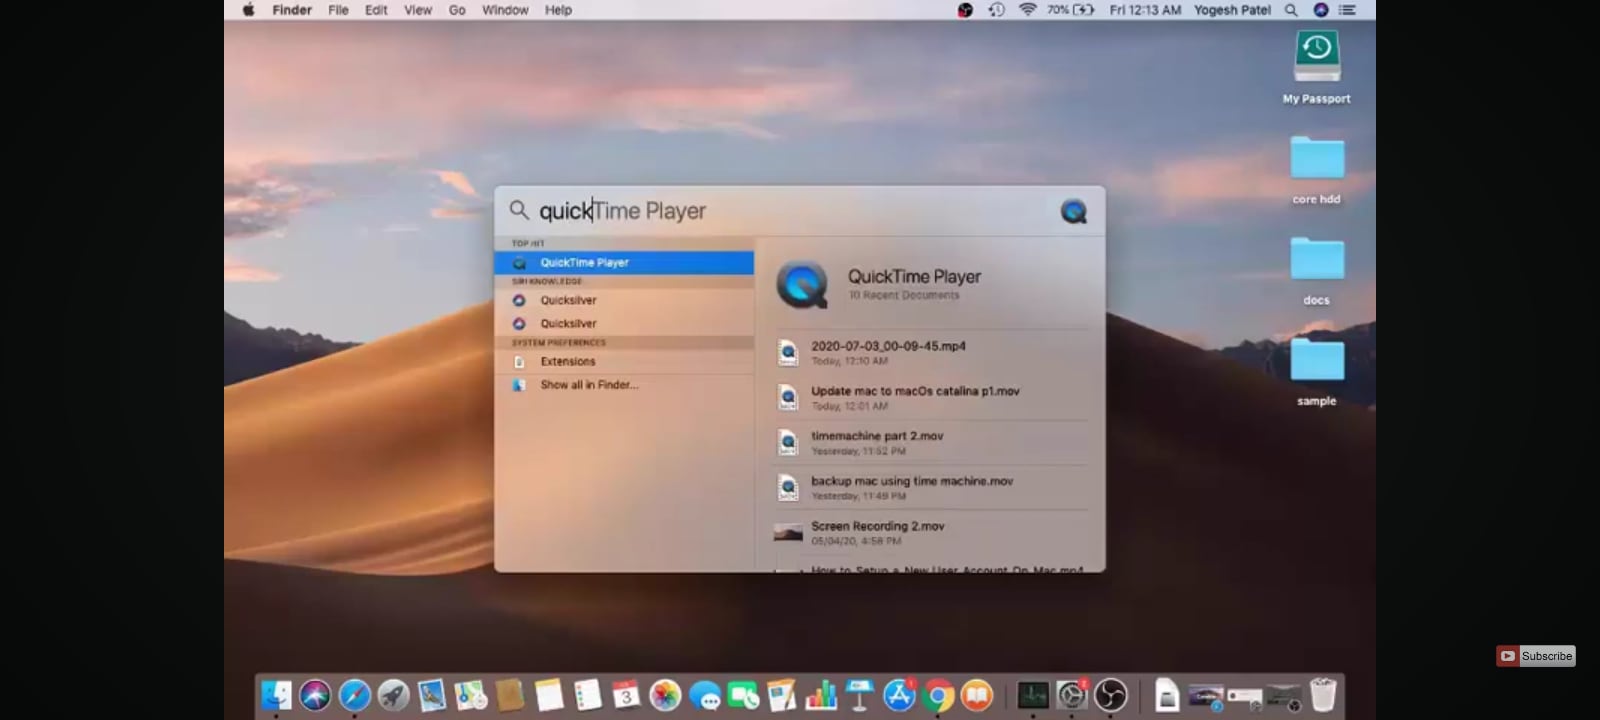
Double-click the QuickTime Player from the Applications folder—the program is located on the Dock or can be opened with a Finder Window.
Step2Go to New Screen Recording
After launching the application, go to the "File" on the top panel of the screen and then click on "New Screen Recording" to record the activity on the screen that is the game. Screen capturing can be done in either full-screen mode or partial-screen mode.
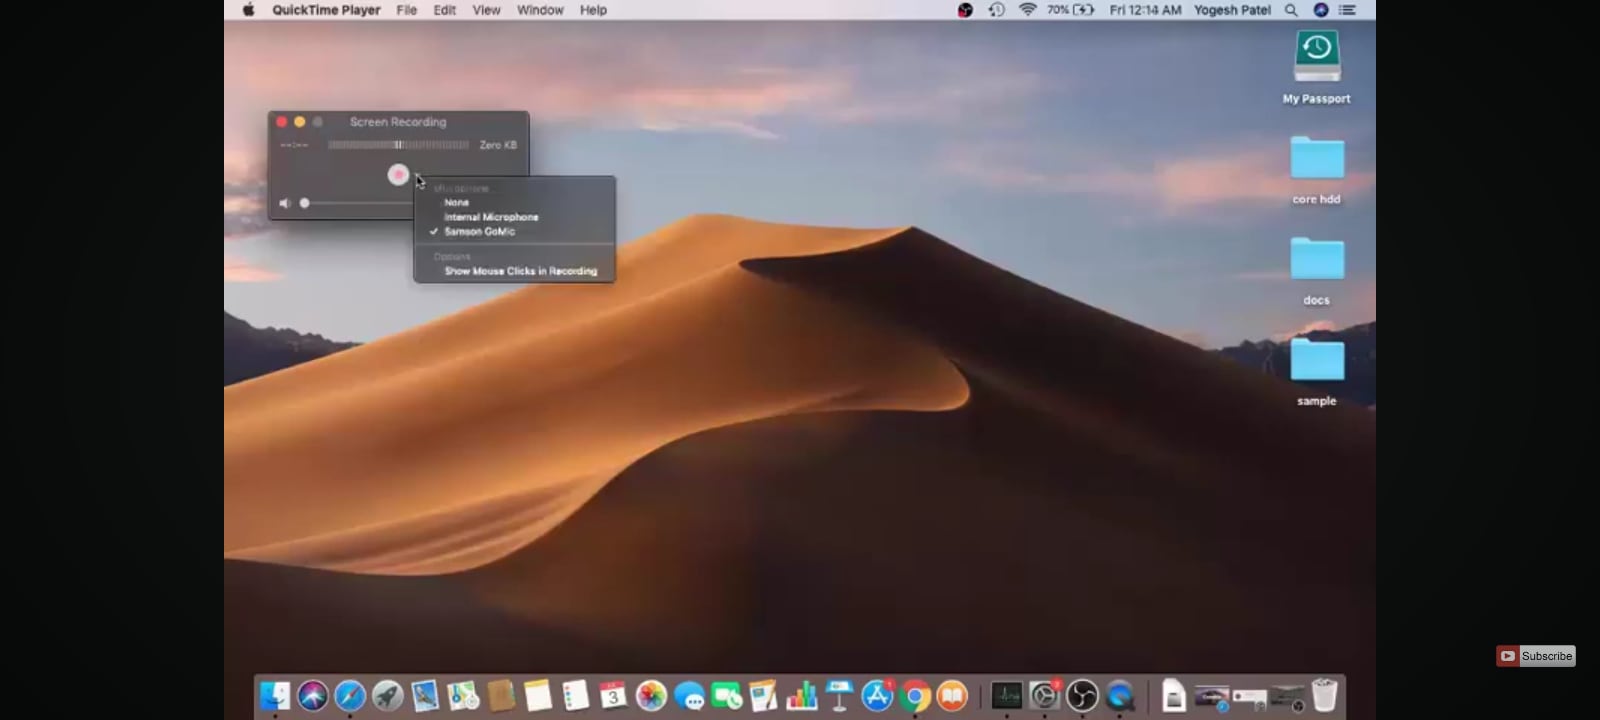
The QuickTime control panel will appear after you have made the right selection.
Step3Adjust sound settings
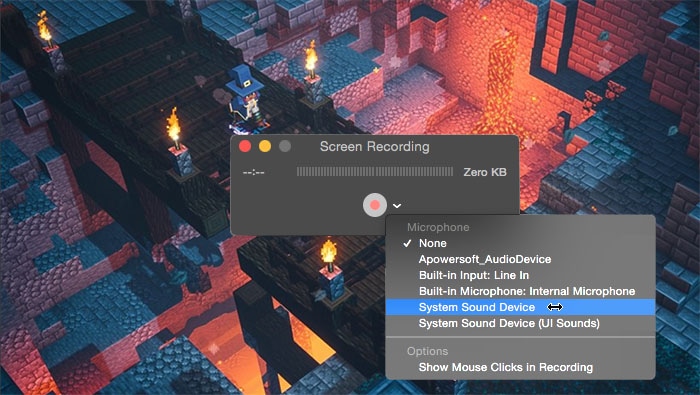
To start recording, hit the record button.
Step4Record and Get the Recorded Minecraft Video
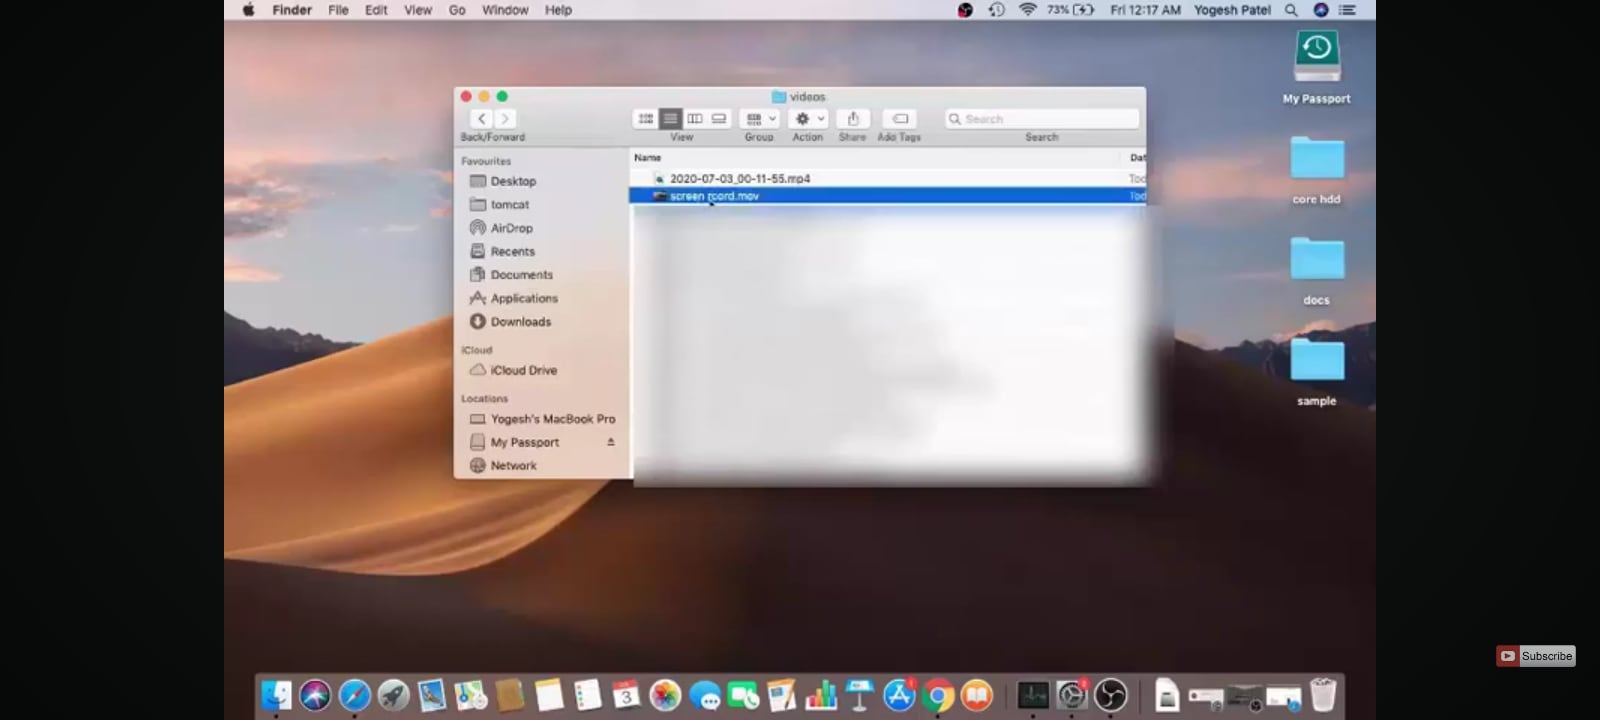
After you have completed the recording, you will need to click on the "Record" button again to stop the recording. You can find the recorded Minecraft in downloads.
Method 3: Using OBS Studio
OBS Studio, or Open Broadcaster Software, is a versatile, cross-platform recording and live-streaming application. It's flexible and has different features perfect for recording Minecraft gameplay.
Key Features:
- Highly customizable settings.
- Includes the ability to record as well as live streaming abilities.
- Full HD recording at up to 120 frames per second; 4K/8K recording
- Integrated recording and editing
Steps to Record Minecraft Using OBS Studio
Step1Download and Install OBS
First, one must go to the official OBS website and get the right version of OBS, depending on the MacOS one is using. You can install software on the computer when the download is done through instructions displayed on the screen.
Step2Name Minecraft
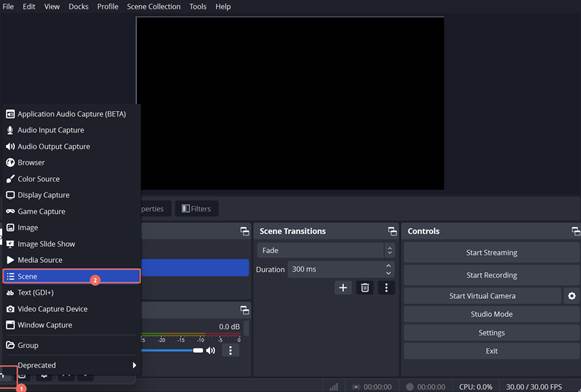
Open OBS, and then from there, go to the scene; look at the bottom of scenes, and you will see a plus button. Click on it, then it will take you to add a scene. You can name this Minecraft, then press ok.
Step3Configure OBS
Output Setting
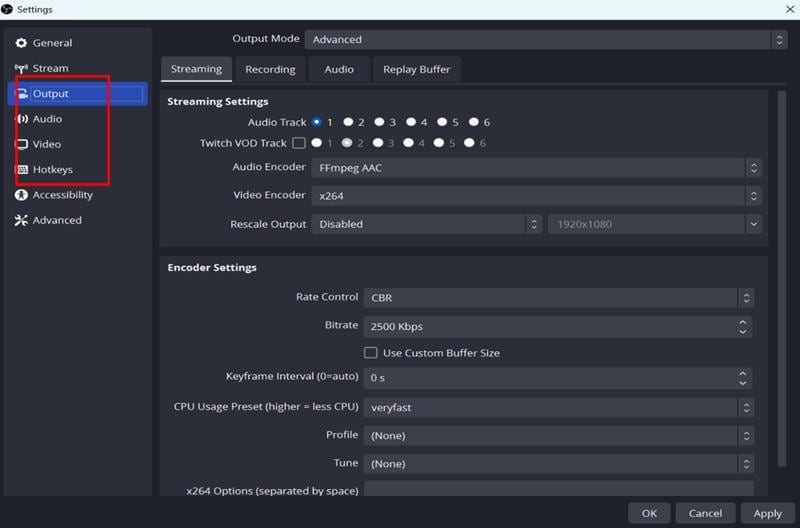
Open the "Files"-"Settings" menu. On the same screen, click the "Output" tab and set the "Output Mode" to "Advanced".
Recording Setting
Immediately, come down to the Recording section. First of all, that decides the "Recording Path".
Click on the "Audio" option in the dropdown menu. The submenu Desktop Audio ensures it is set to Default, or you can select the specific device. Under the option "Mic/Auxiliary Audio", choose "Microphones".
Pre-design HotKeys so you can begin and end a recording with a single click. Ok, record "Start Recording" and then the desired button, do the same with "Stop Recording". Apply, Then ok and settings are set up.
Step4Add Minecraft as a Source in OBS
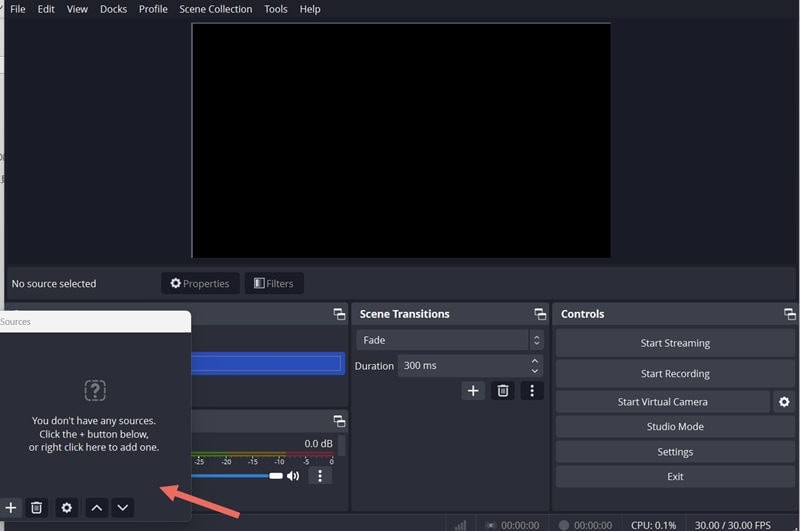
To do this, you must add Minecraft as a source in OBS so that the software can capture your gameplay. Follow these steps to add Minecraft as a source:
Start the game called Minecraft and check that the game runs in windowed mode.

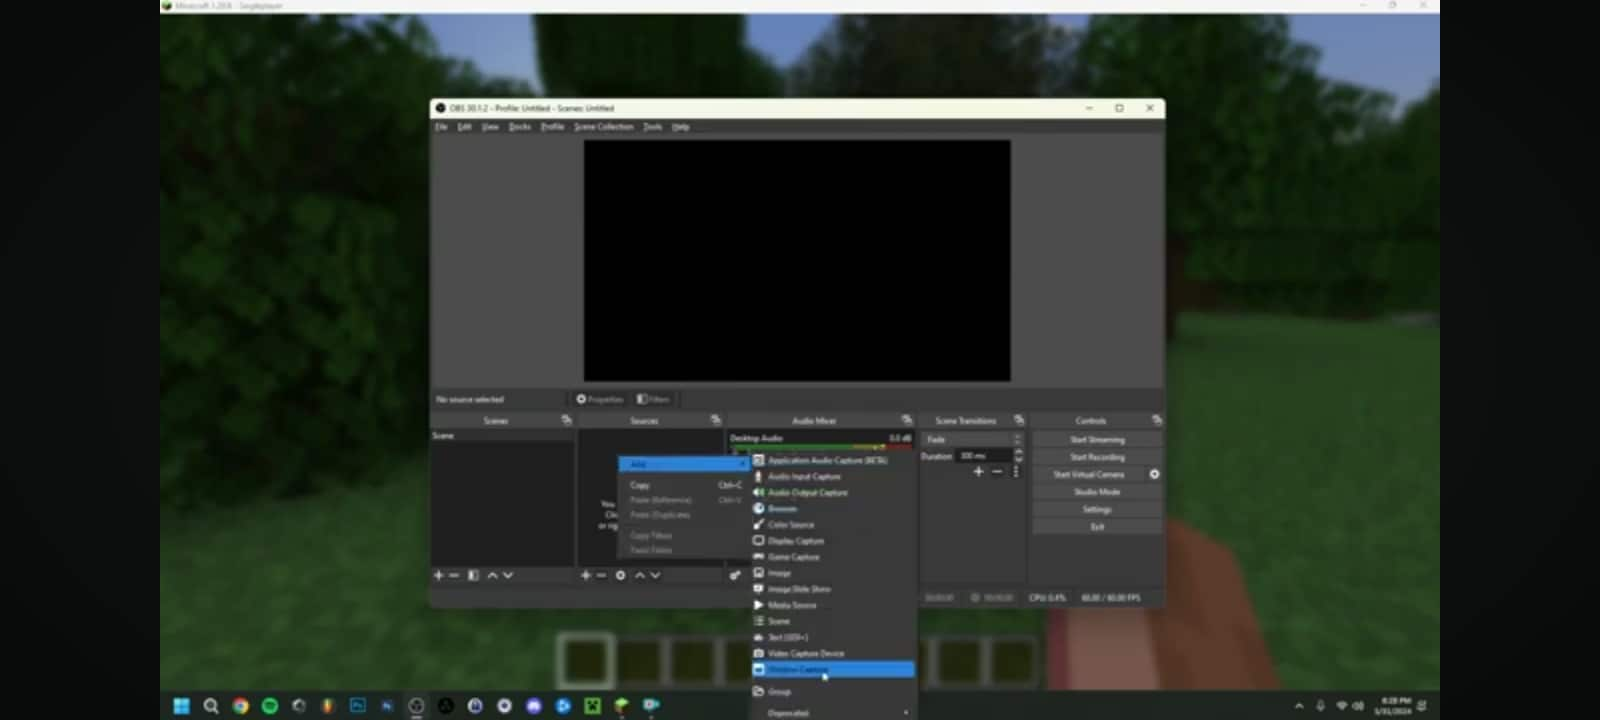
Go back to OBS and click on the plus sign beside the word "Sources". Choose "Game capture" from the list of available sources of the broadcasting screen. Select the "Mode" dropdown and table, then choose "Capture specific window". Open that ‘Window’ dropdown menu, and choose the Minecraft application window. At the bottom of the dialog box, there will be the option of "OK". Click on it to add the source.
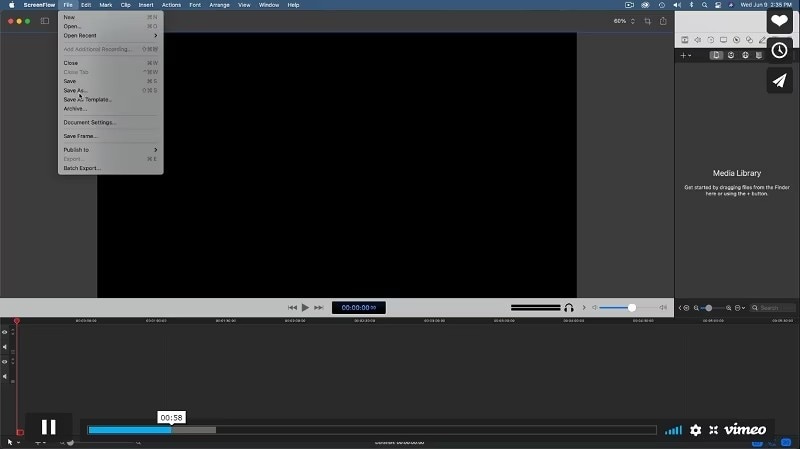
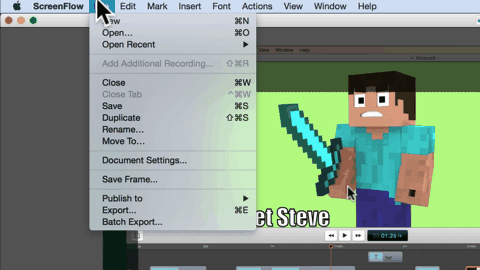
Method 4: Using ScreenFlow
ScreenFlow is a powerful Minecraft Screen Recorder that can capture Minecraft games on a Mac. Although it costs some money, ScreenFlow is greatly applauded for its exquisite features and clear videos. Apart from capture, it provides relatively strong video post-processing functions, which will be suitable for students who want to make high-definition Minecraft videos for YouTube and so on.
Key Features:
- This includes support for recording gameplay with the best resolutions, such as 720p and 4K.
- Gives samples for easy recording process of the easy recording workflow to offer people high efficiency
- Proposes various exporting formats so that the recordings can be backed up by various platforms and equipment.
- Presents the library features to facilitate the management and total control of all your recording files.
Steps to Record Minecraft Using ScreenFlow
Step1Download and Install ScreenFlow
Download ScreenFlow on your Mac. After it has been installed, double-click on the icon to launch the program on the MAC computer. You should see the welcome screen when you first load the program. For a new recording, choose "New Recording".
Step2Choose the appropriate recording choices
In the next screen, you have a number of recording choices like "Record Desktop From" and "Record Audio From" among others. These are to assist you to configure the recording options, depending on whether you prefer to record the screen, webcam or audio.
Here, it is also possible to decide to record a part of the screen or the whole screen, depending on the task at hand.
Step3Start recording
On reaching this stage, hit the red "Record" button and the recording should start within 5-seconds delay.
Step4Preview and Export
To pause recording one can use keyboard shortcut "Shift + CMD +2" or alternatively use the mouse and click on ‘Record’ button, which is in red color. On the screen a preview of the recording will come up and you can then proceed to record it or edit it as required.
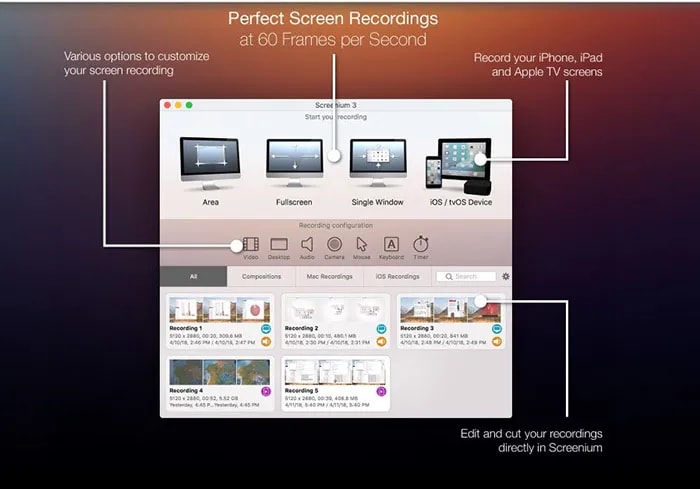
Method 5: Using Screenium Screen Recorder
Screenium Screen Recorder is a user-friendly tool that allows you to record Minecraft gameplay on a Mac with minimal setup. It offers a range of recording options, including the ability to capture your entire screen or a selected region. While not entirely free, Screenium offers a trial version with limited features, making it a good option for beginners.
While it's not quite as feature-packed as Wondershare Filmora, for example, it has all the basic functionality - audio input and output recording, scheduled recording, mouse click effects, and more.
Key features:
- Dual monitor recording
- Text/image/logo insertion
- Keyboard input display
- 24-hour recording
- Fullscreen webcam
- User-friendly interface.
- Can record in full HD.
- Option to capture system audio and microphone input.
Steps to record Minecraft Gameplay Using Screenium
Step1Go to game recording mode
Launch Screenium and select Game Recording mode;
Step2Start recording
Start Minecraft. Press the Record key to start/stop recording.
Step3Play or upload recorded video
To play, edit, or upload your video to a platform of your choosing, simply click on your video icon.
Conclusion
Recording Minecraft on a Mac can be an exciting way to capture your in-game achievements, share tutorials, or even create engaging content for platforms like YouTube. Whether you want a simple recording with minimal effort or advanced options for professional-quality videos, there's a method to suit your needs.
If you're new to screen recording and want something easy to use without sacrificing quality, Filmora could be your best bet. It provides a balance between functionality and simplicity, making it ideal for beginners or casual gamers.


