
 100% Security Verified | No Subscription Required | No Malware

Podcasting is fantastic for promoting your brand because you can reach a worldwide audience. Millions of people regularly tune into podcasts for entertainment or to learn about various topics, acquire new skills, and gain insights from industry experts.
Using Zoom for podcast recording is an excellent way to create quality videos effortlessly. Everyone’s favorite video-conferencing platform offers a seamless setup and lets you invite participants (guests and co-hosts) and record their audio separately.
Dive into our expert tips for recording a podcast on Zoom to understand how to stand out and make high-quality content.
Keep scrolling to see how to edit your Zoom podcast with an intuitive video editor to create a promotional video for social media.
In this article
Top 3 Tips to Use Zoom for Recording a Podcast
Using Zoom to record a podcast requires thorough preparation. That starts with getting the necessary equipment and checking all technical aspects before recording.
Here’s what you need to record a podcast on Zoom that stands out from the competition.
Instruct All Participants to Use a Quality Camera and Microphone During the Zoom Podcast
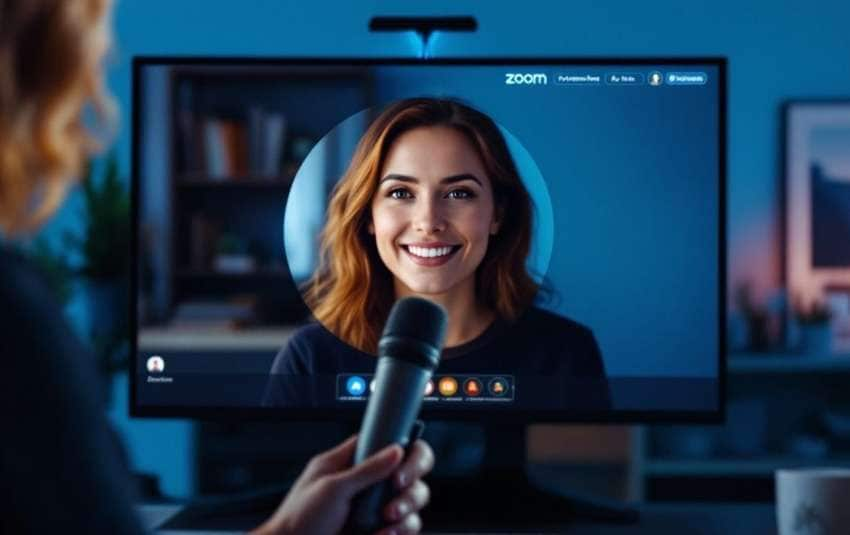
The podcasting world has fierce competition. Cutting through the noise and ensuring your audience takes you seriously requires production value. That’s where a high-quality camera and microphone come into play.
Ensure each participant (including yourself) has a solid mic and camera for studio-quality video and crisp sound. HD and UHD cameras are best for top-tier video quality, while external microphones are a no-brainer for professional audio with maximum clarity and depth. Dynamic mics are fan favorites because they can reduce background noise.
You may also need a Zoom podcast recorder to capture quality audio. For instance, the Zoom H6 for podcasting has four mic inputs and two outputs (for your stereo and headphone tracks). The Zoom podcast P4 (PodTrak 4) recorder supports four mic inputs and four headphone outputs. However, the Zoom podcast P8 (PodTrak 8) recorder is best if you have up to six participants.
Explore your options to see what works best for your podcast.
Check How Each Participant’s Scene Will Look During the Zoom Podcast
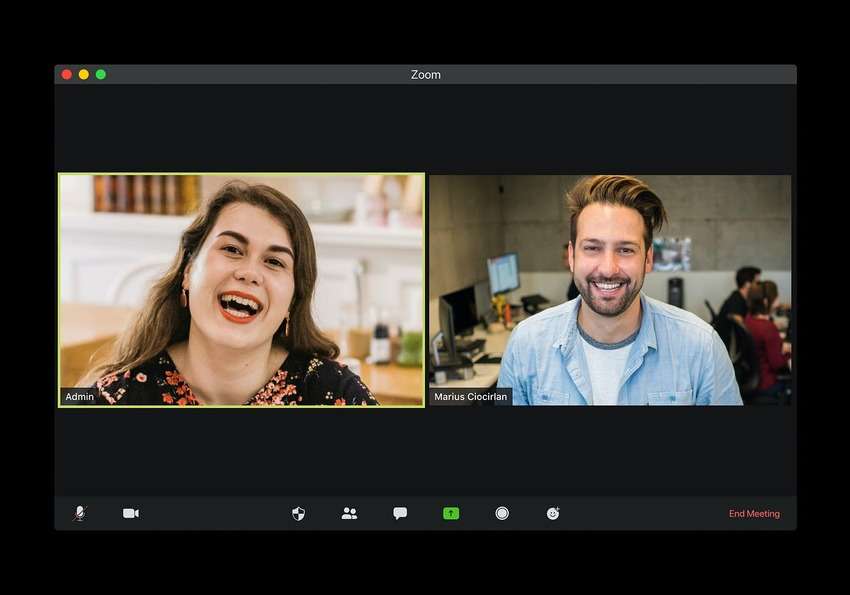
Your Zoom podcast background sets the tone and helps convey your message and values. It can reinforce your brand, so pick a well-lit, distraction-free backdrop that correlates to your podcast’s aesthetics.
Once you do, contact all participants to help them choose a background in their surroundings perfect for your podcast. They can also blur the background or pick a virtual one in Zoom’s video settings. Experiment with all options to see which best showcases professionalism and competence.
Test the Technical Side of Zoom Podcast Recording Beforehand
Once you set your camera, mic, backdrop, and Zoom recorder for podcasts, it’s time for quality checks to ensure the technical side works flawlessly.
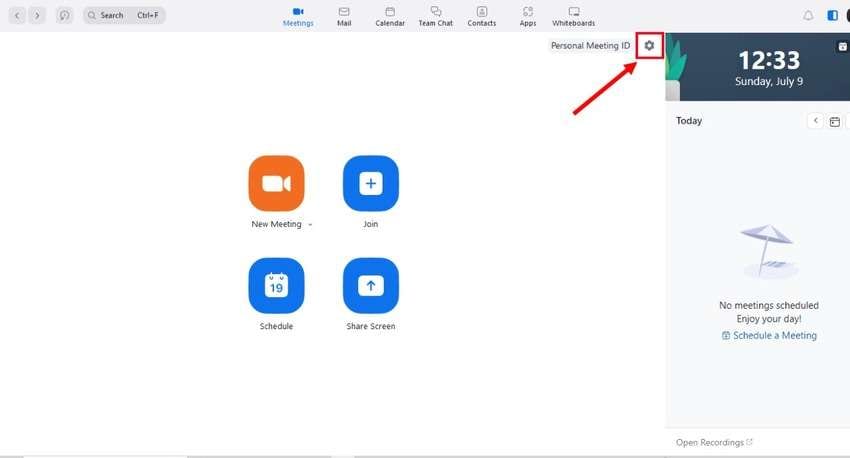
Here’s how to configure the settings in Zoom and make a test Zoom podcast recording (the screenshots are from a PC, but everything works the same on a Mac):
Step 1: Launch your Zoom desktop client and go to Settings (the gear icon).
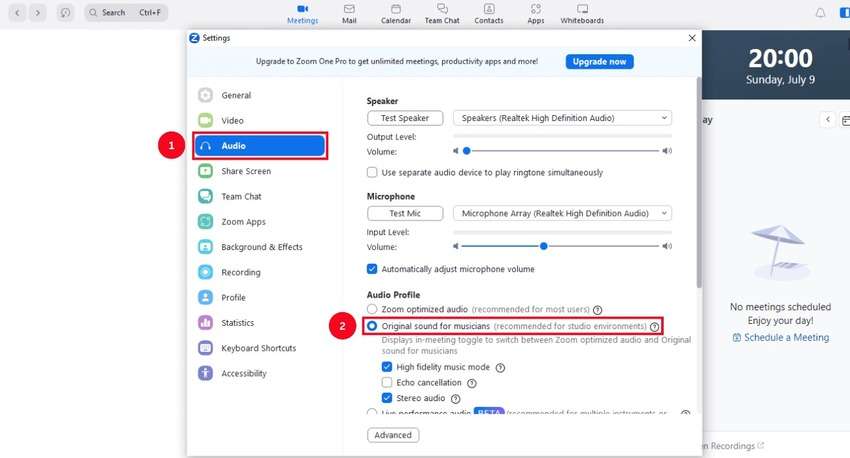
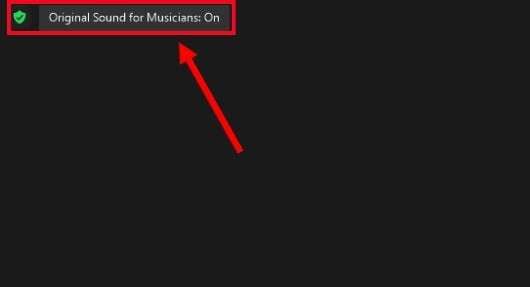
Step 2: Go to Audio in the sidebar and click Original Sound for Musicians under Audio Profile.
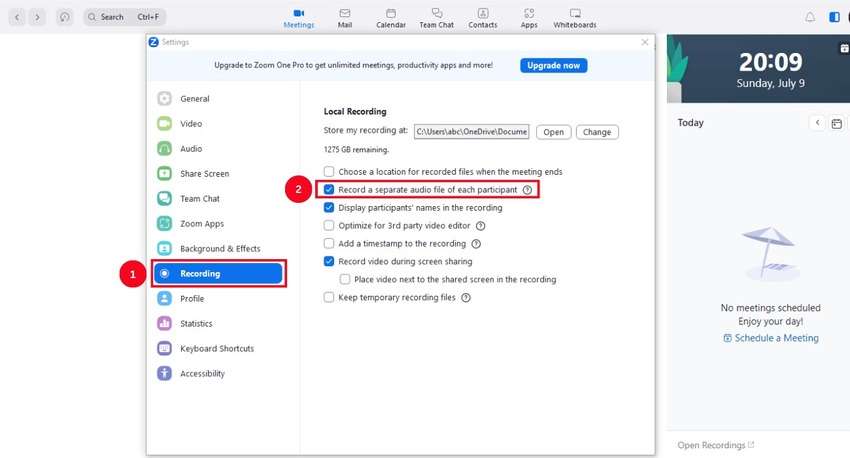
Step 3: Go to Recording and tick the Record a separate audio file of each participant checkbox.
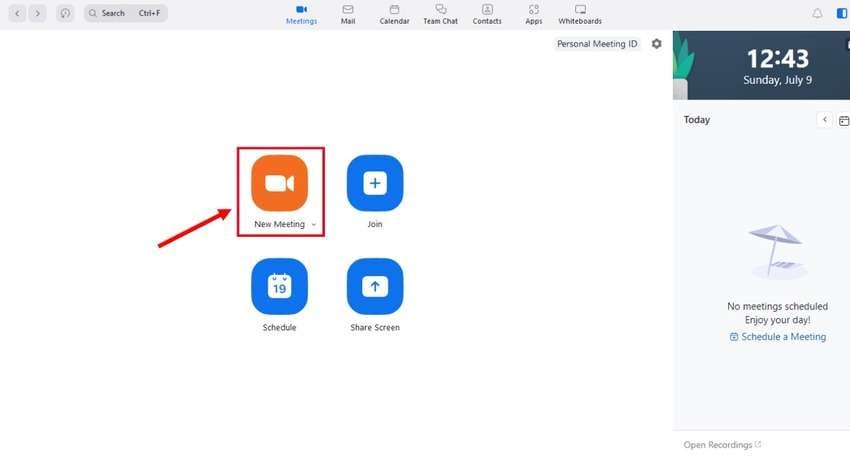
Step 4: Close Settings and click New Meeting.
Step 5: Click Join With Computer Audio.

Step 6: Click Unmute at the bottom of the screen and expand the audio options. Then, choose your mic and speaker and click Test Speaker & Microphone. Audio Settings will open, so hit the corresponding speaker and mic buttons to run checks.
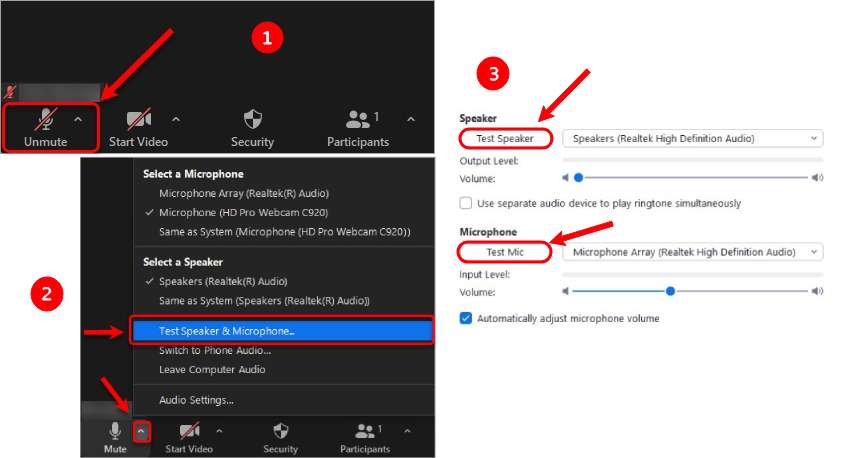
Step 7: Click the Off button next to the Original Sound for Musicians toggle at the top to turn it on.
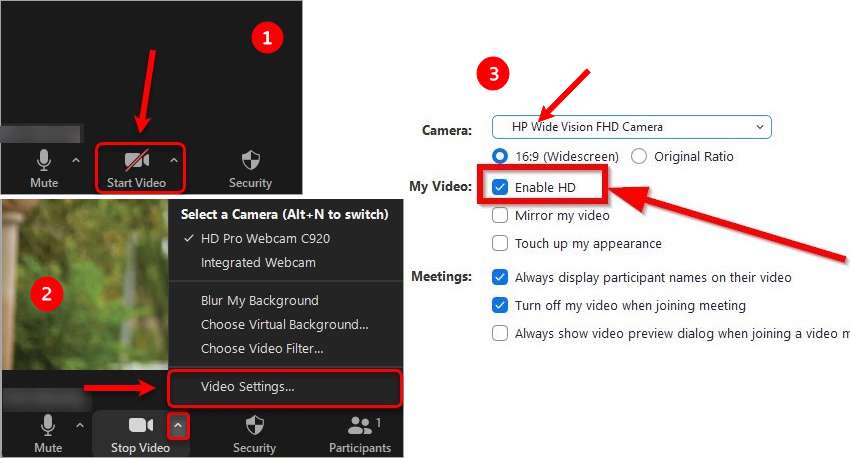
Step 8: Click Start Video and expand the options. Select Video Settings. Then, choose your camera and aspect ratio and tick the Enable HD checkbox.
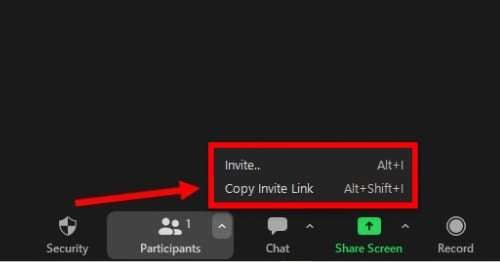
Step 9: Expand the Participants options and click Invite for a unique Zoom podcast link. Then, click Copy Invite Link and send it to your co-hosts or guests.
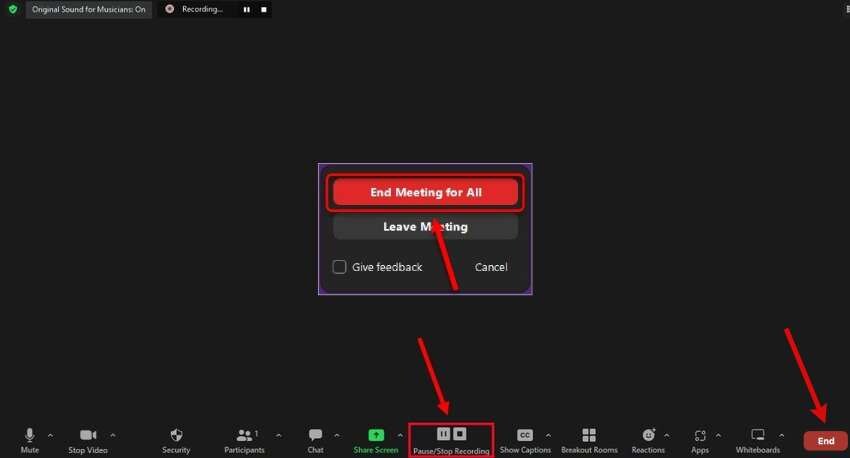
Step 10: Once everyone joins the meeting, hit Record to see how everything looks on video and ensure the sound is perfect.
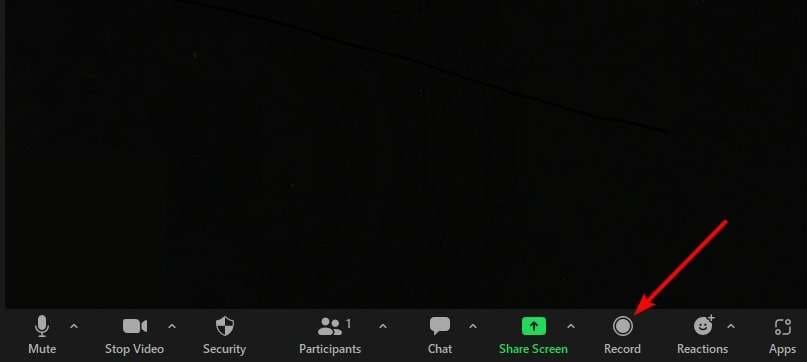
Step 11: Hit the Pause and Stop Recording buttons anytime. After checking with all participants that everything went smoothly during the test recording, click End > End Meeting for All.
Edit Your Zoom Podcast Recording to Promote Your Channel
Once your Zoom podcast is recorded, the next step is getting more people to watch it. Instead of relying on standard social posts, you can turn key moments from your recording into a short, engaging promo video that grabs attention and drives viewers to your channel.
Filmora is an ideal tool for refining your Zoom podcast recording and turning it into compelling promotional content. Available on both Windows and macOS, it combines intuitive editing with powerful features, making it easy for beginners and efficient for more advanced creators alike.
With Filmora, you can trim highlights, add captions, enhance visuals, and polish audio all in one place. It also includes a rich library of creative assets—such as title templates, filters, effects, animations, transitions, and stickers—so your promo video looks more dynamic, professional, and ready to stand out on social media.
Download Filmora for Windows or Filmora for macOS and follow along as we show you how to edit a Zoom podcast to make a snappy promotional video (the interface is identical on both operating systems):
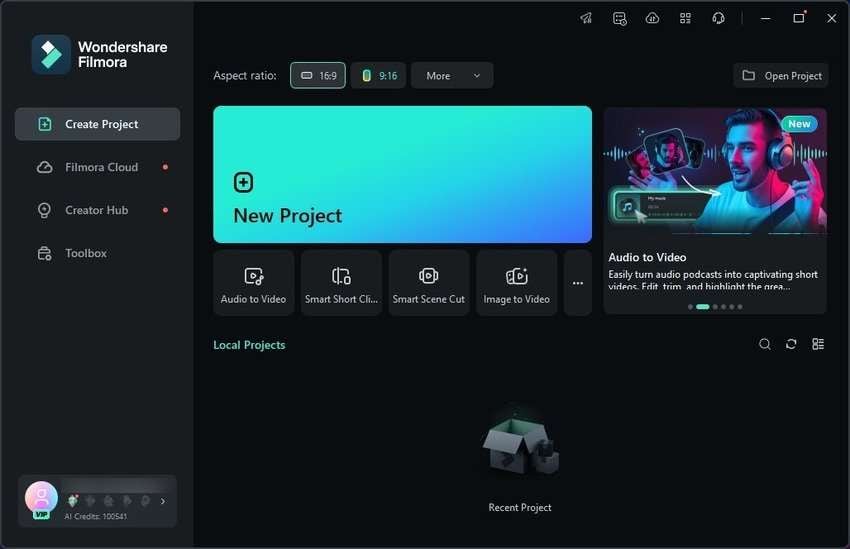
Step 1: Click New Project.
 secure download

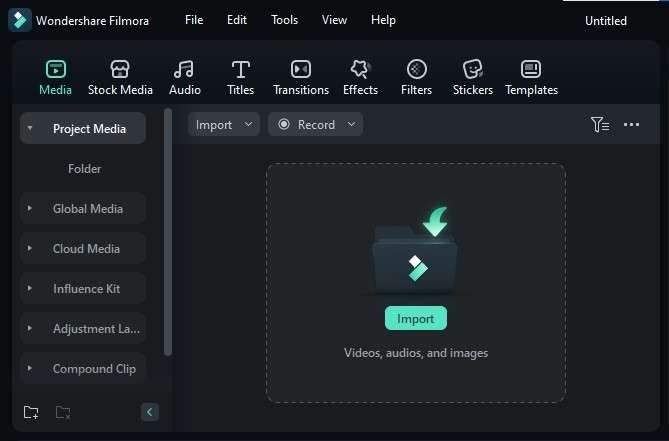
Step 2: Click Import and select your Zoom podcast recording.
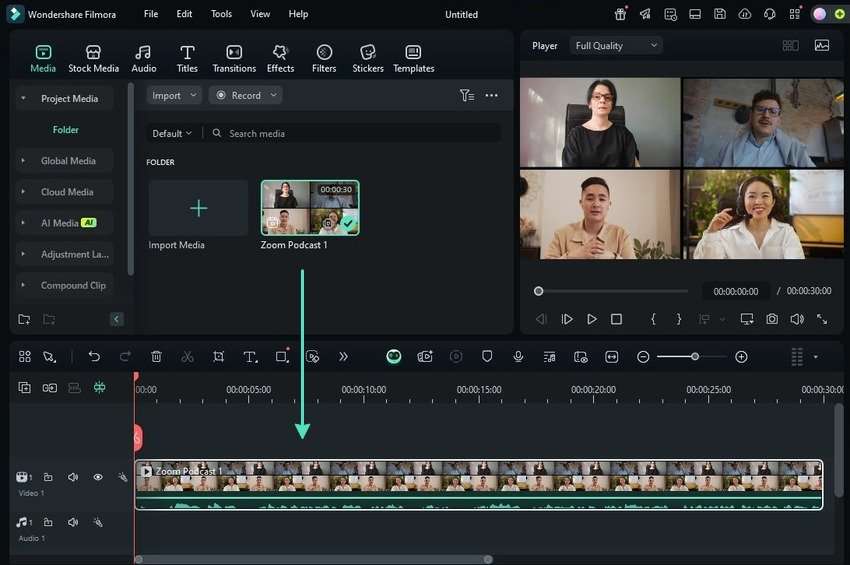
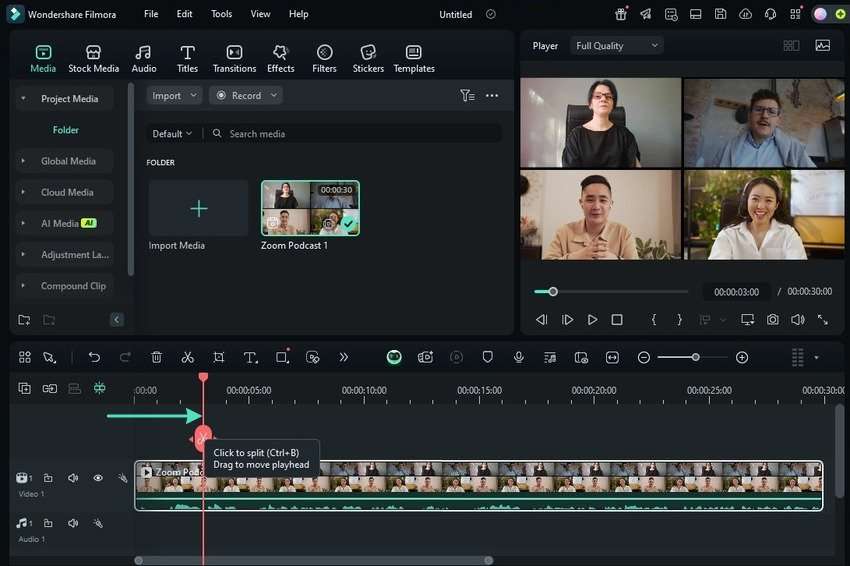
Step 3: Add the recording to the Timeline panel using drag-and-drop functionality.
Step 4: Play your video to see which parts to use for your promotional video and which to delete. Then, position the Playhead on the desired frame and hit the Scissors button to split the video. Repeat the process for all the necessary cuts.
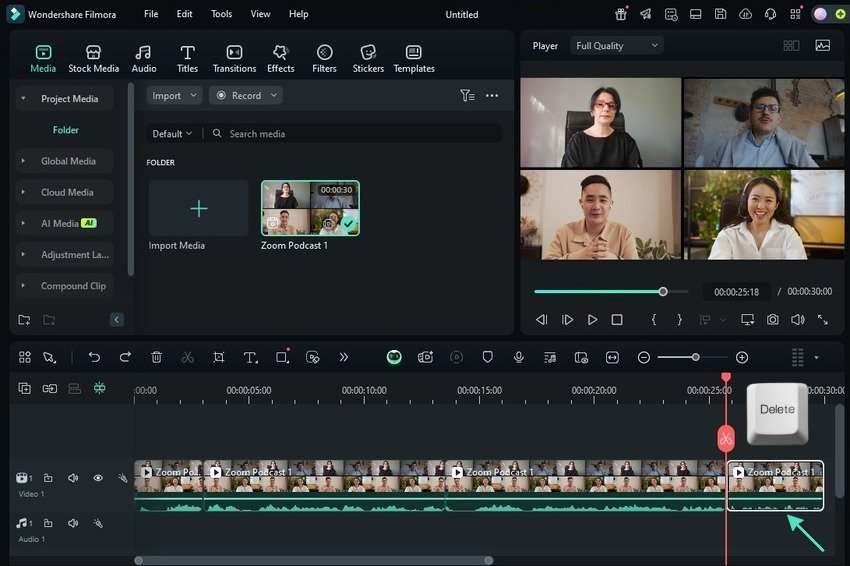
Step 5: Select any clip you wish to remove and hit the Delete key on your keyboard.
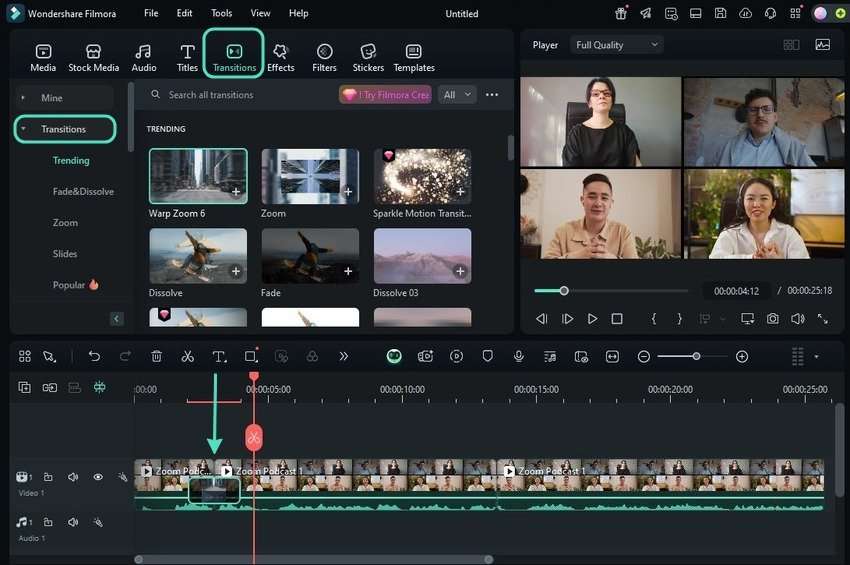
Step 6: It’s time to connect your clips so they flow smoothly from one to another. Go to Transitions and browse the categories to find something perfect for your Zoom podcast. Drag and drop your chosen transitions onto the clips. You can place them at the beginning or end of a clip or make them overlap between clips.
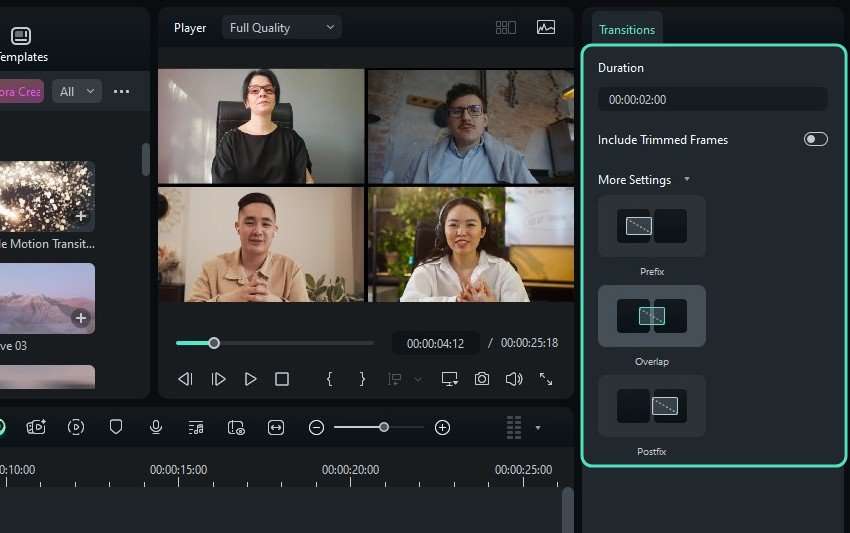
Step 7: Customize your transitions in the Properties panel.
Step 8: Go to Effects and browse the Video, Body, Audio, NewBlue, and Boris FX categories.
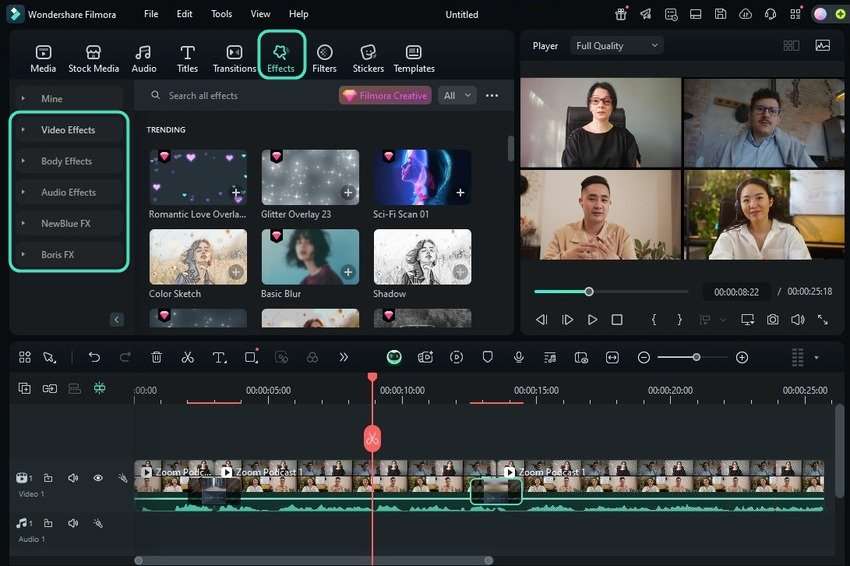
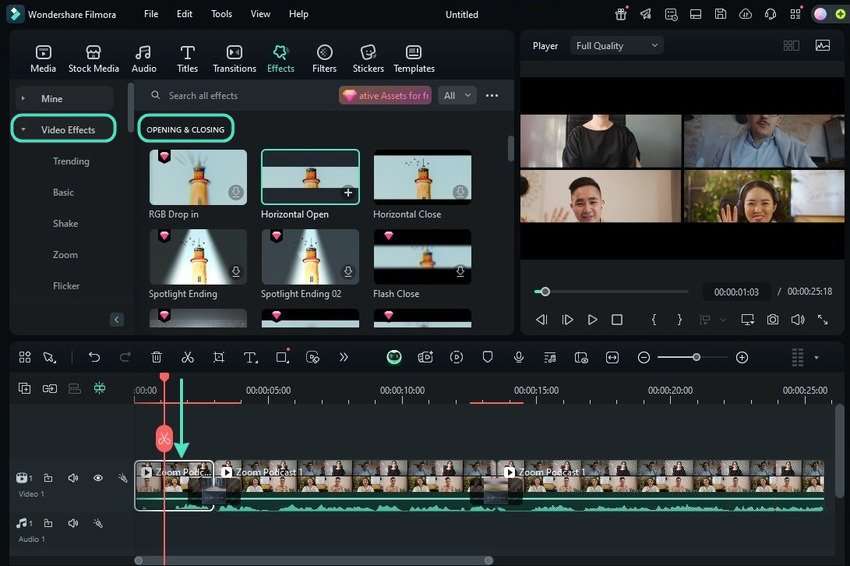
Step 9: Drag and drop an effect directly onto any timeline clip. For instance, find one for the first clip under Video Effects > Opening & Closing.
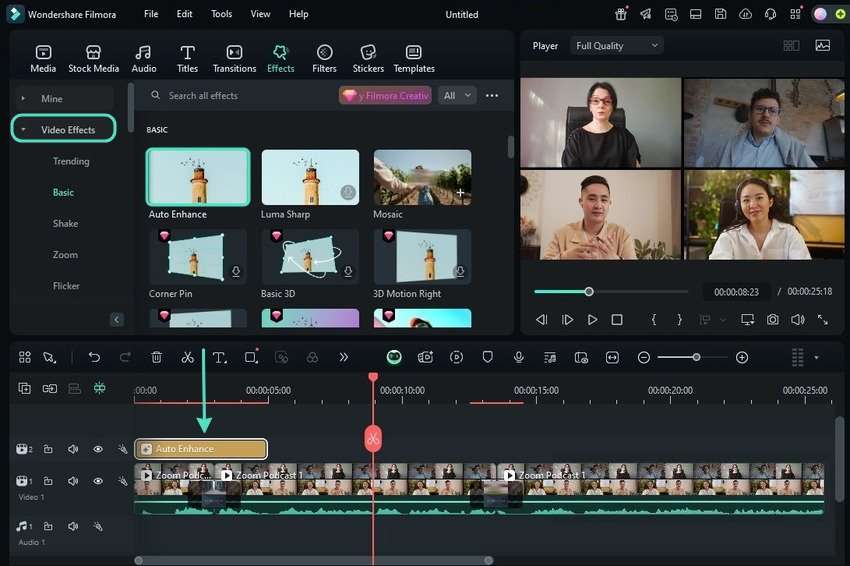
Step 10: You can also apply effects to your entire video. Simply drag one above your video on the timeline.
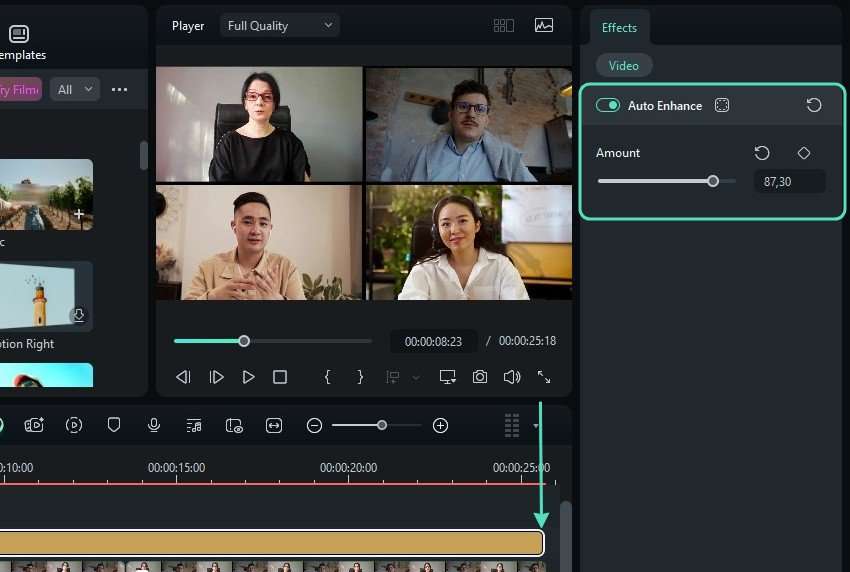
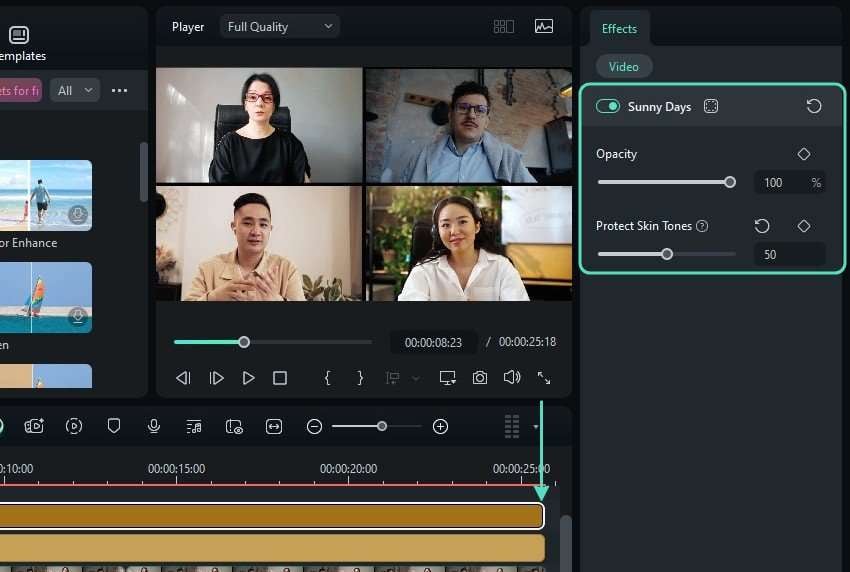
Step 11: Drag the effect’s edges to extend its duration and customize its settings under Effects > Video in the Properties panel.
Step 12: Go to Filters and add them to your video or specific clips.
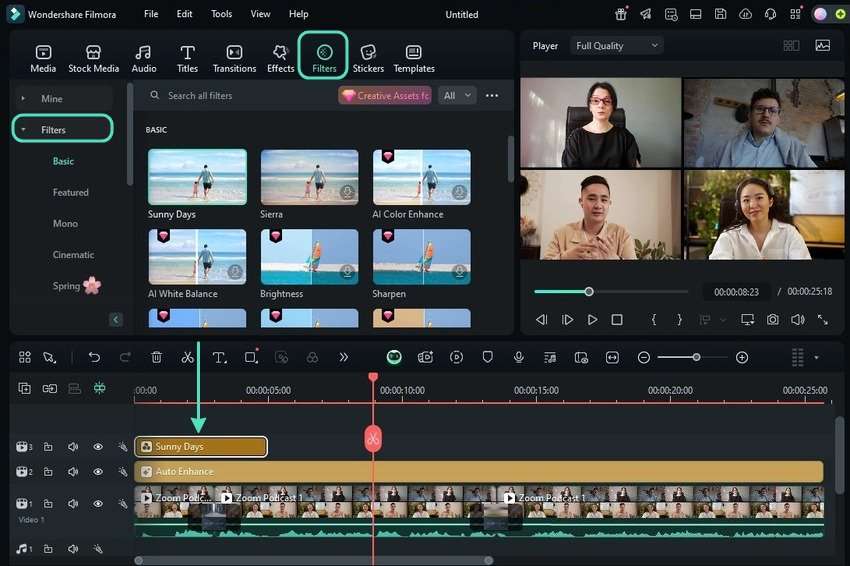
Step 13: Adjust the duration and customize your filters.
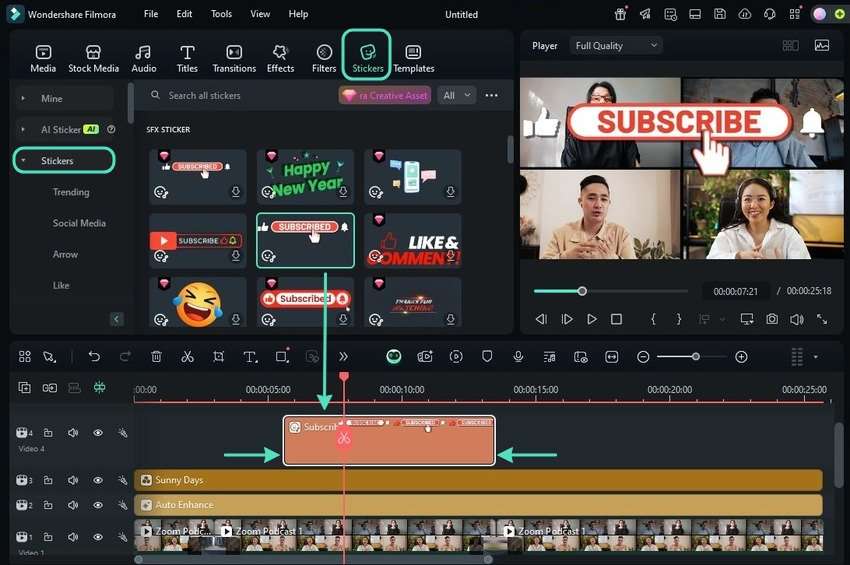
Step 14: Go to Stickers and pick one (or more) ideal for your Zoom podcast promotion. For instance, use a Follow or Subscribe sticker and adjust its duration and position on the timeline.
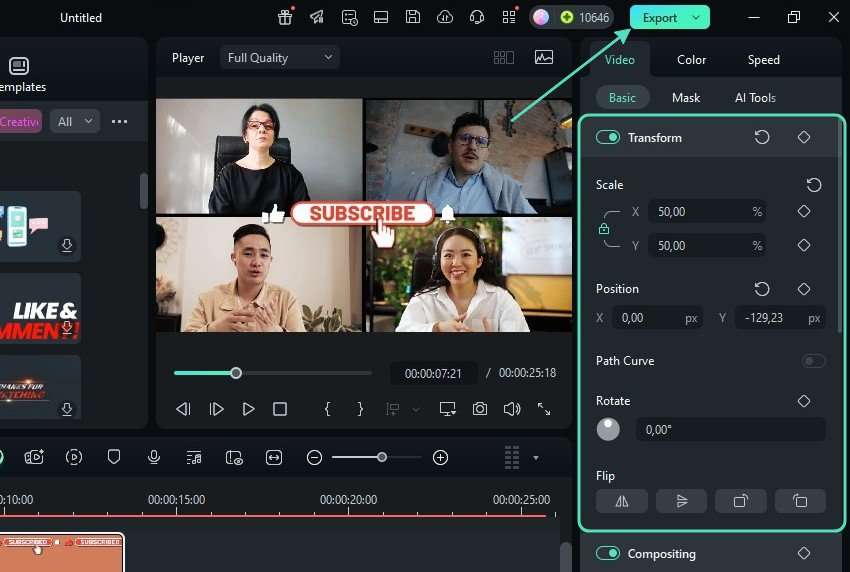
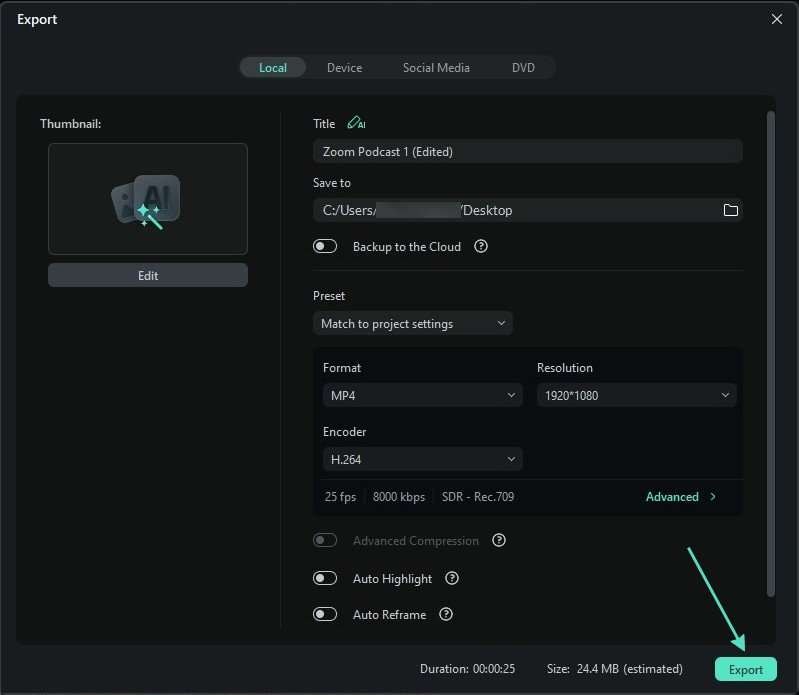
Step 15: Customize your sticker using Transform tools, and click Export once your video is ready for sharing.
Step 16: Check the output settings and hit Export.
This guide shows only the tip of the iceberg, so explore all the Filmora features to see how they can transform your Zoom podcast recording.
Use An Extensive Library of AI Tools to Speed Up Your Zoom Podcast Video Editing Process
Filmora has abundant AI capabilities for streamlining video editing. They can cut production time and make your videos more engaging. Here are the top three AI features to supercharge your Zoom podcast promotion, helping you gain more viewers.
Use Smart Short Clips to Convert a Zoom Podcast Into Short TikTok Videos
Filmora’s Smart Short Clips is ideal for Zoom podcasts. It eliminates the need to manually cut a lengthy video to make a short one for promotion. It recognizes and automatically extracts your recording’s highlights, creating a concise video perfect for TikTok or YouTube Shorts.
Use the Smart BGM Generation Feature to Add Music to Your Zoom Podcast
Music is excellent for evoking emotions. However, you don’t have to spend hours searching for a track that aligns with your podcast’s vibe. Filmora’s Smart BGM Generation feature can do it for you. It analyzes your video to determine its mood and duration and creates matching music within seconds.
Use the AI Video Enhancer to Enhance All Zoom Podcast Video Footage
Recording a podcast via Zoom sometimes means low-quality footage because you depend on an internet connection. Filmora’s AI Video Enhancer can improve your Zoom recording’s quality with one click, removing blur, increasing brightness and sharpness, correcting colors, and enhancing all details. It can also upscale your video to 4K.
Conclusion
Recording a Zoom podcast is a breeze when you and other participants have top-notch equipment and get the hang of all Zoom settings. Follow our expert tips to use Zoom for podcast recording like a professional and edit your footage with Filmora for outstanding promotion.
