Twitch clips are short highlights taken directly from live streams. They can be memorable moments from your streams, funny reactions, or epic plays. Once you make Twitch clips, you can share them with your friends or post them on social media to grow your audience.
If you are curious, there are a few ways how to make a clip on Twitch, which we will cover in this article. This way, you can choose the best method that works best for you.

In this article
Part 1. Ideal Use of Twitch Clips
As you know, short-form video content is key to boosting your visibility online. TikTok, Instagram Reels, and YouTube Shorts are booming right now, which can help you reach tons of new people. To stand out, you need to strategize well, and using Twitch clips to share on these platforms can be a great part of that plan.
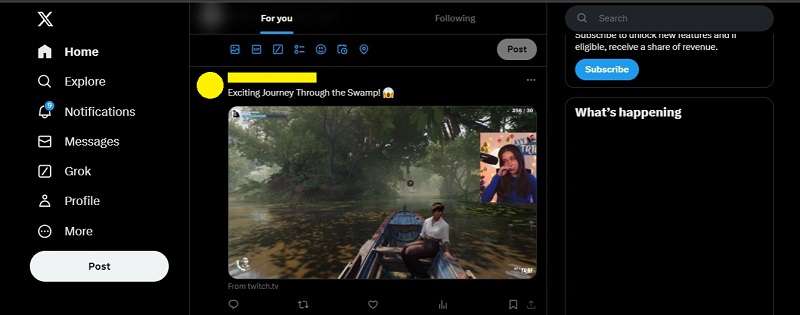
However, different platforms have specific guidelines for video content. So, before we get into the steps on how to create a clip on Twitch, here’s a handy table to help you optimize your Twitch clips for sharing:
| Platform | Maximum Length | Aspect Ratio |
| Instagram Reels | 90 seconds | 9:16 (Vertical) |
| TikTok | 1.60 minutes | 9:16 (Vertical) |
| YouTube Shorts | 3 minutes | 9:16 (Vertical) |
| X (Twitter) | 2m 20s (non-subscribers) | 16:9 (Landscape) |
| Facebook Feeds | 240 minutes | All |
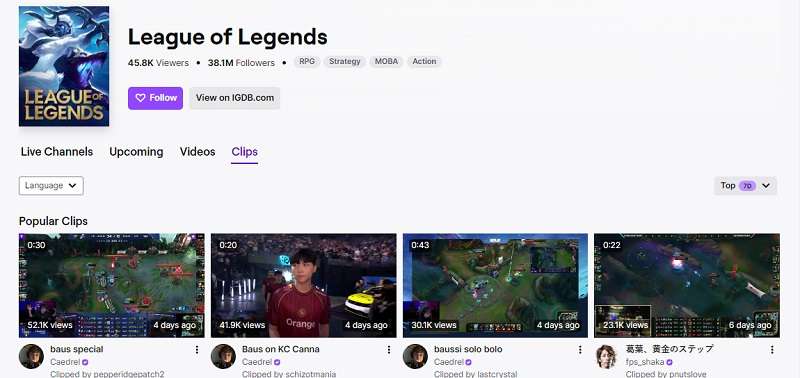
Besides, you can also share the clip directly on Twitch. It will appear in the "Clips" section of the streamer’s profile. What’s great is that viewers can also contribute to adding the Twitch clips.
Part 2. How to Make a Twitch Clip Instantly with AI
After you understand the platform’s requirements, it’s time to learn how to create a Twitch clip. A fast way to do this is by using AI, which is possible with tools like Wondershare Filmora. Filmora offers Smart Short Clips and Smart Scene Cut features, which automatically pick out the highlights from your video and make the clip creation much easier.
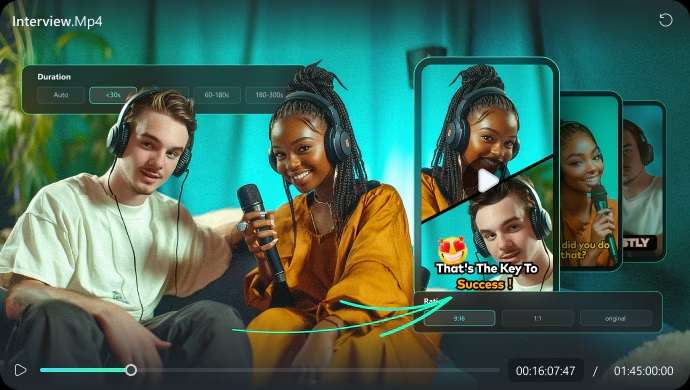
All you need to do is select a template, set the parameters for your video, and let the AI do the rest. It will analyze your footage and automatically generate a clip into a viral-worthy one. Once processed, you'll get:
- Access to over 50 engaging video templates and layouts.
- Auto-reframe feature to tailor your video to any platform requirements.
- Animated captions with a variety of templates to choose from.
- Automatically generated music tracks that match the tone of your clip.
- Integration of fun visuals like stickers, emojis, and smooth transitions.
Additionally, the clip is fully customizable. It’s also fully integrated with Filmora’s editing suite—a one-stop shop for all your editing needs. Once your video is made, you can directly upload it to platforms like YouTube, Facebook, and TikTok, or even schedule the post for later.
Method 1: How to Make a Twitch Clip with Smart Short Clips
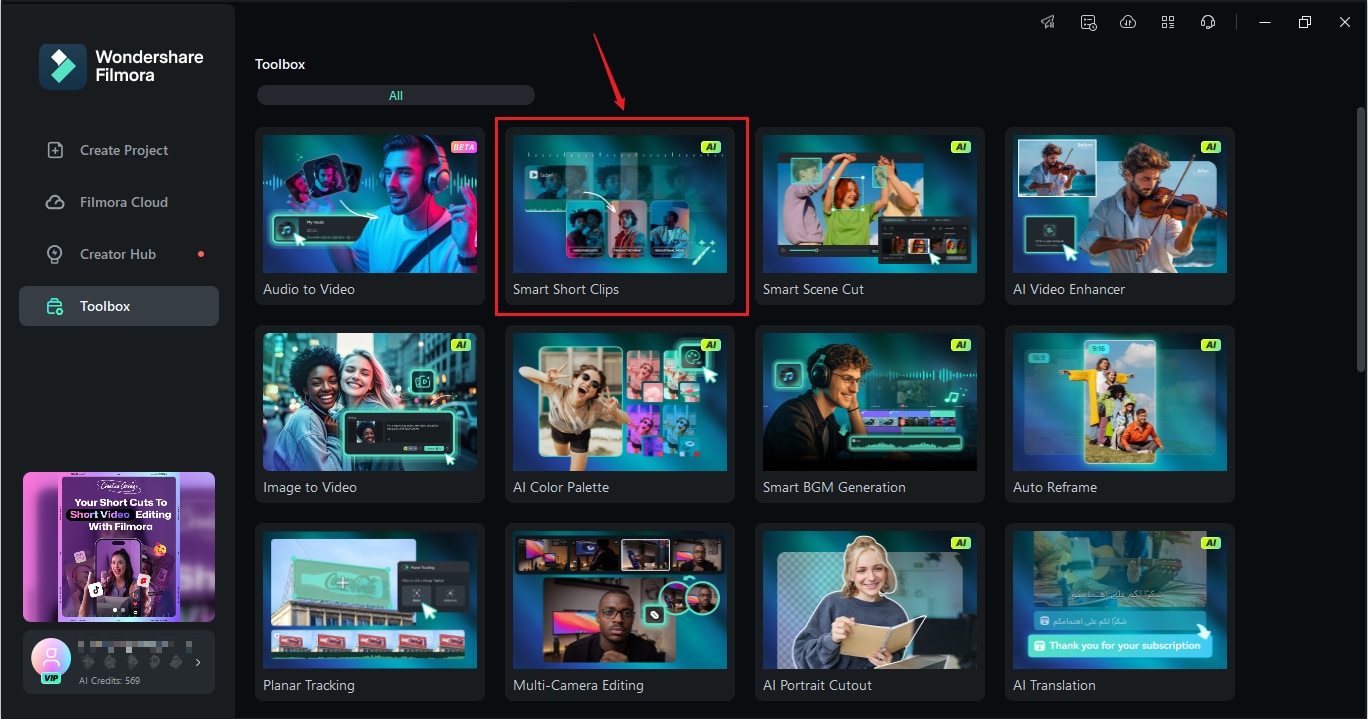
Step 1: Open the Smart Short Clips Feature
Begin by launching Filmora and navigate to the "Toolbox" section. You’ll find the Smart Short Clips option here.
Step 2: Upload Your Video
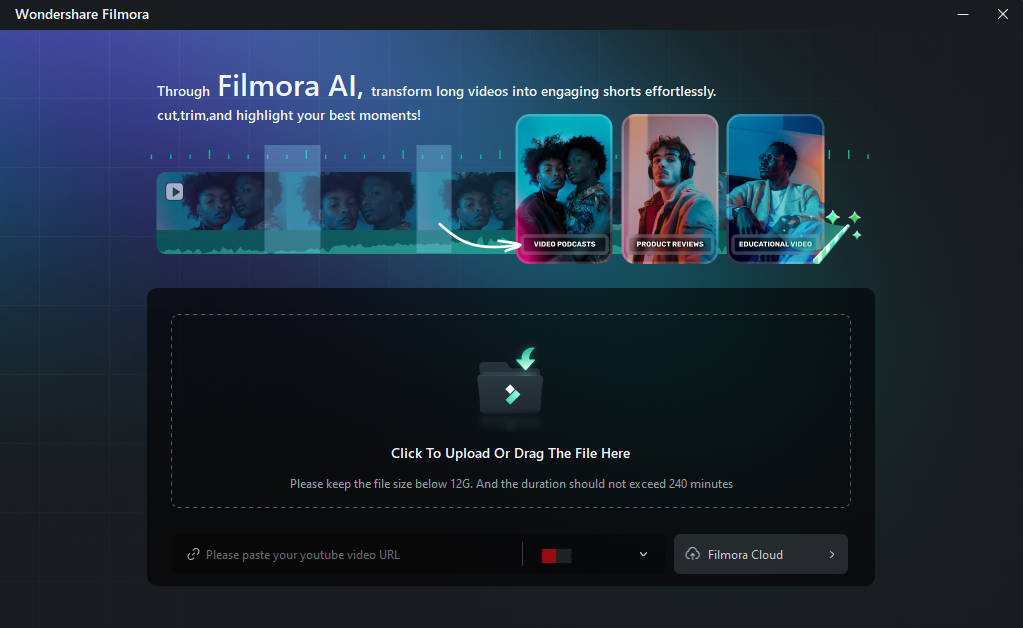
Click on the box to upload the video you'd like to edit or simply drag and drop it into the interface.
Step 3: Adjust Your Settings
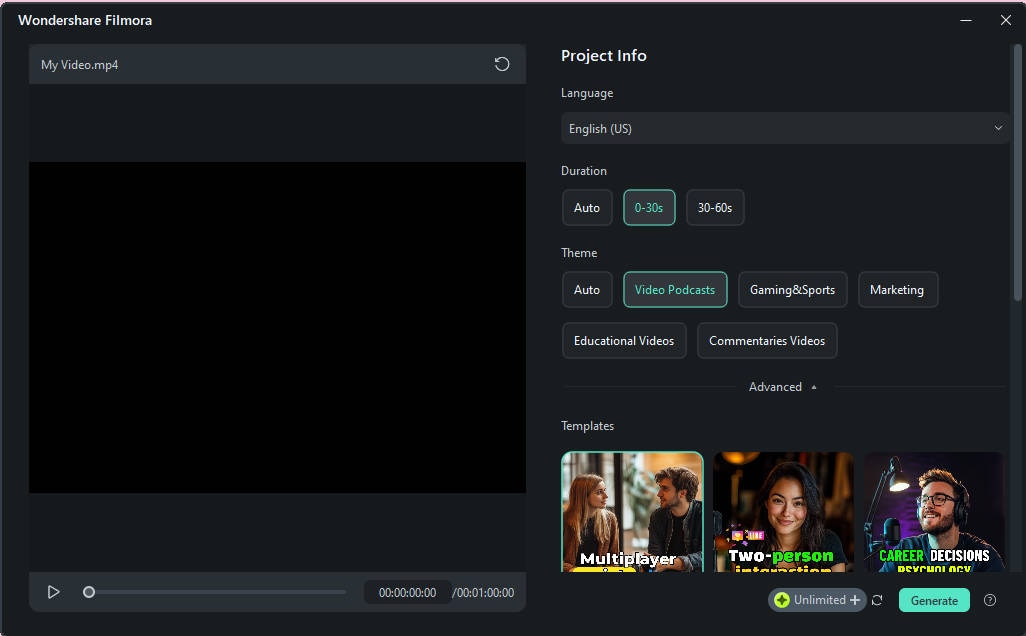
After uploading, choose the language of the video. You can also adjust the duration and themes to fit your preferences or keep the default settings.
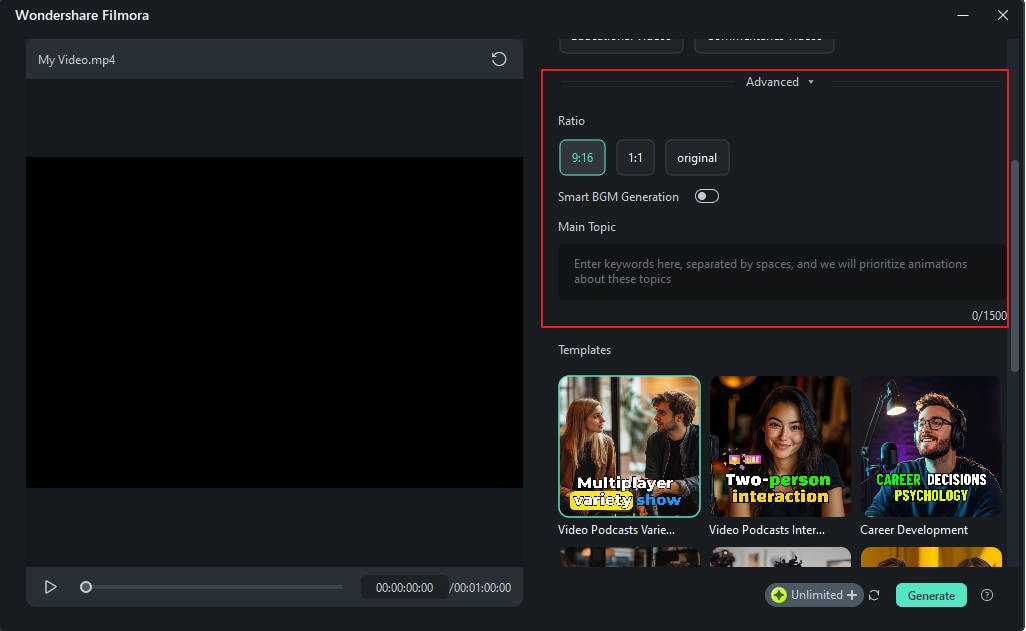
Open the advanced settings to select an aspect ratio and enable Smart BGM Generation, which automatically adds music to match your video. You can enter a few keywords in Main Topic to help AI generate relevant animations.
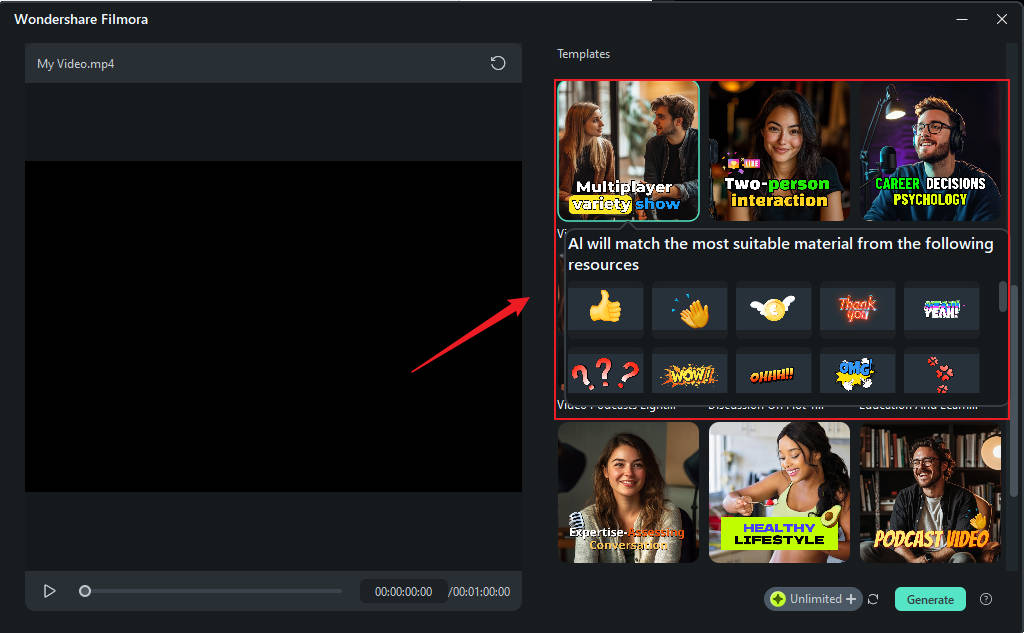
Browse the templates available under different themes. Scroll through and pick one that appeals to you, then click on Generate to proceed.
Step 4: Choose Your Edited Video
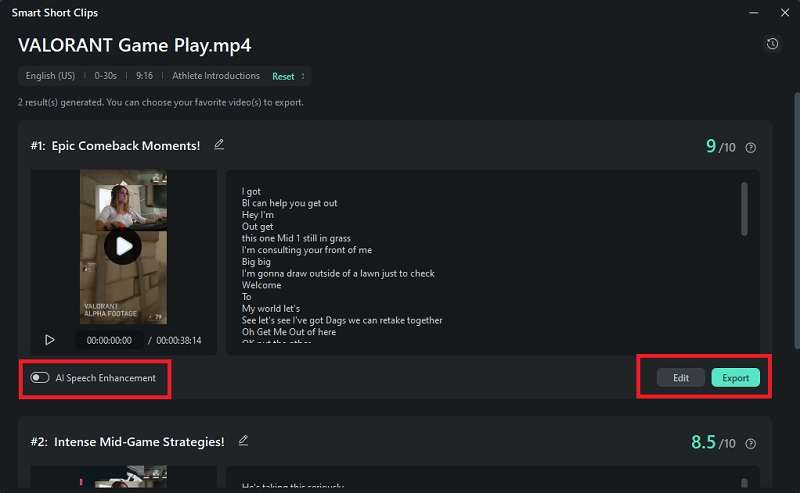
Filmora then will provide several edited versions of your video, each rated according to platform standards. Pick your desired version, use "AI Speech Enhancement" to improve voice clarity and reduce noise, and then click Edit to make additional changes.
Step 5: Finalize Your Video
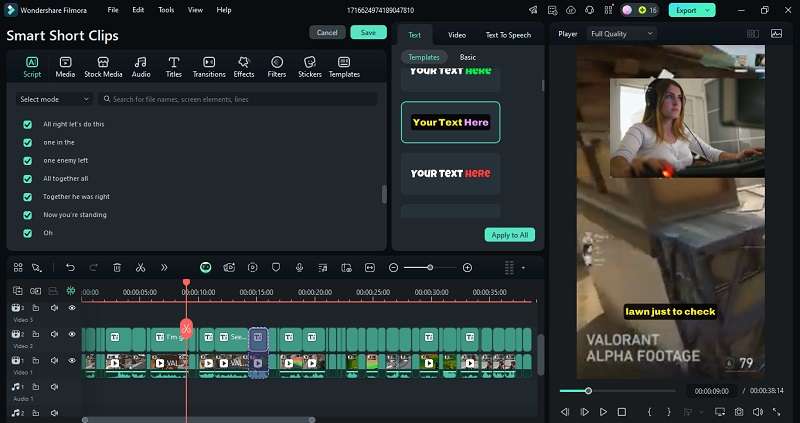
In the Smart Short Clips editing panel, you can modify captions, change background music, add new voiceovers, generate thumbnails, and more.
Step 6: Export and Share
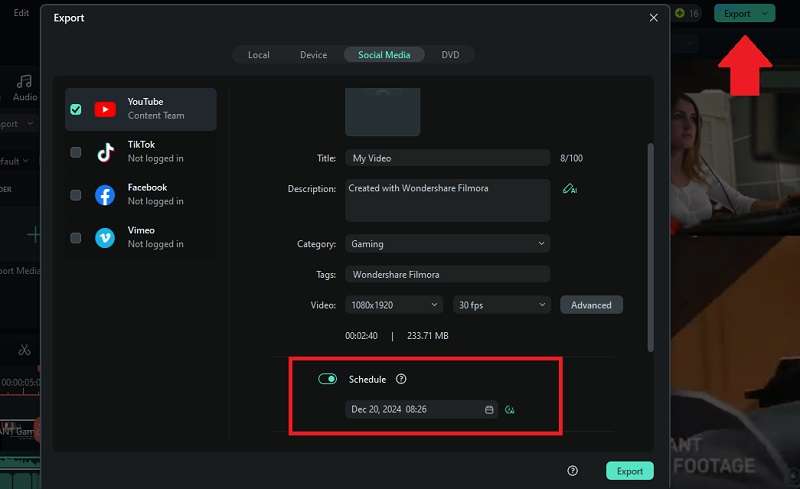
Once you're satisfied with your video, export it to save or directly upload it to platforms like YouTube or TikTok. You can also schedule your posting by enabling the Schedule option.
Method 2: How to Make a Twitch Clip with Smart Scene Cut
Using the Smart Scene Cut is a smart way if you want to quickly extract the most impactful moments from your stream without sifting through hours of footage manually. This feature automatically identifies and isolates scenes based on changes in motion or scene content.
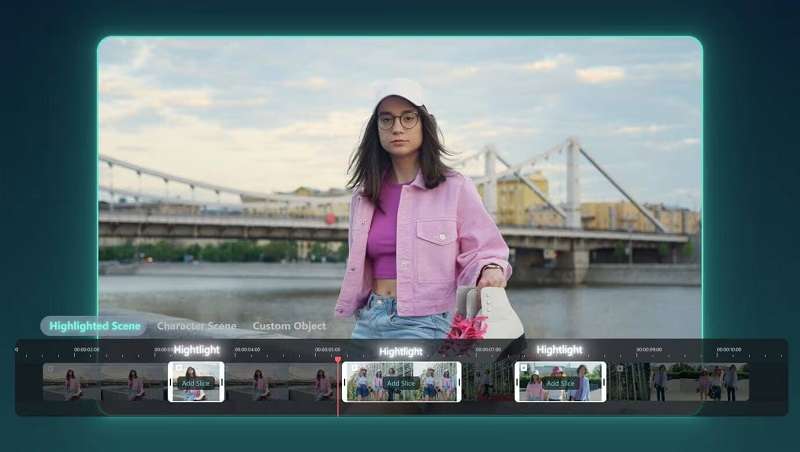
Simply upload your video, and the tool will offer you a selection of clips to choose from. This method streamlines the process, saving you time while still giving you the freedom to pick the clips that best showcase your stream's highlights.
Step 1: Access the Smart Scene Cut feature.
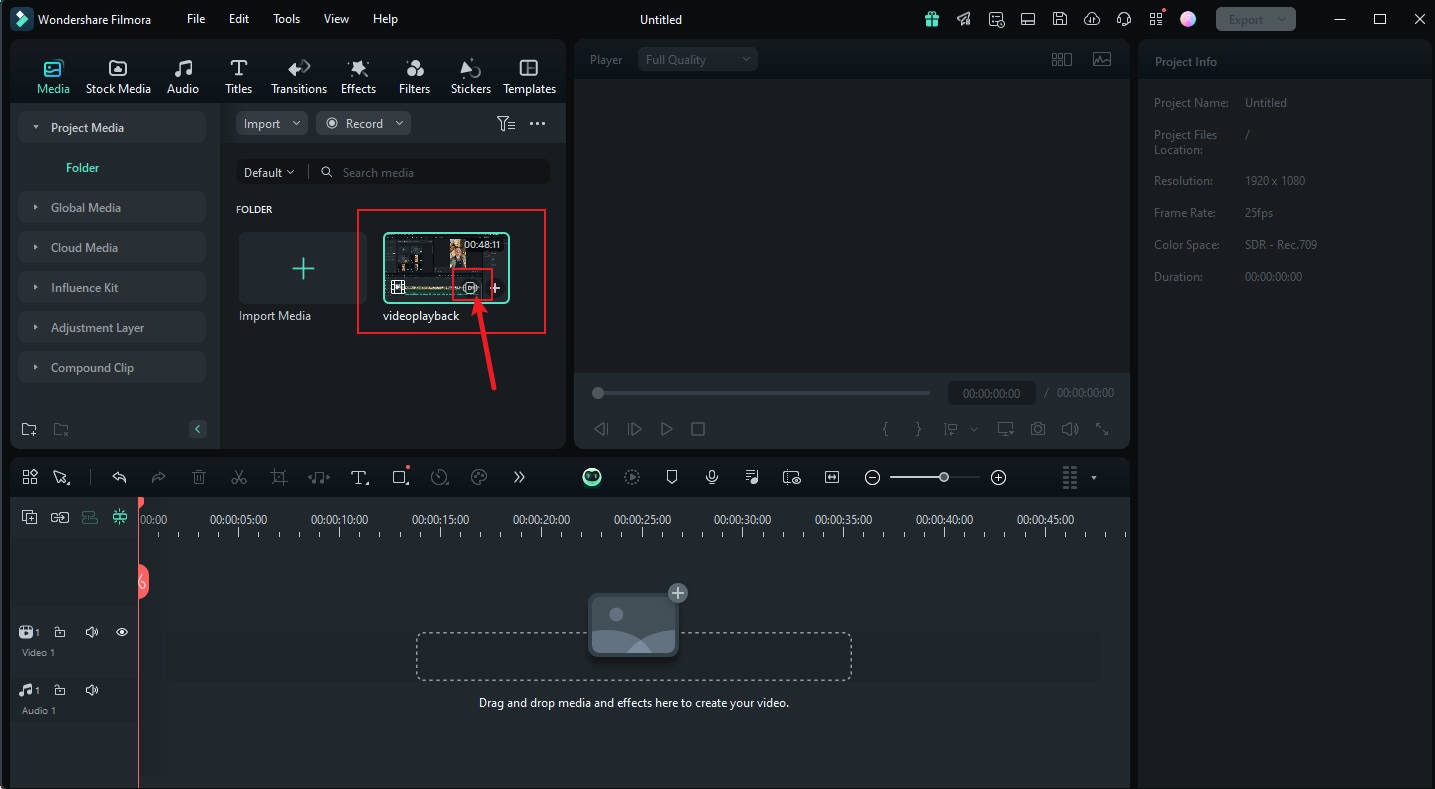
Right-click on a video you’ve uploaded and select "Smart Scene Cut". Then, click Start or Create to proceed.
Step 2: Select the Clip for Highlights
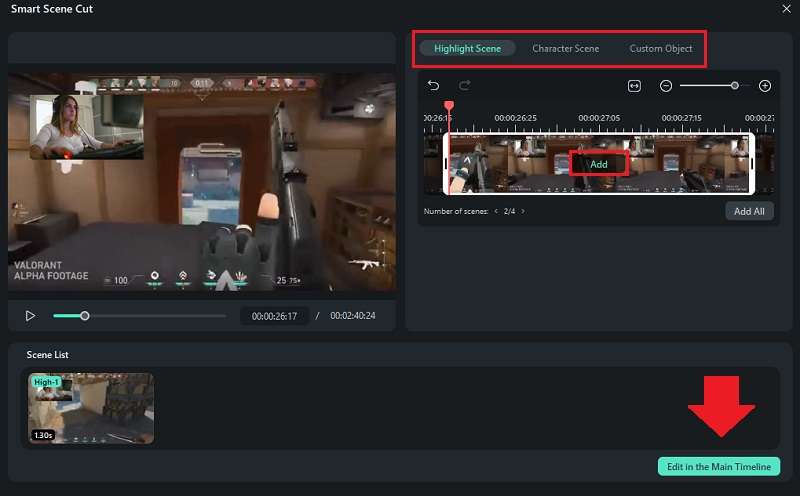
On the smart scene cut results page, you'll find three categories to choose from: "Highlight Scene," "Character Scene," and "Custom Object." Choose the clips you want to work with by clicking Add and click Edit in the Main Timeline.
Step 3: Edit Your Footage
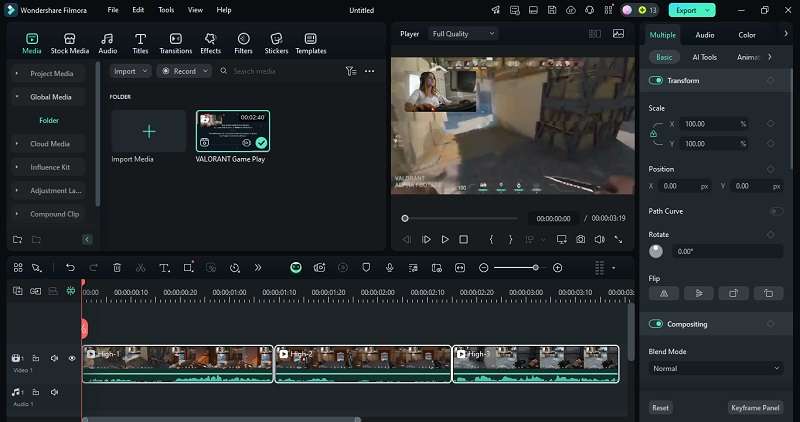
Once your chosen clips are in the main timeline, you can modify them according to your needs. You might adjust the aspect ratio, add text, sound effects, and more to enhance your clips.
Part 3. Built-in Solution How to Make a Clip on Twitch
Twitch also makes it super easy to create clips directly on the platform with its built-in clipping tool. However, there are some limitations, such as limited editing options and the inability to customize the clip’s aspect ratio for different platforms.
This method is ideal if you're looking for a fast way to capture a moment from your stream without needing advanced editing features. It’s perfect for quick highlights that you want to share immediately with your audience. Here’s how to do it.
How to make a clip on Twitch
Step 1: Open the Stream
Log into your Twitch account and visit the Twitch stream you want to clip.
Step 2: Click the Clip Button
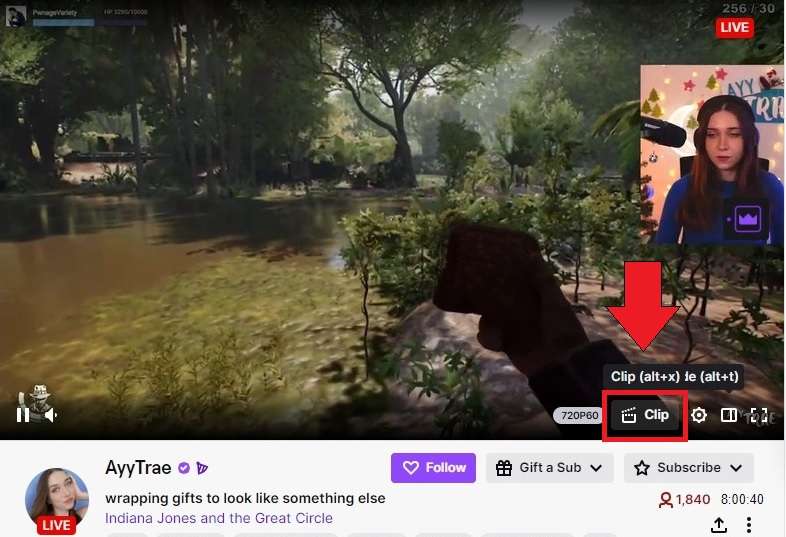
Hover over the video player. Click the "Clip" button (a clapperboard icon) in the bottom-right corner of the video player. Or you can press ALT+X on your keyboard.
Step 3: Trim Your Clip
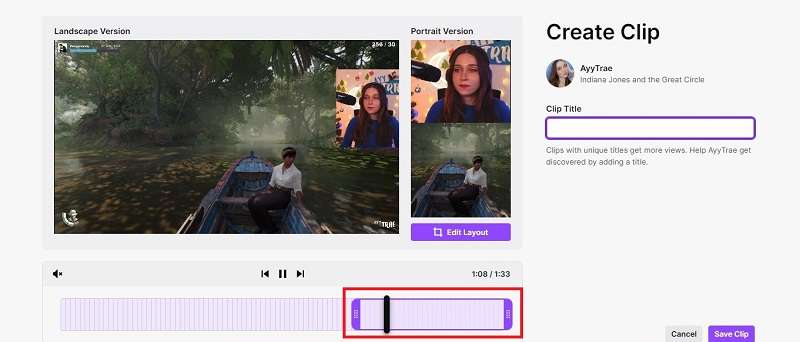
After clicking the "Clip" button, a new page will open where you can edit your clip.
Use the trim tool to adjust the start and end time of your clip.
Step 4: Edit the Layout
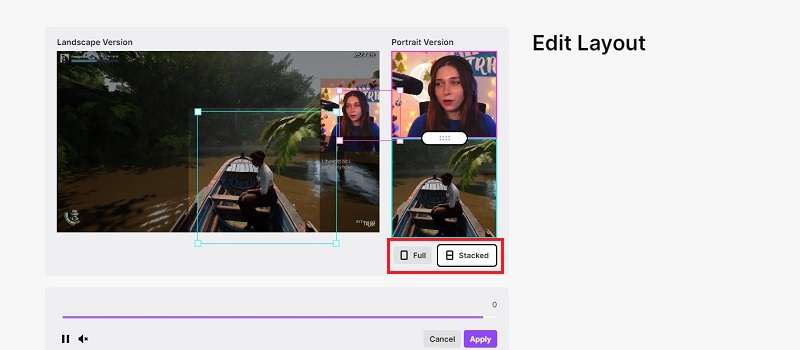
If you want to change the layout, click Edit Layout. Then, you’ll get to choose either Full or Stacked. Adjust the visible area by dragging and resizing the respective rectangle. Click Apply to save the changes.
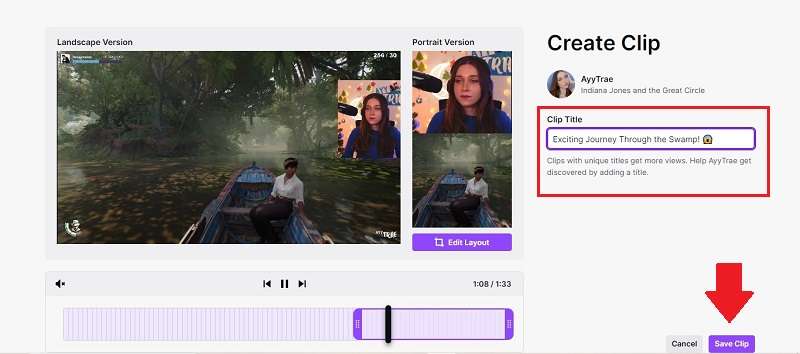
Once you’re happy with your selection, enter a descriptive or catchy title for your clip. Then, click “Save Clip.”
Step 5: Share the Twitch clip
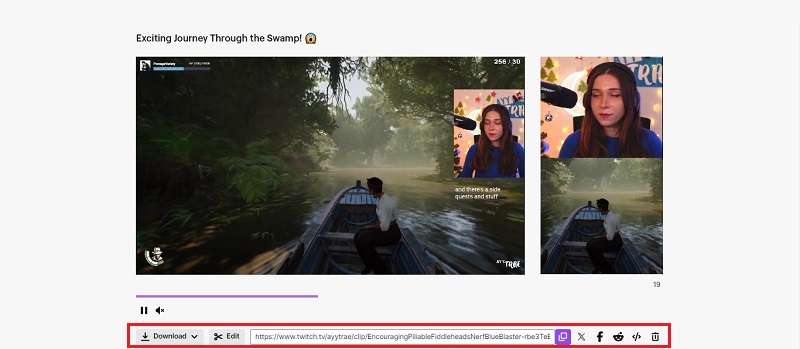
After creating your Twitch clip, you can download the clip to your device or share it to other platforms, such as Reddit, X (Twitter) and Facebook. Additionally, you can copy the URL link to share on messaging apps, forums, or other social media platforms.
Part 4. How to Maximize Your Twitch Clips’ Content Reach
After learning how to make clips on Twitch, your next step is to ensure they reach as wide an audience as possible. Here are some effective ways to boost the impact of your Twitch clips:
- Enhance Clips with Trending Music and Captions
- Use Relevant Hashtag
- Create Compelling Thumbnails and Descriptions
- Tagging for Broader Reach
Adding popular music tracks and engaging captions can give your content a higher chance of getting into the “For You” page and boost viewer engagement. These elements make your clips more relatable and shareable.
Incorporate trending hashtags that relate to the stream’s content. This strategy not only categorizes your clips for relevant topics but also increases their visibility in search results, making it easier to find your content.
Develop eye-catching thumbnails and use descriptive titles and keywords in your clip descriptions to improve searchability. Tools like Filmora AI Thumbnail can automate and optimize this process.
Tag the streamer or include relevant hashtags and mentions to expand your clip’s visibility. This makes it more likely that the clip will be shared across social platforms and reach a broader audience.
Conclusion
Now, you should know how to make a clip on Twitch, either directly on the platform or use AI tools like those in Filmora. You can start capturing and sharing the best moments of your streams and reach even more audiences!
Making a clip on Twitch is a quick way to share highlights from your stream, but when you require more customization, Filmora is the way to go. With its advanced editing tools and AI features, you can tailor your clips to appeal to different social media platforms and audiences.


 100% Security Verified | No Subscription Required | No Malware

