
 100% Security Verified | No Subscription Required | No Malware


 ChatGPT
 Perplexity
 Gemini
 Claude
 Grok
Grok
You might have just returned from the most memorable trip of your life and are reviewing your recorded videos. After watching the travel videos, you notice that the soundtrack lacks emotion and clarity making it a less memorable experience. An engaging audio experience comprises voiceovers, unique sound effects, and vibrant music, all of which play an important role in capturing viewers' attention and keeping them interested.
Content creators who want to bring life to their visual content, Wondershare Filmora offers not only captivating audio but also makes audio editing simple and accessible for them. In this article, we'll explore three simple ways for users who wonder how do I put an audio over a video to make their videos visually appealing.
In this article
Part 1. Put an Audio Over a Video Using Wondershare Filmora Desktop
For a content creator who works on a daily travel vlog, the natural sound of the videos is often distracted by background fuzz and distorted voices. Filmora offers multiple approaches to cater to this problem, creating video narration with overlaying sound effects for a significantly improved visual experience. With this tool, users can add sound to videos by utilizing royalty-free audio libraries seamlessly and quickly.
The AI-driven tools of Filmora enable creators to customize their sound through voiceover features and advanced AI-generated sounds that sync with their content. Moreover, the audio keyframing and audio ducking features can automatically give a polished and well-crafted look to the video content. In the section below, follow these simple methods and instructions on how to add sound over a video using Filmora:
Method 1. Through Manual Means
With Filmora, users can import their audio/video files together and customize their content that gives them the leverage to provide a personal style to their content. In this method, you’ll explore how to add sound to a video manually in the steps given below:
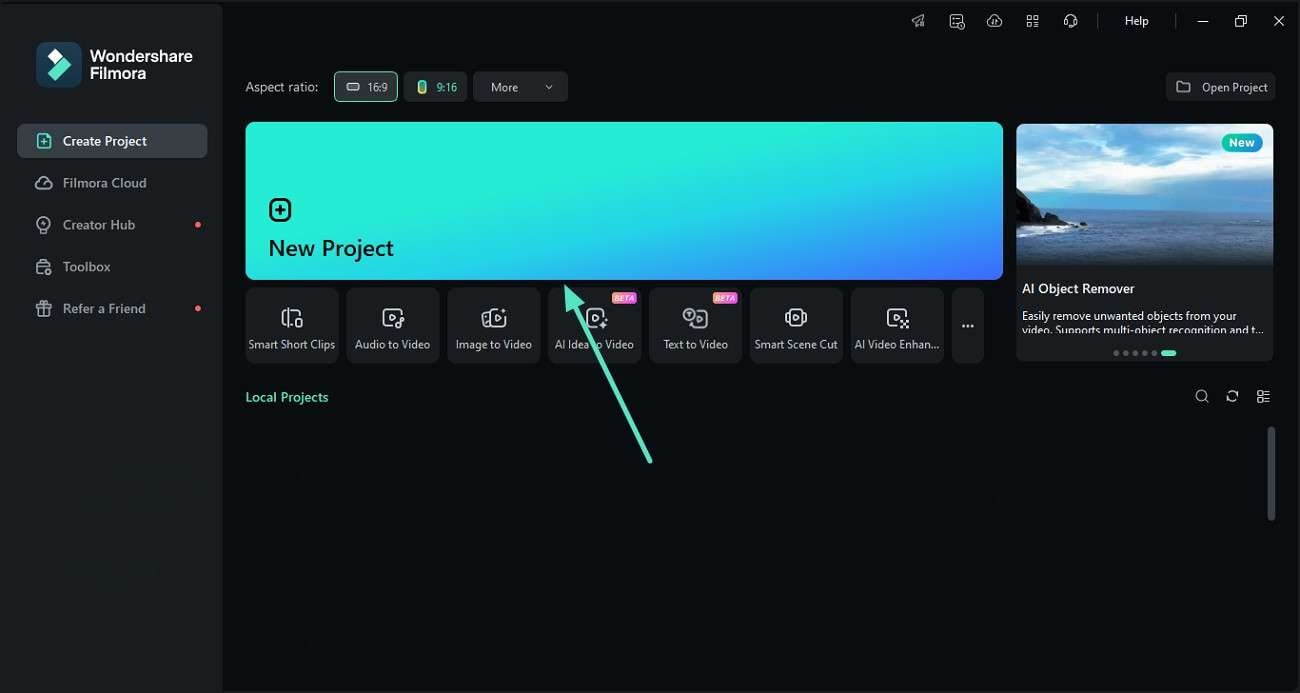
Step1Import Your Video and Audio Files.
First of all, launch Filmora and go to the “New Project” from the home window to import your video and audio files.
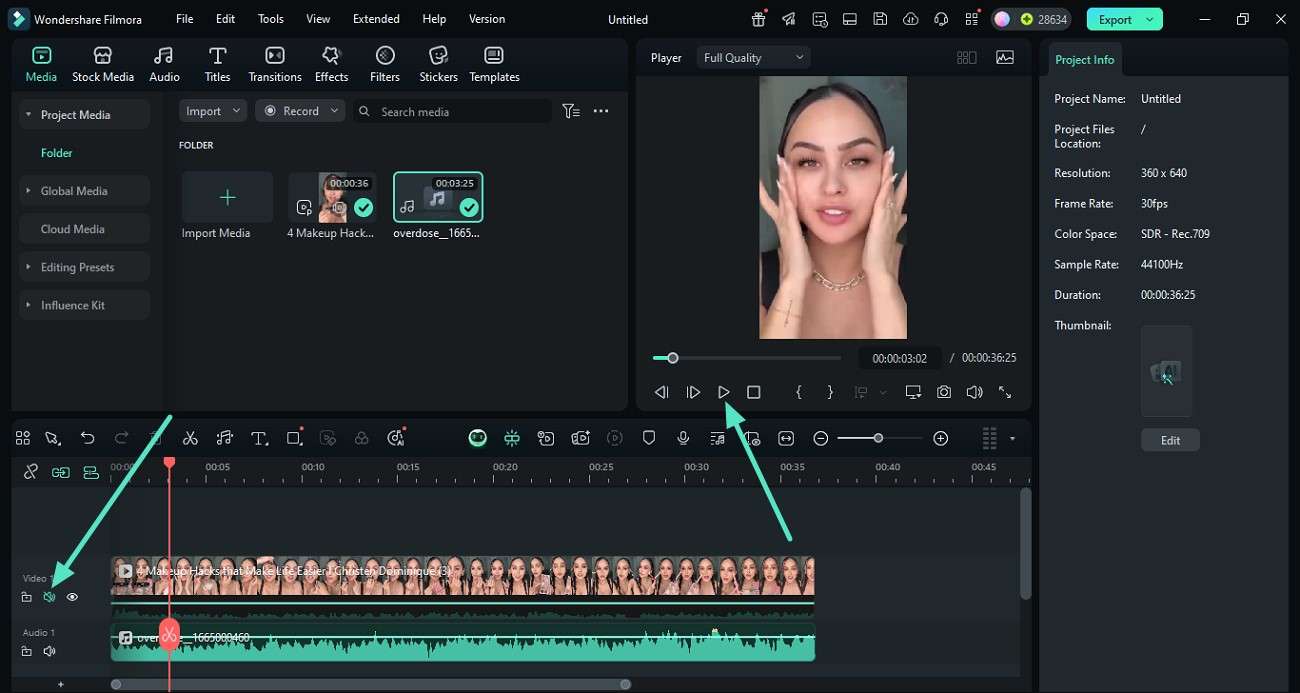
Step2Add Files to the Timeline and Start Editing.
After adding the video file into the timeline, look for the “Volume” icon next to its position and mute the original sound of the video.Drag the audio file into the timeline as well and preview your resultant video.
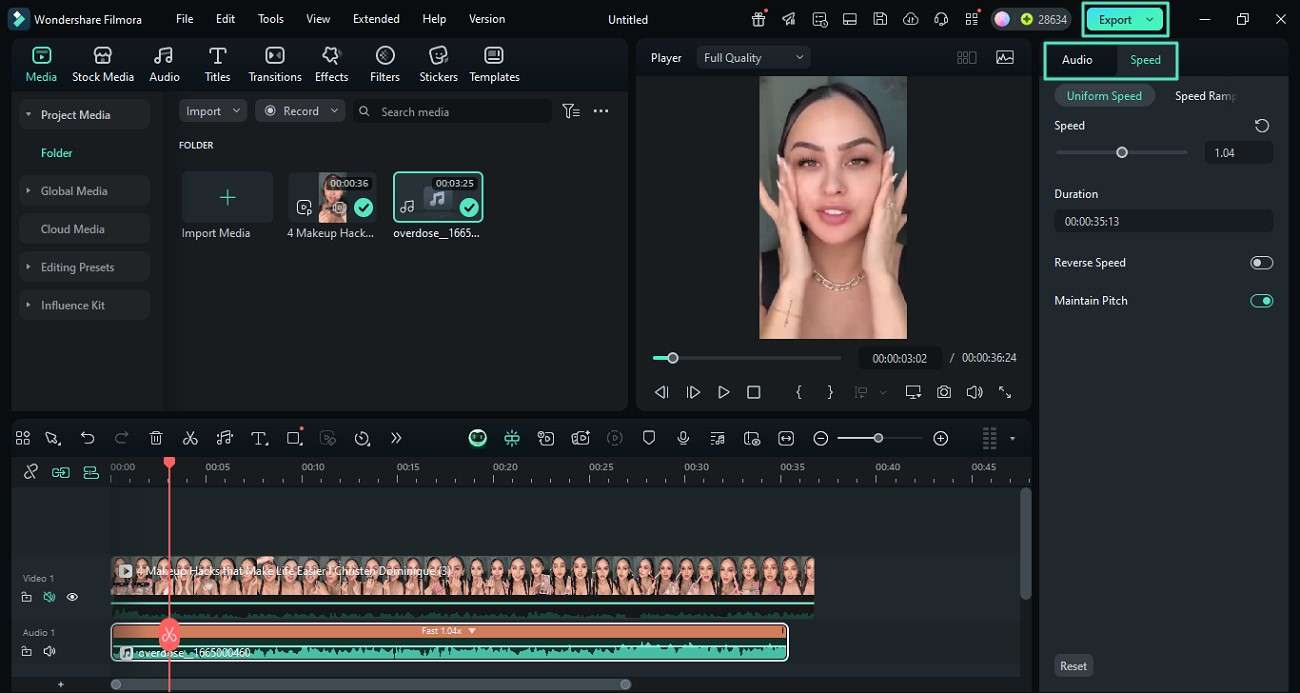
Step3Customize and Fine-Tune Using Editing Features.
Navigate into the “Audio” panel on the right-side and adjust various parameters involving the audio quality. You can also manage the “Speed” slider to control its duration. Once done, use the “Export” button to define the exporting parameters for the video.
Method 2. Generating AI Audio For Video in Filmora
For a content creator, the ambient noise in the video makes the content unprofessional and less engaging. However, with Filmora’s AI audio tools, there is a quick fix to add sound to video. Users can not only affix the background sound but also generate AI music that resonates with the content's vibe. Below you'll find a quick way to transform your video with vibrant soundscapes of Filmora:
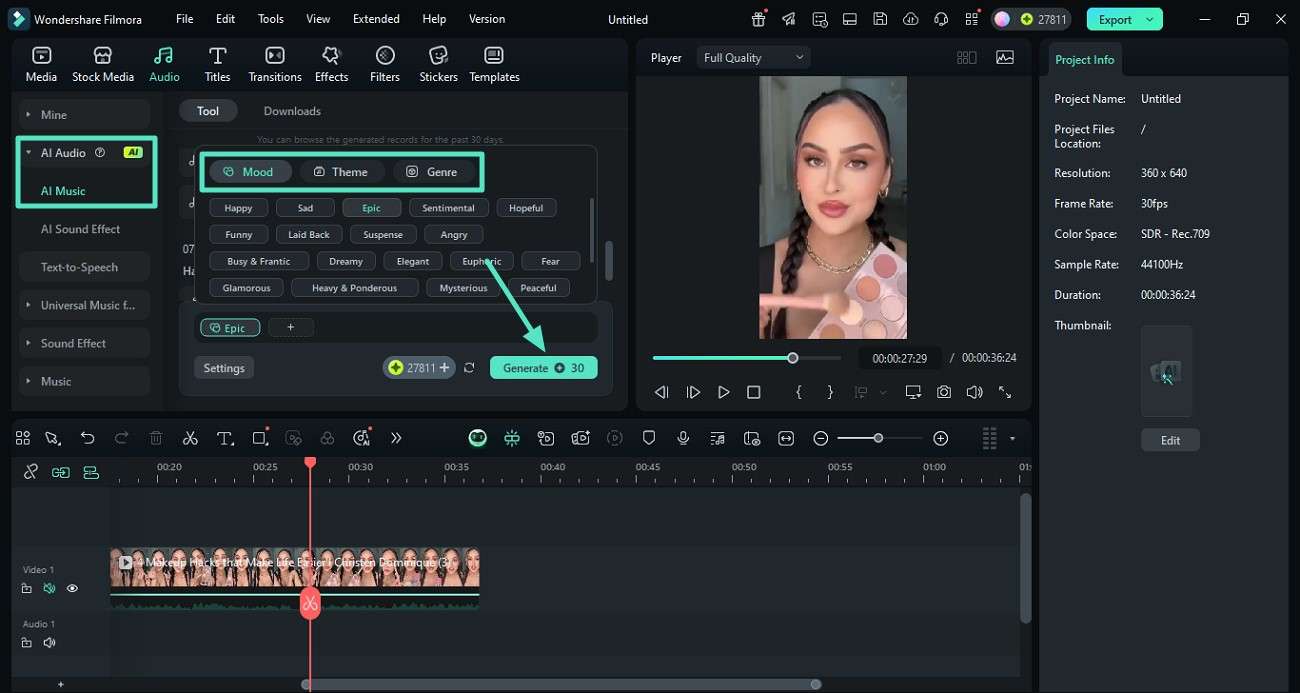
Step1Go to the AI Audio Feature to Generate AI Sound.
From the top toolbar, lead into the “Audio” section after importing your video file. Click on the “AI Audio” from the left side panel and select “AI Music” to generate AI music for your video. Define the “Mood,” “Theme,” and “Genre” of the video before tapping “Generate.”
Step2Customize the AI-generated Audio.
Use the “+” icon across your generated music to add it into the video file. Using the “Speed” section within the right-panel, set the “Uniform Speed” with the available sliders and preview the final edits.

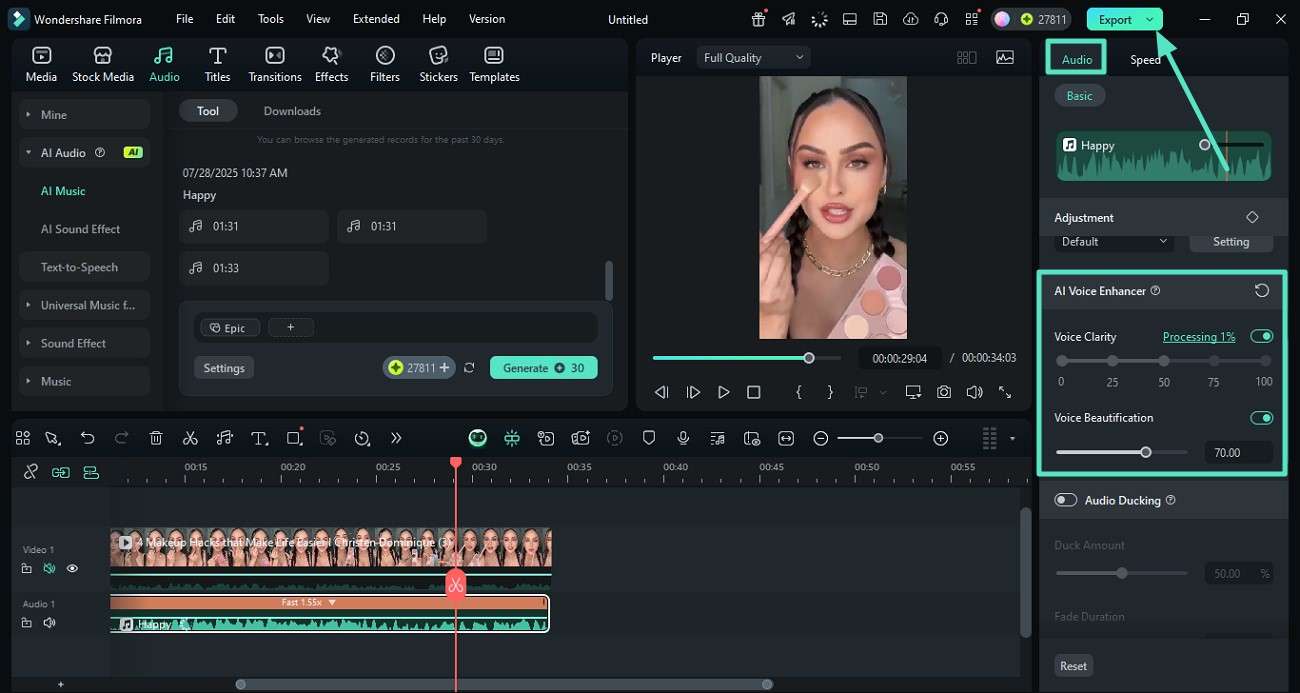
Step3Make Further AI Enhancements to Audio.
You may enhance the sound by enabling the “AI Voice Enhancer” from the “Audio” section to adjust the “Voice Clarity” and “Voice Beatification” of your generated AI audio. From the preview window, click on the “Play” icon to preview the edits of your AI audio and “Export” your media file.
Method 3. Use Existing Royalty Free Library
If you want to enhance the quality of your vlogs and social media content, you don't need a high-budget production team to customize your content. Filmora offers a royalty-free music library with trending audio tracks and AI sound effects, allowing you to add sound to your video in a seamless manner:
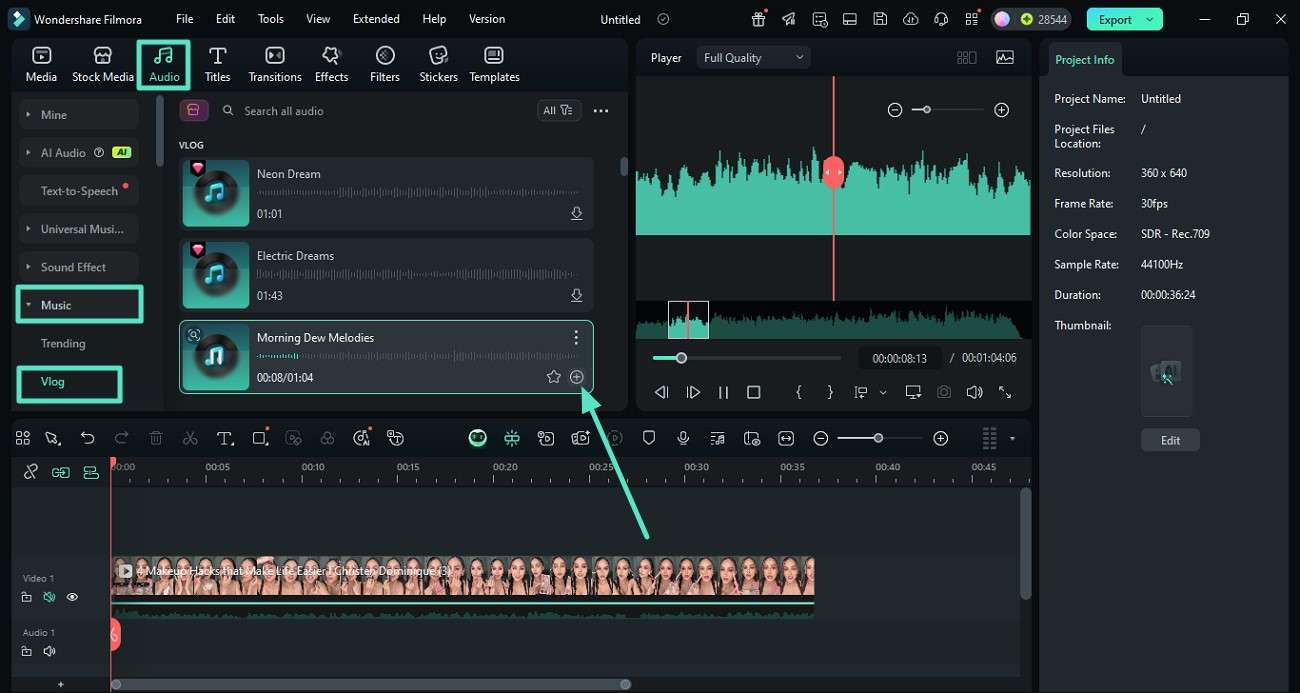
Step1Navigate the Music Library from the Audio Tool.
To add trendy audio to your imported video, navigate to the "Music" option after accessing the "Audio" section in the top toolbar. Select "Vlog" music and choose “Ceeling like Ibiza" to uplift your daily vlog video, and click the "+" icon to add it over your video.
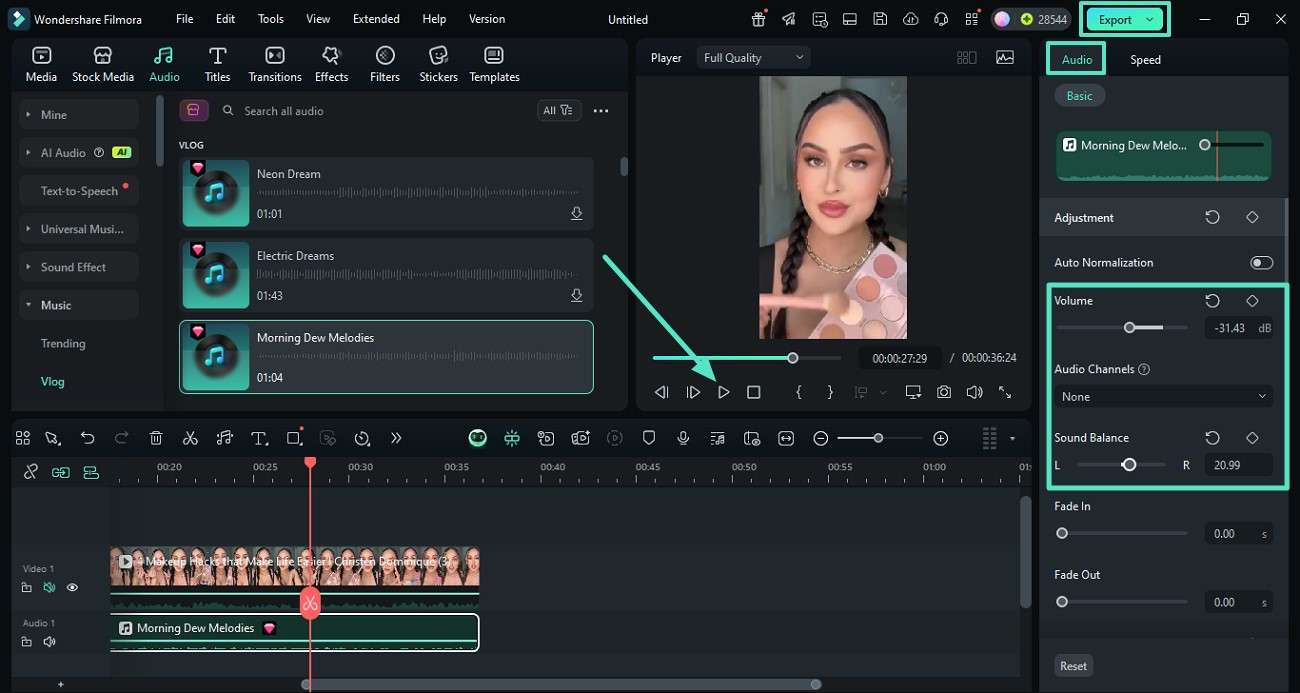
Step2Adjust the Volume and Balance.
Within the “Audio” tab across the “Settings” panel, access the “Basic” sub-section and adjust the volume and sound balance. Click on the "Play" icon to preview the video and press the "Export" button to save the video.
Part 2. How To Put An Audio Over Video With Filmora App
For creating engaging content for social media, clear and dynamic audio is as vital as stunning visuals. Creators often find it challenging when searching for audio tracks for their video content due to copyright issues and high-end recording tools, but Filmora App [Android/iOS] has changed this scenario by offering built-in royalty-free audio tracks and self-recorded voiceovers straight from your mobile phones.
 secure download

The creative AI sound library is not just for beginners; professionals and marketers can also efficiently utilise this feature to enhance their video files just by using their phones. Users no longer need to waste time searching for songs for their Instagram reels and video content, as Filmora provides simple methods for adding audio to videos.
Method 1. Generate AI Audio with Filmora App
Instead of searching for royalty-free music and professional musical skills, Filmora App's AI Audio feature can simply generate trendy music that perfectly syncs with your content's vibe. The step-by-step guide is given below to generate AI audio in the Filmora app:
Step1Open the App and Import Your Video.
First of all, navigate the app from your phone and open Filmora to tap on the “New Project” to import your video file from the gallery.
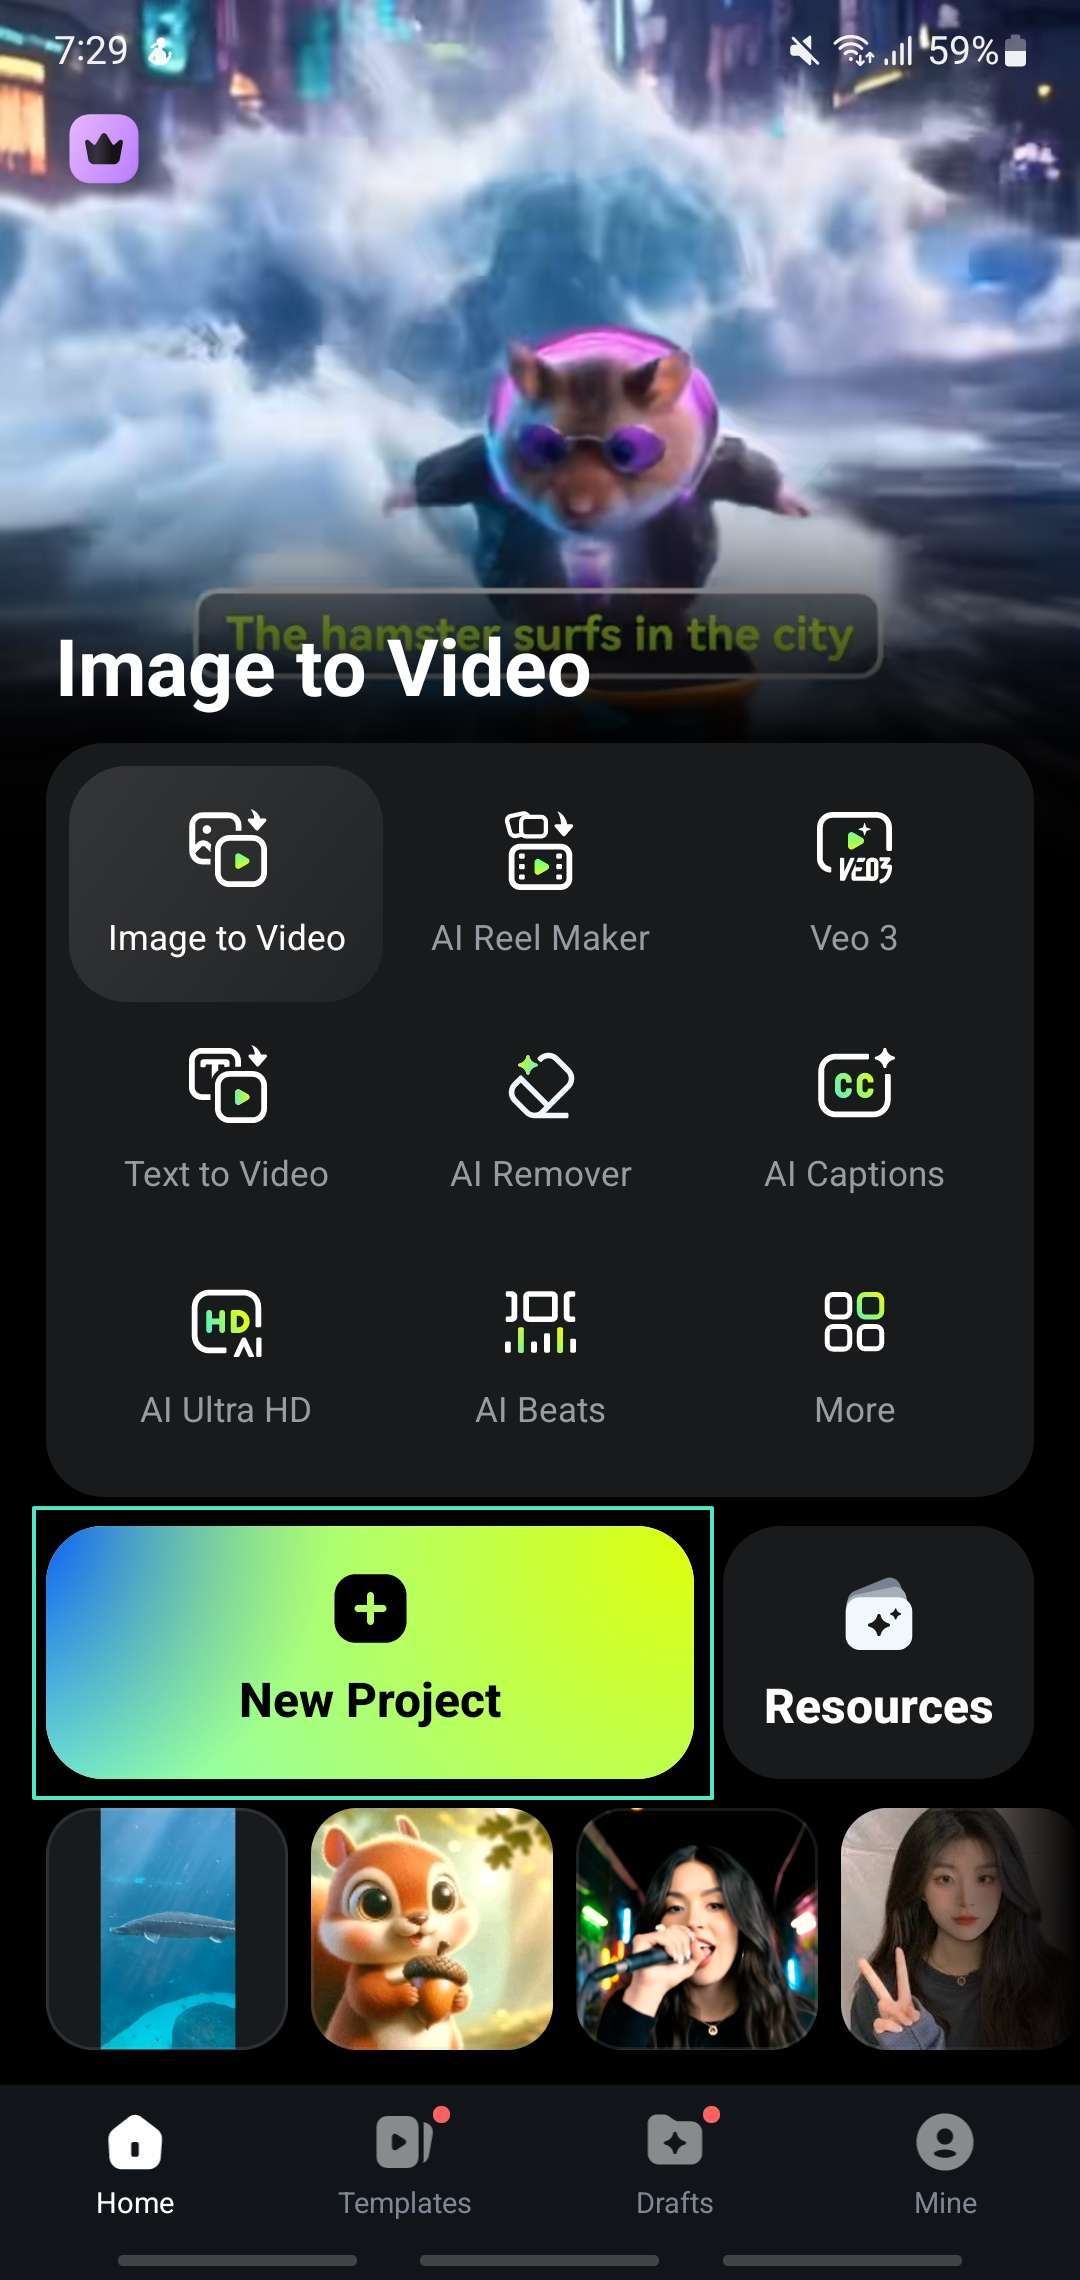
Step2Continue to Apple AI Audio.
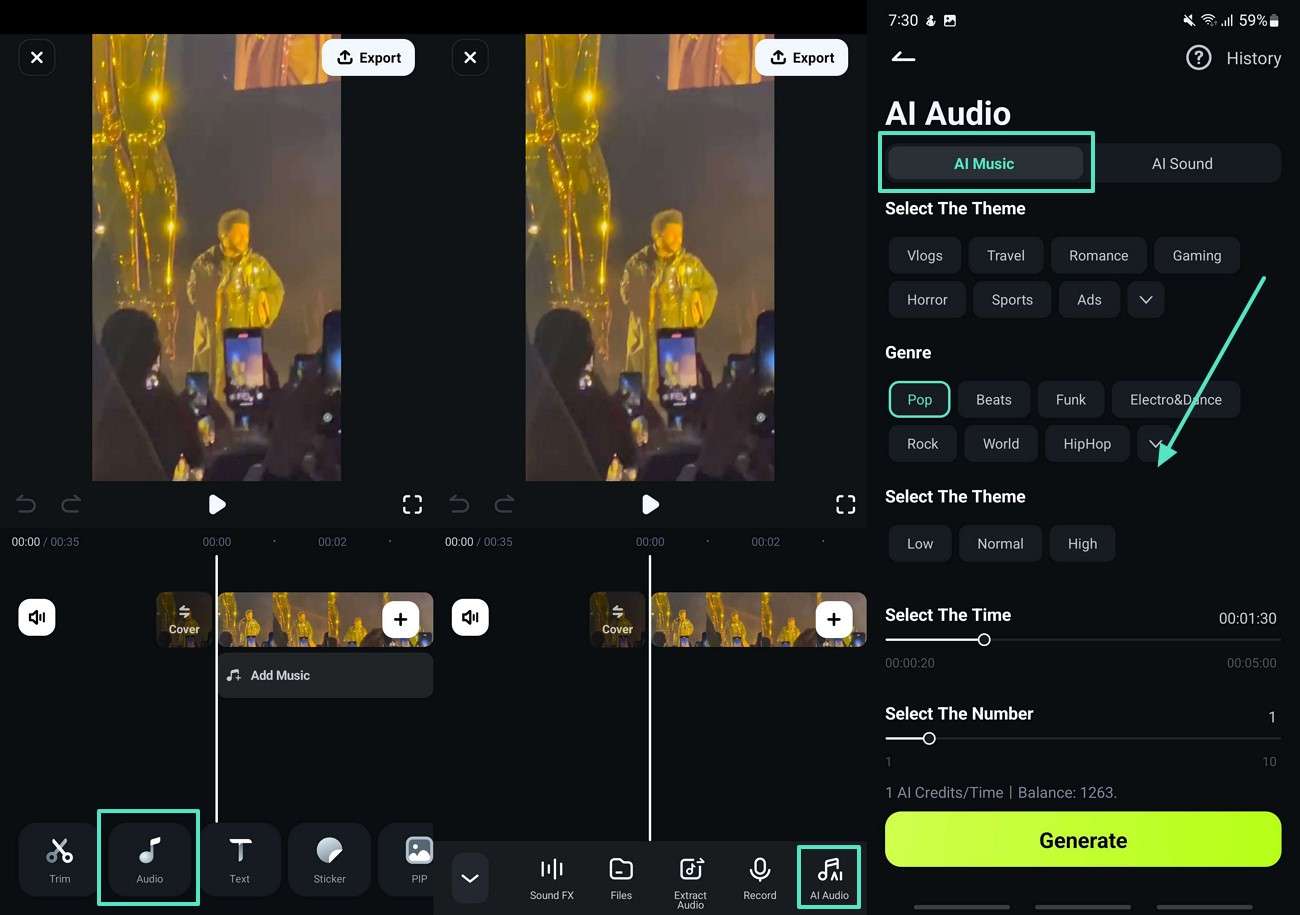
Access the “Audio” feature from the bottom toolbar and tap on the “AI Audio” option. Within the “AI Audio” screen, tap on the “AI Music” section and select the mood or theme for your content according to your preference. You may also define the “Select the Time” option by dragging the slider to adjust it according to your video length.
Step3Add Prompt With AI Sound Screen.
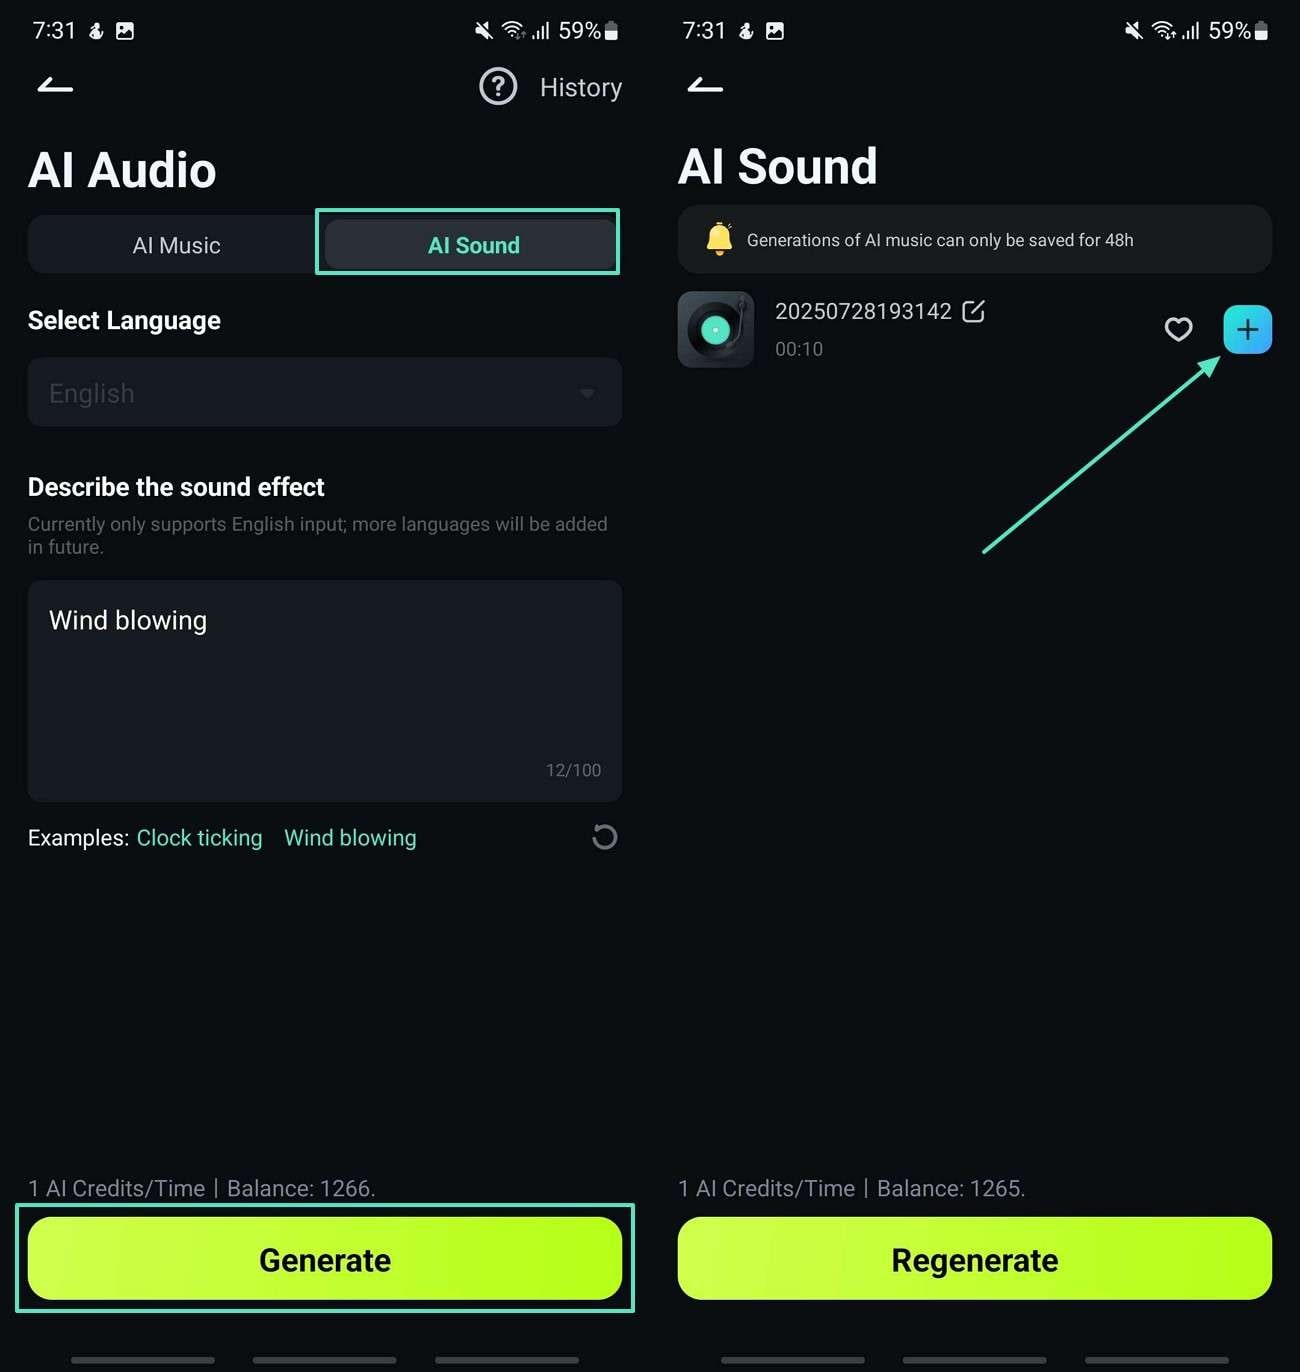
From the "AI Sound" tab, enter a text prompt in the “Describe” box, for example, "Beach Waves," and tap the "Generate" button. After generating the AI sound, tap the "+" icon to add sound to the video in the editing timeline.
Step4Adjust the AI Generated Sound and Export Video.
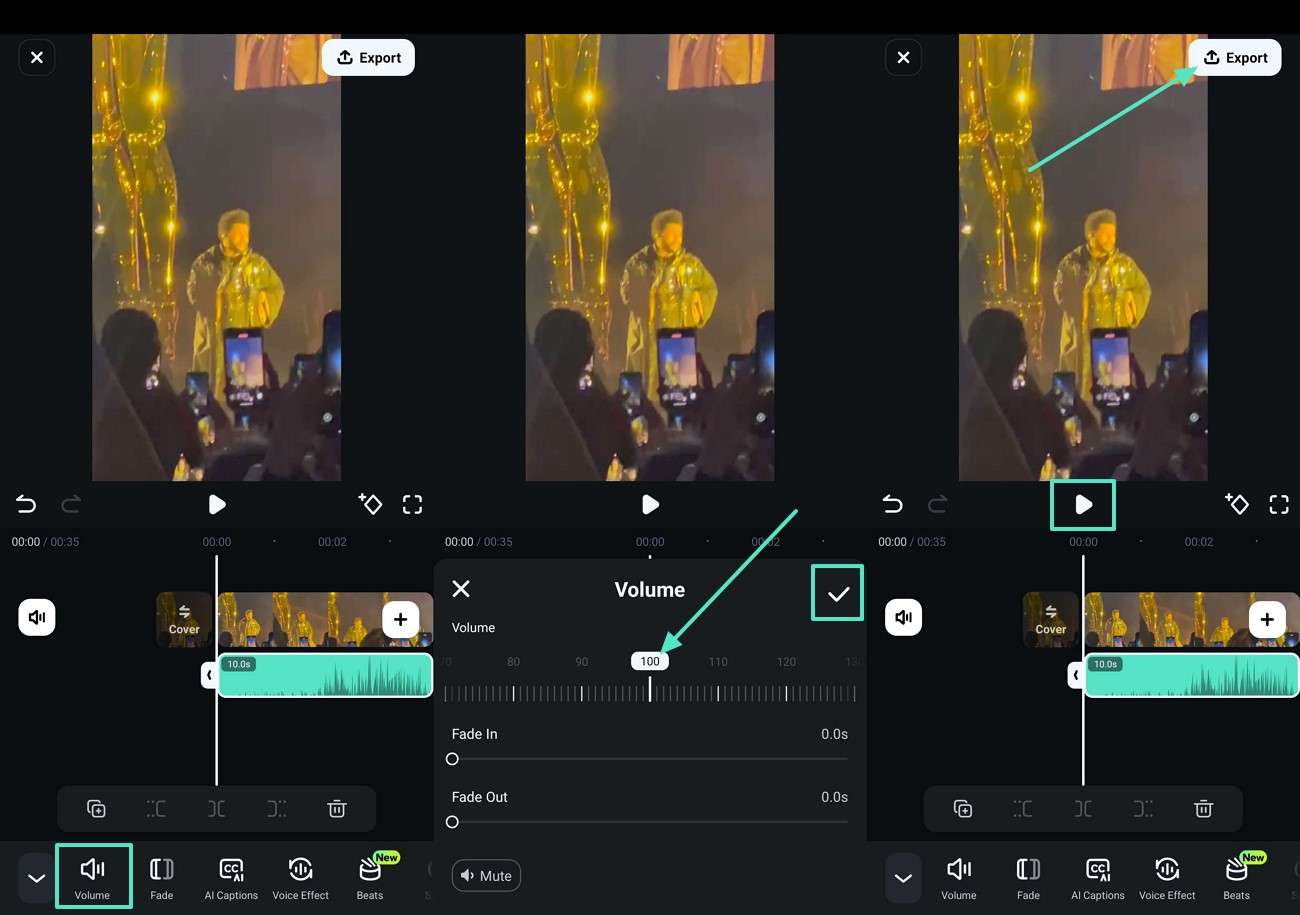
Press the “Volume” icon to turn off the original video sound and tap the “Play” icon to preview the result and hit the “Export” button.
Method 2. Including a Voiceover Within Video
To give a personal narration to your video content, Filmora's voiceover feature enables you to add your own voice and share the story of your content seamlessly. Its Text-to-Speech feature can generate clear narration in multiple languages without requiring advanced audio tools or technical skills for creators. To give a personalised voiceover to your video with the Filmora App, follow the instructions below:
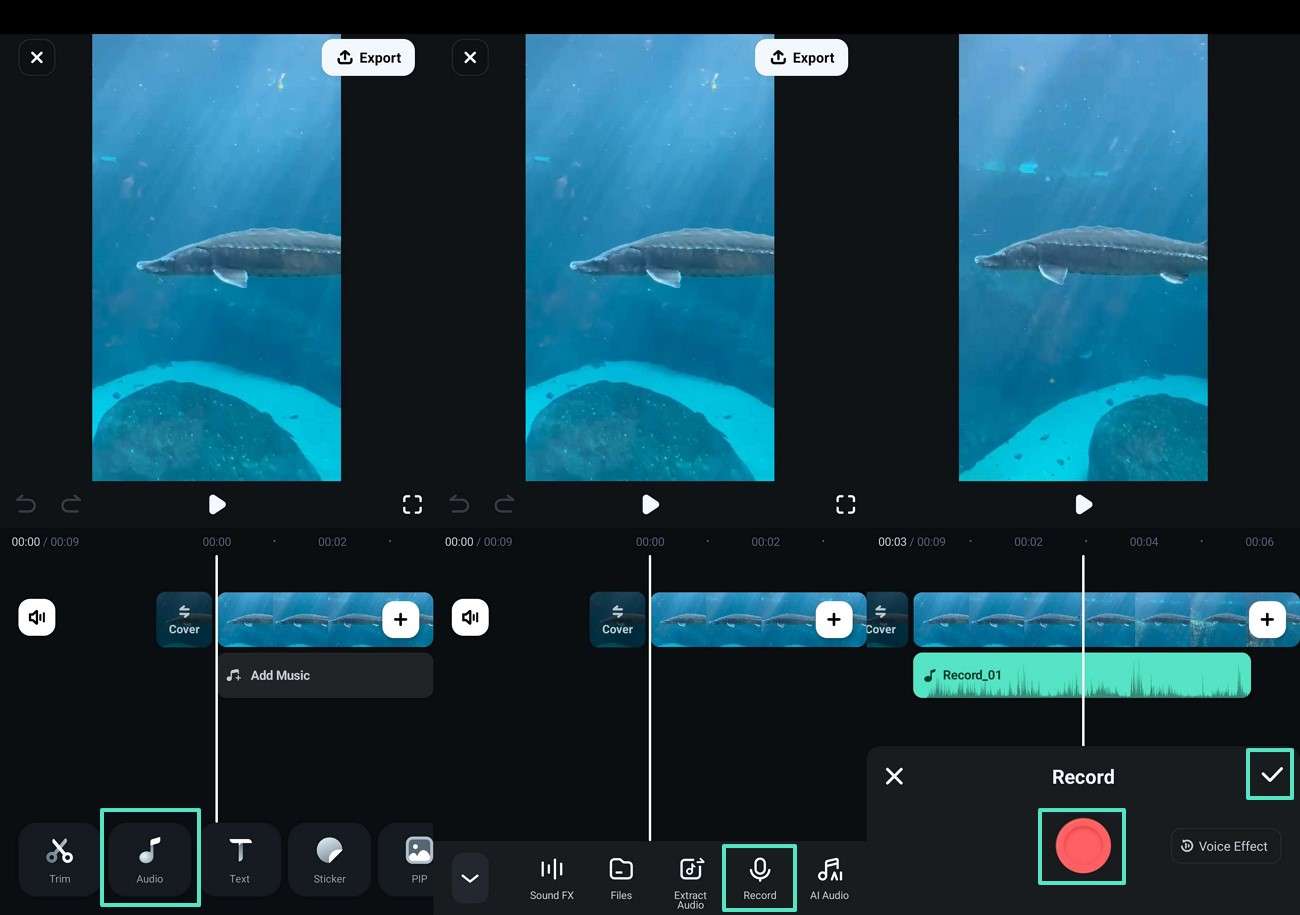
Step1Import Your Video and Navigate the Voiceover Tool.
With your media file imported, search for the “Record” option by accessing the “Audio” feature via the bottom toolbar. Drag the slider to the start of the video in the editing screen and press the “Record” button. Once you’ve recorded your narration, press the "Tick" icon to conclude.
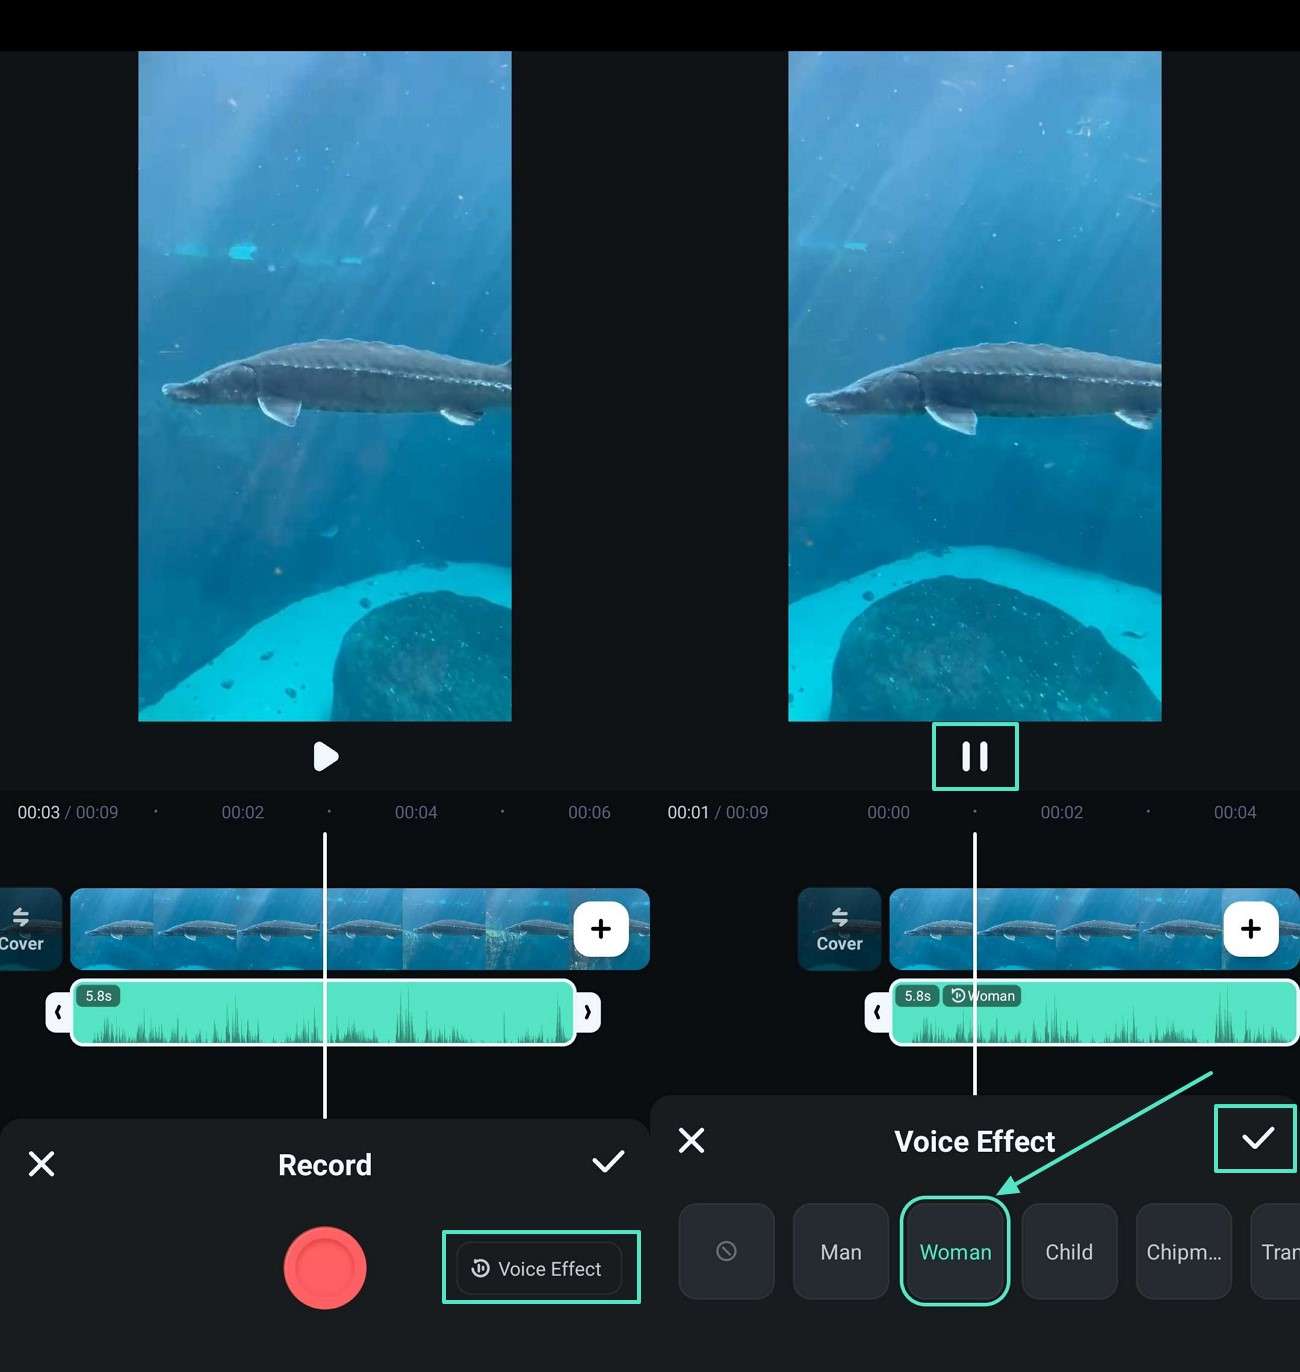
Step2Adjust Your Voiceover by Adding the Voice Effects.
You may also enhance the voiceover by tapping on the "Voice Effect" adjacent to the “Record” button and selecting your choice.
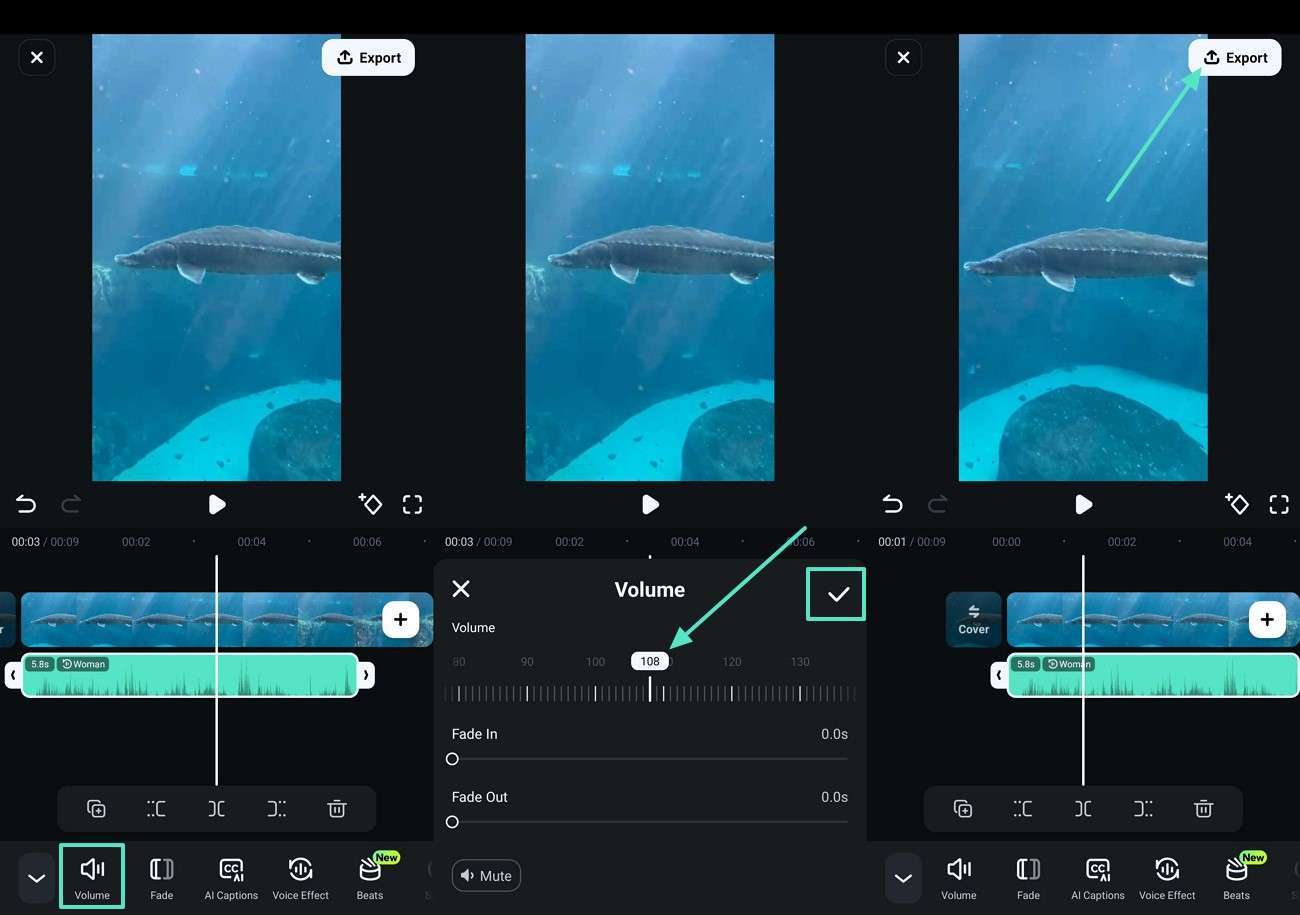
Step3Adjust the Sound of the Voiceover by Tapping the Volume.
Upon choosing the voice recording from the timeline, select the “Volume” feature to adjust its volume. With the audio changed, press the “Tick” icon and conclude the process with the “Export” button.
Method 3. Using the Built-In Royalty-Free Audio Tracks
When you are creating Instagram Reels and marketing content, Filmora's built-in royalty-free audio tracks provide an easy and accessible approach to add sound to the videos. The app not only offers a free library but also provides a safe space for users to access copyright-free music. Learn the step-by-step guide on how to add royalty-free music to your content with the Filmora App:
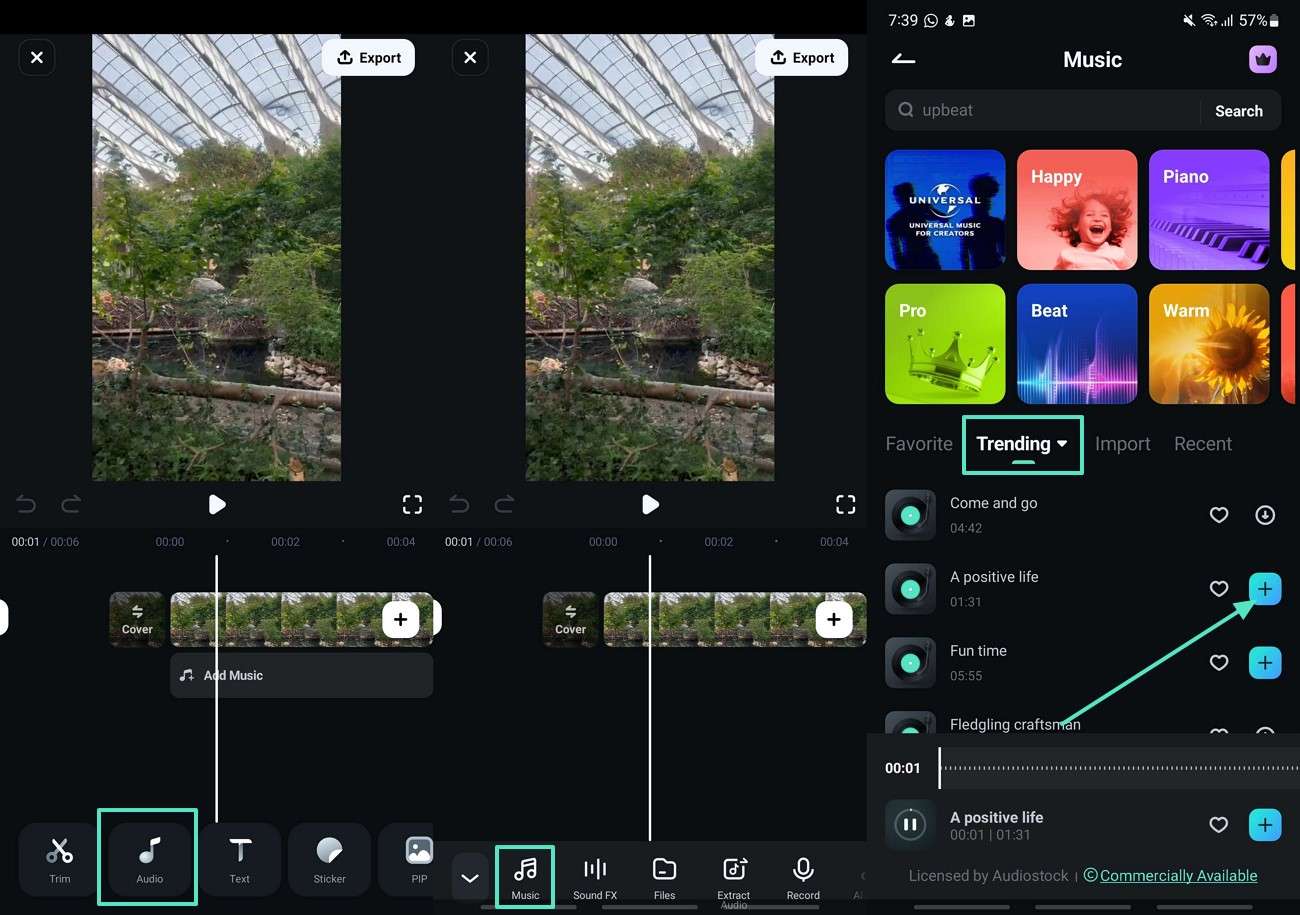
Step1Access the Built-In Music Library.
With the media added successfully, access the “Audio” section and look for the “Music” icon for navigating into the built-in music library. Select your preferred audio from the “Trending” section and use the “+” icon to add it to the timeline.
Step2Tap on the Speed Icon to Edit the Generated Music.
After generating the in-built music, tap on the audio file below the video in the editing timeline and press the "Speed" icon. Drag the slider to adjust the speed of the generated music and conclude using the "Tick" icon.

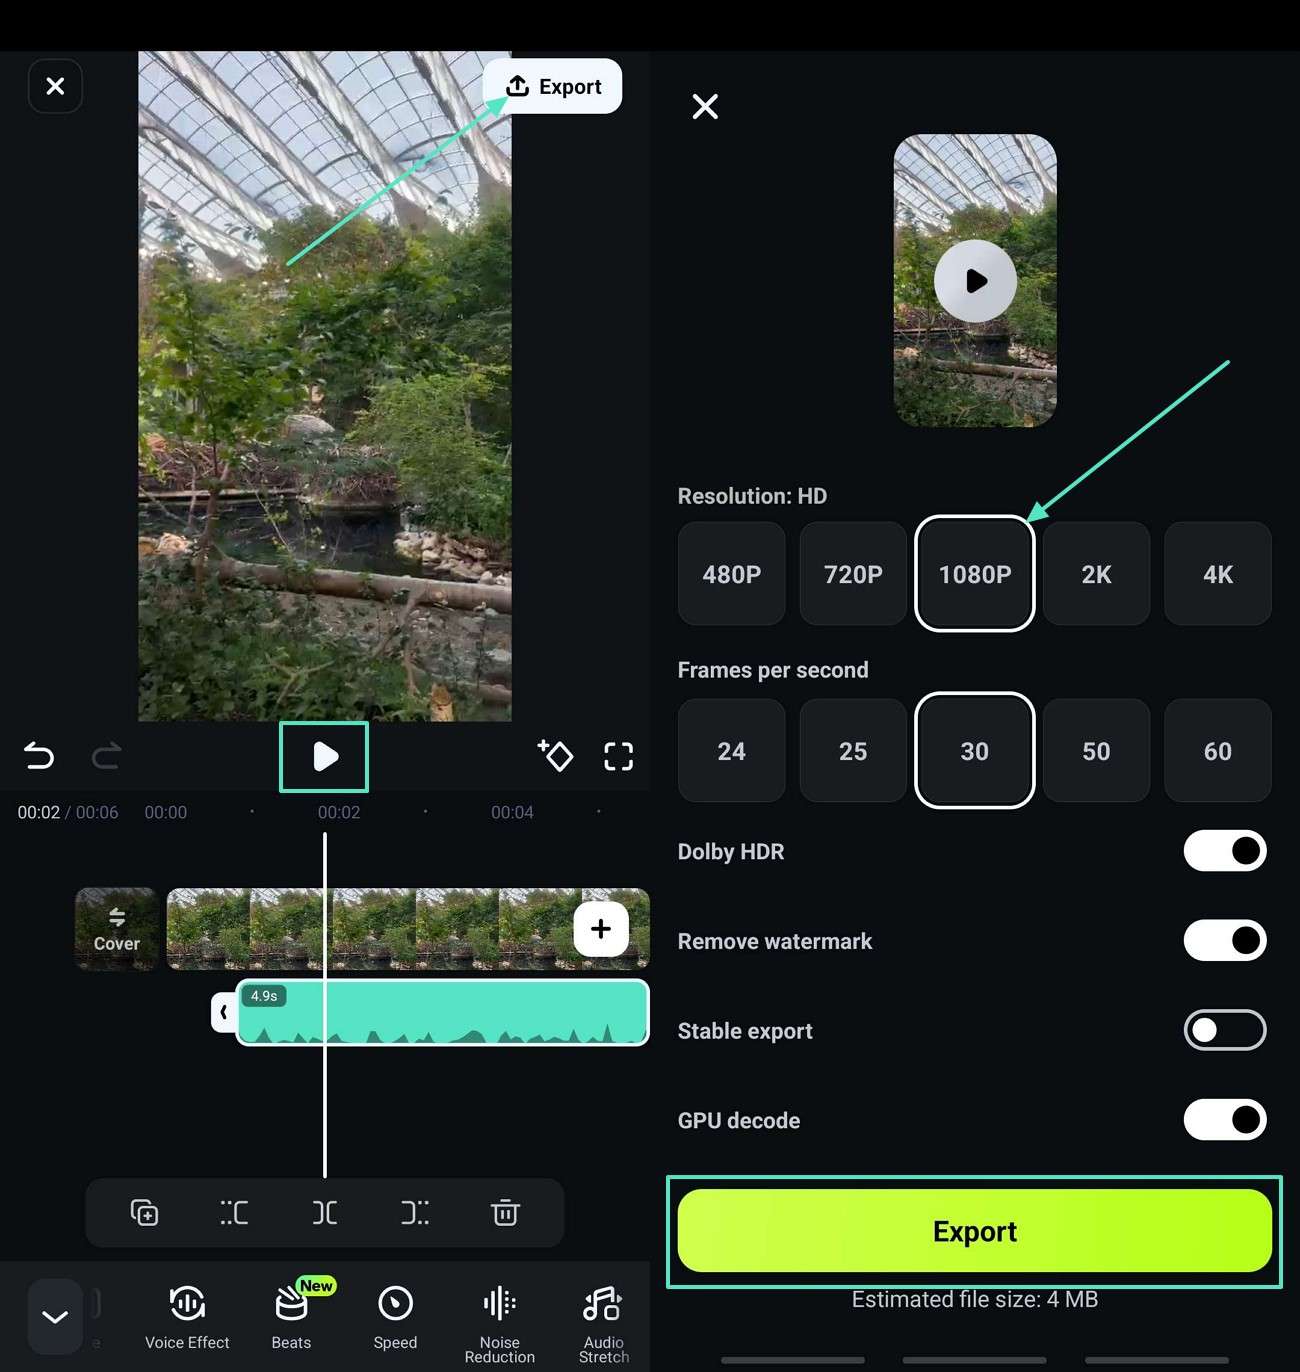
Step3Preview Your Manual Edits and Export.
In the final step, preview your edits by tapping the "Play" icon in the preview screen to see how the sound appears in your video. Lead into the “Export” window using the available button on the top-right and choose your desired resolution. With the settings defined, click the “Export” button again to save the video to your device.
Conclusion
To conclude, with Filmora, creators can easily enhance their videos and stop wondering how to put audio over a video. In this article, we have thoroughly discussed the versatile audio features of the Filmora app and desktop version. With the in-built music library, personalized sound effects, and voice narration tools users can confidently share their content without the challenge of copyright concerns.
