Filmora
Filmora - AI Video Editor
Edit Faster, Smarter and Easier!
OPEN

How to Add Borders to Video on Windows & Mac

Find Solutions in Filmora

  • Ready-to-use border presets to quickly add stylish borders and frames to your videos.
  • AI-powered Human Border feature for automatically detecting and highlighting people in your footage.
  • Customizable border controls including color, thickness, opacity, and animation, allowing easy adjustment for a polished, professional look.
Edit AVI Files for Free Edit AVI Files for Free
qrcode-img
Scan to get the Filmora App
100% Security Verified | No Subscription Required | No Malware

Adding video borders or a video border frame is a simple yet effective way to draw more attention to your content. When you add a border to a video, the clip instantly looks more polished and visually engaging for viewers. This becomes even more important when you plan to add borders to video clips that include a second footage as an overlay above the first one.

A common example is a webcam recording that you might have shot separately and now want to combine with the main footage so both clips look like a single film. In such cases, knowing how to add borders to video properly helps separate layers visually while keeping the final result clean and professional.

With that said, here you will learn how to add a border to a video step by step using Filmora. After reading this guide, you will be able to add a white border to a video in multiple ways, use a different color of your choice, apply a frame overlay so it looks like a video border frame, and even add a border to humans if they appear in the video.

different border styles

Part 1: How to Add Border to Video with Filmora on Windows/Mac [3 Ways]

Wondershare Filmora is a powerful yet easy-to-use video editing software designed for creators who want professional results without a steep learning curve. Compared with traditional industry tools like Adobe Premiere Pro or Final Cut Pro, Filmora focuses on speed, simplicity, and built-in creative features, making it ideal for both beginners and experienced editors.

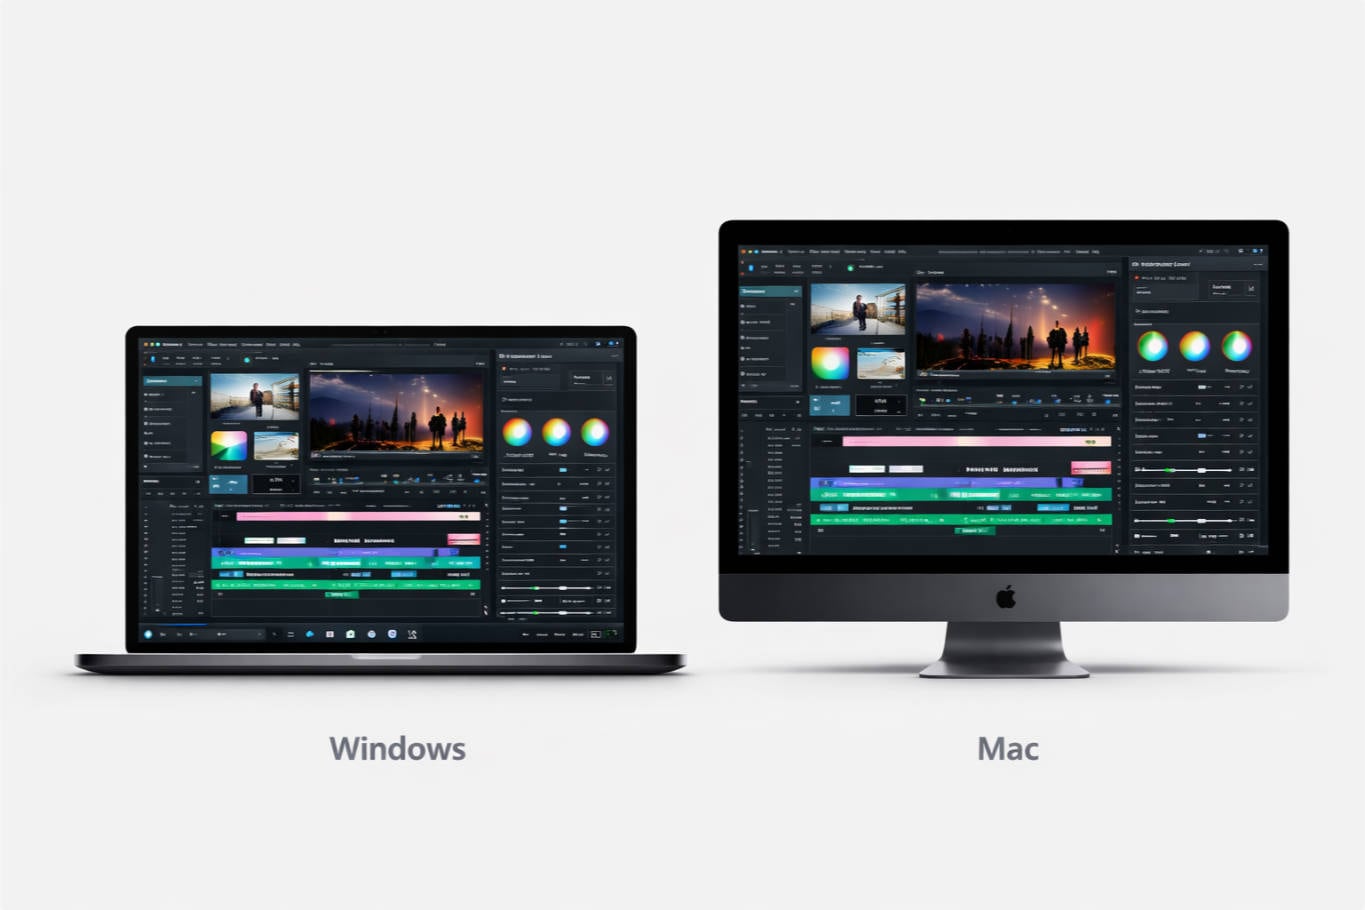
Available on Windows and Mac, Filmora combines a lightweight performance with advanced AI tools, rich effects libraries, and intuitive controls. Tasks like adding video borders, applying visual effects, or animating elements can be done in just a few clicks—without heavy system requirements or complex workflows.

filmora add boeders
Try It Free Try It Free
qrcode-img
Scan to get the Filmora App
secure-icon Secure Download

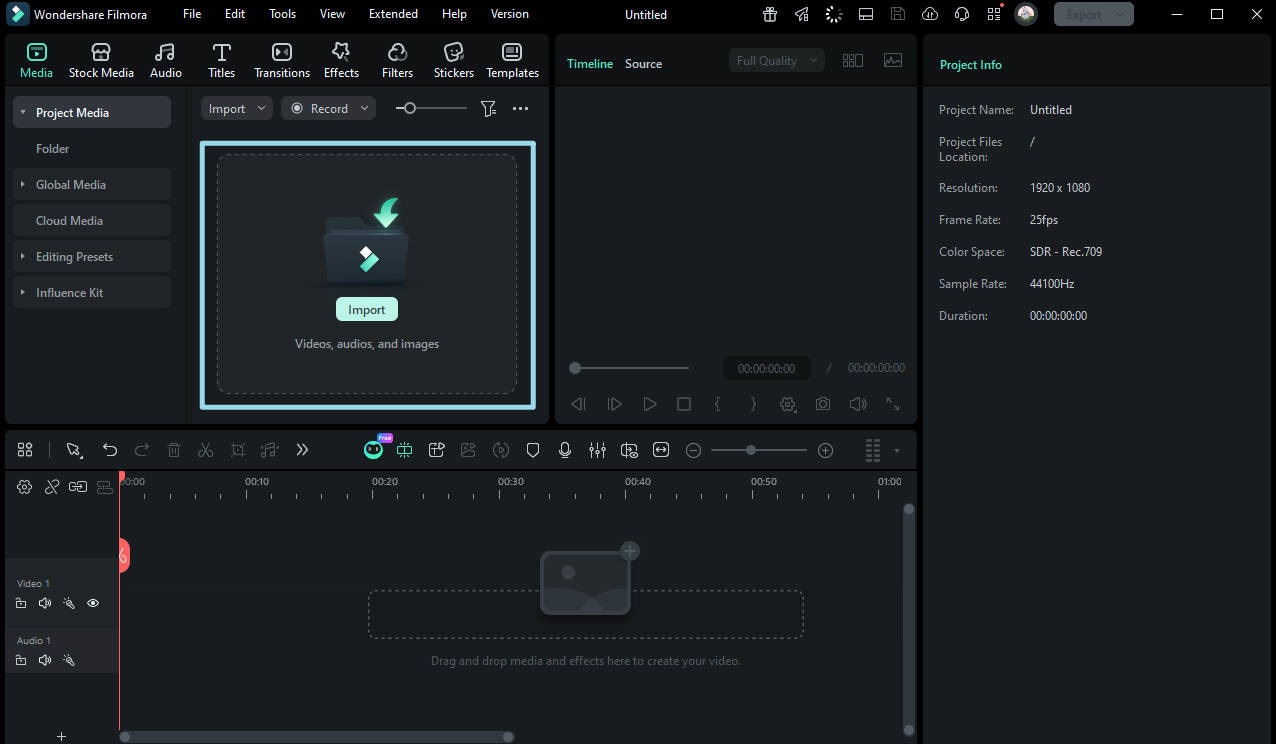
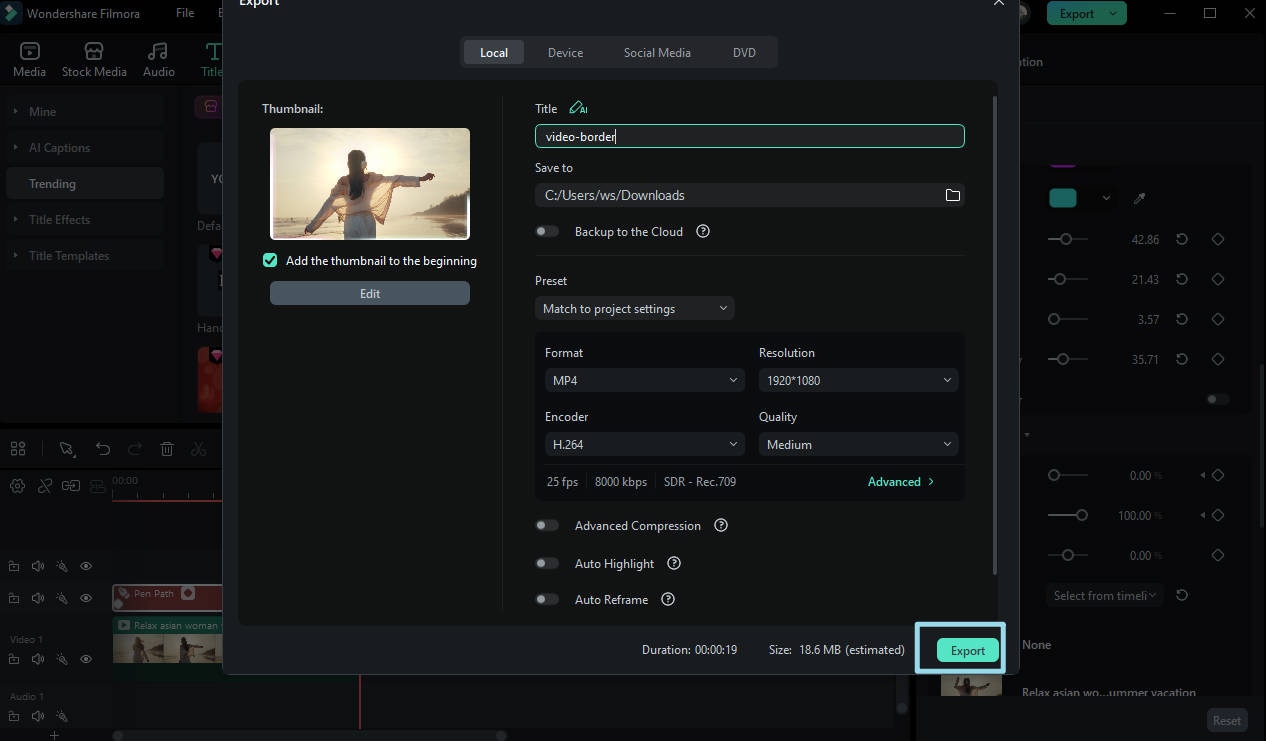
Follow the steps below to learn how to add a border to video using Wondershare Filmora:

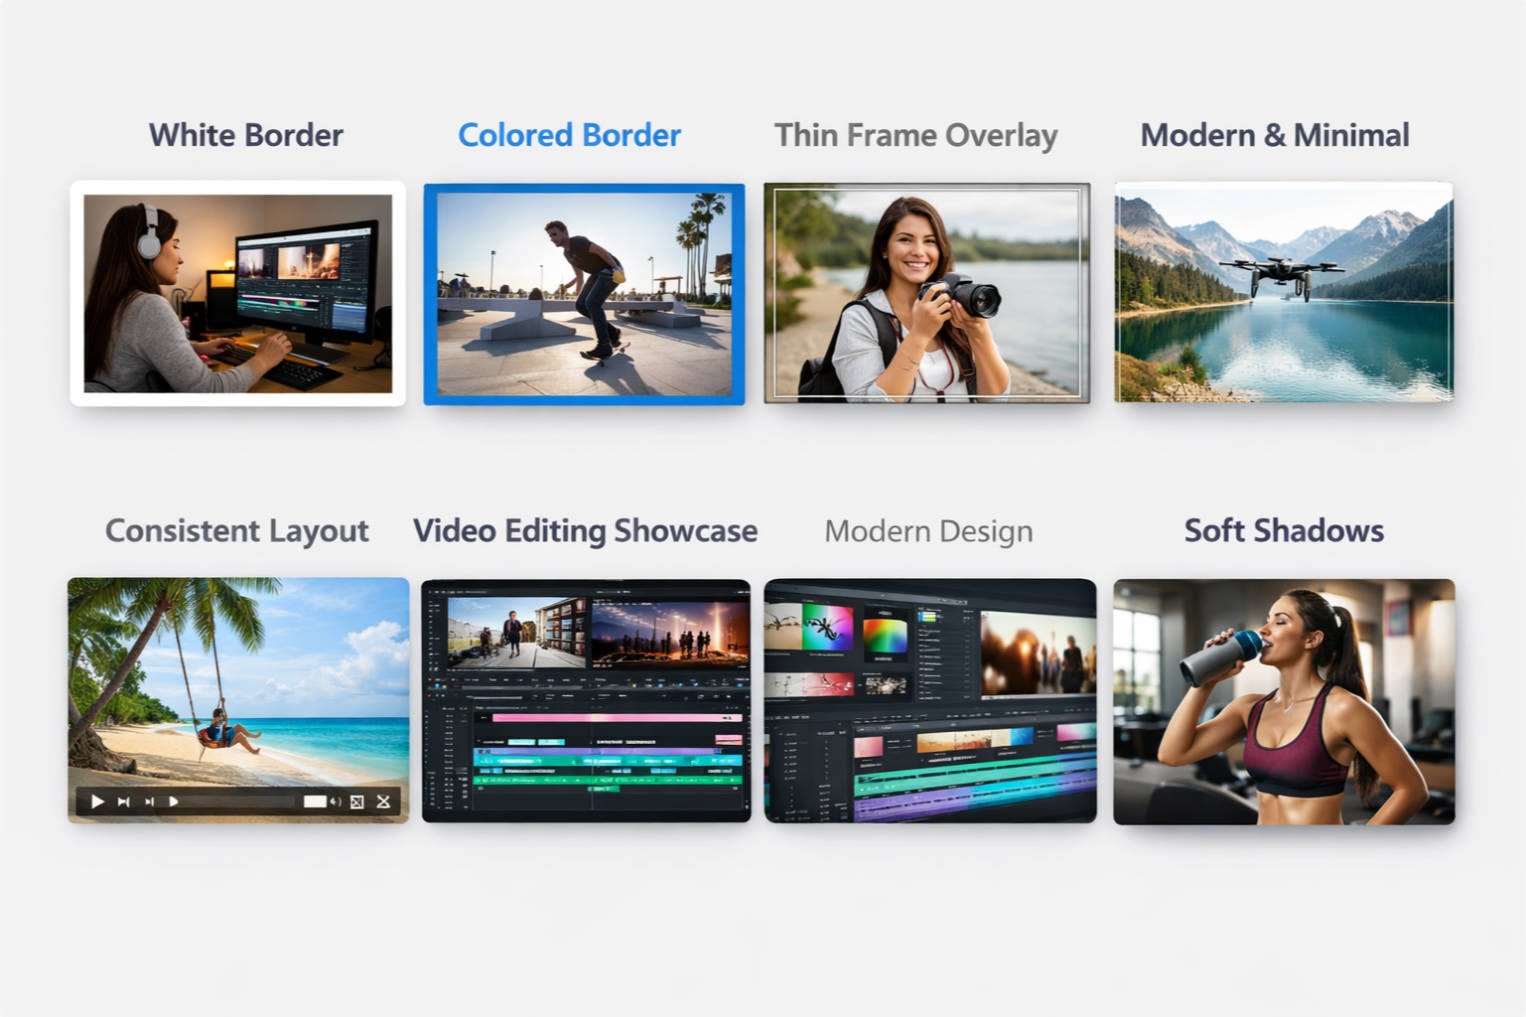
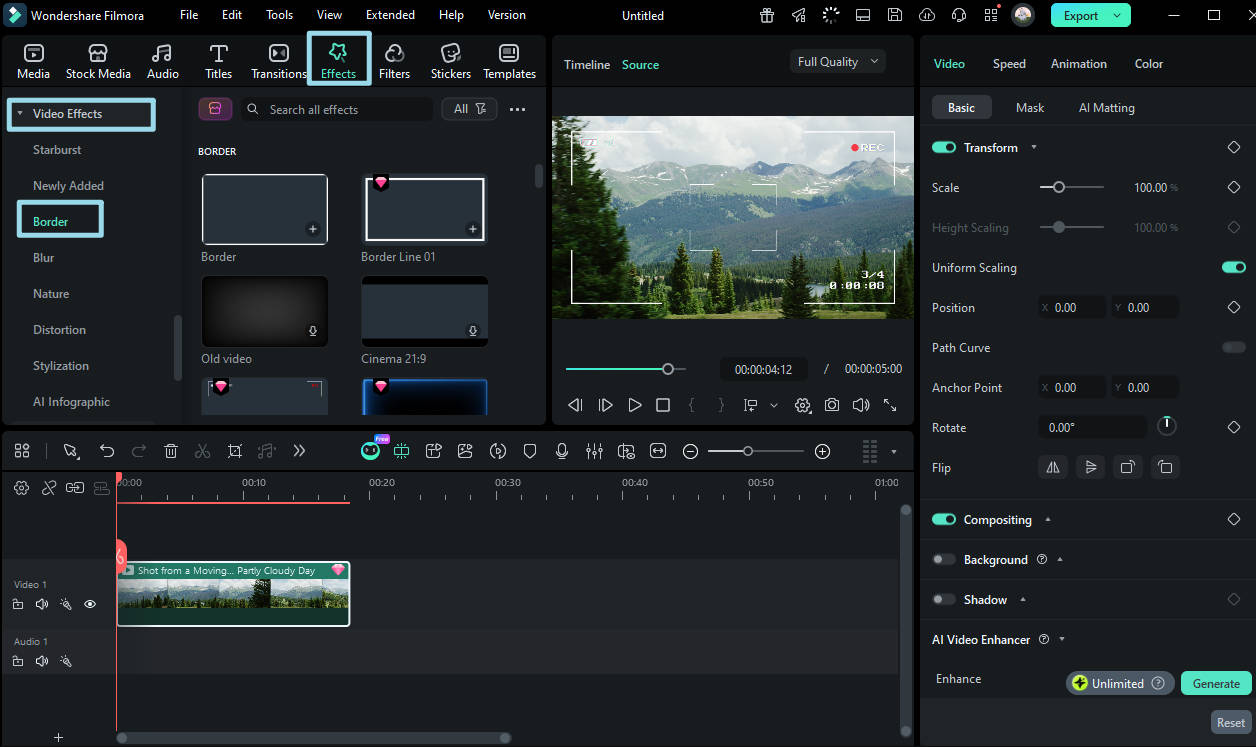
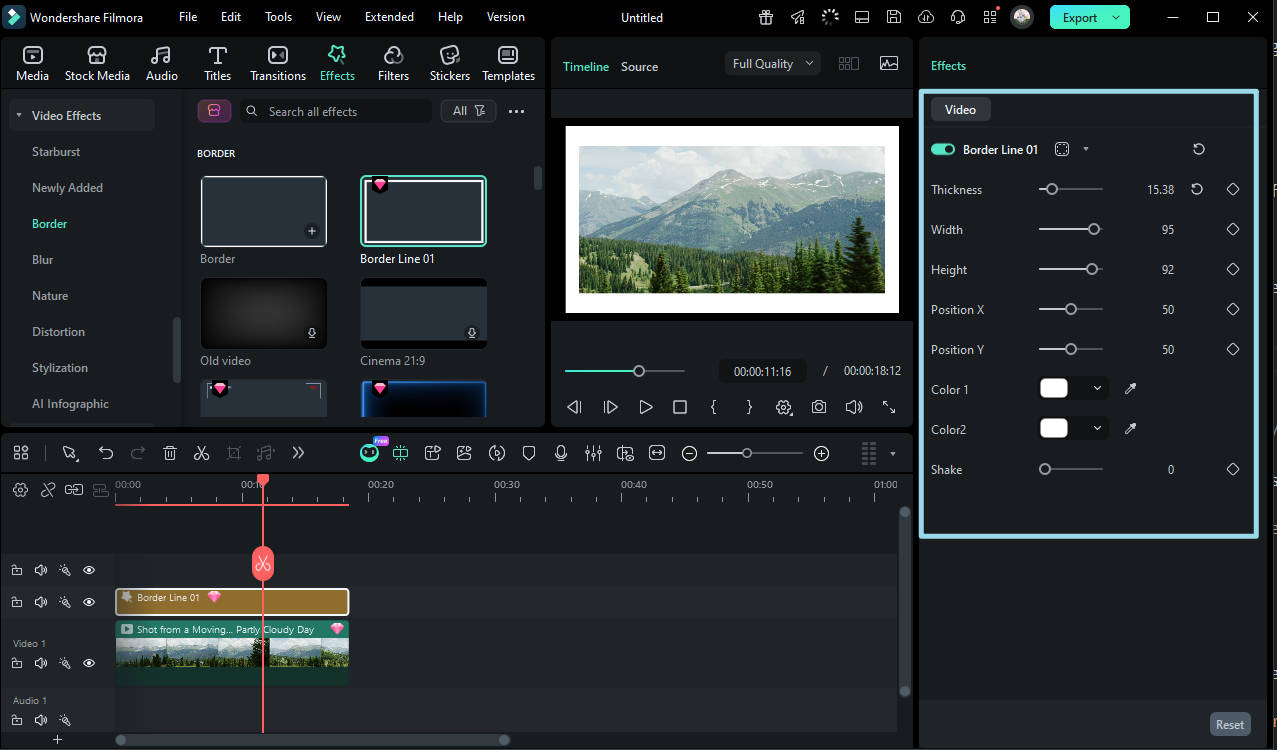
Method 1: Add Borders with Built-in Border Presets

This method adds a simple border style to the video and is ideal when you want a clean frame without spending time on customization.

Below are some sample video border styles. You can download your favorite ones directly in Filmora and apply them to your own videos.

Moonriver Circus Overlay
Neon Blue Border
Neon Blue Border
News Broadcast Overlay
BBQ Party Overlay
BBQ Party Overlay
Christmas Promo Overlay
Beautiful Wedding Overlay
Step 1
Import the Source Video
Open Wondershare Filmora X on your Windows PC. Click Media in the top menu, then select Project Media from the left panel. Click Import to upload your video from your computer. After importing, drag the video from the Media library directly onto the Timeline to start editing.
import video filmora windows
Step 2
Add Border to Video
Click Effects in the top menu, then go to Video Effects in the left panel. Scroll or search to find the Border effect. Drag it directly onto your video track in the Timeline to add a white border. You can also place the Border effect on a separate layer above your video for the same result.
add borders effect to video filmora
Step 3
Customize the Border
To customize your video border, double-click the video layer with the Border effect in the Timeline, then expand the Video Effects tree in the upper-left panel. Use sliders and options to adjust Size, Feather, Opacity, Width, Height, Thickness, and Color Shake, fully personalizing the border to match your video style.
customize video borders in filmora

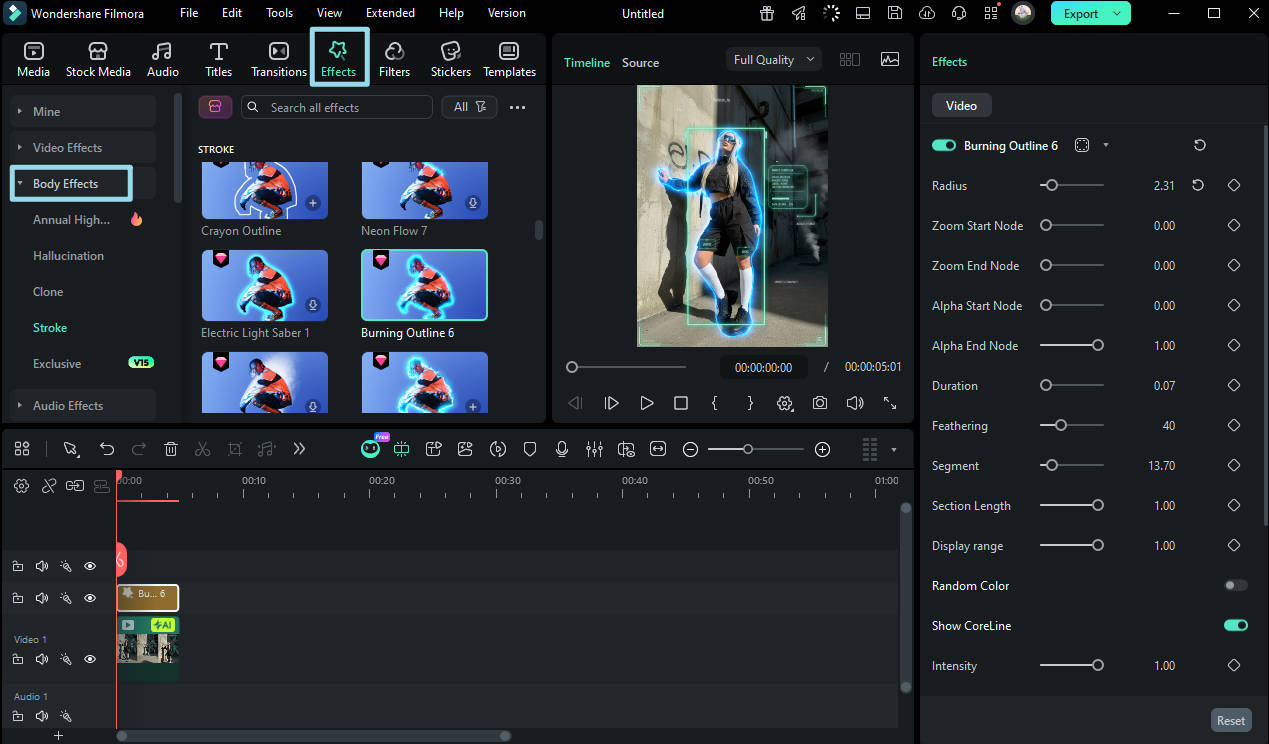
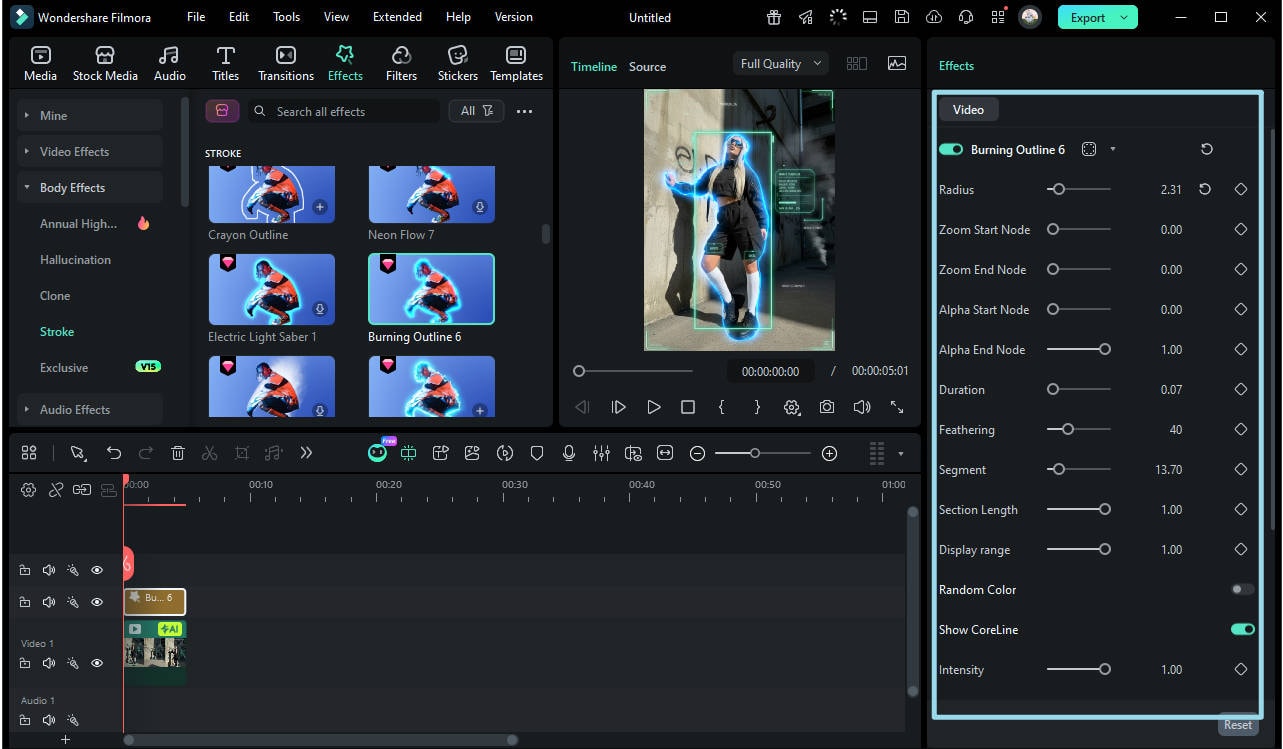
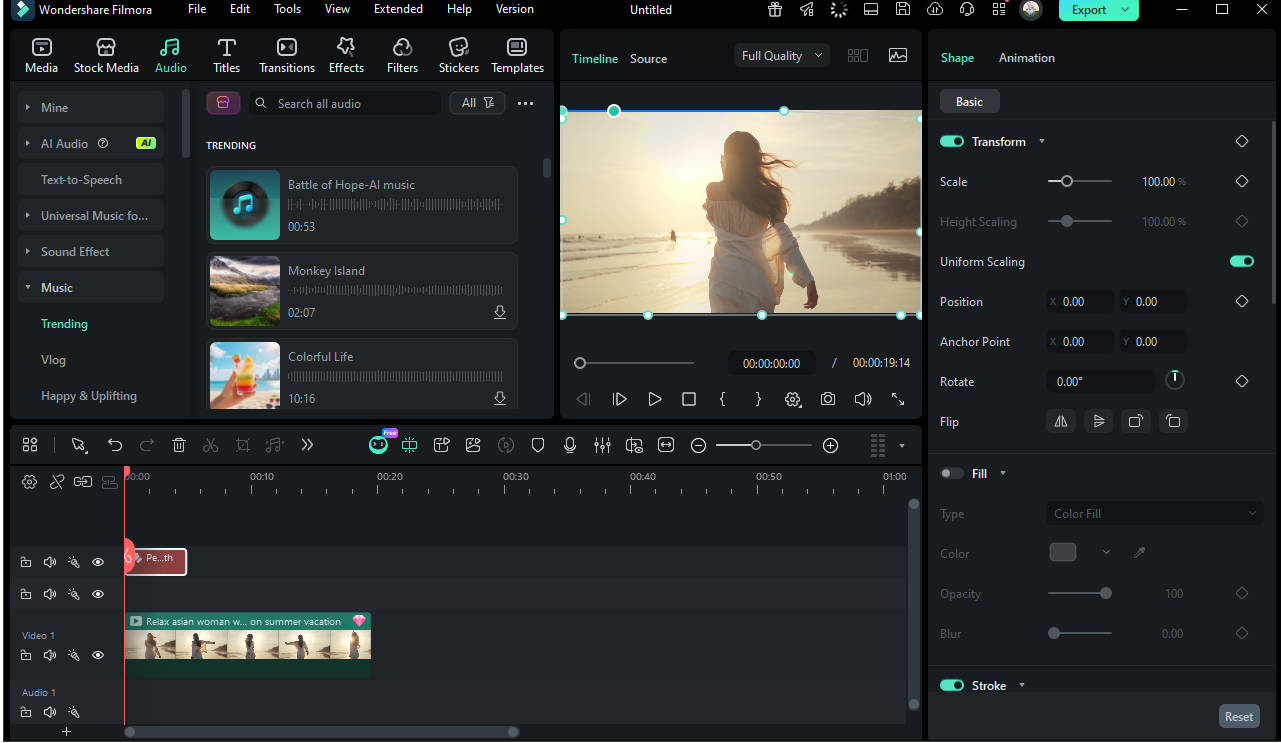
Method 2: Add Borders Around People (Human Border)

Filmora's Human Border feature combines built-in AI human segmentation with border effects, allowing you to automatically detect and track people in your video. With just one click, it intelligently follows the movement of each person, creating dynamic video borders without the need for manual adjustments, saving time while producing professional-looking results.

filmora human border examples
Try It Free Try It Free
qrcode-img
Scan to get the Filmora App
secure-icon Secure Download
Step 1
Add Video to the Timeline
Import a video containing human(s) using the previous method, and drag the clip onto the Timeline.
Step 2
Add Human Border
Click Effects in the top menu, then go to Body Effects in the left panel. Choose an AI Portrait effect, and drag it onto your video clip in the Timeline. Filmora will automatically detect the person in the footage and apply a border around the human subject.
add human border filmora
Step 3
Customize the Human Border
After applying the Human Border effect, double-click the video layer and go to the Body Effects section. Use sliders and options to adjust the border's size, shape, color, transparency, and intensity. These controls let the border dynamically follow the movement of people in your video.
adjust human border settings

Explorer more usage of the AI Portrait effects here: How to Remove Video Background without Green Screen.

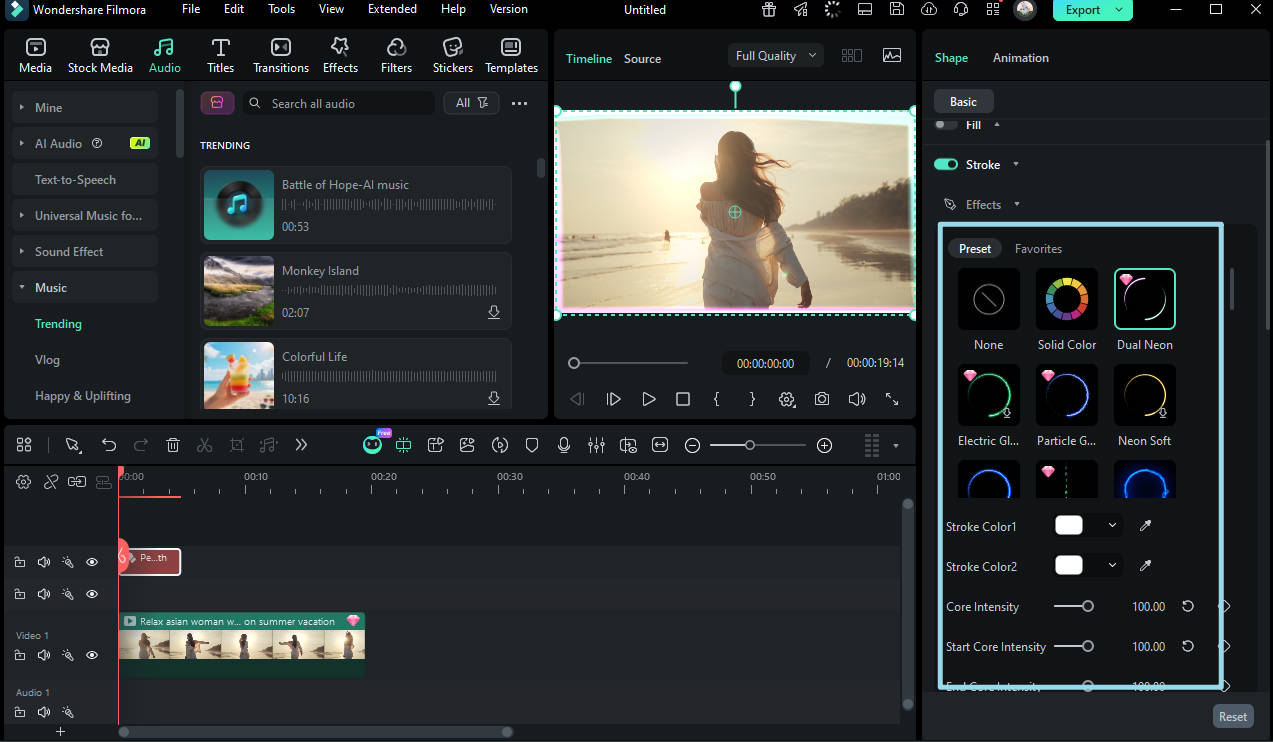
Method 3: Create Custom Borders with the Pen Tool

If you want completely custom, organic, and animated video borders that stand out from preset frames and templates, using Filmora's Pen Tool is a powerful way to do it. This tool lets you draw your own paths and shapes directly on the preview screen, then turn those lines into dynamic borders or motion graphics that follow your creative vision. It's especially useful for highlighting subjects, adding decorative outlines, or animating unique frames around people and objects in your video.

Step 1
Open the Pen Tool
Start by importing your video into Filmora and placing it on the timeline. Then select the Pen Tool from the toolbar or the drawing tools panel. This activates a path-drawing mode in the preview window.
open filmora pen tool
Step 2
Draw Your Custom Border Path
Click to place anchor points and connect them to outline a border around your subject or frame area. Drag points to create smooth curves and unique shapes. You can form a closed path to frame the entire shot, or an open path for decorative edge accents.
draw video borders
Step 3
Apply Stroke and Style Settings
Once your path is drawn, enable Stroke settings to turn the path into a visible border line. Customize the color, thickness, opacity, and effects like glow or gradient to match your video style.
apply stroke effect and adjust style settings
Step 4
Animate the Border (Optional)
For animated borders that draw themselves on screen, use Trim Path controls or keyframes to animate the stroke over time. You can also use Path Follow to make other elements (like decorative icons or text) follow along the border path.
animate your video border
Step 5
Fine-Tune and Export
Play back your video to preview the custom border animation. Adjust curve points or stroke properties until you're satisfied, then export your project in your desired format.
export final video

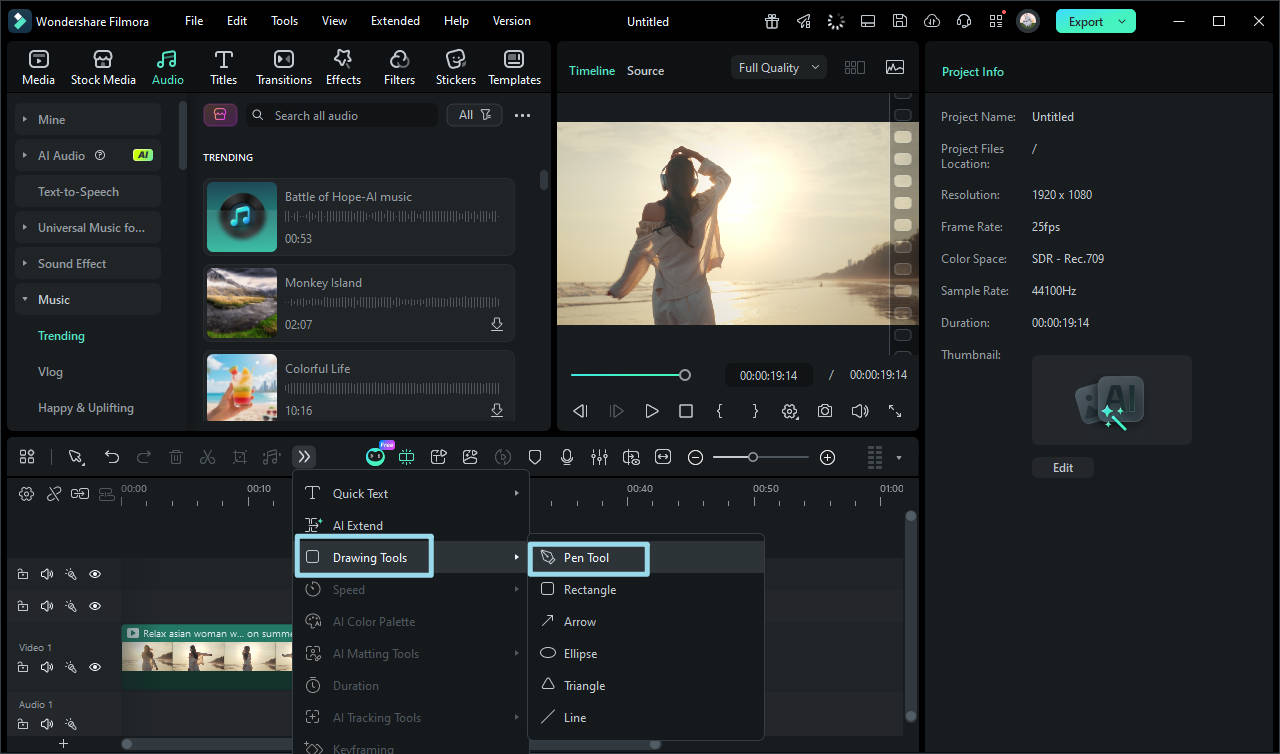
Learn more about using the Pen Tool with this comprehensive article: Filmora Pen Tool Tutorial

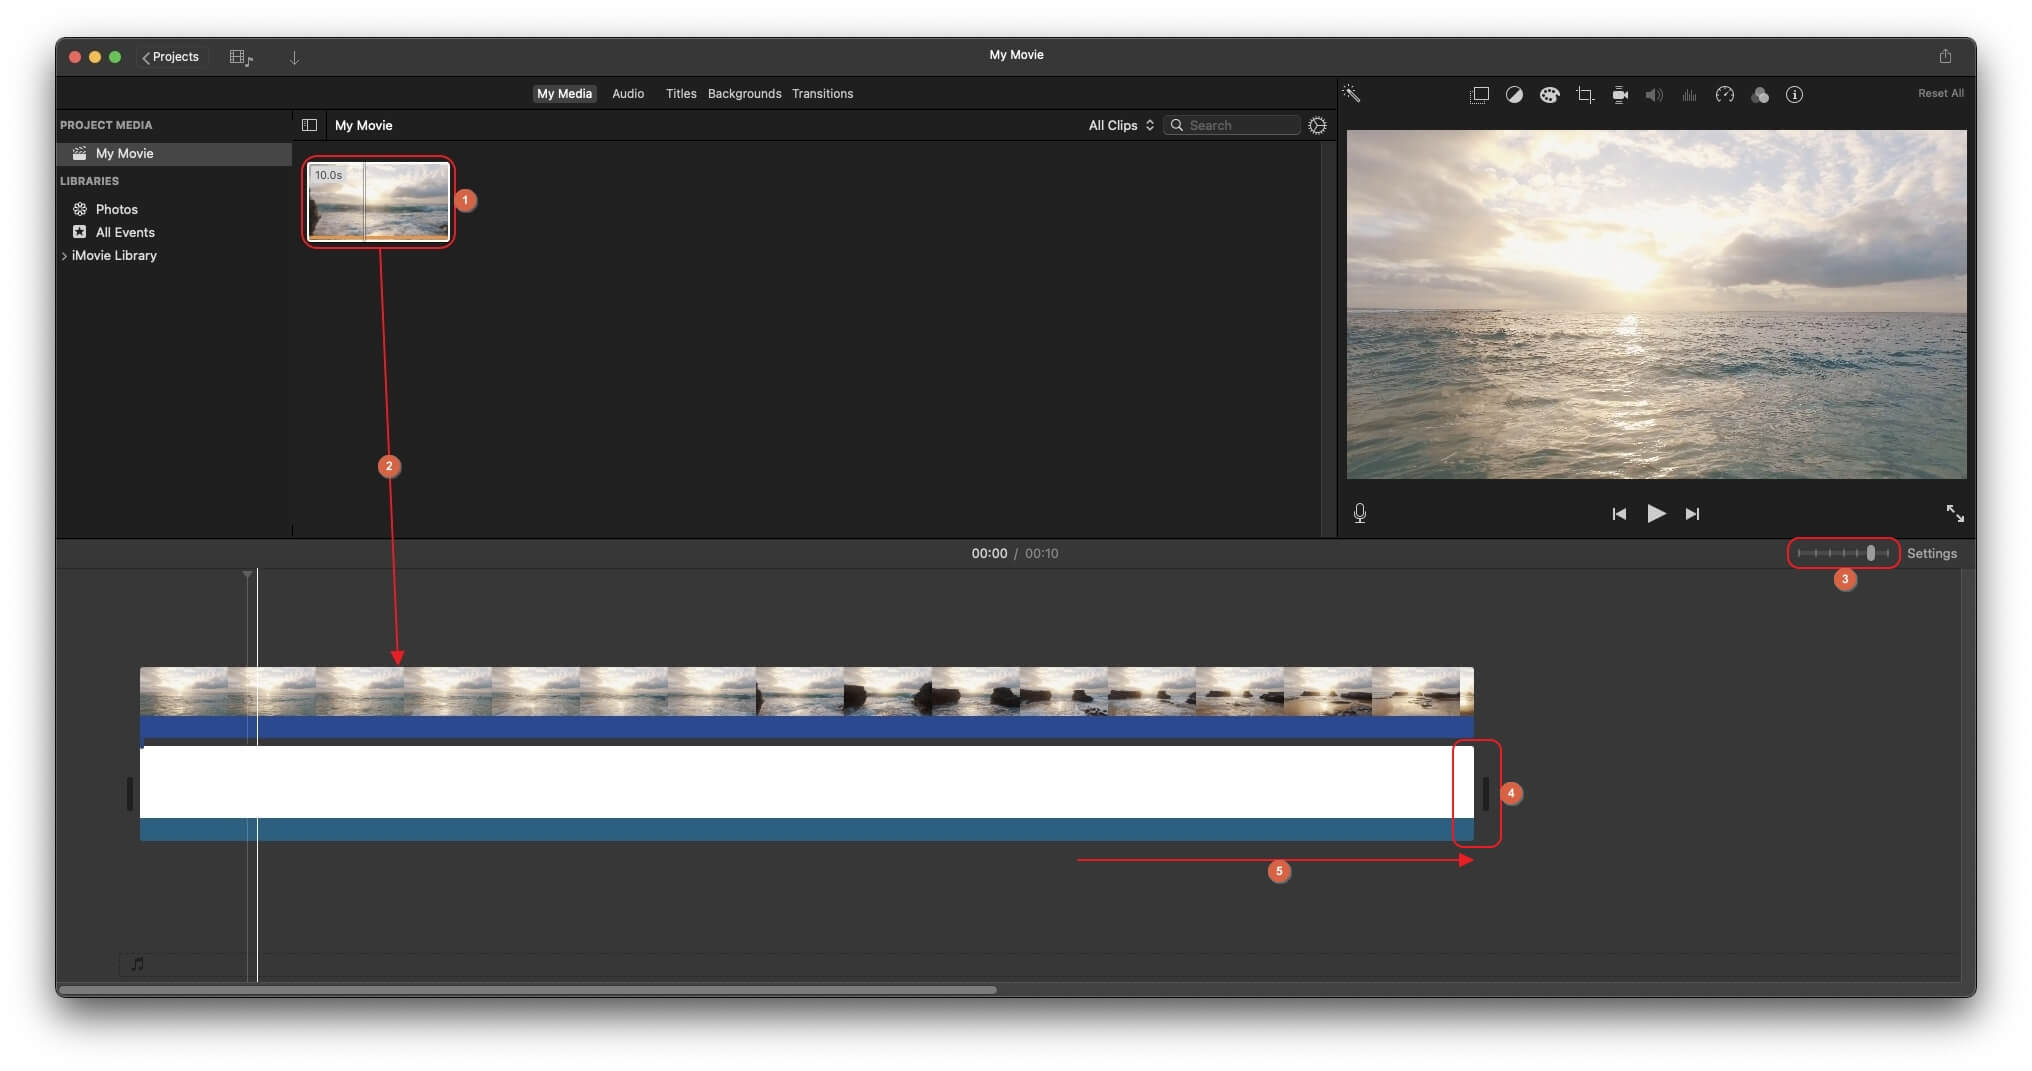
Part 2: How to Add Borders with iMovie on Mac

iMovie is a proprietary application developed by Apple Inc. and is available for iPhones, iPads, and Mac computers. Because the app detects and checks for genuine Apple hardware, it can't be installed even on the virtual machines running macOS. Nevertheless, iMovie is absolutely free for all devices, and it is also equipped with a plethora of features and presets to make post-production tasks easier, even for those who are new to the industry.

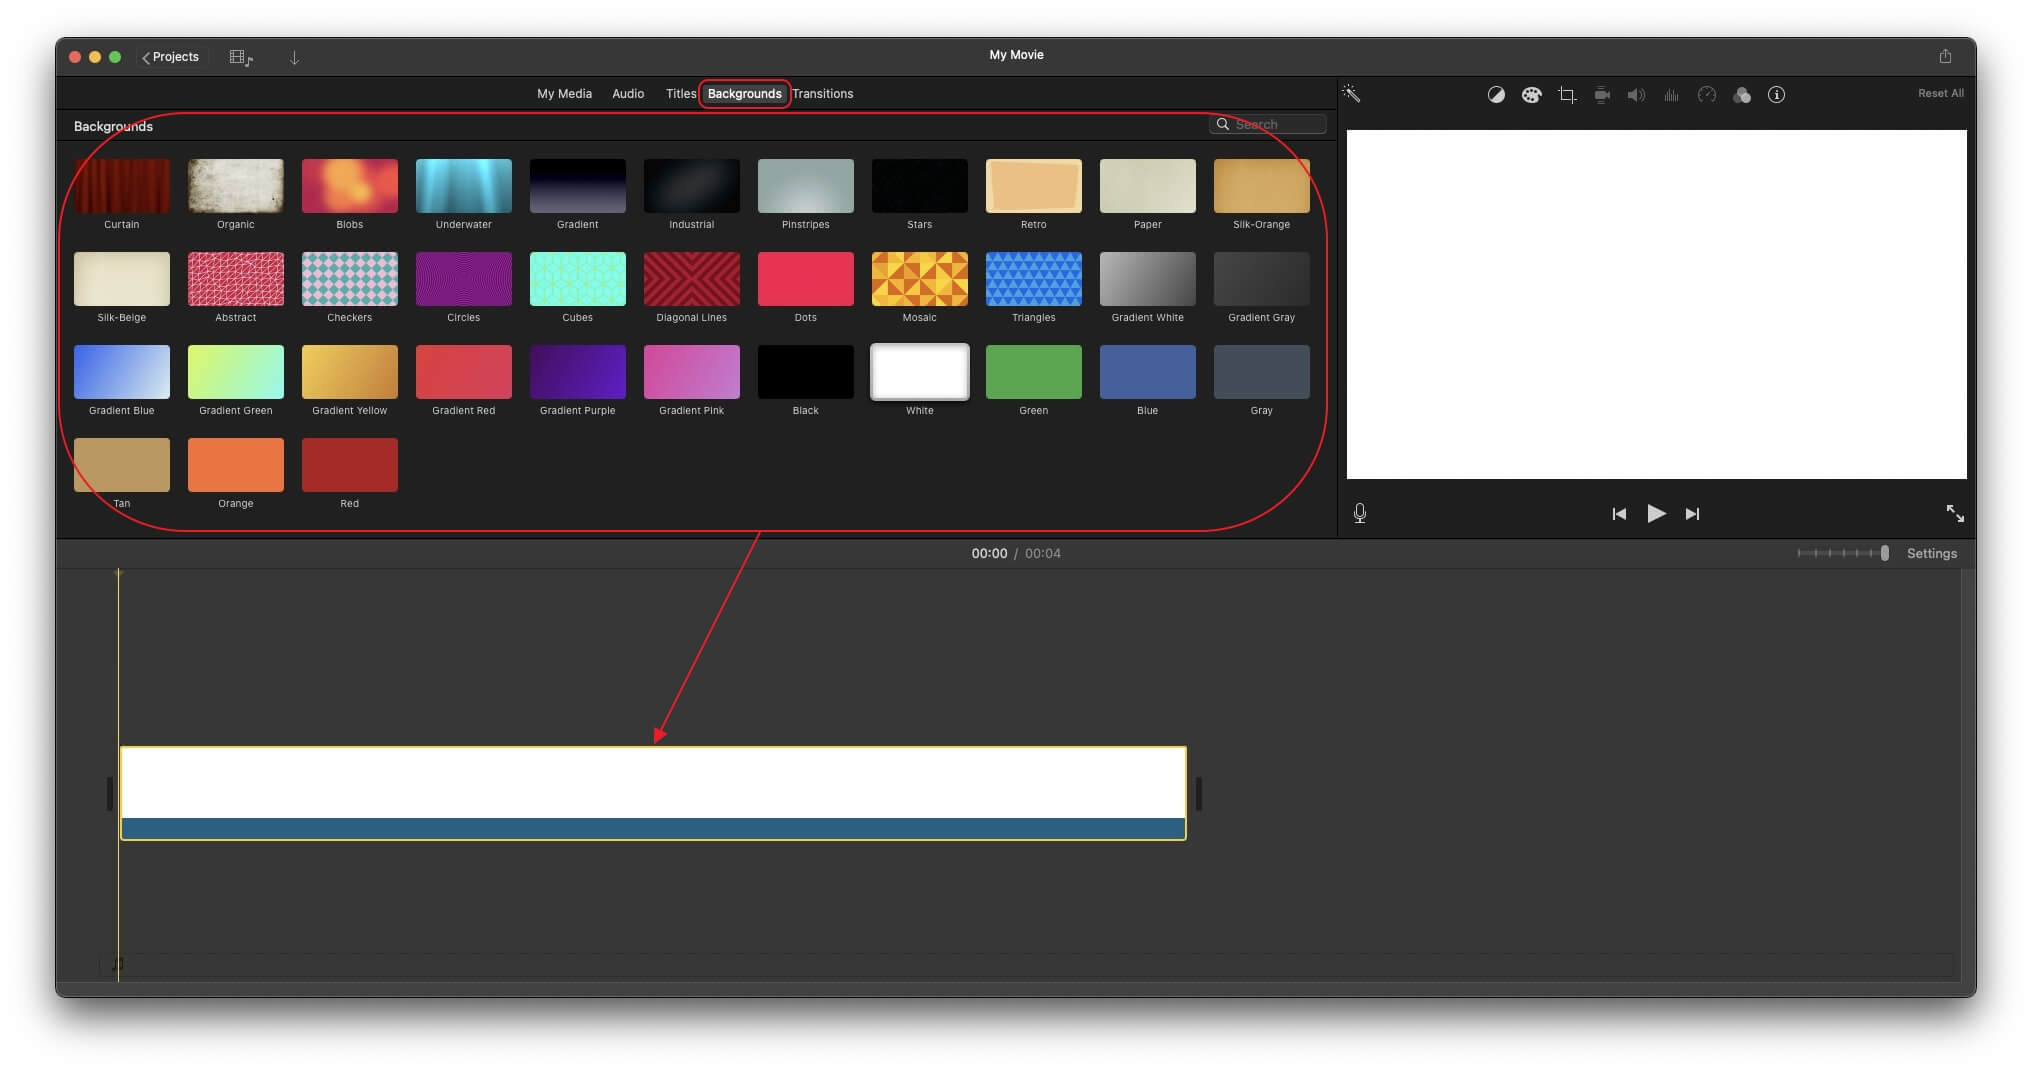
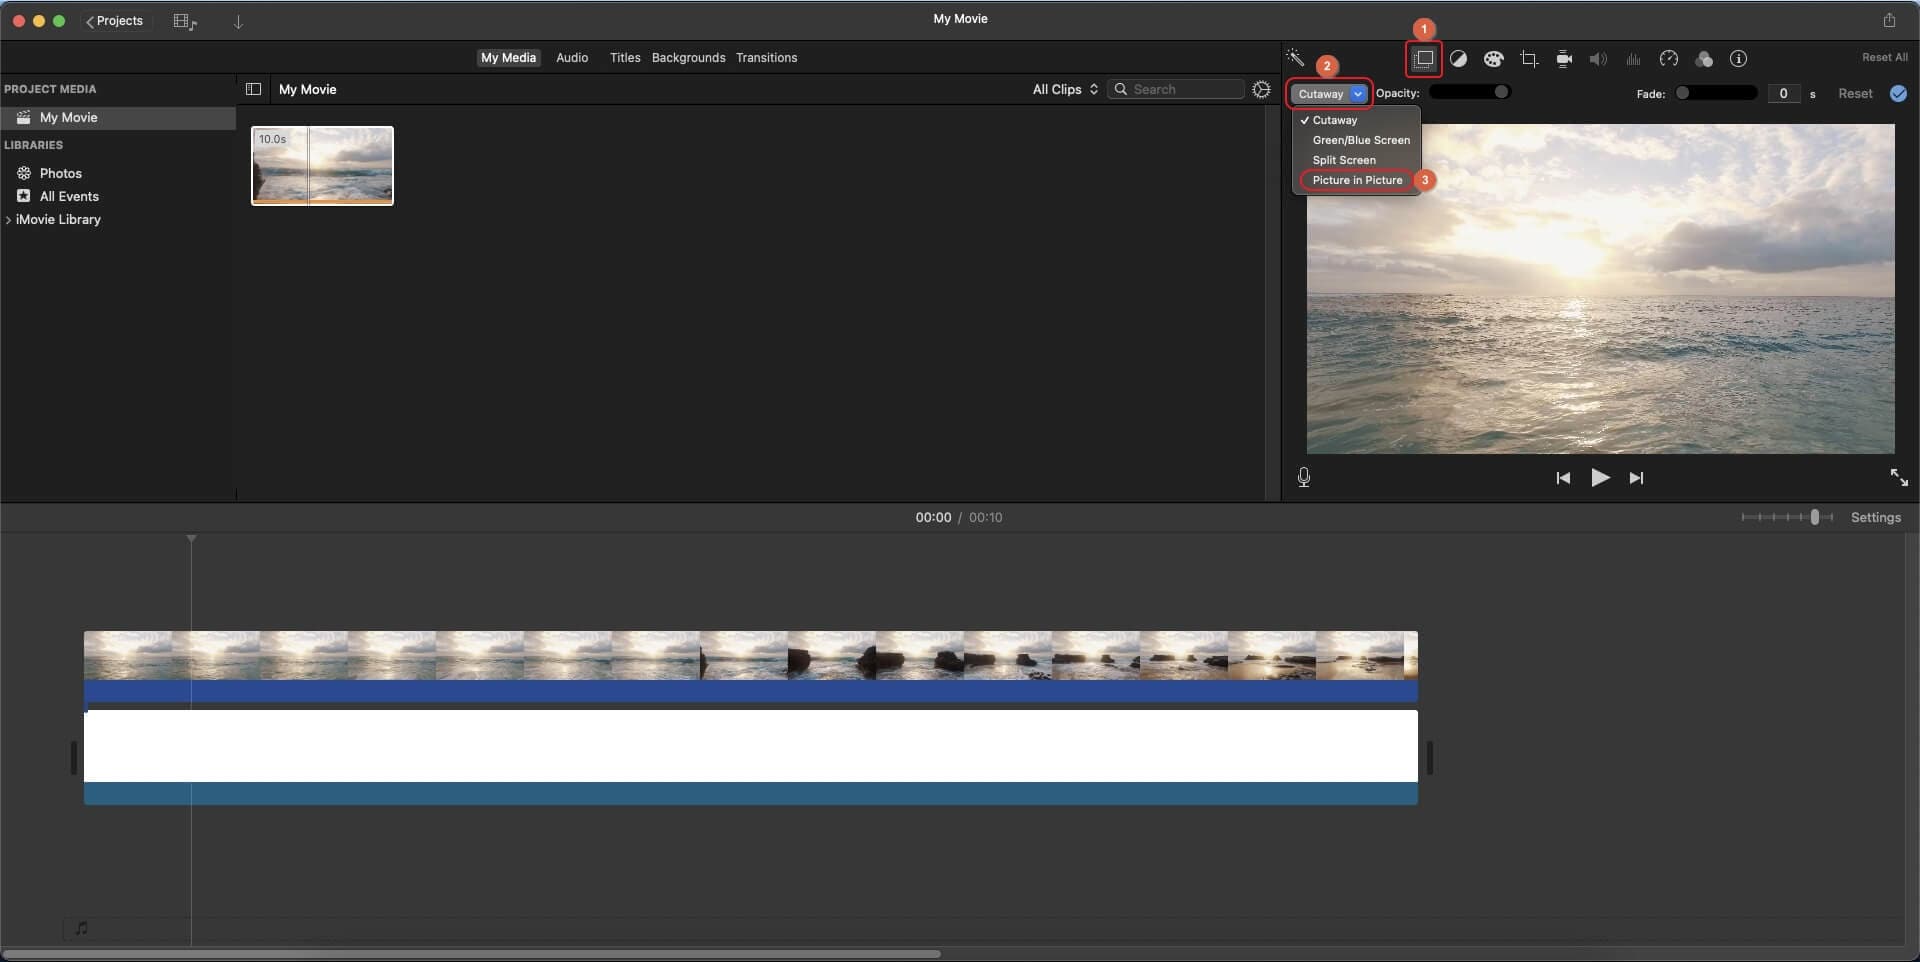
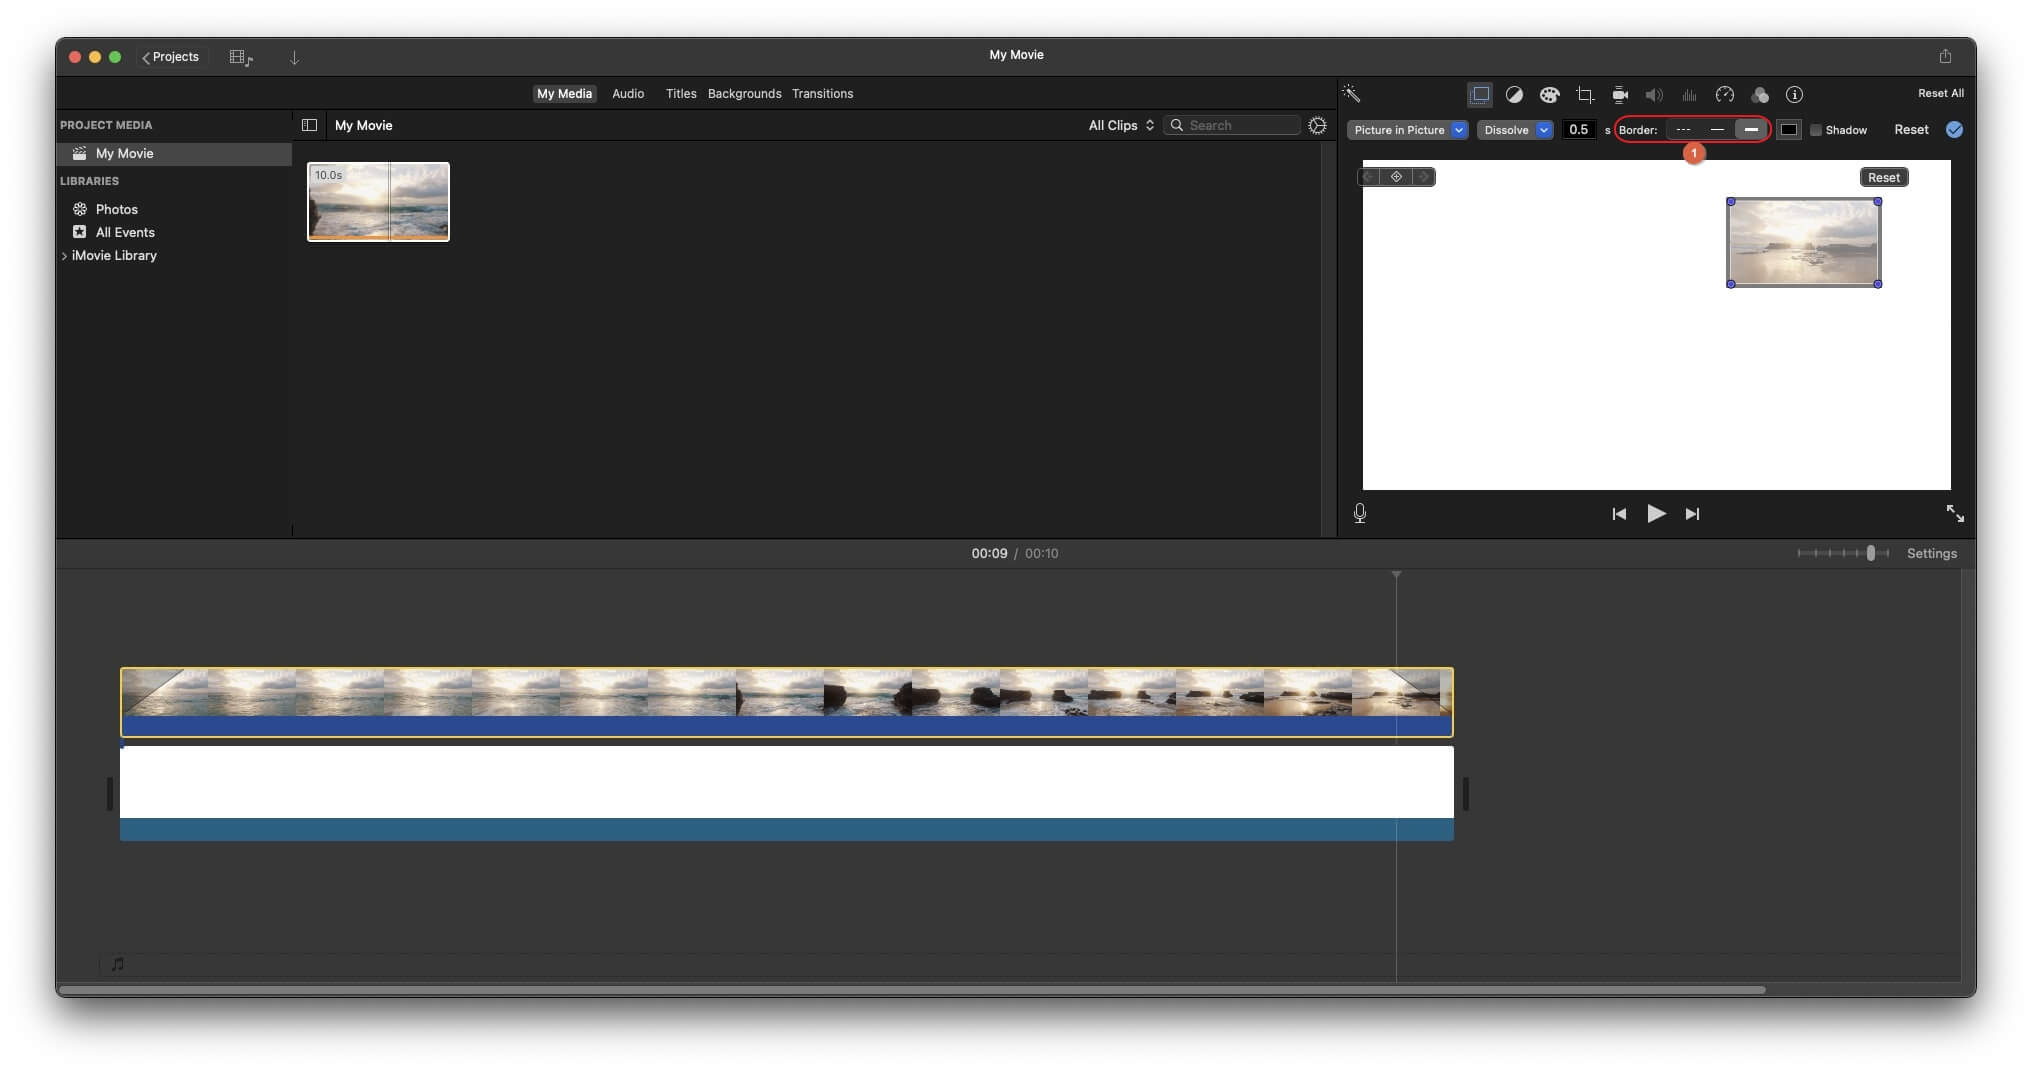
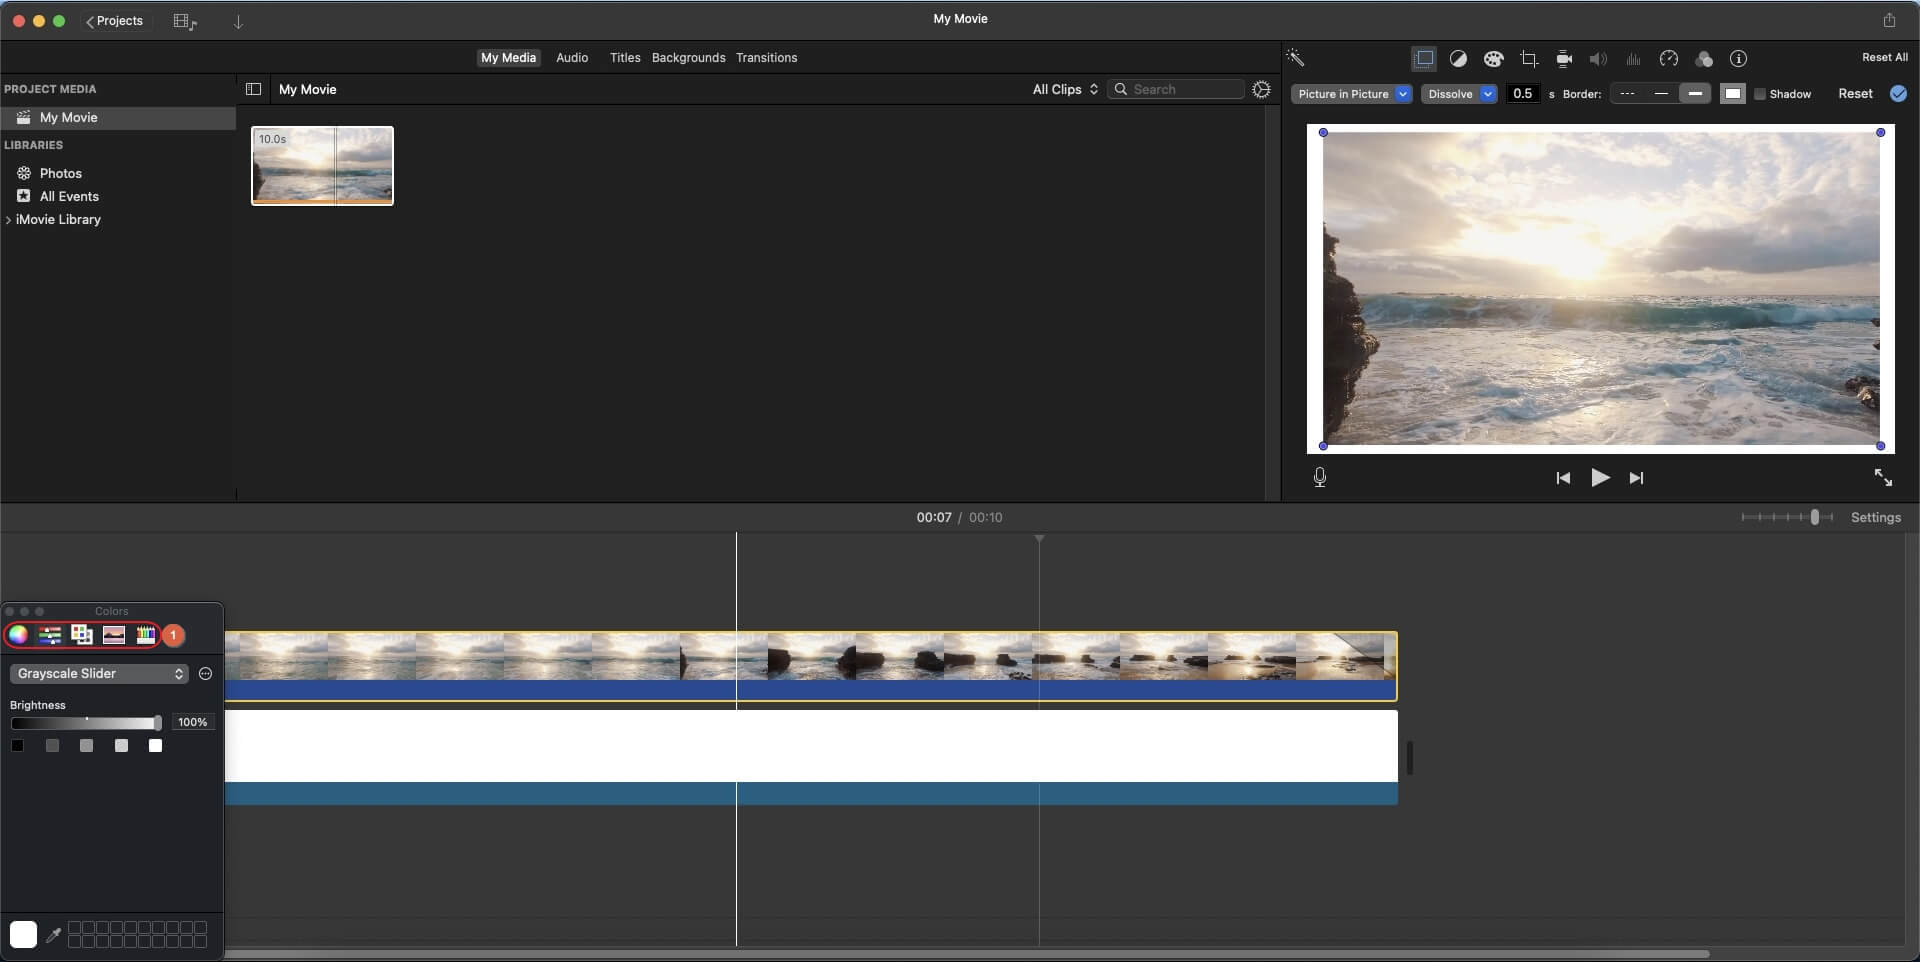
As for the borders, even though the software doesn't have any native tool or feature to add them to the video clips right away, the same effect can be achieved by using the 'Picture-in-Picture' option.

The process to add border to video with iMovie on Mac is given below:

Step 1
Add a Background to the Timeline
Launch iMovie on your Mac computer (MacBook Pro M1 here), make sure that the Project tab is selected from the center-top of the interface, click Create New from the main window, and select Movie from the options that appear next.
Go to the Backgrounds tab from the top of the upper-left box, and drag a solid color preset to the Timeline at the bottom.
add background video imovie
Step 2
Add the Source Video to the Timeline
Go to the My Media tab, click Import and import the source footage to iMovie.
Drag the clip from the media box and place it on a new layer right on top of the solid preset track in the Timeline. Optionally, drag the Settings slider from the upper-right area of the Timeline to reduce the size.
Finally, drag the solid track to match the length of the video footage.
add video above background imovie
Step 3
Add Border to Video with iMovie
Click the Video overlay settings icon from the top of the preview window, expand the Overlay menu, and select Picture in Picture from the list.
imovie overlay picture in picture option
Choose your preferred style from the available 3 Border options.
picture in picture border options
Select the video track in the Timeline if not already selected, drag to scale up (enlarge) the video frame in the preview window.
Click the Border color box at the top of the preview, and use the Colors box at the bottom-left to change the border color.
change borders color imovie
After this, make any further adjustments to the size of the video clip in the preview window before exporting the project to your preferred format.

Conclusion

Compared with editors that require extra workarounds to create video borders, Wondershare Filmora offers a more direct and beginner-friendly solution. With built-in border presets, including retro frames and AI-powered human borders, you can apply stylish outlines to your footage in just a few clicks—no manual masking or complex setup required.

Whether you want to add a simple white border, apply a creative frame overlay, or highlight people in your video with an intelligent border effect, Filmora makes the process fast, intuitive, and flexible. As a result, your videos look cleaner, more polished, and more professional after export.

Filmora
AI Video Editing App & Software
Try It Free Try It Free
qrcode-img
Scan to get the Filmora App
Best tool for making videos anywhere for all creators!

Frequently Asked Questions

  • Will adding a border reduce video quality after export?
    No. Adding a border in Filmora does not reduce video quality as long as you export the video using the correct resolution and settings. Borders are applied as visual layers, so the original footage quality remains unchanged in the final output.
  • How to put a border on a video on iPhone?
    You can add a border to a video on iPhone by using a mobile video editing app that supports border and frame effects. The Filmora App for iOS allows you to import a video, apply built-in border styles or frames, and export the video directly from your phone with just a few taps.
  • Can I add a border only to people in a video?
    Yes. Filmora offers AI Portrait effects, such as Human Border, which automatically detect people in a video and apply a border only around the human subject. The border follows the person's movement, helping highlight people while keeping the background untouched.

You May Also Like

How to Add a Watermark to Photos and Videos Online for Free + Alternative

Learn how to add a watermark to photos and videos online for free and discover the best alternative for customizable, professional watermarking.

Posted bySumia Rafique|2025-11-12 10:04:50
Animal Filter: Apply Cute Animal Face Filters to Photos

Discover how to use Filmora's animal face filter to create playful, AI-enhanced transformations of your selfies and photos—quick, simple, and creative

Posted bySumia Rafique|2025-11-28 14:51:59
How To Add Lightning Effects to Videos Easily: An Ultimate Guide

Learn how to add stunning lightning effects to your videos using Filmora. Perfect for dramatic, magical, or cinematic scenes—no expert skills required.

Posted byJames Hogan|2025-11-12 10:01:34
How to Use OBS Green Screen?

Do you want to set up a green screen in OBS? Here is the best guide on what obs green screen is all about and how to set it up.

Posted bySumia Rafique|2025-11-12 10:04:37
Step by Step: How to Convert Images to Grayscale?

Explore the step-by-step guide to convert images to grayscale in this article, plus some image editing tips.

Posted bySumia Rafique|2025-11-12 10:04:27
How to Add Motion Graphics and Animated Stickers to Photos and Videos on Mobile?

Are you curious about how to do motion graphics in Android? Check out filmora and learn how to do it on mobile.

Posted bySumia Rafique|2025-11-12 10:03:13
How To Blur Faces in Videos with Movavi [2025]

In this article, we will show you how you can blur faces in videos with Movavi video editing software, and explain how to apply Blur effects with alternative editing software such as Filmora.

Posted byJames Hogan|2025-11-12 10:04:50