
 100% Security Verified | No Subscription Required | No Malware


 ChatGPT
 Perplexity
 Gemini
 Claude
 Grok
Grok
When it comes to modern video editing, filters are there to transform a basic clip into visually engaging content. Such effects basically integrate emotions into the scenes with the help of hues, shades, and similar creative flair. While adjustments are allowed, you can be sure that adding one is not rocket science. Just pick one and go for it. In this regard, Wondershare Filmora provides tons of selections. Its vast library is packed with video filters made not only for ease but also for impact. This diverse and professional-grade collection will surely enhance the mood and correct the colors of your content.
In this article, we will delve into the primary reasons why you should add filters to video content. We will also provide some tips and guides to get you started. Continue reading below to learn more.
In this article
Why Should You Add a Filter to a Video?
We tend to make quick assumptions that filters are created to improve the visual appeal and aesthetic quality of videos. Well, we can say that it’s technically true, at least to a certain degree. Video editors add filters to video content to make it look better and much more polished. But hold on. On the side, video filters also have functional benefits that can be applied to various use cases. Do you want to know what those are? If that is the case, check out the list below.
Social Media Content
In terms of social media content, we can say that visual quality matters a lot, and first impressions last. That’s why you should always give your best shot whenever you post content on this platform. Don’t worry. You can add filters to your video content using Wondershare Filmora. One way or another, it can help you achieve a certain look that grabs attention and creates an impact. Try the Dreamy Glow and Vibrant Pop filters from the Wondershare Filmora library. The smoky and ethereal quality of these filters is great for your social media videos.

Vlogs and Personal Video Diaries
Instead of keeping them raw, you can somehow elevate your vlogs and personal video diaries a little. How? You can add filters to your video. That’s it. For this type of content, you can make the clips quite cinematic. Don’t worry. Wondershare Filmora has some warm and cozy filters that can help you achieve such vibes. Try Film Grain, Teal, and Orange. These selections obtain Hollywood-style color grading.
Travel Videos
In a certain way, travel videos are supposed to carry the highest quality available. They should look clear, professional, and enticing. Aside from the necessary color adjustments, you can also add a filter to a travel video of yours. But hold on. You have to keep the clips natural. Don’t overdo it. In this case, you can try the Film Stock or Sunset Boost filters of Wondershare Filmora. Both of them bring out the innate beauty of the clips while maintaining a good dose of nostalgia.

Vintage-Style Videos
From time to time, it’s great to walk down memory lane. Don’t worry. In this respect, you can add filters to your video content to achieve such effects with ease. Your footage will surely let you travel back in time with just the snap of a finger. Try the Old Film and Sepia Tone. Wondershare Filmora offers this kind of video filter to help you create a stunning retro video.
Beauty Enhancement
Let’s just say you want to keep your video content natural and neutral. Well, there’s no problem with that. It works well on videos like interviews, documentaries, and the like. However, you might somehow tweak the appearance of your human subjects a little. Make a few adjustments and enhance their look. Don’t sweat it. With regard to this matter, Wondershare Filmora offers some selections that can truly be of great help to you. Try Soft Focus and Skin Smoother. You can add such filters to your video content if you want to keep the enhancement raw and simple.

Quick Fixes
As implied earlier, the video filters offered by Wondershare Filmora are editable. Yes. You can instantly add filters to video content and apply their effects. But that doesn’t mean you can’t configure them at all. Of course. You can customize them a little according to your preferences. However, there are custom-tailored calibrations that need no manual adjustments anymore. Like filters, you just basically need to apply them to your content. In this regard, use Brighten and Color Correction to enhance your video automatically.
How to Put a Filter on a Video Using Wondershare Filmora?


Have you already decided to add a filter to a video of yours? That’s absolutely great! Now, it’s time to put it into action. Don’t worry. Wondershare Filmora has a very intuitive and responsive interface. If you need to add filters to video content, you can do it effortlessly. Do you want to give it a shot? If so, read the tutorial provided below and find out how to put a filter on a video with the help of Wondershare Filmora.
Step1On the main dashboard of Wondershare Filmora, head over to the Elements Panel and click Import under the Media tab. Select all the files you are going to use and upload them to the platform. Once the assets are ready, drag them one by one onto the Editor Timeline and make all the necessary adjustments.
 secure download

Step2After that, go back to the Elements Panel and switch the tab from Media to Filters. Select a category on the left pane or type a keyword into the search bar. Go over the given selections, then choose one based on your preference and tap its corresponding Download button.
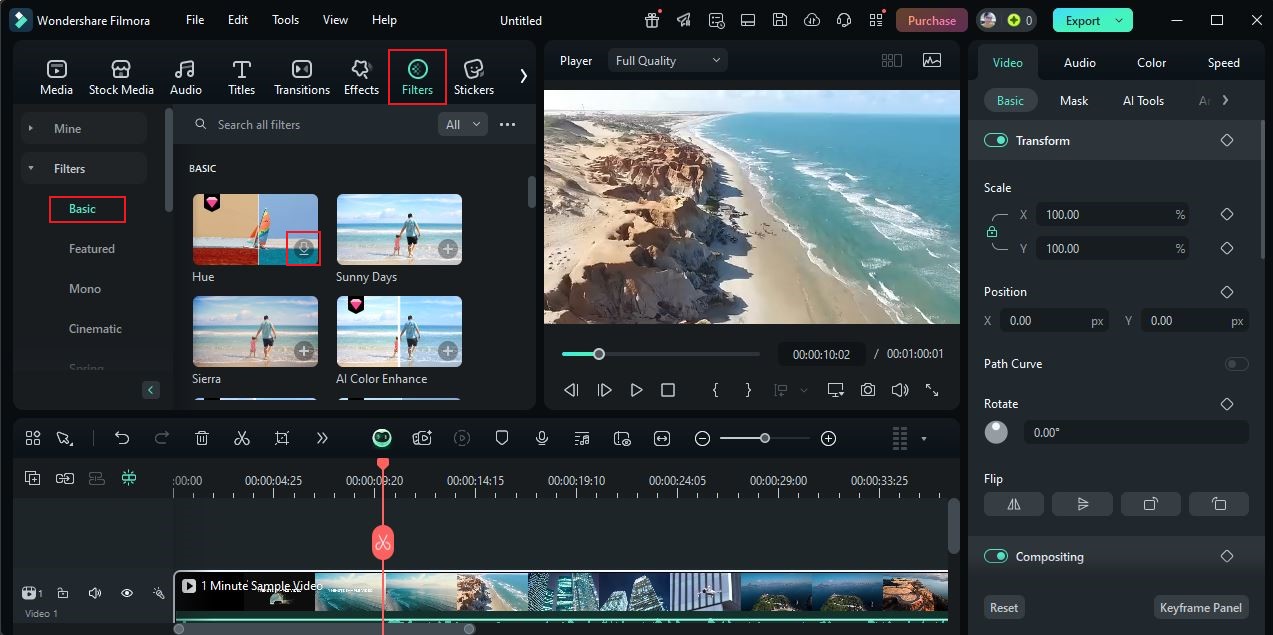
Step3Grab the selected filter asset and drag it to the Editor Timeline. Place the filter right above the video track or drop it onto the specific video clip you want to edit.
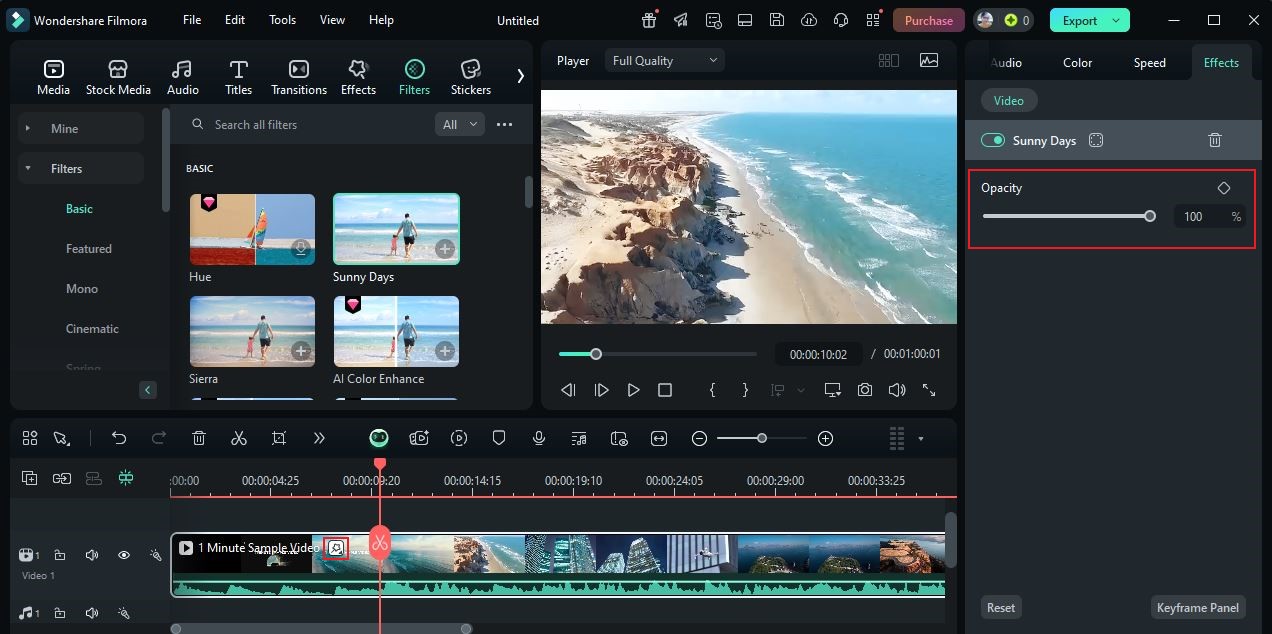
Step4As mentioned earlier, Wondershare Filmora filters are editable. That means you can adjust their look according to your liking. To do that, simply click the Filter asset attached to your video clip. A new panel will then open on the right-hand corner. From there, find the Opacity option and adjust its corresponding slider accordingly.
Step5Finally, play and review the output. If you’re satisfied with the result, click the Export button to render the video and save a copy to your computer. Otherwise, continue making changes until a desirable effect is achieved.
Tips on How to Add Filters to Video Content Like a Pro
When you add a filter to a video, you’re actually defining your style as a content creator. That’s why you should do your best to apply such effects properly. To help you out, check the list of tips below and keep them in mind.
- You can add multiple filters and adjust the blending modes. This technique might be tricky at some point. Sure. But with the right blending configuration, you can certainly make a true masterpiece.
- Don’t add filters to video content just for the sake of applying one. Make sure that the design and style of your preferred filter match the theme of your video. For wedding and family vlogs, use warm tones. On the one hand, use cool tones for tech reviews, tutorials, and the like.
- Go over each available filter before choosing one. Meaning to say, apply them one by one and preview the effect. Check if it’s good enough. This way, you can thoroughly select the best for your content.
- Finally, customize the filter after applying it to your video. Yes. It’s very easy to add a filter to a video. However, your job isn’t supposed to end there. Use the available options and make certain adjustments according to your liking.
Conclusion
Truly, we cannot deny that custom-tailored filters have a special role to play in video editing. Generally, they elevate the visual quality of any content to a whole new level.
That’s why you should not skip this very important step and instead prioritize it during the process. Don’t worry. Wondershare Filmora has made it a lot easier to add filters to video content. Whether you’re a beginner or already a pro, all it takes to apply this effect is a click or two. Select one from the library and literally drag it onto your footage. Easy, right? Therefore, hesitate no more and try these filters in your next video project!
secure download 