
Need to quickly resize a video with VLC Media Player? Whether you want to change video resolution, scale a video down for easier sharing, or adjust its aspect ratio, VLC offers powerful built-in tools to get the job done. While it's a straightforward process, knowing the right settings is key to avoiding quality loss.
This guide provides a detailed, step-by-step walkthrough on how to resize video in VLC. We'll also introduce you to an even faster method using Filmora's Auto Reframe feature, designed for perfect results across all social platforms.
In this article

Part 1. Step By Step To Resize Your Video in VLC
Anyone who has a lot of videos on their computer knows how frustrating it can be to find the video you want among the hundreds of ones you have. Well, VLC makes it possible to resize your videos so they'll fit onto your desktop.
Because some video formats, such as MKV and AVI, take up too much space, it's a good idea to convert videos to smaller formats, such as FLV, WMV, and so on. To lower the video size, you'll be pleased to learn that VLC allows you to convert video/audio files without the need to install any other software. The video conversion guide for VLC can be found below.
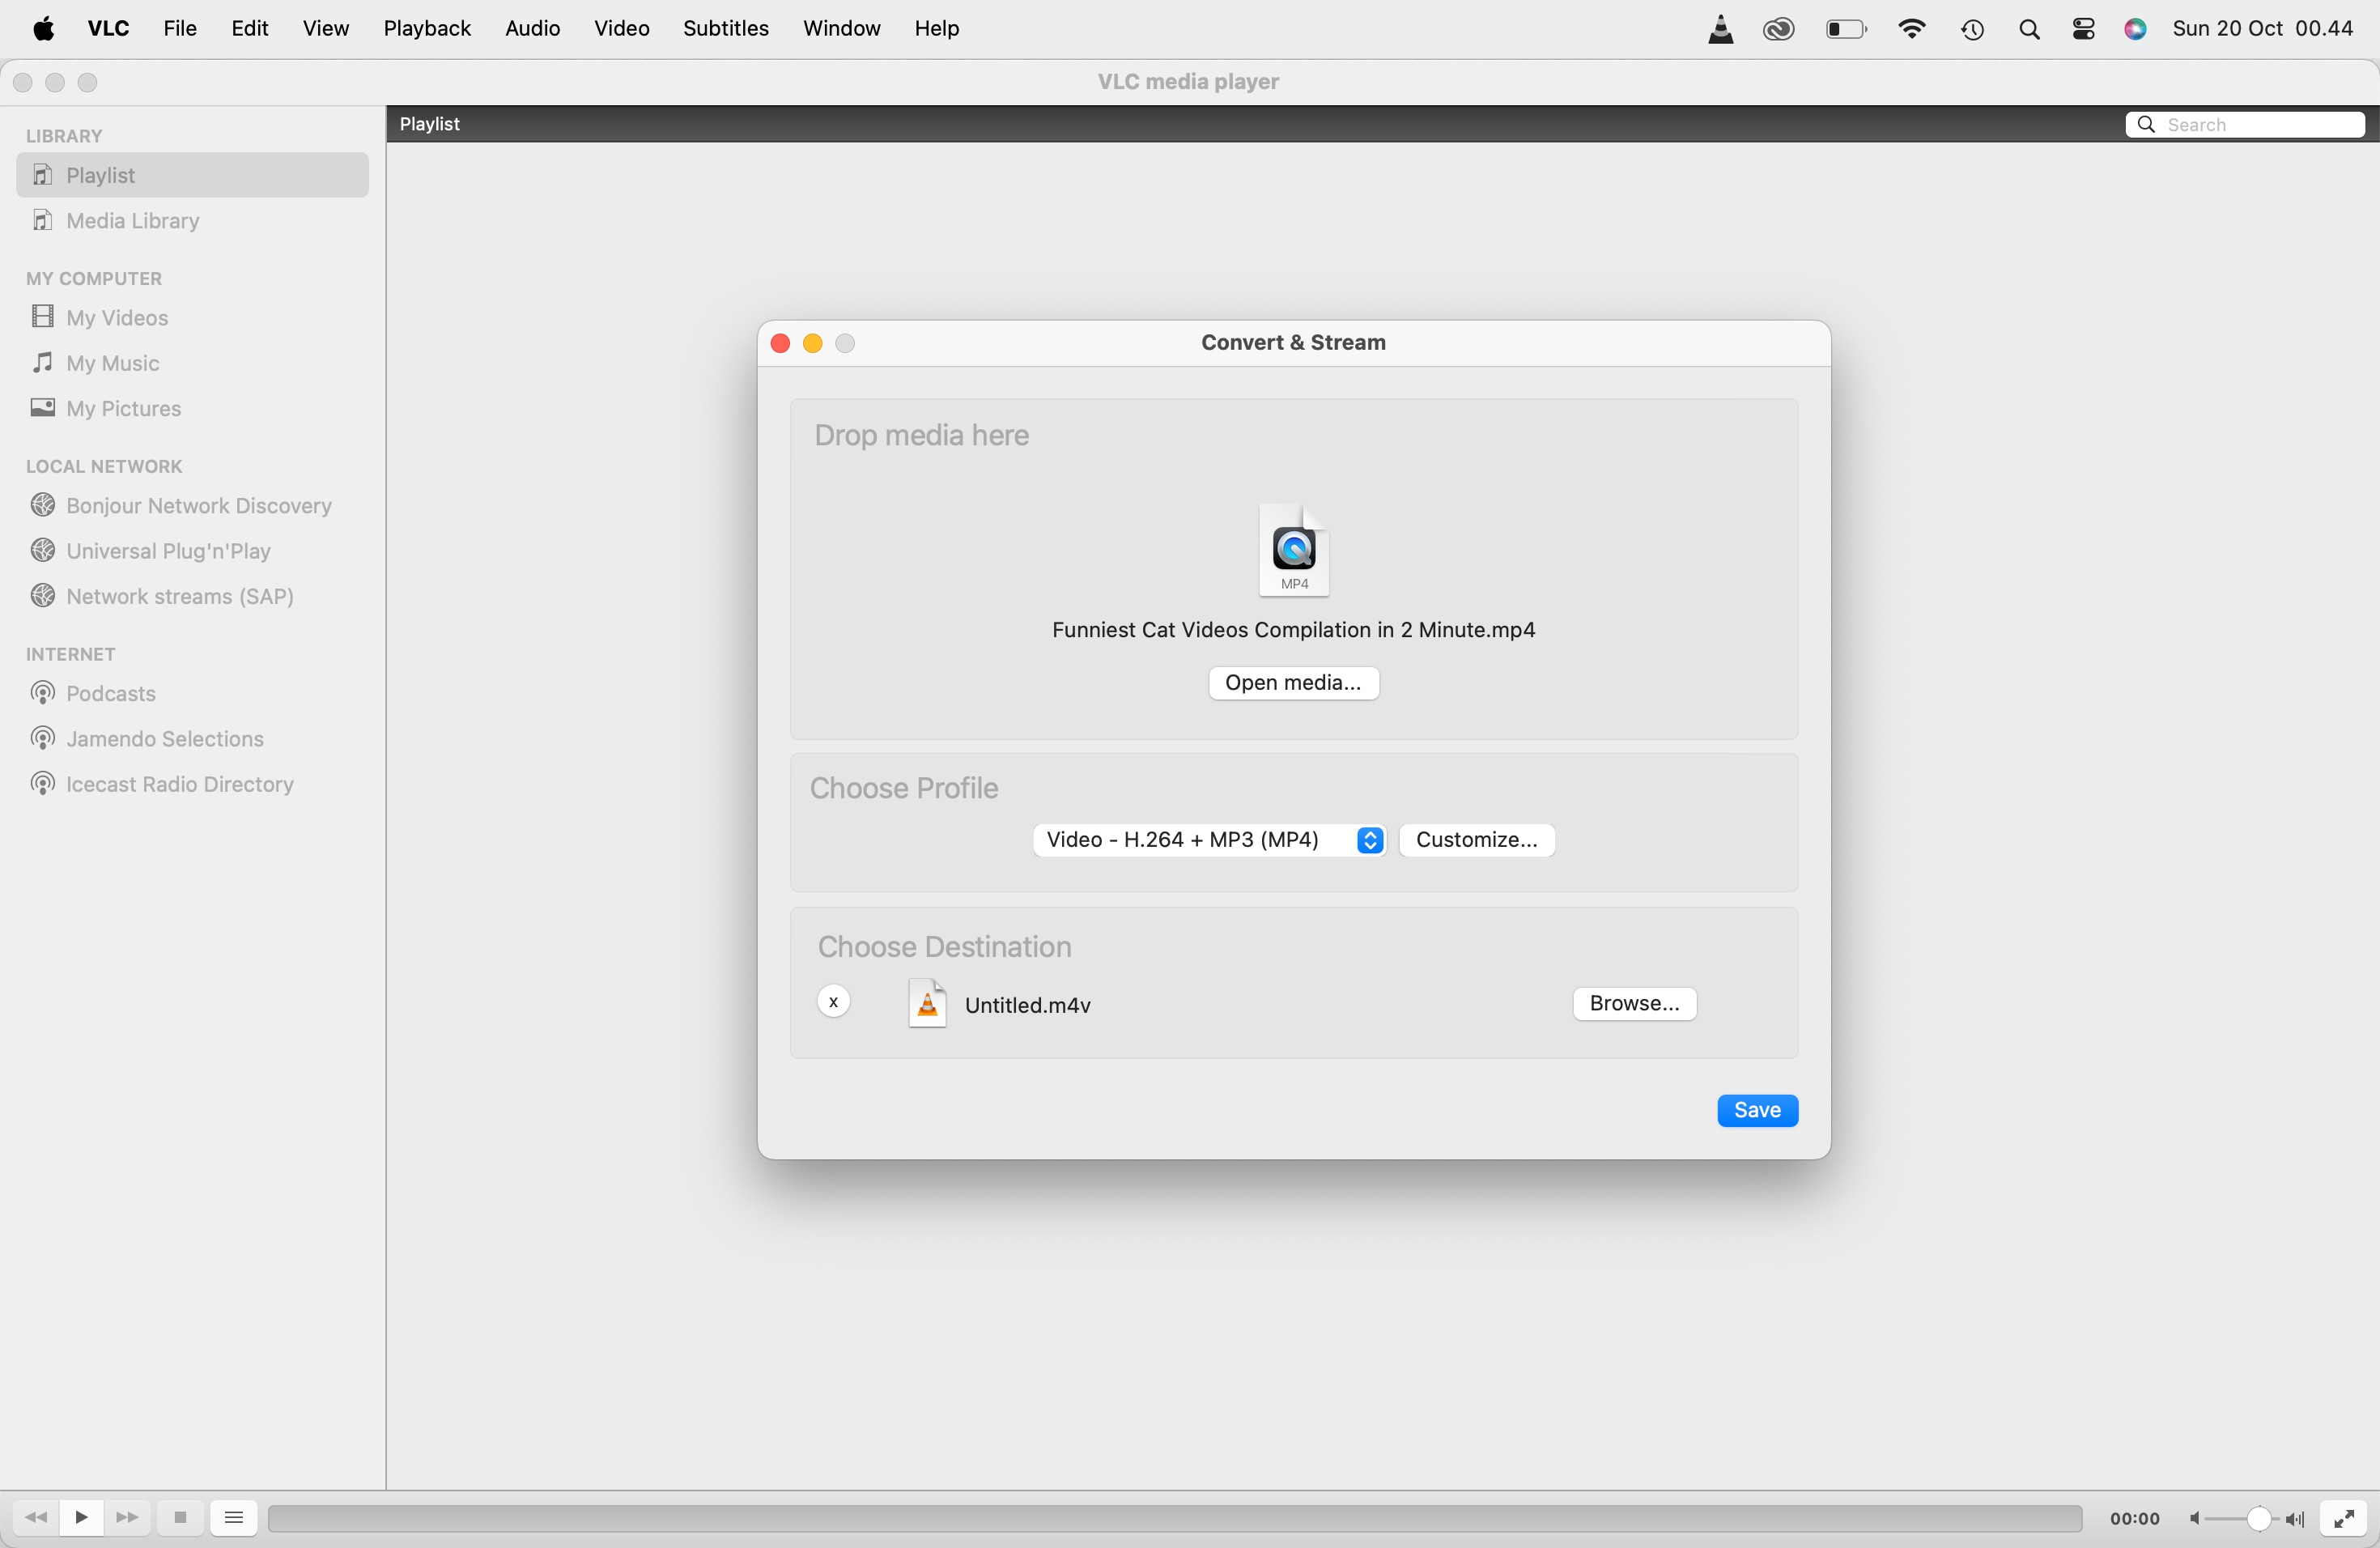
Step 1: Launch the VLC Media Player.
Step 2: Go to the menu and pick File > Convert/Stream from the drop-down menu.
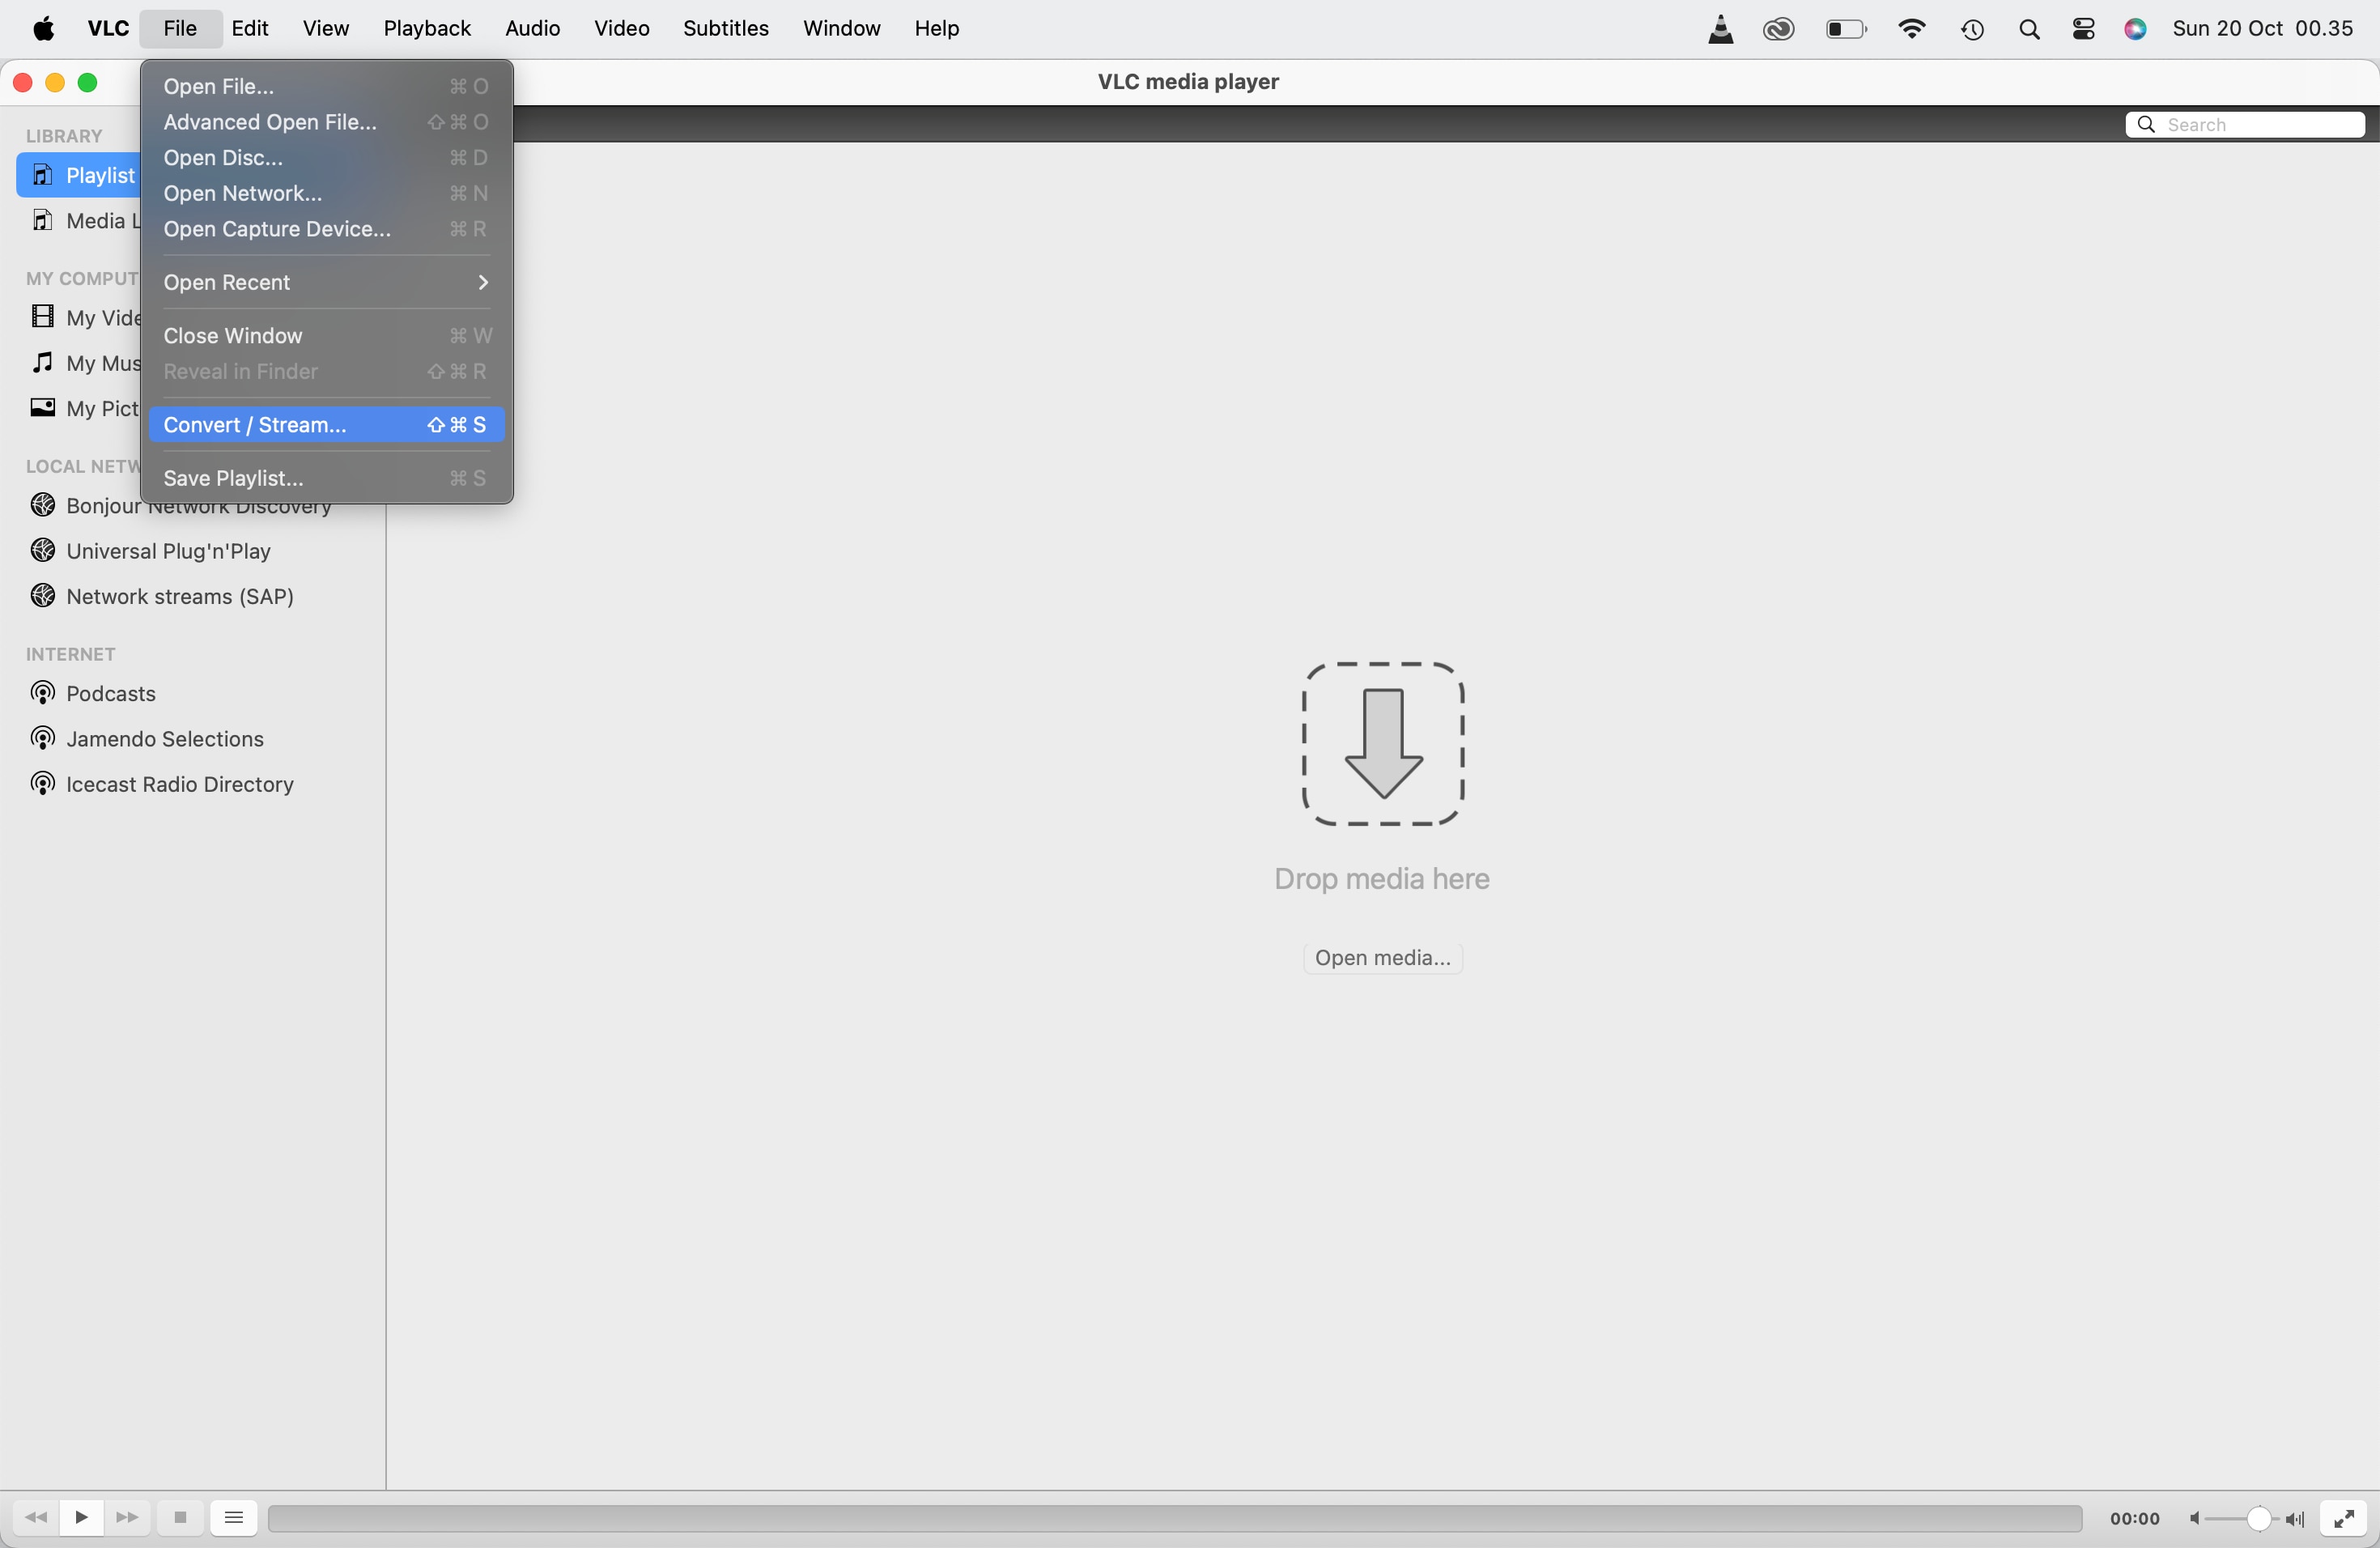
Step 3: A Convert/Stream window will pop up. Upload the video you want to convert by clicking "Open Media" or drag the video to the window.

Step 4. Select an output profile that matches your needs. You can choose a more compressed format (e.g., MP4, H.264) to reduce file size

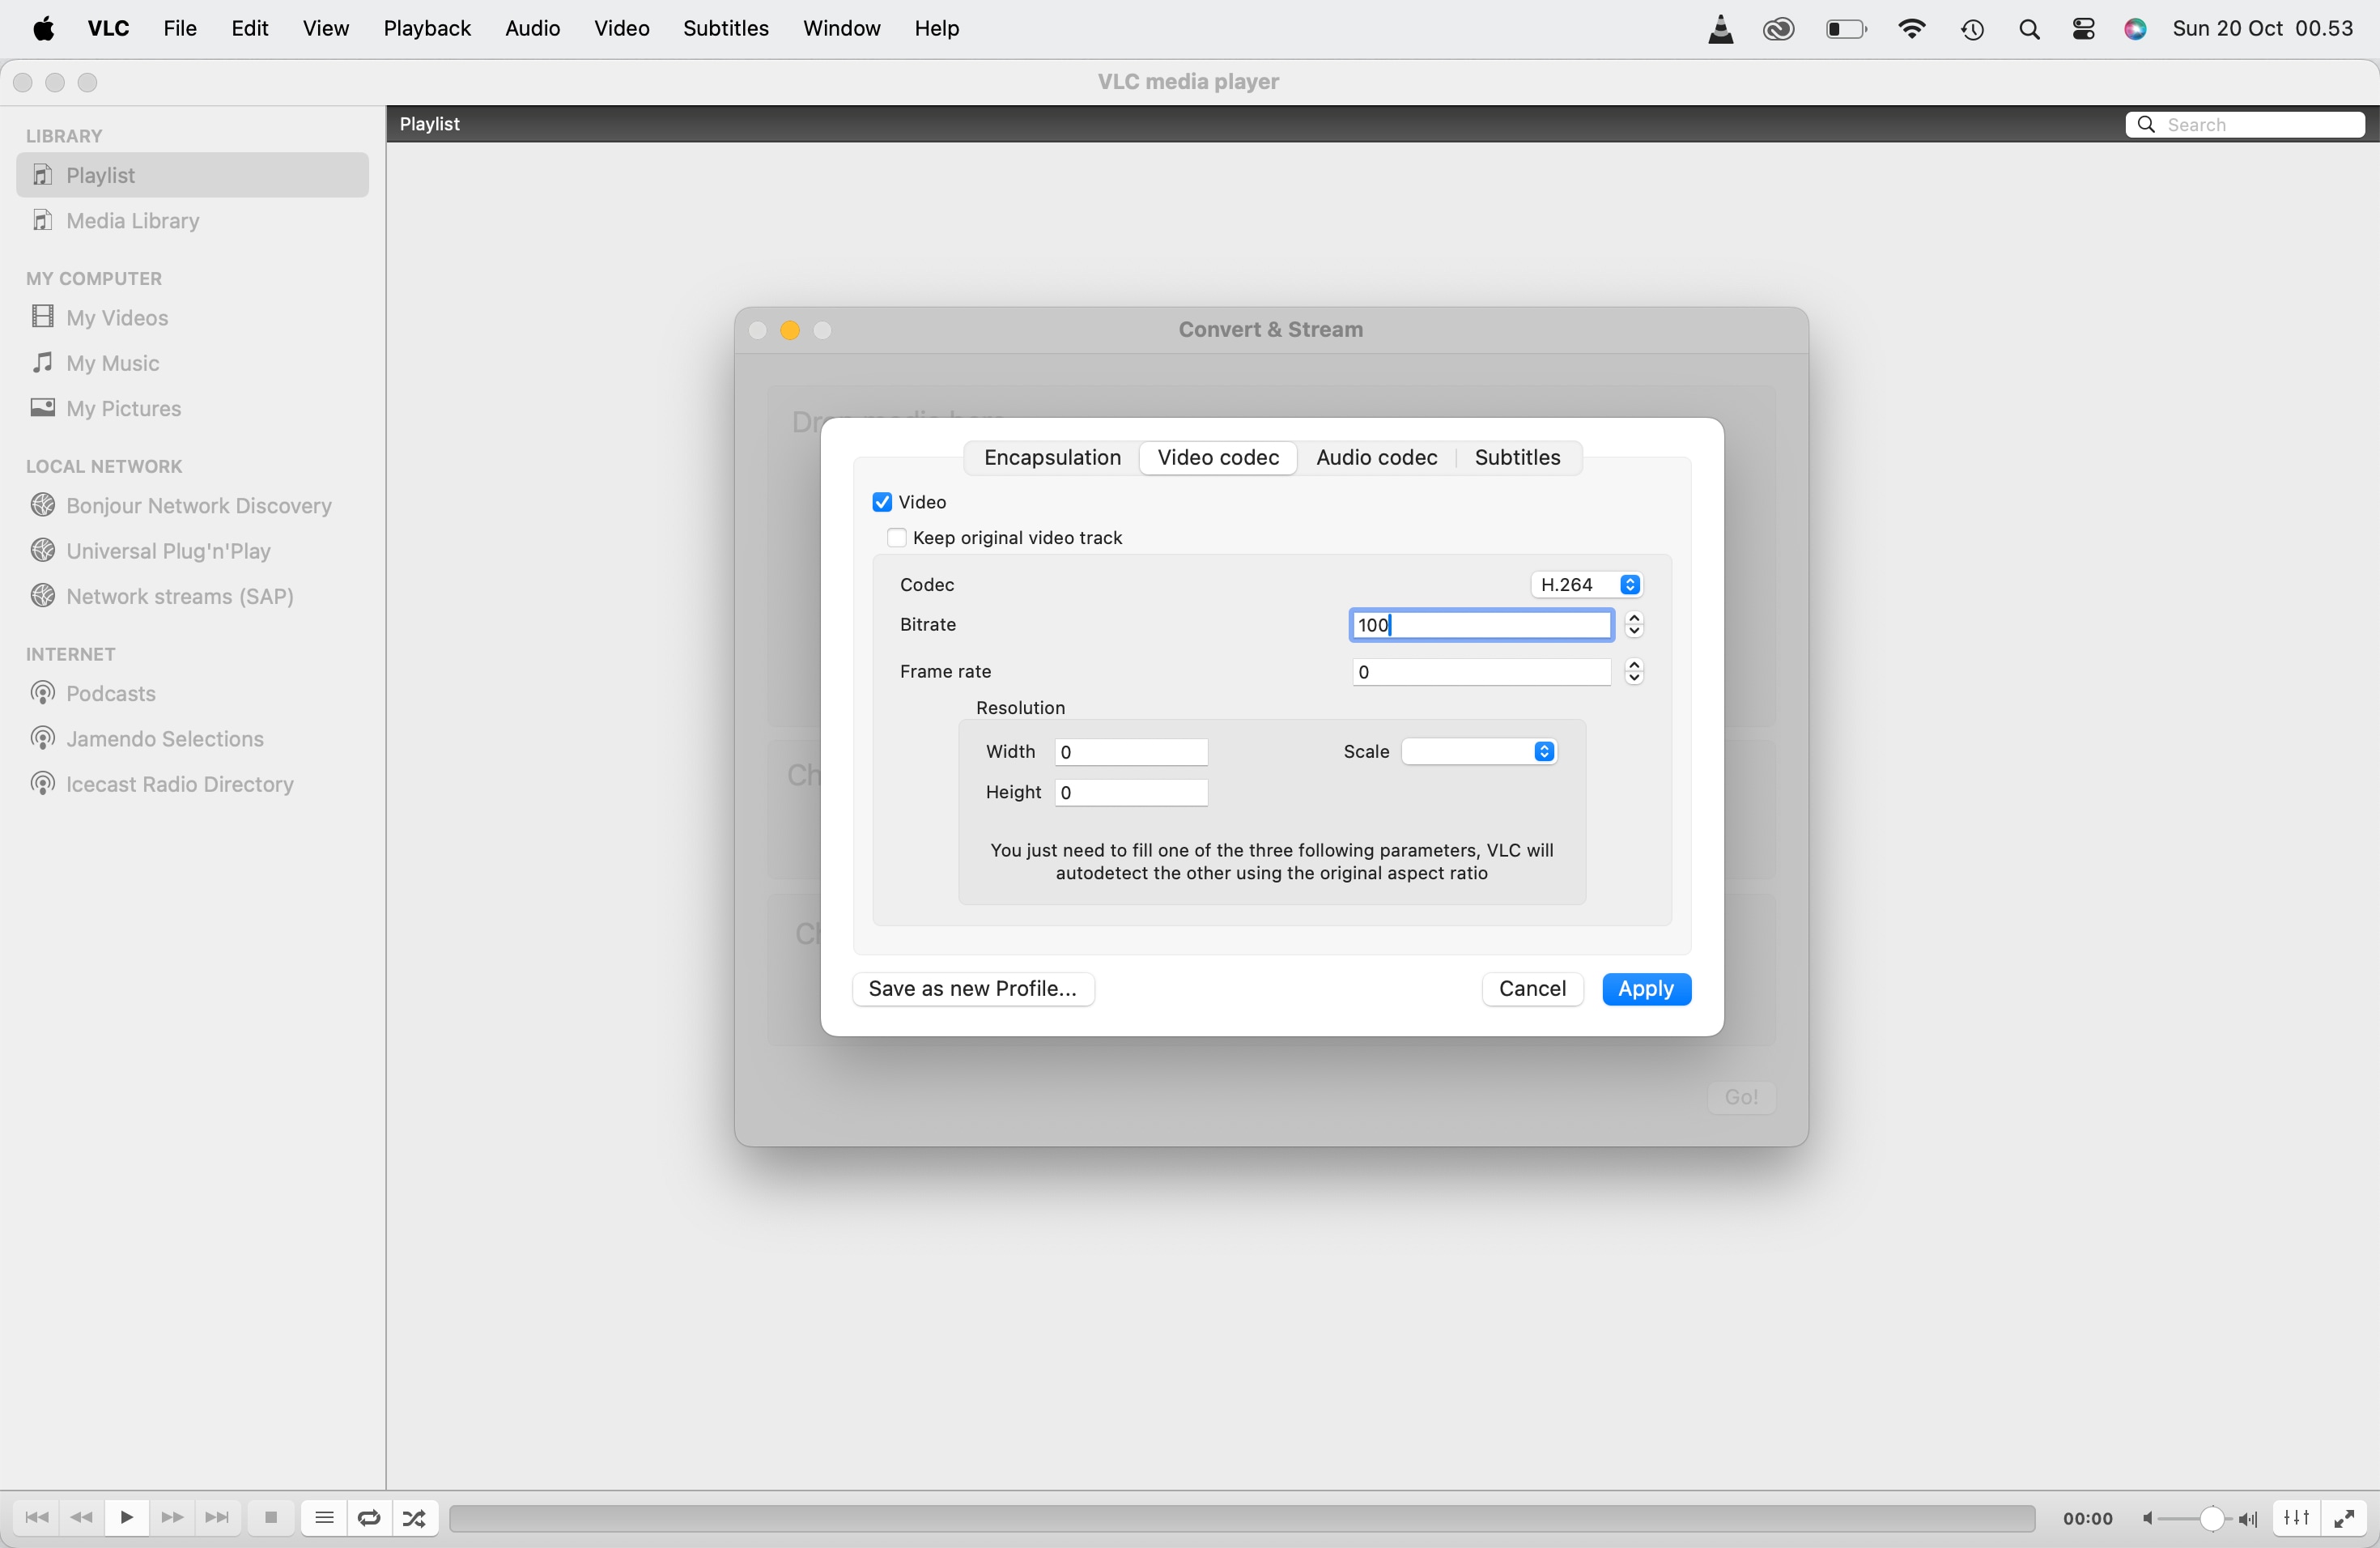
Step 5. To manually change the resolution, click the Customize button. Go to the Video Codec tab, and under the Resolution section, enter the desired width and height. Lower resolutions, such as 720p or 480p, reduce the file size significantly.
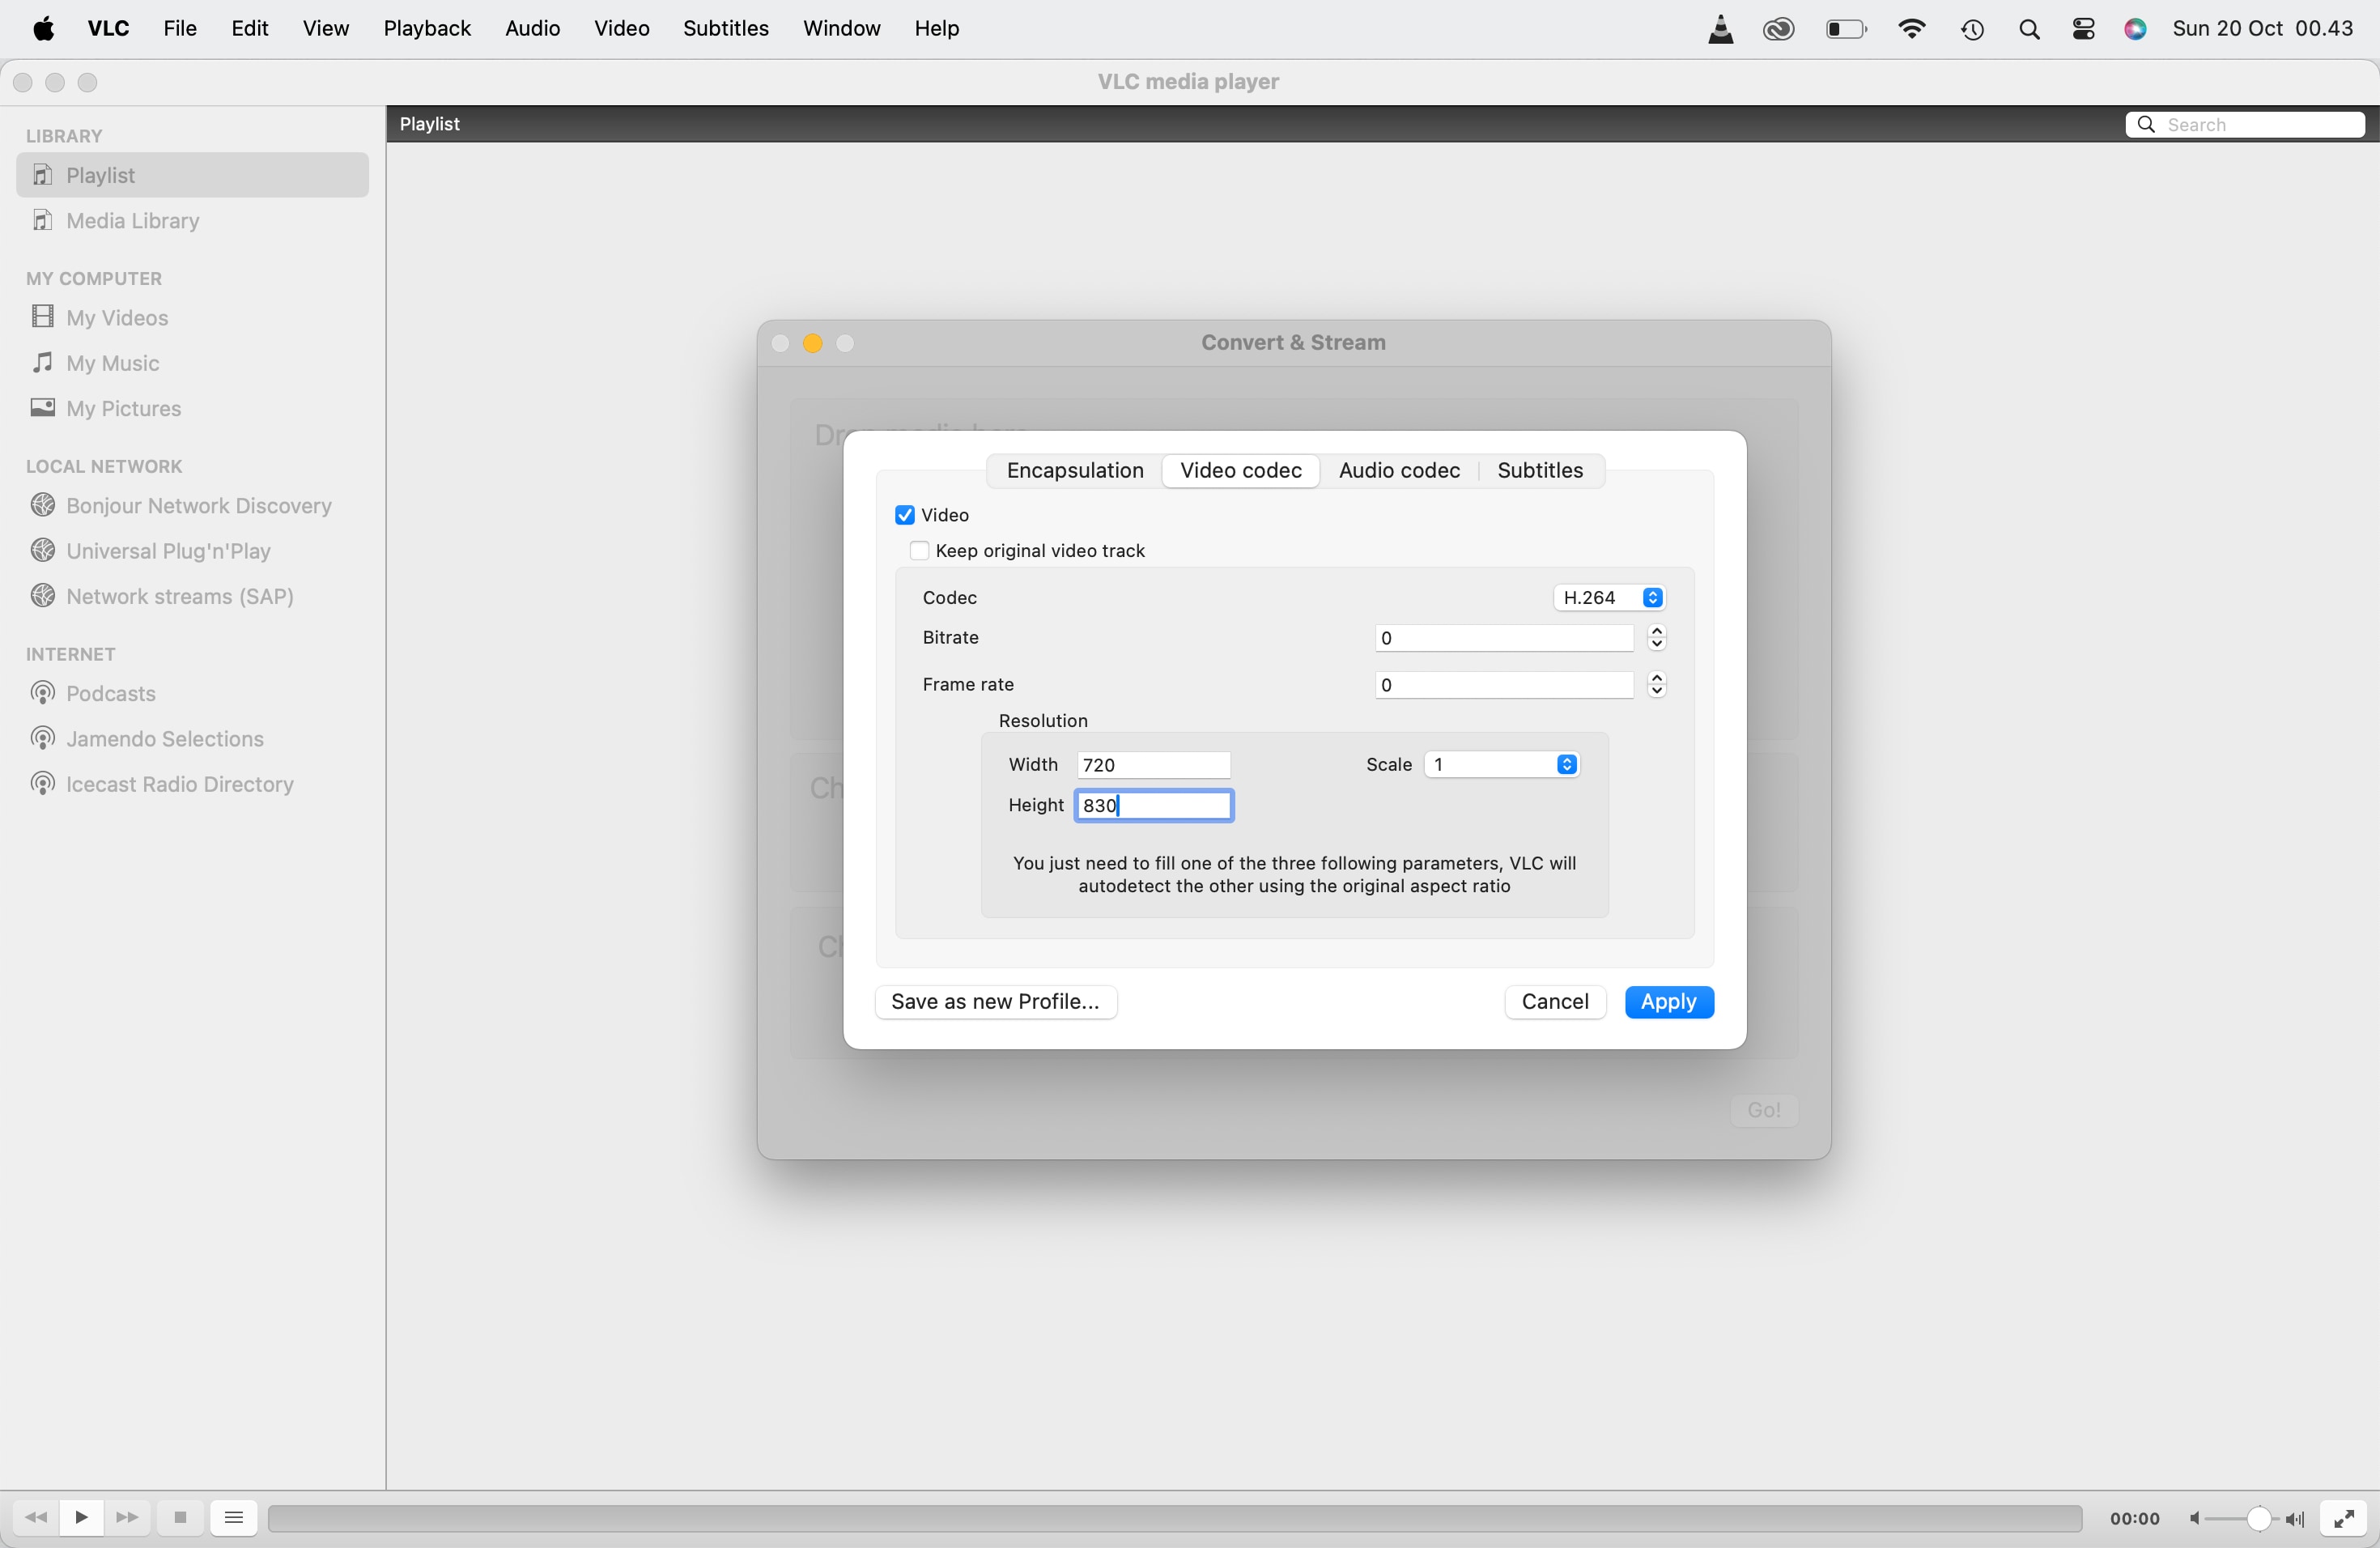
In addition, you can also resize your video in VLC using Bitrate. In the Video Codec tab, under the Bitrate section, you can reduce the bitrate to lower the file size. Be cautious when lowering the bitrate too much, as it can affect video quality.
Step 6. Choose the destination of the video. Then, click Save. Once the conversion is complete, check the output file to ensure the file size and quality meet your expectations.
VLC Media Player is unquestionably one of the greatest video players available for free. Nonetheless, it isn't the finest video reduction because it just reduces the size of videos by using certain simple parameters rather than complex ones. As a result, we offer Fimora, an all-in-one video toolbox that can convert, compress, download, record, edit, burn, and more, as a better video compressor. You can change the video resolution, bit rate, encoder, format, and other settings to compress video and audio files in a variety of formats. Follow the simple steps below to get this VLC compressor replacement on your Windows/Mac for free.
Common Issues When Resizing with VLC (And How to Fix Them)
- Audio Out of Sync: If your audio is not synchronized with the video after conversion, try checking the "Enable audio" box and selecting a specific audio codec (like AAC) in the conversion settings.
- Poor Video Quality: If the final video looks pixelated, increase the Bitrate in the Video Codec settings. A higher bitrate results in better quality but a larger file size.
- VLC Crashes During Conversion: Ensure you are using the latest version of VLC. Large 4K files can sometimes be demanding; try closing other applications to free up system resources.
You may also like: VLC Auto Subtitle Generator?
Feeling frustrated with these technical hurdles? Filmora is designed to avoid these issues, providing a smooth and error-free experience.
Part 2. A Faster Alternative: Resize Videos Automatically with Filmora
In addition to VLC, you can simplify the process of resizing videos for various platforms with Wondershare Filmora Auto Reframe. With Auto Reframe, you can quickly convert your horizontal videos into vertical or square formats without losing the focal point of your content.
This feature intelligently detects the main subject or action in your video. It ensures the subject remains centered, making it an ideal solution for creators who must adapt content for multiple platforms while maintaining high quality.
- Auto reframe video in 16:9, 1:1, 9:16, 4:3 or 21:9.
- Offers cool video effects and filters to make your video become professional.
- Cross-platform supported - (Windows, Mac, iOS, Android)
- Resize Your Videos Without Quality Lose


How To Use Auto Reframe in Filmora
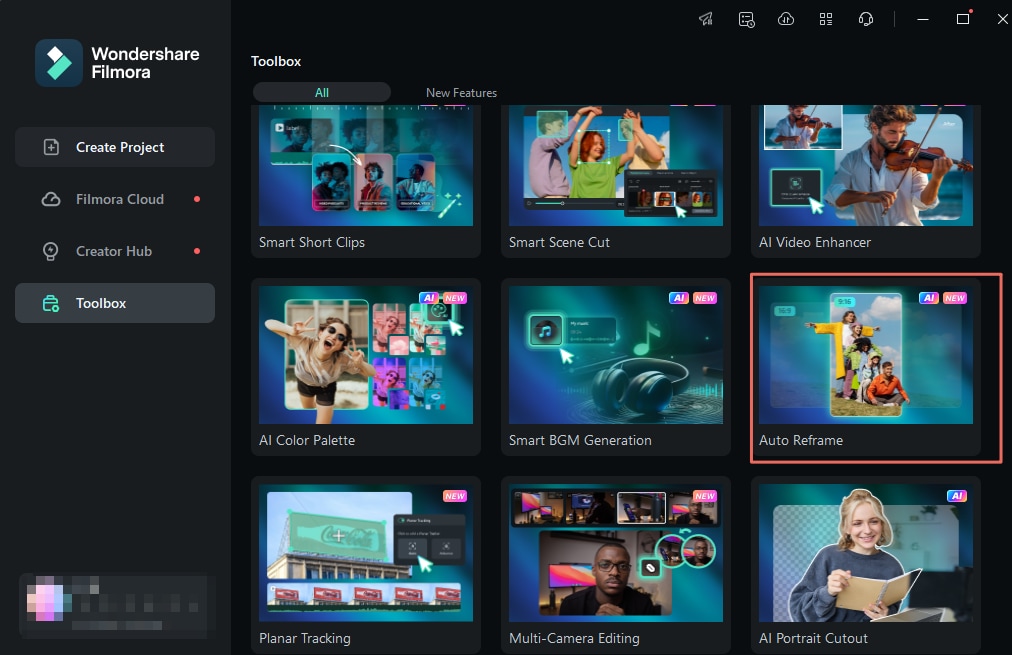
Step1Open Filmora and Select Auto Reframe
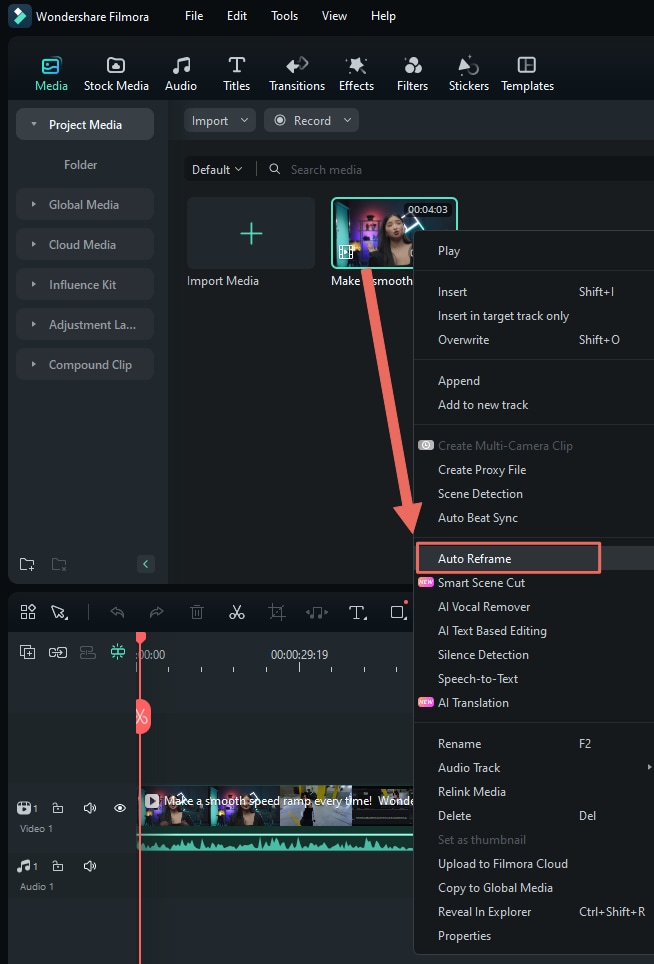
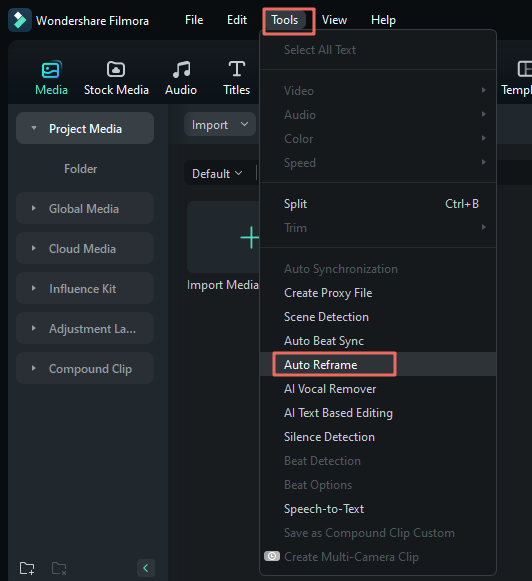
To get started, open Filmora and access Auto Reframe in one of four ways:
- From the AI Toolbox on the right side of the home screen.
- Import your media via File > Import Media Files, then right-click on the video and choose Auto Reframe.
- Navigate to Tools on the top menu bar and select Auto Reframe.
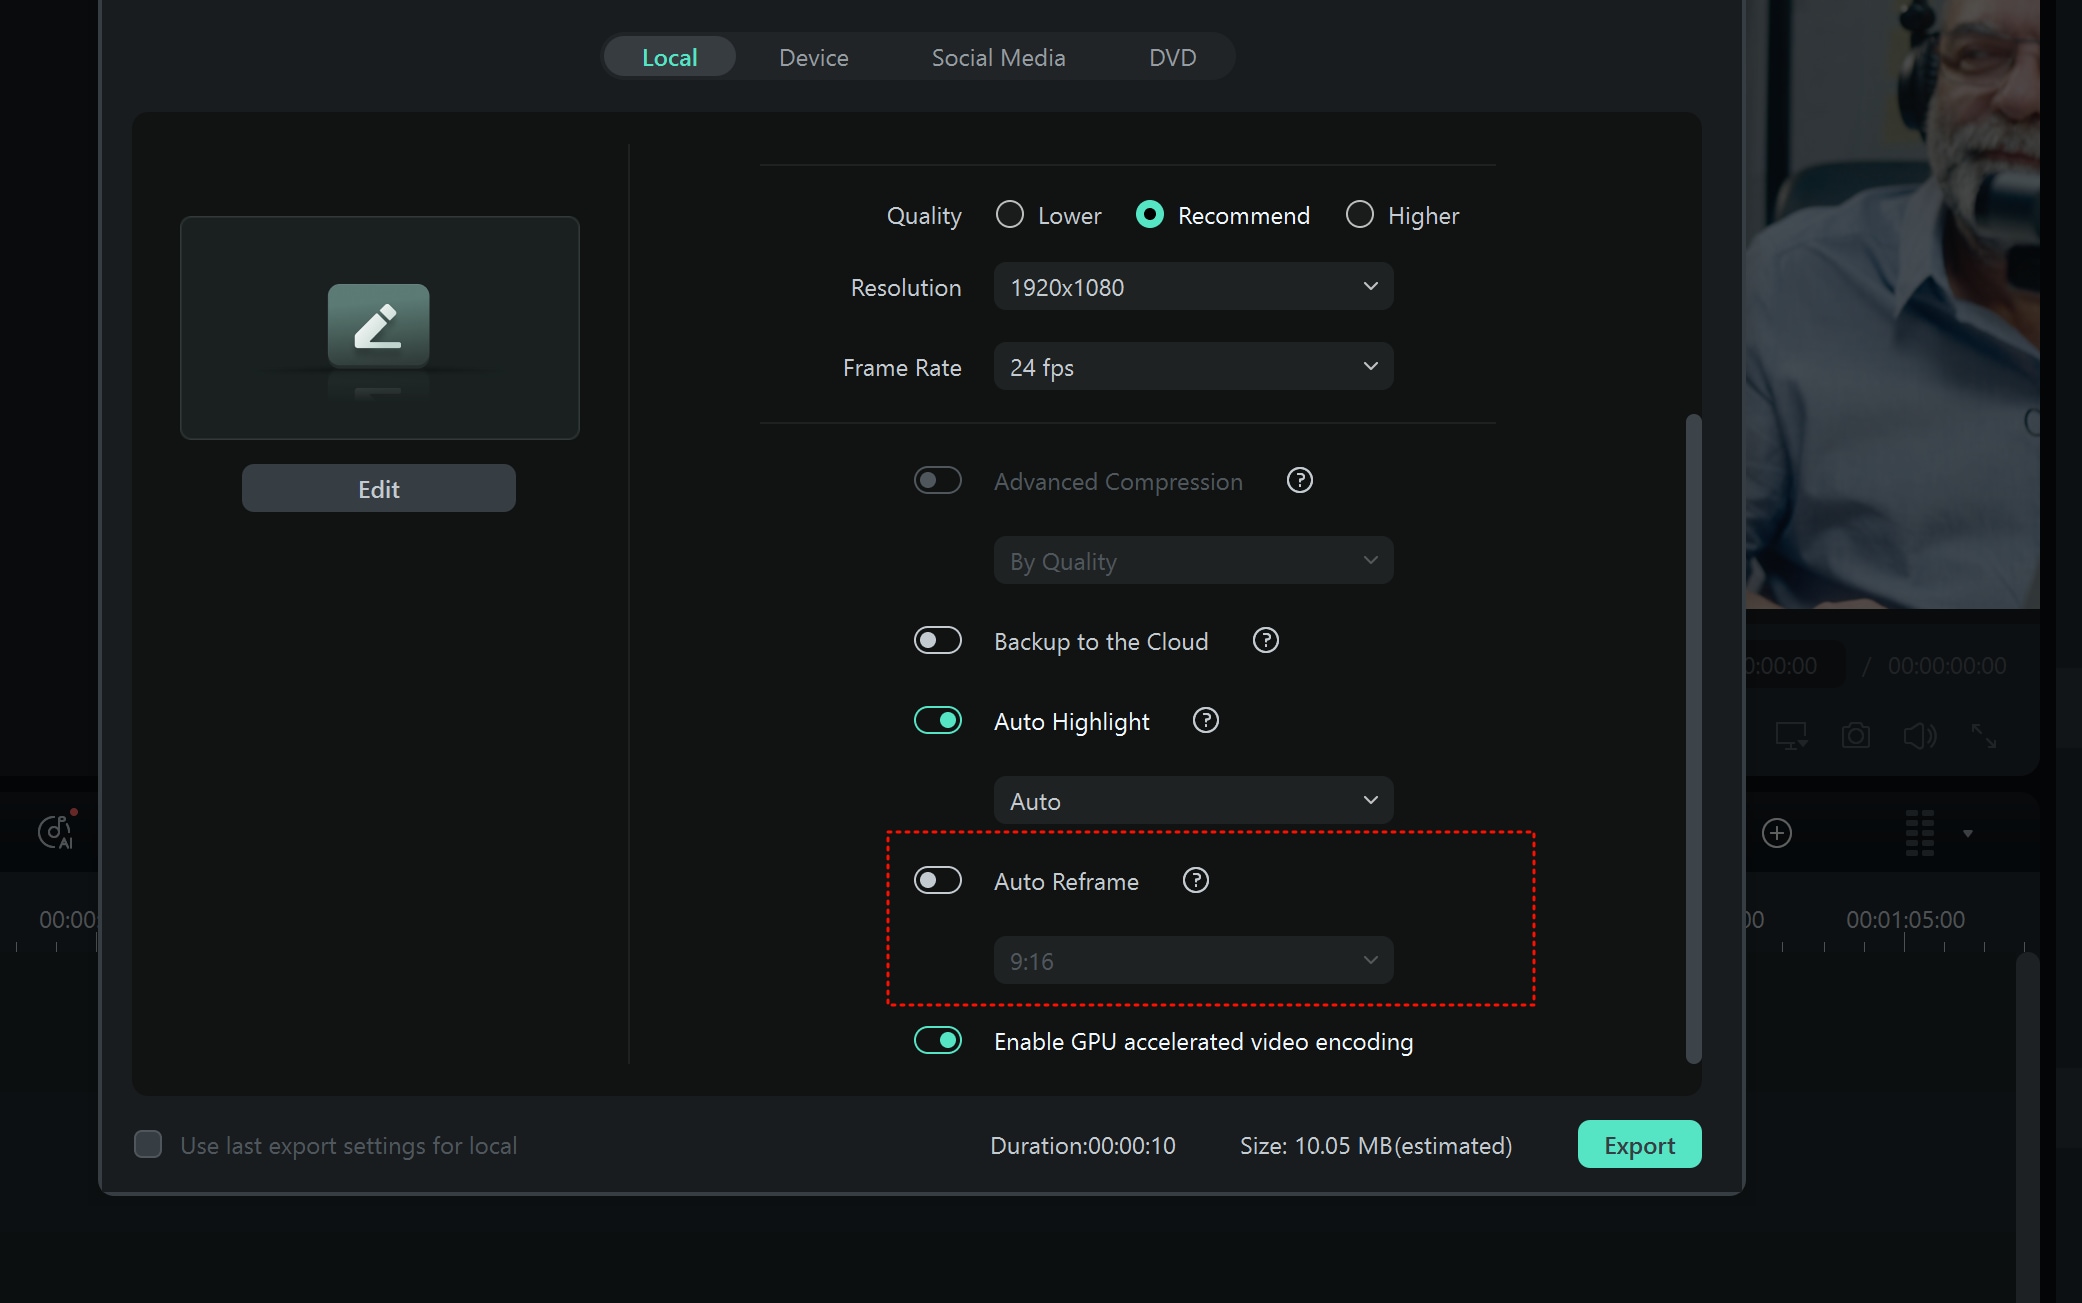
- After clicking Export, enable the Auto Reframe option in the output panel.
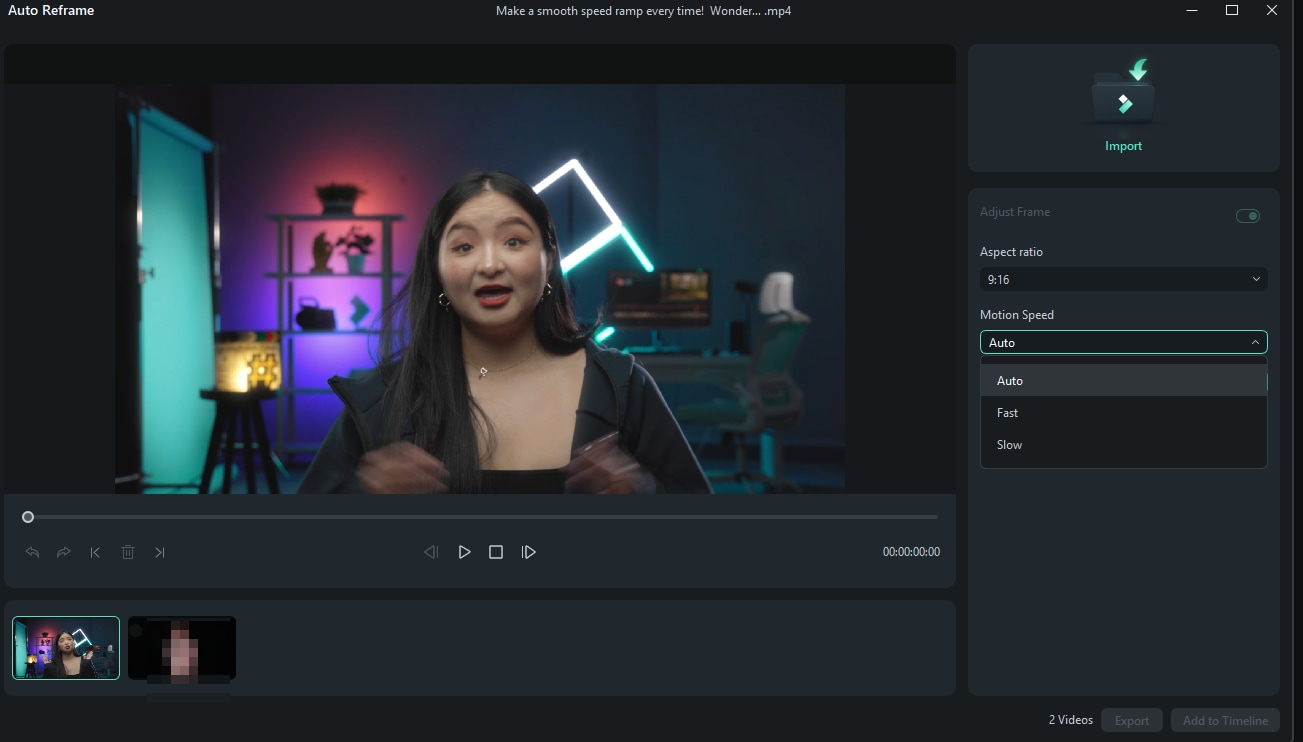
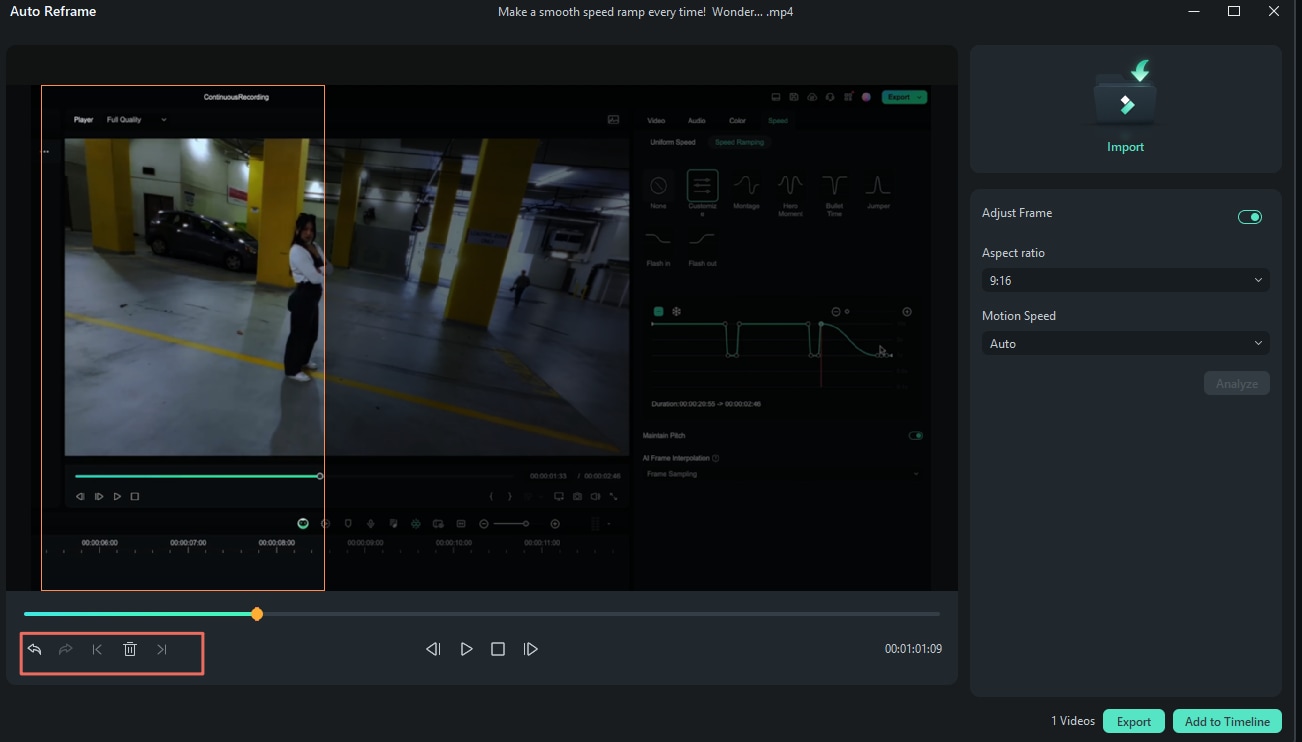
Step2Adjust the Aspect Ratio and Motion Speed
Once Auto Reframe is selected, a dialogue box will appear where you can import your video if you haven't already. You'll find multiple aspect ratio templates to choose from, such as square (1:1), vertical (9:16), and widescreen (16:9). Select the aspect ratio that best suits your platform—whether it's Instagram, YouTube Shorts, or TikTok.
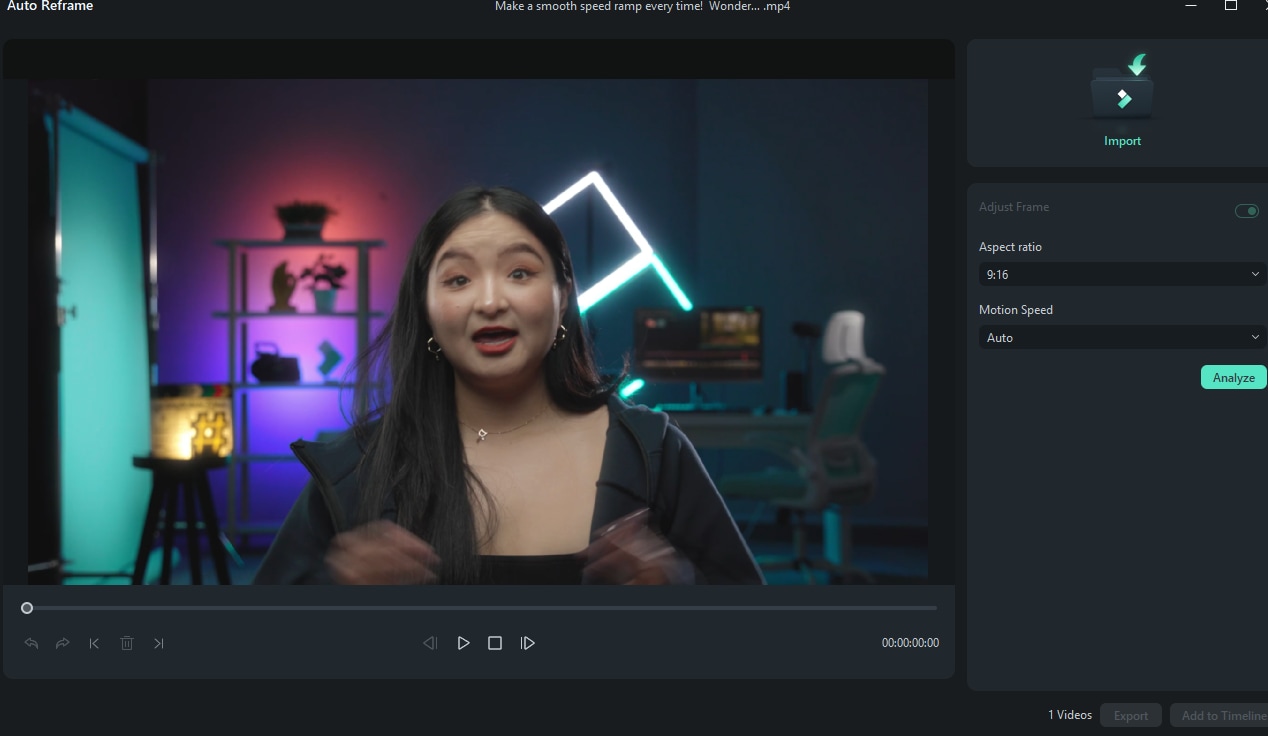
You can also adjust the motion speed (Auto, Fast, or Slow) depending on the type of content.
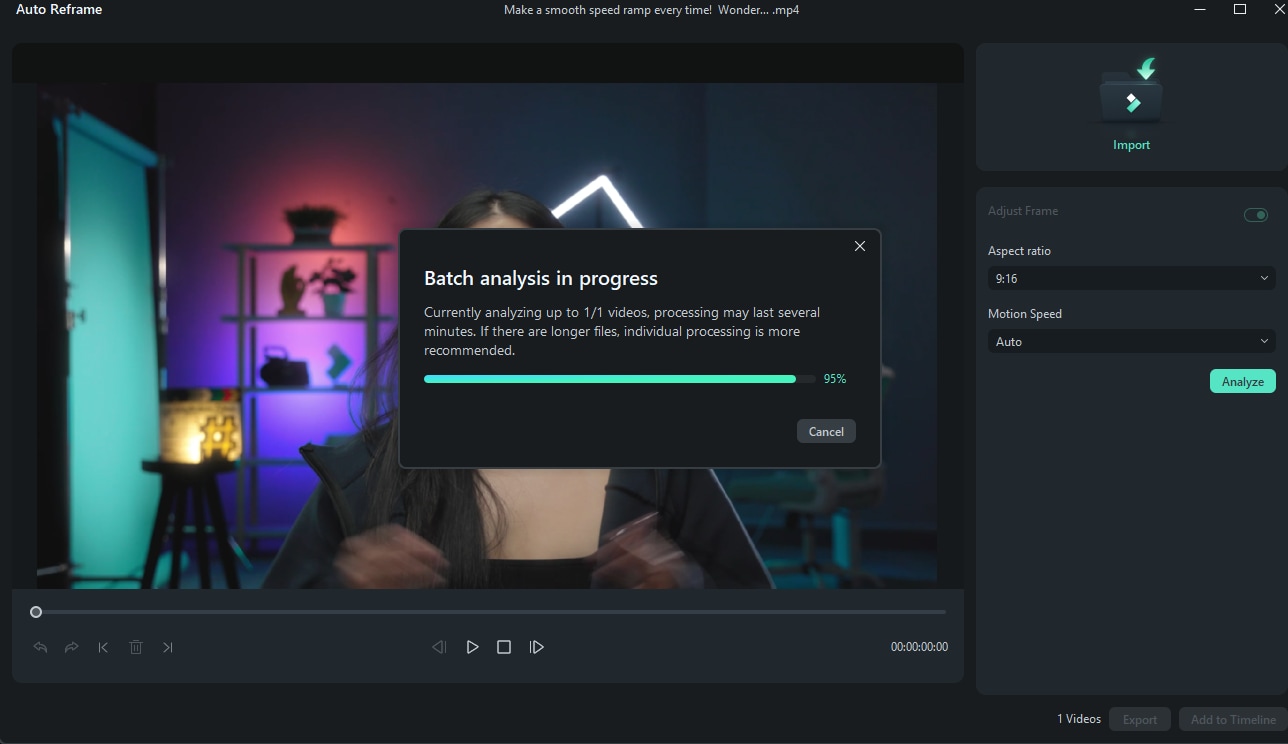
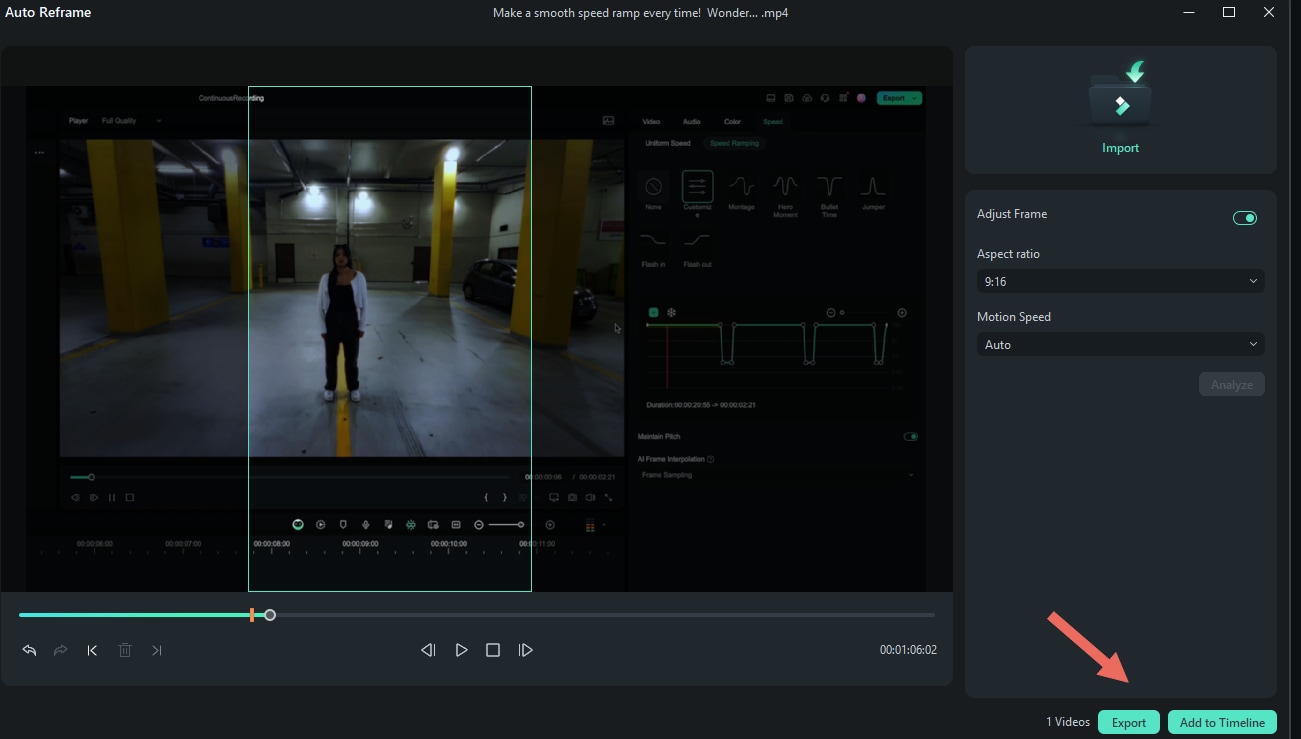
Step3Analyze and Auto Reframe the Video
After setting your preferences, click on Analyze. Filmora will automatically detect the key focus points and reframe the video to match your chosen aspect ratio. The process takes just a few seconds, after which your video will be perfectly resized.
Step4Preview and Make Adjustments
Once the video has been reframed, you can preview the results. If needed, adjust the framing by dragging the box around the focal point manually. You can also fine-tune using the Undo, Redo, or Edit Point options to ensure that every moment is perfectly aligned with your vision.
Step5Export the Video
Once you're satisfied, simply hit Export to save the reframed video. Your content is now ready to be shared across multiple platforms.
Advantages of Using Auto Reframe
- Speed and Automation: The Auto Reframe feature saves time by automatically detecting the main subject of your video and resizing it to fit different formats, eliminating the need for manual cropping or re-editing.
- Customizability for Multiple Platforms: With pre-set aspect ratios for popular social media platforms like Instagram, TikTok, and YouTube, you can quickly create versions of the same video tailored to different audiences.
- High-Quality Output: Despite the automation, Auto Reframe ensures that the quality of your video remains intact, maintaining sharpness and clarity across different formats. This feature is perfect for creators who want to maximize their reach without compromising on quality.
VLC vs. Filmora: Which is Better for Resizing Videos?
| Feature | VLC Media Player | Wondershare Filmora |
| Ease of Use | Manual settings, requires some technical knowledge | Intuitive drag-and-drop interface, AI-powered Auto Reframe |
| Speed | Slower conversion process | Fast processing with GPU acceleration |
| Quality Control | Basic control over resolution and bitrate | Advanced options with presets, maintains high quality |
| Aspect Ratios | Manual cropping and adjustments | Presets for TikTok (9:16), Instagram (1:1), YouTube (16:9) |
| Primary Function | Media Player | Professional Video Editor |
Part 3. Other Video Resizing Methods Using Filmora
Resizing videos in Filmora is a quick and easy process. To resize videos, first make sure you have imported your video file into the editor.
Resizing by changing the dimensions
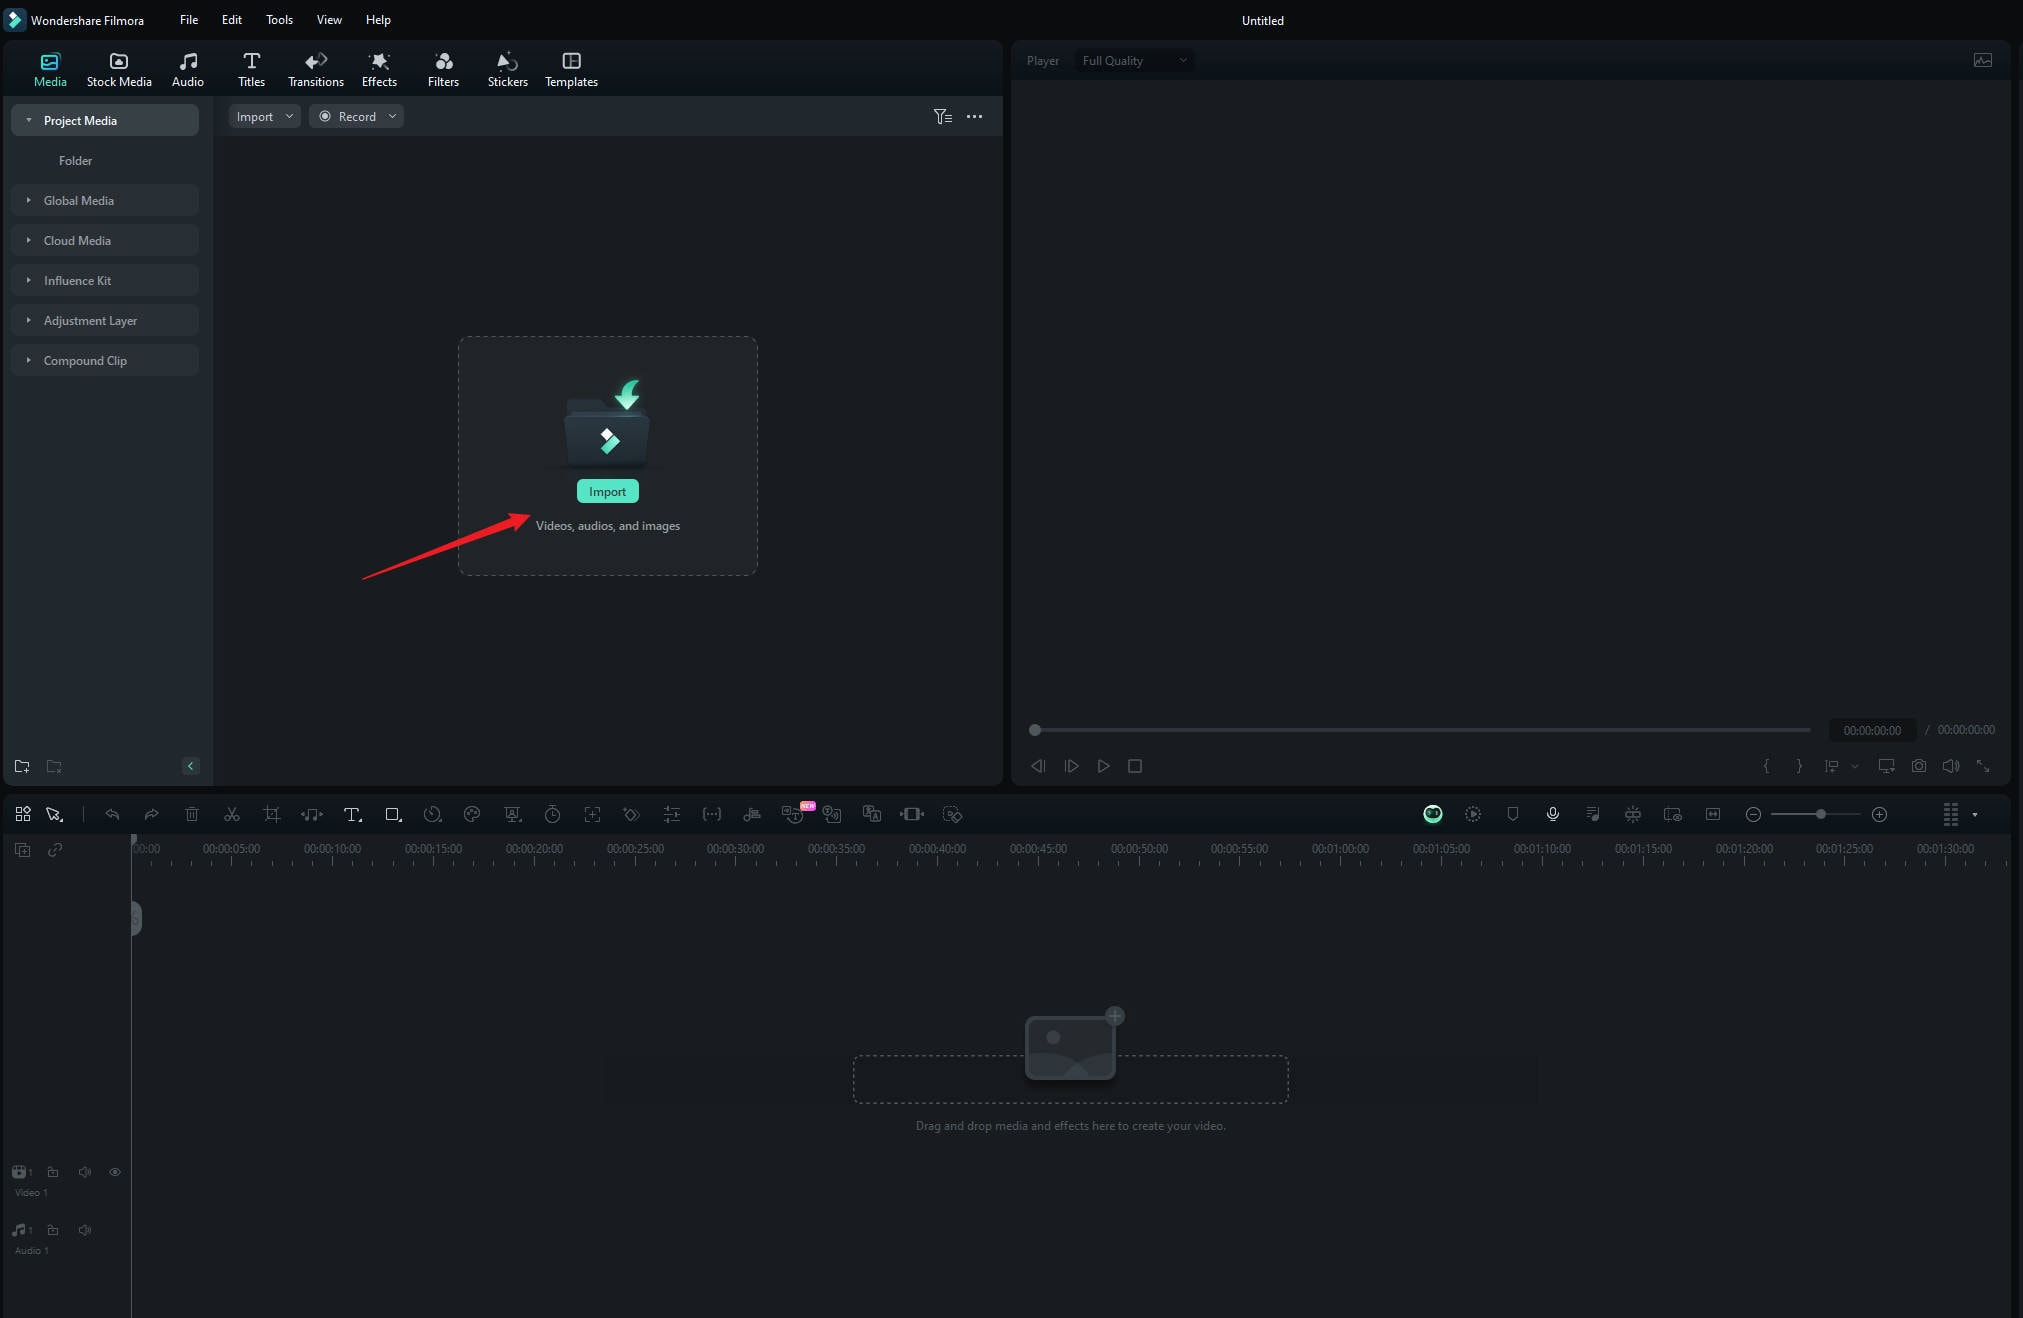
Step 1: To import a video file, either drag and drop the file on the screen or click on "Import Files" in the toolbar.
Step 2: Once you've imported your video, select the video clips that you want to resize by clicking on them; then, resizing them is as simple as dragging their borders!
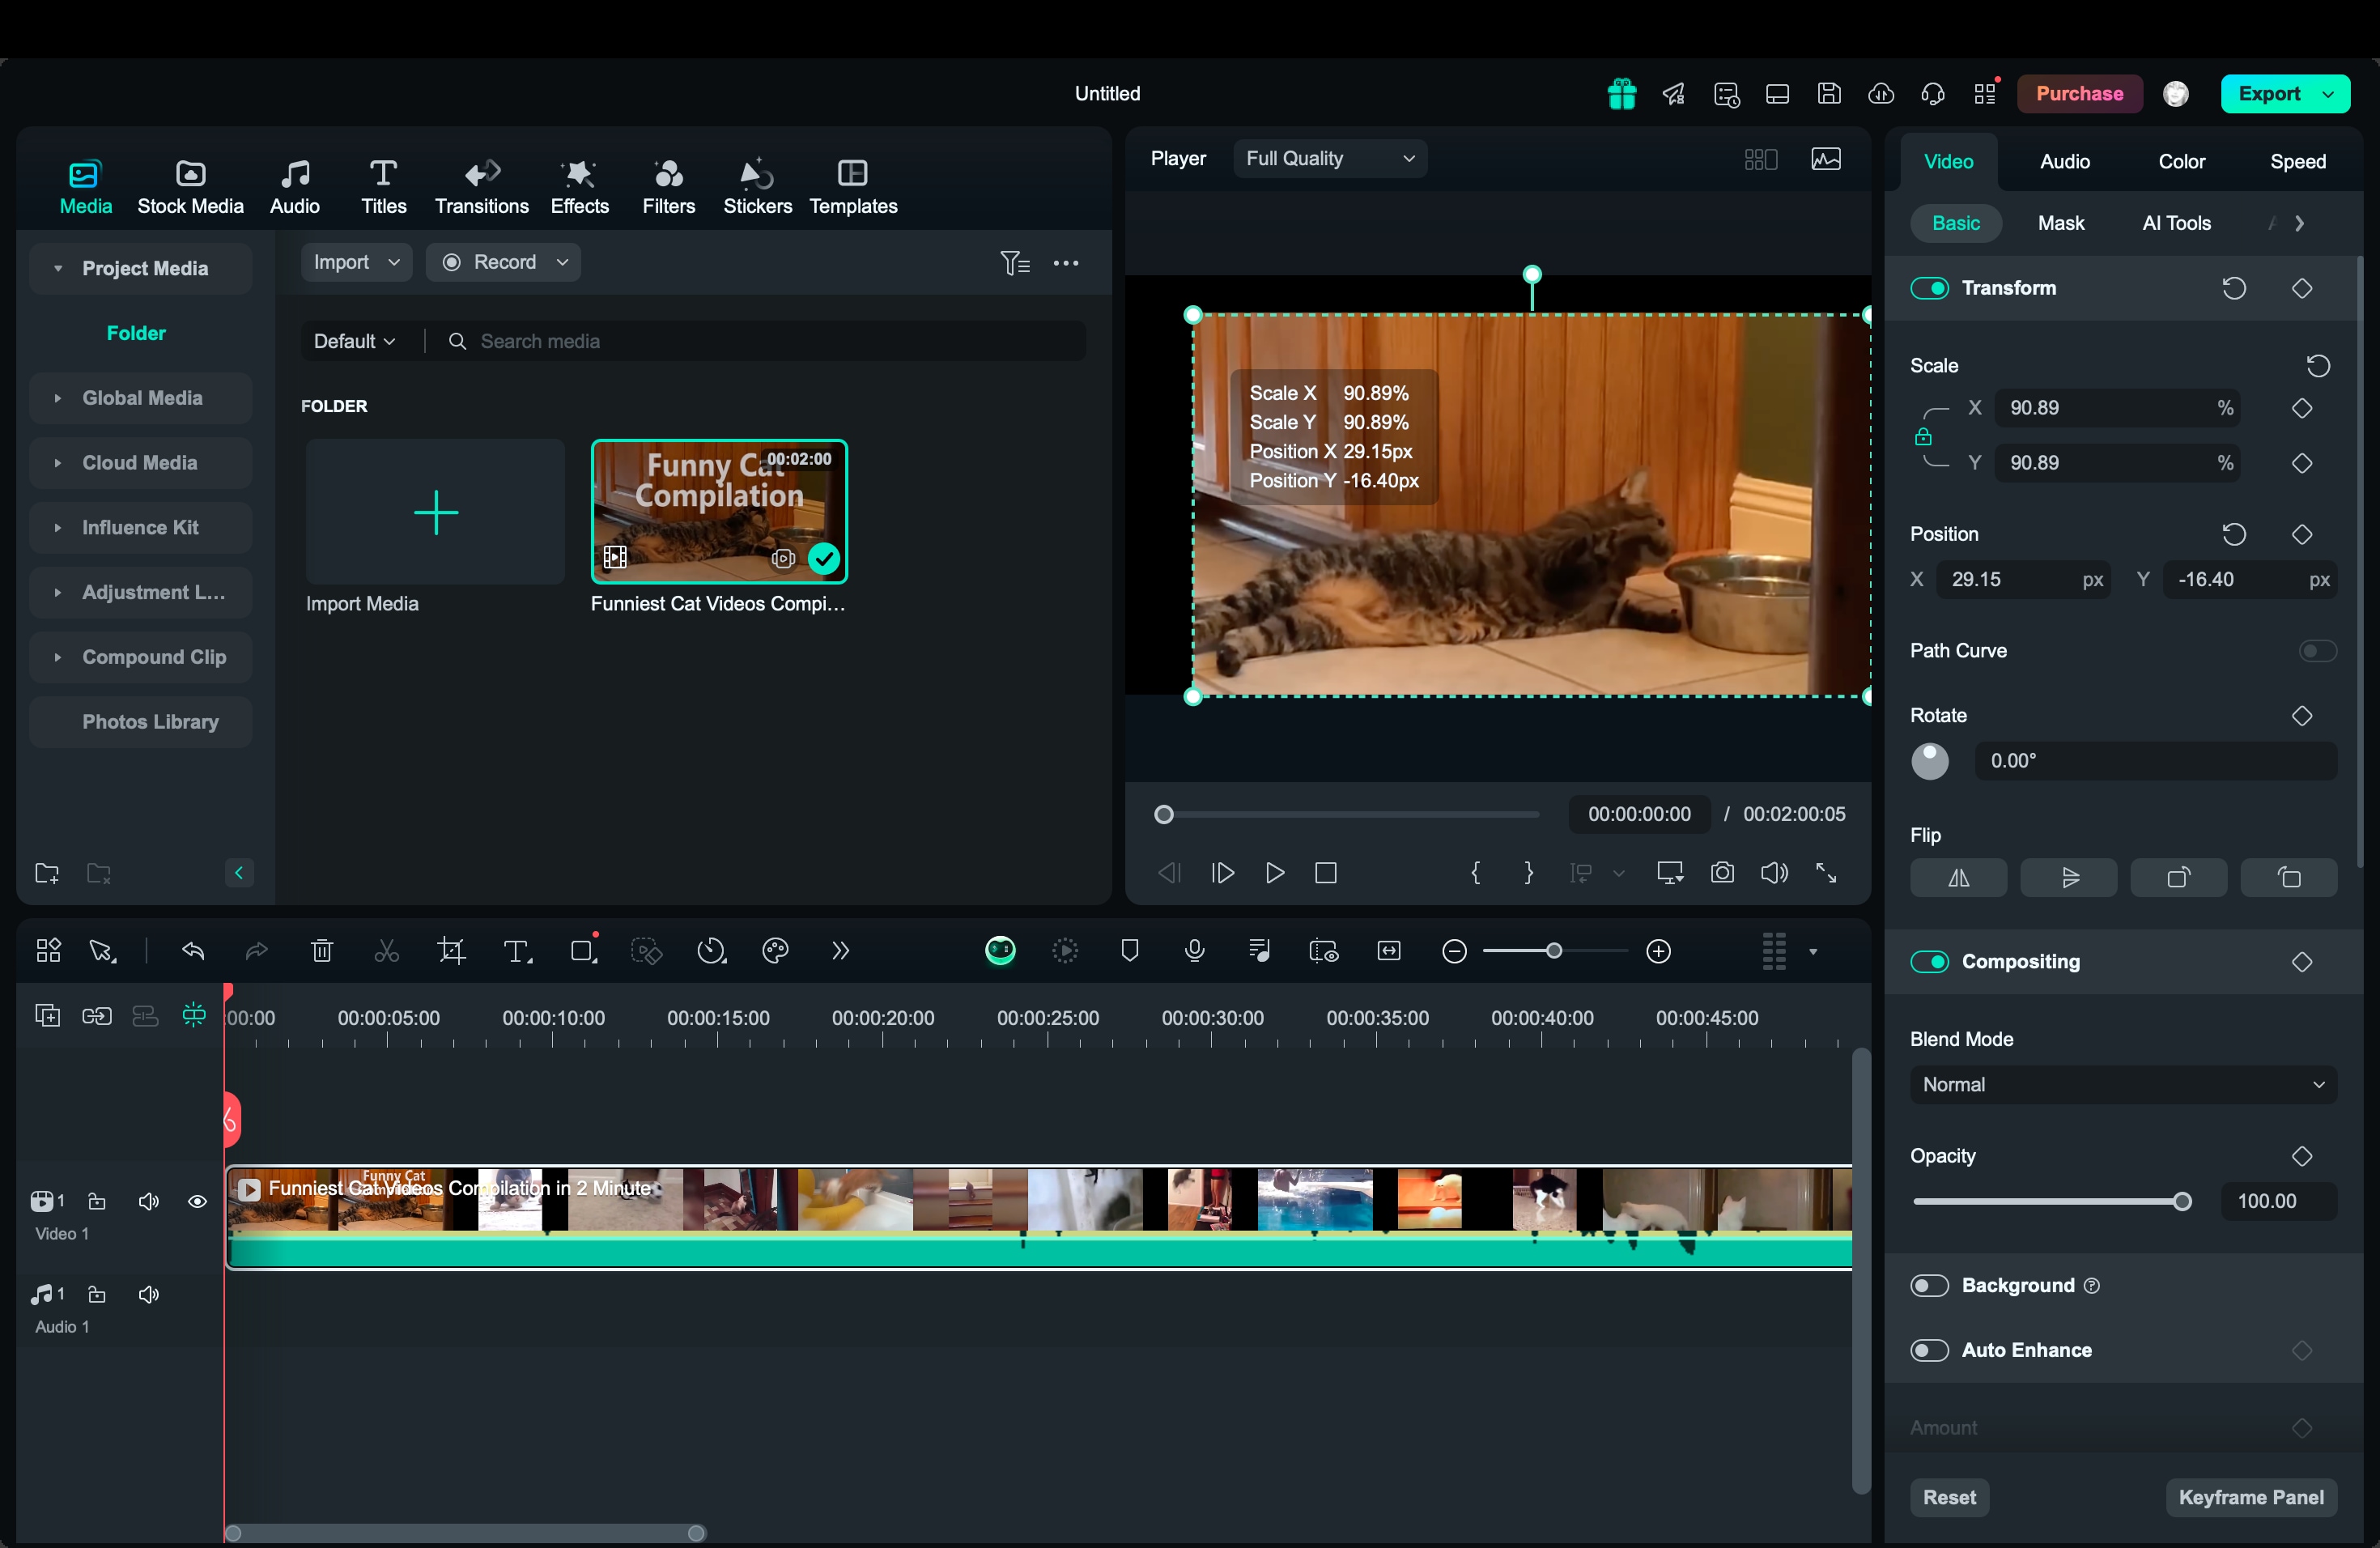
Step 3: You can also use the size fields at the bottom of the frame to change their dimensions.
Step 4: Keep in mind that changing one dimension of a video clip will affect both its width and height proportionally. For example, if you enlarge a 16:9 widescreen clip to 720p (from 480p), it will be double its original proportions (720x480).
Additionally, you can use ""Crop and Zoom"" feature. Click the Crop icon or right-click and choose "Crop and Zoom".
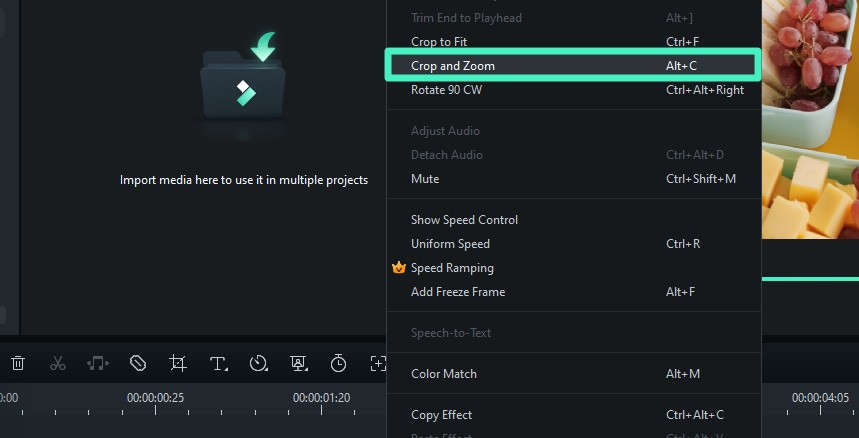
In the panel that appears, choose a preset aspect ratio like 1:1, 9:16, or 16:9.
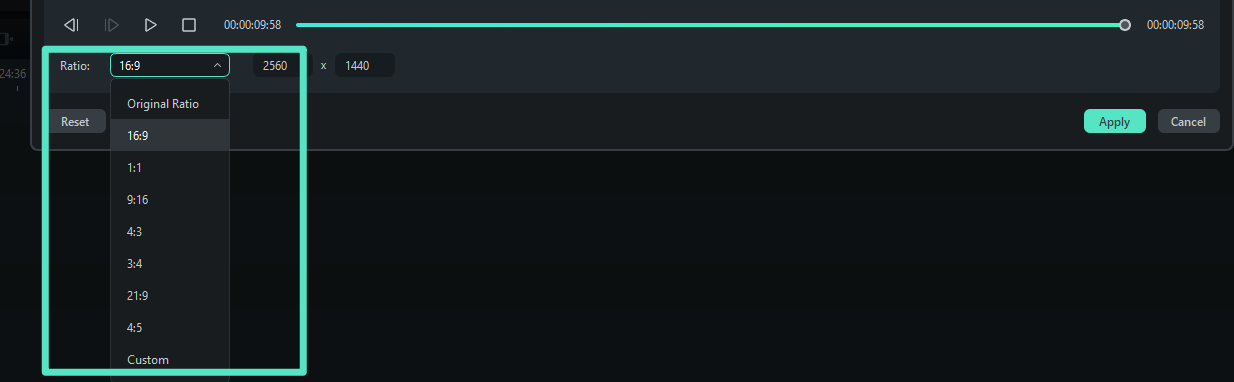
Then adjust the crop area by dragging the corners to focus on the desired part.
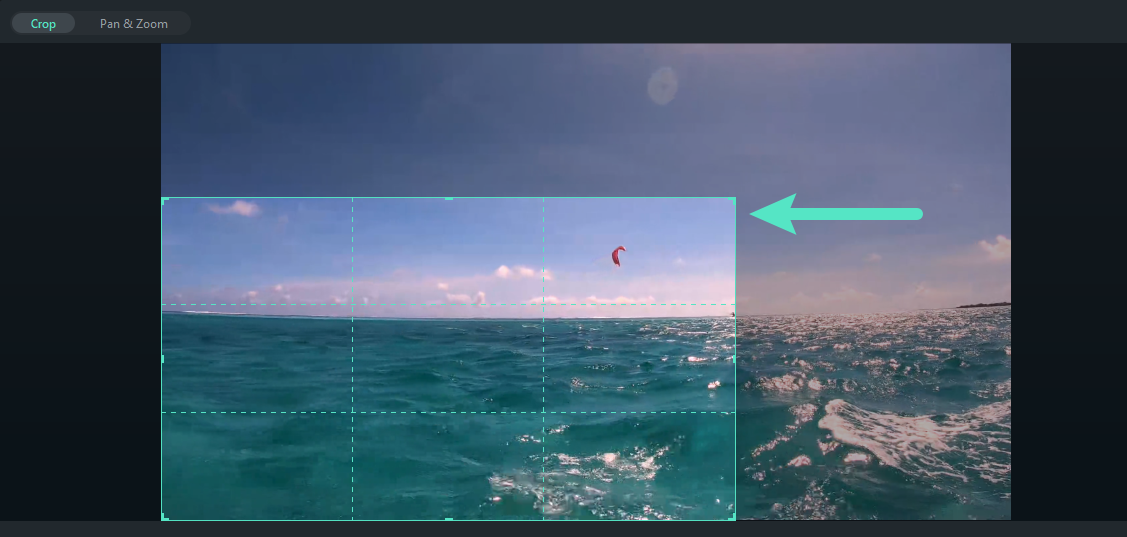
Once you're happy with the crop, click "Apply" to save your changes.

Resizing by shrinking video file size
Step 1: To import a video file, either drag and drop it onto the screen or use the toolbar's ""Import Files"" option.
Step 2: Open the video shrinker's output window by clicking the "Export" button.
Step 3: Select the Format tab and keep the video in its original format as a result. Then, in the ""Output Settings"" panel, click the lower video resolution, frame rate, or bit rate. When it comes to video formats, you can choose among FLV, MP4, and other similar formats, which normally result in smaller files.
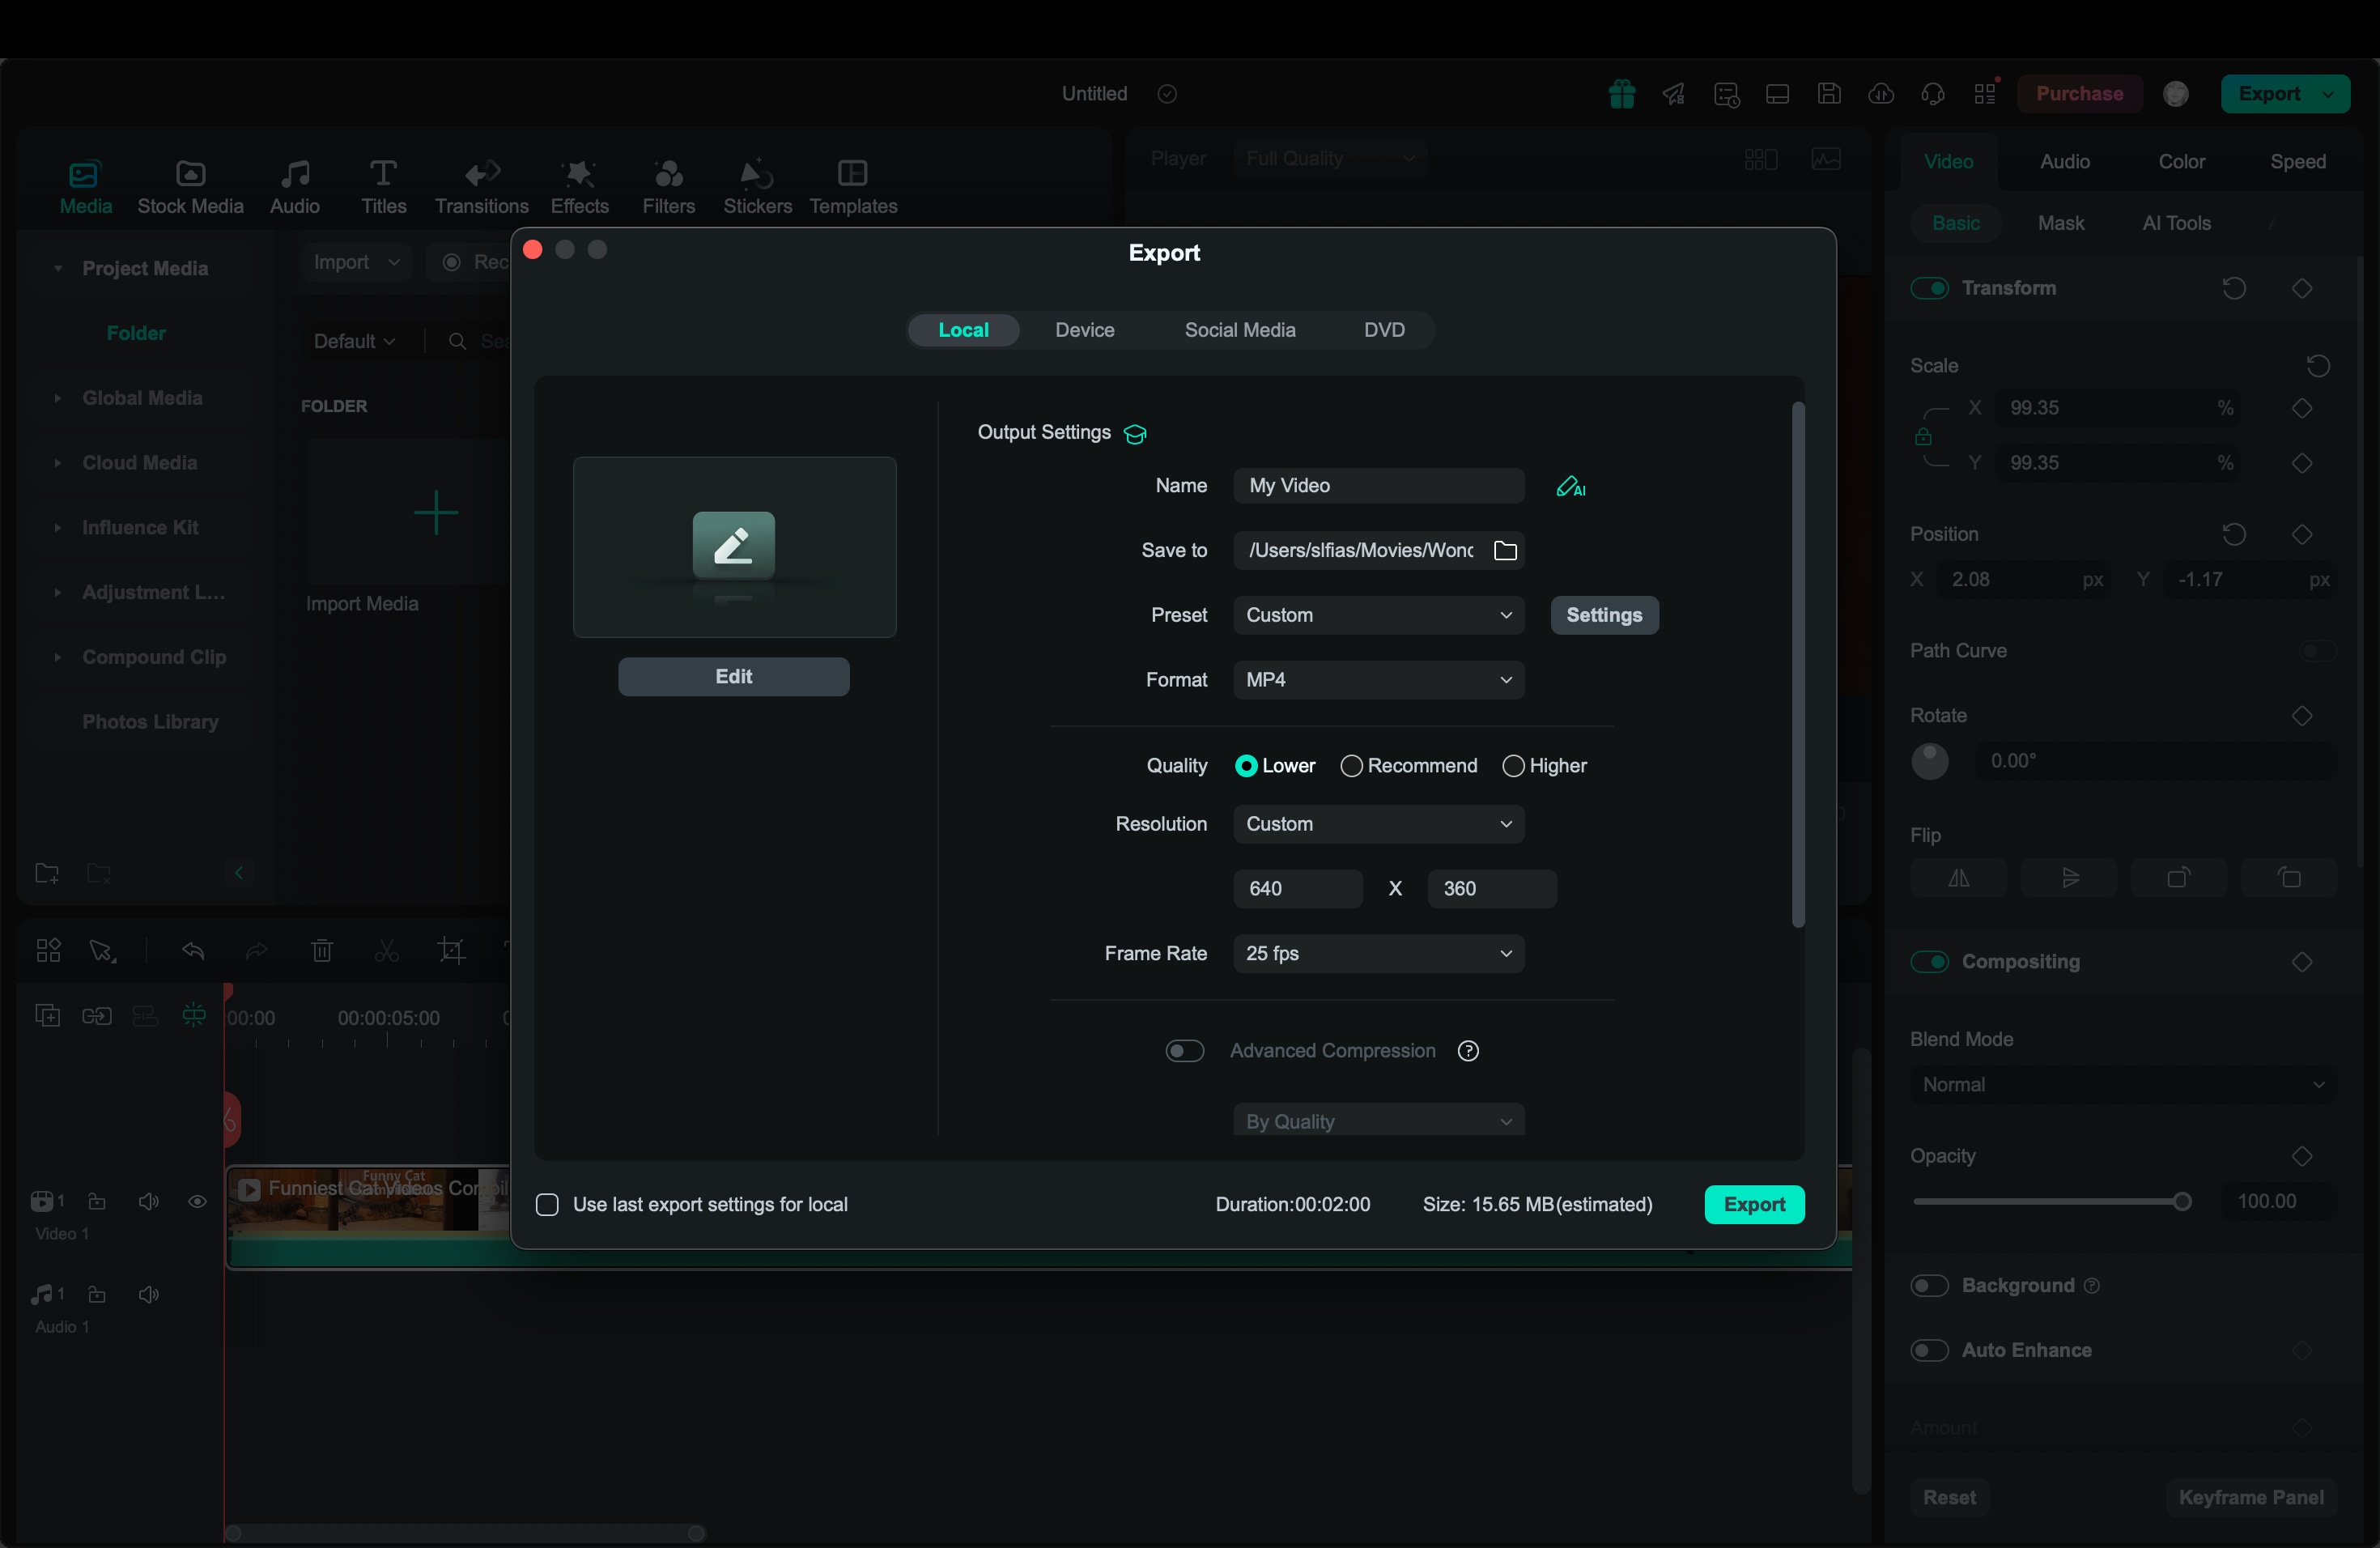
Step 4: The shrunk file should be exported.
Resizing by Auto Compression
This method is more about reducing the file size or "volume" of the video rather than altering its physical dimensions. Auto compression helps minimize the video's storage footprint, making it easier to share or upload while maintaining its quality.
Step 1. On the main dashboard, select New Project to get started, then import your media file onto the editing timeline.
Step 2. Once your video editing is complete, click Export located on the upper-right side of the navigation panel.

Step 3. In the Export pop-up window, scroll down and enable the Advanced Compression feature. Filmora offers two ways to compress your video without losing quality:
- By Quality: Select this option from the dropdown to set the desired compression percentage.
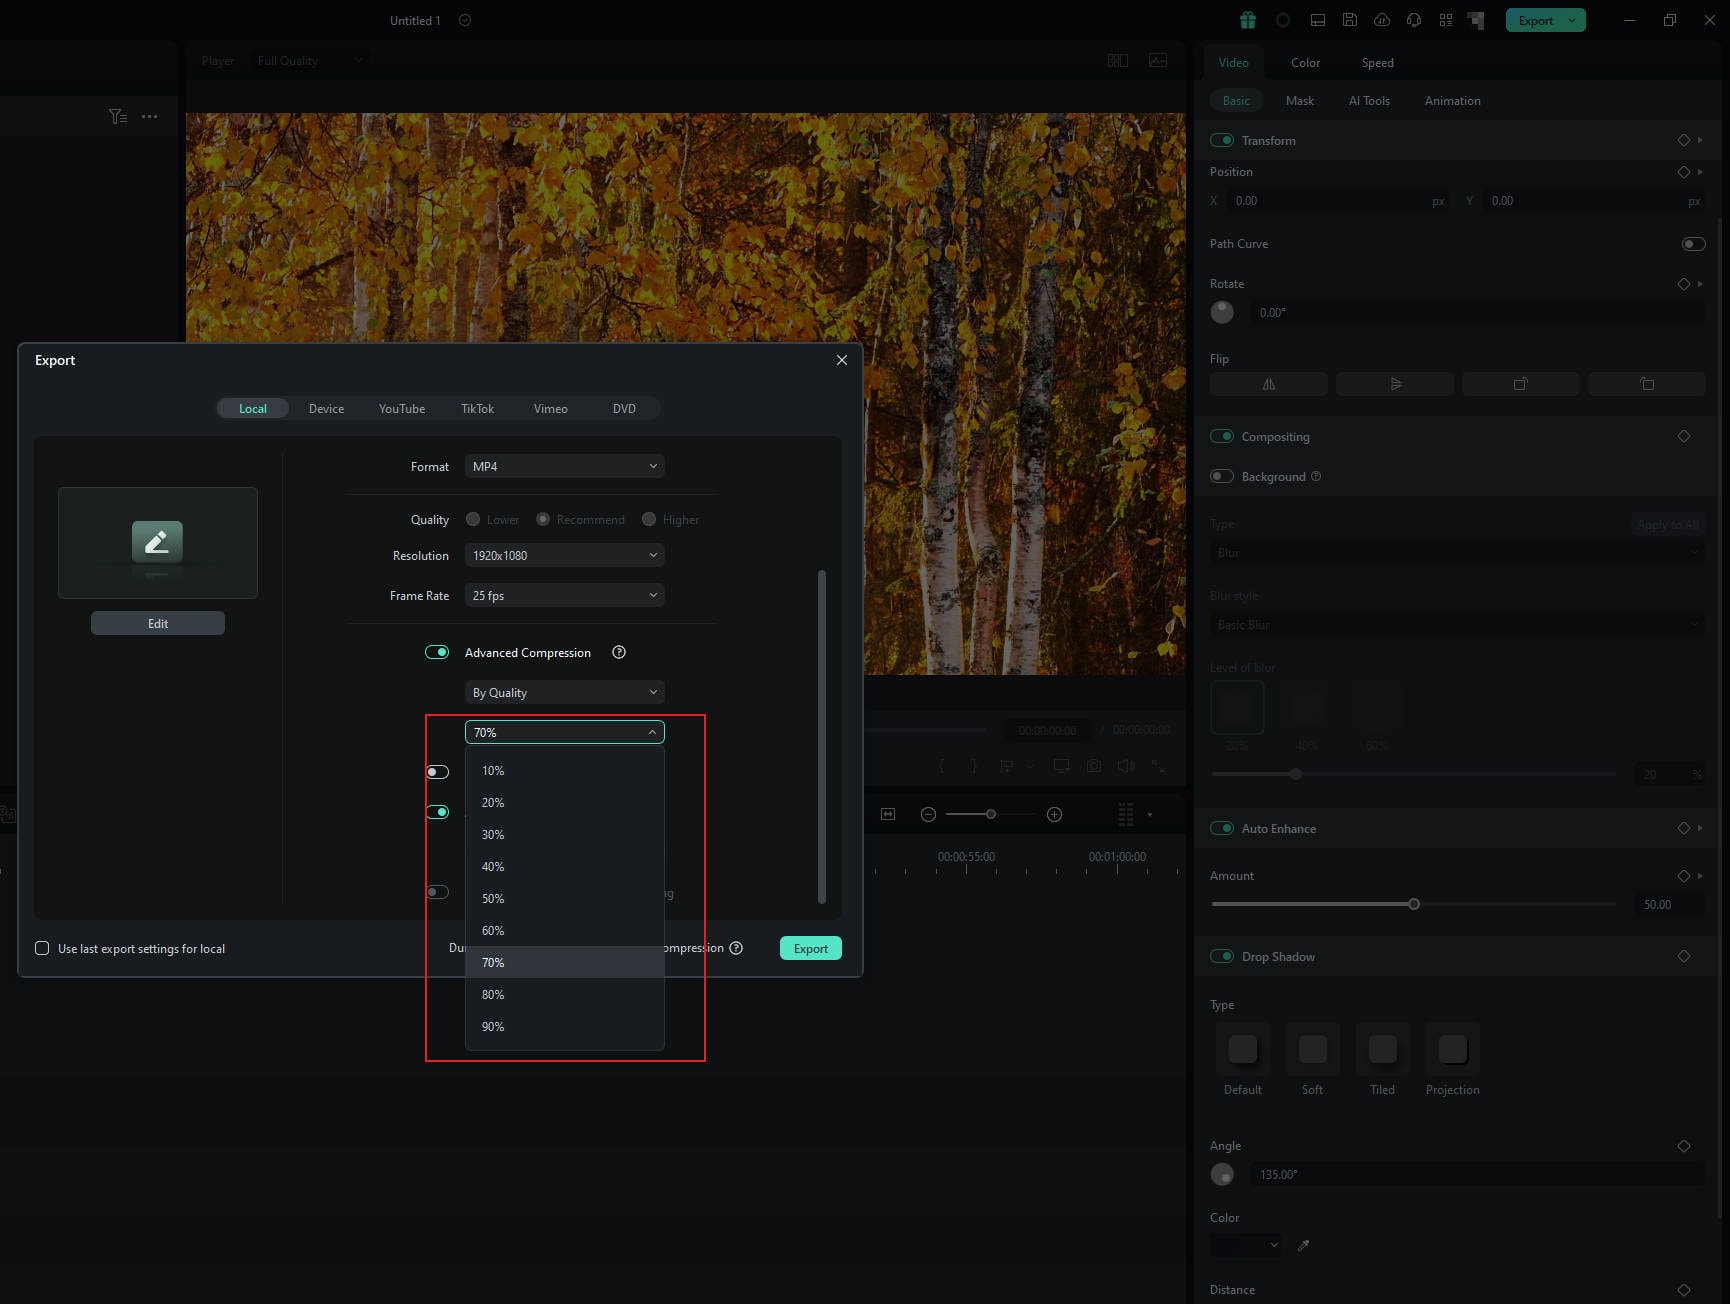
- YouTube Upload: Choose this option to automatically compress the video to the platform's recommended bitrate.
Step 4: Finally, click Export to download the compressed video to your computer.
Conclusion
Resizing videos is essential for ensuring they look their best across different platforms. While resizing videos in VLC is supported by useful tools, Filmora makes the process faster and more intuitive. With features like Auto Reframe and Advanced Compression, you can effortlessly resize your videos for any platform, maintaining high quality without the hassle of
manual adjustments. Filmora provides the perfect balance of speed, customization, and output quality. Perfect for resizing your videos for Instagram, YouTube, or TikTok.
