

 ChatGPT
 Perplexity
 Gemini
 Claude
 Grok
Grok
Creating split-screen videos is a great way to tell multiple clips at once. It can be to compare scenes or add a dynamic element to your projects. However, finding the right split-screen video editor that offers this functionality can be tough.
This time, we will introduce you to the top three split-screen editors. These tools are user-friendly and packed with features to help you create stunning split-screen videos. Keep reading to find out which are the best split-screen video editors and how to use them.
Part 1. Why Split Screen Videos Are Common?
Split-screen videos are popular due to their versatility. Plus, using a split screen effect in your video allows you to show multiple clips in one frame. Here are some reasons why they are so beneficial to elevate your projects:
Enhanced Storytelling: Showing different scenes or perspectives side-by-side can make your videos more engaging.
Great for Comparisons: Split-screen videos are perfect for showing side-by-side comparisons. For example, videos with before-and-after scenarios, product comparisons, showing different viewpoints.
Ideal for Tutorials and Demonstrations: Split screen videos are excellent for educational content where you can display instructions and demonstrations together. This effect will make it easier for viewers to follow along with the tutorials.
The top three split-screen video editors that we are going to explore in this article are Wondershare Filmora, VideoProc Vlogger, and Movavi. Each of these tools offers unique features and ease of use, making them excellent choices for both beginners and experienced editors.
Part 2. Top 9 Video Editors for Split Screen Videos
Finding the right split-screen video editor for your split-screen videos can significantly enhance your video projects. In this section, we will look at the top three video editors that are great for split screen videos. Let’s see what makes these editors special and how to use them.
1. Wondershare Filmora [Recommended]
Wondershare Filmora is known for its easy-to-use interface and powerful tools. It is a versatile video editor for split-screen videos and has a dedicated split-screen feature with various layouts. These layouts can help you create split screen videos with ease.
Key Features
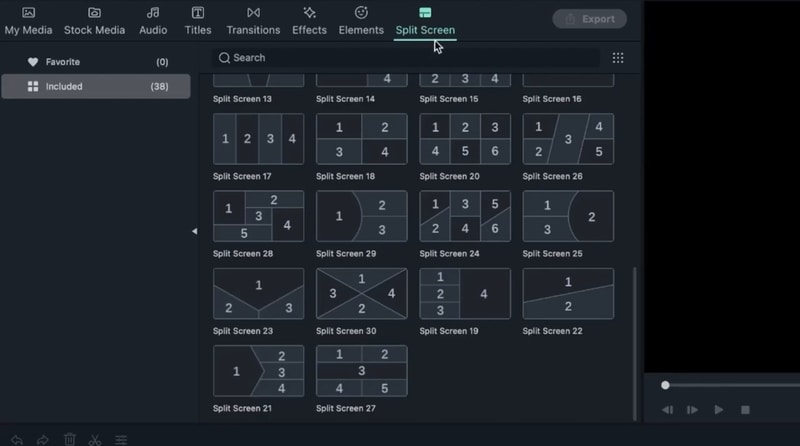
- Split Screen Templates: Filmora provides over 250+ split screen presets. Allows as many as 6 videos to be added to create split screen effect.
- Split Screen Editing: The Split Screen feature allows you to drag and drop video clips into the template. You can adjust the size and position of each clip and see your changes in real time.
- Keyframing: This feature lets you add custom animations to your split-screen videos. You can control the movement, opacity, and other parameters of each clip over time to create dynamic videos.
- Motion Tracking: Motion tracking helps you follow the movement of objects within your split-screen video. You can add elements that follow this movement, which is great for highlighting parts of your video or adding special effects.
- Audio Synchronization: Filmora’s audio synchronization feature aligns the audio tracks from different clips in your split-screen video. This keeps the audio in sync and ensures a smooth viewing experience.
How to Create Split Screen Videos Using Wondershare Filmora:
Step1Start by Adding the Split Screen Template.
If you are already in Filmora with your project timeline open, go to where you want the split screen template.
Step2Choose a Split Screen Layout.
Go to Templates > Split Screen and explore more than 80 layout options. Double-click to preview a layout and drag your chosen one from the library to the timeline.
Note: Split screens default to 5 seconds, adjustable by dragging the clip edges on the timeline.
- Two Videos:

- Multiple Videos:

Step3Add Clips to Each Split Screen Window.
Drag your video clips from the media library one by one into each window of the split-screen preview.

Step4Edit Individual Clips.
Next, you can customize each clip within the split screen:
- Zoom In/Out: Adjust the zoom level of a clip in the split screen preview using the slider.
- Mute Audio: Silence a clip by clicking the Mute icon in its preview window.
- Remove Clip: Delete a clip from the split screen by selecting it in the preview and clicking Remove.
- Advanced Edits: For more detailed adjustments, go to Edit > Advanced Split Screen. Here, you can rotate clips, adjust their position and scale, apply color corrections, and add motion effects.
Additional tips: Use AI to generate video scripts for your videos.
To boost your video content creation, consider using Filmora’s AI Copywriting tool for script writing. This tool can analyze your video content and generate scripts based on factors like tone and structure. This feature will save you time and ensure consistency in your videos.
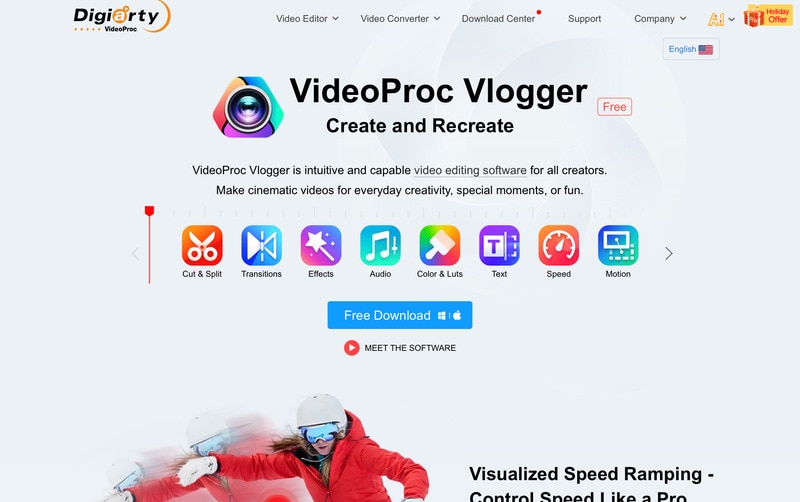
2. VideoProc Vlogger
VideoProc Vlogger is a split screen video editor that is free to download. You can enhance your finished split-screen video by adding sounds, transitions, filters, effects, and text. All these features are free, and there won’t be any watermarks on your exported video, unlike many other editing tools.
3. Movavi
Movavi is a video editor that is easy to use. It is suitable for both Mac and Windows users. This video editor has a split screen feature where you can combine two videos on a single screen to play simultaneously.
4. iMovie
A proprietary of Apple, iMovie is available for both iOS and macOS, and is absolutely free of cost. Even though the tool lacks some advanced options for fine editing, it still offers a good platform to those planning their career in post-production industry. With simple UI, it is easy to learn iMovie.
5. VSDC
VSDC is a free and efficient split screen video maker. In fact, the program is a full-fledged post-production application that can be used to edit the videos to prepare industry-standard clips for presentations, broadcasting, and commercial and private distribution. The best thing about VSDC is, it is absolutely free of cost, and doesn’t add any watermarks to the output files.
6. Shotcut
A free and opensource editing tool, Shotcut can also be used as a split screen video maker to produce industry-standard movies and documentaries. Shotcut is available for FreeBSD, Windows, Linux, and macOS, and comes in both x64 and x86 variants. Being a free program, Shotcut doesn’t require any activation or registration.
7. Lightworks
Used by the professionals to edit and prepare movies like Pulp Fiction, The Cure, L.A. Confidential, Bruce Almighty, The Wolf of Wall Street, etc., Lightworks is, in true means, a complete and full-fledged post-production application to create industry-standard outputs. The main reason for the app’s wide userbase is that it is a cross-platform software that is available for Linux, Mac, and Windows computers.
8. Adobe Premiere Pro
One of the most appreciated and widely used post-production applications for Windows and Mac computers, Adobe Premiere Pro has been professionals’ first choice when it comes to video editing, irrespective of the fact that it has a steep learning curve, and is also a resource intensive software to work with.
9. Final Cut Pro X
Available only for Mac computers at the time of this writing, Final Cut Pro X or FCPX gives tough competition to Adobe Premiere Pro. Since Apple devices are famous for their speedy processing, professionals any day prefer FCPX over Adobe Premiere Pro if they own a Mac PC running macOS.
Conclusions
Selecting the appropriate split screen video editor can greatly enhance your projects with creativity and depth. In the article we have listed the best split screen video editor that you can find on the market.
Each editor on this list offers distinct advantages. It ensures there’s a suitable option for various video editing needs, from the paid to the free split-screen video editor. Ready to enhance your videos? Explore these editors like Wondershare Filmora and start creating stunning split-screen effects in your projects right away!
